Went away for a couple of months on business and came back to find a stain on the garage floor. Took my car in to the local BMW dealer and was told the mechatronics sealing sleeve failed. Quoted at just over $700 parts and labor so I decided to see if it was something I could do. With this DIY, ATF change kit from CTSC and instructions on changing the sealing sleeve (
6_speed_sleeve_replacement.pdf) I got the courage to take on the task

.
Dropping the pan was relatively easy, although I had to use my kung-fu grip to loosen all the torx screws around the pan.
Removing the old mechatronics sealing sleeve was a little tricky because I have big hands and there is very little room to play with. I could only use 2 fingers at a time to try and maneuver the mechatronics plug around.

I used a pair of pliers to pull the old sleeve out which of course had the faulty OEM orange colored o rings. (Thank you BMW for charging me $700 to fix your mistake.

)
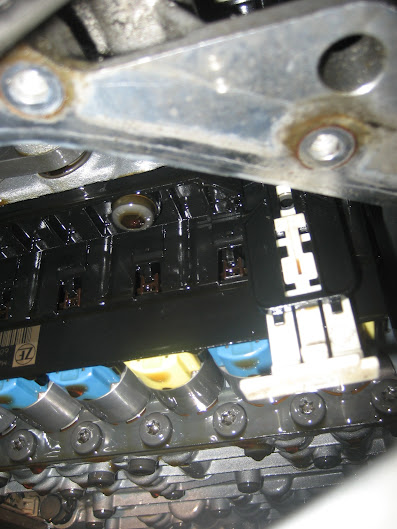
Properly seating the new sealing sleeve was not too difficult at first. Just rotate the new sealing sleeve while GENTLY applying pressure inward until you feel a click, then go ahead and give it a push. Here is a pic of a properly seated sleeve. Note the notch lined up with the male end of the mechatronics connection.

At this point, the sealing sleeve locking mechanism was giving me fits of rage

. The locking mechanism refused to budge until I applied some more pressure inward on the sealing sleeve while pushing up on the locking mechanism, then it finally locked into place.
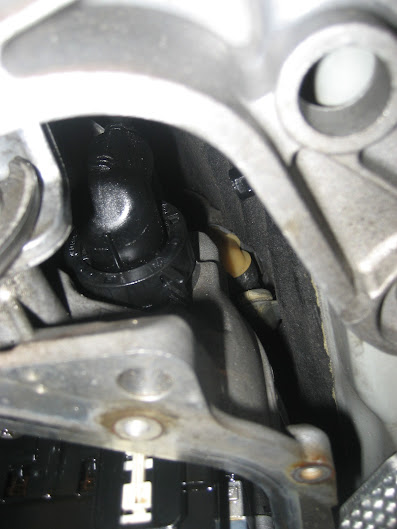
It took me a while to get the mechatronics plug lined up with the pins in the transmission. Did it by slowly rotating the plug the same way I set the sleeve in place. There is a notch that has to line up perfectly or it will not work. Here is a good look at the plug and the notch.

Finally connected the plug with some patience, ok, a lot of patience

.
After installing a new pan, it was time to fill the transmission case with ATF. I used the ZF Lifeguard6 that was included in the kit from CTSC. When I drained the pan I got about 5 1/2 quarts of fluid.
The fill plug was a beast to remove!! I had to spray a little WD-40 and use the lug nut key from my e36's trunk kit for extra leverage.
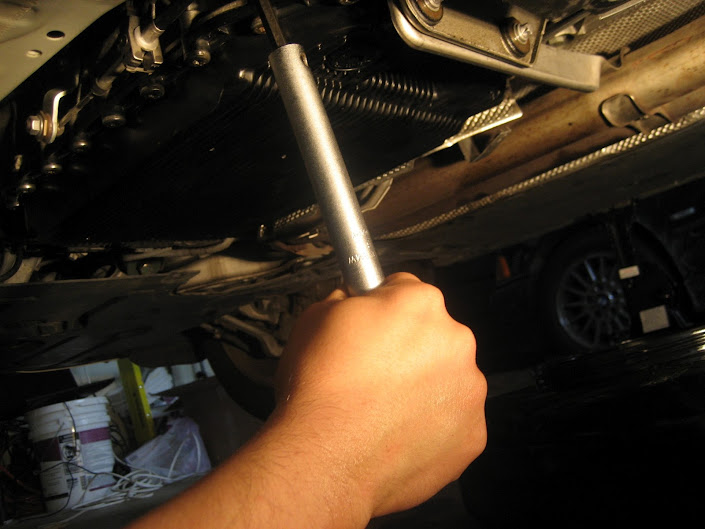
Even had a little scare when the hex key slipped and dug a gouge out of the fill plug

.

I would recommend opening the fill plug BEFORE draining the pan. Just in case you strip the drain plug you don't end up with an empty tranny case crisis on your hands

. Filled with just over 3 quarts of fluid when the case got full, closed the fill plug and idle'd for 5 min. Opened the fill plug again and added another 2 quarts. Idled for another 5 min, then added another half quart. Five and a half total quarts of fluid. Test drove around the neighborhood in MS mode went through all 6 gears smoothly.

Also this was very messy!! There was so much fluid on the garage floor, it looked like a hospital delivery room. Make sure you have plenty of hot towels and bandages! Or kitty litter to help soak up fluids.
Of course the big test is whether there is a stain again on the garage floor. So far so good no ATF leaking.

Thanks to sammy_0559

good job on the DIY

. It inspired me to take on this DIY. In yo face BMW dealer!