How to hardwire a Valentine 1 Radar Locator on a BMW E90.
Do I have to cut, splice, or solder onto any wires? NO, not with my method.
Will I damage or scratch my vehicle? No, again. Not with my method.
Will my V1 cut off when I use my sunroof? No
Will this void my warranty? I'm concerned because it's a lease. No. My way will leave no trace that you ever had it installed. Well... unless you don't clean off the suction cup marks on the windshield after you remove it.
Really, Why? My way is comprised of techniques from many resources. I have determined these to be the best of the best... from removing the console to wiring it up.
IMPORTANT!!! Read this post in it's entirety before attempting to install.
It's only the beginning:
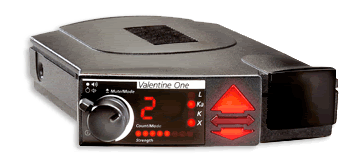
Getting Started You will need a Valentine One Radar Locator
 www.valentine1.com
 or buy one on
eBay but be sure it comes with the hardwire kit.
A V1 Windshield Mount
A Power cord
Note: Any telephone cord can be used.
Direct-Wire Power Adapter

Solder and Soldering Iron
Note: Just read the entire thing... you'll see why.
10mm socket and small ratchet
Female wire connector
Wire Strippers with ability to fasten connectors
About 3 inches of wire
Note: must be the same guage (thickness) as the Direct-Wire Power Adapter wire
3 zip ties
A person with small hands
Getting In:
Removing the console is typically the hardest and most frustrating part of the install
so you will do it first. To help avoid the frustrations you are going to do without
the spatula's and screwdrivers that may damage the vehicle. I'm a perfectionist
and I could do without any scratch that may be caused by other methods. This part
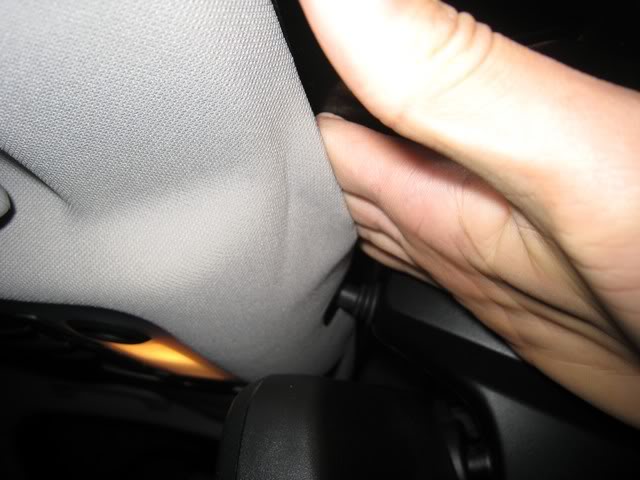
of the install requires small clean hands. So you may need to grab your girlfriend
(unless she is bigger than you) or your little brother/sister. Get into the passenger
seat where you (or your small one) can sit comfortably facing away from the windshield
with their back against the dash and head looking up. Move the
seat around and tilt it whichever way is most comfortable. I moved the
chair forward and sat "indian style" in it then leaned back. This is what you
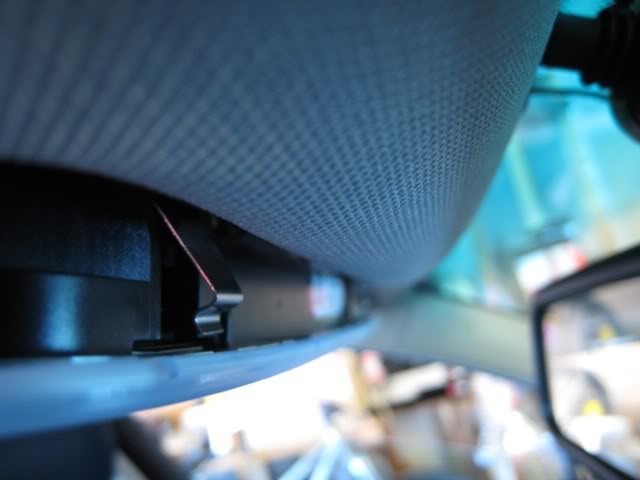
should see:
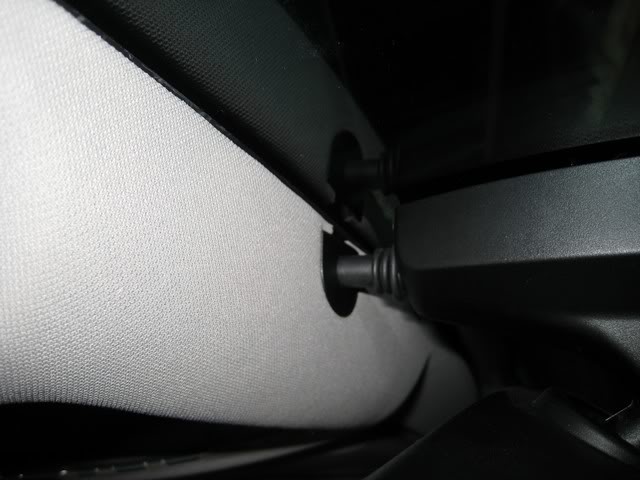
Where the windshield meets the roofs interior you need to carefully slide a couple
of fingers in there until you can feel the lighting console. It's a tight fit, be
gentle cause it's her first time.
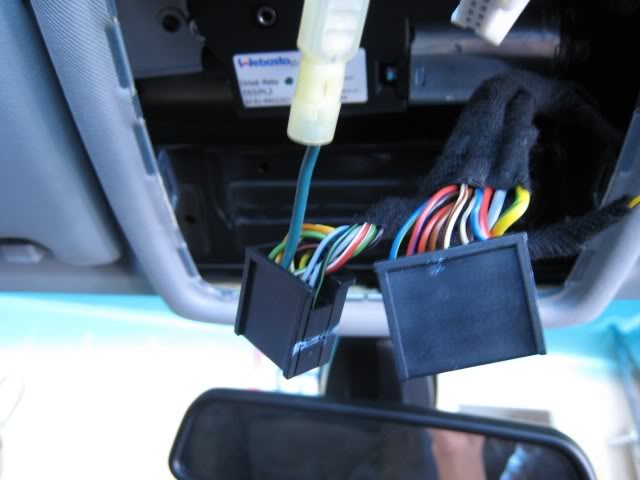
Now run your fingers along the console from the inside till you feel the metal clips.
They are located directly
behind the round lights. The clips are easy to recognize because everything else
is plastic and the clips have a semi-sharp edge. Once you locate one push it in
and down to push the console out of the cutout. Do it for the next clip as well.
Now you should see this.
Completely remove the console and place it in your back seat. Don't worry about
what wires connectors go where. They are all different and can not be mistaken
when putting back into place.
To remove the connector there are small tabs that keep them secure. Push on them
to remove each individually. The only one you may want to make note of its placement
is the connector that just has two wires going to it. It has this little storage
connector type space on the console. Now, Unless you want to drive around with the
hole in your roof keep reading.
Make ends meet:
Creating a lead wire to insert into the car's connector will prevent
you from having to cut, splice, or solder into factory wires. This will eliminate
any risk of messing up and cutting too deep or getting sloppy, etc. Now you may
want to do this part first. Just in case you want to save some time and have this
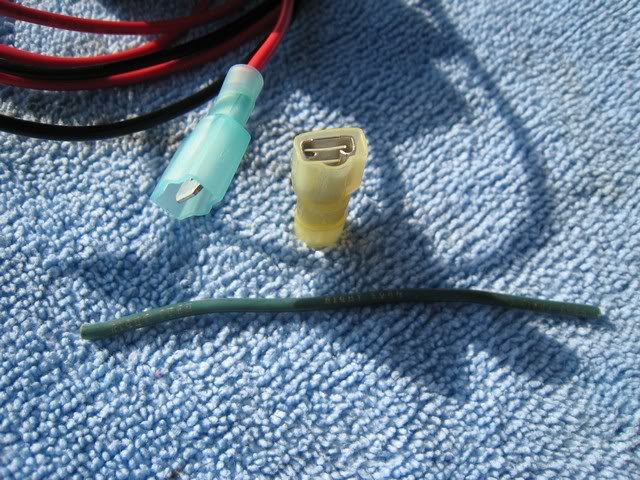
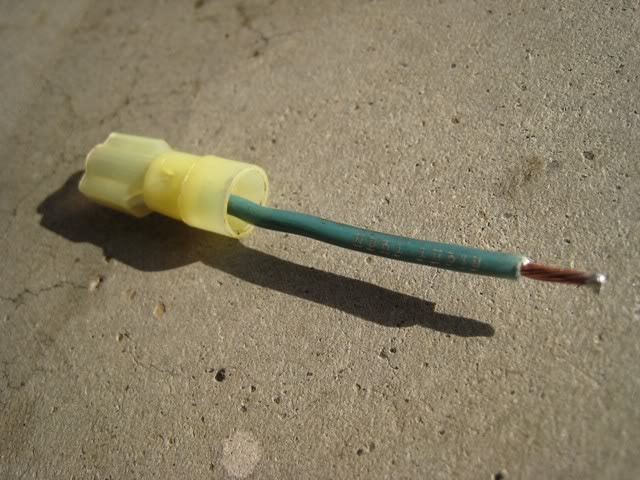
step ready so you can jump to the next. Take your 3" wire and strip a little bit
from both ends. Connect the female connector to one end of it by putting
one of the stripped ends into the adapter and using the wire strippers to
fasten it into place by clamping down on it . I fold over the wire
before I put it in so it has a tight and secure fit. Like this.
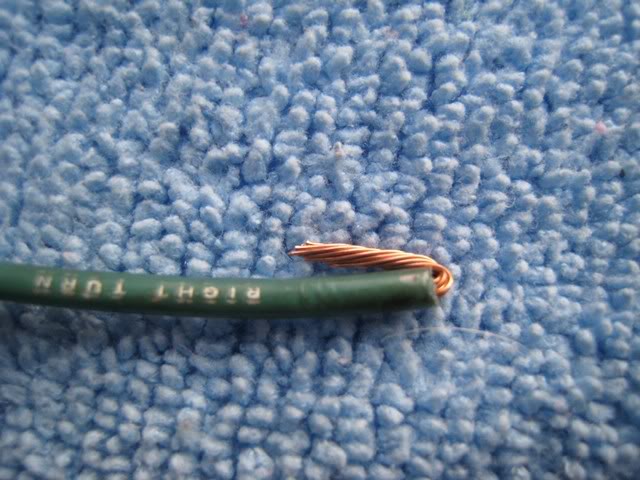
Now take the other end and slightly twist the strands of wires and then add a little
bit of solder to the end to keep them together. If you get sloppy just use sand
paper or a file to clean it up.
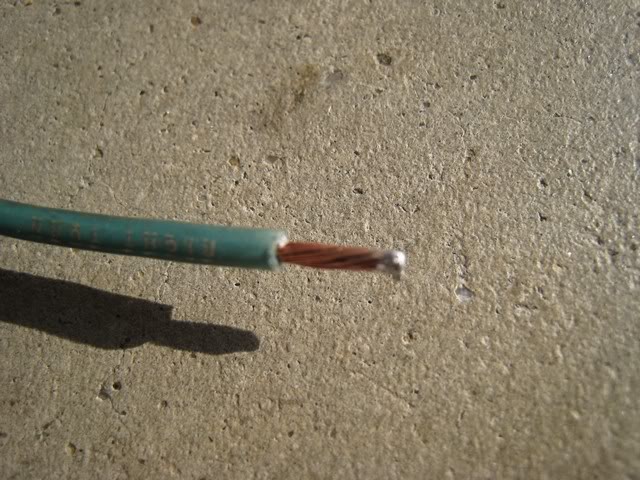
This is what you should end up with when done.
Lead the Way:
To power the unit you are going to run your lead wire into the connector instead
of splicing into it. Locate the green wire with a white stripe and let it lead you
to the connector that plugs into the console. This is so easy! Simply take you lead
wire and slide it into the connector where the green with white stripe wire is.
Kinda like if you were to connect two speakers the the same speaker output on a
receiver. This technique I believe is commonly referred to as piggybacking.
It should have a pretty snug fit but to ensure it stays in and secure I zip tied
it.
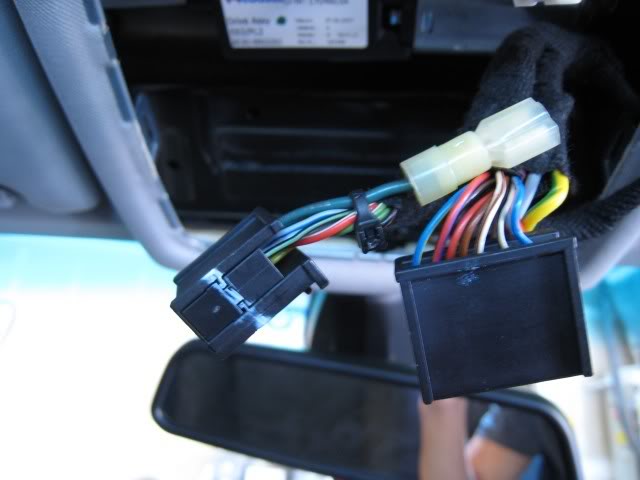
Now connect your red wire with the blue male connector from the Direct-Wire Power
Adapter to your lead wire female connector that is going to the car's black connectors
wiring harness.
Your Grounded:
Grounding the unit is a fairly simple process. Although I have heard some things
about people having problems with certain bolts they ground to where they have to
file a bit to get some raw surface area. I haven't had any problems, and from the
resources there are no complaints of anyone having problems. The 10mm bolt is located
in the upper left if you are facing the windshield and upper right if you are facing
the backseats.
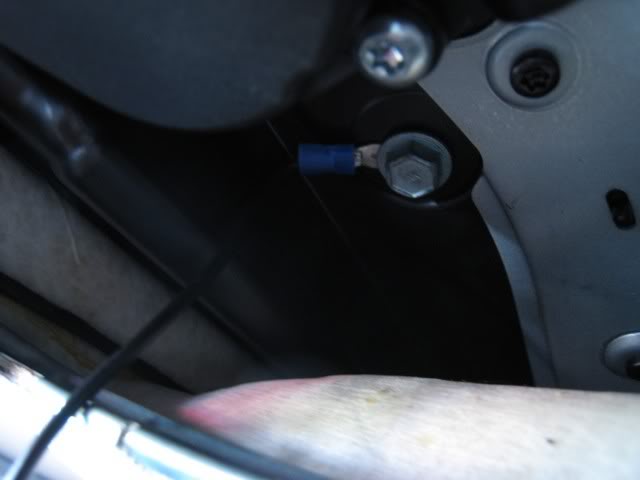
Loosen up the 10mm bolt with a small ratchet enough where you can slide in the ground
wire from the Direct-Wire Power Adapter. Tighten it back up and now your grounded!
You can count the amount of turns it takes to loosen it up so you can tighten it
back up relatively close to where it was initially.
Lights? Good!:
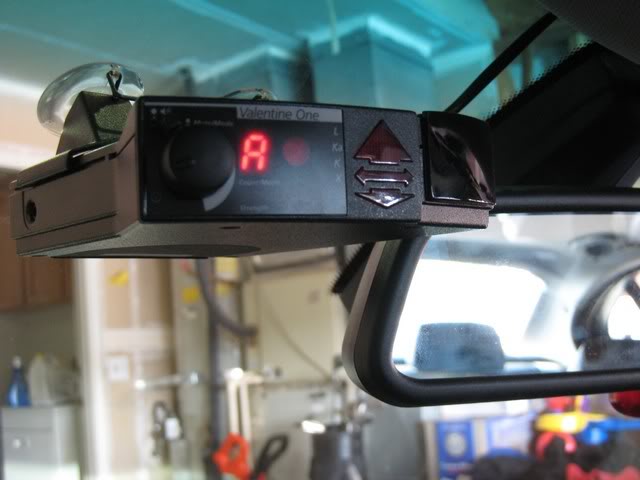
Now before you put everything back together this would be a good time to make sure
everything works, right? Get your V1, your car key, and the power cord. Plug the
power cord into your V1 and the other end into the Direct-Wire Power Adapter's "Main
Unit" output. Getting excited now? Good! Put in your key and push the start button.
No need to push the brake. You aren't going to go drive around, just make sure the
thing works.
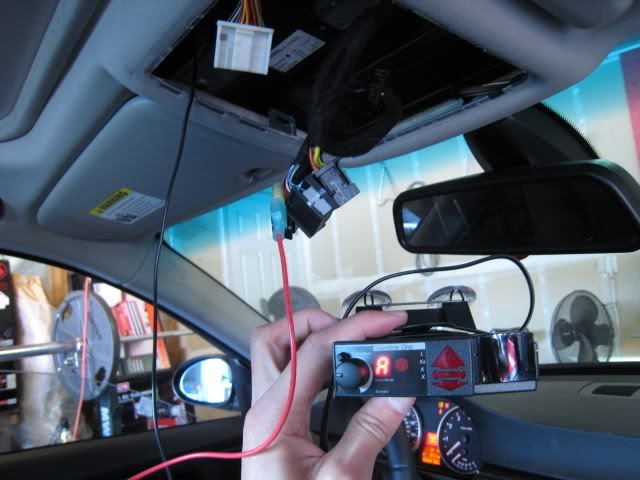
Awesome! It works! If for some reason it doesn't it's probably your own fault and don't
worry about it. If you couldn't handle the install you probably shouldn't be driving
fast enough to get a speeding ticket anyways.
Get back in there:
Now you want to take the power cord and put it through the roofs interior in the
same place you accessed the metal clips. Doesn't matter which way you feed it through.
Just leave enough to make it from where the power cord hides to your V1.

After you have done that bundle it up nicely with a zip tie. Black ones look better
but if you want to use clear or whatever else go for it.
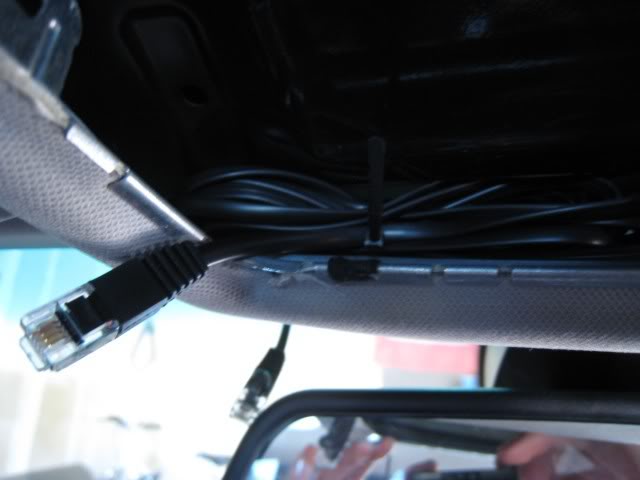
Now bundle up the power and ground wires neatly in the same fashion.
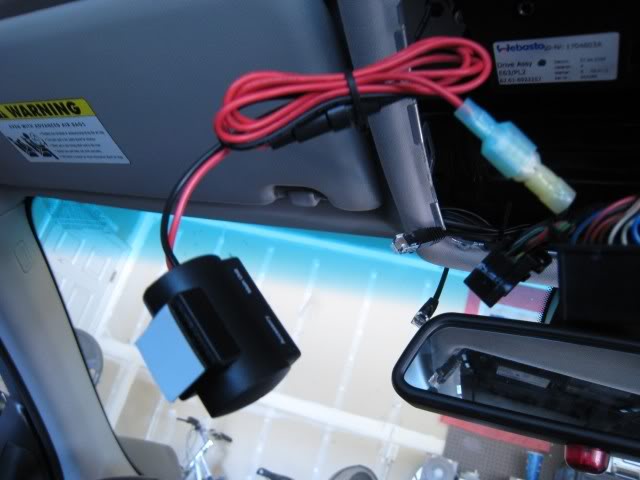
The power cord should be sitting just above the mirror in the little space between the windshield and the light console. I tucked the adapter in the left hand corner. To ensure you can fit the console back in make sure it is tucked all the way in the corner. The wires from the Direct-Wire Power Adapter are tucked behind the metal tab on the left side of the cutout.
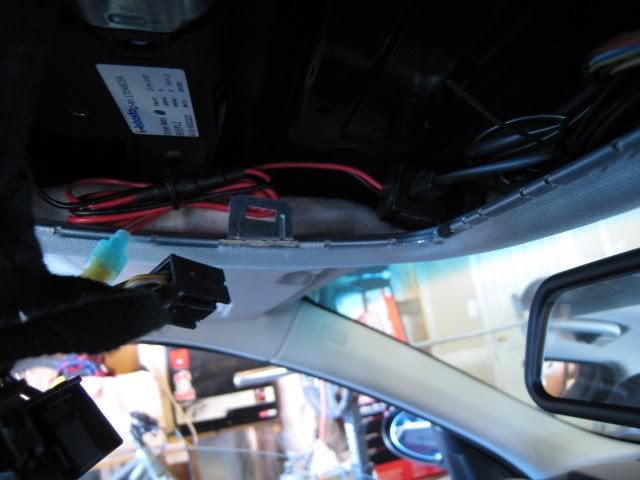
Plug the connectors from the vehicle back into the lighting console and then carefully insert it back into place with the side closest to the rear of the vehicle first and then slide it back and then up into place. If for some reason it does not want to go back up you may have the Direct-Wire Power Adapter in the way. Make sure it's tucked in that corner.
Special Thanks to E90post forums, user ALPINE, and Jeremiah from Weber BMW of Fresno,
CA.