DIY - M5 SMG Shift Knob Wiring Retrofit Kit
by a l l an
based on ironic's initial design
DISCLAIMER
It's your car, not mine.
 CREDITS
Thanks to
ironic for creating ver 1.0 of this kit.
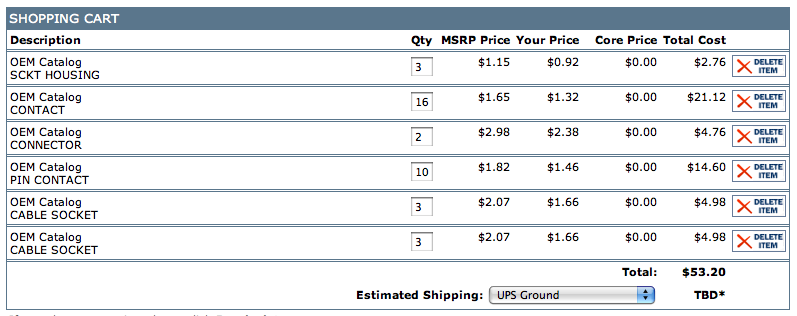
 PARTS
Total Kit Cost
PARTS
Total Kit Cost
$240 to $320 (incl shift knob, wiring parts, shift boot, and heat shrink tubing) plus your own time
Where to buy
Tischer BMW /
getbmwparts.com
Not in any way affiliated with Tischer but the parts were bought from them.
Part #1 - M5 shift knob
Shift knob "buy" link (Tischer)
http://www.trademotion.com/partlocat...logid=4462&tab
Note: The knob on this picture has the E9x auto shift boot pre-sewn. The actual knob you'll be getting will have a different shift boot that you'll have to replace with your E9x boot.
Part #2 - Harness components
 Part #3 - Shift boot (either you use your existing or buy a new one)
Part #4 - Heat shrink tubing (optional)
TOOLS
Part #3 - Shift boot (either you use your existing or buy a new one)
Part #4 - Heat shrink tubing (optional)
TOOLS
1. Scissor or wire cutter
2. Wire stripper (for 20 and 16 AWG)
3. Hair dryer (if you will be using heat shrink tubing)
4. Electrical tape (if you won't be using heat shrink tubing)
TIME REQUIRED
A few fun hours
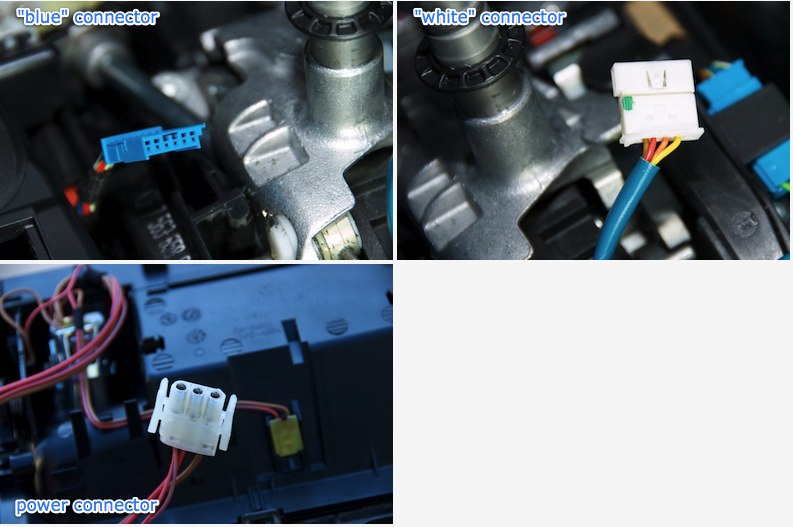
 PIN ASSIGNMENTS, HARNESS CONNECTIONS, and WIRING SKETCH
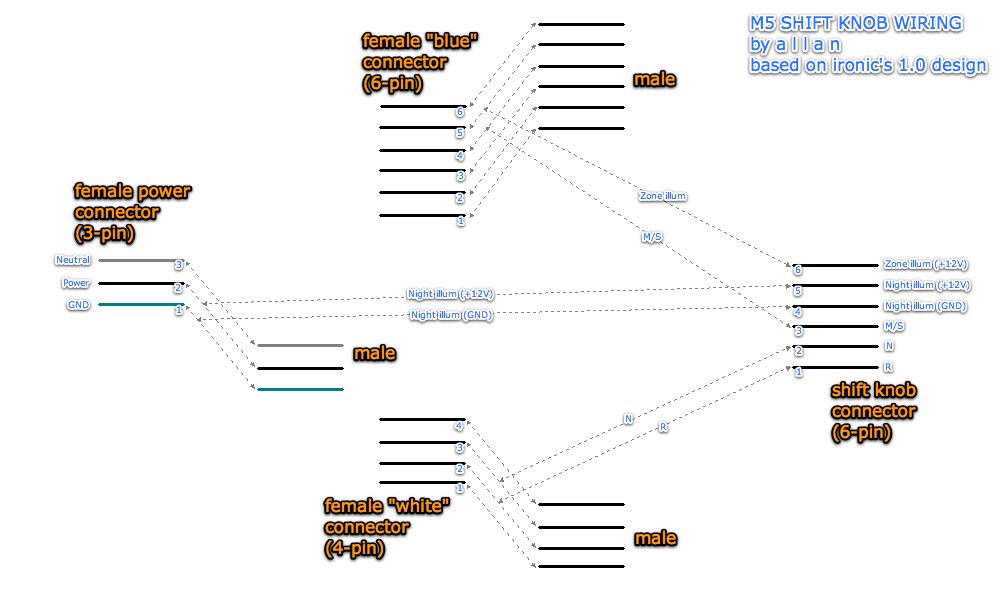
M5 shift knob pin assignments
PIN ASSIGNMENTS, HARNESS CONNECTIONS, and WIRING SKETCH
M5 shift knob pin assignments
1 = Zone Reverse (GND)
2 = Zone Neutral (GND)
3 = Zone Drive A/S (GND)
4 = Night Illumination (GND)
5 = Switched +12v for Night Illumination
6 = Switched/Constant +12v for zone lighting
Pin connections
M5 pin 1
-> White connector pin 2 (or 3 if you look at it as a 6-pin connector)
(R)
M5 pin 2
-> White connector pin 3 (or 4 if you look at it as a 6-pin connector)
(N)
M5 pin 3
-> Blue connector pin 4
(M/S)
M5 pin 6
-> Blue connector pin 5
(Zone illum)
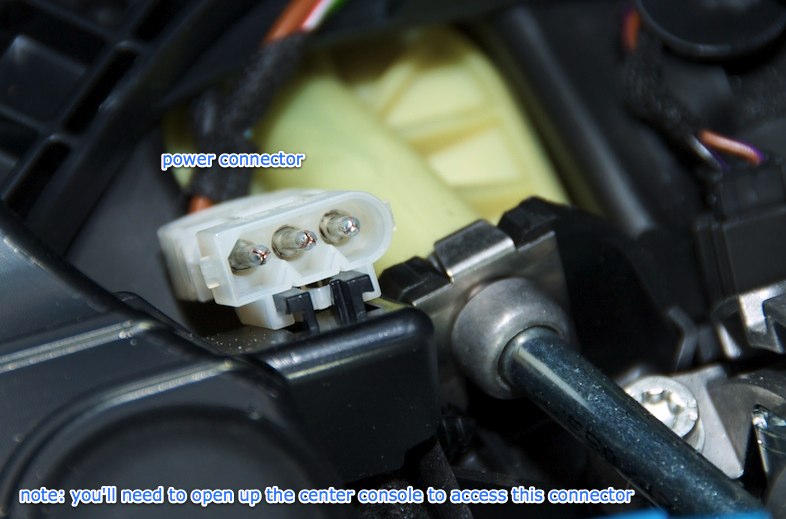
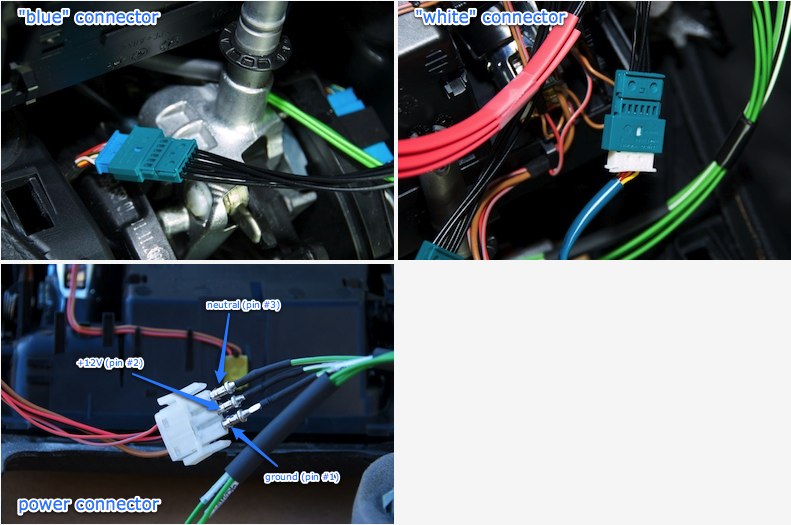
M5 pin 4
-> Power connector pin 1
(Night illum - ground)
M5 pin 5
-> Power connector pin 2
(Night illum - +12V)
Sketch
 KIT ASSEMBLY
The wiring sketch is all you need really to build this kit. Here are a few guidelines/tips that can help you out.
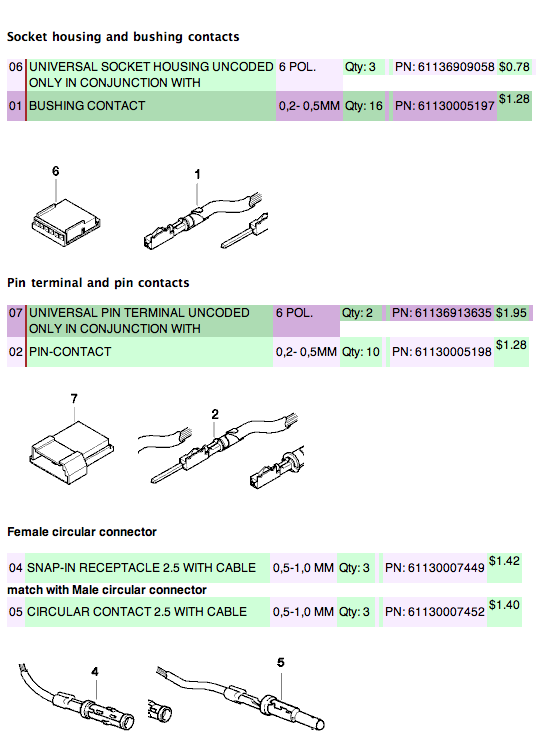
- Assembly
Assemble your wiring harness like below. The bushing contacts go to the socket housing and the pin contacts go to the pin terminal. There is no housing for the circular receptacles.
I cut the cables with the following approx. lengths. These are longer than what's needed but you're better off being long than short.
(4-pin) cables for the "white" male/female connectors - 6in
(6-pin) cables for the "blue" male/female connectors - 8in
(6-pin) cables for the shift knob connector - 10in
(3-pin) male/female circular power cables - 10in

- Pin # designation
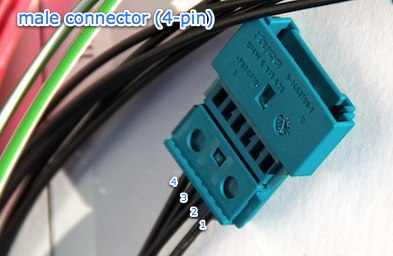
Tip: Make sure you follow the orientation of the connectors as shown below when determining the pin #s.
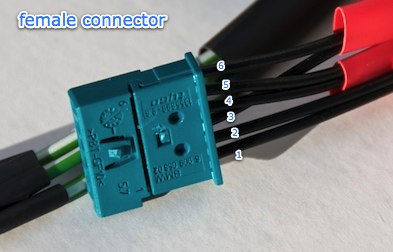

The 4-pin connector is the same 6-pin connector but the 1st and 6th slots are not used. I numbered pins 2-5 as 1-4.
Tip: It helps to tag-label the wires to avoid confusion and mistakes.
- Connecting the wires
Tip: The dotted lines in the sketch represent the wires.
Now connect the female connector wires to corresponding male wires.
Tip: If you'll be using heat shrink tubing and wire jackets, insert the tubes/jackets to appropriate wires and spots before you connect/splice the wires.
Examples:
- pin #1 of the female "blue" connector joins with pin #1 of the male "blue" connector
- pin #5 of the female "blue" connector joins with pin #5 of the male "blue" connector and pin #6 of the shift knob connector.
Tip: Check your connections a few times to ensure you did it right.
Now wrap the connection with electrical tape or heat shrink tubing (I prefer the latter). Use the hair dryer to shrink the tube.
- Completed wiring kit
Your kit should look identical to this (probably minus the red/orange jackets).
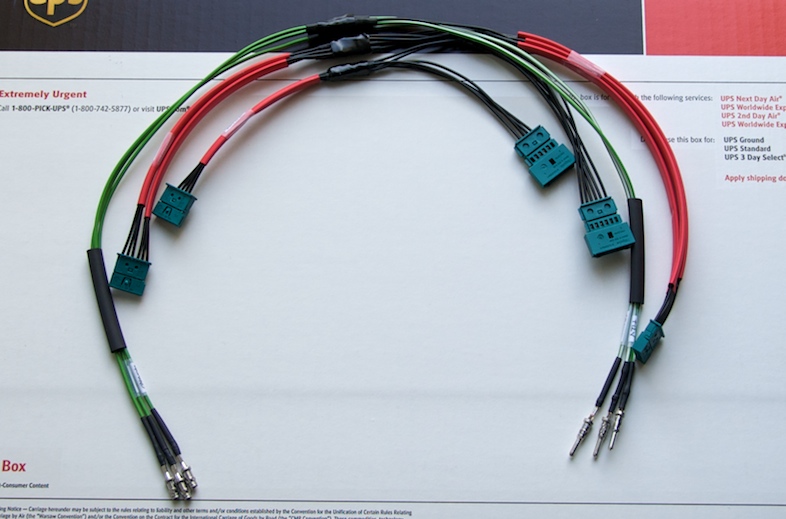
You'll see that I tag-labelled the green (power) wires as they don't have their own housing. I labelled the ground and +12V wires on both sides so I can identify them during the install.
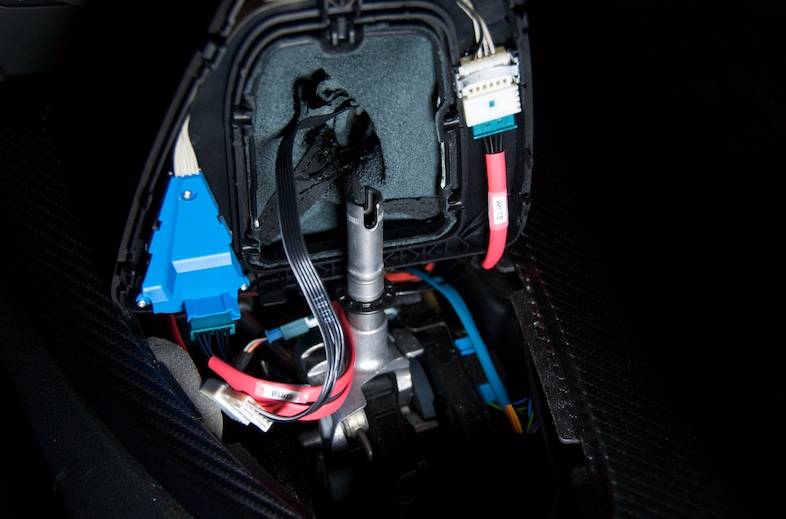
INSTALLATION
Step 1 - Disconnect the stock shift knob wiring connections (blue, white and power connectors)

Detached female stock connectors
 Step 2a - Connect the wiring kit female connectors to stock male connectors
Get your badass wiring kit and make these connections. The male/female pairs can only be hooked up one way so there is zero chance to mess up the orientation.
You'll here a "click" when the connectors snap and lock into place.
Tip: Be careful still inserting the connectors to avoid bending the male pins.
 Step 2b - Connect the wiring kit male connectors to stock female connectors
 Step 3 - Neatly tuck in the wires and install the M5 shift knob
Tip:
Step 3 - Neatly tuck in the wires and install the M5 shift knob
Tip: Route your wires to the top of the center console so they don't get in the way of the shifter.
 Tip:
Tip: Don't permanently close your center console yet as you still need to test the knob and gear functionality. I just can't wait to show you how awesome it looks right now.

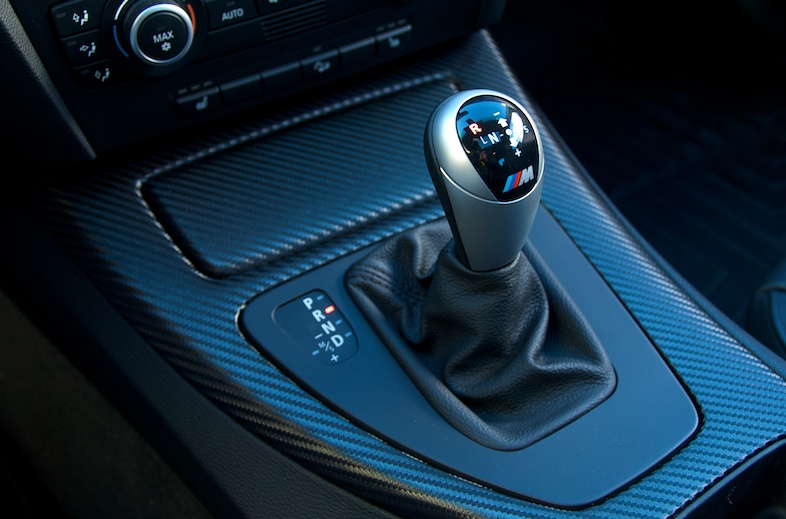 Step 4 - Test your super knob
Check that the knob illuminates the selected gear and make sure the gears are working properly.
Now it's time to celebrate!


