PLEASE DO NOT MESSAGE ME ASKING ME TO DO THIS MOD FOR YOU. I am willing to help you over AIM, Privet Message, e-mail, or phone, but as I have had over 40+ requests from people asking me to come out and do this for them, if I would have to help one person, it would mean I would have to help them all, I do not have the time. If anyone would like to setup a meet with atleast 10 people showing up around the area I live in, I can come out and guide and help everyone do their install. Thank you!
*Update: It has been about 8 months I am running with this mod, no errors, no problems at all. I have compared the flashing with another E92 335, and they flash identically, not too fast, not too slow.
Big thanks for Chesmu, if it wasn't for him I wouldn't know it could be done. It was almost the same as the E90 but wire colors and wire positions where different, I also didn't change the signal bulb to LED like Chesmu did, I just left the stock one, before I did the other side I compared the flashing and everything was on point. Took me about 2 hours but looks great.
Disclaimer: Not this forum or alex310(me hehe) is responsible for any damage to your car, or your self. This is for educational purposes only and is ILEGAL in the United States to operate a motor vehicle on public roads/freeways without front orange lights/markers. This is for off road use only. Basically if you decide to do this mod anything that happens is all your fault(hehe!)
Big thanks to Chesmu for his E90 write up that showed me hope to try it on the E92
Here is his write up
http://www.e90post.com/forums/showth...ner+delete+mod
Okay, to start on the US SPEC (DOT) E92 there is two AMBER (orange) lights on each headlight in the front. The main larger one is for Signals and Running Lights when you have your headlights on. The second is a small LED at the top corner of the headlight which is a Running Light when you have your headlights on. The goal of this mod is to first make the larger light only flash (signal) and to cut the power off to the LED Running Light so when your headlights are on all you see is your angel lights and your headlights. No ugly orange. As I am writing this I am half about 70% asleep, so if I leave something out or you have a question please do one of the three (whatever is better for you) reply back to this post, privet message me, or send me an instant message on AIM.
Before we start! PLEASE DO NOT USE CRIMPS!!! IF YOU DO NOT KNOW ALREADY, CRIMPS FALL OFF REALLY EASY, I DO NOT CARE HOW GOOD YOU CRIMP THEM, THE CAR IS ALWAYS RATTLING CAUSING THE CRIMPS TO COME OFF. IF YOU DO NOT KNOW HOW TO SOLDER SEARCH ON GOOGLE AND LEARN TAKES 5-25 MIN AT THE MOST!!!!! I AM WARNING YOU HARD HEADED PEOPLE DO NOT CRIMP!!
AND PLEASE IF YOU ARE LAZY, OR LIKE JUMPING STEPS PLEASE THIS IS NOT FOR YOU! MANY TIMES I SEE PEOPLE WHO ARE TOO LAZY TO COVER WIRES. IF WIRES ARE NOT SEALED CORRECTLLY YOU WILL PAY IN THE FUTURE!
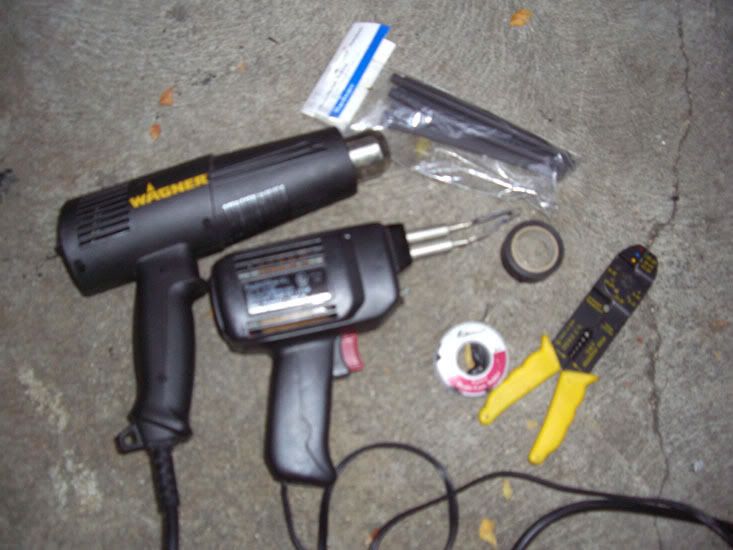
Tools needed (if you want to do it my way) (1-3hour job)
*If you read Chesmu's post on how to do this on the E90 you will be much better prepared
http://www.e90post.com/forums/showth...ner+delete+mod
1. Wire Cutter/Stripper
2. Soldering Gun and Solder
3. Heat Shrinks and Electric Tape
4. Heat Gun or Hair Dryer to shrink the Heat Shrinks
5. About 40ft of 16-20gauge Car Electric Wire (I used 18gauge)
6. 2x 25 watt LED Load Equalizer from
http://superlumination.com/equalizers.htm
7. Your brain, and to read FULLY and FULLY UNDERSTAND THIS POST and ask if you are not sure about something (trust me, Alex will help!)
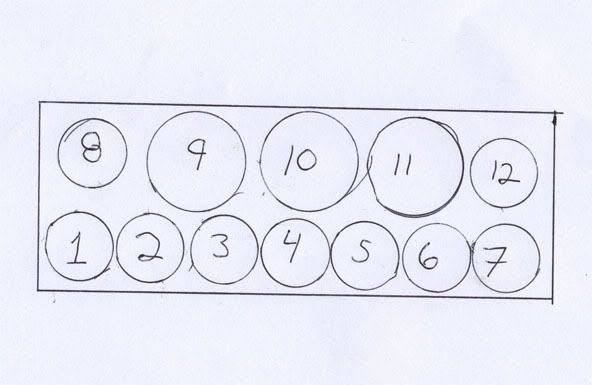
8. Alex's Ghetto Diagram!
7. A hanger
Pop your hood open (if you do not know how to do this, please stop right here)
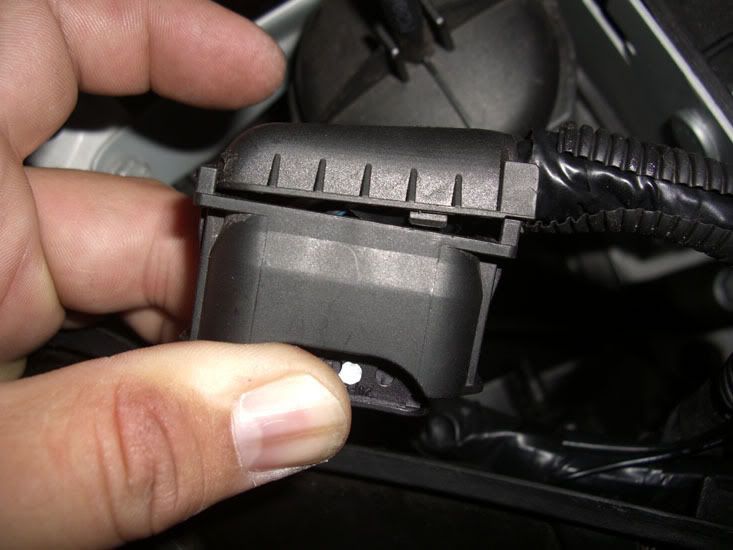
Find the wire harness going into your headlights, on each side (left and right sides) of the harness is a clip you have to sqeeze in to release it, you can sqeeze it in with your fingers, I suggest you push the harness in as you are sqeezing then pull it out. You should feel the clips go in when you sqeeze it. The clips are more towards the back of the harness away from the headlight. This could be very hard, I have a good grip so it wasn't too hard for me.
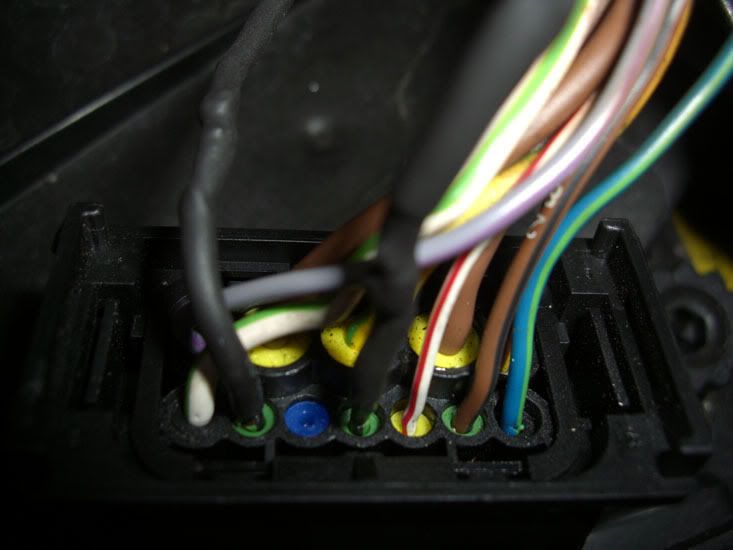
Once you have removed the harness, then you must remove all the factory electric tape, and then look at the harness from where the wires go into the harness. Compare it to my diagram and we are ready to roll!
You must pop off the cover ontop of the harness, this one...
Diagram
Harness
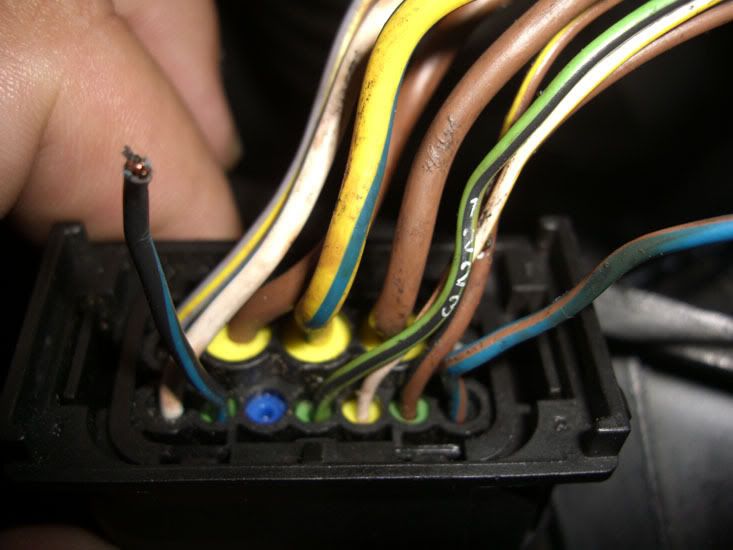
When I say "FROM THE CAR" this means the wires that are coming from the car to the harness of the headlights. When I say "FROM THE HARNESS" this means the wires coming from the harness.
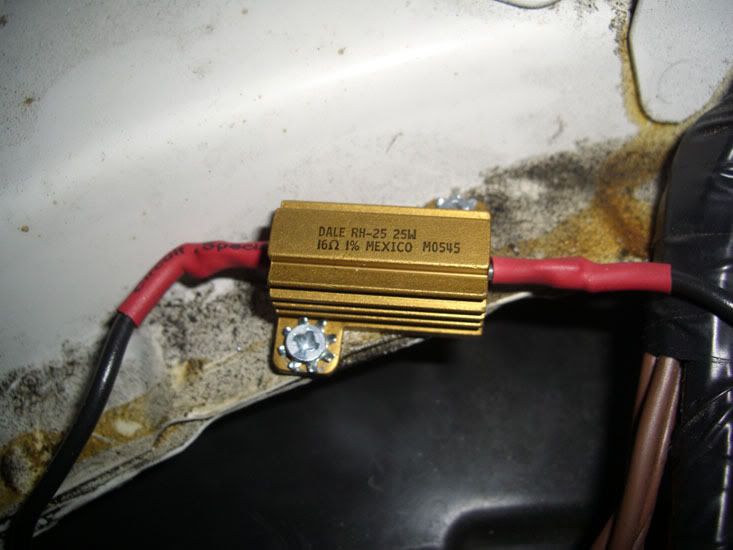
What we are doing is disconnecting two wires. One wire is for the Signal/Running Light (Wire #7 on the diagram driver side wire color is BLUE with a GREEN LINE and passanger side color is BLUE with a BROWN LINE) (the larger light) and the second is the LED Running Light (Wire #2 on the diagram driver side wire color is BLACK with a GREEN line, passanger side is BLACK with a BLUE LINE). The Signal/Running Light (Wire #7 on the diagram driver side wire color is BLUE with a GREEN LINE and passanger side color is BLUE with a BROWN LINE) the wire coming from the car will be connected (before connecting the wires togther make sure you slip in a heatsink onto one of the wires so you can seal on the open wire) to a "25 watt LED Load Equalizer" (fancy for RESISTOR with HEATSINK) and then ground the 25 watt LED Load Equalizer. The 25 watt LED Load Equalizer will take the power from the car making the car think that the bulb is still connected and you do not get that annoying message on your dash/iDrive.
*Remember the 25 watt LED Load Equalizer gets really hot, you must place it in a place so it can be facing up and not hit anything plastic or flameable. I suggest you screw it down and do not use double sided tape as it will just melt away.
25 watt LED Load Equalizer Picture
My grounding method (drilled a hole and screwed in the ground)

The LED Running Light (Wire #2 on the diagram driver side wire color is BLACK with a GREEN line, passanger side is BLACK with a BLUE LINE) must be cut (disconnected) and each side covered with electic tape so that the uncovered wire does not hit anything.
As you can see in the picture the wire is cut and not connected to anything...
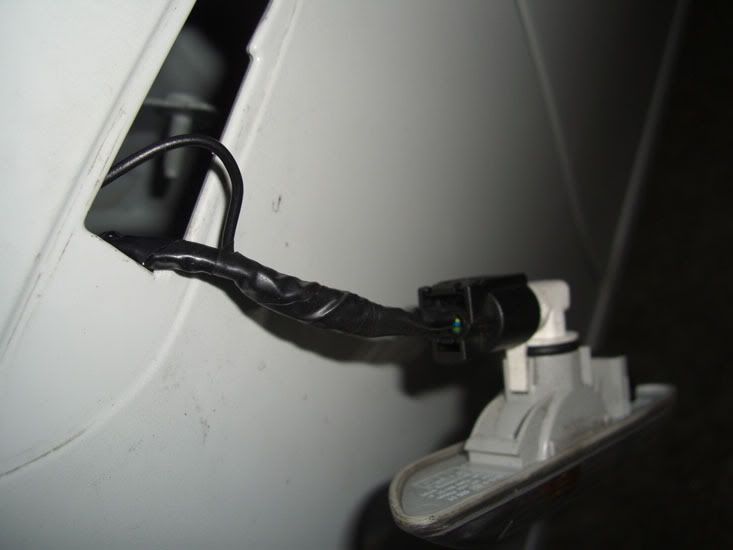
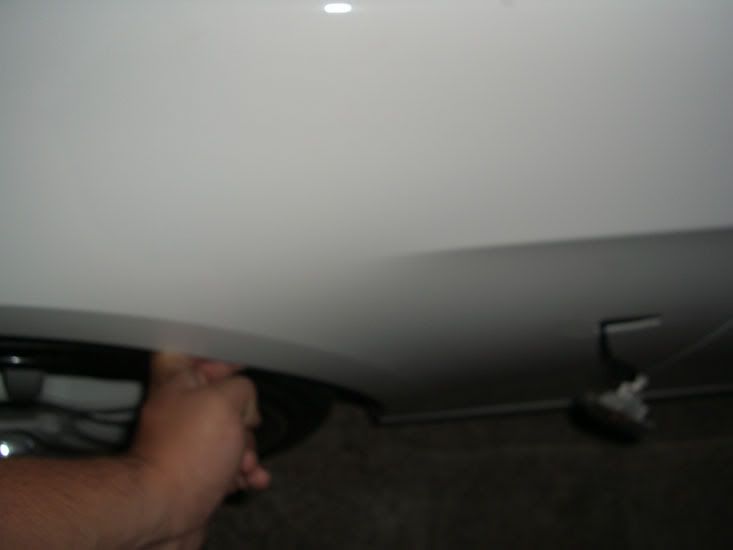
Now we must pop off the sidemarker on the fender of the car, this is very easy, I used a plastic screw driver so it does not damage the paint of the car, sticked it in under the end of the sidemarker facing the front of the car and pulled it a little out and used my fingers to just pull it off. Make sure you pull out the wire as much as you can, do not pull to hard! Remove or push back the factory electric tape (I just pushed it back.) There is going to be two wires, one is BROWN, we are NOT GOING TO USE THE BROWN WIRE.
Sidemarker...
Get your hanger, open it up and make it as straight as possible, here is mine...
You will stick the hanger in from the engine compartment right above the plastic wheel liner fender area and guide it to the sidemarker, once you have it guided to the sidemarker, connect some of the 40 feet of Electric Wire to the tip of the hanger (I used electric tape to connect the wire to the hanger) and pull the hanger back out. You can also remove the wheel, then remove the fender lining and guide the wire your self. but if you use my method, make sure you do not leave too much slack on the wire. Make sure it is a little tight so it can't move around too much. Dont worry, nothing can hit the wire in that area. Okay, now if you are having a hard time guiding the hanger to the sidemarker from the engine compartment you can pull the fender out with your hand, dont be shy it is plastic, it wont break if you pull too hard.
Me pulling the fender...
Once you are finished you should have a wire from your sidemarker area to your headlight harness. You will now have to tap that electric wire into the second wire (NOT THE BROWN ONE) on the sidemarker. Do not cut/disconnect the sidemarker wire, you will need to strip the about half a inch of the wire cover off and connect the your electric wire to the sidemarker wire. Once you have finished taping into the sidemarker wire cover all the wires on the sidemarker with electric tape and pop the sidemarker back in.
Now connect the the wire (make sure you slip a heatsink on before you connect the wires) coming from the sidemarker you have taped into to the wire coming from the harness #7 on the diagram driver side wire color is BLUE with a GREEN LINE and passanger side color is BLUE with a BROWN LINE.
Do this on both driver and passanger side, cover all wires with electric tape. Pop the harness back in, turn on the car, turn on the headlights, see if everything works.
Remember, it will take the car about 2-3 drives before the adaptive headlights will start to turn again with the car. So do not freak out if they do nto work right away.
Some pictures...
Driver side harness
Passanger side harness
Headlight Harness Diagram
*PLEASE IF I MADE ANY SPELLING MISTAKES OR LEFT SOMETHING OUT PRIVET MESSAGE ME, I WAS REALLY SLEEPY WHEN I DID ALL THIS, WANTED YOU GUYS TO HAVE IT BEFORE THE WEEKEND STARTS!
Once again you guys need help, feel free to contact me, you can IM me on AIM, I always have it signed onto my mobile phone.
Sorry 56K guys!