Ok, this is for all of you who might be getting a BOV for your 335 and the instructions suck or the pictures are barely visible. I
HIGHLY suggest you do this when your car is cooled down. Things are very hot very fast even if you just went for a short drive. I got burned a couple times cus I was too anxious to install this. My pain is your gain.
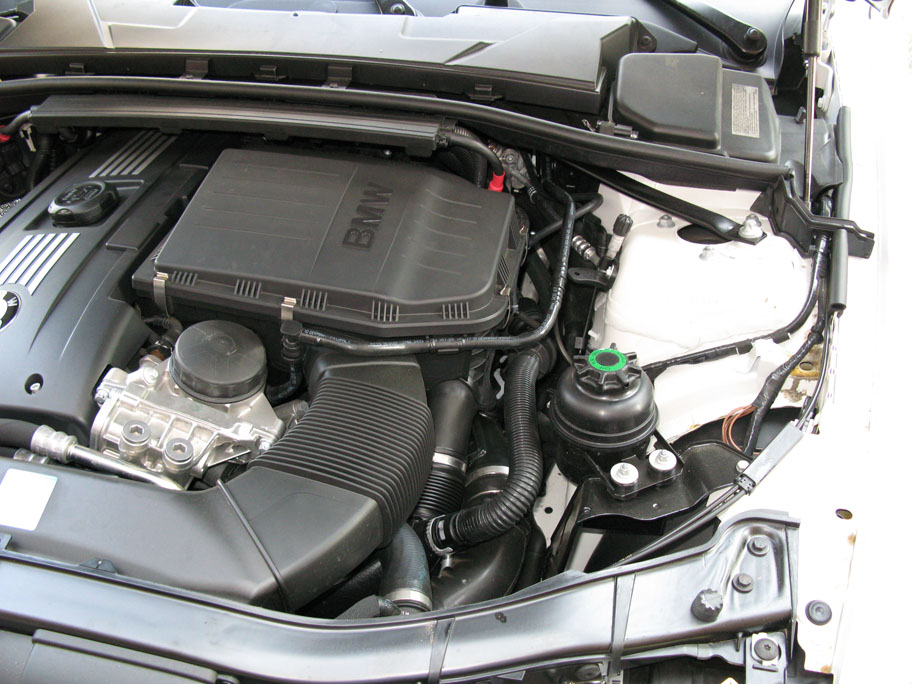
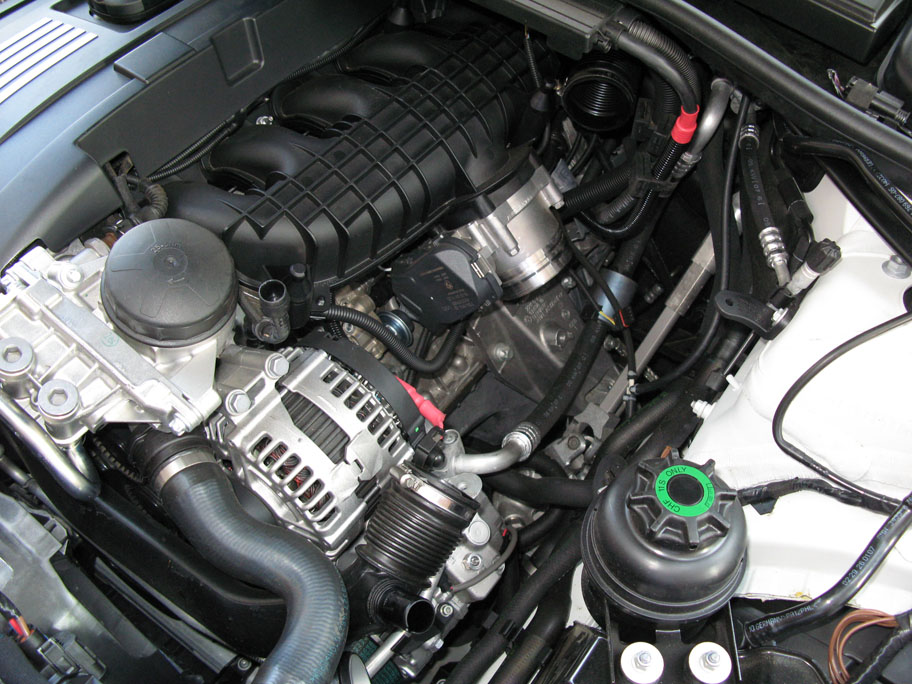
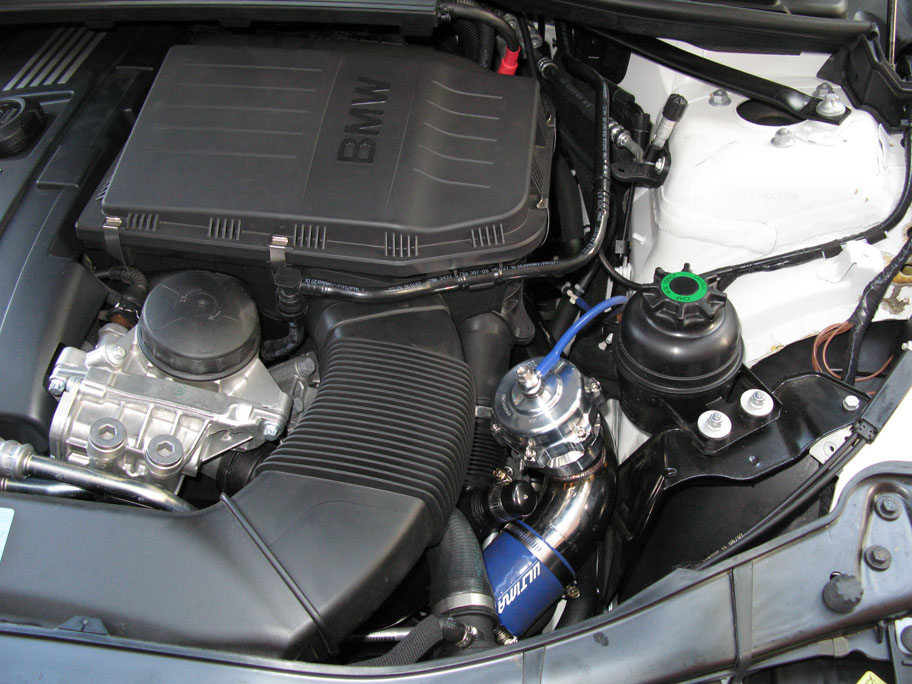
First up, this is just a pic of the stock engine bay, examine all the beauty that it is.
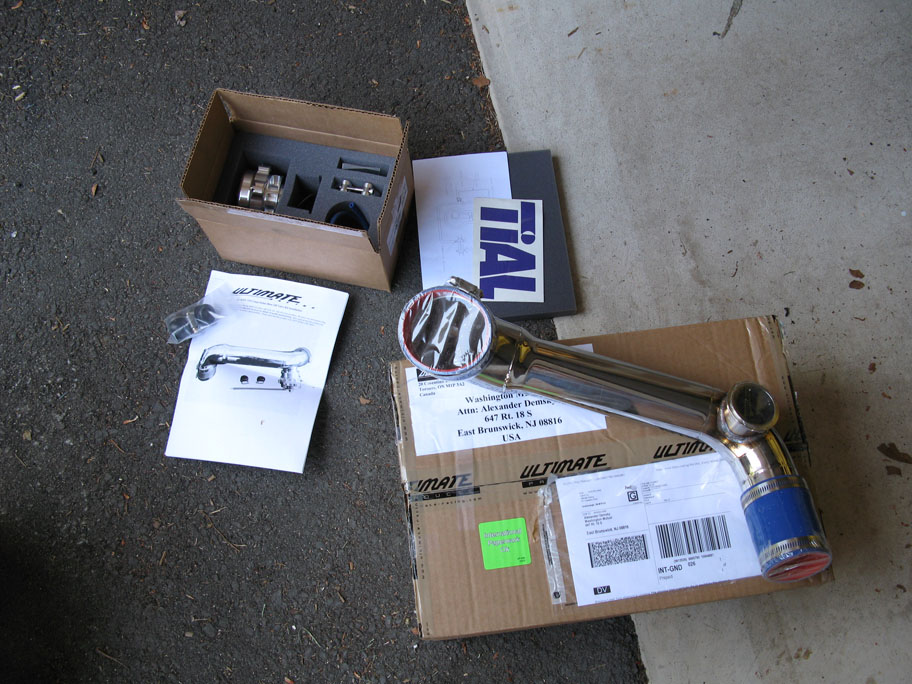
Then take everything in your kit out and make sure you arent missing anything. The last thing you want to do is find out some screws or bolts were not included in your shipment and half your engine bay is removed.
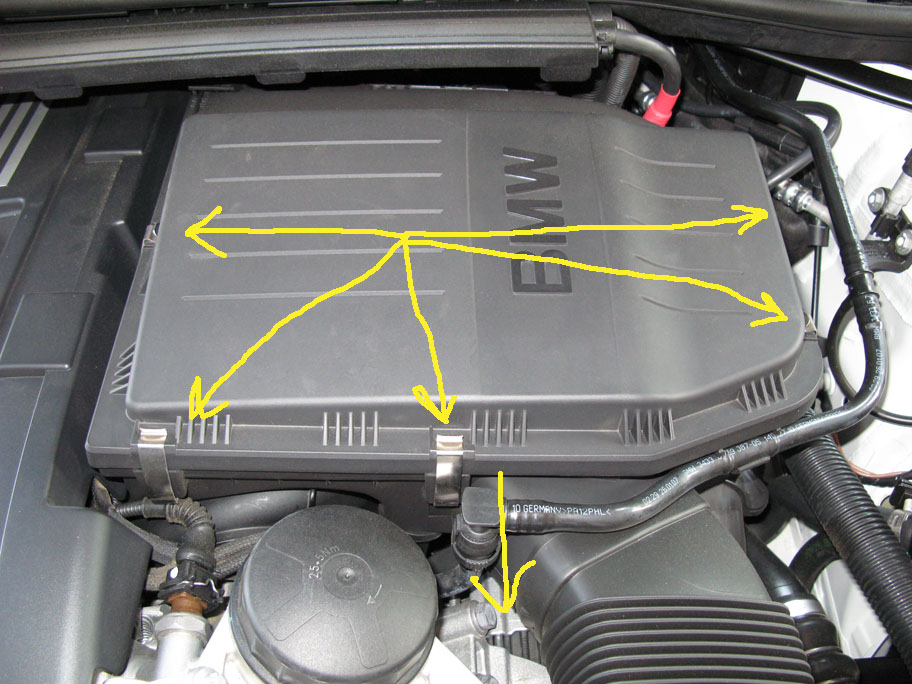
What you want to do next is remove the airbox lid. Theres 5 fasteners that you just push right off. No tools are needed for this, just fingers. Lift up the cover in the front and pull towards you. Then remove the air filter.
Once the lid is removed, you want to pull detach the hose connector. Just squeeze the sides and pull up. Very simple. Then pull the hose away from the airbox. This requires a little force as its in there pretty good.
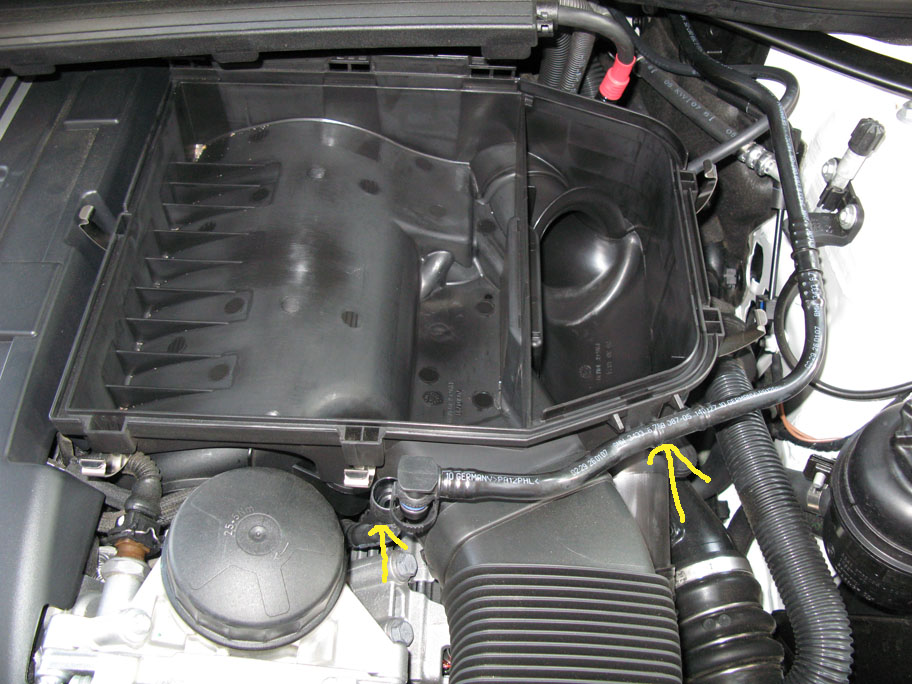
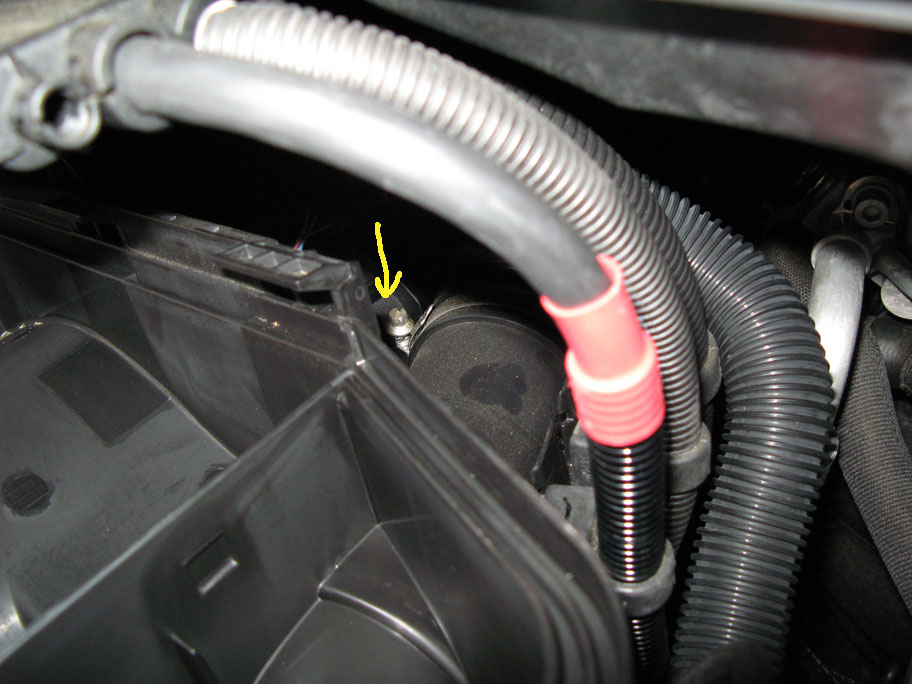
Next you'll want to remove the wire harness in the back of the box. Theres three wires attached by rubber grommets. Just pull them up with a bit of force. Dont worry about stretching the rubber, they wont break.
Now youre going to remove the snorkel that connects to the intake. Theres two screws that are T20 Torx. This is not the same as a Hex key so dont try to put a square peg in a round hole. Tools are designed to fit exactly. Get yourself a good Torx set, they are used all over the inside of the car too. Once you take out the two screws, take the snorkel off the airbox with two tabs. I just squeezed down on the top and bottom of it and flexed it off the tabs.
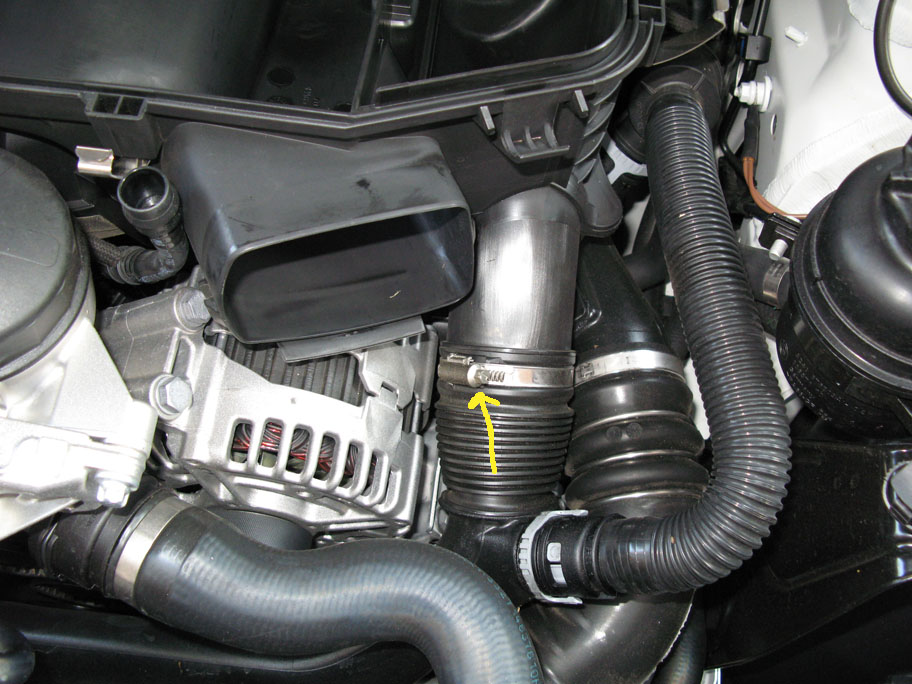
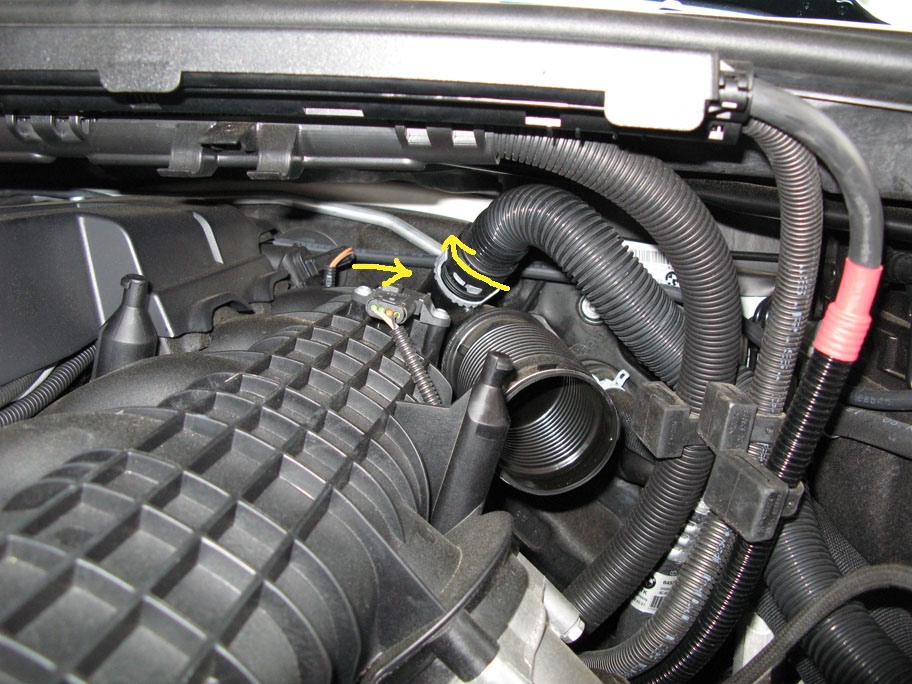
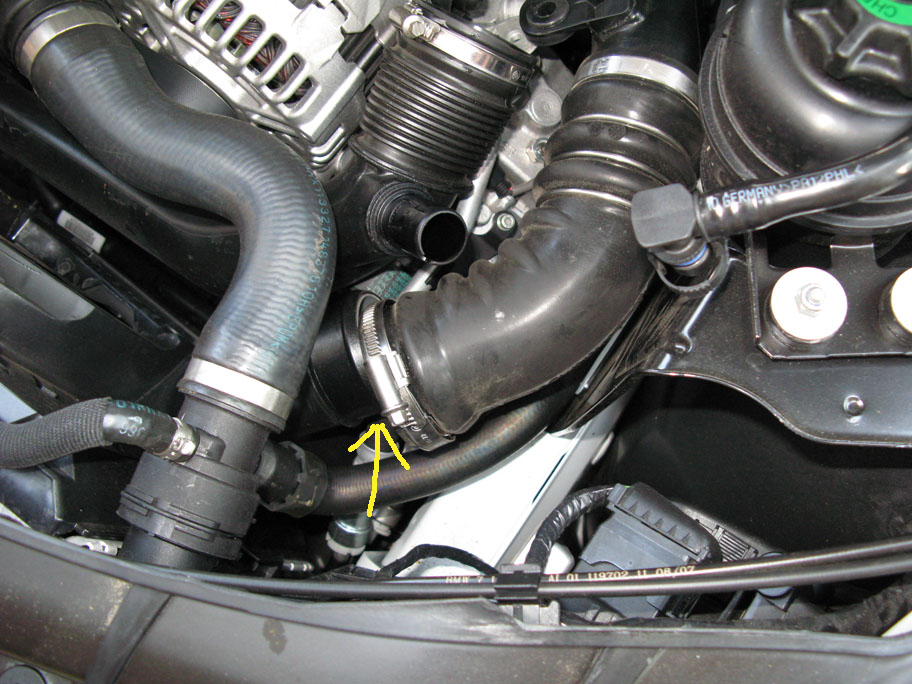
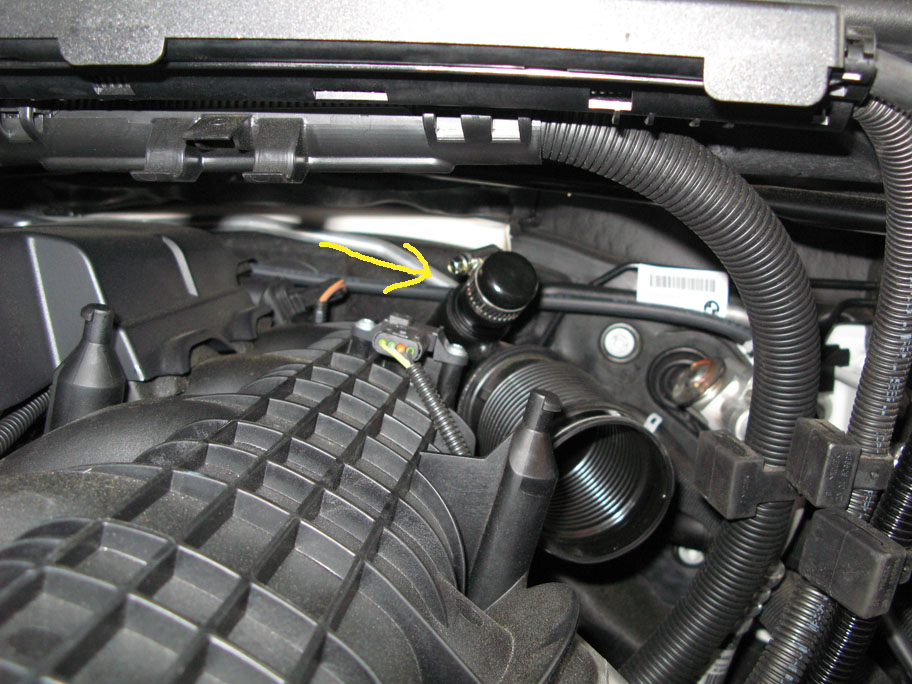
Next, remove the airbox by first loosening the clamps from the turbocharger pipes at the front and the rear. The rear one is a bit tricky to get to so removing the wiregridthing(technical term) may make it easier(third pic). This is pulled straight out and is attached by 3 tabs. Just pull.
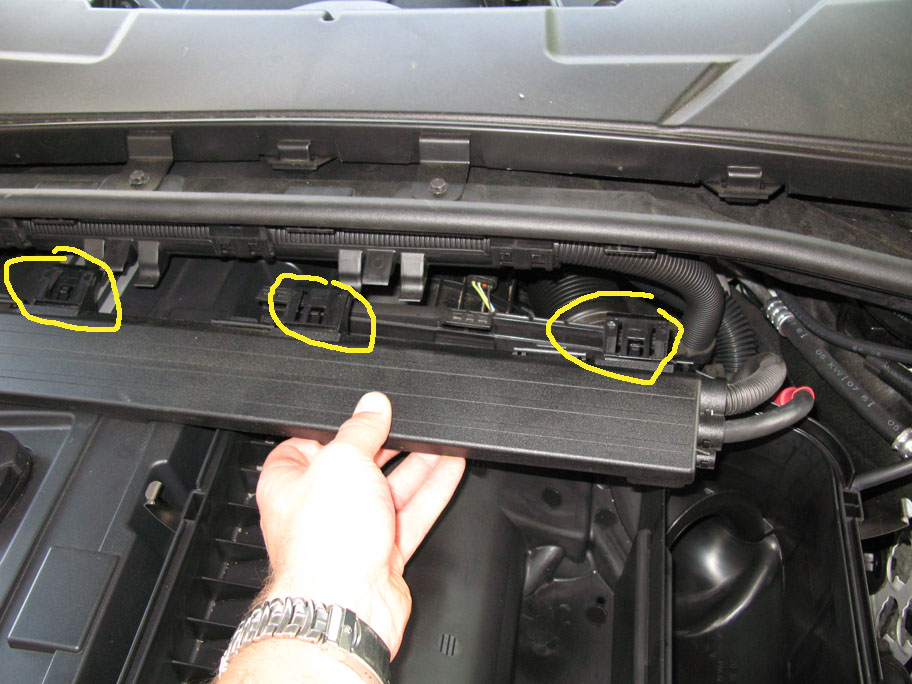
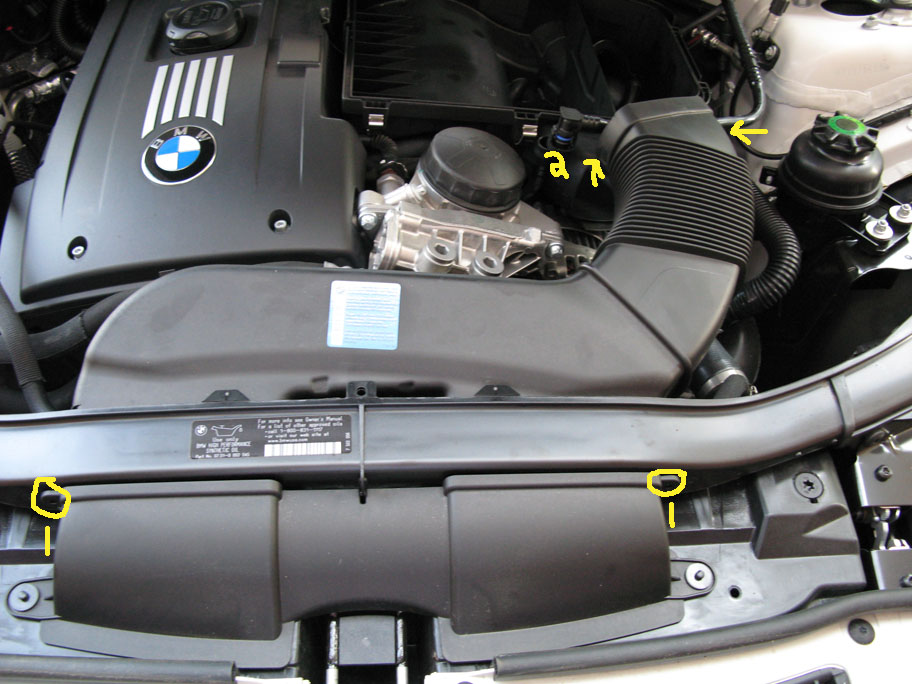
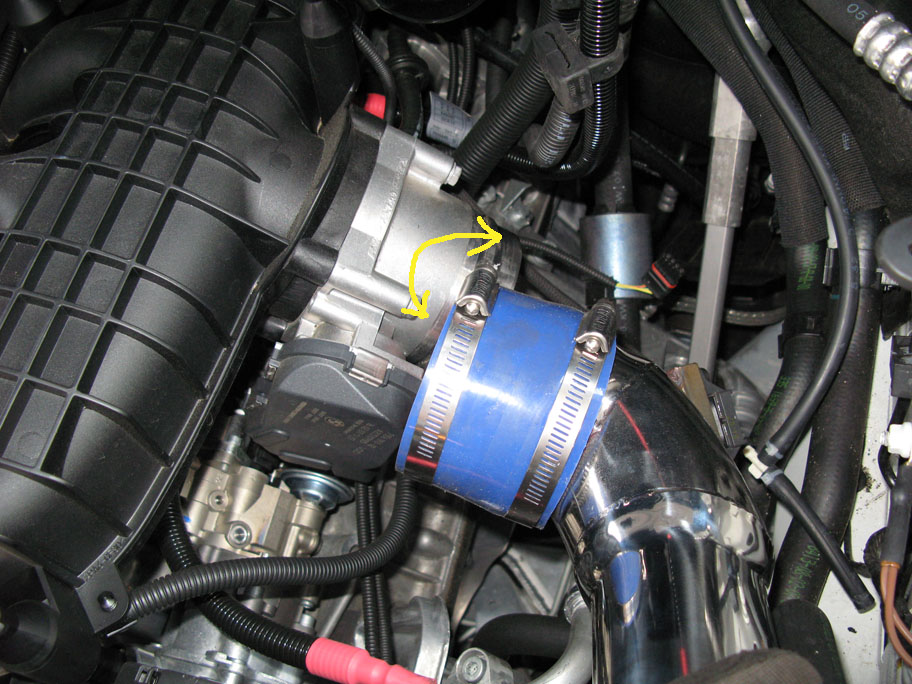
When pulling the airbox off, there are three rubber tabs that hold it down over the intake runners(marked #1 on the pic). Two are in the back, one is in the front(you can see it inside the airbox). Start from front to back and pull up. Make sure the front intake pipe is not attached at this point. The back one will come undone when you pull out the airbox anyway.
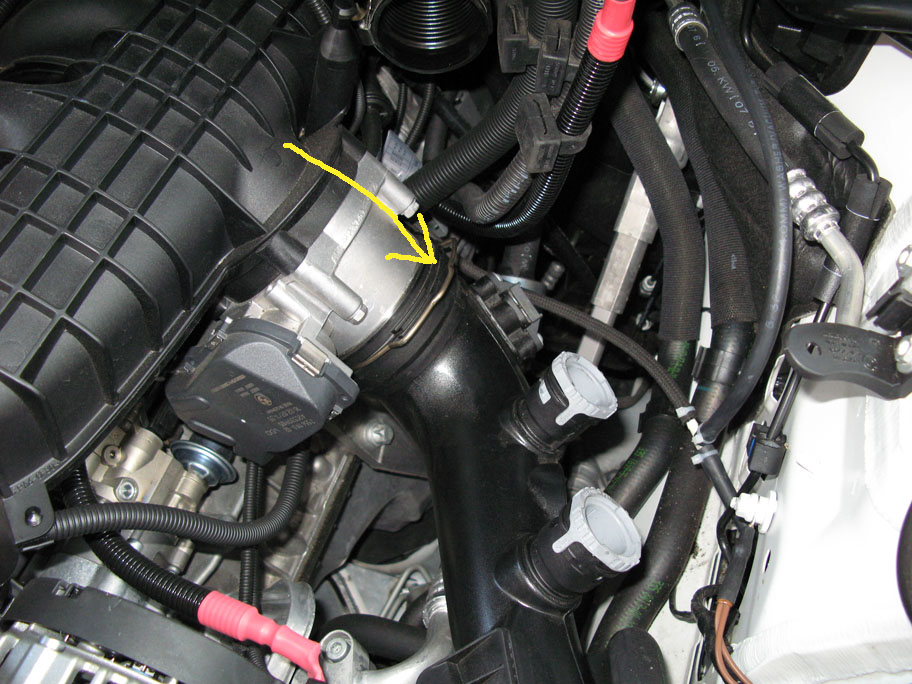
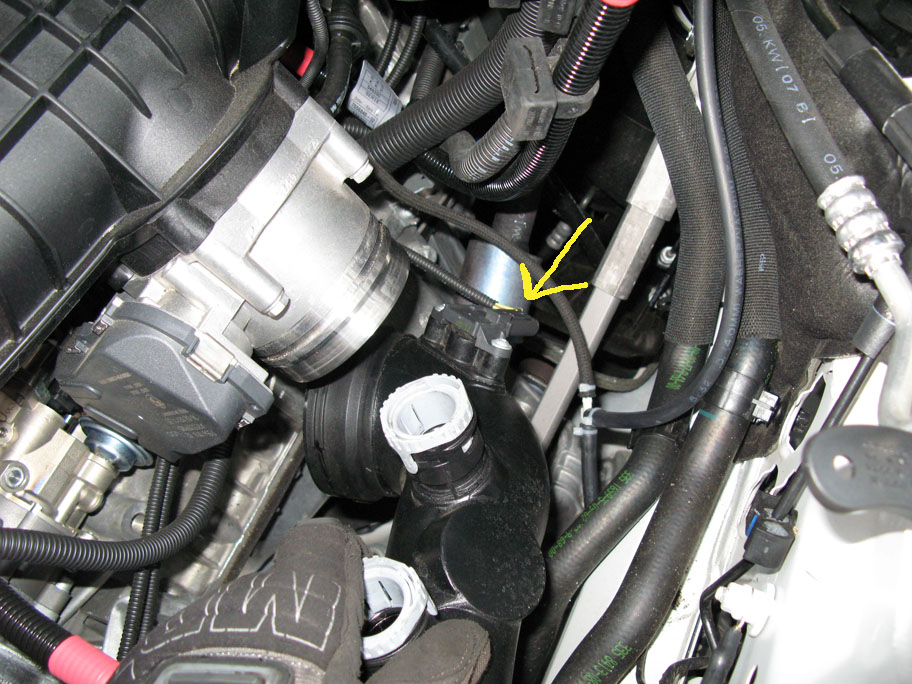
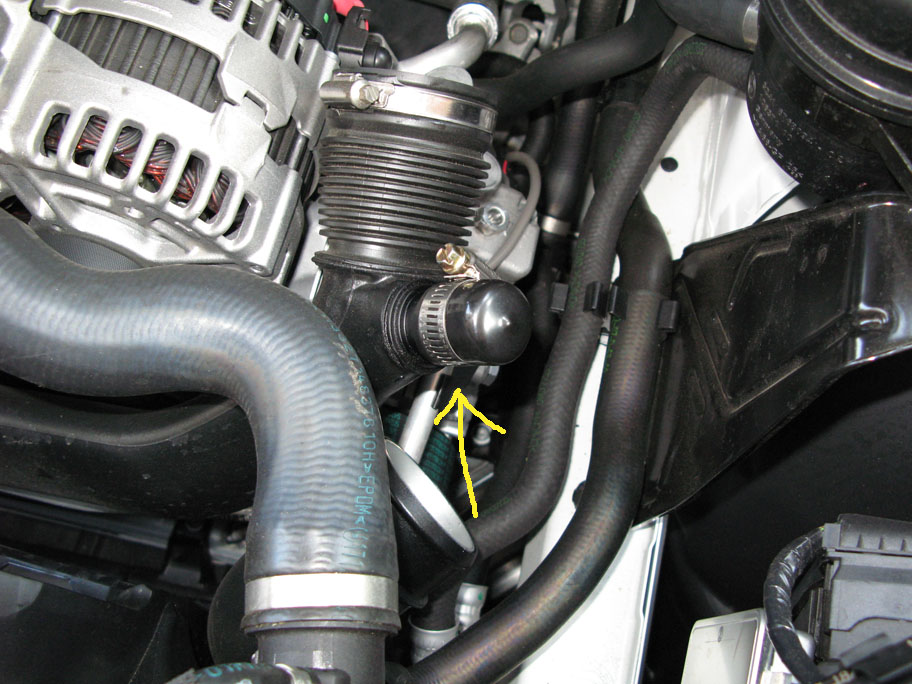
After youve done this, its time to remove the Bypass Valve Tube connections)(marked #2 on the pic). Theres a 4th one in the back(second pic). They all twist in the same direction. Hold down the gray bottom ring, NOT the tabs that stick up. Twist them to the right. Once that is done, pull them straight out.
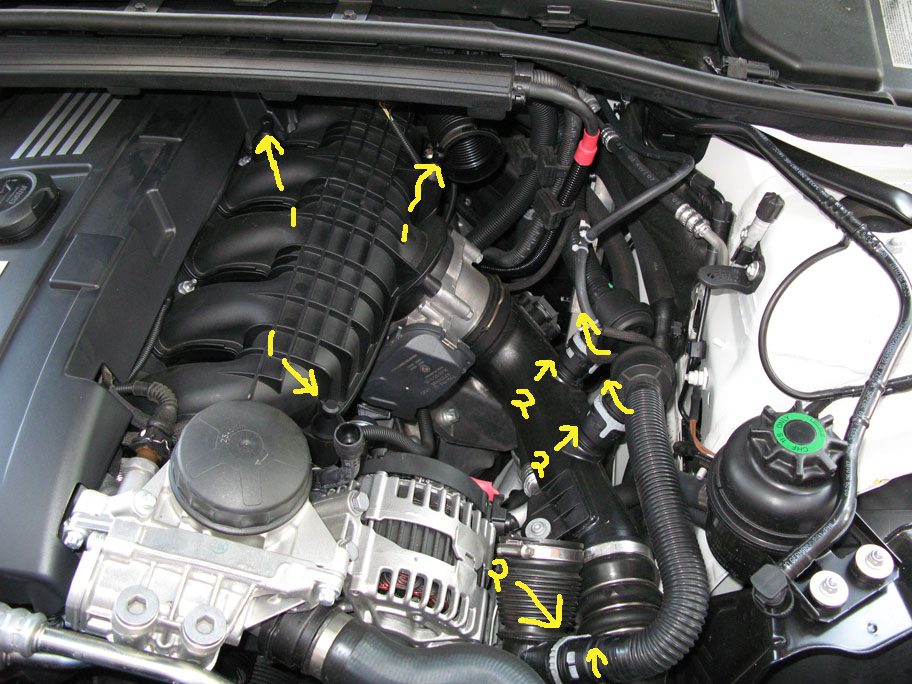
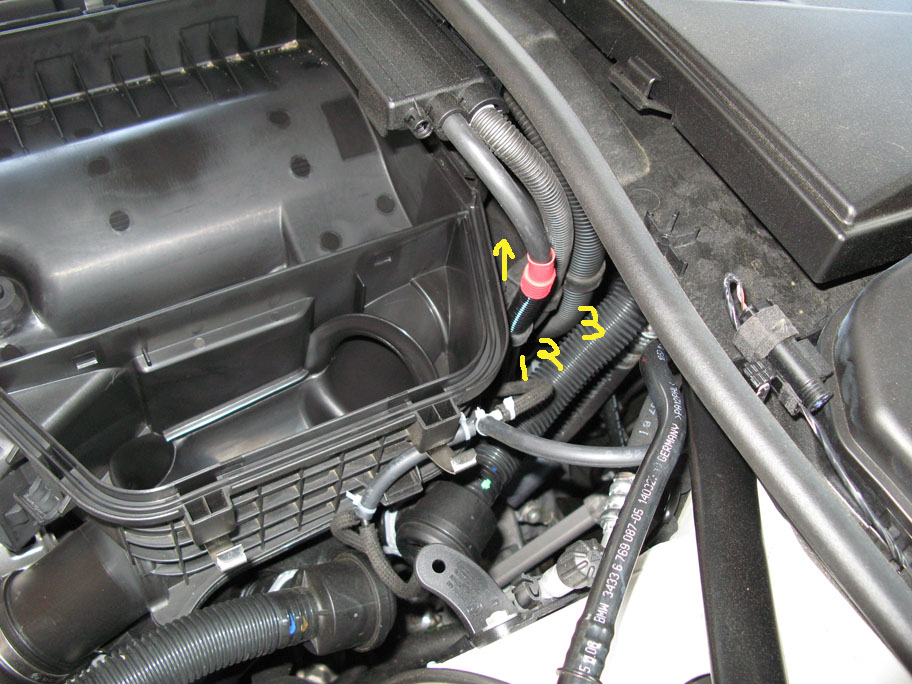
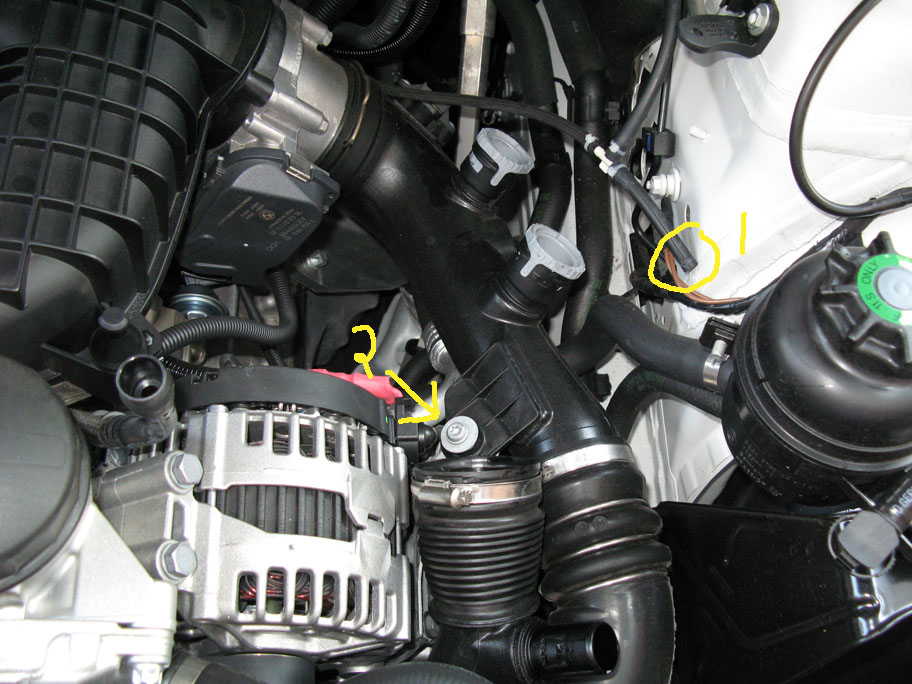
Now remove the 3-way vacuum fitting from center of the BVT's(marked #1 on the pic). And remove the Air Intake Pipe bracket using a T30 Torx bit(marked #2 on the pic).
Time to loosen the lower intake pipe clamp using a flathead screwdriver.
Now do the same for the top of the intake pipe, using the same flathead screwdriver.
BE CAREFUL. Do not fully remove the intake pipe from the throttle body. Turn it gently downward so you can get to the intake air temp sensor. This just pulls right off by squeezing it.
Ok, now everything is out of the engine bay. Take a quick break, make calls, have a beer, wash the blood off...whatever.
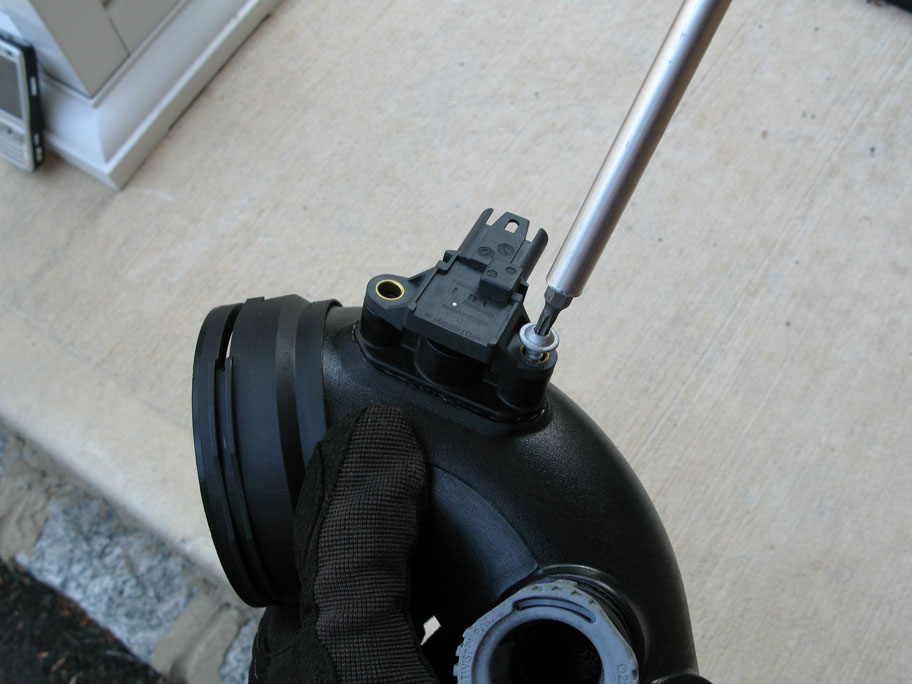
Alright, back to work. Now its time to transfer the intake sensor from the OEM pipe to the new BOV pipe. Again, use your T20 Torx bit to remove. Before installing onto the BOV pipe, apply some lubricant to the o-ring so that it slides into place easily. Install using supplied 4mm allen screws.

Install the included bypass valve recirculation caps provided in your kit. The rear one is a bit tight to get to so make sure you align the clamp accordingly.
When reinstalling the BOV intake pipe to the throttle body, I found it easier to reverse the clamp so you have more room to work with. Do the same to the lower pipe connection.
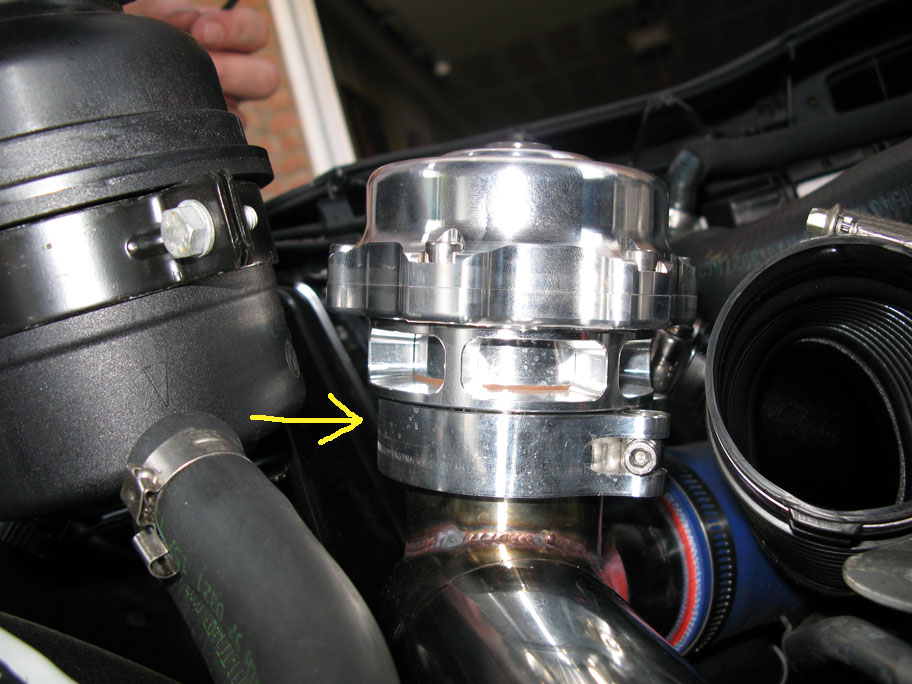
Now install the TIAL(or whatever) bov to the pipe. Mine came with this really annoying clamp that you had to spread apart to fit over both the pipe and bov flanges. Theres also a rubber o-ring that fits in between the two. I forgot to take a pic of all this seperately but here it is on.
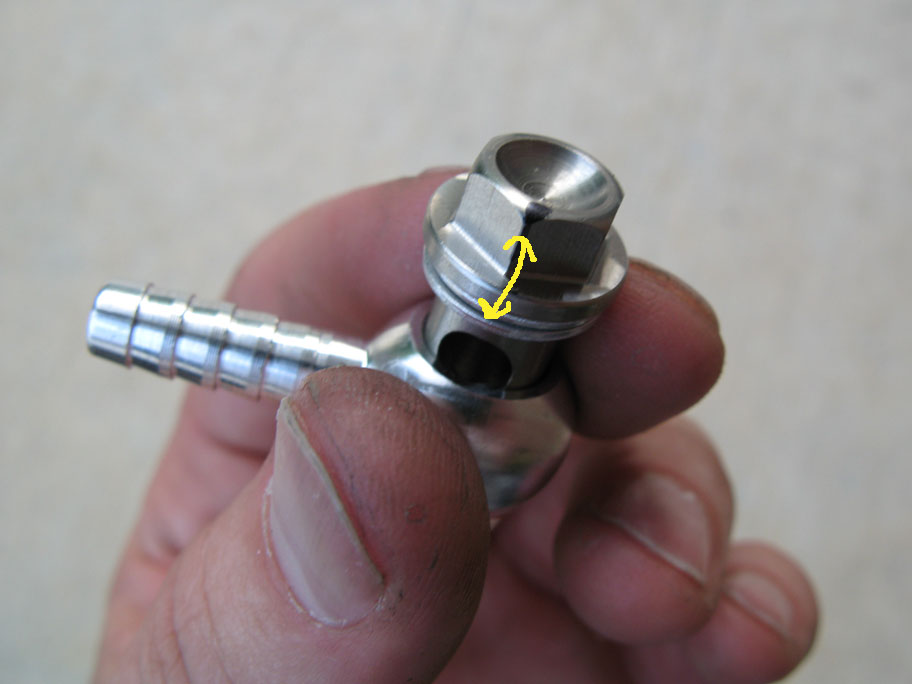
There was one thing I noticed about the vacuum hose adapter for the BOV. The nut that tightened it on was only hollowed out at one point. This means, you need to have this facing the outlet you connect the vacuum line to. I marked the top of this nut with a pen so I could align it correctly when tightening. Install vacuum line now.
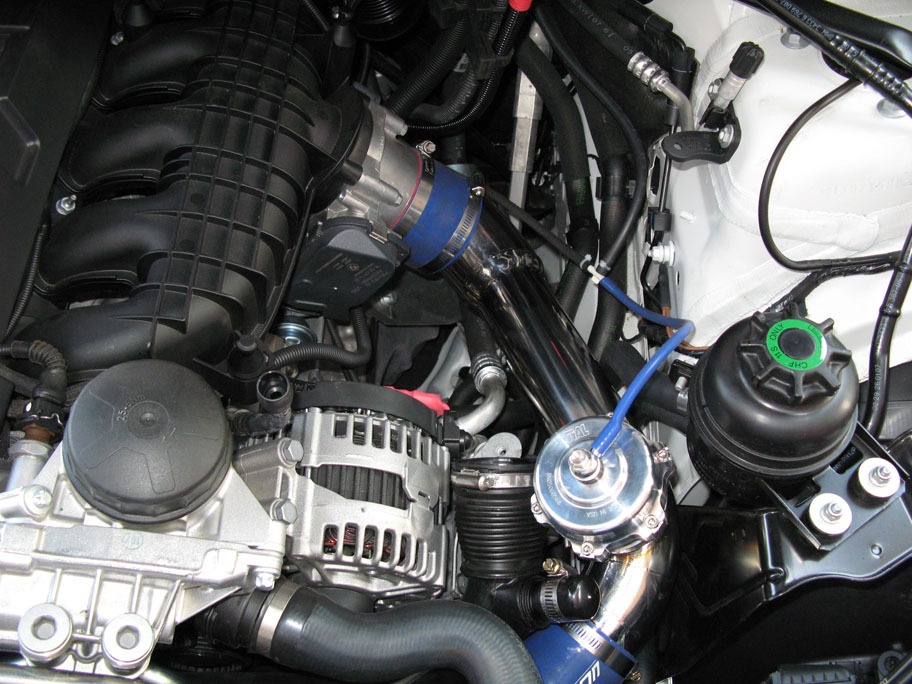
Everything should be finished at this point.
Now put everything back together in reverse: Airbox, Air filter, Snorkel intake, Harnesses, and hose connector.
Couple bits of tricks here for ya. Instead of using a flathead on all the clamps, I preferred an 8mm socket. This way, I wasnt stripping anything and I was getting better torque for tightening. You want this on the intake pipe as theres lots of pressure in there which could end up popping it off if not correctly tightened(ask me how I know). Also, take your time. I cant stress that enough. Read the directions over a couple times and study the pics. Use gloves if you can, you will get cut up and dirty.
BIG POINT: Make sure you have one of those grabby flexy pickup tools(if you dont know what Im talking about, PM me and Ill include a pic here). I dropped a few parts down in the engine bay by accident and if I didnt have that tool, I wouldnt have been able to finish the job.
Thats it, hope this helps. Any questions, PM me. Good Luck!!
EDIT: Video