Disclaimer
I am not a licenced mechanic and only offer this DIY as a reference to my experience replacing the oil pan gasket on a 2006 325i 6spd. Obviously the automatic, turbo & all wheel drive models will have some differences. PLEASE use jacks and jack stands appropriately.
I ASSUME NO RESPONSIBILTY FOR WHAT HARM MAY COME TO YOU FOR NOT AIRING ON THE SIDE OF SAFETY. Be wise and get help if needed.
 Tools Needed:
Engine Support Bar,
Torque Wrench (capable of going as low as 8nm which is 6lbs/ft),
Torx Bits, Torx Socket (E12 for oil pan & engine mount bolts)
3/8" Sockets (8mm, 10mm, 16mm, 17mm & 18mm)
Various Extensions, Flex Joints, Flathead Screwdriver,
Jack Stands, Lift Jack (capable of lifting the car high enough to work comfortably)
Pliers, Gasket Scraper, Parts Cleaner
and of course 6.5 litres of engine oil.
First make sure you order the right oil pan bolt kit for your car. The automatic transmission cars use some longer bolts than their manual counterpart (28 aluminum bolts in all).
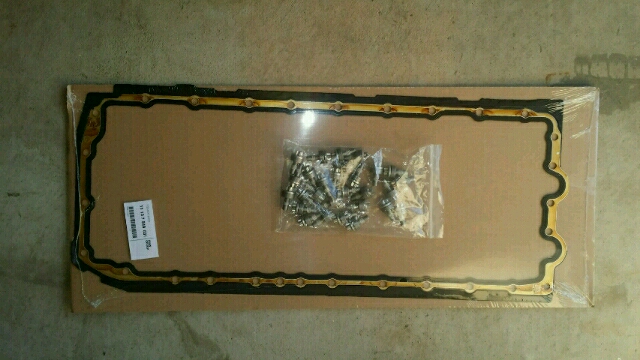
I would recommend replacing the seal for the oil level sensor (I should have done this)
"I apologize for some of the photos being too close but I didn't have much room from under the car."
1. Jack up your car and support it safely with the stands (front and rear) high enough to work under with the sub frame hanging.
2. Drain the oil. I would recommend allowing a lot of time so oil isn't dripping on you while your underneath. (I drained mine overnight)
3. Remove the front wheels and unplug the sensor on the drivers side lower control arm.

4. Remove the plastic belly cover, the small plastic cover under the radiator, there are 2 triangular covers 1 behind each wheel & the covers under the transmission (I removed these ones to clean the oil from the tranny)
5. Remove the 3 screws that are accessible holding the engine cover. I was then able to pry the cover enough to allow access for the tow hook.
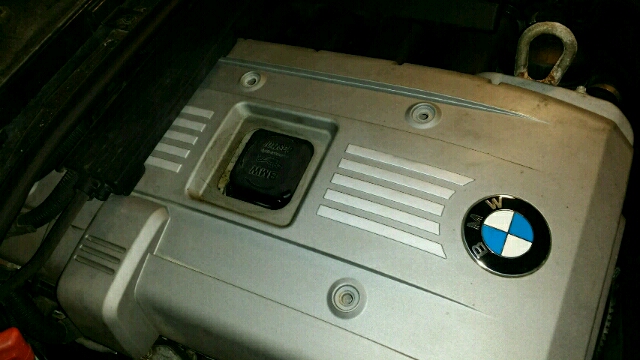
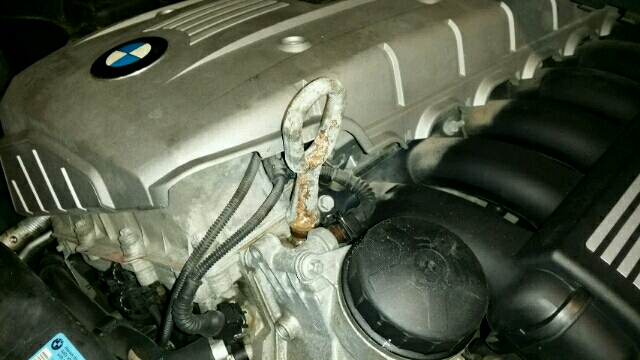
6. Get the tow hook from the utility kit in your car and screw it into the the drivers front corner of the cylinder head.
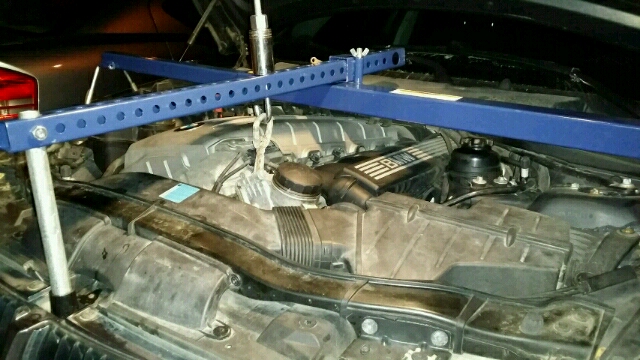
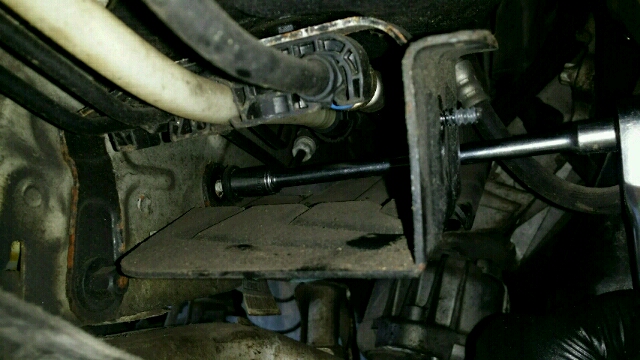
7. Set up the engine support bar to get ready for unbolting the sub frame
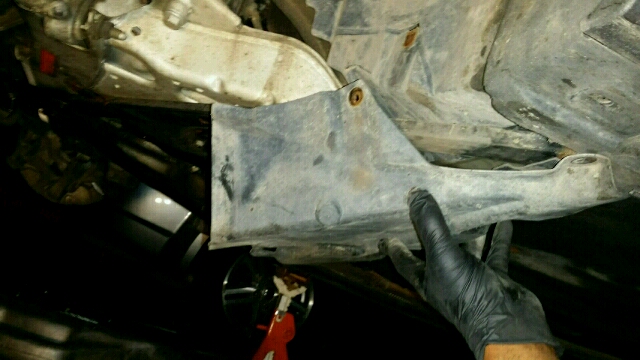
8. Unbolt and remove the triangular bar beneath the sub frame.
NOTE: I had 1 bolt that would not come out from the front of that bar. There is a chance you may have the same problem. The reason is these 2 at the front have clips inside the sub frame that secure them, these rust because of the cheap metal causing the bolt to just spin without releasing. I sprayed liquid wrench inside the sub frame with a tube to soak the remaining bolt. Then when removing the bolt I worked it back & forth gradually going a bit further each time until it came out. The first one I tried I left it.
The one bolt that was left in I just turned the bar from side to side as needed to make access for the other hardware removal. It will not be in your way when you drop the sub frame.
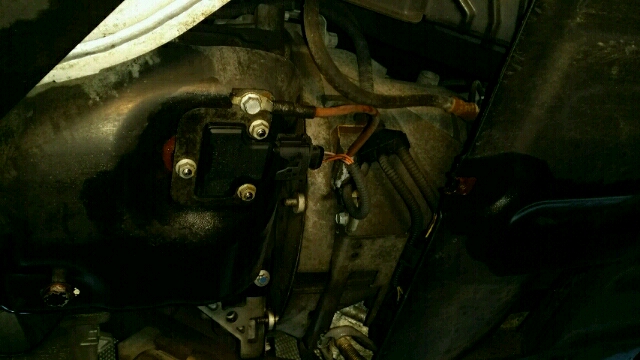
9. Now remove the bolts for the engine mounts.
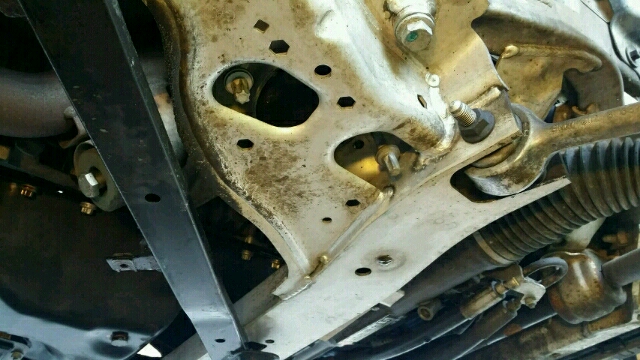
10. Be careful because 2 of these bolts were rubbing on something (probably the sub frame) causing some wear on the threads. Same routine working them back and forth gradually until they come out.

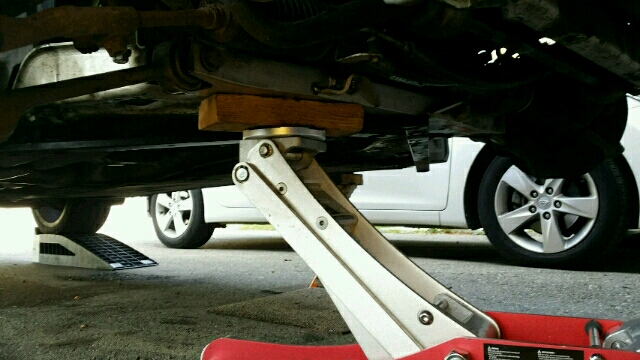
11. Get the jack and place it under the larger section (rear) of the sub frame in the centre. (you will notice I didn't put my jack there because my triangular brace was still in the way).
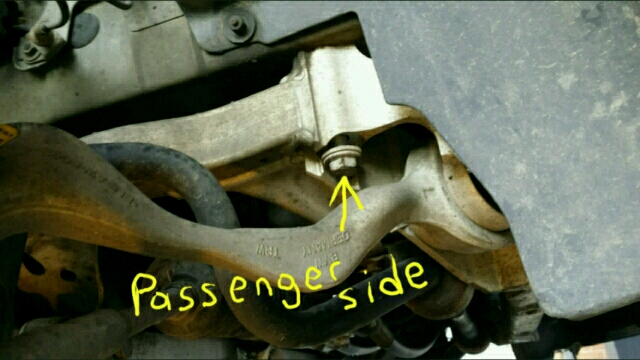
12. Remove the 6 bolts holding the sub frame. 3 bolts on the drivers side & 3 on the passenger side.

13. Now slowly lower the sub frame until the jack falls away from it. The struts will now support it.


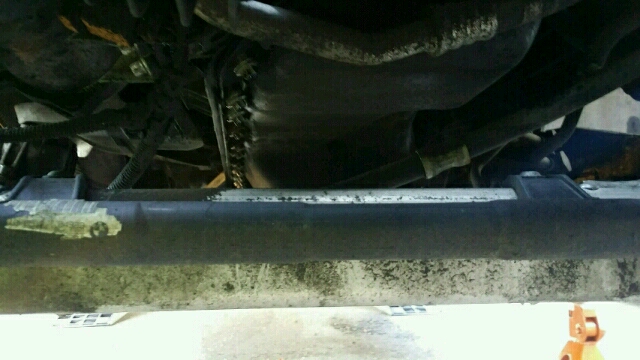
14. You can see the space you've gained.
I absolutely don't know how anyone can do this job properly without dropping the sub frame.
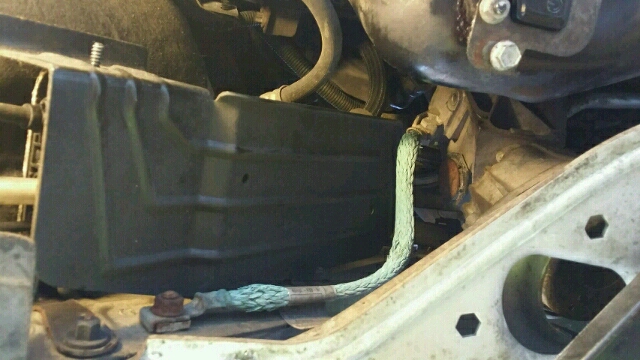
15. Disconnect the plug and ground wire for the oil level sensor.
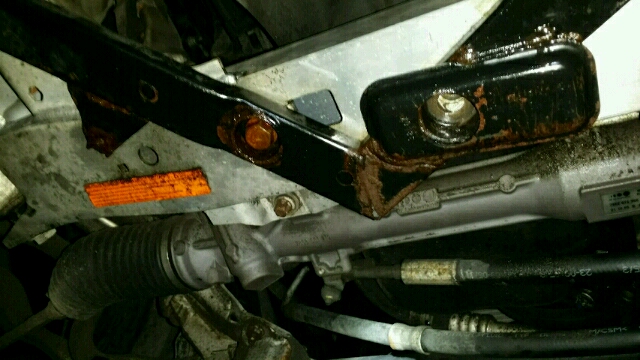
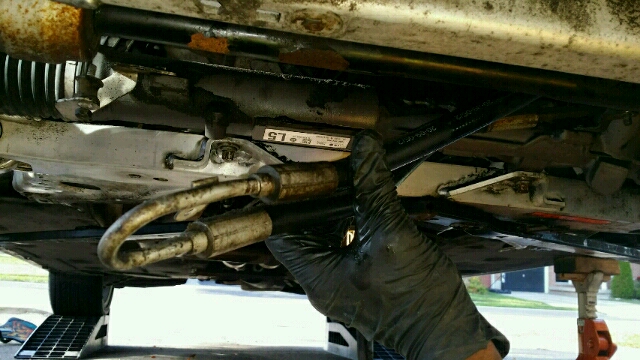
16. On the drivers side remove the bracket protecting the fuel & brake lines.
You will see why later.
17. Unbolt the power steering hose at the right front of the sub frame. This will allow it to move for the oil pan later.
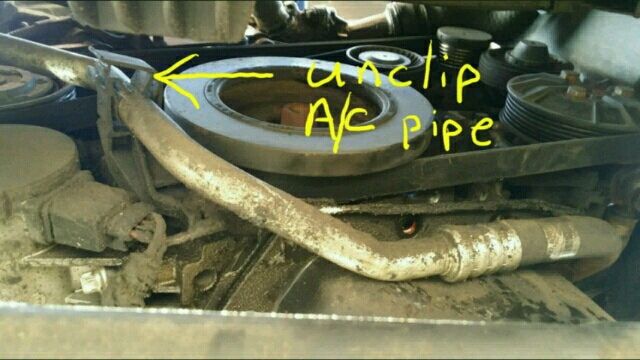
18. Unclip the A/C pipe which will allow it to move easier for the oil pan later.
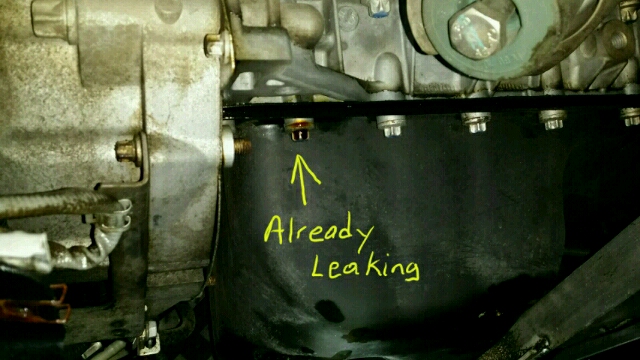
19. Remove all the oil pan bolts. You can see mine leaking already after it was power washed. While removing my bolts I found 5 that were loose. (finger tight)
20. Remember that plate protecting the fuel & brake lines we removed? Well this is to give you room to remove the tube from the oil return line (which is a PITA!!!) try your best to not break it. To replace it means removing the intake manifold. It has 4 clips locking it to the oil return pipe. I used a pliers to squeeze one way which unlocks 2 sides, at this point I placed a mini flathead screwdriver in to unlock the other 2, then wiggle the pan as you work them free.
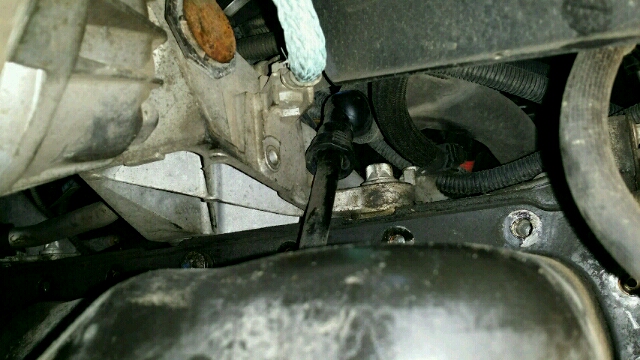
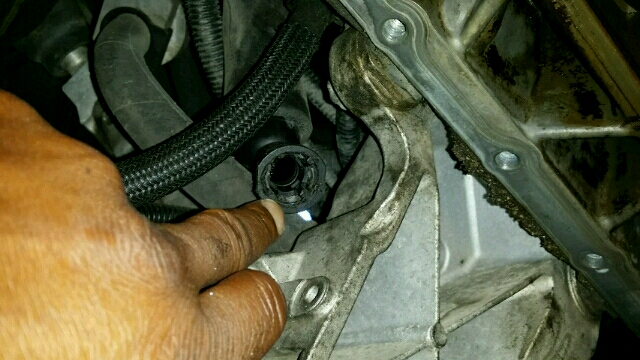
21. To free the front of the oil pan the power steering line & A/C tube will now have some extra play because of we freed them earlier.

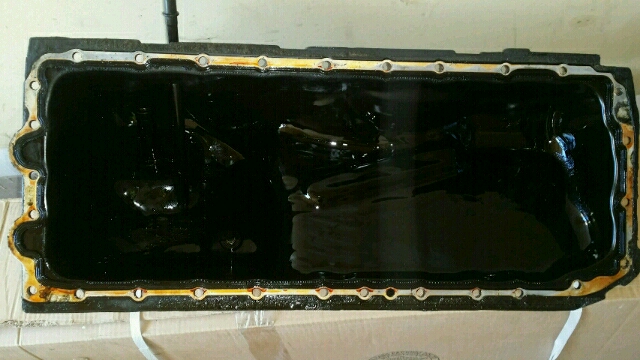
22. Once the oil pan is out put a drain pan under the engine to catch any oil still dripping. Now you can clean the oil pan of the old gasket using the scraper & do the same to the engine block
*Be Careful Not to Damage the Engine Surface. Use the parts cleaner to wash out the pan & block surface.
This I where you would also replace the oil level sensor seal. (I didn't think and should have bought a seal to replace mine.)
23. Once all is done and cleaned use 2 small zip ties at opposite ends to hold the gasket to the oil pan for installation (you can cut and remove them later once you have a couple bolts threaded in on opposite sides,
but don't put any bolts in until after the next step). Take your time as to not damage the new gasket.
24. When the pan is in place reconnect the oil return tube. You will need to be able to move the pan a bit to get the oil return tube connected.
25.
Now you can put the bolts in the pan. Make sure you start them by hand as to not cross thread anything. When they are all in you can snug all of them to the pan. Not to tight because our required torque is only
8nm which is 6 lbs/ft.
26. To torque the pan start at the middle & work in a "criss-cross" pattern outwards until all are done.
8nm or 6lbs/ft. plus 90. I marked each bolt so I knew which were already done.
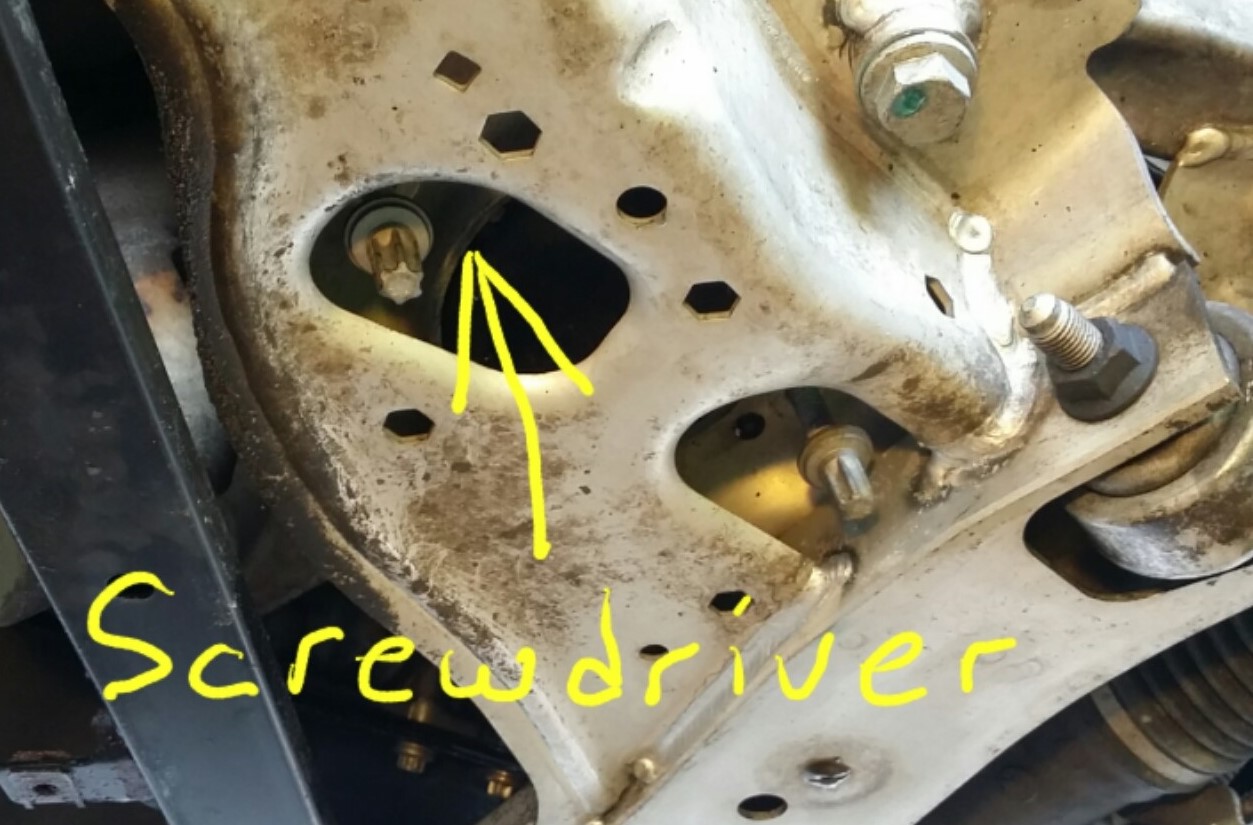
27. Raise the sub frame paying attention to the guides for it to line up. Put in all the mounting bolts but leave them loose for the sub frame to move a little because you also need to line up the engine mounts (there is a small guide pin to help align them) . Use a screwdriver to make adjustments) once there start the bolts for the engine mounts.
28. Now tighten up all the sub frame bolts then the engine mount bolts.
29. Put everything else back together in reverse order and make sure you did not leave anything out. Fill your oil & leave the plastic shields off just in case you missed something and need to get back in. Also it helps checking for leaks.
Here's some links referring to the oil pan:
http://workshop-manuals.com/bmw/3_se...ns/11__engine_(n52)/13__oil_sump/1_ra__removing_and_installing_sealing_or_replacing _oil_sump_(n52)/
http://workshop-manuals.com/bmw/3_se...ns/11__engine_(n52)/13__oil_sump/1_ra__removing_and_installing_sealing_or_replacing _oil_sump_(n52)/page_288/
http://workshop-manuals.com/bmw/3_se...es/11__engine_(n52)/13__oil_sump/2_azd__oil_pan/
Cheers
KrashFinatik