|
08-28-2005, 05:21 PM
|
#1
|
|
Administrator
Drives: F80 M3
Join Date: Mar 2005
Location: USA
|
DIY - blackout "shadow" (black) kidney grills
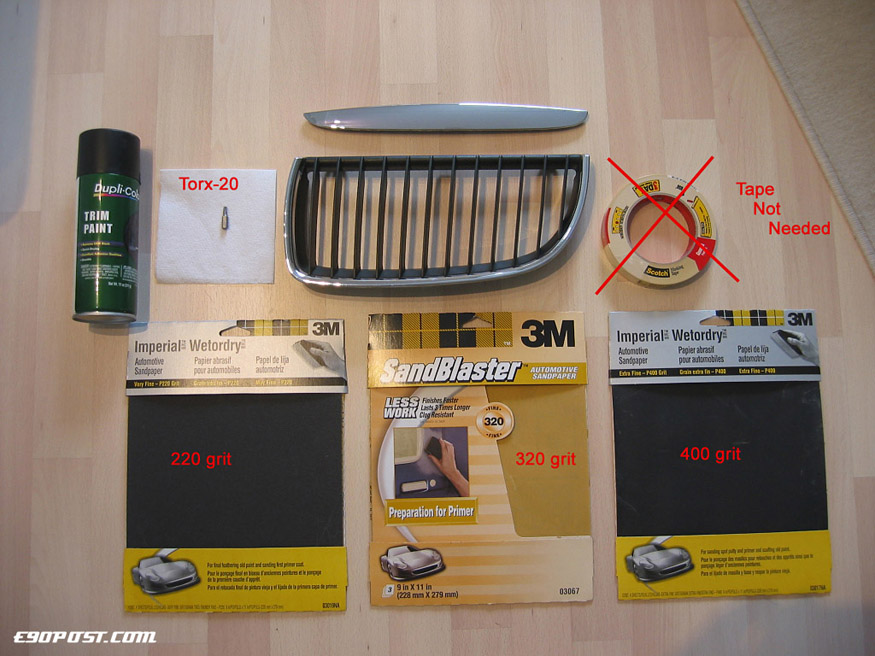
Tools/Parts/Supplies:
- Torx-20 screwdriver
- 220 grit sandpaper
- 230 grit sandpaper
- 400 grit sandpaper
- Black paint (any black paint suitable for exterior use - get flat or gloss depending on desired finish)
- Clearcoat (not pictured here, but you should probably clearcoat the paint with a few layers as it will leave the paint less prone to chipping)
Removing Grills:
1) pop open hood
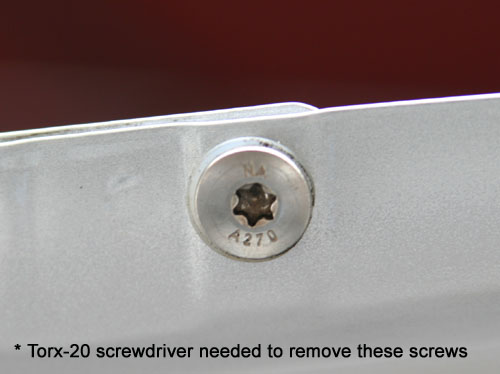
2) to remove top two grill pieces (the two pieces that are attached to the hood), remove all 6 torx screws using a Torx-20 screwdriver (as diagramed below)

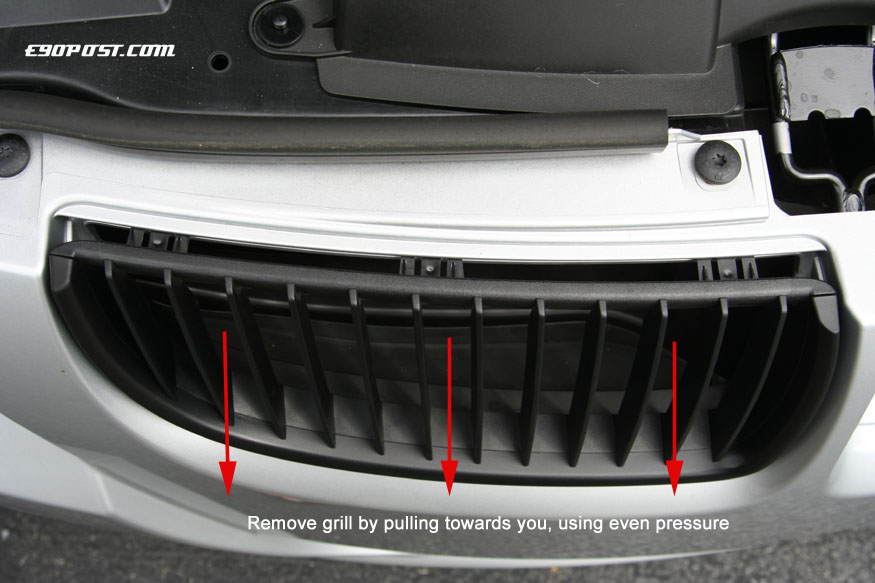
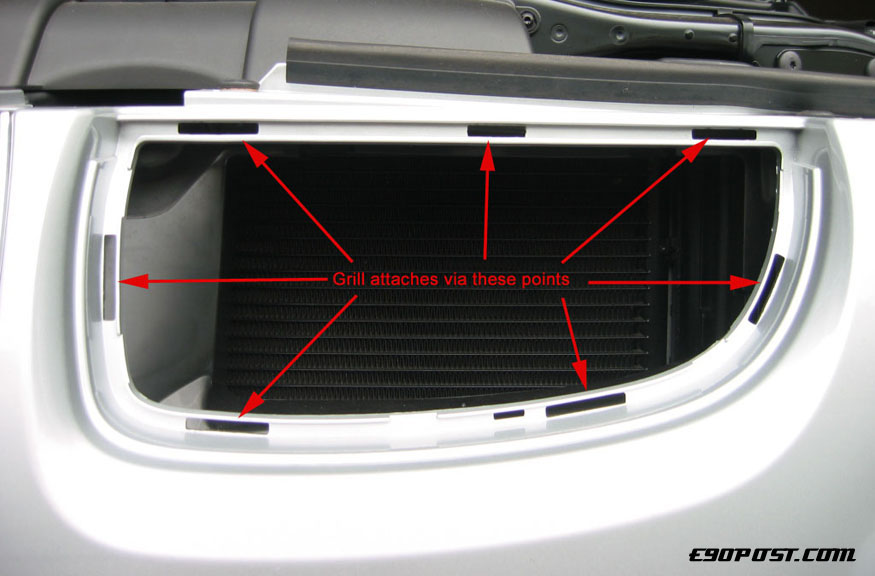
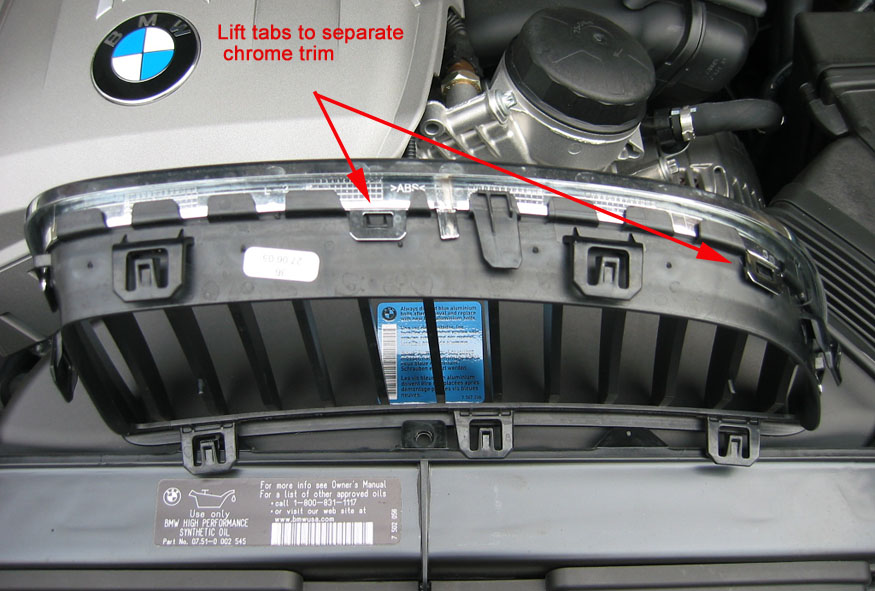
3) to remove the two main grill pieces, grab a hold of 2-3 slats with each hand and pull out straight towards you (as diagramed below). The attachment points for the grill is shown below.
Sanding and Painting:
4) separate the chrome trim from the slats by lifting the tabs that connect the pieces and pulling the parts apart (see picture). This eliminates the hassle of having to tape up the slats (note: If you have a 325, using the bumper trim paint I used will result in a finish that is very close to the plastic finish of the slats, so no real need to also paint the slats; therefore it's easier just to remove and paint the chrome trim pieces. However, if you have a 330, you may consider keeping the entire grill (slats and chrome trim) together since you will be sanding and painting both the slats and the chrome trim.)

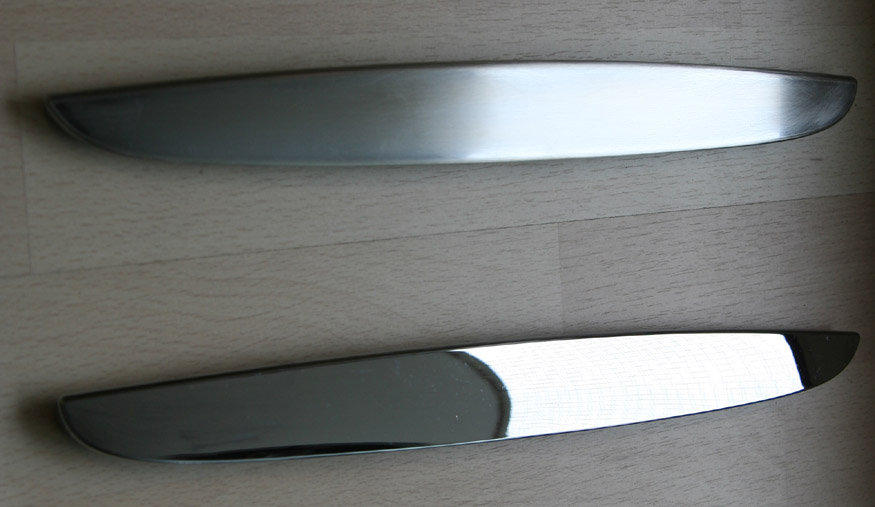
5) using the coarsest grit sandpaper (220), sand the surfaces you will be painting. The chrome should begin to turn into a coarse and scratched aluminum piece. Continue sanding with the next coarsest sandpaper (320) and finish with the (400) grit sandpaper. The final piece should resemble the brushed aluminum trim you can order with the E90 (see picture).
6) paint each piece using a total of 2-4 light layers so as to prevent dripping and uneven coverage. Wait a few minutes between layers to allow some drying between layers.
7) finish with a coat of clearcoat spray (I personally didn't clear coat because I liked the flat/matte look), but a coat of clearcoat shouldn't add too much shine and will add an extra layer of protection.

8) reinstall parts the same way they were removed.
VOILA!
Before:

After:


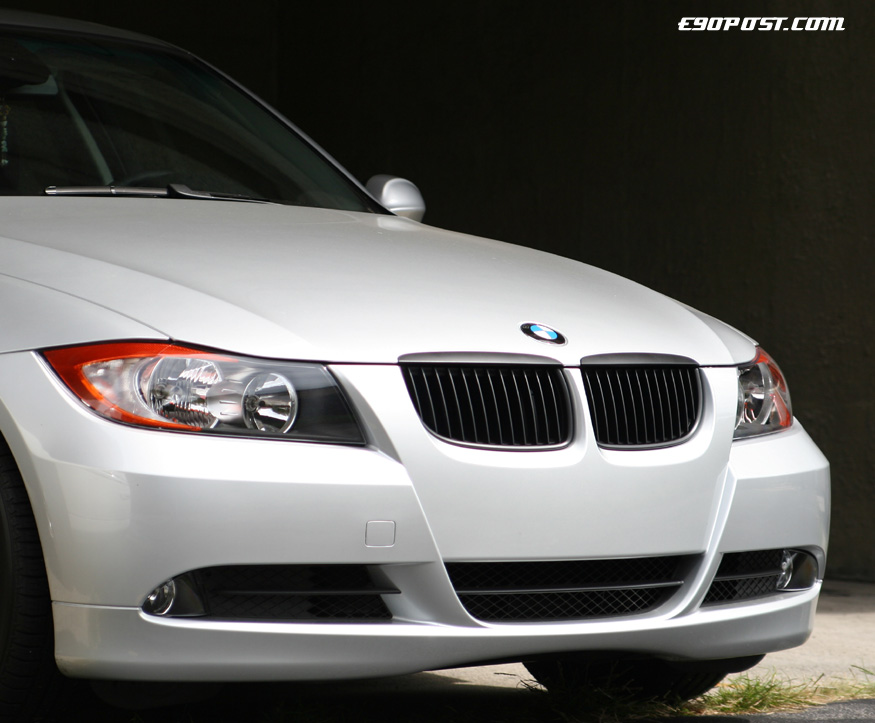
 Blackout grills on richp's black e90

|
|
|
|