Under Seat Earthquake SWS8s
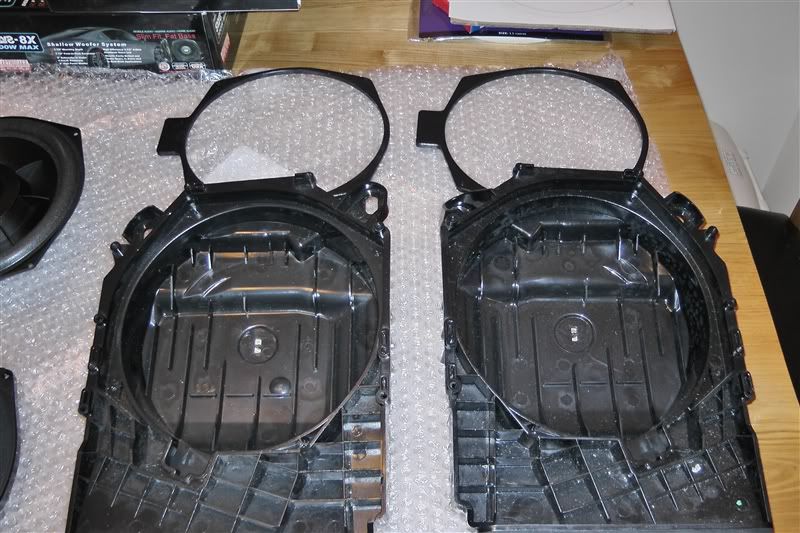
I managed to find two second hand under seat enclosures for sale on eBay a couple of months ago and bought them so that I could use these and preserve my originals for when I eventually change the car.
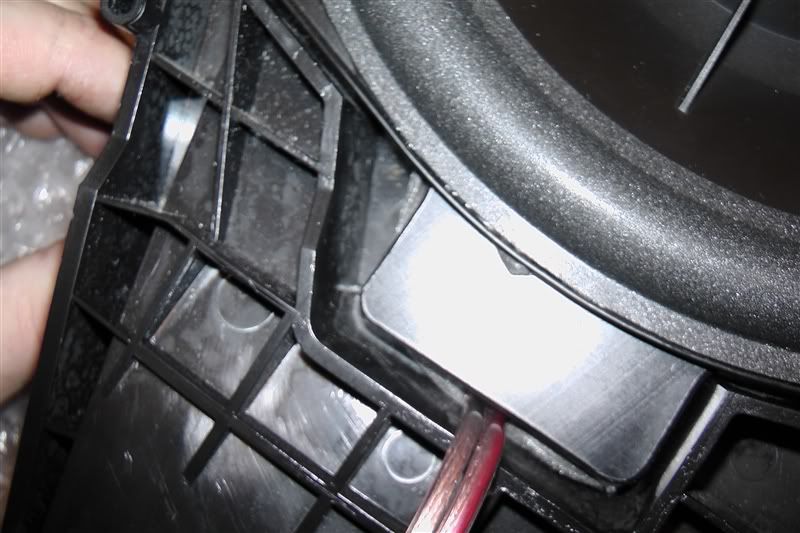
Also the newer cars speakers are glued in rather than screwed in so you cant get them out without damaging them. I had to hand a couple of JTsherris spacers which I thoroughly recommend investing in if you are doing this!
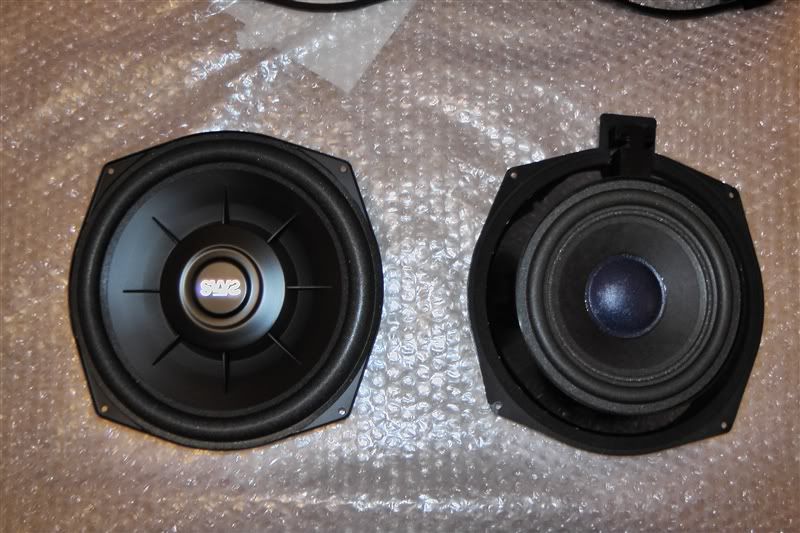
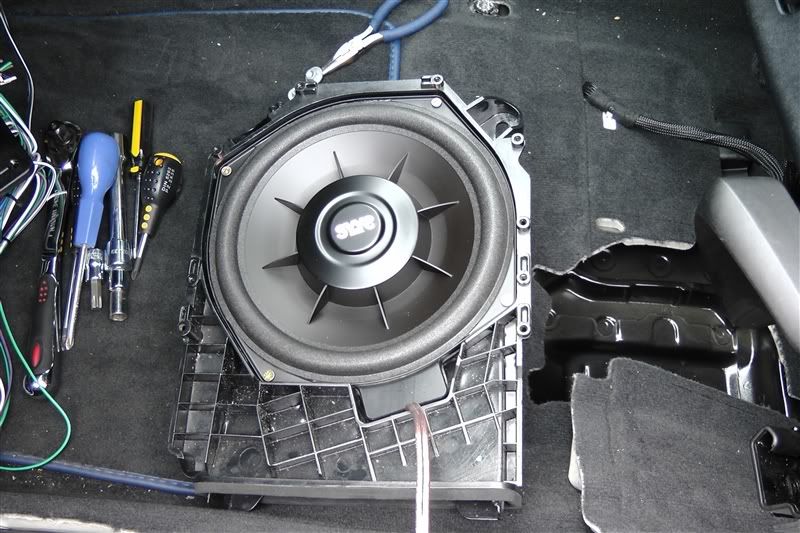
Original v Earthquake
These were extremely easy to make up using the spacers. I put a layer of foam rubber on the underside of the spacer to mate with the enclosure. I then ran foam rubber around the underside of the SWS8 where it mated to the spacer. This formed a perfect seal.
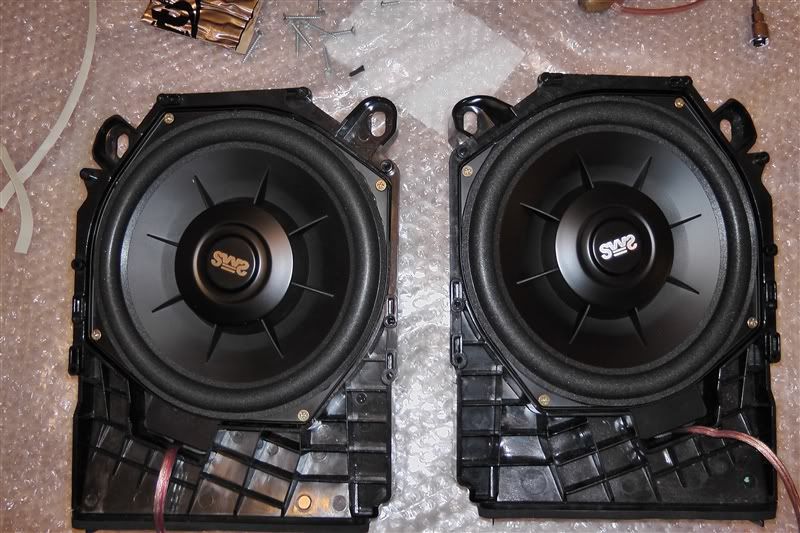
For the area where the new speaker wire exits the enclosure I ran foam rubber around the edge before screwing it down firmly. This again formed a really tight seal without the need for cutting a groove in the spacers.
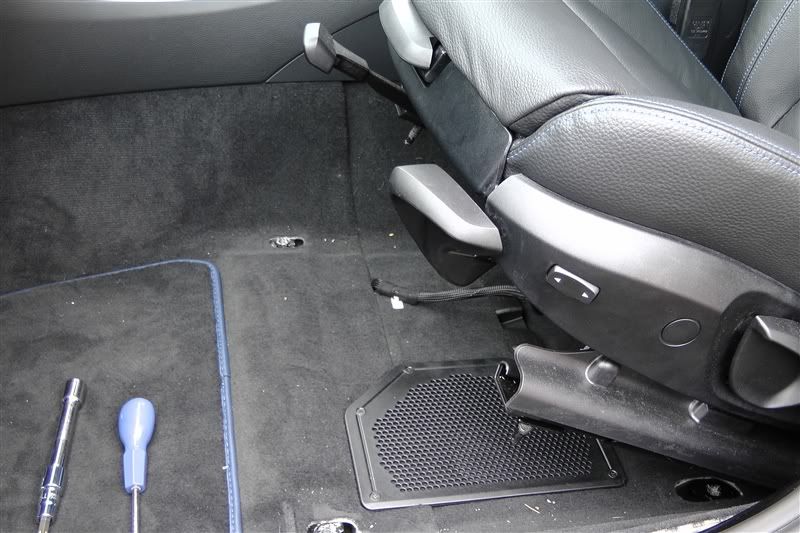
Next I fitted the new enclosures by loosening the four Torx bolts on each front seat and carefully tipping them backwards. Make sure you have disconnected the battery by this point in case you accidently unplug the cables under the seats.
I have read somewhere that this can cause an airbag error which requires a dealer reset. I found that there was more than enough slack in these cables for this not to happen but better to be safe than sorry.
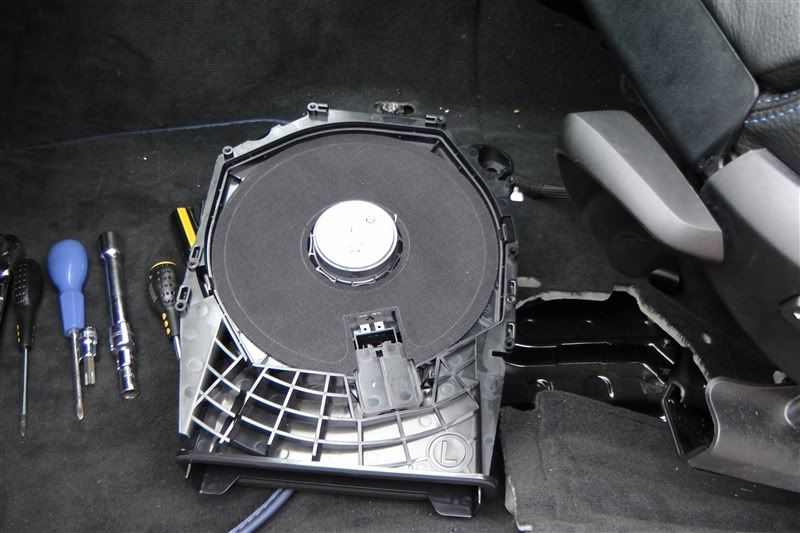
The grills simply unscrew
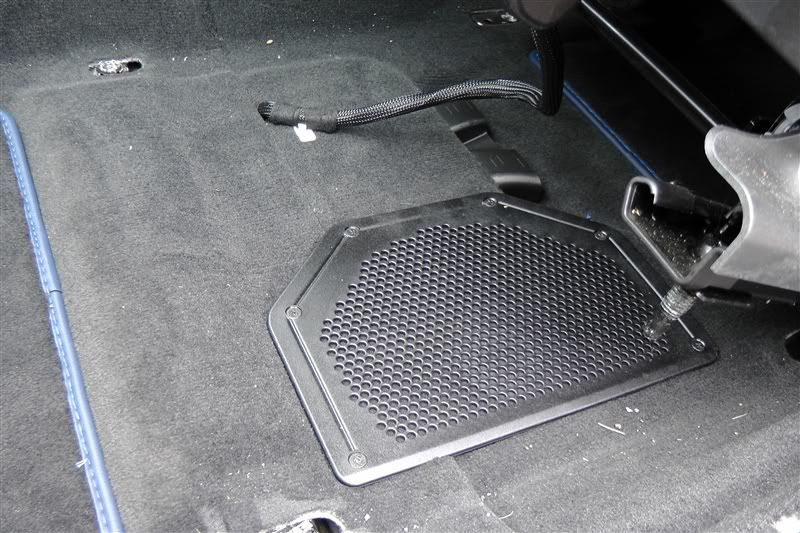
To reveal the enclosure
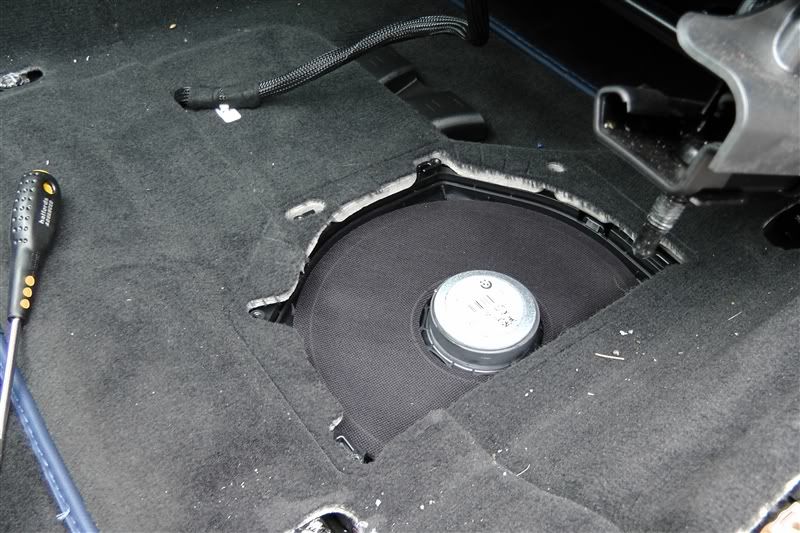
There are two Torx screws holding this in, once removed it lifts straight out. There is a plug to disconnect from the speaker before you can lift it out.
New enclosure ready to go
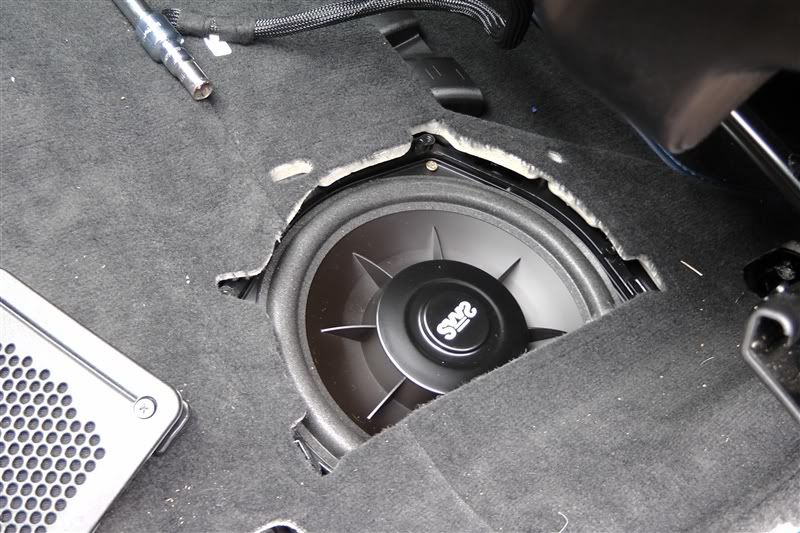
And in she goes. Now doesnt that look much better?
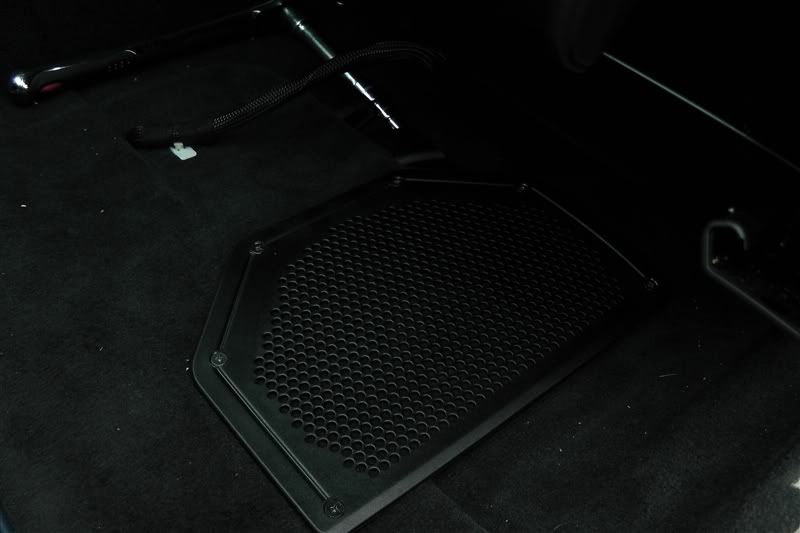
Included with JTsherris spacers are two further spacers the same shape as the grill which fit on top of the enclosure and underneath the carpet to raise them off the SWS8 and prevent it being hit by the cone. The grill then screws neatly back in place.
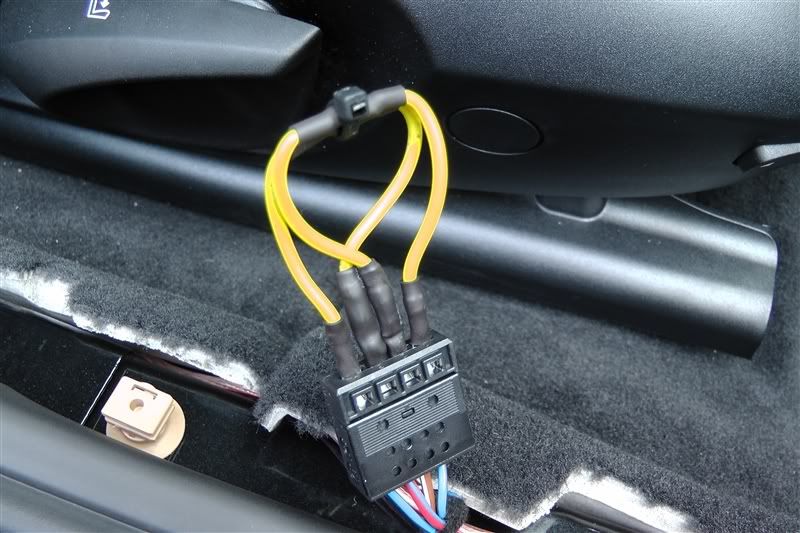
Before re-fitting the seats make sure you fit Technics jumpers into the original connectors that ran to the under seat speakers. There is one each side of the car. I found that the two centre pins would not push in fully no matter what I did (same on both sides) so I applied heat shrink, to prevent the possibility of shorting, prior to pushing them in as far as they would go. They made good contact so there is are issues, it may be the plugs have been changed slightly on newer cars?
The cables from Technics harness ran down the passenger side of the car quite easily and there was plenty of room for the new speaker cables for the centre speaker and passenger side SWS8. I also decided to permanently mount the display for the MS8 in the glove box as I know I will probably want to fiddle with it now and again so I ran the displays cable down the passenger side also.
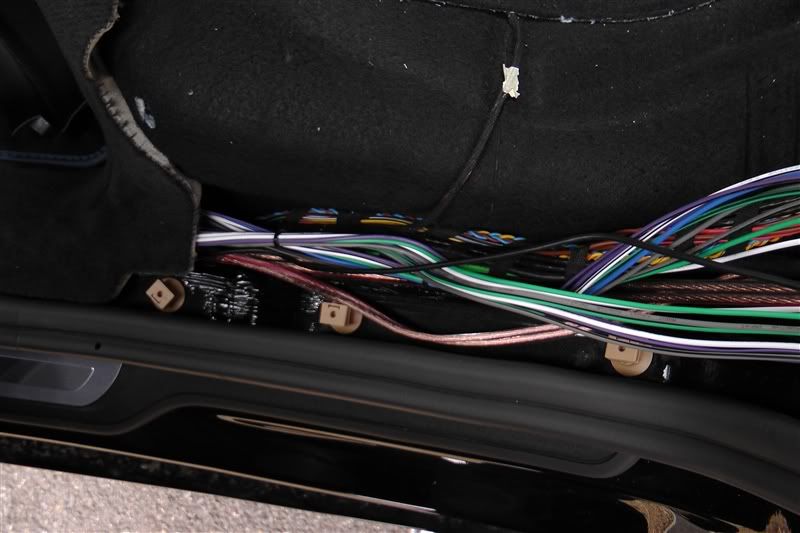
I ran the new speaker cable to the drivers side SWS8 down the drivers side of the car. The trim panels lift up easily each side and are a push fit. Below is a picture of the cables passing underneath the rear seat, passenger side (trim removed).
I neatened these up with cable ties before replacing the trim.