

|
|
|
|
 |
|
 |
BMW Garage | BMW Meets | Register | Today's Posts | Search |
 |

|
BMW 3-Series (E90 E92) Forum
>
Replace Reveal Molding
|
 |
| 04-28-2011, 08:13 PM | #1 |
|
New Member

22
Rep 27
Posts |
Replace Reveal Molding
When I first inquired my local auto glass shop about this problem, they claimed that they would have to pull the windshield to replace the molding. I decided to investigate further, and found that this was not true. The entire job took about 30 minutes. If I had been more confident in the process it really could have taken only 15 minutes.
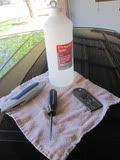 Tools I used: 1. Box Blade 2. Flat Blade 3. Flathead Screwdriver 4. Rubbing Alcohol 5. Rag 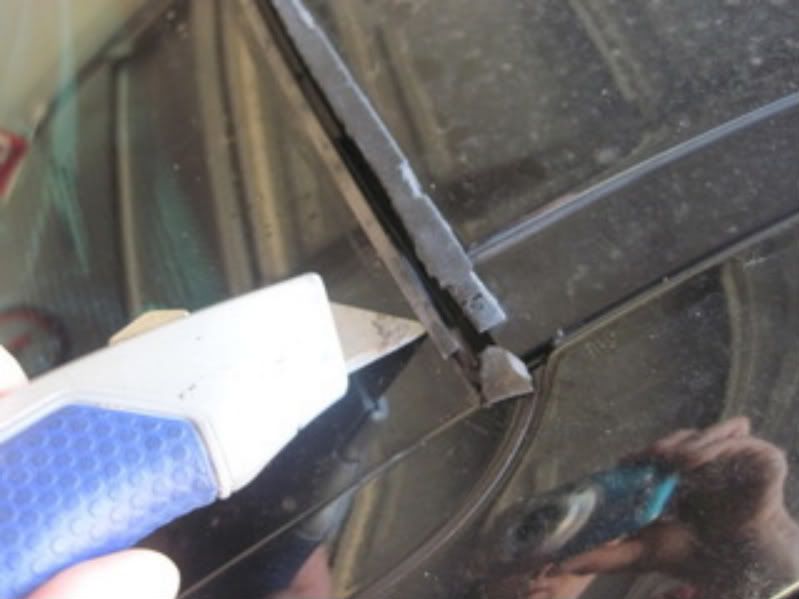 Using a box blade, wedge the blade between the molding and the windshield. If your molding is like mine then it shouldn't be too difficult to get the edge of a box blade under the original molding. 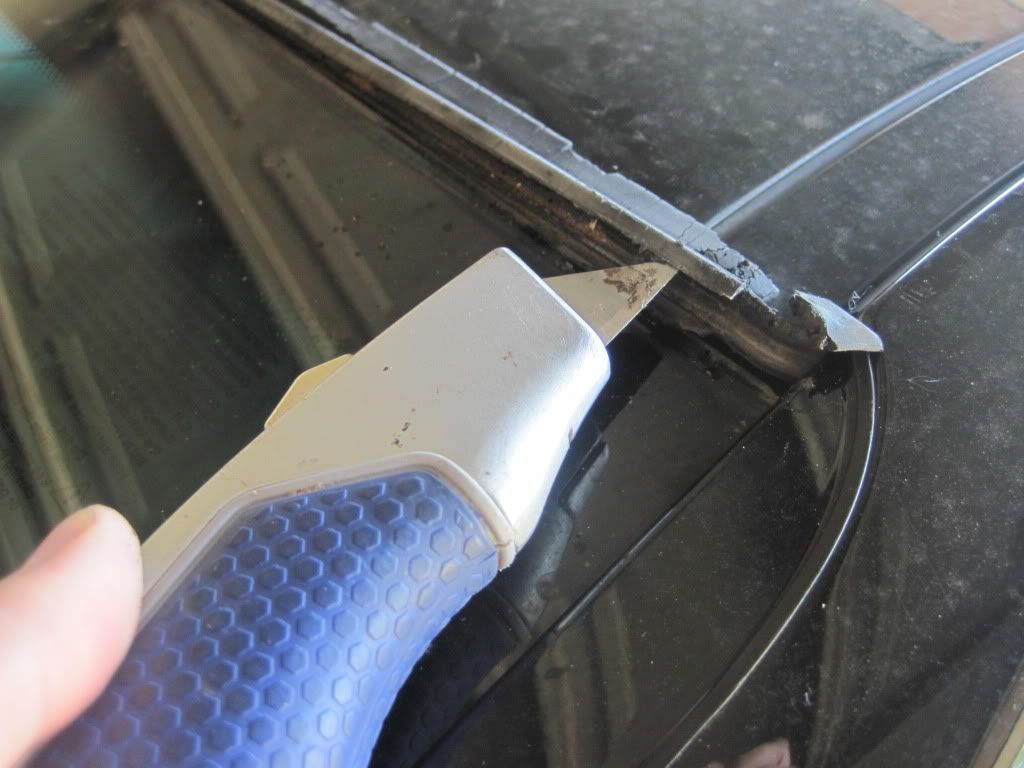 With a little leverage on the box blade, you should be able to pry the molding up.  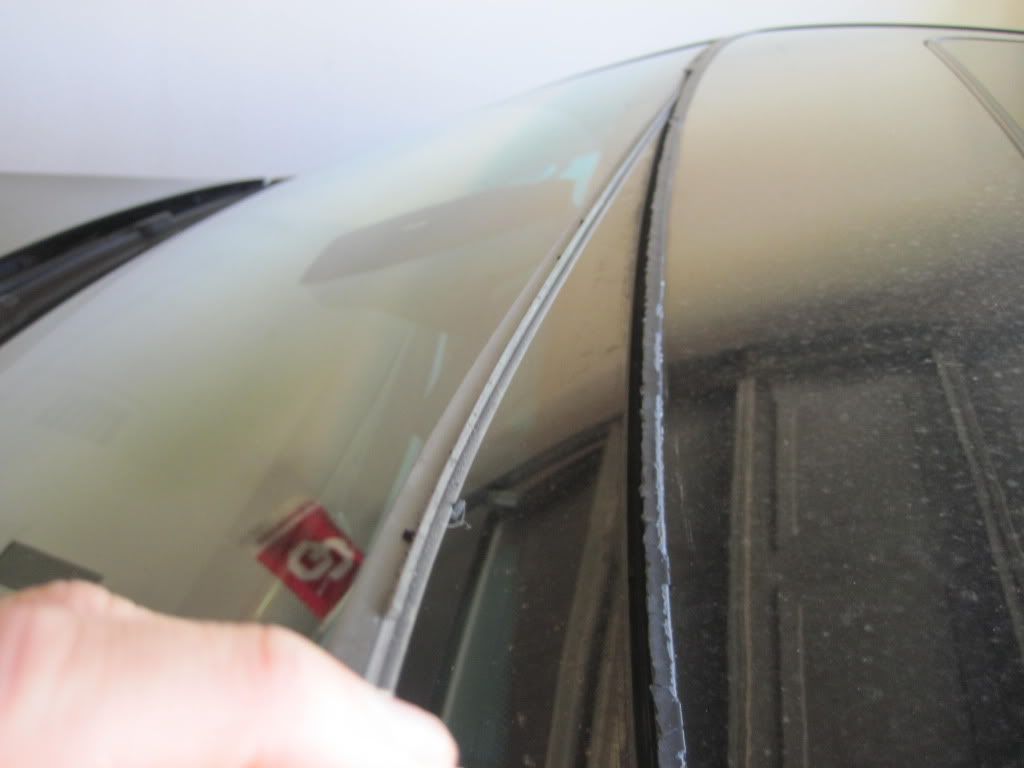 Once you have part of the molding pried up out of the crevice, you should be able to pull the spine out by hand. 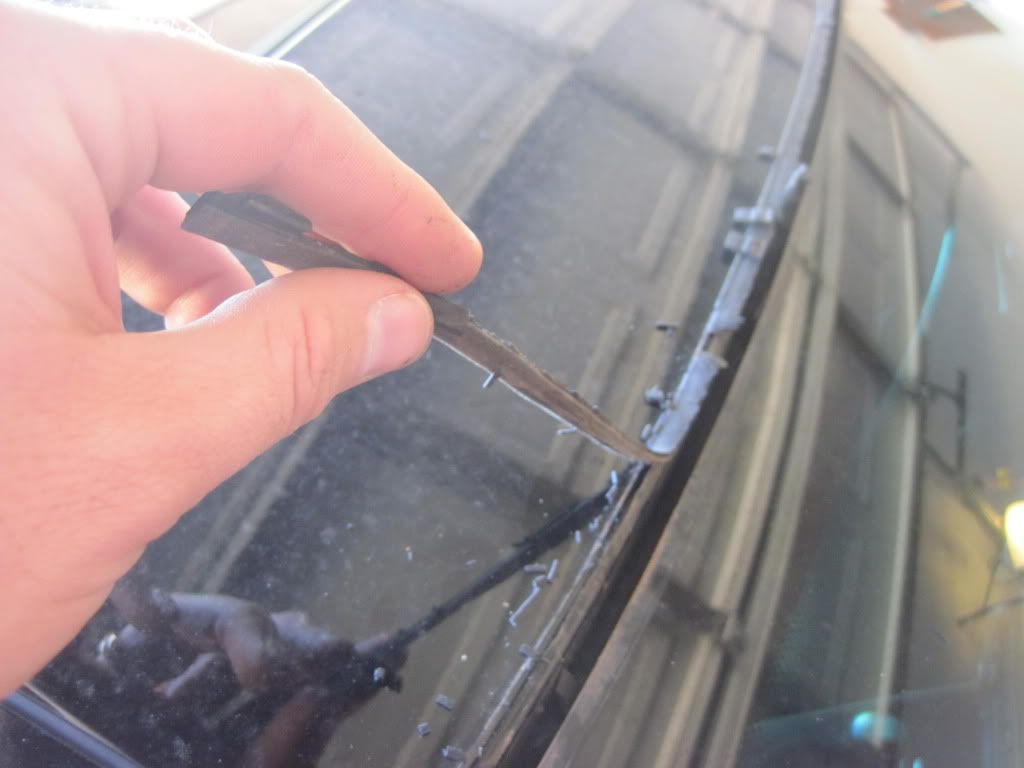 After the spine of the molding has been removed, there will be residual molding rubber still attached to the car. For this I used a flat blade to gently peel the residual away from the car. 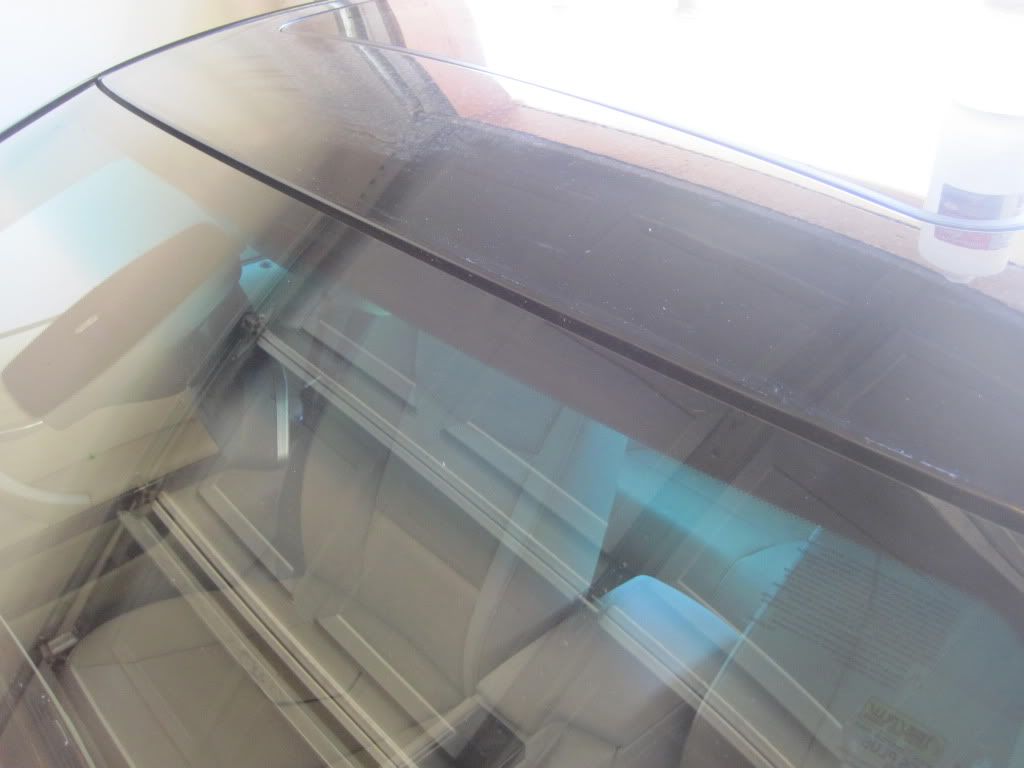 Now that the residual has been peeled away, there is still some adhesive that needs to be cleaned off. For this I grabbed some rubbing alcohol and a soft cloth. This both helped remove the residual adhesive, and cleaned the surface for the new adhesive to stick to. 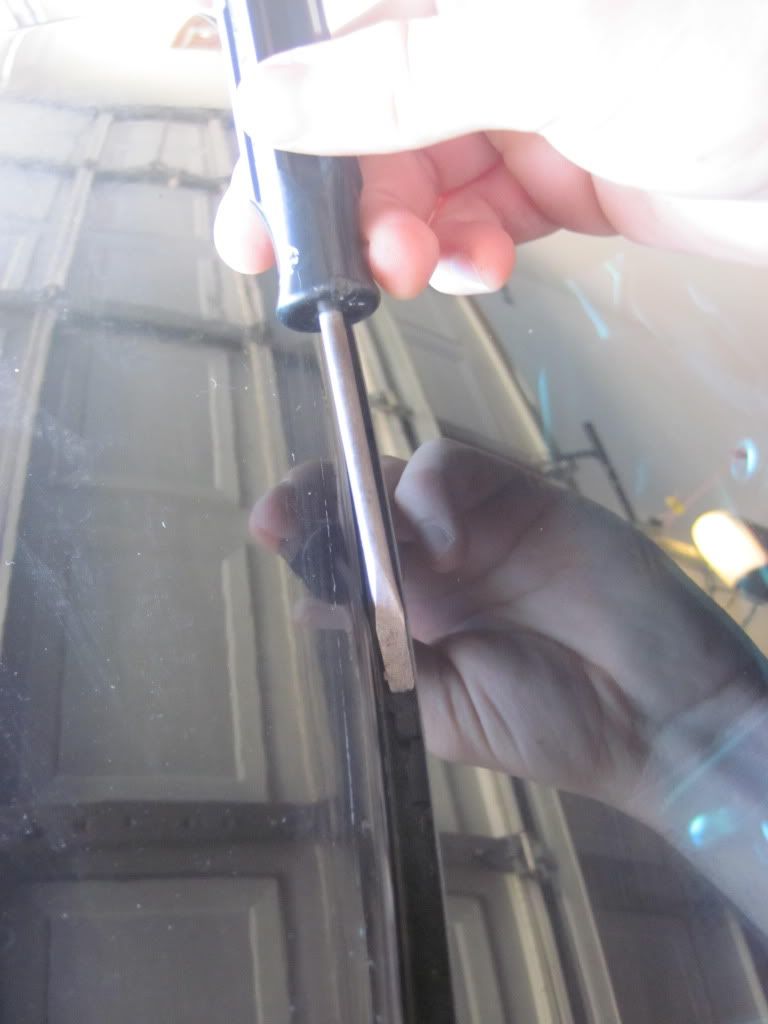 Keep in mind there may also be small shards of rubber that flaked off into the crevice while pealing the molding off. You'll need to scoop it out with a tool like a flathead screwdriver. You may even want to try to blow it out with some canned air if you have it. 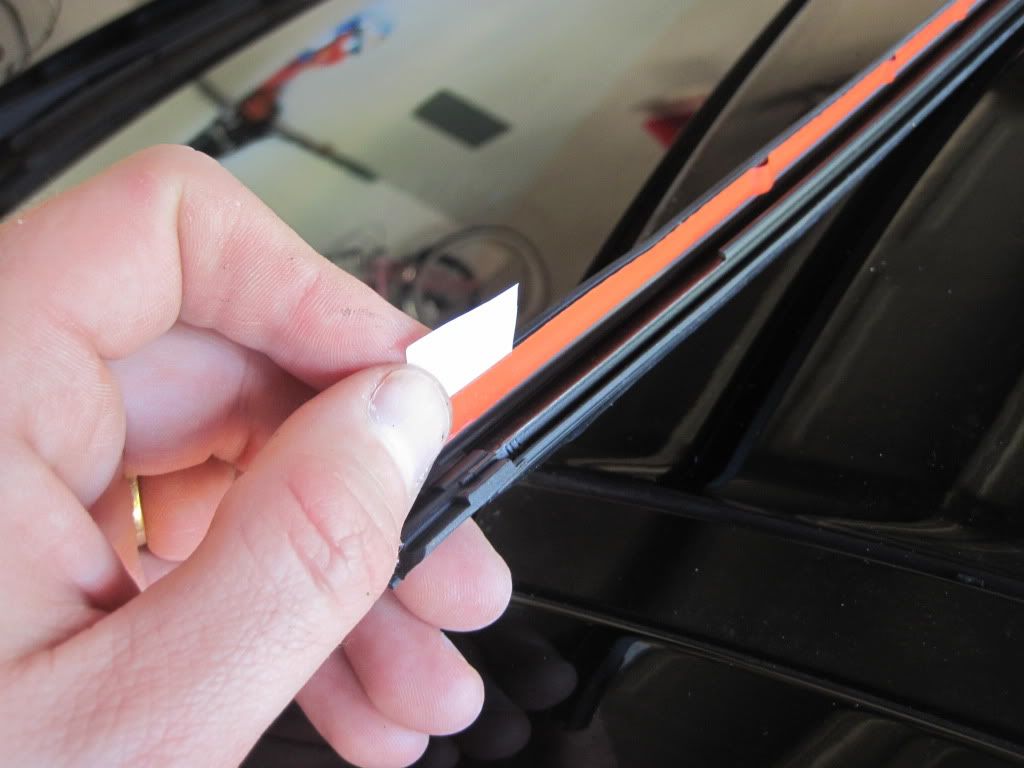 The new molding comes with a adhesive strip with a protective peel. This peel can be left on the molding while installing and fitting it into the crevice. As you do this you may have to apply a little more force to one side or the other depending how tight the fit is. 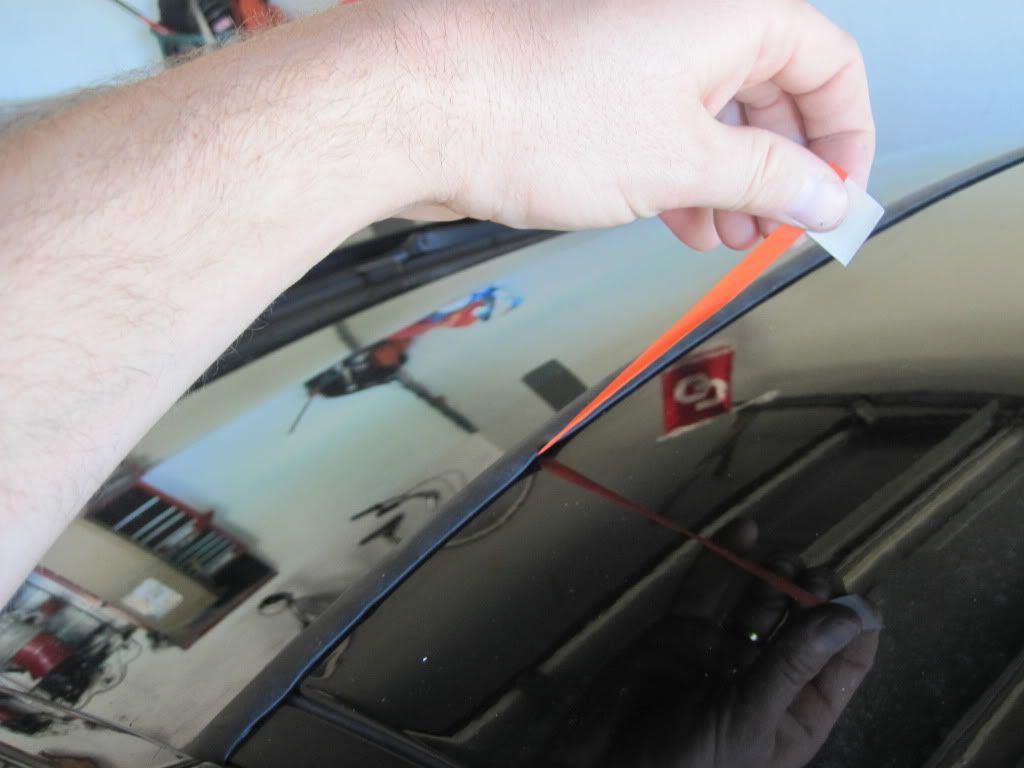 Once the molding is in place you can begin to pull the protective strip away from the adhesive. As you do this, press the adhesive into contact with the roof.  And that's it. Pretty simple job. |
| 04-28-2011, 08:45 PM | #3 |
|
Weebl wobbles but eats Pie
95
Rep 1,794
Posts |
Was the part which fits over the glass metal or plastic. I know on older ones it is metal and you can chip/crack you glass trying to take it off.
Nice write up.
__________________
Kevin Goto
2000 740i-Annalisa (sold 2018) 2008 335i-Weebl. Weebl may wobble but has DTC  2012 X5d in Sparkling Bronze ( The Ultimate Cat Carrying Machine)-RIP BMW buyback 2019:2017 A3 2012 X5d in Sparkling Bronze ( The Ultimate Cat Carrying Machine)-RIP BMW buyback 2019:2017 A3 , 2018 Audi SQ5 , 2018 Audi SQ5 |
|
Appreciate
1
dcorn76.50 |
| 04-28-2011, 09:26 PM | #4 |
|
New Member
22
Rep 27
Posts |
What I have called the spine of the molding seemed to have a metal core. Despite this, the entire piece was very malleable. I had no issues getting the piece out and putting the new one in.
|
|
Appreciate
0
|
| 04-28-2011, 09:36 PM | #5 |
|
New Member
7
Rep 19
Posts |
This is great! What is the part no. you used for the new molding and where did you get it from?
I was looking at real oem parts, did you use what's called "Cover, windshield" with part no. 51317061967? Thanks! |
|
Appreciate
0
|
| 04-28-2011, 10:07 PM | #6 |
|
New Member
22
Rep 27
Posts |
https://www.trademotion.com/partloca...layCatalogid=0
Item Number MSRP Core Price Price 51317061967 $20.25 $0.00 $16.20 Windshield - Glass - Reveal molding Reveal molding 2006 - 2011 |
|
Appreciate
0
|
| 08-01-2011, 10:00 PM | #8 |
|
Registered
0
Rep 2
Posts |
I just did mine under 1 hr (I was taking my time to clean it well). Very easy to change. Excellent instructions and picture, Rich!
I bought the part with Tischer; the part was very cheap (for a BMW), I think 16.99, but then I had to add the S&H plus $4.99 extra handling fee. I think the latter is to make it up for the cost of gas and I think it should be included with the S&H. I've ordered a couple of times and I can't complain of the service. In regards to the previous question about the spine, the spine slightly graps around the edge of the windshield, so just push up and awayalongside the windshield a little bit and it will come out. Just study the new molding and you'll see what I mean. |
|
Appreciate
0
|
| 08-05-2011, 02:03 PM | #10 |
|
First Lieutenant
 56
Rep 392
Posts
Drives: 2017 Tacoma TRD Pro
Join Date: Jul 2010
Location: Pasadena, CA
|
Anyone know of a good glue that will bond these rubber pieces to the windshield ?? My strip fell off around the rear window on the bottom near the truck.
|
|
Appreciate
0
|
| 09-02-2011, 09:26 PM | #11 |
|
New Member
7
Rep 19
Posts |
Excellent instructions.
But on the part of doing it.....the part i had the hardest time with was snapping the new molding in!!! It just wouldn't go in!!! I have literally spent 2 hrs trying to snap it in and it just wont budge. Anyone have tips??? AHHH!!! |
|
Appreciate
0
|
| 09-09-2011, 08:02 AM | #12 |
|
New Member
0
Rep 11
Posts |
Anyone have any luck getting this replaced under CPO? I've tried replacing it myself and even my friend who works at a local body shop couldn't get it out and said he'd have to lift the windshield. I know it says "no trim/molding" on the not covered, but I don't see how this can't be a defective part when every other piece of trim on my car is in perfect condition and this one has literally disintegrated.
|
|
Appreciate
0
|
| 09-15-2011, 03:58 PM | #13 |
|
Team BAMF
2
Rep 88
Posts |
I just called the dealer and even though I am still within my first 4, it doesnt look like it will be covered. It is not considered a defect, only a product of the environment.
__________________
FOR SALE, 07 E90 335i, $21,995
|
|
Appreciate
0
|
| 09-16-2011, 04:01 PM | #14 |
|
New Member
0
Rep 11
Posts |
If you decide to replace this yourself be careful. I just got ambitious and tried again. It took nothing to crack the windshield. Now I've got a shredded reveal molding and a 3 inch crack in the top corner of my windshield. Now I'm going to need a new windshield anyway and I doubt insurance will pay for it since its blatantly obvious I cracked it myself.
|
|
Appreciate
0
|
| 10-14-2011, 07:36 PM | #16 |
|
Registered
0
Rep 2
Posts |
Great job on the DIY. I took my time on the spline (aluminum piece) and worked it up with my fingers a little bit at a time and it paid off when it was time to remove it. When it was time to install the new one I started on the ends and worked my way to the center. It was fairly easy only that towards the center it became difficult to snap in... sliding works a lot better.
Thanks! |
|
Appreciate
0
|
| 01-26-2012, 11:00 AM | #17 |
|
Registered
0
Rep 3
Posts |
I never thought it's so easy to reduce the mold on the windshield, I guess I am not a big car expert, I admit that. It's one of the reasons why I my college years I actually put my car on a donate a car because of a minor issue at the engine. People there fixed it right in my front in a matter of minutes. At least I got a tax incentive for that...
|
|
Appreciate
0
|
| 02-29-2012, 11:04 PM | #18 |
|
Registered
0
Rep 1
Posts |
No Metal Tools!
The write-up on replacing the reveal molding was really very good. However, one thing to beware of doing: NEVER use metal tools around glass unless you intend to break it.
There are plastic and nylon trim tools made especially for this kind of work and they are not expensive. They can be purchased at several sites that cater to automotive enthusiasts for between $25 and $40. (Cheaper than a new windshield.) If you have a Harbor Freight nearby, you can buy the same tools for less than $10 per set. I changed both the windshield and backglass reveal moding with the nylon trim tools. They can also be used to remove trim pieces on the interior of the car. |
|
Appreciate
0
|
| 07-16-2012, 02:19 PM | #20 | |
|
Brigadier General

1560
Rep 4,512
Posts |
Quote:
 |
|
|
Appreciate
0
|
| 09-05-2012, 04:08 PM | #21 |
|
Registered
0
Rep 4
Posts |
I just wanted to give a big thank you to the OP, richjamison. Thanks to you, I saved $600! I took the car to an auto glass repair shop who insisted the glass would have to be replaced because it would be crack. I wasn't going to pay $600 to have a strip of rubber fixed... not yet anyways.
I went home and googled and this thread came up. After gathering up tools and the part, this repair was done in under 30 mins. I'm in Fresno so the 100 degree heat made the adhesive removal very easy. Total cost... $30. $24 for the trim and $6 for the trim removal tools. Which reminds me, thank you to Copperbender who recommended using the tools. It was VERY easy. I used the crowbar looking tool and the trim came up without any resistance. Thanks again! To those who have or will have trouble, I slid the new trim on the sides first. Then i just press down while moving towards the center. Took me 30 secs. In fact, it went in so smoothly, I though I had done something wrong. |
|
Appreciate
0
|
| 09-16-2012, 09:06 PM | #22 |
|
Captain

304
Rep 657
Posts |
Mine looks super bad right now. Going to get the rubber trim and try this out. Thanks for the write up!
__________________
 /// E92 | JB4 | UR DP | BMS DCI | H&R | LC Z2S | |
|
Appreciate
0
|
 |
| Bookmarks |
|
|


