

|
|

|

|
 |

|

|
BMW Garage | BMW Meets | Register | Today's Posts | Search |

|

|
BMW 3-Series (E90 E92) Forum
>
E90 Sedan Interior Door Grab Handle
|
 |
| 05-16-2015, 08:59 PM | #23 |
|
Banned

129
Rep 245
Posts |
Door handle fix solution
So I figured out an easy way to replace the inner door handle on our e90s. Like most of you, my handle started literally melting so that if you grabbed it, you got black tar on your hand. Like most of you, I bought the two handle parts and easily removed the door trim, outer handle piece, 4 torx bolts, and the door panel only to find that the 2nd piece of the door handle has 4 melted plastic rivets holding it to the door panel. Here is my easy fix (sorry I do not have pictures - I did not know it would turn out so well):
1. Remove the melted plastic rivets by drilling in through the hole in the rivet head with a 1/4" drill bit. Go slow and you only need to drill in about 1" before the stem inside heats up and releases. Then get rid of the excess rivet with tip of screwdriver or needle pliers. 2. The new inner door handle has 4 long plastic "stems" that are supposed to go through the 4 door panel holes (and then get melted with another rivet). Well, I do not have rivets or heat guns or flaming red hot bolts. So, just cut them off. I left about 1/4" of the stem. Cut enough off so that the stem does not stick out the other side of the door panel. I used my dremel. 3. Bottom 2 holes on the handle: Drill down through the stem nubs with a 3/16" drill bit. Then insert a 1.5" long #8 bolt in each. Get a bolt head that is small enough to fit flush on the door handle piece. Turn it until snug. You should have approx 3/4" of the bolt sticking out the other end of each nub. Place the handle in position, add a 5/8" washer, and a #8 locking nut to the end of the bolt inside the door panel, and tighten with a socket. Do not over torque it. I probably did 15ftlbs or so - it was a 5 setting on my cheap black and decker drill. 4. Top 2 holes on handle: You will need a short 1/2" #8 screw (not bolt) and a 5/8" washer for each stem nub. This time, you will put the washer on the screw and drill from the inside door panel into the door handle nubs. Again, do not over torque. This is not as solid as the lower 2 holes, but it does not need to be because the top of the handle has the torx screw which does most of the heavy work. 5. Screw in the upper handle torx screw. I did this pretty tight - probably 30ftlbs - an 8 on my drill setting. You are done! Helpful Hints: - When I took the door panel off, I only removed the speaker wiring. Then I set the door panel on a chair. - I washed the leather armrest before replacing the door handle - its the best time to do it since there is no handle in the way. - When replacing the door panel, make sure the door latch cable is set in its little holder. If it isn't, your inner door latch will hang open and will not work. - When replacing the door panel, make sure the door open knob is through the hole at the top of your door panel. Easy to forget. Good luck! |
|
Appreciate
0
|
| 07-28-2015, 07:34 PM | #25 |
|
Registered
0
Rep 1
Posts |
I followed craesq post above and it work great, was really easy and is very strong. On the lower handle connection I had to use a 2" #8 bolt instead of a 1.5" on one side because the 1.5" was quite long enough with a flat washer and lock washer.
|
|
Appreciate
0
|
| 08-11-2015, 07:00 PM | #26 |
|
First Lieutenant
  65
Rep 307
Posts |
You can also use a spacer and washers, no need to cut the tabs/stubs.
I used a dremel to grind off the old melted tabs. I bought the screws from BMW because I didn't want to go find screws that fit, FYI, they are a coarse thread similar to sheetrock screws. The tabs/stubs are tapered, so you need 2 different size washers, one big enough to go all the way down the stub, the second smaller to allow the screw to seat and hold. I think I bought a 3/8" (?) spacer. Once you have the old handle out, just push the new one through, slide on your bigger washer make sure that it fits flush on the door panel, then insert a spacer, then another spacer or two to allow the screw to seat and hold, don't use to much force or you will pull the threads out of the stub of the door handle. I did my front door over 2 years ago and it is still solid, just did the rears earlier this year and they are rock solid so this fix does work. |
|
Appreciate
0
|
| 10-26-2015, 06:49 AM | #27 |
|
Symptoms of 135i denial..

0
Rep 71
Posts |
Digging up a dug up thread, but have replaced both passenger side door pulls a bit simpler.
Once the handle is in place I put a washer on each of the 4 posts, and then used 6mm star washer things (the ones that never come off again) and push it on with an 11mm socket, persuaded with a bit of hammer action. Practiced on the back door, and then the front door was done in less than an hour. Now the new handle stands out like... Umm.. |
|
Appreciate
0
|
| 10-26-2015, 11:19 AM | #28 | |
|
DOPE
153
Rep 762
Posts |
Quote:
|
|
|
Appreciate
0
|
| 11-03-2015, 08:57 PM | #29 |
|
Symptoms of 135i denial..

0
Rep 71
Posts |
That sounds right. Not the ones with about 20 little fingers on the inside. The ones that have 6 solid fingers.
If the time comes to replace again, drill the plastic out of the inside again. |
|
Appreciate
0
|
| 02-08-2016, 12:50 PM | #30 |
|
Lieutenant
   25
Rep 517
Posts
Drives: 2007 BMW 328i
Join Date: Mar 2007
Location: Los Angeles
|
Any pictures of the final installation with the star washer?
__________________
[2007 328i|Black Sapphire|Terra Leather|6 MT|Xenon headlights|BMW Alarm|Clear Bra|Stainless Steel Pedal Pads|Black Line Tails|MTEC V3.0 Angel Eyes|HUPER OPTIK 30 Ceramic TINT|GPThunder Fogs|LED License Plate mod|Sport Shocks/Springs upgrade|ZHP Shift Knob|//M Dead Pedal|Matte Black Grill|Aluminum Strut Bar|Cyba Air Scoops|Rear Fog Switch|Perforated Mtech Wheel|Miro 935s|Hankook v12 evo Tires|BMW SSK]| BMW PE
Last edited by g9sBMW; 02-08-2016 at 12:51 PM.. Reason: typo |
|
Appreciate
0
|
| 03-22-2016, 12:26 PM | #31 |
|
Brigadier General
 3011
Rep 3,541
Posts |
I should have taken pictures, but I just did the passenger handle replacement on my E91 and used push on nuts from Ace Hardware -- the spring steel type that once you push them on, they won't come back off. I found a representative picture:
 I bought two different sizes since they only had American-sized push on nuts, and seeing the post above mention 6mm, I bought 1/4" and 5/16". This actually ended up working out great since I used the 5/16" on the lower studs and the 1/4" on the upper ones. It could have been the other way around, but it's easy to see which when doing this -- the plastic studs on the handle are stepped in diameter, and the lower ones stuck through the panel enough such that I could use the 5/16" push on nuts as is. I used an appropriately sized socket to push down the nut; just make sure that the socket is big enough to allow the spring steel fingers to flex backward, i.e. so socket is only contacting the outer edge of the nut. For the upper ones, the plastic studs didn't stick far enough through the panel to allow the larger diameter part of the stud to engage enough, so I used the 1/4" push on nuts here to engage the outer, smaller diameter, part of the stud. I used some appropriately sized "normal" washers (3 I think on each stud) to build up enough height to allow the push on nut to engage only the smaller diameter part of the stud. Again, used a socket to firmly push down the nut. There was no need to trim the length of the studs on the handle on either end. This worked wonderfully. The handle is firmly attached to the panel and completely secure once reinstalled in the car. Oh, yeah, I used a regular drill with a fairly large bit to drill out/off the original melted stud -- just went very slowly (rpm-wise) and carefully, and it worked fine. So if you have an Ace Hardware store nearby, in their American sized nuts/bolts/washers section, they have a bin with these push on nuts in all sizes. They did not carry these types of spring-steel push on nuts in metric sizes (at least not at my local store). Once the door panel is off, it takes maybe 2-3 minutes to carefully drill the original, melted on, studs out, and then it takes no more than 2-3 more minutes to install the new handle as outlined above...really easy fix actually. Regards, Chuck
__________________
Current Stable:
2024 G20 M340i Melbourne Red/Cognac 2019 F87 M2 Competition 6MT, LBB, slicktop, exec pkg 2021 X4 M40i Phytonic Blue/Black |
|
Appreciate
0
|
| 03-30-2016, 12:27 PM | #32 |
|
Lieutenant
   25
Rep 517
Posts
Drives: 2007 BMW 328i
Join Date: Mar 2007
Location: Los Angeles
|
__________________
[2007 328i|Black Sapphire|Terra Leather|6 MT|Xenon headlights|BMW Alarm|Clear Bra|Stainless Steel Pedal Pads|Black Line Tails|MTEC V3.0 Angel Eyes|HUPER OPTIK 30 Ceramic TINT|GPThunder Fogs|LED License Plate mod|Sport Shocks/Springs upgrade|ZHP Shift Knob|//M Dead Pedal|Matte Black Grill|Aluminum Strut Bar|Cyba Air Scoops|Rear Fog Switch|Perforated Mtech Wheel|Miro 935s|Hankook v12 evo Tires|BMW SSK]| BMW PE
|
|
Appreciate
0
|
| 02-11-2017, 11:03 AM | #35 |
|
Registered
0
Rep 3
Posts |
E90 passenger door handle repair
This is after you have carefully removed the door panel.
2007 335i [IMG] 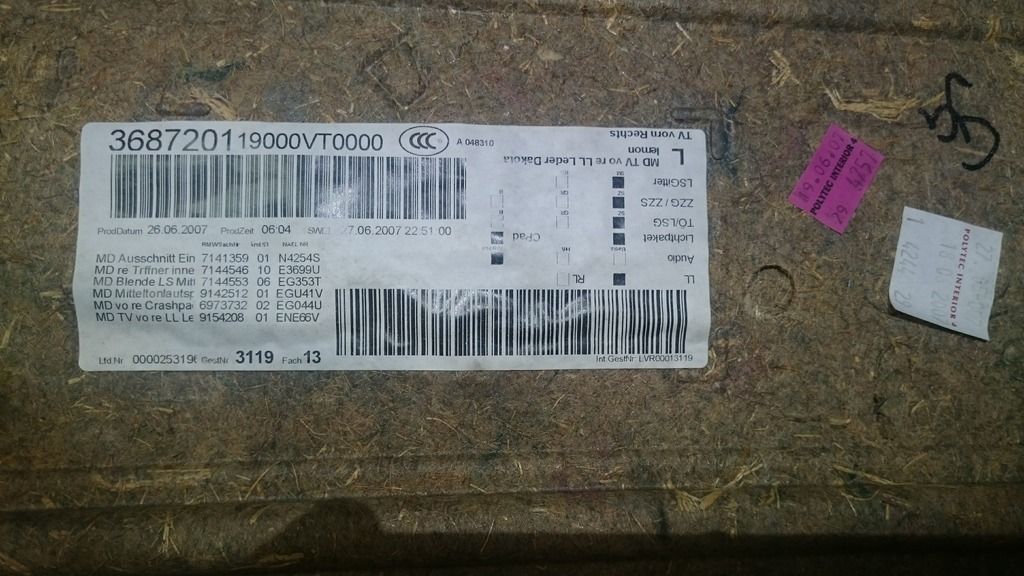 [/IMG] [/IMG]1. Remove the melted plastic rivets by drilling in through the hole in the rivet head with a 1/4" drill bit. Go slow and you only need to drill in about 1" before the stem inside heats up and releases. Then get rid of the excess rivet with tip of screwdriver or needle pliers. You can see this pointed out in the picture with black arrows. 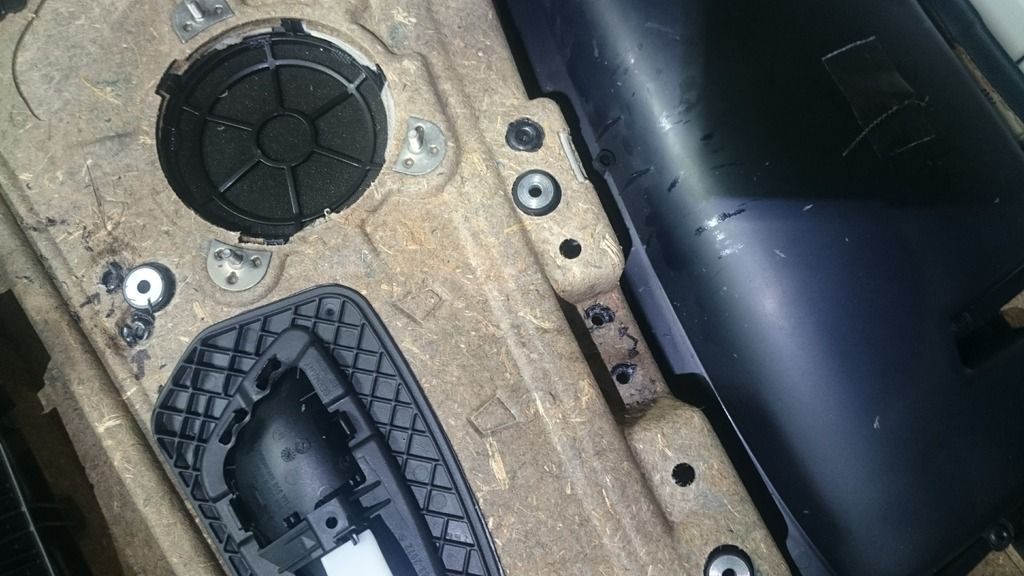 2. The new inner door handle has 4 long plastic "stems" that are supposed to go through the 4 door panel holes (and then get melted with another rivet). Well, I do not have rivets or heat guns or flaming red hot bolts. "DO NOT CUT THE STEMS/POST ON THE NEW HANDLE"! I went down to Lowes and got the screw down thread cutting nuts. Be careful not to screw them down too far, they will cut into the post and then become loose. 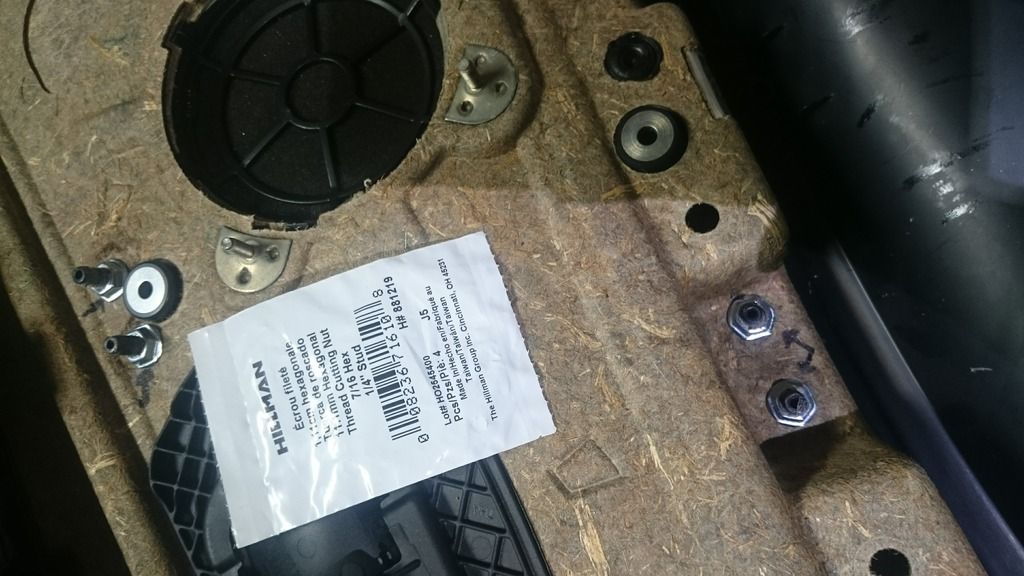 3. To avoid them coming loose from the continued pulling on the handle I got some Gorilla glue. It is a little thick but also after 5 minutes it starts to foam and create a hardened mound over the nut and will hold it in place. 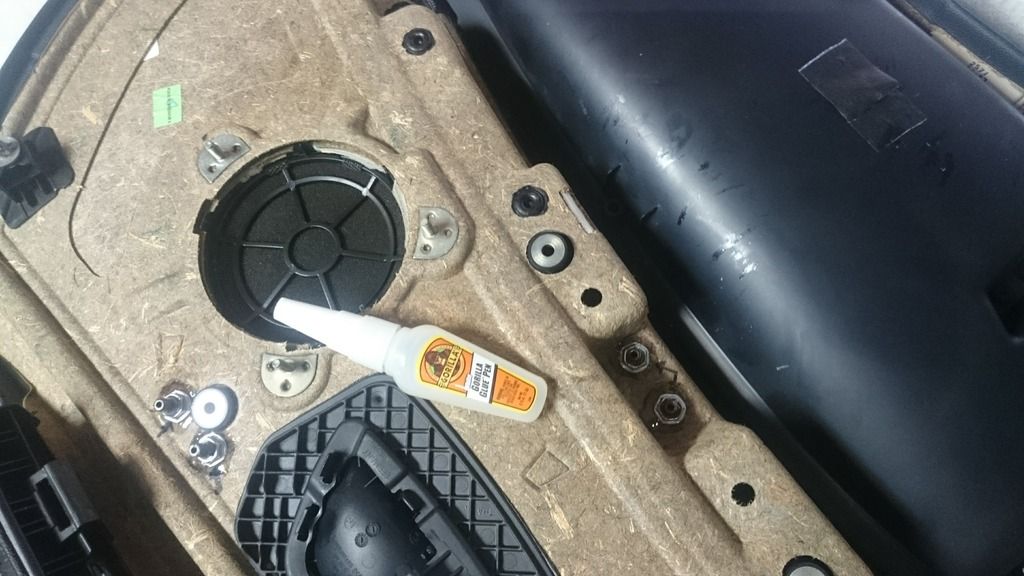 4. Allow the glue to completely harden for a few hours. 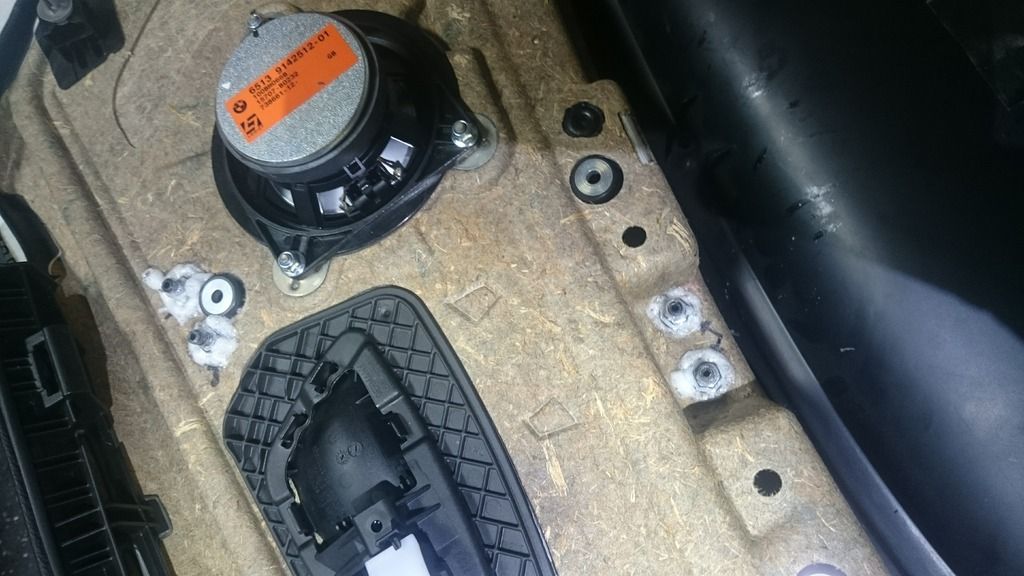 You are done! |
|
Appreciate
0
|
| 05-30-2017, 08:39 AM | #36 |
|
Private
 9
Rep 76
Posts |
Hello, guys. Thank you for the DIY!
I have problems with both the passenger and rear interior door handles and was thinking that I'd rather paint them as I think they will melt again if I change. Any ideas what should I use to remove the sticky rubber/plastic before actually applying the paint? Thank you! |
|
Appreciate
0
|
 |
| Bookmarks |
|
|