|
|
|
|
 |

|
 |
BMW Garage | BMW Meets | Register | Today's Posts | Search |
 |

|
BMW 3-Series (E90 E92) Forum
>
EAS Carbon Fiber Interior Trim Installation
|
 |
| 04-27-2008, 02:51 PM | #1 |
|
Modder Raider

753
Rep 8,633
Posts
Drives: M3
Join Date: Apr 2007
Location: Surf City, HB
|
EAS Carbon Fiber Interior Trim Installation
EAS Carbon Fiber Trim Installation Guide
Tools Needed: 1 Thin Flat Head Screwdriver T10 Torx Wrench 8mm Wrench Needle Nose Pliers (For transferring clips and Plugs) Masking Tape (For Marking Purposes) FRONT DOOR TRIMSTART AT THE TRIM CLOSEST TO THE FRONT OF THE CAR BEFORE  Get a flat head screwdriver and fit it in between the trim and the door. Once the screwdriver gets in position, pull the screwdriver towards yourself and grab the trim with your other hand. Once you get a hold of the trim with your hand then keep pulling down the line. Make sure that you keep pulling at the spot closest to the door so you dont bend the trim that you are removing. Once the trim is off the car, then transfer the bolts (fittings) to the new EAS CF trim. When the fittings are in place, make a dry fit by linning the trim in place and observe that the fittings are lined up with the holes. Adjust the fittings accordingly. I also added masking tape (painters tape) to the outside of the CF trim so I know where the fittings are. This helps by knowing where to push the trim when installing it. Ive heard the horror stories of people applying pressure in the wrong spot (weak spots) of the CF trim and the trim will crack. If you push the trim where the fittings are (the strong spots) then the trim will not flex and fit perfectly. 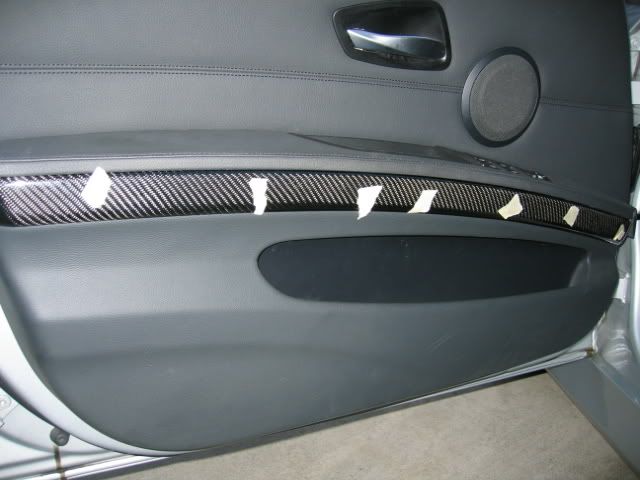 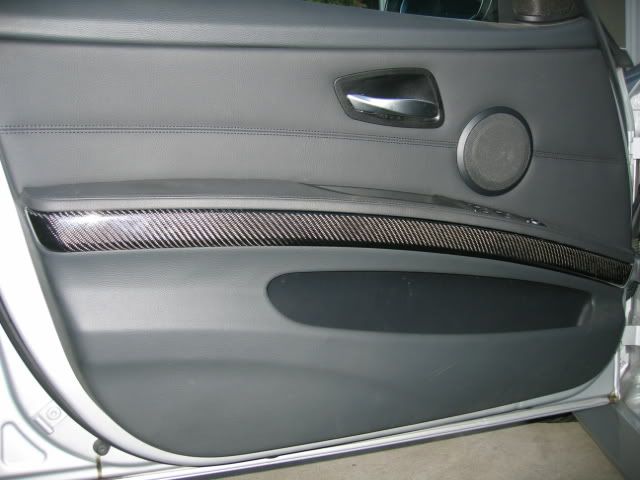 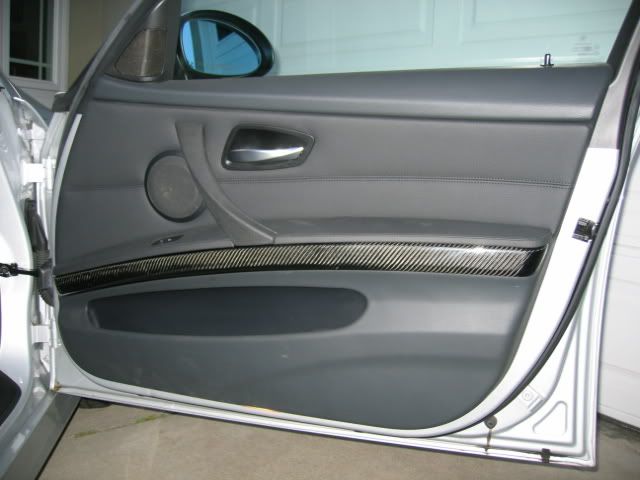 You are now done installing the front.  REAR DOOR TRIMSTART AT THE TRIM CLOSEST TO THE REAR OF THE CAR Do the same thing to the rear doors that you did to the front doors except you are starting at the rear of the door first. CENTER CONSOLE TRIM Make sure that nothing is in your cubby, and the ashtray/sunglass holder is empty. Remove the shifter boot by pulling the knob straight up. Once the knob is loose then unclip the leather from the center console.  Open the arm rest. Grab the center console like Im doing in the picture. Pull straight up. 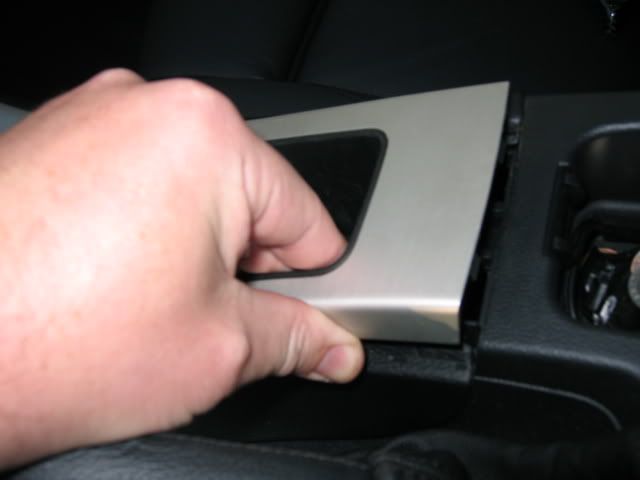 Once the console it loose then grab the console with both hands and pull it towards the back of the car. The console should break free, and you should be able to remove the console from the car. Turn the console upside down and use a torx T10 wrench to remove the ashtray from the console. Use the flat head screwdriver to pry the ashtray cover off of the ashtray. 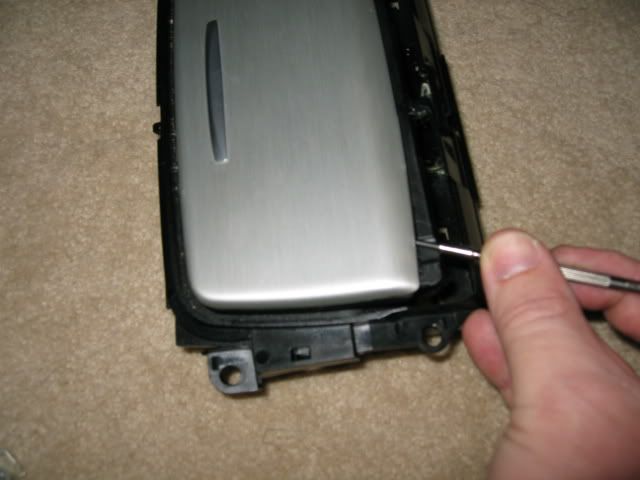 You will see the 2 slots in the rear of the ashtray. Once the old trim is off, install the new CF trim by fitting the front first and then push down on the back making sure the rear clips are being held by the ashtray assembly. Your ashtray is now done. Transfer all the clips and padding to the new console. Transfer the cubby over to the new console. Transfer and install the ashtray over to the new console. 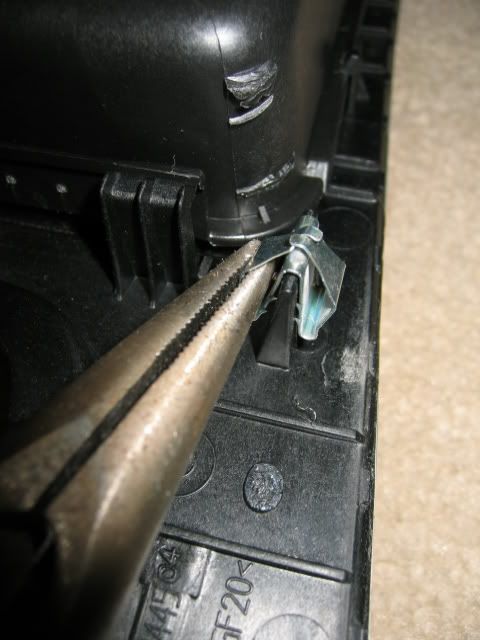 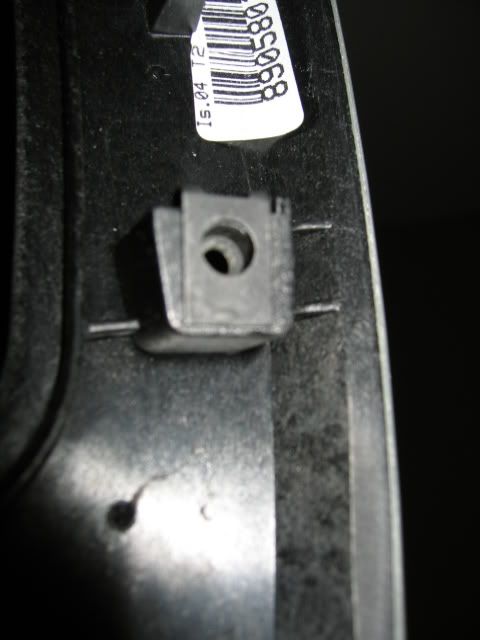 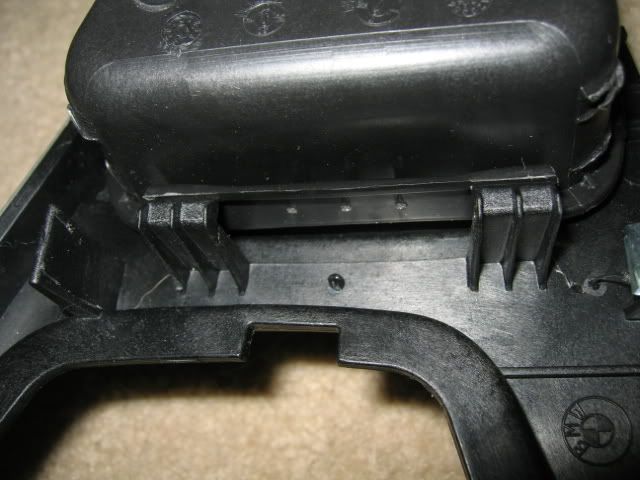 Now, install the center console by going in reverse order of what you did to take it off. Your center console is now installed and completed! DRIVERS SIDE AIR VENT TRIM 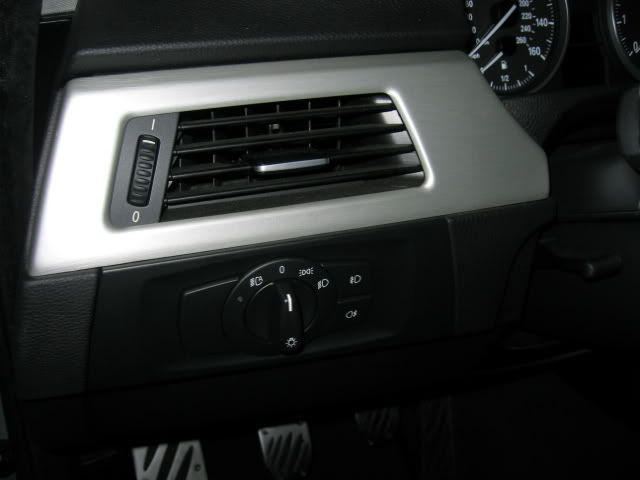 Use your flat head screwdriver to pry back the old trim from the instrument cluster side. Once the trim is out far enough, grab the trim with your hand and massage it towards you until the trim breaks free. You now ned to transfer the vent over to the new CF trim. Use your flat head screwdriver to pry back the clips that are holding the vent on. Be very carefull that you do not pry too hard. When you are prying with one hand, keep a hold of the vent with the other hand pulling gently. Doing this will help the clips that you are prying not go back into the slot when you pry in other areas. 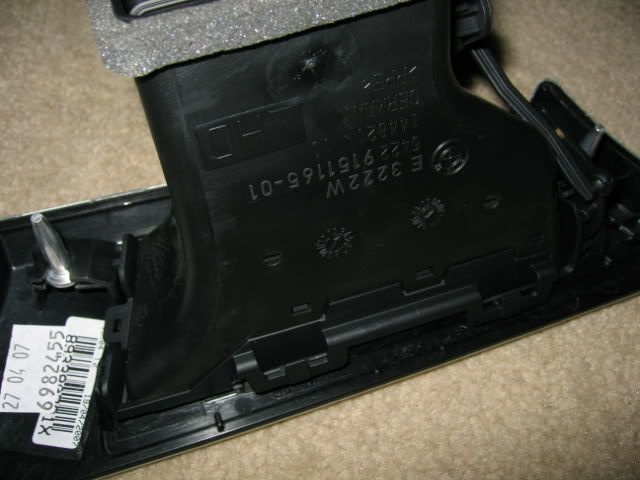 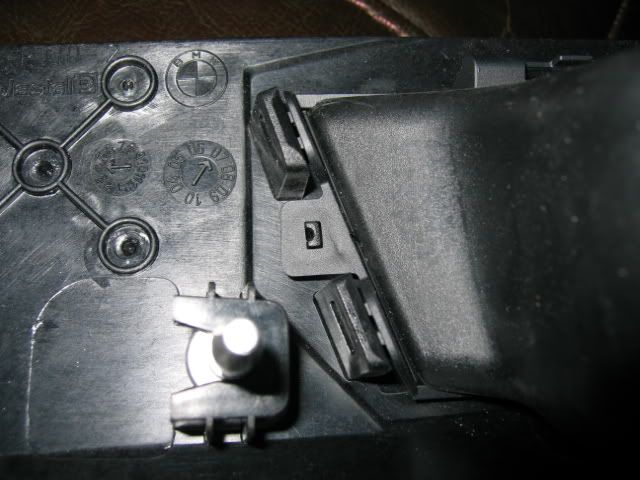 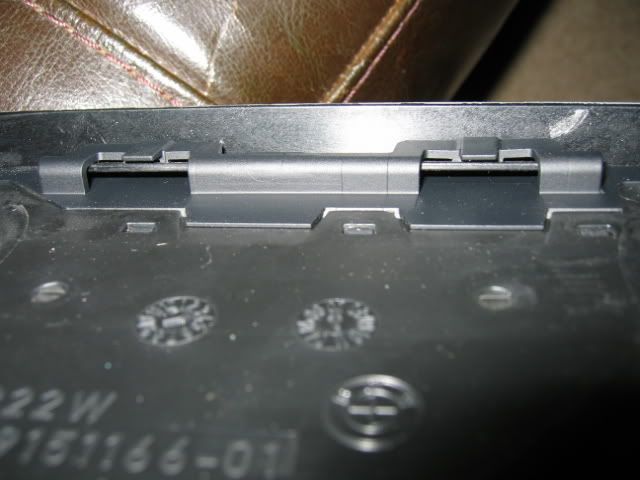 The vent will become looser and looser when more and more clips are pryed up, and you will find that the vent will just get loose enough to slip off. Now install the vent onto the new CF trim by going into reverse order. Everything should clip in to place. Transfer the clip/bolts to the new CF trim. Push the new CF trim with the vent into place. Your drivers side air vent trim is now installed. PASSENGERS SIDE AND MAIN AIR VENT TRIM Do somewhat of the same thing as the Drivers side vent. Start by prying the trim up with the screwdriver on the center console side. Do not pull hard though. Just try to get the whole piece of trim loose. 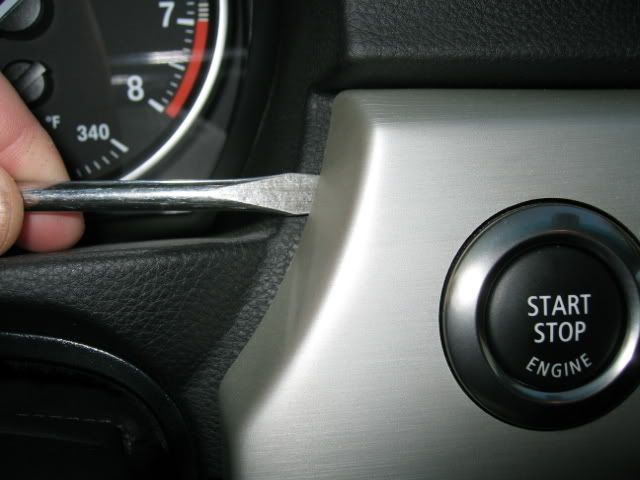 You will need to disconnect the plug going to the Start Button. 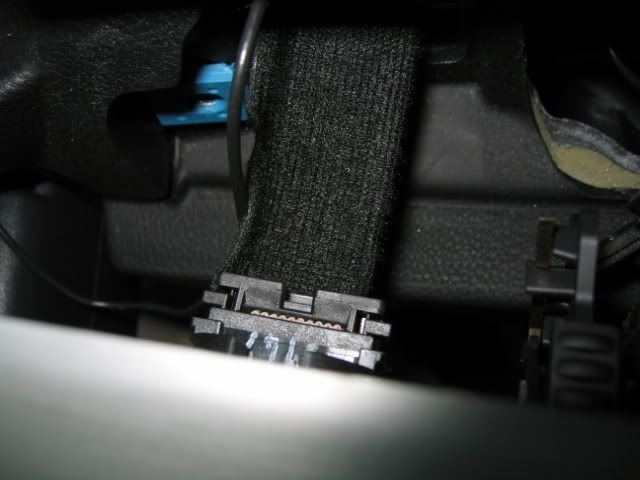 You will also need to disconnect the wires going to the main vent (hazard lights, door lock, etc.). Use your needle nose plyers to get the plugs off of the vent. Take your time with this. Dont get frustrated and break anything. If youre feeling frustrated then take a break.  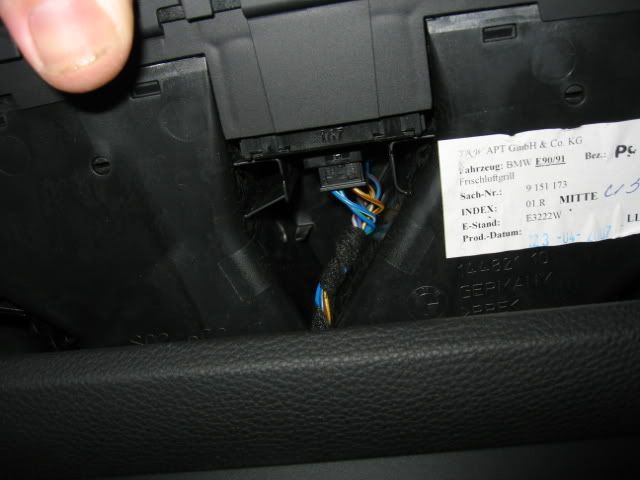 When you get everything unplugged, you should be able to get the entire trim piece off the car. Transfer the Start button over to the new trim. Squeeze the two prongs like in the pic to remove the button. When removed just clip it into the new trim. It should clip in pretty easily. 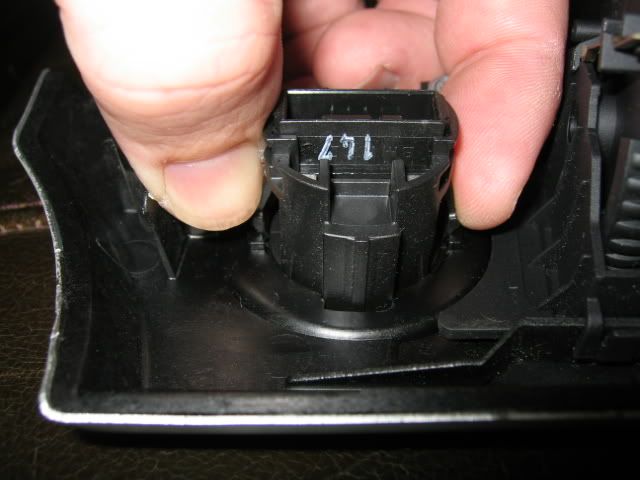 Transfer the vents over to the new trim just like you did with the Drivers side vent. Transfer all the clips and bolts over to the new trim. You will need to use an 8mm wrench though to take off the main vent. Once everything has been transferred over to the new trim, it is now time to install the new CF trim to your dash. Lay it in place just enough to get the wires plugged back into the vent. Once the wires are plugged back in, then push everything back in place and install your main vent trim. Your EAS Carbon Fiber Interior Trim Set is now complete! Enjoy the pictures!!
__________________
e36 M3 Coupe, e36 325i Sedan
e90 335i--SOLD Best 60-130-------------9.15 Seconds------------------WWW.MR5RACING.COM  |
| 04-27-2008, 07:41 PM | #3 |
|
Captain
 
63
Rep 805
Posts |
Great right up. Does the EAS kit come with clips for attaching the pieces? I have wood trim now which doesn't have clips for the door pieces and what not.
__________________
|
|
Appreciate
0
|
| 04-27-2008, 08:29 PM | #4 | |
|
Modder Raider
753
Rep 8,633
Posts
Drives: M3
Join Date: Apr 2007
Location: Surf City, HB
|
Quote:
If you have the wood trim and you are looking to upgrade to the CF then I would suggest following this thread: http://www.e90post.com/forums/showth...4999&highlight It looks like you need the following: 7 Pins (Part Number 51-45-8-266-808) 20 Threaded Bolts (Part Number 51-41-6-976-220) 1 Spectacles Tray (Part Number 51-16-7-132-376)
__________________
e36 M3 Coupe, e36 325i Sedan
e90 335i--SOLD Best 60-130-------------9.15 Seconds------------------WWW.MR5RACING.COM |
|
|
Appreciate
0
|
| 06-03-2008, 12:32 AM | #6 |
|
Private First Class

8
Rep 188
Posts
Drives: jetblack e92 - 335i
Join Date: May 2008
Location: SGV
|
sooo sexy! nice pics as well. great job buddy!
|
|
Appreciate
0
|
| 06-04-2008, 04:30 PM | #8 |
|
Major

22
Rep 1,083
Posts
Drives: 2021 M2C 6MT
Join Date: Jun 2007
Location: Chicagoland
iTrader: (4)
Garage List My garage spot [0.00]
07/07 BMW 335xi [8.50] 2001 Honda CBR600F4i [0.00] 2007 Husqvarna SM610 [0.00] 2004 Chevy Tahoe Z71 [0.00] 2005 Harley Davidso ... [0.00] 2007.9 335xi [6.50] |
Great writeup!
Did I miss the price of the EAS Trim? To the poster above....I may be selling my alum trim soon!
__________________
2021 BMW M2 Competition, BSM, Exec Pkg, 6MT
GONE:07/07 E90 335xi SG Black Dakota|Alum|ZSP|2AB|ZPP|ZCW|Nav|CA|6FL|PDC| Blacklines|3M Summers: 235/40/18 265/35/18 Hankook Ventus V12 on VMR 701s A/S: 225/40/18 255/35/18 Pirelli PZero Nero M+S on OEM 162s |
|
Appreciate
0
|
| 06-04-2008, 07:06 PM | #9 | |
|
General

8158
Rep 18,821
Posts
Drives: BMW
Join Date: Nov 2005
Location: Anaheim, CA
|
Quote:
e90 Carbon Fibre Interior Trim set - 2x2 Twill http://www.europeanautosource.com/pr...oducts_id=1874 |
|
|
Appreciate
0
|
| 06-05-2008, 03:37 PM | #10 | |
|
Major
22
Rep 1,083
Posts
Drives: 2021 M2C 6MT
Join Date: Jun 2007
Location: Chicagoland
iTrader: (4)
Garage List My garage spot [0.00]
07/07 BMW 335xi [8.50] 2001 Honda CBR600F4i [0.00] 2007 Husqvarna SM610 [0.00] 2004 Chevy Tahoe Z71 [0.00] 2005 Harley Davidso ... [0.00] 2007.9 335xi [6.50] |
Quote:

__________________
2021 BMW M2 Competition, BSM, Exec Pkg, 6MT
GONE:07/07 E90 335xi SG Black Dakota|Alum|ZSP|2AB|ZPP|ZCW|Nav|CA|6FL|PDC| Blacklines|3M Summers: 235/40/18 265/35/18 Hankook Ventus V12 on VMR 701s A/S: 225/40/18 255/35/18 Pirelli PZero Nero M+S on OEM 162s |
|
|
Appreciate
0
|
| 04-28-2009, 12:36 AM | #12 |
|
Colonel
 
375
Rep 2,348
Posts |
how do you remove the cubby in the center console?
any special tricks? i tried and i thinki have cracked one of the clips. i seriously need help.
__________________
  |
|
Appreciate
0
|
| 05-18-2009, 02:58 PM | #13 |
|
Registered

0
Rep 2
Posts |
Great walk through! Now I think I just might do it myself rather than pay a local custom shop. I just bought a '06 325i. I really like the wheels on yours. What kind are they? V710's in Gunmetal? Also I saw your profile on dragtimes.com. Very cool. What is "JB2HR"? I searched on some forums but got zero hits. Can you help me out?
|
|
Appreciate
0
|
| 06-18-2009, 03:36 AM | #16 |
|
Banned
0
Rep 64
Posts |
Great right up..i love the results..Id get the needed parts from Fram Parts and do this job later.
 Last edited by kurtdaniel; 06-22-2009 at 08:36 PM.. |
|
Appreciate
0
|
| 12-11-2009, 03:16 PM | #18 |
|
Banned
79
Rep 2,446
Posts |
I have an aluminium and bought a set of OEM wood (dark burl). Do I need additional clips / attaches or maybe I can transfer everything from my alu set?
It would have been nice to show exactly where to pry in sequences. I don't get it from the pics. |
|
Appreciate
0
|
| 12-29-2009, 07:31 PM | #19 |
|
→сяuisiиg iи му вмш←

66
Rep 1,642
Posts
Drives: 2010 Space Gray 328i
Join Date: May 2009
Location: The Unemployment Capitol of America
|
WOW the CF is the way to go I have the dark Burl now and the small cracks and deformities make it look horrible in sunglight.
Great DIY by the way
__________________
SuPerMoD @ MassMonsterz.com
A "Happy" Owner of a Metallic Space Gray 2010 BMW 328i ProGaMeR on the XboX 360  |
|
Appreciate
0
|
| 03-02-2010, 10:43 AM | #20 |
|
Private
 3
Rep 60
Posts |
i'm confused a bit about the spectacles tray that listed here for a replacement part. do you use this instead of the ashtray and if so you would still have access to the cigarette lighter plug?
|
|
Appreciate
0
|
| 03-02-2010, 03:10 PM | #21 |
|
Private
3
Rep 60
Posts |
"""CENTER CONSOLE TRIM
Make sure that nothing is in your cubby, and the ashtray/sunglass holder is empty. Remove the shifter boot by pulling the knob straight up. Once the knob is loose then unclip the leather from the center console."" anybody remover an automatic shifter. it it the same removal instructions like a manual knob and boot? |
|
Appreciate
0
|
| 03-02-2010, 03:42 PM | #22 |
|
First Lieutenant
8
Rep 315
Posts |
I'd suggest using a putty knife instead of a screw driver to remove the old trim, especially if you want to sell it and/or if it is wood. A putty knife will distribute the pressure making is much less likely that you mar the corners of the trim. Just a thought.
A credit car works pretty well too.
__________________
'10 335i sedan/AW/Premium/M-Sport/Steptronic/Active Steering/6FL/Logic7/Sirius/heated seats/rear fold seat/alarm/Navi/Performance Power Kit
|
|
Appreciate
0
|
 |
| Bookmarks |
|
|