

|
|
|
|
 |
|
 |
BMW Garage | BMW Meets | Register | Today's Posts | Search |
 |

|
BMW 3-Series (E90 E92) Forum
>
DIY - E90 (Pre-LCI) Hamann style lip spoiler installation on OEM front bumper
|
 |
| 07-12-2009, 11:32 PM | #1 |
|
Private
 
53
Rep 87
Posts |
DIY - E90 (Pre-LCI) Hamann style lip spoiler installation on OEM front bumper
In some cases, a Hamann style front lip may not come pre-drilled with all the necessary holes for easy installation. This DIY summarizes how to install a Hamann style front lip spoiler for the OEM E90 (Pre-LCI) front bumper in such a case. In particular, this DIY involves marking the appropriate places on the lip for drilling four new holes, and assumes that you already know how to remove the front bumper from the car.
*** This DIY assumes that you already know how to remove the E90 front bumper from the vehicle. (Removing the front bumper should only take about 15-20 min if you are already familiar with the process.) *** 1. Overview shot of the Hamann style CF front lip spoiler (from ******), which is about 2 inches thick on either side. The lip actually did come with a couple of holes already pre-drilled on the bottom side (not shown in the photo), but these holes didn't seem to correspond to any obvious attachment points on the underside of the car... 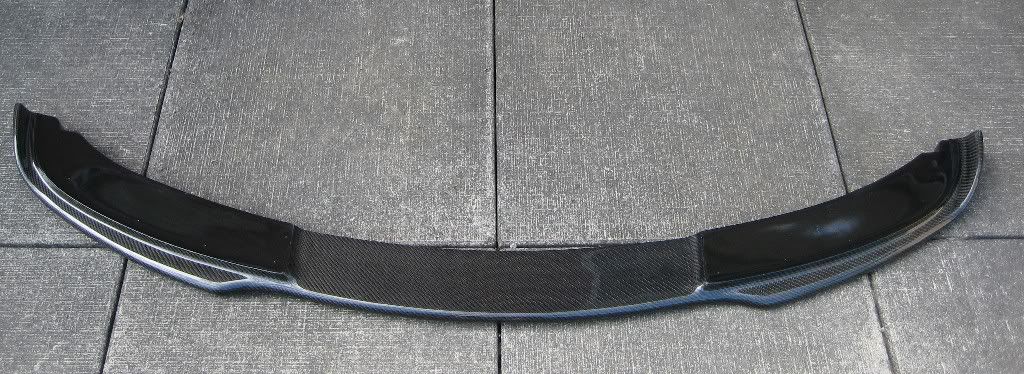 2. I used four 9/64" x 3" stainless steel screws (flat, square socket head) in conjunction with four 3/16" x 1.5" metal washers to attach the lip to the front bumper. 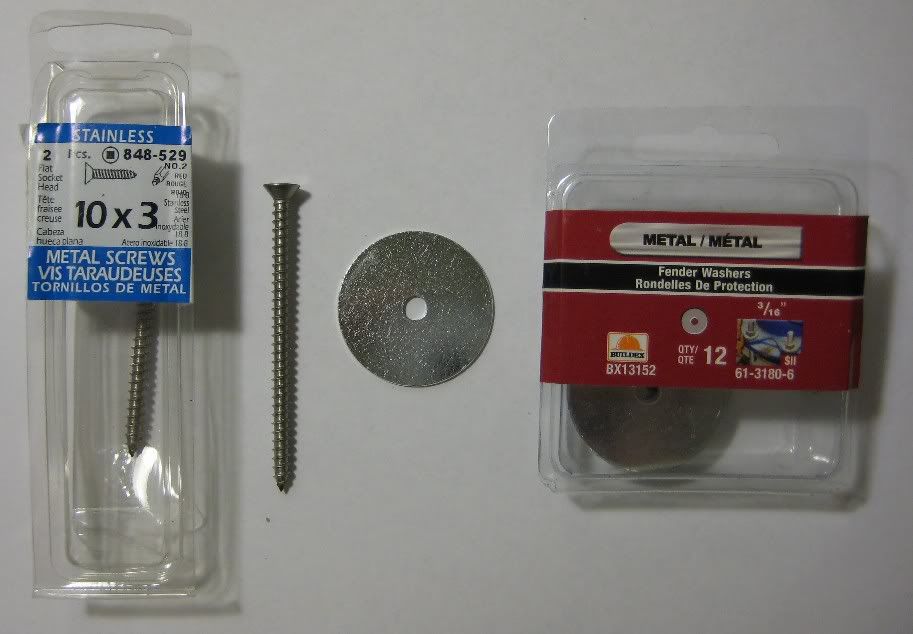 3. A test fit showed that the screws fit nicely into the OEM holes on the underside of the front bumper and the corresponding bracket.  4. To mark where the four new holes should be drilled, remove the front bumper from the car and then place the bumper on top of the lip such that the rear edges of both the bumper and the lip are flush. The photo below shows where the two holes on the left hand side of the lip should be drilled. Two similar holes should be drilled on the right hand side of the lip. 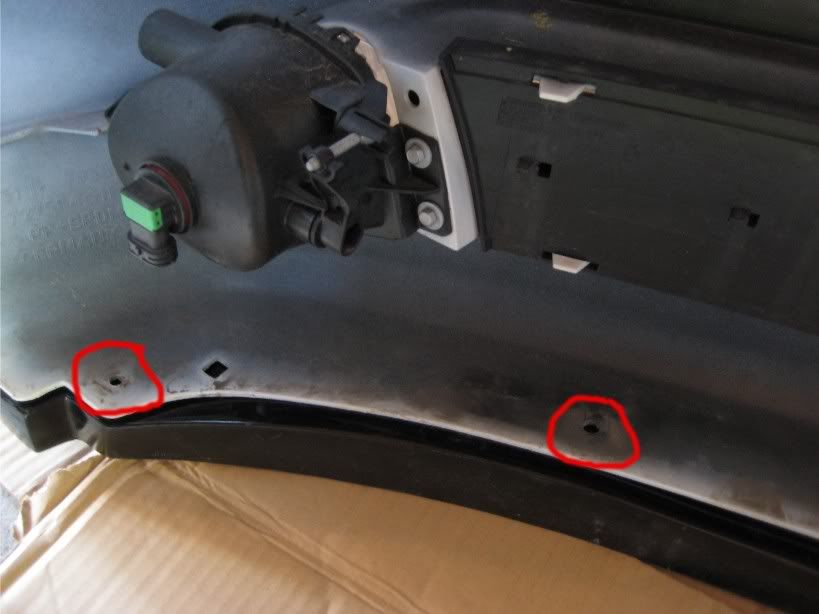 5. Photo of the two holes on the left hand side of the lip after some drilling. Each hole was eventually made to be a little wider than 1/4" in order to allow for some play when passing the screws through the lip during installation. (If you don't allow enough play during installation, the lip may not give a good fitment as the screws become tightened.)  6. Place the front bumper back onto the car, but do not screw anything back on just yet. 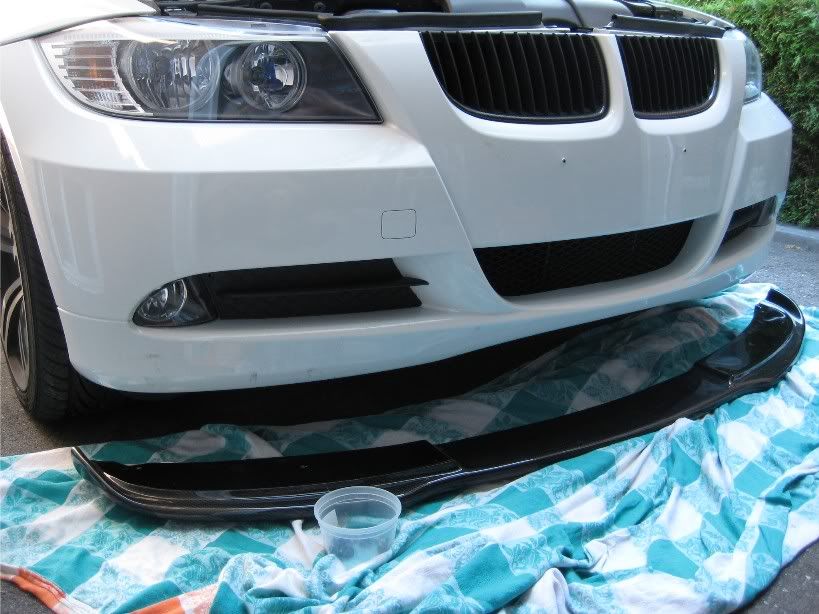 7. Re-install the three bottom OEM screws located beneath the center part of the front bumper (underneath the lower mesh grille piece). 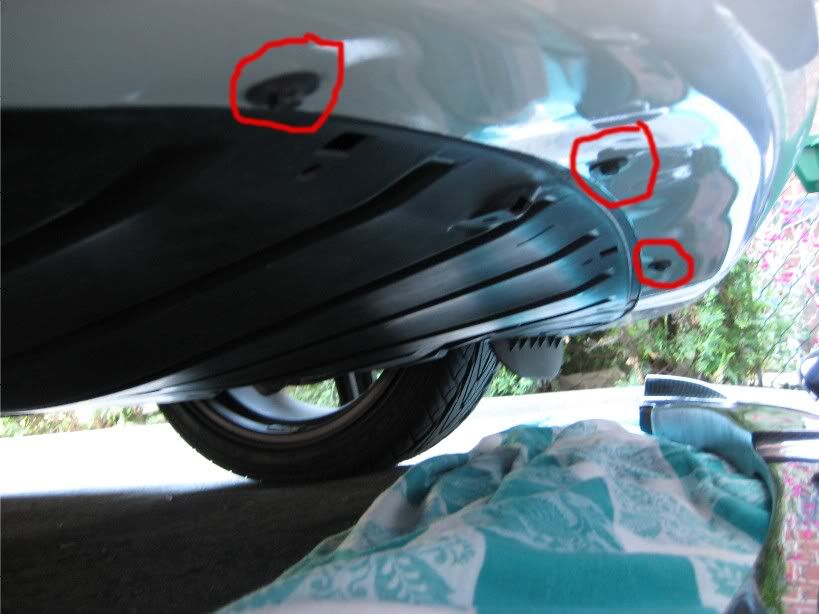 8. Use something handy (like flower pots...) to position the lip underneath the front bumper so that it can be installed. 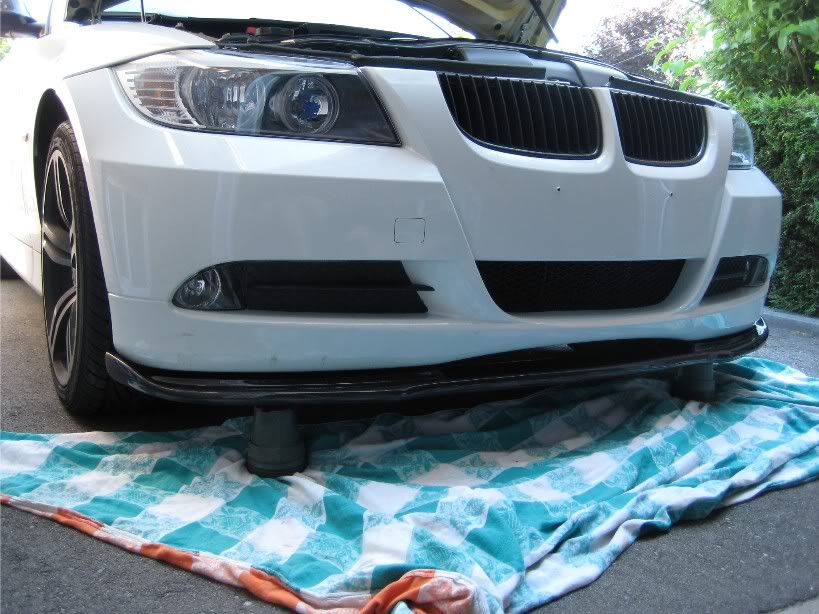 9. Use a ratchet to secure each of the four screws/washers that will hold the lip in place. (The photo shows a washer that is smaller than the one I eventually decided to use.) 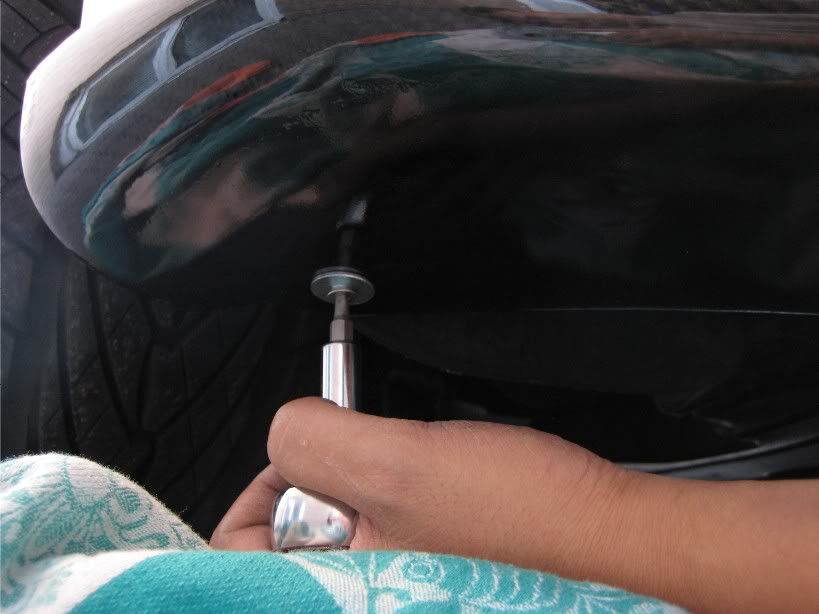 10. After all the OEM screws securing the front bumper are reinstalled and tightened, the lip should appear reasonably flush against the bottom of the front bumper. 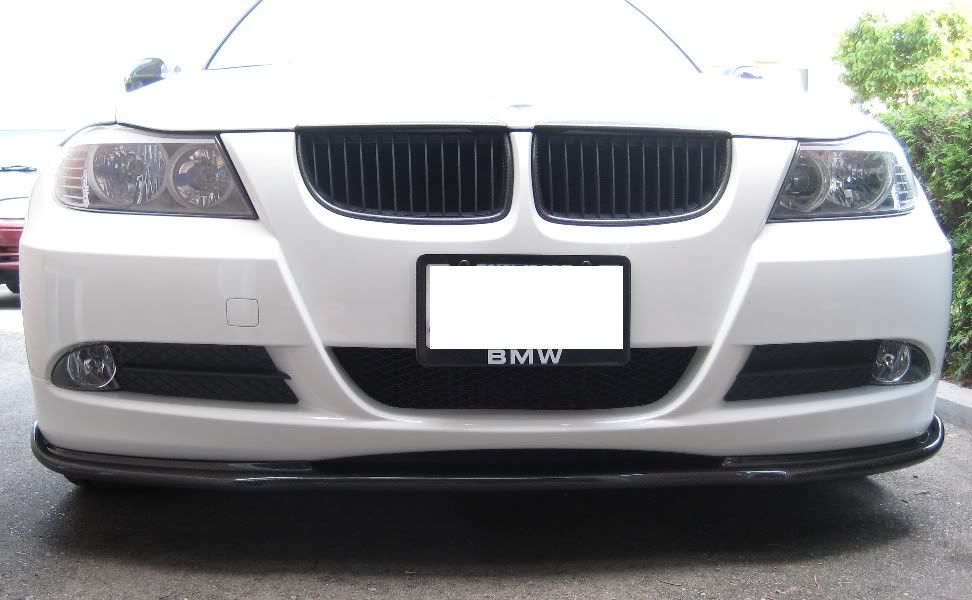 11. Some more views of the installed lip from a few different angles. 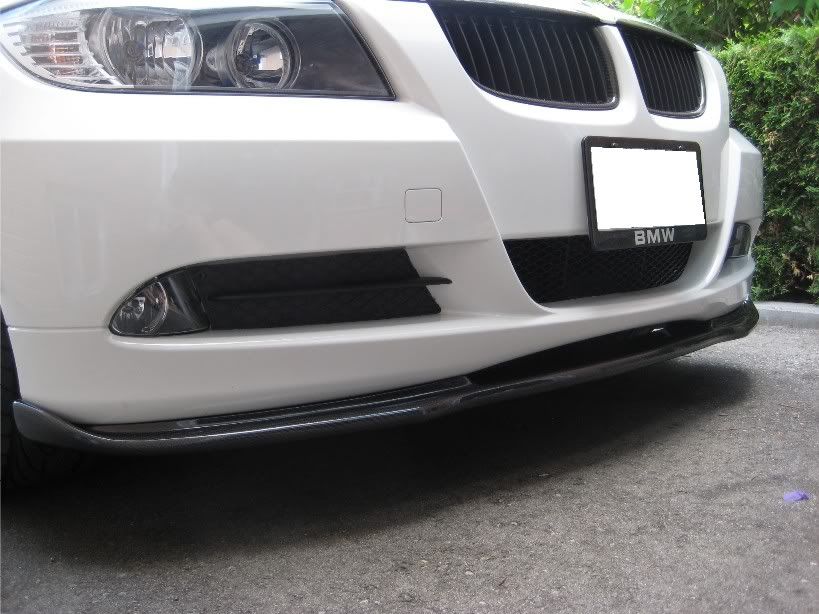 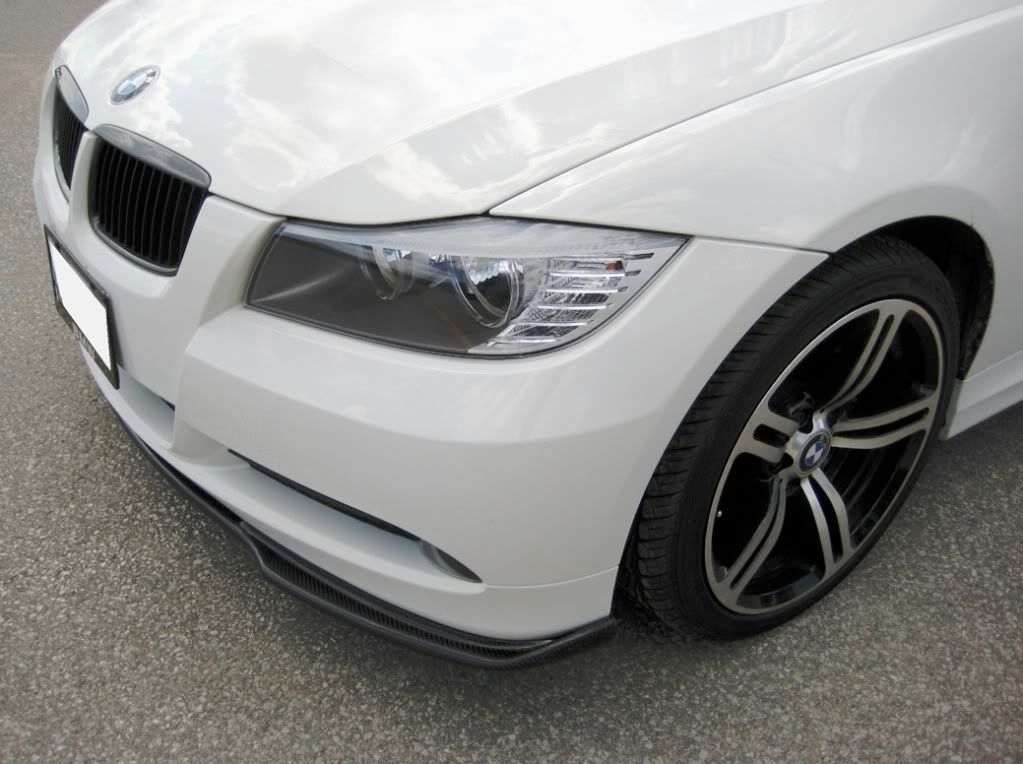 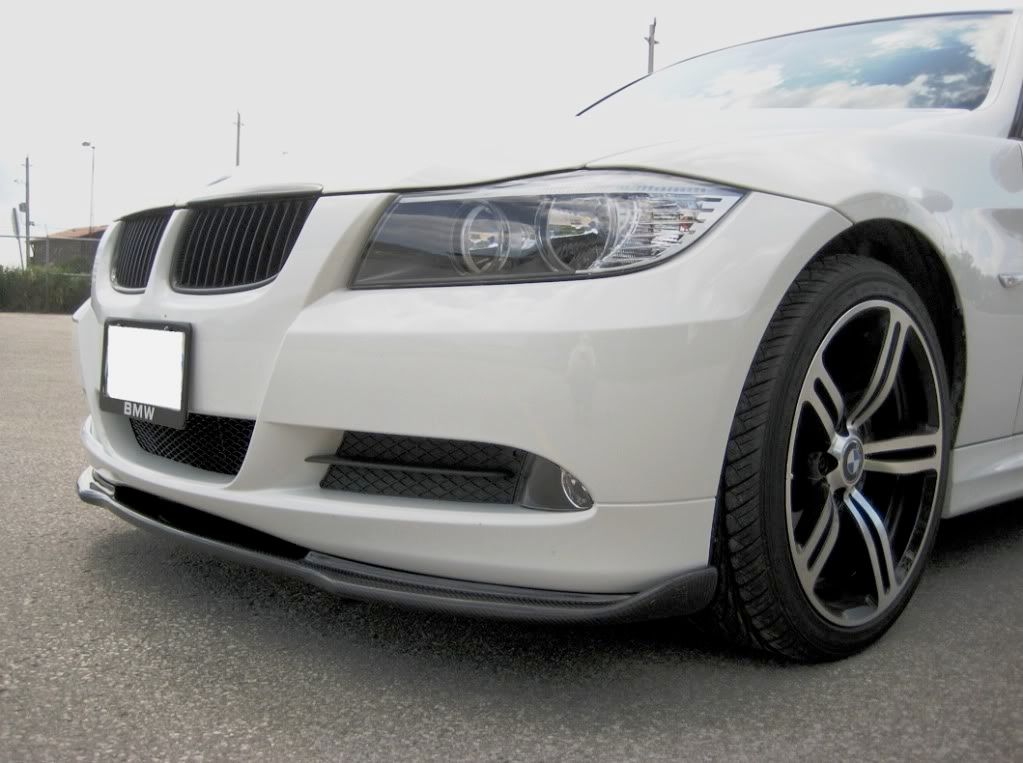 More photos are at http://www.e90post.com/forums/showthread.php?t=281166 and http://www.e90post.com/forums/showthread.php?t=285598 Last edited by ssm12; 07-26-2009 at 08:53 AM.. |
 |
| Bookmarks |
|
|


