|
|
|
|
 |

|
 |
BMW Garage | BMW Meets | Register | Today's Posts | Search |
 |

|
BMW 3-Series (E90 E92) Forum
>
DIY - Clearing your headlights (removing amber/orange reflector)
|
 |
| 03-01-2006, 09:45 PM | #1 |
|
Lieutenant General
 1431
Rep 16,628
Posts |
so as you guys know it is possible to remove the amber lens. this was my experience of removing the lens. if any you guys try to do this, please do it at your own risk. i am not responsible for any damages you cause to your own headlight while trying to remove the amber lens. i am posting this to show how i remove the amber lens. another thing, if you succeed on this project and got a ticket for it, do not blame it on me...so basically what i am saying is please do this at your own risk!!!
it is pretty hard to explain this, but i will try my best to do so. if you guys have had experience taking apart headlights before, then you shouldnt have a problem doing this. here is what i used: flat screw driver heat gun needle nose pliers (need this later to move the plastic back to its place) 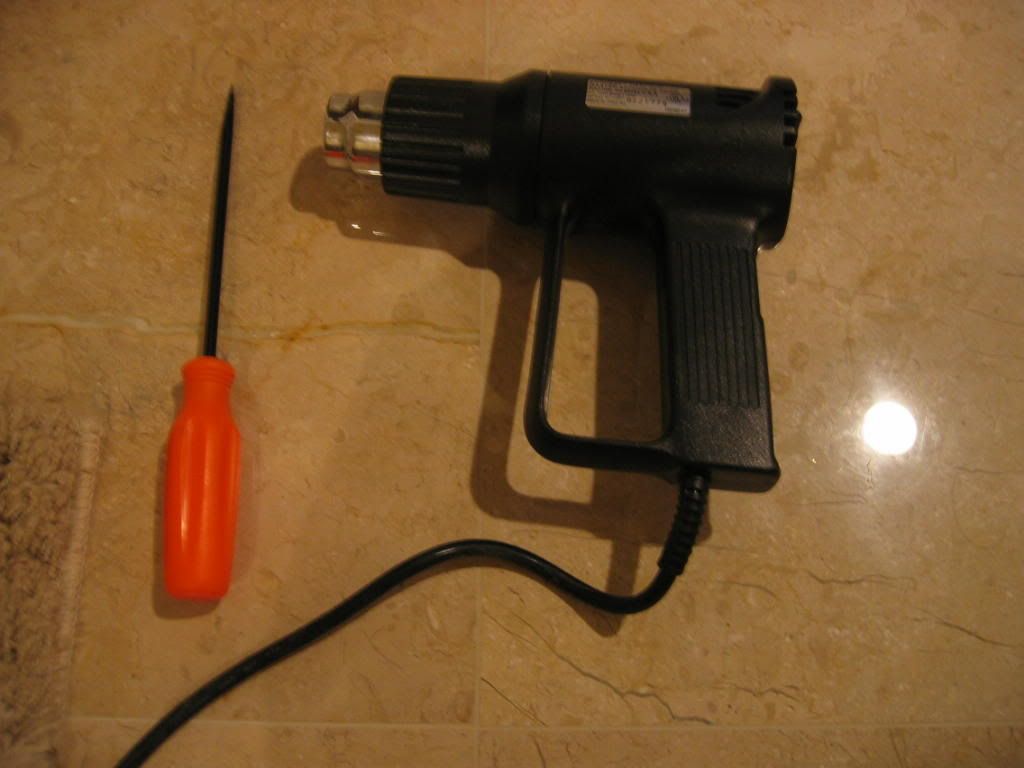 begin by heating each clip and pry it back with the screw driver. (there is a total of 6 clips, do not worry about bending them back too much. you can bend them back later.) 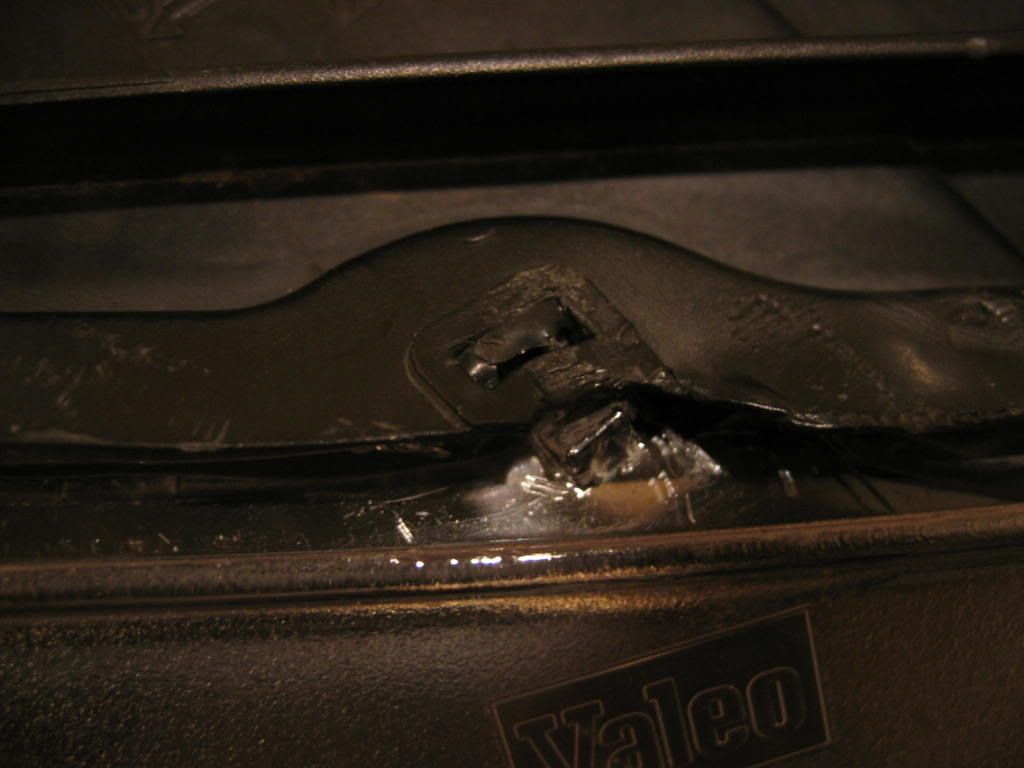 now using the heat gun, start heating up the section you want to begin. i started on top and move to the right. everytime you heat up a section, pry apart the cover from the housing. then move on. continue doing it until you get to about the halfway point. some section are harder than others. like this. it takes alot of time to get it open halfway. just be patient and do not break anything.  now you should be able to get a little opening, like this. 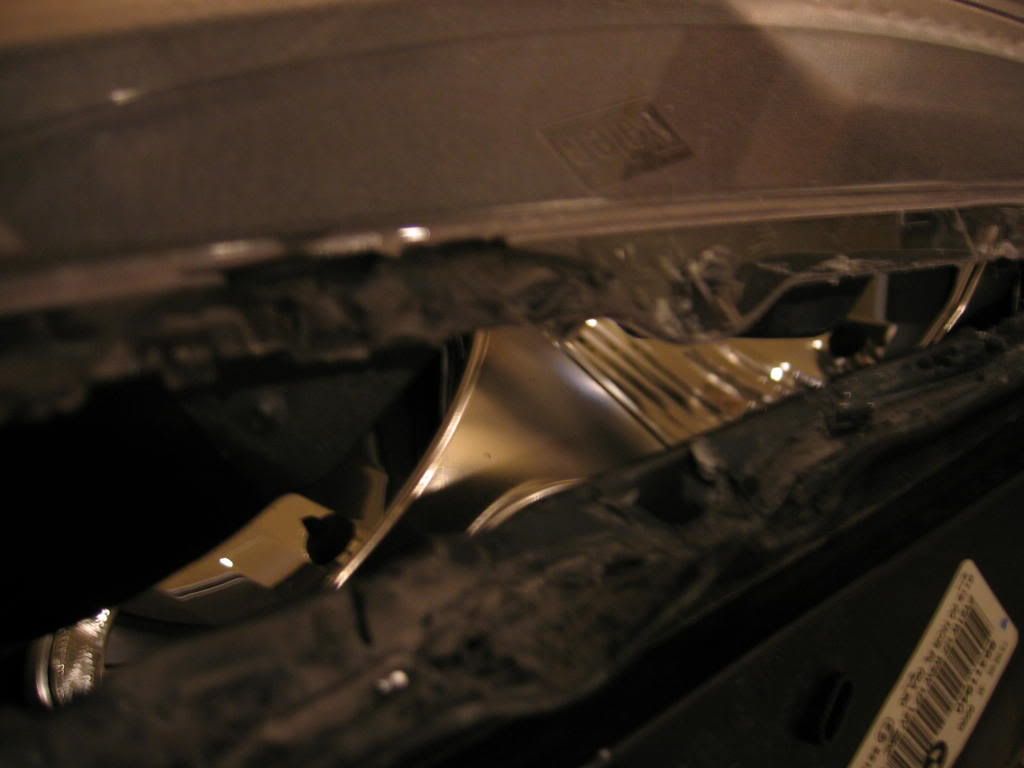 now heat the unpry area really good. this is where you need to put some muscle into it. like this. 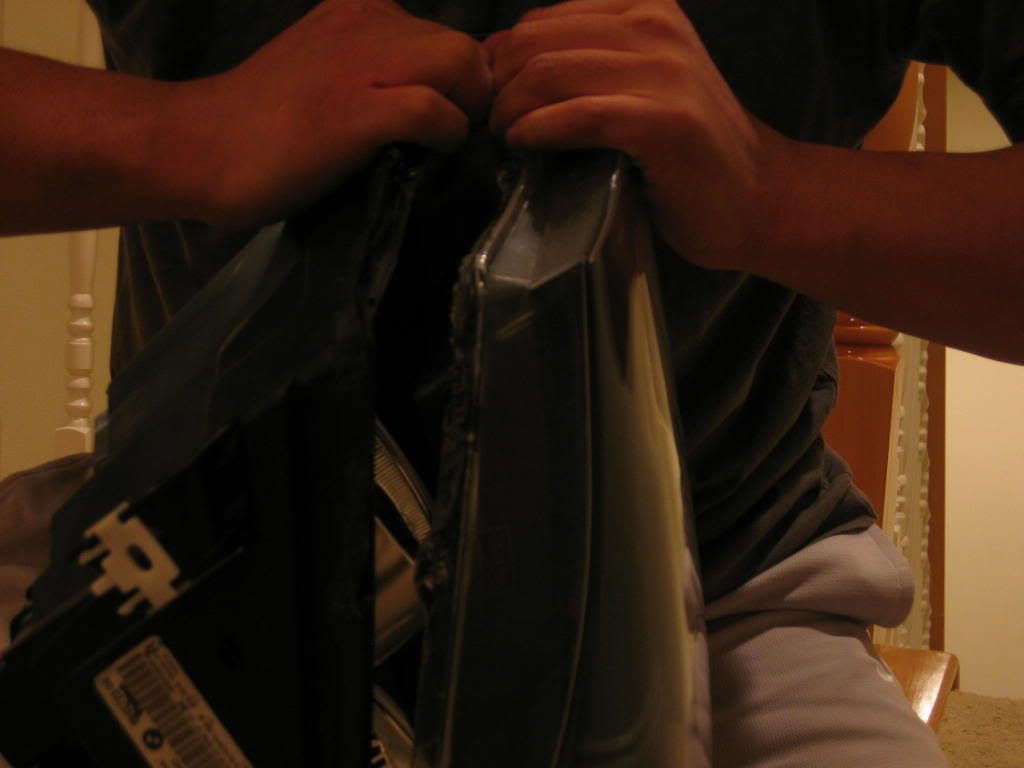 if it is not coming apart, do not force it. just do some more prying. 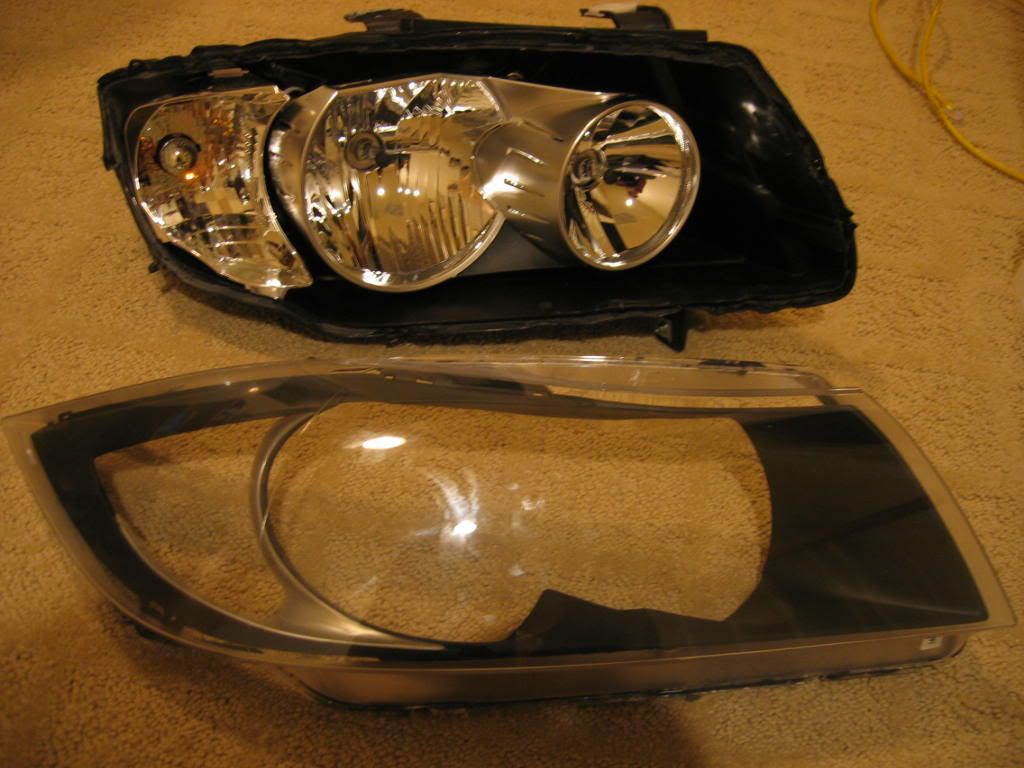 now that you got it apart just use the screw driver to unclip the amber lens. at this point you should be sweating like a pig, tired, wanna go sleep and at the same time feel proud you are saving yourself a bunch of money to make your e90 look good. i have not attempt to put the headlights back together yet. but here is some process i did. now that all the surrounding look like this 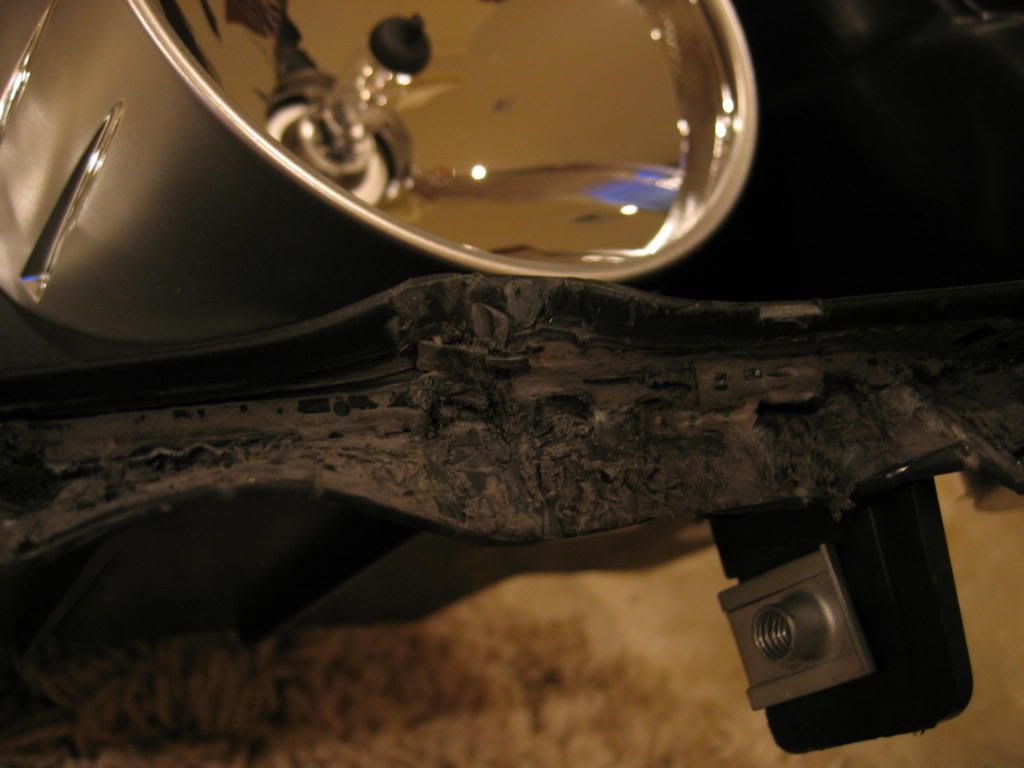 get the heat gun and heat that section up, like this 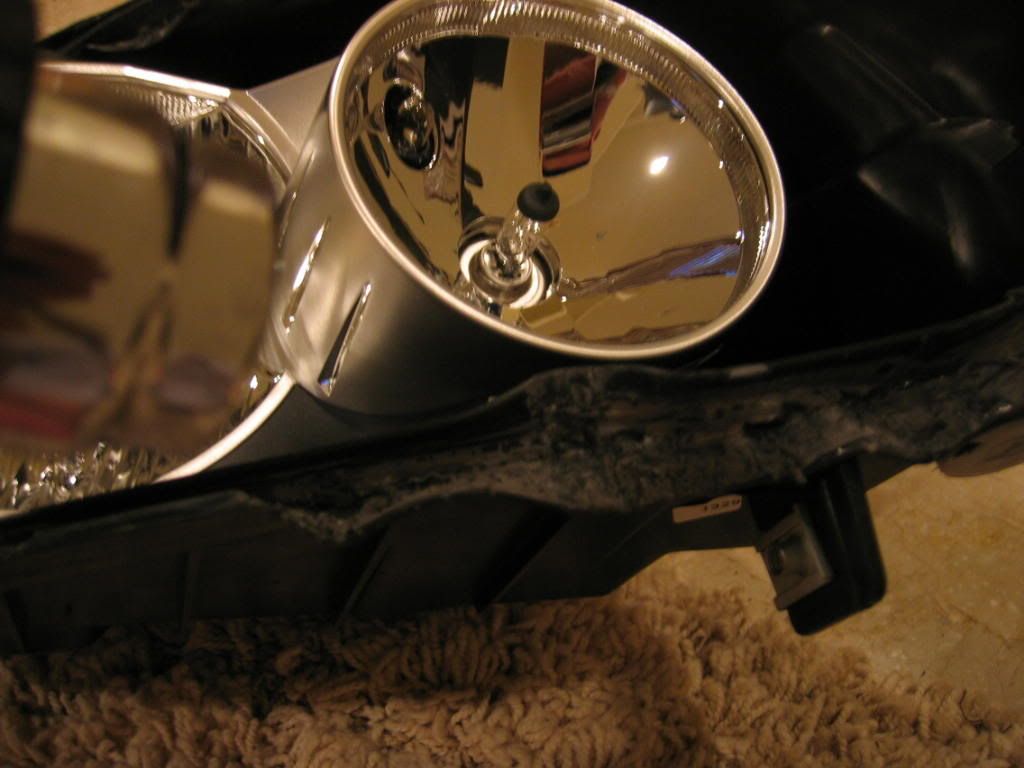 and use the needle nose pliers to put it back to its place. 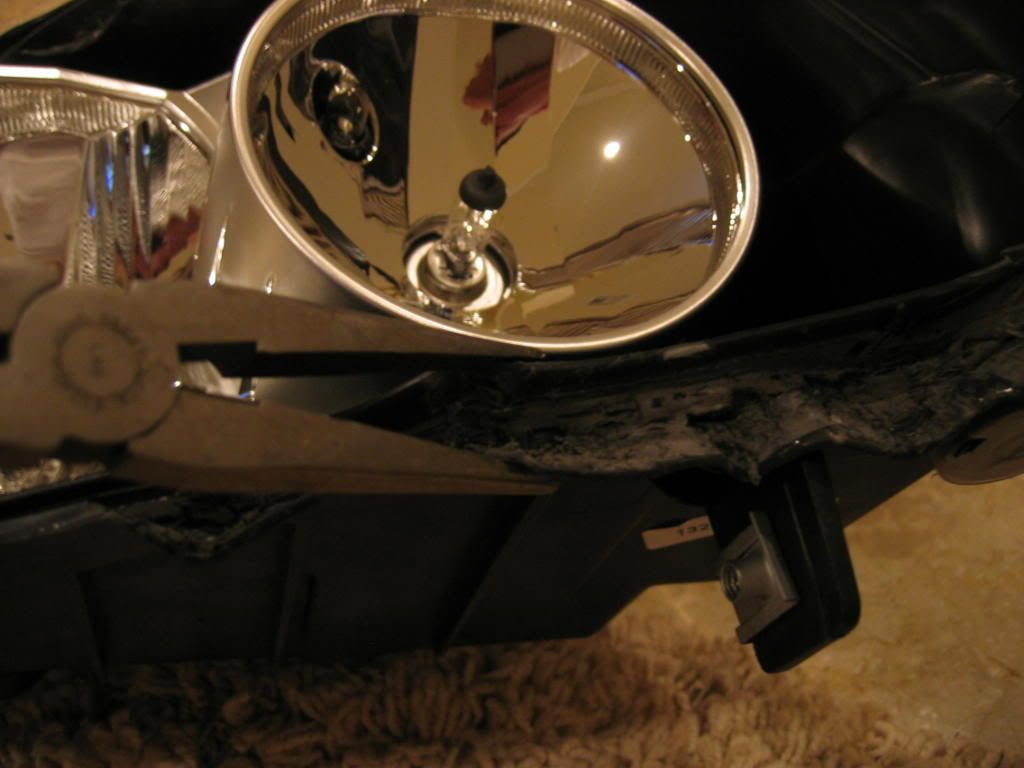 what i recommend is to remove all the old glue. make sure everything lines up. put the cover back on housing to see if it clicks in. go to the dealer and buy the german glue or ask them what can you use to seal headights together. german makes the strongest glue, i think. when you add in the sealer, use masking tape to tape the cover to the housing to keep it in place. leave it for how long the directions recommend you to. this will keep it seal real good. well, thats all for now. i just did this to give you guys hope about removing your lens if you want. Last edited by longtran; 03-07-2006 at 09:38 PM.. Reason: add to tittle |
| 03-01-2006, 10:03 PM | #2 | |
|
Administrator

40836
Rep 21,240
Posts |
Quote:
|
|
|
Appreciate
0
|
| 03-01-2006, 11:07 PM | #4 |
|
Moderator

497
Rep 27,441
Posts |
thanks!
i'll have to debate hard whether to do this. love the look without the amber though!
__________________
|
|
Appreciate
0
|
| 03-02-2006, 01:26 AM | #5 |
|
there is no spoon
243
Rep 867
Posts |
Does the glue seem harder to heat up on these headlights then others you've done? The glue and everything looks pretty similar to other headlights I've pried apart. I always just use hair dryer combined with the oven, haha. And about 5 different screw drivers.
__________________
[SIGPIC][/SIGPIC]
|
|
Appreciate
0
|
| 03-02-2006, 02:11 AM | #6 | |
|
Lieutenant General
1431
Rep 16,628
Posts |
Quote:
|
|
|
Appreciate
0
|
| 03-02-2006, 11:21 AM | #7 | |
|
there is no spoon
243
Rep 867
Posts |
Quote:
__________________
[SIGPIC][/SIGPIC]
|
|
|
Appreciate
0
|
| 03-02-2006, 11:40 AM | #8 | |
|
Lieutenant General
1431
Rep 16,628
Posts |
Quote:
|
|
|
Appreciate
0
|
| 03-03-2006, 08:35 AM | #9 |
|
Lieutenant General
156
Rep 10,411
Posts |
I cant wait for pics on the car
__________________
2010 AW e90 328i: 6 speed, Black Leather, Dark Wood trim, ZPP, ZCW, ZVP,ZSP, Nav, Xenon
BMW Performance CF Rear spolier and Gloss black grills 2008 Candy White MKV GTI 2.0T 6 Speed Manul Gone 2008 AW X3 3.0si: 6 speed Returned 2006 AW e90 330i: 6 speed Dinan Stage 1 Returned |
|
Appreciate
0
|
| 03-03-2006, 11:31 AM | #10 | |
|
there is no spoon
243
Rep 867
Posts |
Quote:

__________________
[SIGPIC][/SIGPIC]
|
|
|
Appreciate
0
|
| 03-03-2006, 02:53 PM | #11 | |
|
Lieutenant General
1431
Rep 16,628
Posts |
Quote:
i dont think it is possible to do it with the e90. |
|
|
Appreciate
0
|
| 03-03-2006, 03:14 PM | #12 | |
|
there is no spoon
243
Rep 867
Posts |
Quote:
__________________
[SIGPIC][/SIGPIC]
|
|
|
Appreciate
0
|
| 03-04-2006, 12:55 AM | #15 | |
|
Lieutenant General
1431
Rep 16,628
Posts |
Quote:
|
|
|
Appreciate
0
|
| 03-04-2006, 01:14 AM | #16 |
|
Major
 83
Rep 1,329
Posts |
longtran: excellent diy! thank you. Can you please tell me where to get spare ones for cheap so i can tinker with it too?
By the way, instead of using masking tape to hold it together, did you consider using a plastic clamp you can get from home depot? they sell these blue and yellow colored plastic clamps that have soft edges and i think they may work much better at creating a tight bond. and if you use it gently, you may be able to return it later.  hehe. hehe. |
|
Appreciate
0
|
| 03-04-2006, 05:12 AM | #17 | |
|
there is no spoon
243
Rep 867
Posts |
Quote:
__________________
[SIGPIC][/SIGPIC]
|
|
|
Appreciate
0
|
| 03-07-2006, 10:04 PM | #18 |
|
Lieutenant General
1431
Rep 16,628
Posts |
PART II: sealing the headlight.
things you need: 1. box cutter 2. heat gun 3. needle nose pliers 4. betalink k1 (germn glue use to install spoiler) 5. hose repair tape (optional) 6. dremel (optional, makes life easier) 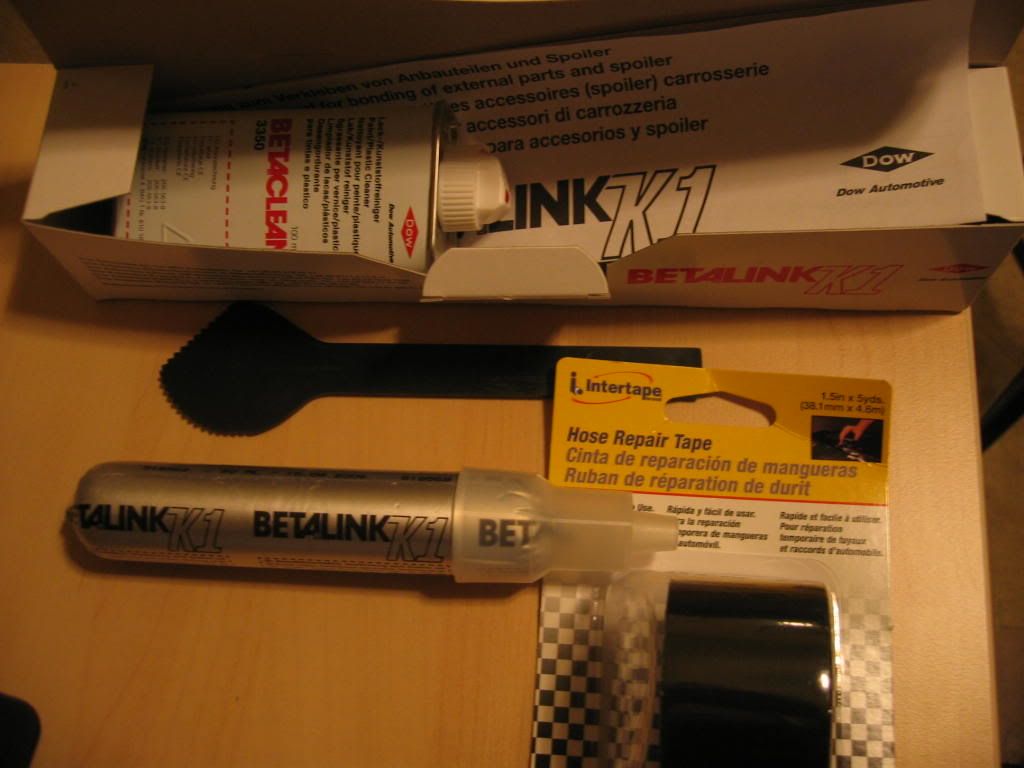 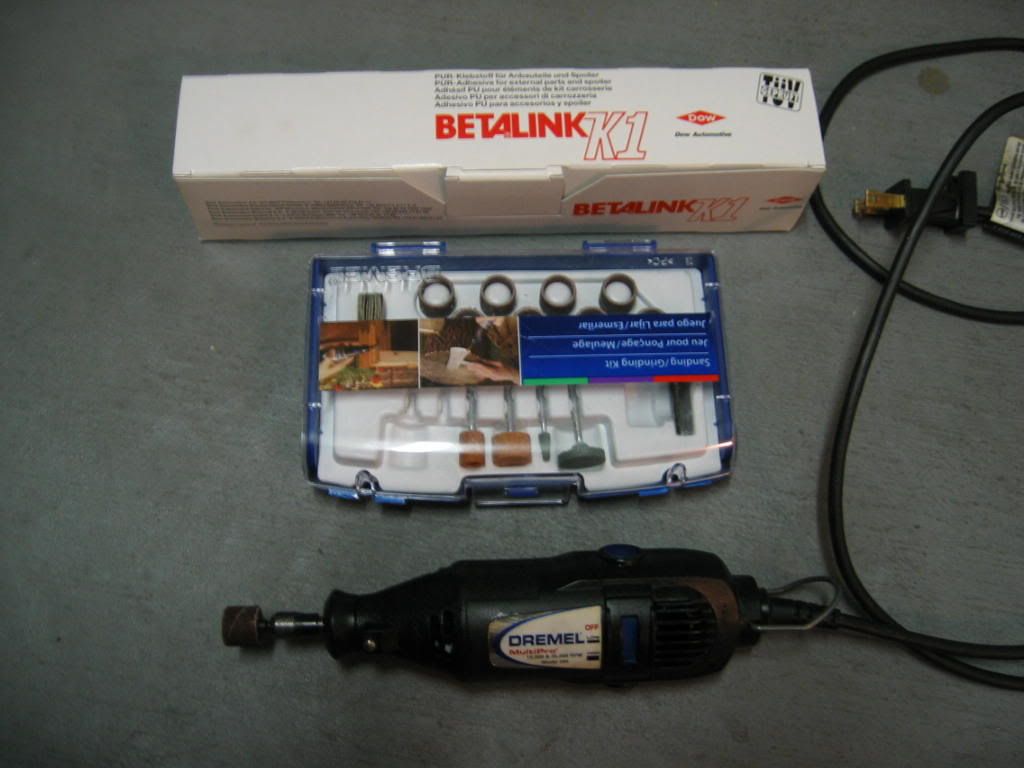 first off i heated the section that were over pried and moved it back to its original place with the nedle nose plier. (dont have to be exact). from here i do not have pictures because i did this at work. once it kinda look like it was before, use the box cutter to clean out the old seal. just kind of slice it away from the plastic. use the dremel with the sanding bit to clean deep inside. if you do not have a dremel, keep picking out the old seal. now everything is cleaned, fit the cover back on to make sure it goes back in. if it doesnt you need to clean the seal more or adjust the plastic piece with the heat gun. do not rush. at this point the clear cover should fit back in the housing. not perfect but enough. use your own judgement. if you dont trust your judgement, go the extra mile to clean more old seal out or move the housing around to make it fit good. mine did not go in perfect but it was enough to seal. make sure evey dust, partical, dirt, hair, or any debris are clean from the inside. i used an air compressor to blow all the dust out. i also washed the lense with dawn liquid soap. make sure it is dry before continuing. now, with the BETALINK K1 add it in the crack where the lense will sit in. 1 bottle should be more then enough. do not use it all at once. you should have 1/4 left after going around the headlight. it is very important to save 1/4 or to make sure buy 2 tube. you can now put the lense on. (make sure you practice this without the seal many time before doing with the seal) make sure it is nice and tight. use some sort of tape to hold them together. i used duct tape. go around the headlight once again and look for gaps. this is where the 1/4 seal comes in. try to seal it up real good. so you wont have leaks. here is a picture of the headlight with the tape. 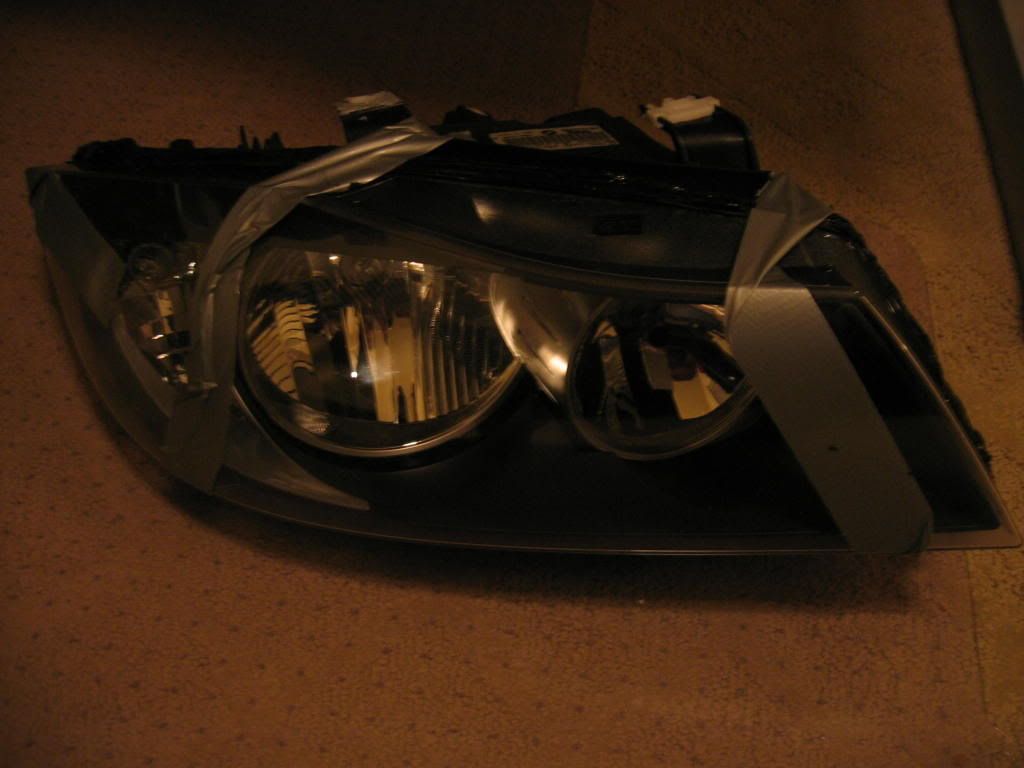 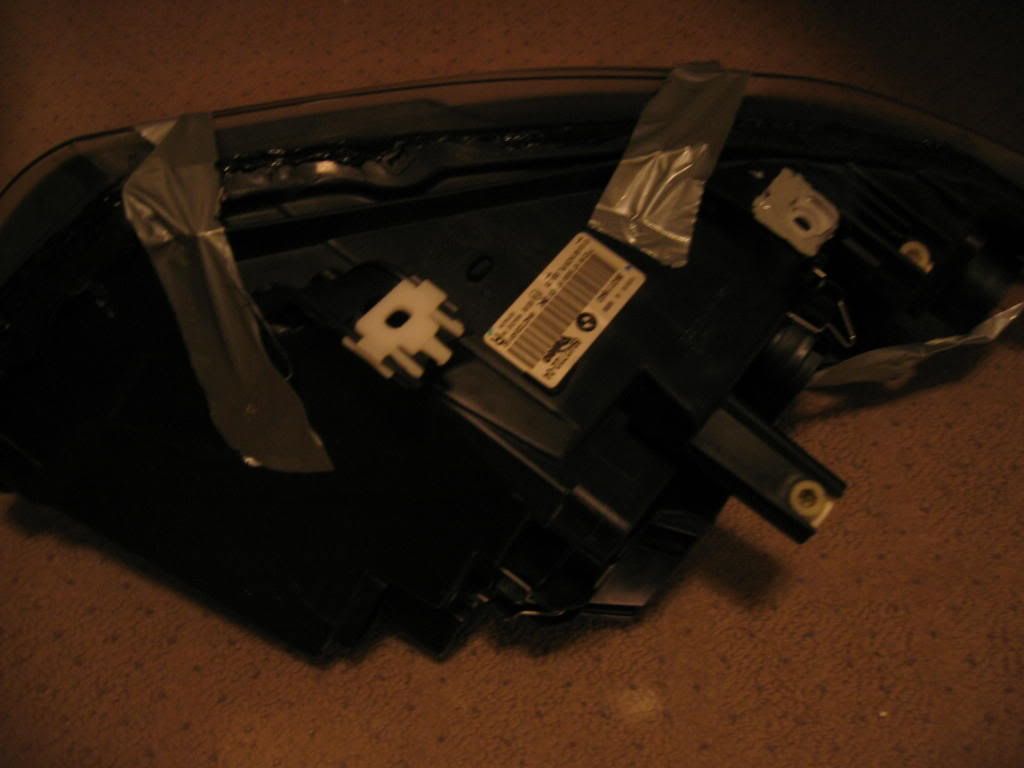 i let it sit for about 6-7 hours before touching it. after the wait, remove the tape. at this point you should be almost done. i would let it sit for 24 hours beofre putting it back on your car. for extra precaution i used hose repair tape to cover the seal. this will help seal any leak. (if this thing can stop a hose leak for temp, it should seal pretty good, plus it gives a cleaner look) here are some pictures of the finish product. 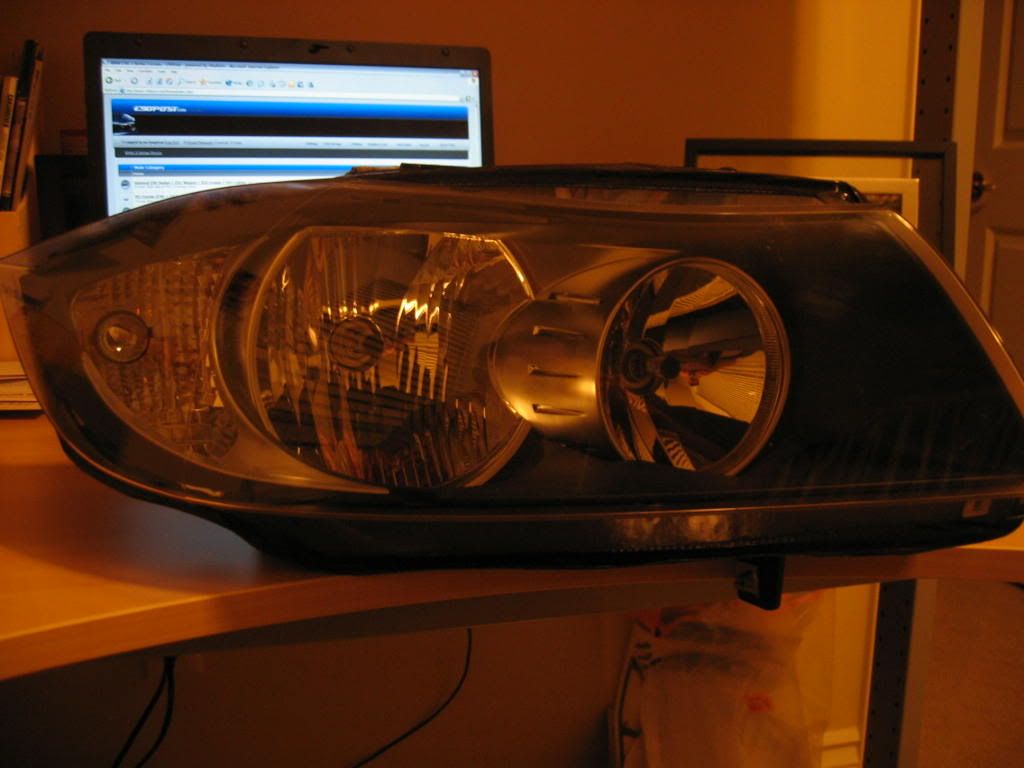 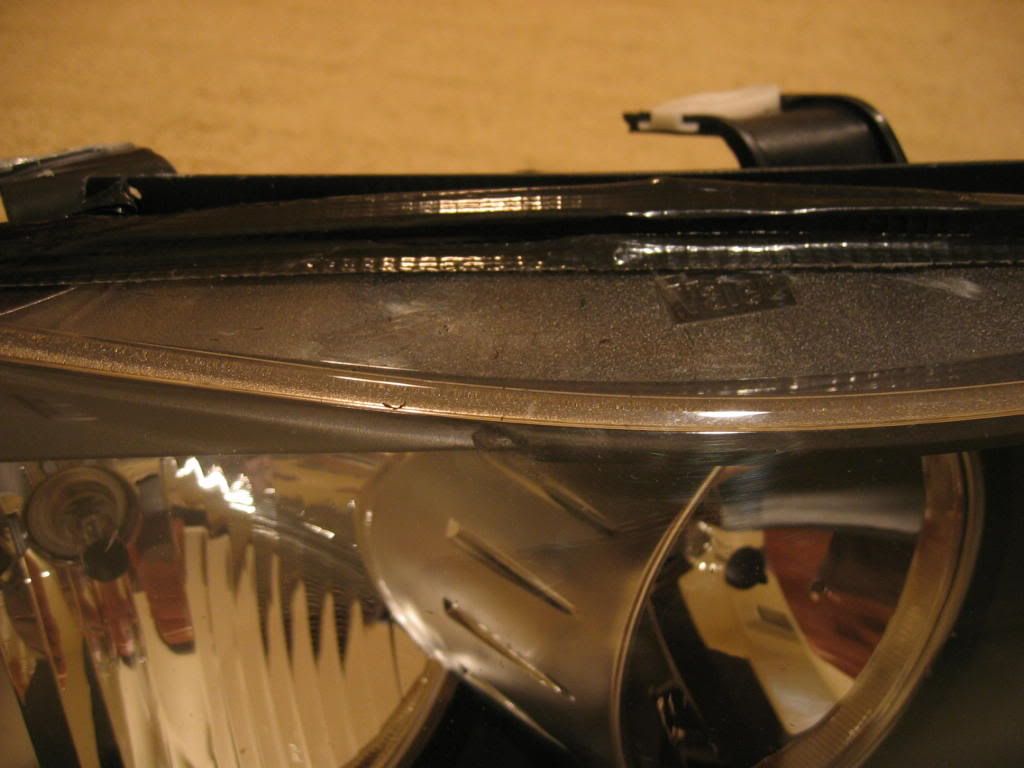 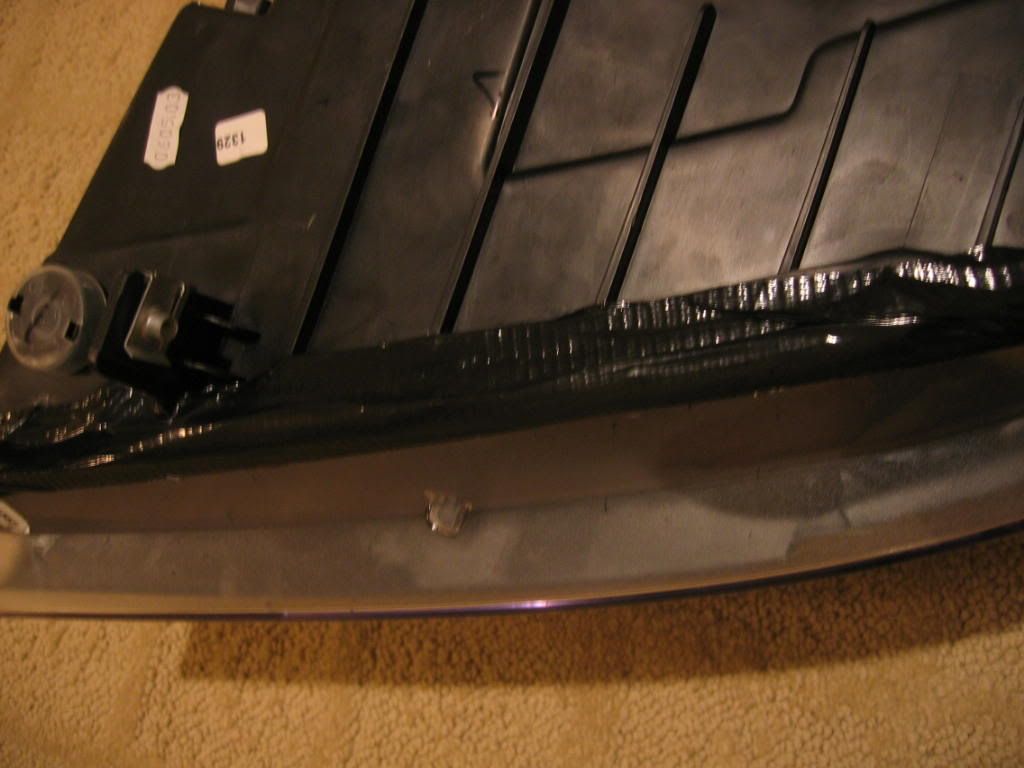 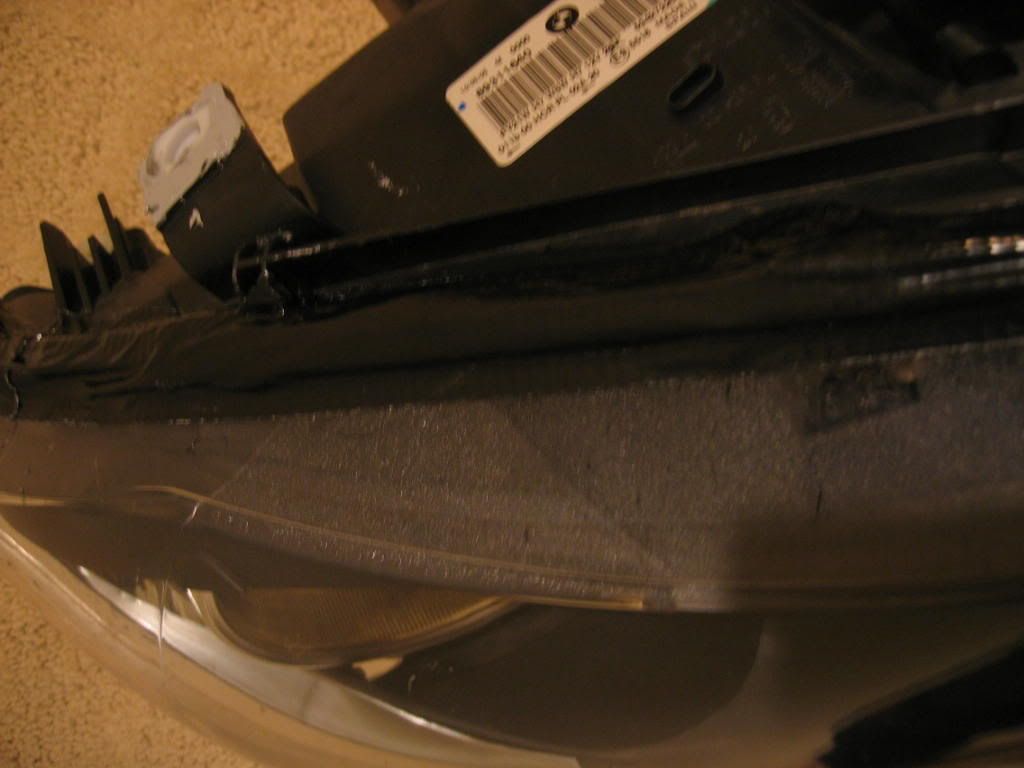 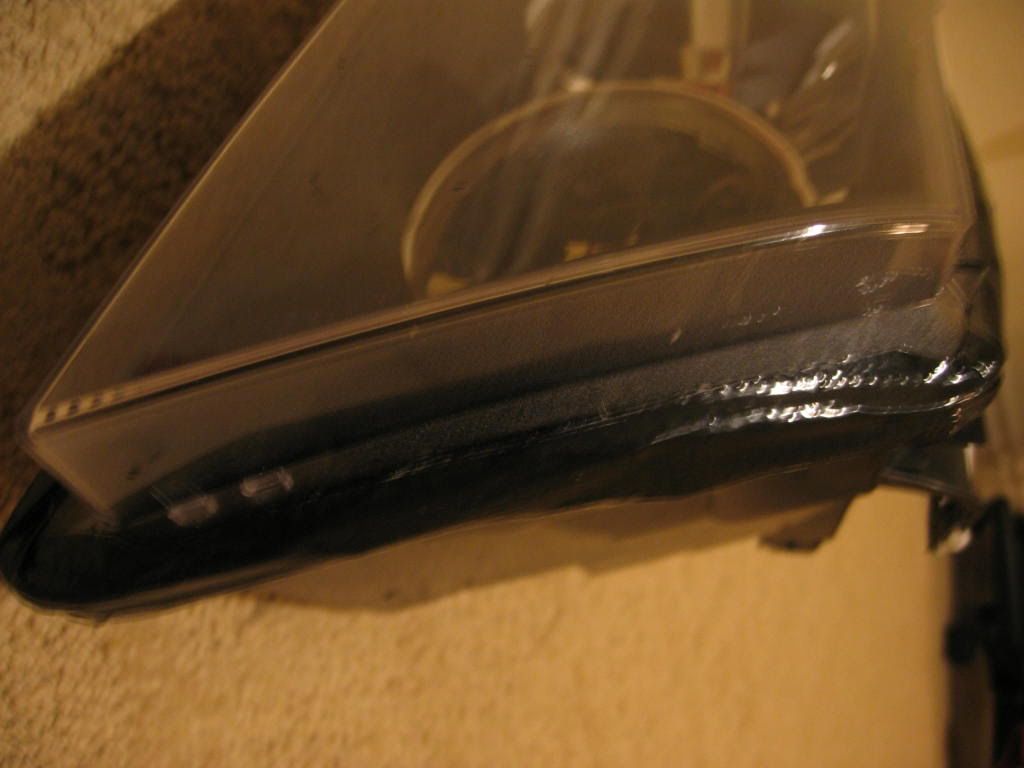 hopefully this will not leak. does anyone know how i can check for leaks or condesation???? |
|
Appreciate
1
spurcap4.50 |
| 03-07-2006, 10:11 PM | #19 |
|
LTBMW

106
Rep 1,068
Posts
Drives: 2008 AW e92 M3
Join Date: Jul 2005
Location: Ladera Ranch, CA
|
take a shower with it..hahhaha
__________________
tuned by LTBMW
|
|
Appreciate
0
|
| 03-07-2006, 10:13 PM | #20 |
|
Colonel
 150
Rep 2,419
Posts |
Long, you're brave, man. You have the halogen ones, and it's worth to do this. If you screw up, you can always get the Euro version on ebay for ~$600. For bi-xenon, damn, it will cost us ~$2600-$3000 if we mess up the job. By the way, good job. it looks better.
|
|
Appreciate
0
|
| 03-07-2006, 10:45 PM | #21 | |
|
Lieutenant General
1431
Rep 16,628
Posts |
Quote:
|
|
|
Appreciate
0
|
| 03-07-2006, 11:44 PM | #22 | |
|
Chicketeh china the chinese chicken, you have?
34
Rep 790
Posts
Drives: 335ci hold out
Join Date: Oct 2005
Location: San Francisco
|
Quote:
__________________
"In Soviet Russia car forks you!"
 |
|
|
Appreciate
0
|
 |
| Bookmarks |
|
|