|
|
|
|
 |
|
 |
BMW Garage | BMW Meets | Register | Search | Today's Posts | Mark Forums Read |
 |

|
BMW 3-Series (E90 E92) Forum
>
DIY E90 N54 Valve Cover Gasket
|
 |
| 02-13-2015, 10:03 PM | #155 | |
|
Boosted


28
Rep 183
Posts |
Quote:
The car is extremely loud without all the engine covers back on. It sounds like a diesel for sure. It's those direct injection injectors under extremely high pressure. Once all the engine covers and cowl are all installed back in it'll be quiet and normal again.
__________________
2012 135i
|
|
|
Appreciate
0
|
| 02-16-2015, 08:03 PM | #156 |
|
Registered
0
Rep 2
Posts |
Just finished mine, here are the tough parts and some tips
I had read this thread over and over again and helped me decide doing this myself. BMW charges for Vanos $800, valve cover replacement $2,300, Walnut blast $1,200, oil filter housing gasket $400 and oil cooler gasket $390. I saved thousands and thanks to all who participate in making it easy to keep our N54's running and sharing your experiences. To do something back here are the things i found to be hard, easy and what to be careful with.
It took me around 12 hours to replace valve cover, Vanos solenoids, walnut blast, oil filter gasket replacement and oil cooler gasket replacement. tough bits: When removing manifold (walnut blast) it was difficult to remove box from clips attached to bottom of manifold. Oil everywhere in air ducts, lots of cleaning. Difficult to remove breather hose in back without breaking part, the clip that holds the hose in place locks on all four sides and all need to be disengaged simultaneously, I managed to fold aluminum into little bits and insert them under clip one at a time. the other side of the breather hose that is connected to heater was hard to get loose. Valve cover was stuck on head (I had a new cover because my old had a crack so I was not worried breaking it ) and took a crowbar to pry it of!!, Be careful not to scratch aluminum block and the seal surface is close to outside of block so don't insert tool too deep. Do it on the high side of the block in case you do scratch something as there will be less oil accumulated on that side. Tip 1: (valve cover) I had to leave on a trip the next day and when I came back the bolts from the valve cover were all loose 2 days later (could turn them with hand easily) even if they were torqued properly the day before. The seal seems to work its way in the plastic cover so pay attention to this and redo this a few times with same torque setting. Tip 2: (removing manifold) If you need to remove manifold (walnut blast) you don't need to cut these two vacuum tubes from that hose (next to oil filter). Some people mentioned they broke off those barbed fittings, simply remove complete hose (the one with the barbed fittings) with the vac hose still intact, it connects to HPFP (but almost impossible to access in there with manifold still in place. Make sure you walnut blast only when the valves are closed, remove the connector on the starter motor and Jerry rig a wire to the pin on the starter motor that is now exposed (don't connect to connector on wire but on starter motor, tapping with the other end on the red positive clamp makes the engine crank, do one at a time where the valves are closed. I was able to run this of my battery without charger but battery is largest i could fit and brand new. Tip 3: (general) Make sure you have all tools and parts (wife was out with other car and had to use my bicycle to go buy some tools hence the long time I spent on this project. I also had the oil filter housing gasket and oil cooler gasket which were around $10 each but lost as they got thrown out with trash and bubble wrap. Local BMW charges $74 each. Tip 4: (oil filter housing gasket) Get a torx wrench set (E10 and E12) and cut them short. Removing the bolts on underside oil filter gasket is a pain. 1/4" of thread and a 2" bolt. Lots of 10° turns, took me an hour, then at end dropped the wrench. On my bicycle again to get a retrieval tool (the one with 4 prongs), Make sure you have one since they are only $2.78 at hardware store. Tip 5: (oil cooler housing gasket) Remove oil lines to oil cooler (if equipped with one). Removing this oil cooler housing (the one attached to oil filter housing) can be a pain, the torx in the bottom front is also very hard to get too but these two oil hoses on bottom can be removed with a hex socket, there is a bolt right between the two hose connections. Then torx screw is ready available. Tip 6: (engine model N54 changed after 9/2009!!!) Buy the right parts, N54 engine changed after 09/2009!!!, Throttle body gasket is much smaller now, me on my bicycle to BMW once again. Injectors are different too, electrical connector not the same as the pictures I saw in this blog. Tip 7: If cracked valve cover, fix right away as it usually cracks at the filler plug, oil sips into spark plug holes, filling these up and killing coils. A couple of coils is more expensive than a valve cover. Good things: No broken bolts, cranked right up. Throttle response is much better, I used to have a one second delay, now it's imminent. So far 4 mpg better in similar driving (actually I drove in DS today where i use to drive in D with cracked valve cover), not sure if this is from cracked valve cover or manifold. Hope it helps |
|
Appreciate
0
|
| 02-25-2015, 07:37 PM | #157 |
|
Registered
0
Rep 1
Posts
Drives: 2007 BMW 335i Sedan
Join Date: May 2014
Location: Fontana Ca 92335
|
valve cover replace 07 bmws 335i sedan
Thank you for this diagram. Im about to change my valve cover gasket since my car is smoking inside the engine compartment when its how and checked my gasket they are all wet... I have 86k miles on mine.
|
|
Appreciate
0
|
| 03-03-2015, 11:41 AM | #159 |
|
Enlisted Member
 16
Rep 32
Posts |
Big thanks to you for this great DIY! I just did valve cover gasket + oil filter housing gasket last week. I did break two plastic wire clips but it was not a big deal given the age of the car (115k). I just tied them to the fuel rail. The MPG seems to be improved from 18 to 19.5 on my daily routine between home and work.
|
|
Appreciate
0
|
| 03-04-2015, 11:12 AM | #160 |
|
Second Lieutenant
 

20
Rep 256
Posts
Drives: 335i M3 Look
Join Date: Feb 2014
Location: Denmark
|
have a stupid question:
Any way to do the OFH without draining everything. Im doing the intake valves now(manifold is off) , so acces to the bolts is good.. but garage space is very limited so cannot jack it up. Can I drain oil from above, just enough to be able to change the OFH gaskets without oil everywhere..? (N54 6MT with OEM oilcooler) |
|
Appreciate
0
|
| 04-03-2015, 10:43 PM | #161 |
|
Private
 15
Rep 78
Posts |
on my second valve cover
i just wanted to post a comment on the mileage mine was discovered leaking. i had my original valve cover gasket replaced under CPO at around 85-95k miles, i cant remember the exact number. It is an 06 330i. it was discovered leaking again by the dealer this week during an oil change, along with the oil pan gasket. I currently have 157k miles. although its being replaced again, i cant say for sure that not replacing the bolts had any influence. I doubt they replaced them, but i will confirm that when i take a look, but i wont be doing it soon since i just got an oil change, unless it gets worse. Also, the service advisor has been helpful the last couple times, usually offers advice since i do my own maintenance. He suggested i change the o rings by the injectors and somewhere else as part of the job. I'll have to look at the engine schematic.
other maintenance by me with the life of the car. brake fluid, coolant drain/fill. top your coolant. level stick is there, use it. rotors (front just recently, wow)/brakes tie rods water pump/thermostat failed suddenly at 130k. belt tensioner 100-130k mi? lifetime alignments, tire rotation, wheel balance i also have a rear main seal oil leak discovered at about 103k mi transfluid drain n fill/filter at 103k mi (oil life per manufacturer is 40-80k mi) safety recall of airbag mat sensor (free) this maintenance done DIY is reasonable enough for the cost of having this car and not buying a new car (used). I take the car to BMW for the $80 oil change every 15k and it gives me a free checkup on the rest of the car, take advantage of this because parts alone for an oil change is about $75. if you are keeping your car a while, buy the water pump, thermostat ahead of time. it is a sudden failure and you will have to go to the stealer. buy parts online, save money. I also ran down the rotors way past the wear sensors interval, they had plenty of material left, the rotor face was perfect. Be smart. winter tires are worth every penny, it is a must. and get a bentley manual. Thanks to everyone who post detailed step by step DIY's as well. Last edited by RectalItching; 04-03-2015 at 10:50 PM.. |
|
Appreciate
0
|
| 04-08-2015, 10:02 PM | #162 |
|
New Member
1
Rep 29
Posts |
Great write up! I really appreciate that someone did this. I did this myself the other weekend and it took me about 8 hours total. One thing to add may be to insert the spark plug metal housing from the top when putting the valve cover back on. this made my life a lot easier than trying to work the cover onto these metal housings.
|
|
Appreciate
0
|
| 05-10-2015, 02:04 PM | #163 |
|
Private
4
Rep 89
Posts |
6 Connectors on Fuel Injectors
There is a small wiring connector on each of the 6 injectors. The tabs holding them in place are very brittle. I had 5 casualties. You'd think I'd learn after the first one (definitely after the second), but they're just a nightmare to deal with. They should still stay in place, however, because male end has a rubber grommet and fits vertically down into the female end (mine were still a snug fit).
I imagine, mechanics break quite a few clips and tabs along the way, but we're none the wiser. |
|
Appreciate
0
|
| 06-12-2015, 04:10 PM | #164 |
|
New Member
3
Rep 22
Posts |
So I replaced my VCG and ran into a few problems.
1. One of my ignition ground connectors wouldn't screw all the way down, not sure why. 2. Im having trouble putting fuel rail back on. When I finished everything, one of the fuel lines was leaking when I started up the car. I tightened it, but it still slowly leaking. 3. I over torqued a bolt head and it broke off, so a mechanic told me the whole valve cover is going to have to come off in order to drill out the bolt... Is that true? Other than those mentions, the car starts up fine. Although it sounds like a little rattling, but as I read, the engine is loud without the cover. I didn't realize that at first |
|
Appreciate
0
|
| 06-13-2015, 05:09 PM | #165 |
|
Lieutenant
90
Rep 463
Posts |
Hey Guys.. Just completed this on my 2007 E90 335i 6spd, 105K miles. Excellent DIY by the way!
 Gasket was hard, but not falling apart, but I'm sure it was due anyway. Yesterday, I had the walnut blast done at a local shop along with the OFHG. So should be oil free! Well, slight leak at pan.. ") Anyhow, took me about 6 hours start to finish. A good amount of time was spent wrestling with that damn vent pipe (?) at the back of the engine! Could not get it loose until I realized squeezing the bottom helped. Anyway, fired her up and she hesitated for a second, tried again and started fine. I suppose it was because the fuel line was not yet pressurized at that time? I did disconnect the battery before starting. However, the car drives fine but, I am now getting the "P0151 HO2S Circuit Low Voltage Bank 2 Sensor 1". I am sure I connected everything back up? Any clues on what I missed? I did drive the car for about 6 miles or so, figure it would reset itself and it didn't, also tried clearing the code with my generic OBDII scanner and it came back as "pending" and "MIL", and erased it, but came right back.. I'm sure it is still an issue. Input anyone?? |
|
Appreciate
0
|
| 07-02-2015, 08:57 AM | #167 |
|
First Lieutenant
35
Rep 311
Posts |
Currently in the middle of doing this job and here are a few things:
1. did not take me long to get to removing the bolts on the valve cover (about 1 hour) 2. the bolts on the rear of the valve cover are a PITA. Not sure how I'll torque them back there. 3. I broke everyone of those damn O2 sensor clips no matter how gentle I was. Will go and try and get the last bolts removed and go from there. |
|
Appreciate
0
|
| 07-03-2015, 06:23 PM | #169 |
|
First Lieutenant
35
Rep 311
Posts |
I broke one of the bolts. Luckily I was able to extract with just some needle nose pliers. Now it will be Monday before I can get another
 it's the top driver side bolt. Could I run without it? it's the top driver side bolt. Could I run without it? |
|
Appreciate
0
|
| 07-30-2015, 10:43 PM | #170 | |
|
Lieutenant


126
Rep 482
Posts |
Quote:
They look like these: 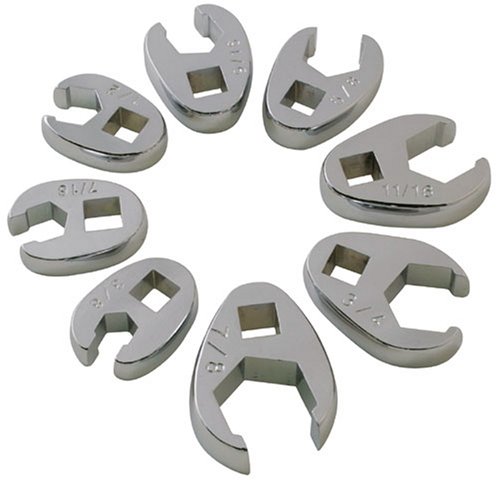
__________________
Stable:
e92is f25 N52 e83 N52 e46ci M54B25 (e53 N62 - sold, R.I.P. e39 M54B30) |
|
|
Appreciate
1
|
| 08-03-2015, 12:41 PM | #172 | |
|
DIYER
613
Rep 5,521
Posts |
Quote:
__________________
JB4 G5, Stage 3 LPFP, Stage 2 MOTIV PI, VM 6466 ST, Custom OCC W/ SS lines, ER FMIC, ER CP W/HKS BOV, M3 control arms, M3 guide rods, M3 upper links, M3 front & rear sway-bars, HPA rear toe arms, Wavetrac LSD, HPF Gen 2, DEFIV kit, KW clubsport, Delrin solid SF bushings, stoptech rotors, Rogue Tranny Mounts, 1M bumper, M3 CF hood, M3 fenders, M3 OEM sideskirts, Mtech rear bumper, CSL trunk, MORR VS8.2 rims 245/295
|
|
|
Appreciate
0
|
| 08-03-2015, 03:08 PM | #173 | |
|
Major
 169
Rep 1,039
Posts |
Quote:
|
|
|
Appreciate
0
|
| 08-03-2015, 05:34 PM | #174 | |
|
DIYER
613
Rep 5,521
Posts |
Quote:
__________________
JB4 G5, Stage 3 LPFP, Stage 2 MOTIV PI, VM 6466 ST, Custom OCC W/ SS lines, ER FMIC, ER CP W/HKS BOV, M3 control arms, M3 guide rods, M3 upper links, M3 front & rear sway-bars, HPA rear toe arms, Wavetrac LSD, HPF Gen 2, DEFIV kit, KW clubsport, Delrin solid SF bushings, stoptech rotors, Rogue Tranny Mounts, 1M bumper, M3 CF hood, M3 fenders, M3 OEM sideskirts, Mtech rear bumper, CSL trunk, MORR VS8.2 rims 245/295
|
|
|
Appreciate
0
|
| 10-08-2015, 12:00 PM | #176 | |
|
DIYER
613
Rep 5,521
Posts |
Quote:
|
|
|
Appreciate
0
|
 |
| Bookmarks |
| Thread Tools | Search this Thread |
|
|