

|
|
|
|
 |

|
 |
BMW Garage | BMW Meets | Register | Today's Posts | Search |
 |

|
BMW 3-Series (E90 E92) Forum
>
DIY - Replacing the Reverse Light on an E90 LCI
|
 |
| 01-10-2013, 02:14 PM | #1 |
|
Brotographer

88
Rep 1,741
Posts |
DIY - Replacing the Reverse Light on an E90 LCI
Hello all! I was asked to do a DIY on changing the reverse bulbs in our cars, so here we go!
COST: 30 minutes >$50 or so needed to buy the bulbs TOOLS NEEDED: Replacement Bulbs T-20 Hex bit or screwdriver Screwdriver, pliers, or trim removal tool OVERALL MAP: 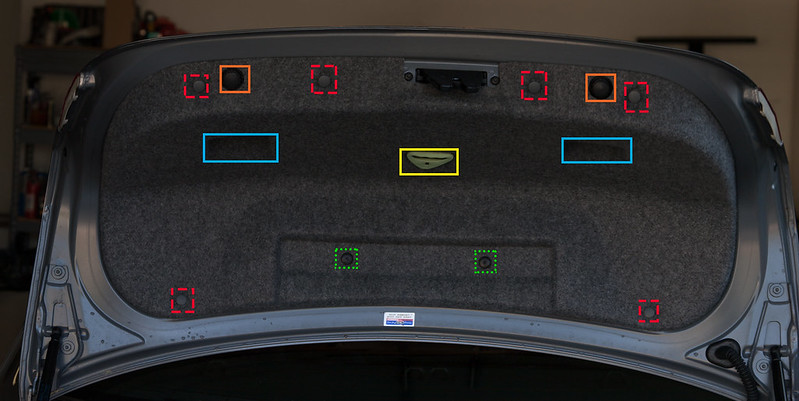 DIY Map by RobStone, on Flickr INSTRUCTIONS: First, open your trunk, and unlatch the emergency trunk release handle, circled in yellow and shown below. 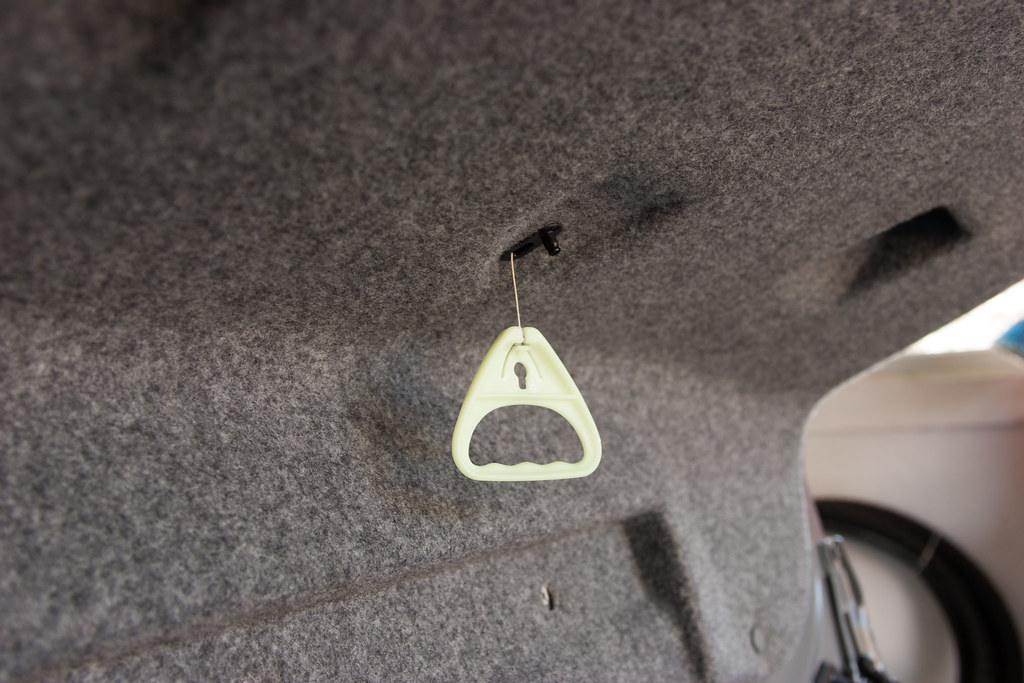 Trunk Handle Release Hanging by RobStone, on Flickr Next, Take your trim removal tool and unhook the 6x gray fasteners circled in red using your tool of choice. I chose this pair of pliers over the screwdriver because it has a nice area that allows for a better grip when pulling out the fasteners. 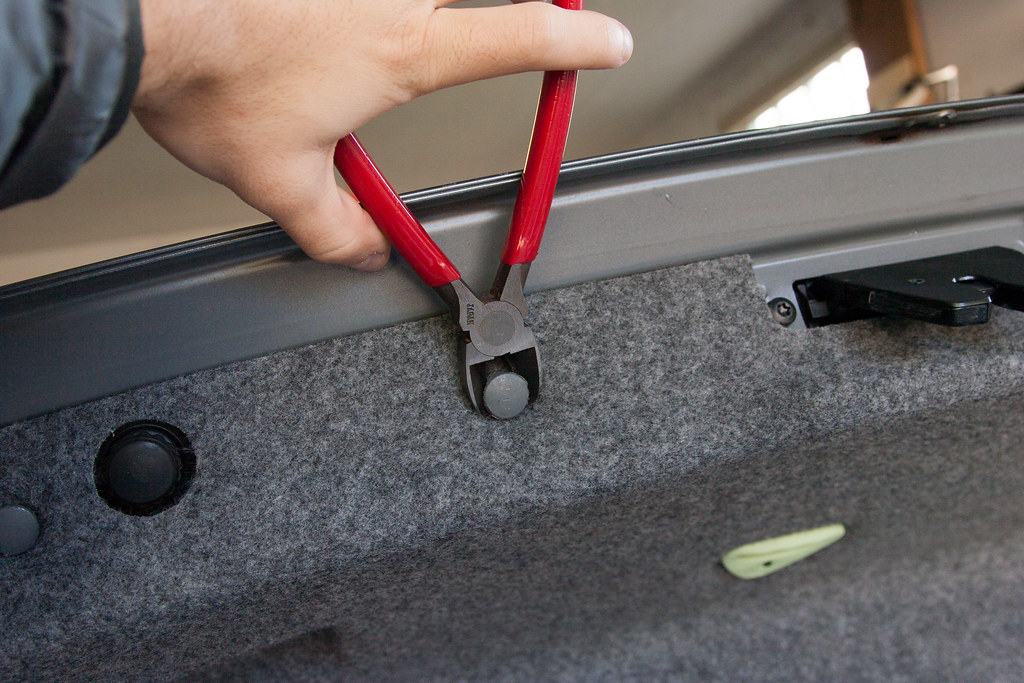 Tool of Choice by RobStone, on Flickr Now before you go yanking away, take note that these gray trunk fasteners are TWO pieces!! When removing them, make sure youre pulling out the top bolt piece. If you try and pull them both out at the same time, its going to be EXTREMELY difficult (learned that when there was no DIY). However, after removing the plastic bolt, I would recommend removing the plastic sheathing as well and setting that with the plastic bolts to prevent part loss. 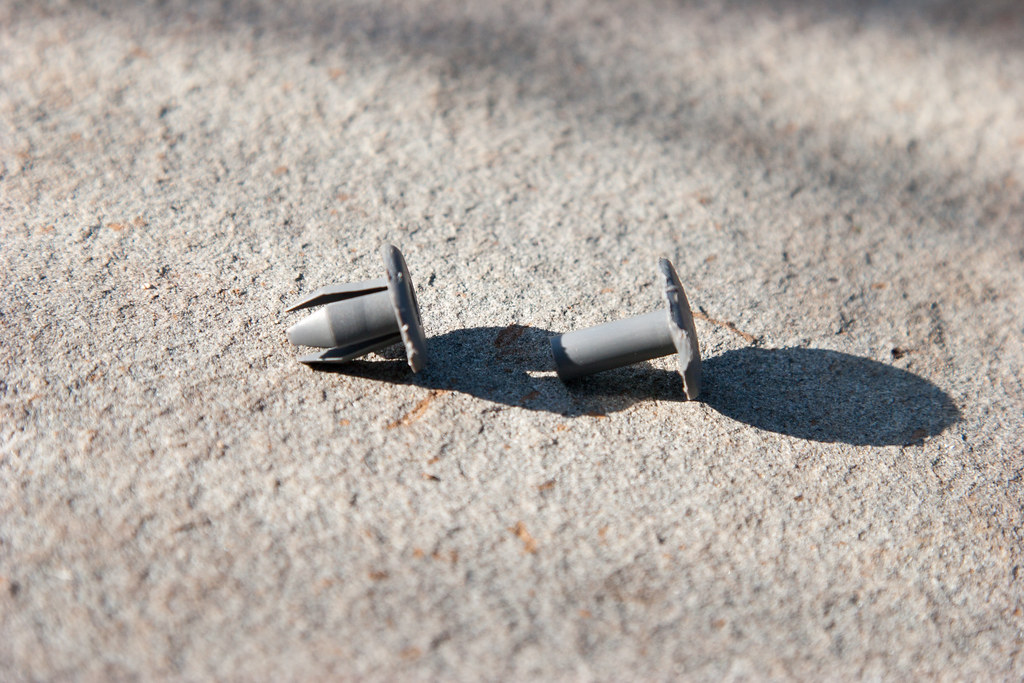 Two-Piece Design by RobStone, on Flickr Unscrew the 2x black T-20 screws, circled in green. You should now have this number of fine selection of retaining devices removed: 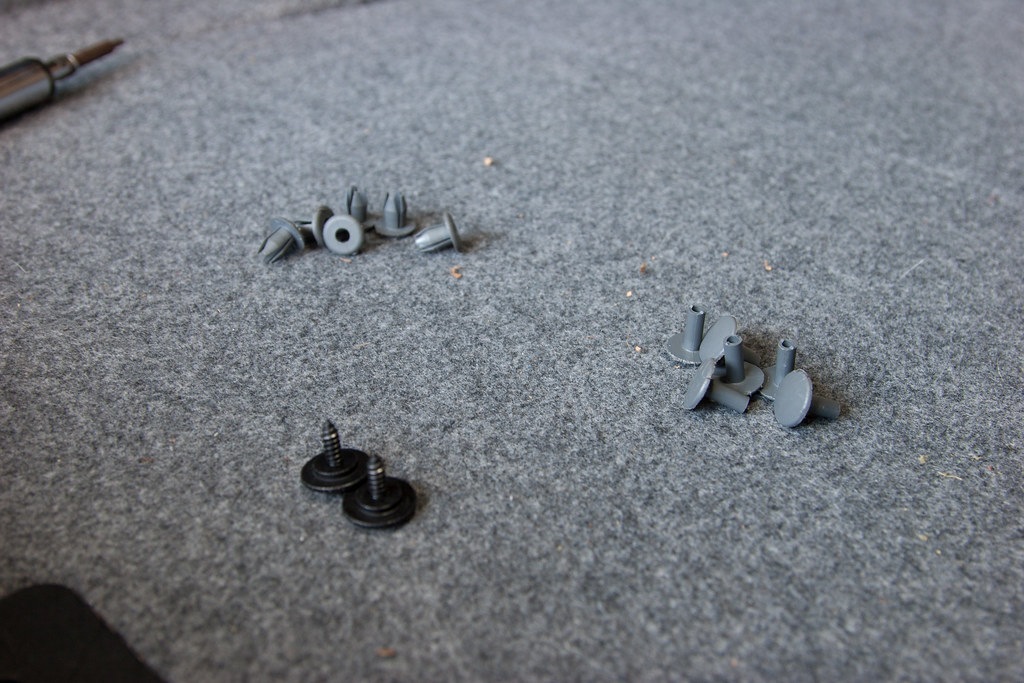 Plastic Bolts & Hex Removed by RobStone, on Flickr Now, youll notice that the trunk liner wants to pull away the farther it gets from the locking mechanism. 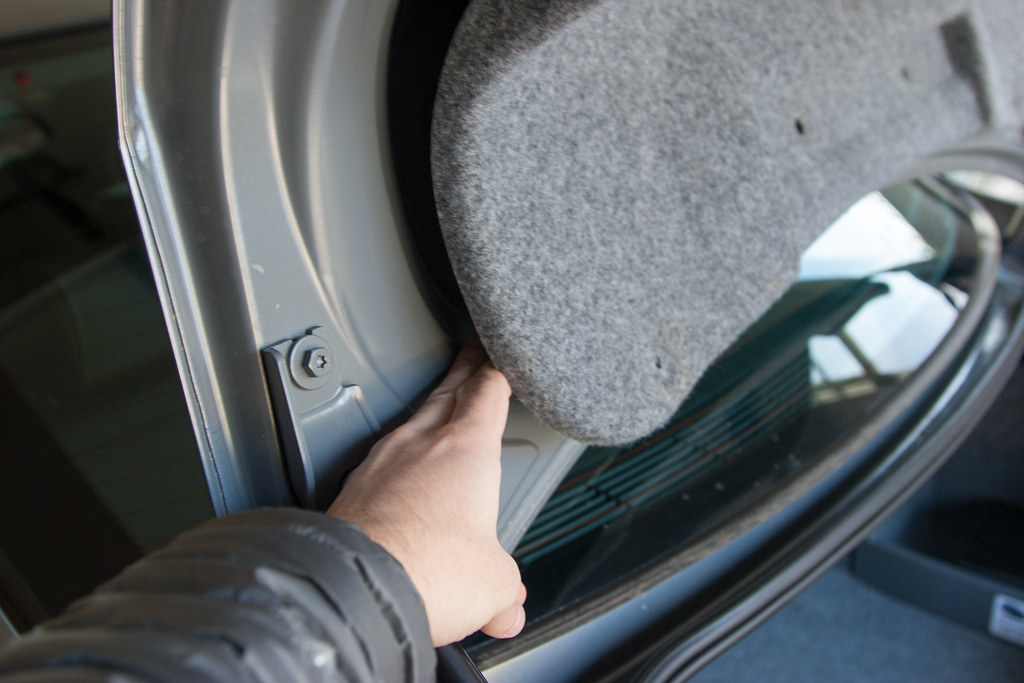 Gap By Trunklid by RobStone, on Flickr So in order to lower the trunk liner (no need to entirely remove it!) I suggest putting your hands in both of the recesses circled in blue, and gently pulling down and towards the front of the car to slip the liner out of the recesses in the trunk.  IMG_7680.jpg by RobStone, on Flickr The liner will now be hanging on the 2x black adjusters, circled in orange. Simply lift the trunk liner over the adjusters. 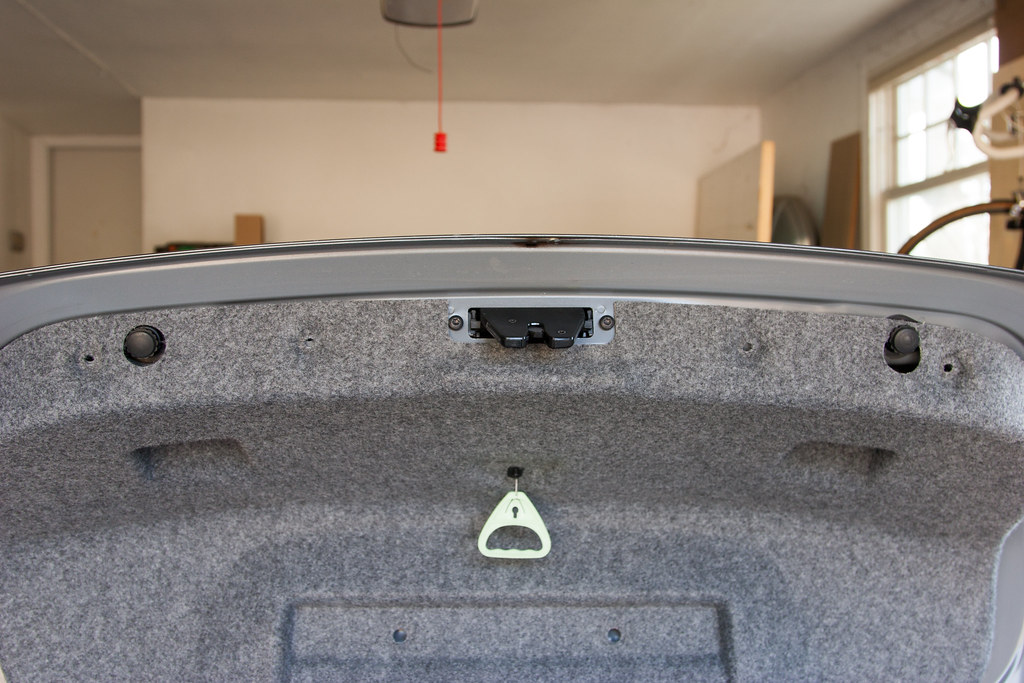 Hanging on Adjusters by RobStone, on Flickr 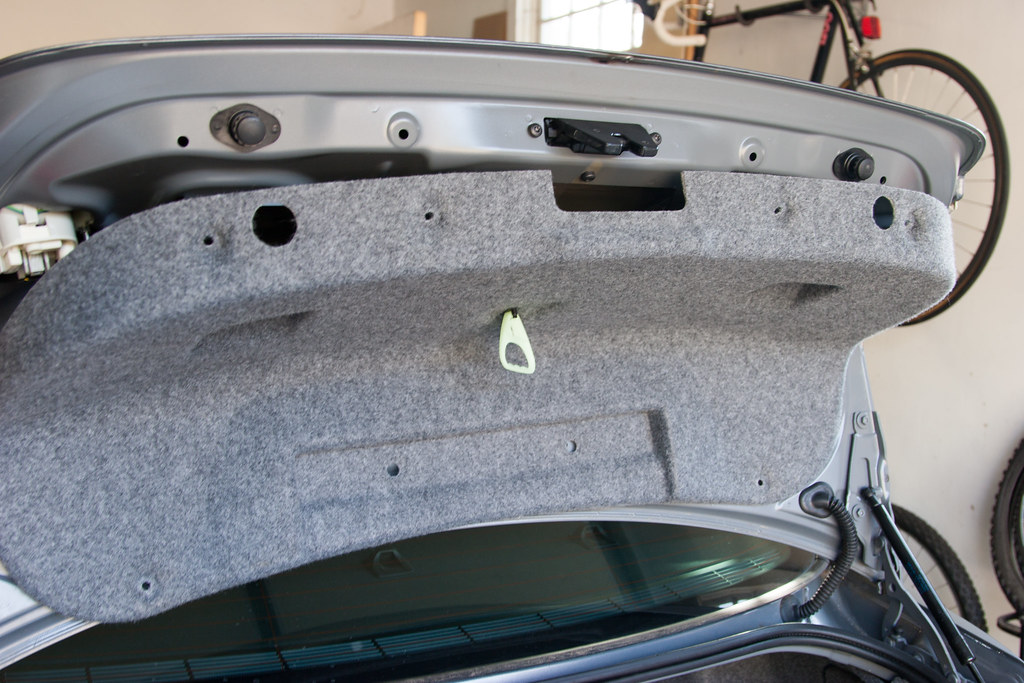 IMG_7685.jpg by RobStone, on Flickr Now the trunk liner should be hanging by the emergency release thread. You can now extract the bulb carrier for the rear fog bulb and the reverse light bulb. 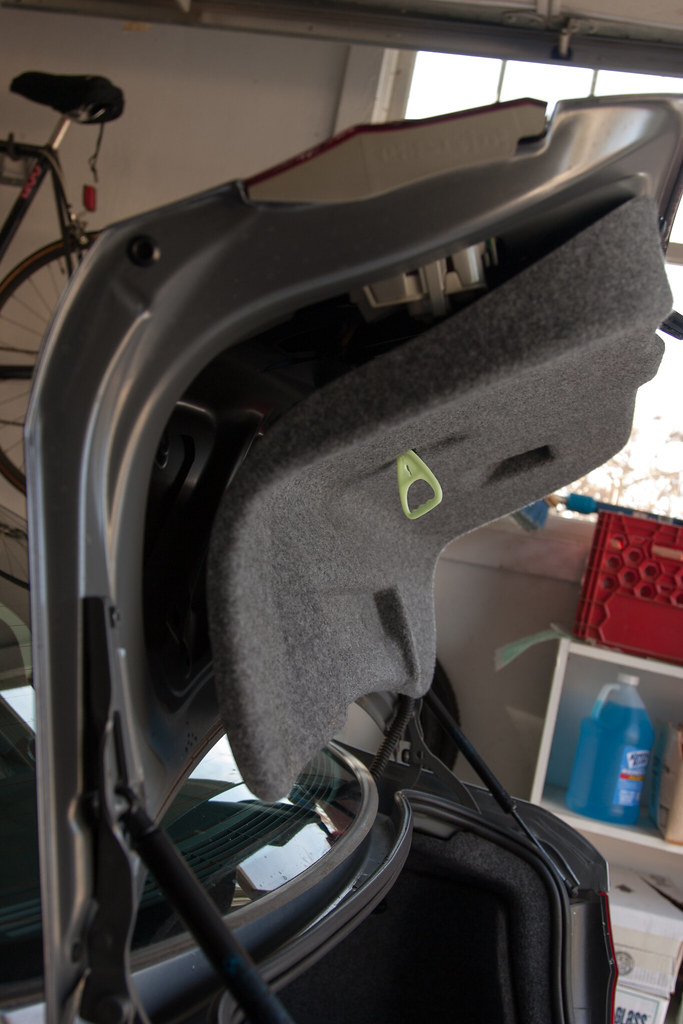 Hanging on Adjusters by RobStone, on Flickr To remove the bulb carrier, place one hand on the unit, and firmly push on the tab to unlock the bulb carrier. While pushing the unlocking tab, gently yet firmly pull the bulb carrier straight down (in order to avoid breaking bulbs). 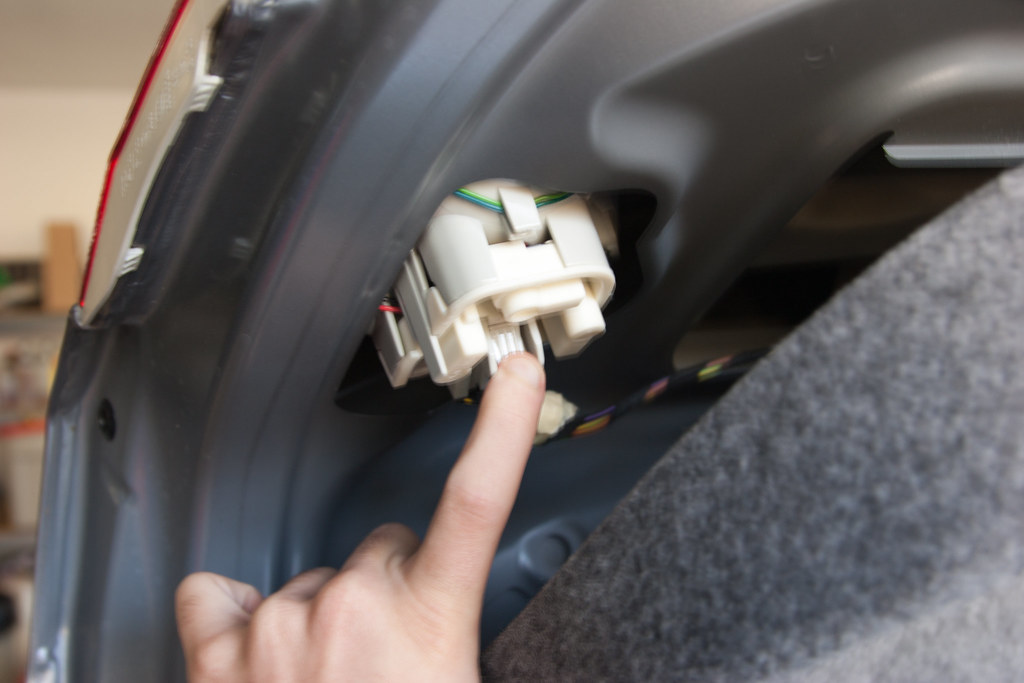 Unlocking Tab by RobStone, on Flickr 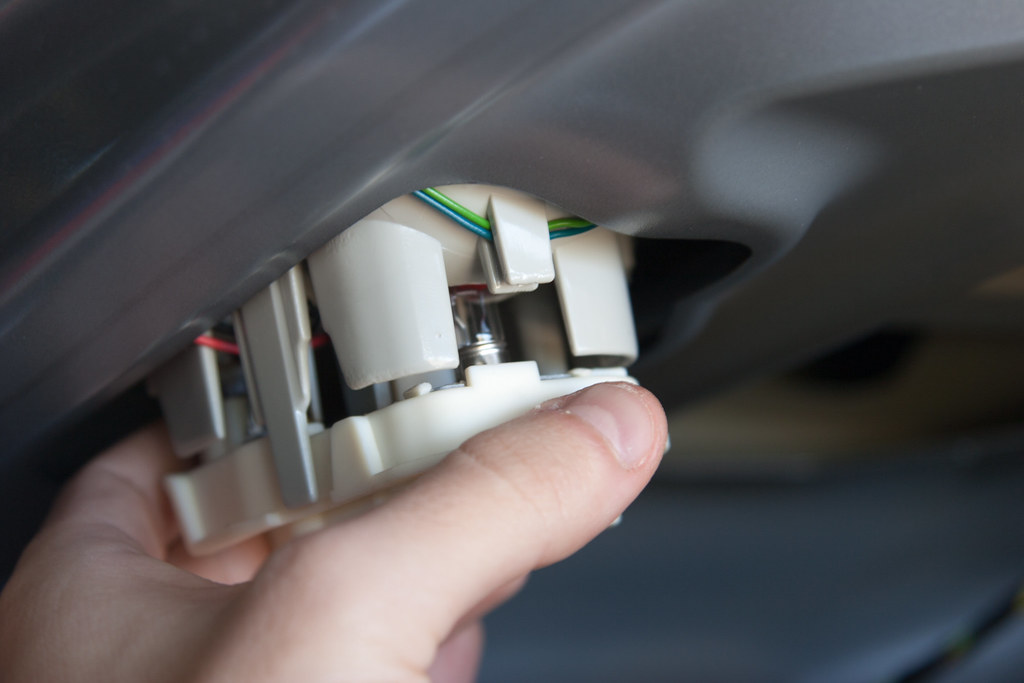 Removing Bulb Carrier by RobStone, on Flickr With the bulb carrier in your hands, disconnect the power cable by pushing down on the release tab on the black plasgtic wiring connector/harness doodad (offers little resistance, so its easy to know when youve found it!) Now gently remove the 921-type bulb by pulling up (not the funky candle-looking twist-lock bulbthats for the rear fog), and replace the bulb. Now simply repeat for the other side using the same process. Before sealing the car back up, connect the power cables to the bulb carriers, and turn on the car to accessory mode (i.e. climate control works but the engine isnt on), and slip the car in reverse. Make sure that the bulbs light up. If not, check to make sure your bulb is seated properly. If theyre cheap bulbs, flip them aroundreversing the polarity does the trick on cheap bulbs that handle electrical input differently than more expensive ones. NOTE: make sure the emergency brake is engaged, and if you are on anything resembling a slope have someone sit in the car with their foot on the brake. 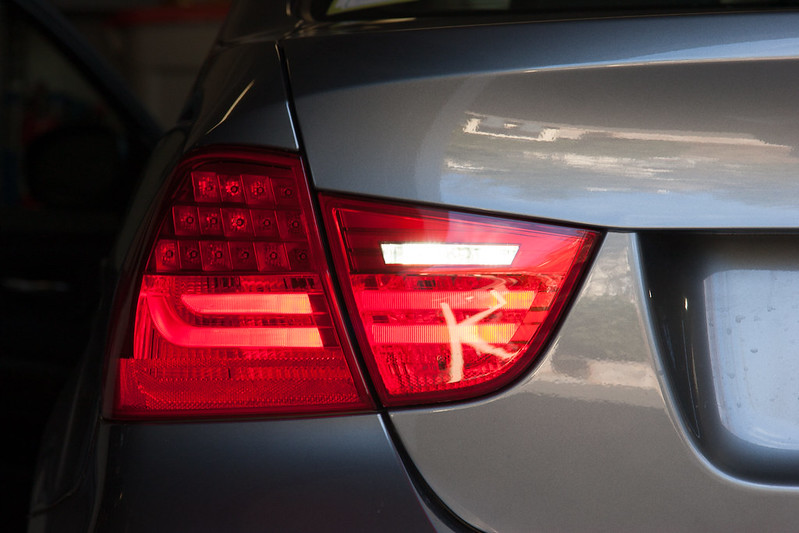 End Result by RobStone, on Flickr If everything is good, seal the car back up. I personally like to install the 6x retaining clips, then the 6x plastic bolts, then the 2x hex screws. Last edited by rollinstone157; 03-23-2013 at 10:00 AM.. |
| 04-08-2013, 02:44 PM | #2 |
|
Second Lieutenant

16
Rep 253
Posts |
Thanks for the write up! I tried to be as careful as possible but still ended up breaking one of those stupid fasteners. Why would they use something so flimsy??
I think the brake force BA9s bulb went bad. I don't know how since I doubt I ever use it that much. Thanks again for the great write up. |
|
Appreciate
0
|
 |
| Bookmarks |
|
|


