

|
|
|
|
 |
|
 |
BMW Garage | BMW Meets | Register | Search | Today's Posts | Mark Forums Read |
 |

|
BMW 3-Series (E90 E92) Forum
>
How to install moleskin to prevent scratches in window tint
|
 |
| 06-29-2012, 01:48 AM | #1 |
|
First Lieutenant
 
42
Rep 393
Posts |
How to install moleskin to prevent scratches in window tint
As some of you may already know alot of BMW's as well as other cars have a problem with vertical scratches after getting their windows tinted. That's because of the weather stripping. Dirt and residue gets caught between the hard plastic part of the weather stripping and the glass which then scratches the tint. On E90's I noticed that the top part of the weather stripping has the felt already on it as seen in the photo below, but the bottom part of the weather stripping that you can not see is actually made of hard plastic which is the problem. What happens is after time, dirt and other crap falls down and gets wedged between the had plastic part of the weather stripping and the window which causes scratches when you roll the window up and down. What you need to do is install soft moleskin on the hard plastic.
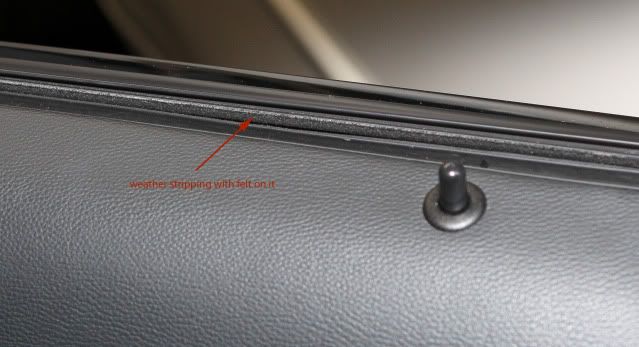 You can remove the weather stripping and install the moleskin without removing the door panels. I know some people actually pull out the door panels but it is not necessary. Here's what you do. Just grab the top of the door panel on one side and pull it towards you. 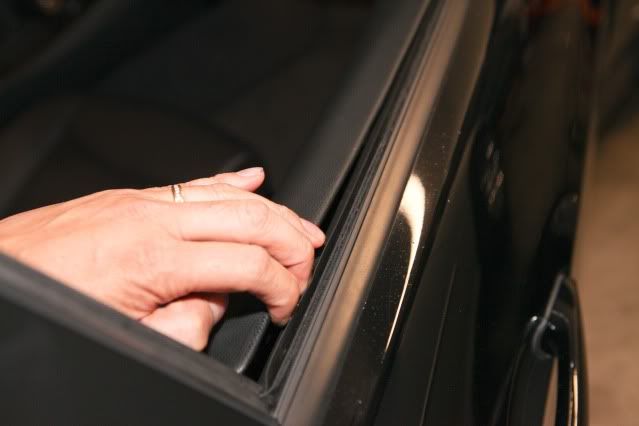 The top of the door panel is held on by metal clips . 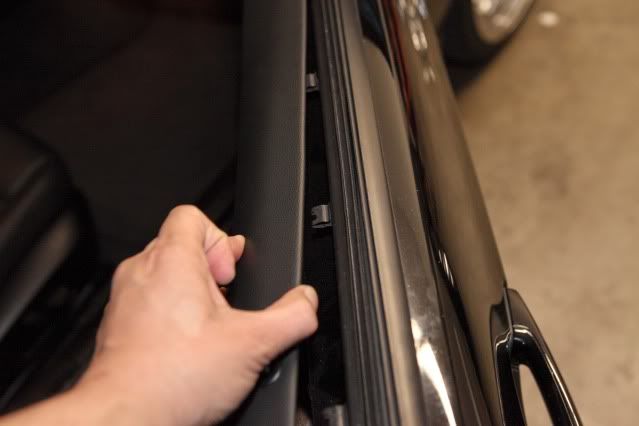 Once you have the top of the door panel fully loosened from the metal clip you want to grab the middle part of the weather stripping and pull up. If you have a hard time pulling up with your fingers you can use some pliers and grab it. 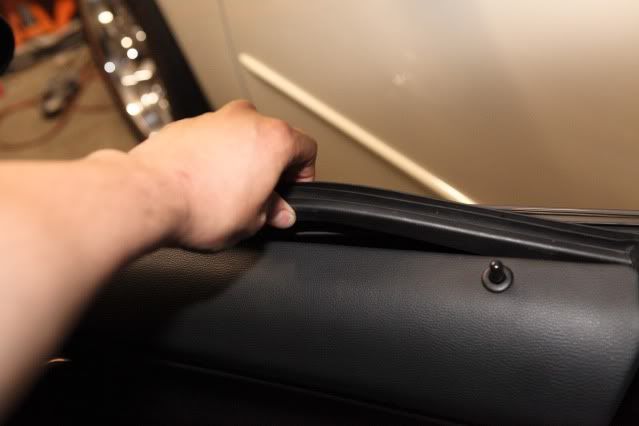 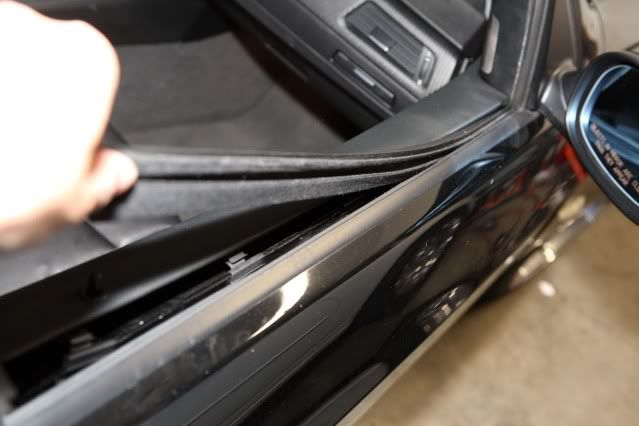 My car already has the felt on the bottom part of the weather stripping but some of you will have hard plastic on the bottom part of the weather stripping 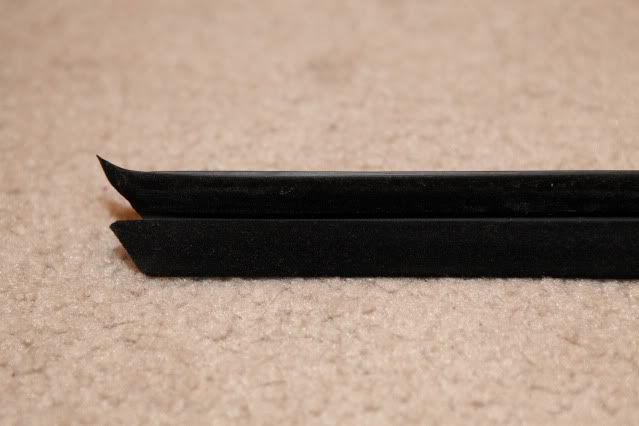 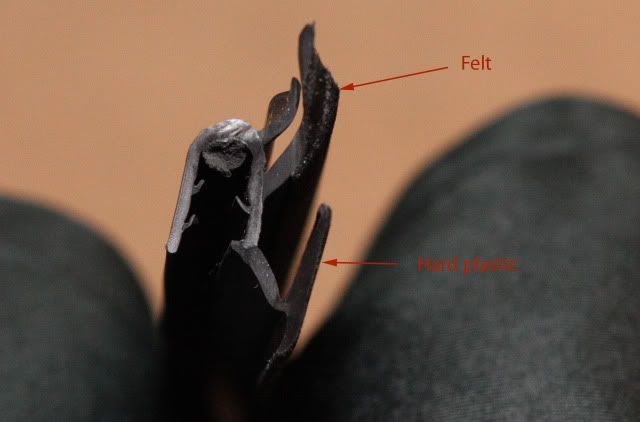 This is the moleskin you can get from www.tintprotector.com. It comes in a roll with adhesive on the backside of the moleskin to help it stick on the plastic part of weather stripping.  So what you want to do is measure the moleskin to make sure you cut off enough to cover the length of the weather stripping that you will be applying it to. Then trim the rest off. You will be applying the moleskin along the area of the weather stripping shown with the red line. 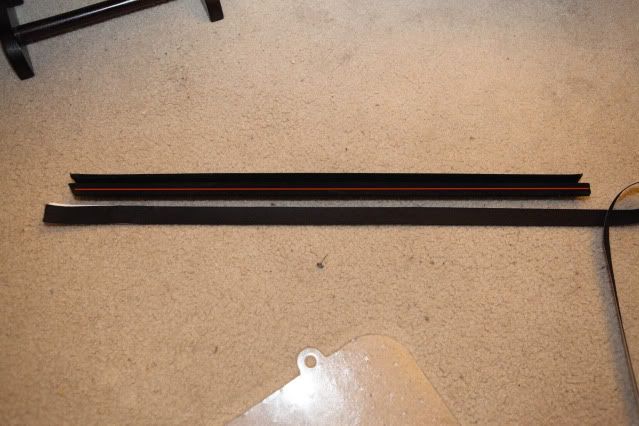 Now you need to peel off the white backing that covers the sticky part of the moleskin. 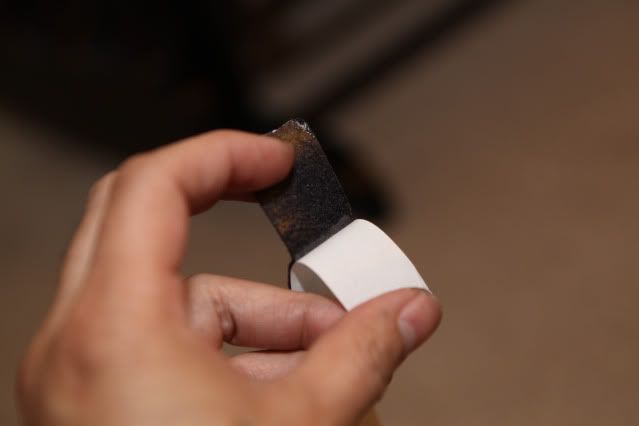 Now stick the moleskin on the plastic part of the weather stripping and it will now look something like this. In the picture I only stuck on a section of the moleskin since my weather stripping already has it. 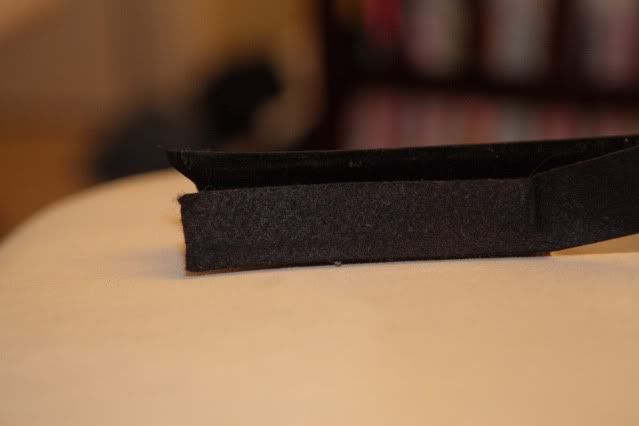 After you are done installing the moleskin put the weather stripping back in by reverse procedure of how you took it out. I find it easier to put in by sticking one end of it into the top part of the window first then pushing it down and then pushing the rest of it down along the window. Hope this helps some people with installing moleskin without taking door panels off. |
| 06-29-2012, 06:10 AM | #2 |
|
Private First Class
 6
Rep 142
Posts |
How do the metal clips pop on and off the panel? I have a 2011 335i sedan that I need to do. I was going to pay the BMW dealer to take the panels off for me so I could install tint protectors on. Just dont want to screw anything up...I got my windows tinted and rolled down my drivers window down and it scratched it. I have not rolled any other window down since....
|
|
Appreciate
0
|
| 06-29-2012, 01:43 PM | #3 | |
|
First Lieutenant
42
Rep 393
Posts |
Quote:
__________________
 |
|
|
Appreciate
0
|
| 07-07-2012, 10:33 AM | #4 |
|
Colonel
 
255
Rep 2,547
Posts |
One thing I found while doing this job is that if you remove the torx screws from behind the wood trim and the inner door handles you can just pop off the panels from the top like the original diy above more easily. This allows a little more freedom for working at the top of the panel when you are taking the rubber/felt seal in and out. You can leave the panel fully clipped in on the bottom so there is no need to support the panels as when you take them all the way off.
When I did one door with just pulling from the top clips and not taking anything off, they do pop out but I ended up putting a very slight crease in the panel as it must bend to allow the top out but keep the rest tight to the door. I thought the removal of the torx screws only was a nice compromise between this DIY and the full panel removal method as mentioned in the tintprotector.com instuctions. |
|
Appreciate
0
|
| 07-11-2012, 10:12 PM | #5 |
|
Second Lieutenant


19
Rep 286
Posts |
Sweeet write up. Tint Protector is good stuff.
 |
|
Appreciate
0
|
| 09-03-2013, 02:25 PM | #9 | |
|
Private First Class
8
Rep 134
Posts |
Quote:
|
|
|
Appreciate
0
|
| 09-13-2013, 11:01 PM | #10 |
|
Private
 6
Rep 69
Posts |
Thanks for the DIY write-up and pictures. For the first two doors, I followed the TintProtector instructions. The last two, I ended up only taking off the wooden trim on the doors and then pulling the top away from the door. Everything worked out well except for one door, when the window wouldn't go back up. I figured out that the moleskin was catching against the window because I didn't cover the plastic/rubber weather stripping properly...
|
|
Appreciate
0
|
| 06-13-2014, 11:12 PM | #13 | |
|
Second Lieutenant
19
Rep 286
Posts |
Quote:
|
|
|
Appreciate
0
|
| 06-19-2014, 10:22 PM | #15 | |
|
Captain
27
Rep 743
Posts |
Quote:
|
|
|
Appreciate
0
|
| 04-13-2016, 07:52 AM | #17 | |
|
Colonel

377
Rep 2,365
Posts
Drives: 2007 E90 323i (Cdn)
Join Date: May 2013
Location: Toronto, Canada
|
Quote:
__________________
|
|
|
Appreciate
0
|
| 04-23-2016, 09:46 PM | #18 |
|
Registered
0
Rep 1
Posts |
Great DIY
Just did this using this DIY. Great Job!
FYI: 2006 330i 4 door Sedans already have the felt on the front doors. The rear doors do not. The "Hard Plastic" piece on mine was more like hard foam/rubber. Another tip. You can remove the weather stripping with out rolling down the windows. I personally suggest doing this only because I got a scratch line in one window from rolling down the window before removal of the weather stripping. Trial and error, then learn from mistakes. |
|
Appreciate
0
|
| 07-18-2016, 07:40 AM | #19 |
|
First Lieutenant
31
Rep 363
Posts |
Old thread, but I had to bump it because it saved me a ton of time. Tint Protector's instructions would have had me take just about the whole door panel off. I'm glad you posted this. Many thanks!
__________________
 |
|
Appreciate
0
|
| 09-29-2016, 07:51 PM | #20 |
|
Private First Class
15
Rep 113
Posts
Drives: 2011 335i
Join Date: Jul 2011
Location: Blue Ridge Mountains
|
Thanks to OP and others. No need to remove door panel on my 2011 335i e90! Many thanks to all who have contributed.
__________________
Current: 2011 335i Sport, 987 Boxster
Prior:e92 M3 DCT ZCP, f10, e93, e46, ... |
|
Appreciate
0
|
| 10-24-2016, 02:13 PM | #21 |
|
Lieutenant
75
Rep 503
Posts |
So is this the exact same for the E92's? Can you follow the same steps as mentioned above or is the weatherstripping different on our E92's?
__________________
// 328i E92 // N52 // Muffler Delete // K&N Drop In // Charcoal Delete // RGBW LED Halos |
|
Appreciate
0
|
| 02-18-2017, 02:32 AM | #22 |
|
student

224
Rep 911
Posts |
Just installed tintprotector today. Some tips below:
- The tintprotector is both longer and wider than needed for the whole car length + size of window strips - Suggest measuring and cutting the width before sticking on it's easier - Take the door handle screw entirely off, but just loosen the trim screws - Use your fingers to squeeze the protector firmly to the plastic once you've stuck it on and before you install it back to the car - once installed to the car check the window are going up and down properly. one of my windows the tint protector caused the window to catch on the rubber and push the whole trim up. I had to slightly trim the rubber & tint protector in that area so it wouldn't do that |
|
Appreciate
0
|
 |
| Bookmarks |
| Thread Tools | Search this Thread |
|
|


