|
|
|
|
 |
|
 |
BMW Garage | BMW Meets | Register | Today's Posts | Search |
 |

|
BMW 3-Series (E90 E92) Forum
>
DYI: BMW Performance Steering Wheel - Installation
|
 |
| 03-25-2009, 10:16 AM | #1 |
|
Major General
 
405
Rep 6,107
Posts |
Hey guys,
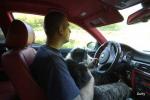
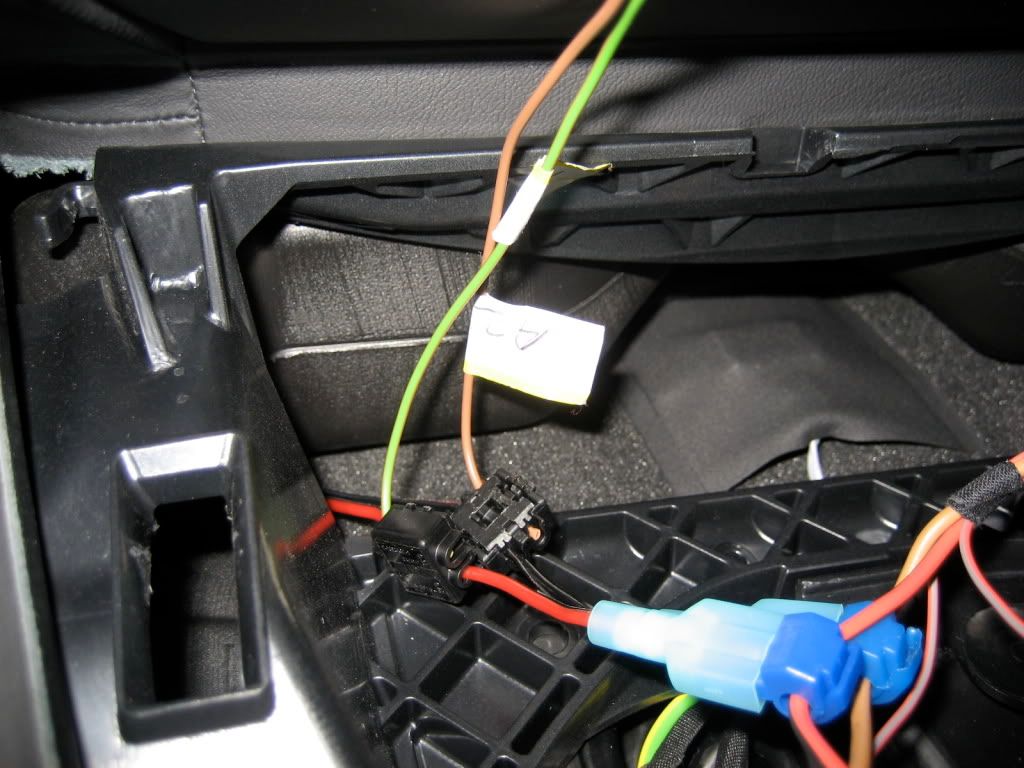
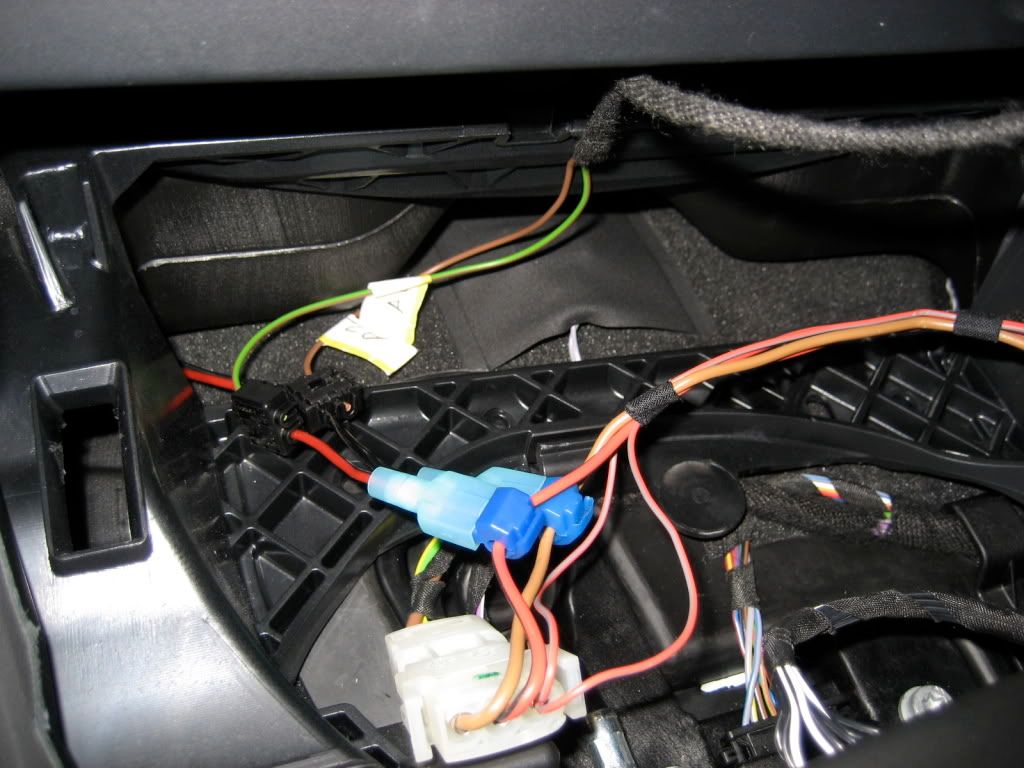
Here is DIY on how to install BMW Performance Steering Wheel. It is not very difficult you just need to take your time and pay attention to what you are doing. Tools: 1. Not very big Flathead Screwdriver 2. 16mm or 5/8 socket with wrench and extensions 3. T15 torx socket ( i think it is T15 but I might be wrong) 4. Very small flathead screwdriver 5. 10mm socket This DIY is for you just to look/read and get an idea on how it can be done. I am not encouraging you to do this installation. I will not be responsible for anything that might happen to you, your vehicle, or anybody who might be helping you, or anything else. If you are local ( Bay Area ) I can install it on your car for a $90+ Grande Vanilla Late  Before you start taking everything apart you need to read PDF Instructions in the Post#3 at the bottom and get familiar with it. Make sure you understand what goes where. After you did that, I would recommend to label supplied BMW harness with A1,A2,A3,A4,A5,A6, and A7 tags. It will be easier to figure out what goes where. 1. Disconnect your Battery and make sure your (-) Negative terminal will not be touching battery 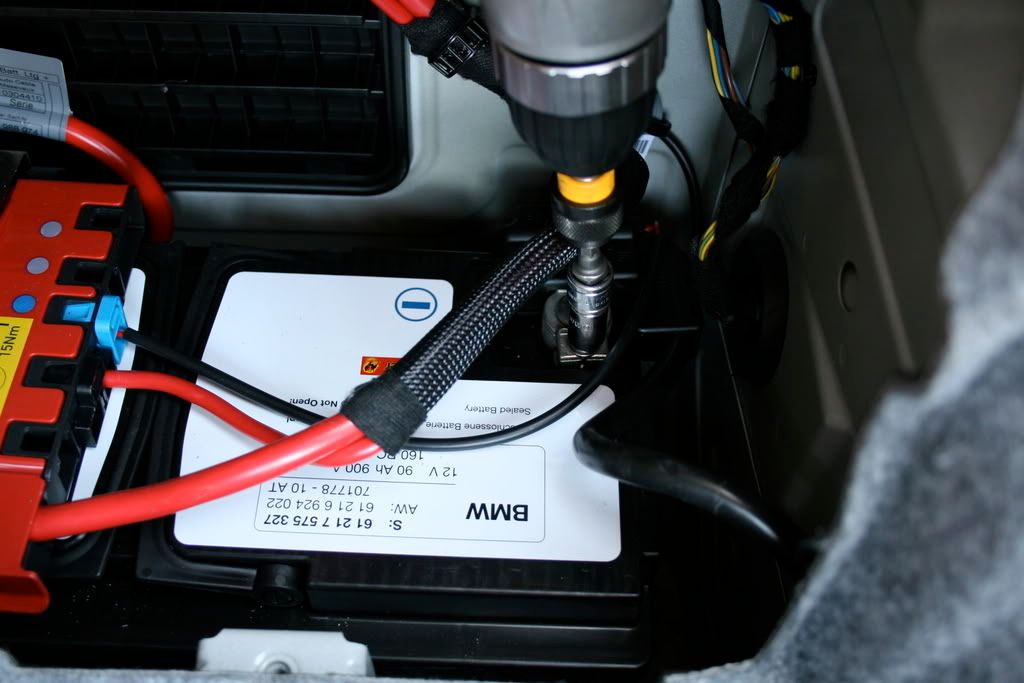 2. Remove lower plastic panels on both sides (passenger/driver). I just have picture of the passenger side 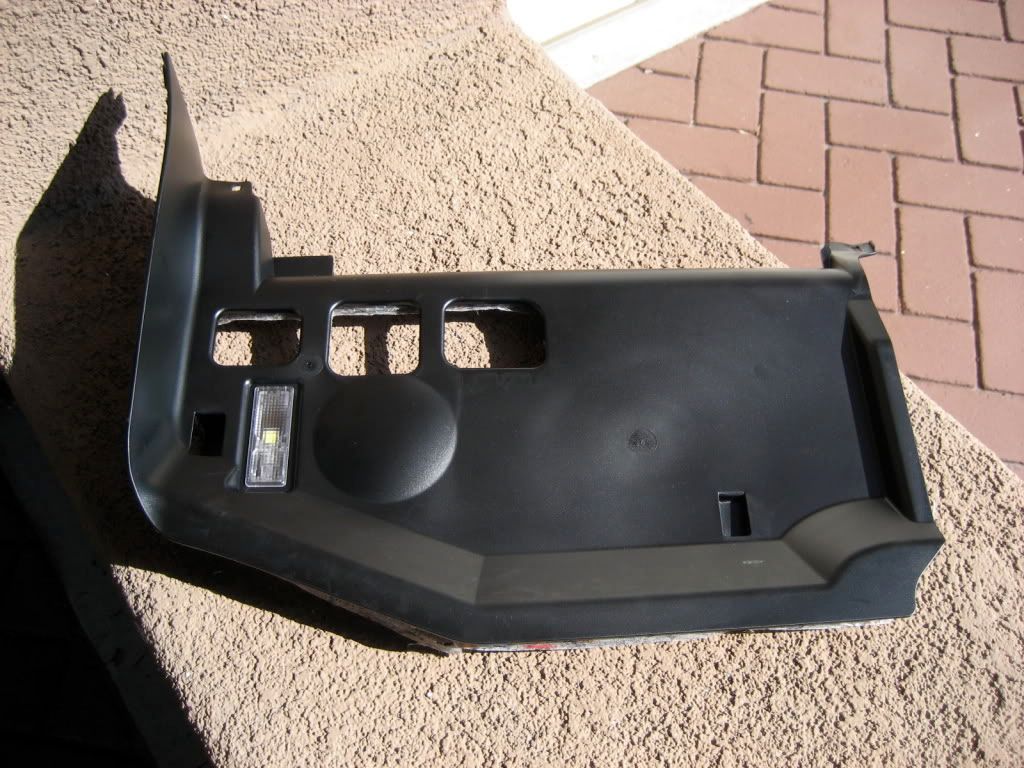 Driver side 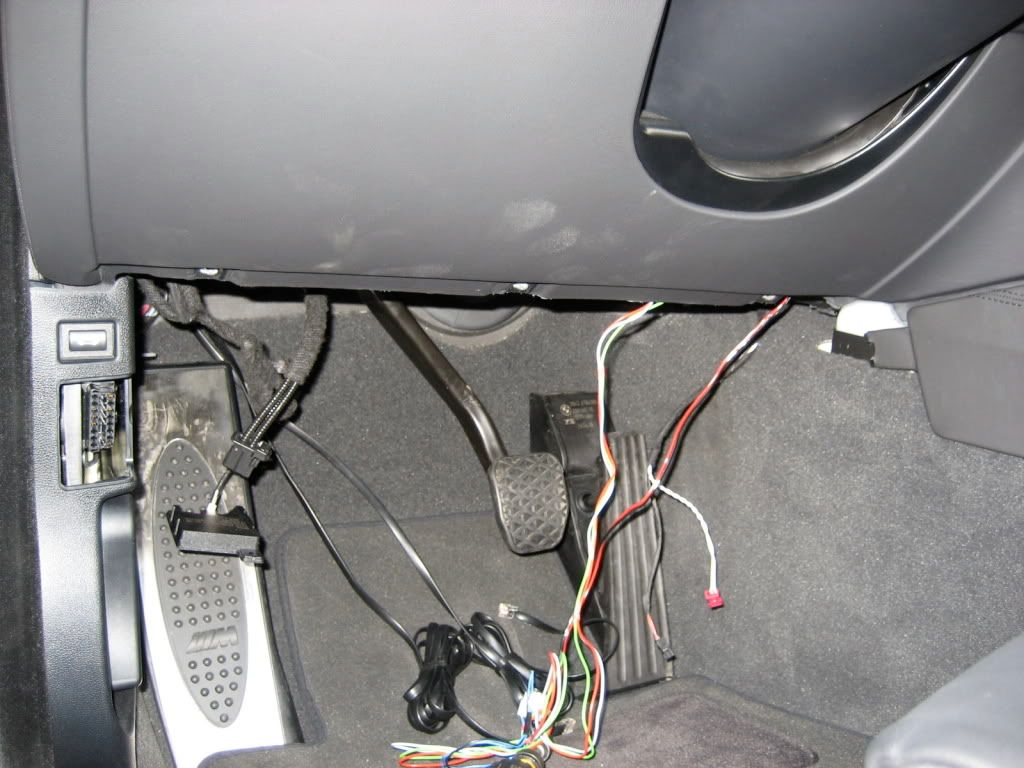 3. Read PDF instruction and unplug Blue connector 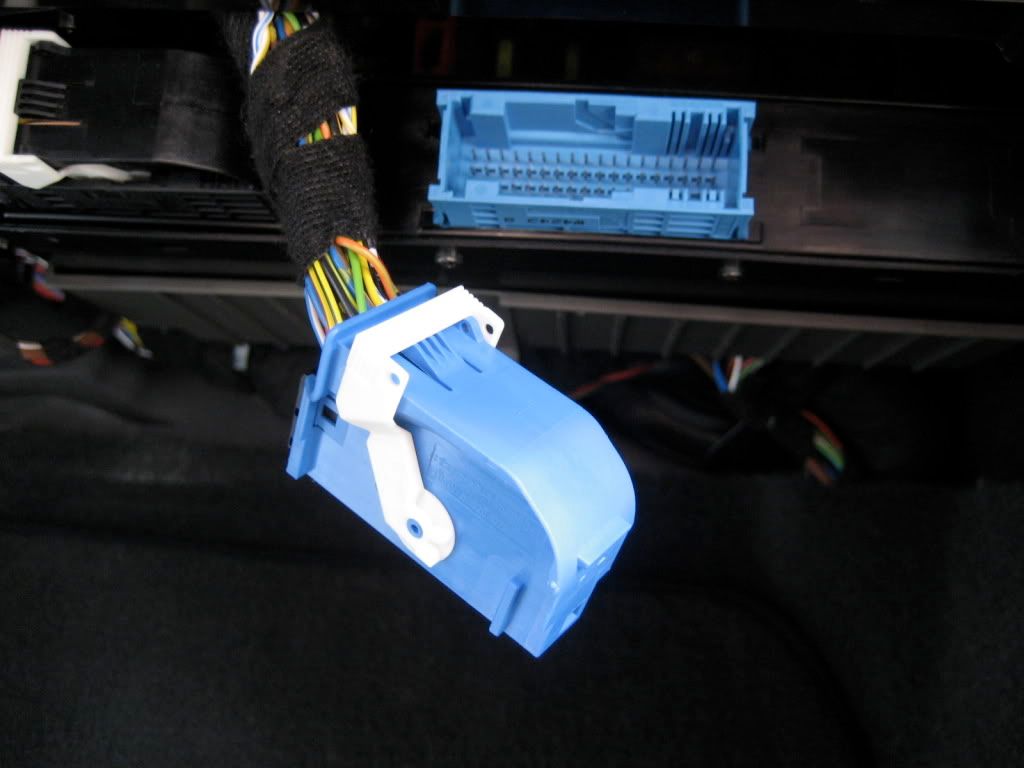 4. Reales the side tabs and pop off the Black/Grey connector that is inside the Blue one. 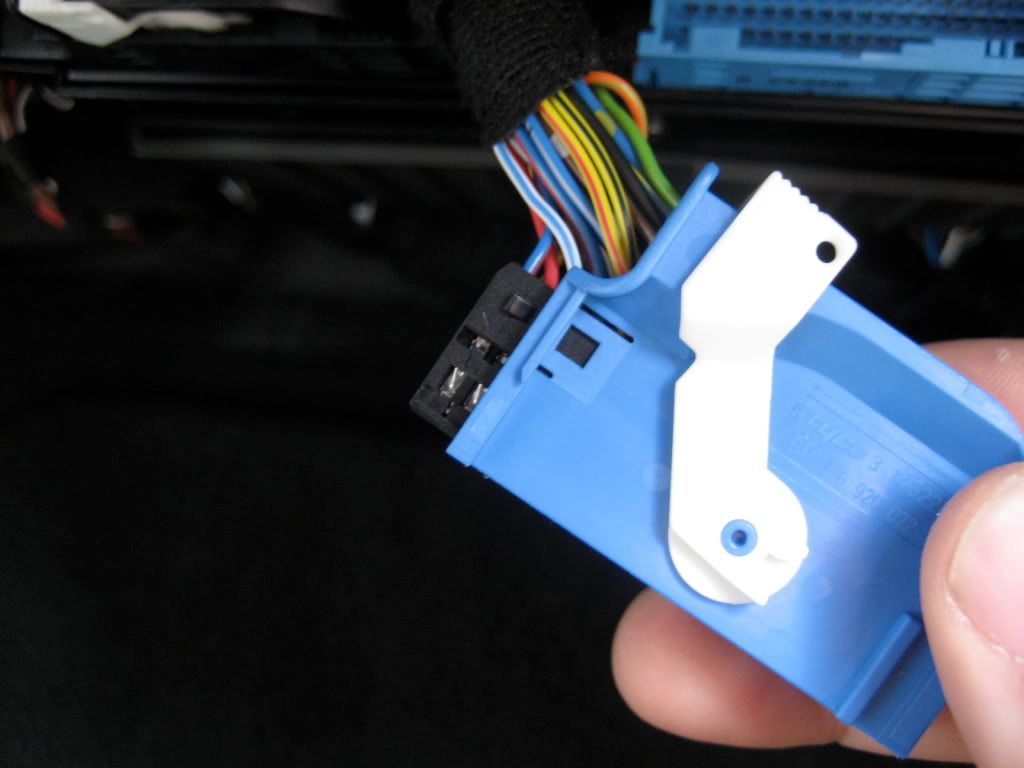  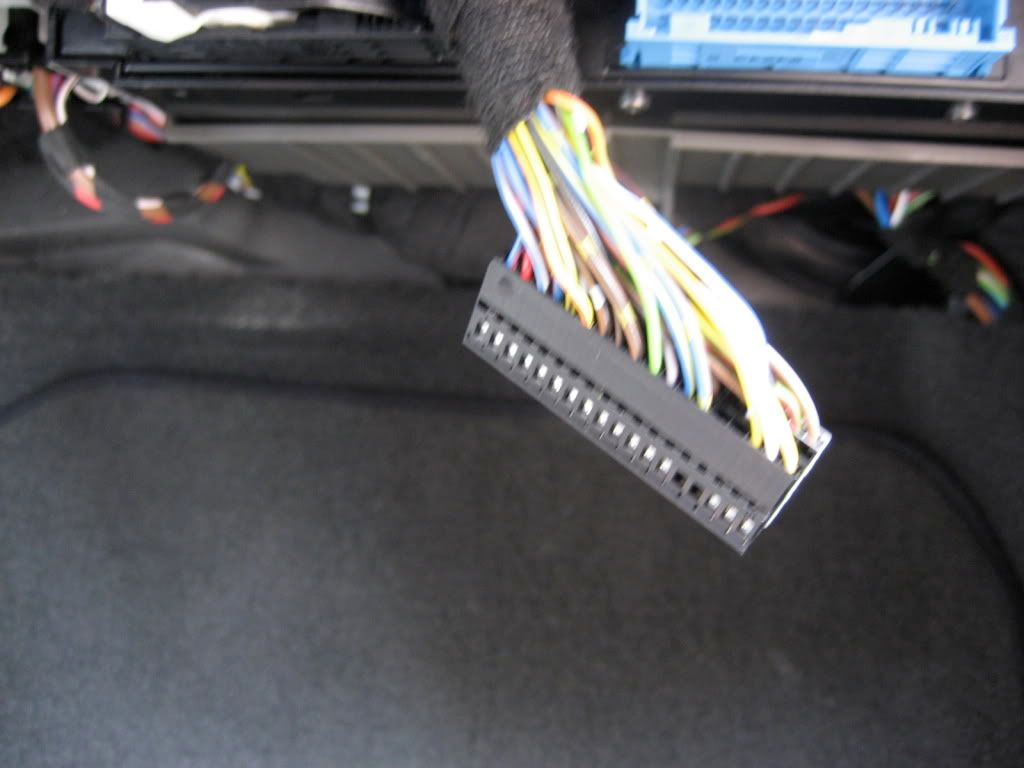 5. Read PDF installation and remove Blue/Red wire from Pin1 and Red from Pin2. Insert A3 into Pin1 and A4 into Pin2. Now install wires that you removed from Pin1 and Pin2 into Connector E Pulling out wires from Pin1 and Pin2 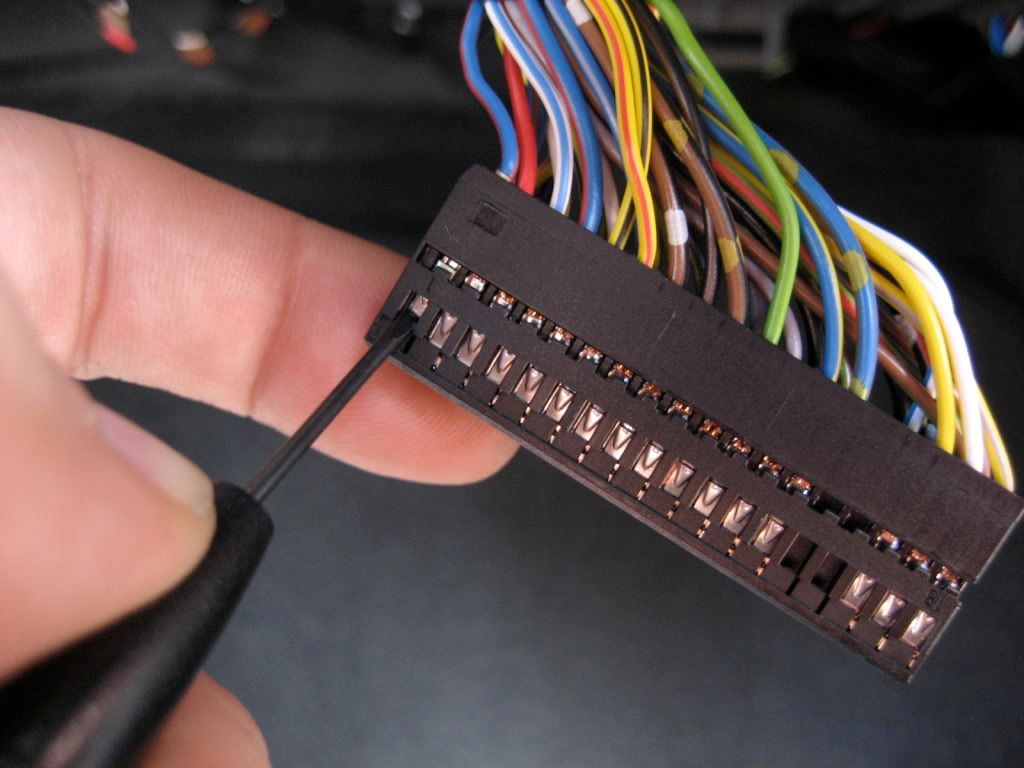 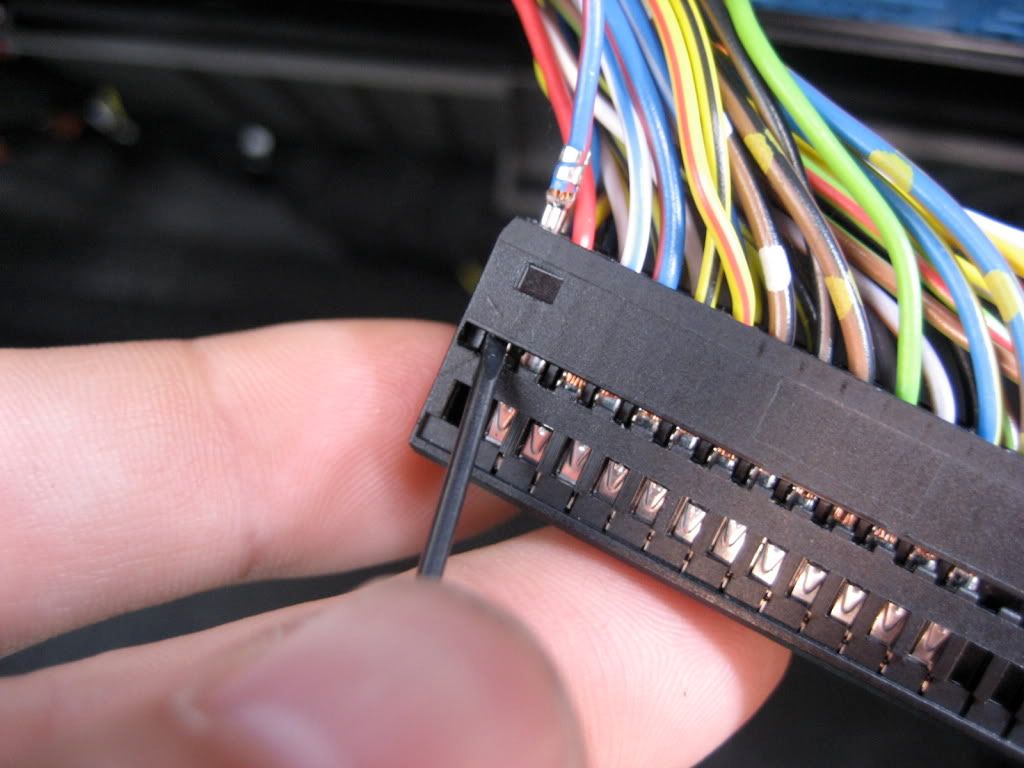 Connector E 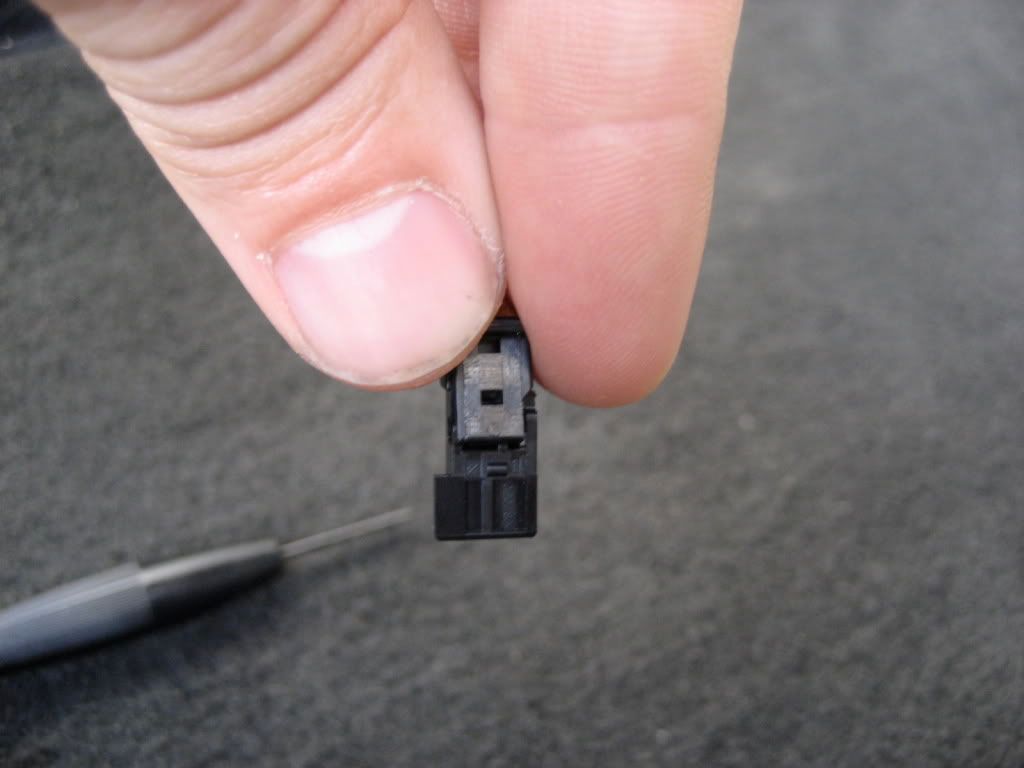 Wires from Pin1 and Pin2 inserted into Connector E 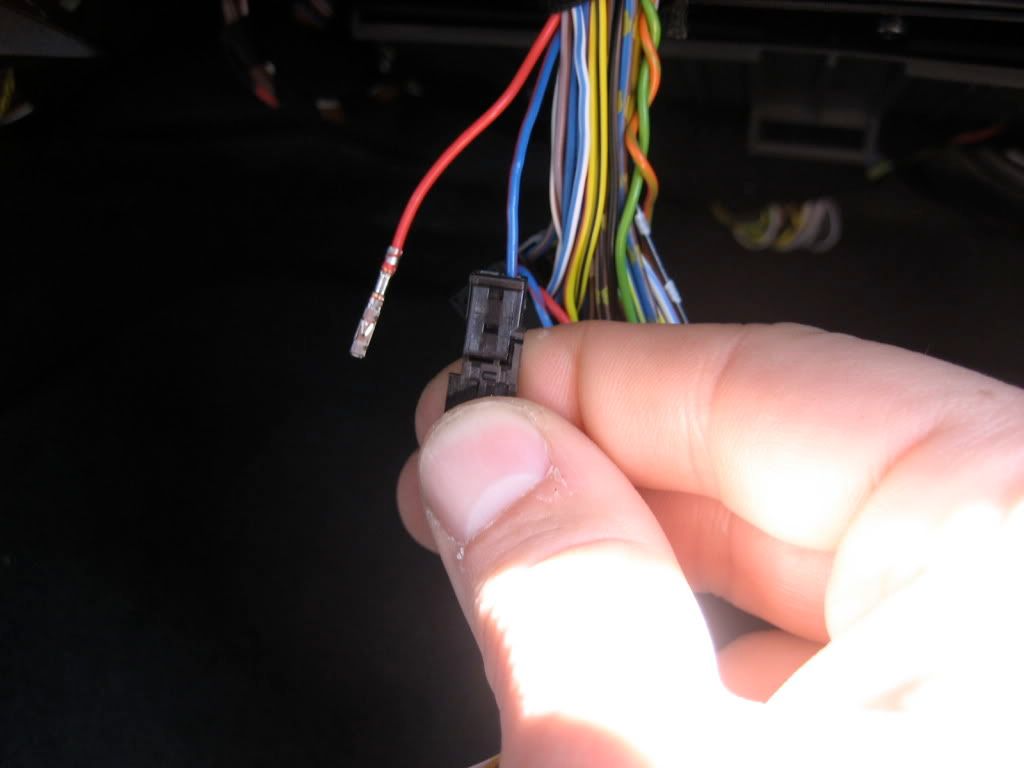 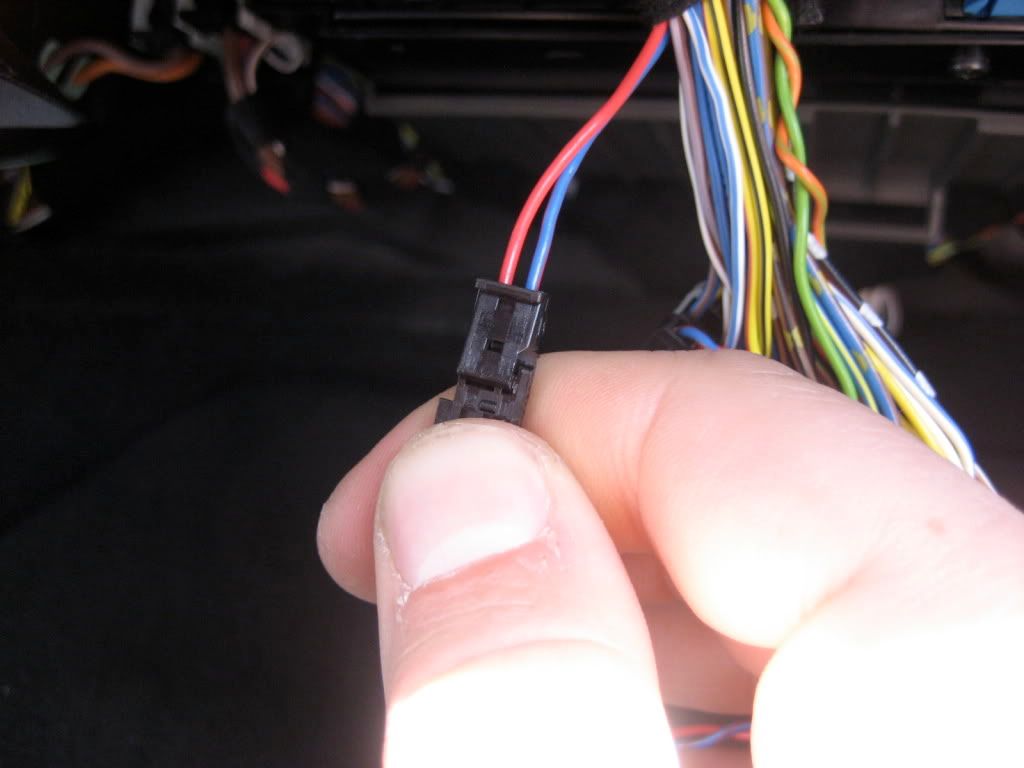 Wires A3 and A4 inserted into big Black connector into Pin1 and Pin2 and Connector E connecter to A5 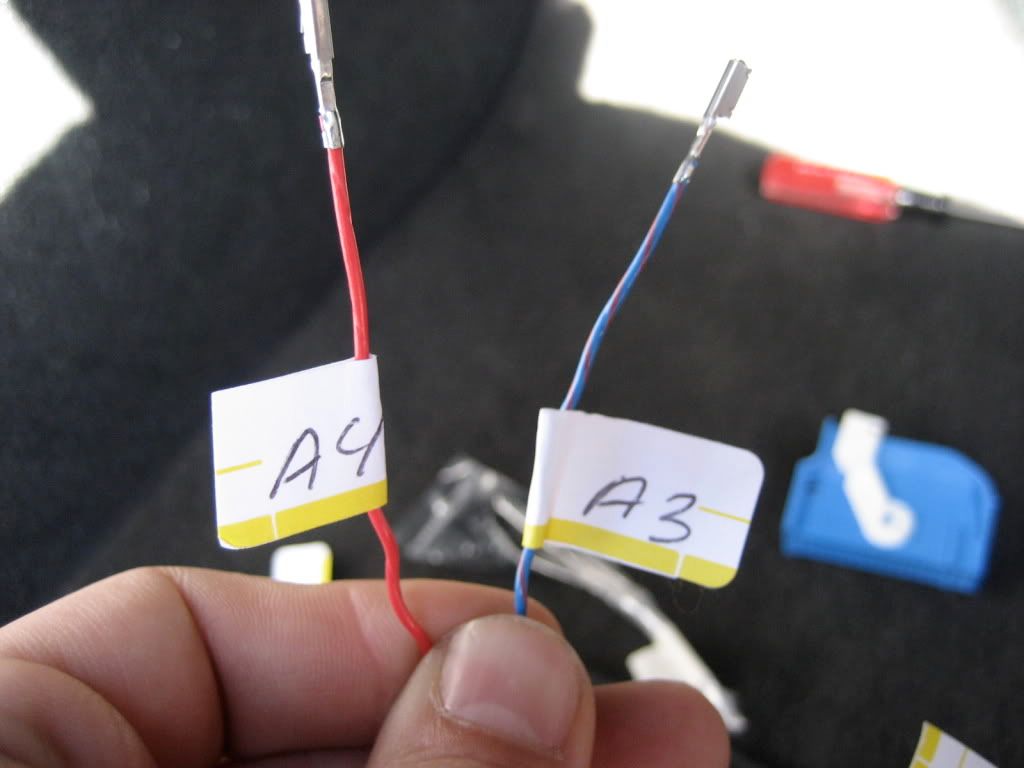 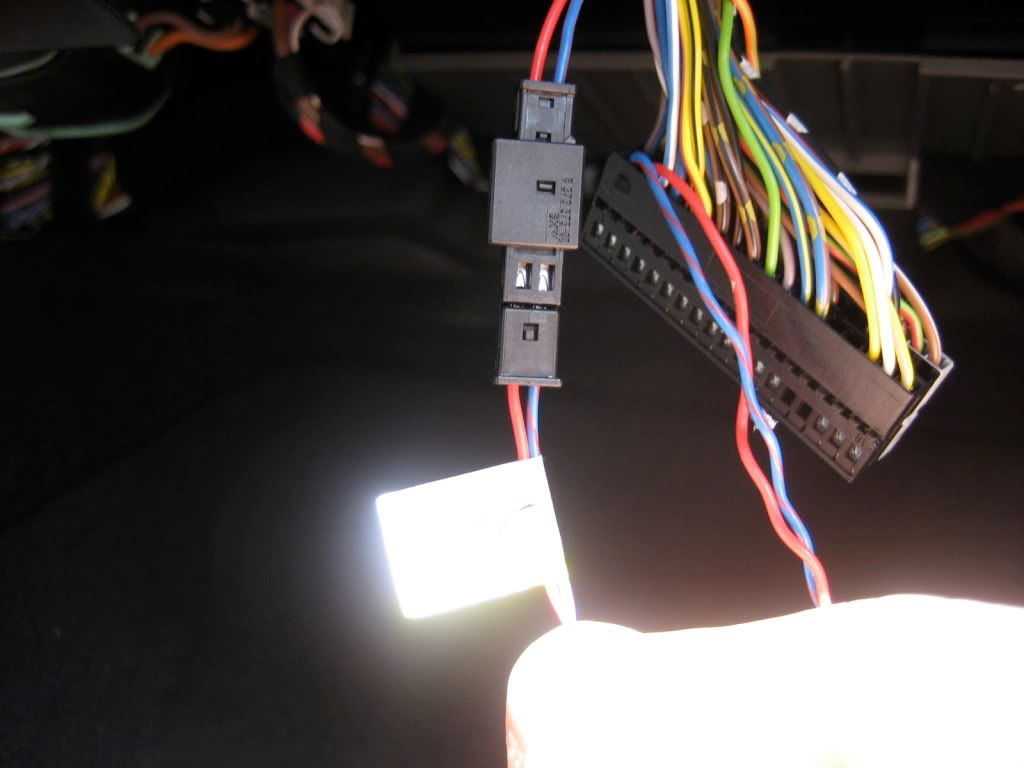 6. Now you can install Control Module B and connect A6 to the module  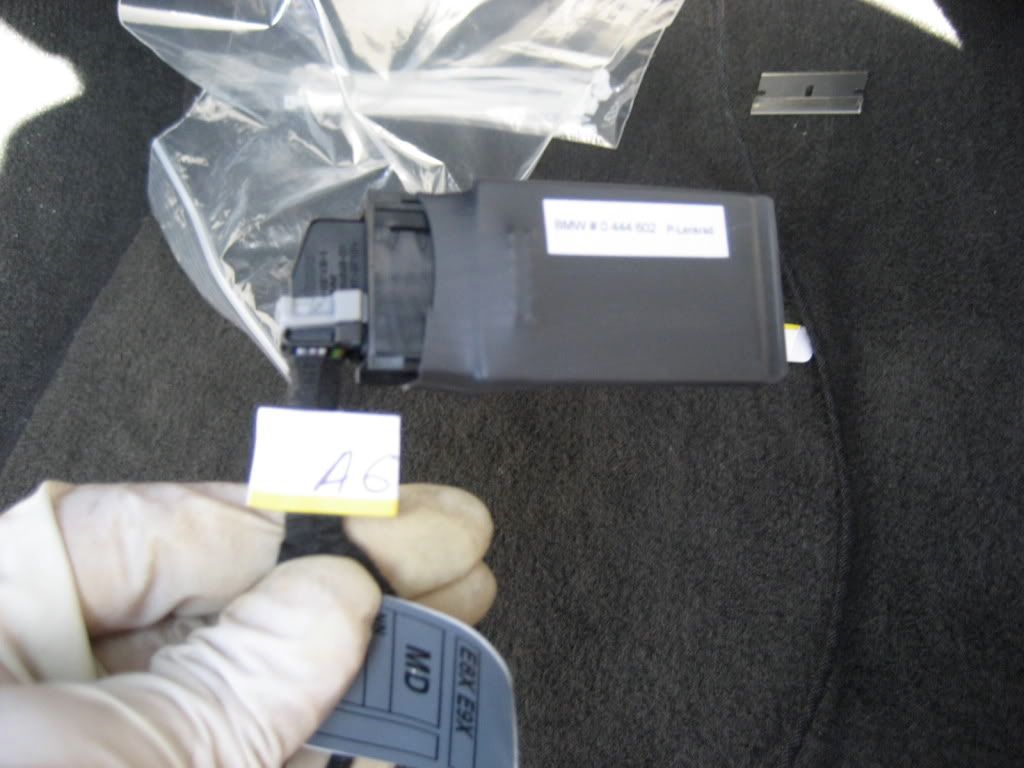 |
| 03-25-2009, 10:18 AM | #2 |
|
Major General
405
Rep 6,107
Posts |
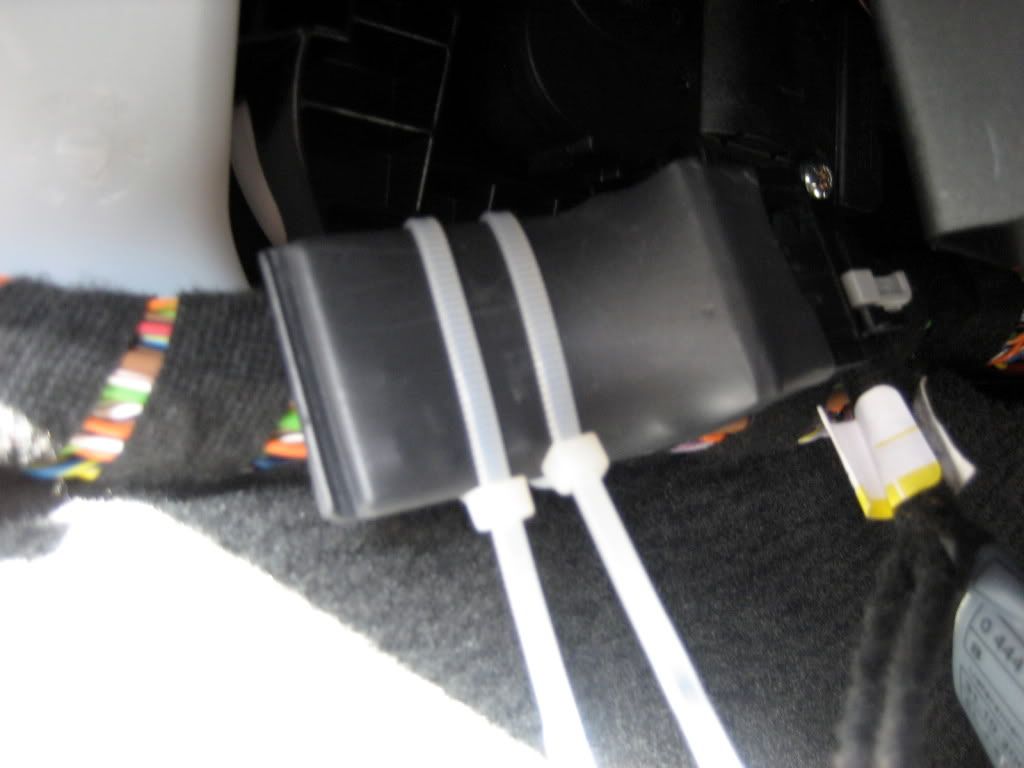
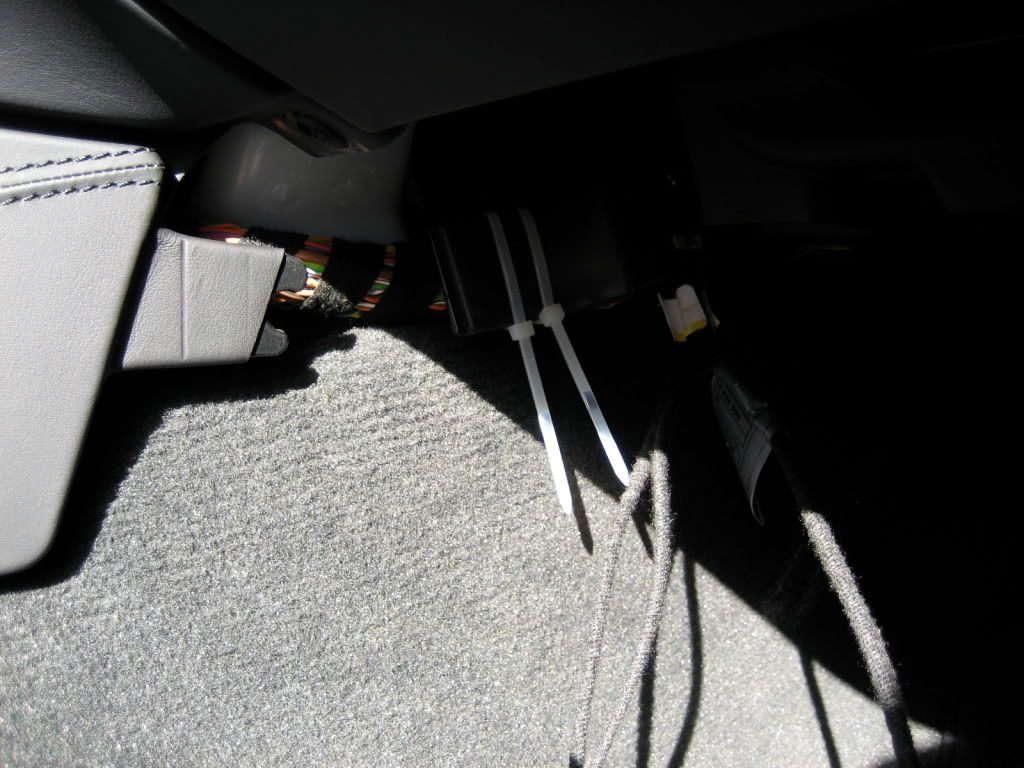
7. Attach module B to the harness using zip-tie like i did or somewhere else ... it is not the best spot because it make a bit hard to install plastic cover at the end.
  8. Install the Black connector into Blue connector and then reinstall Blue connector. I used zip-tie to get all those wires together ... 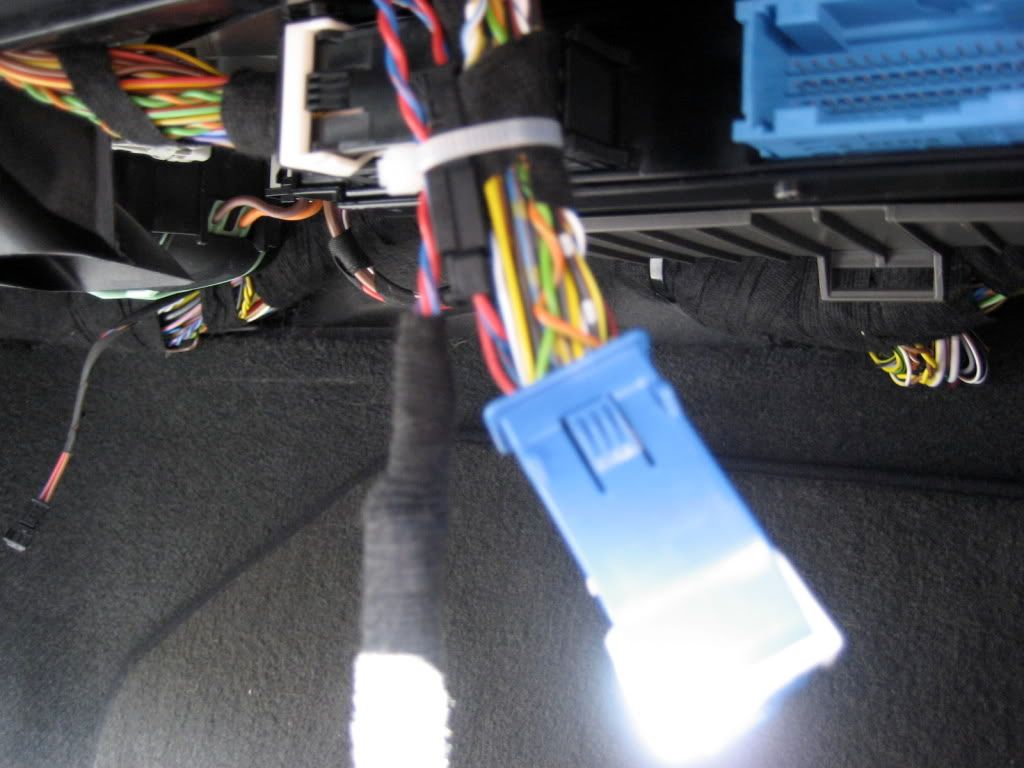 9. Now you need to remove your Airbag. Make sure you have no power going to your car or it can be very bad and dangerous ! Use medium size flathead screwdriver and insert it into very little openings (one on each side) 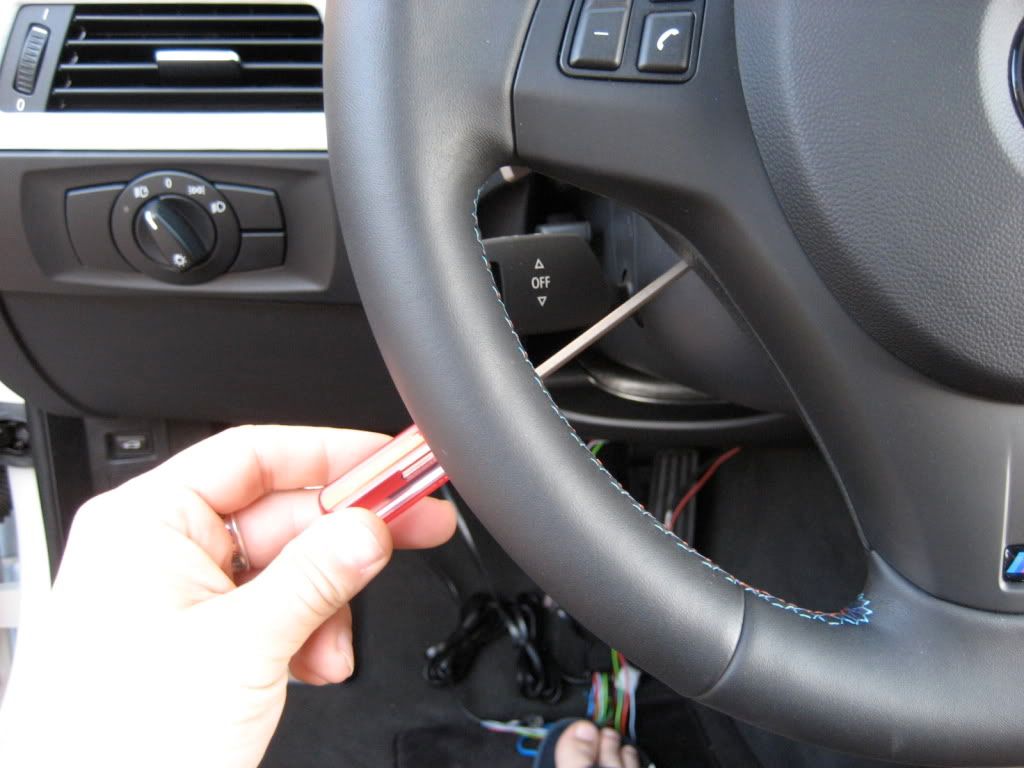 Insert screwdriver like this 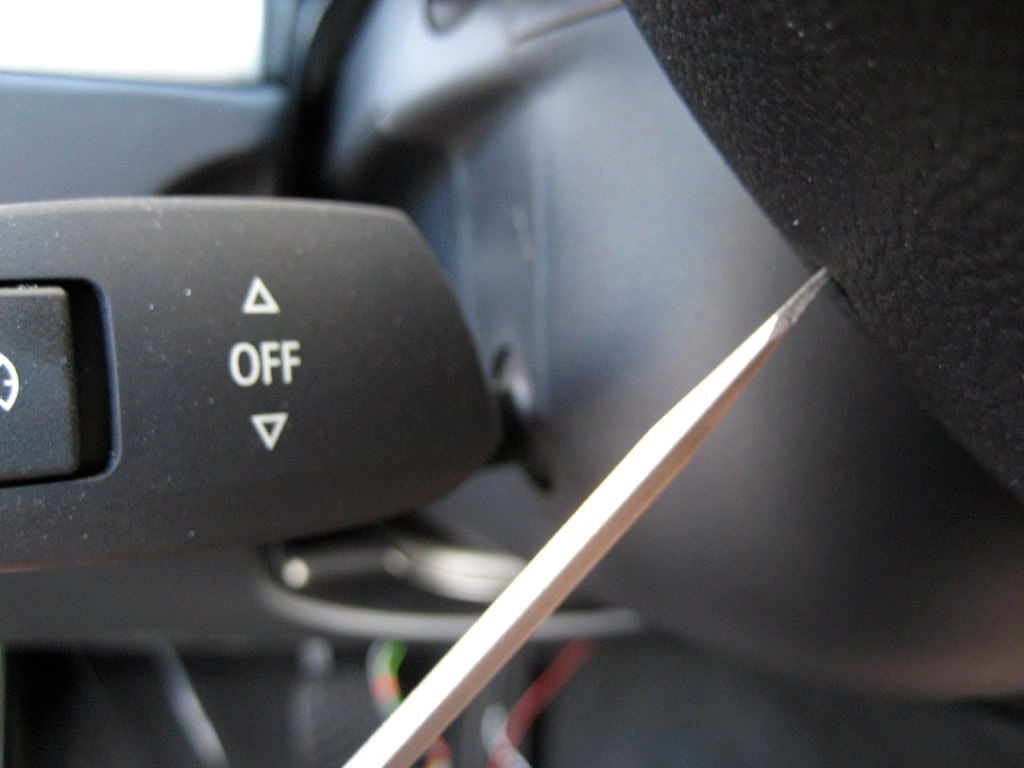 Not like that 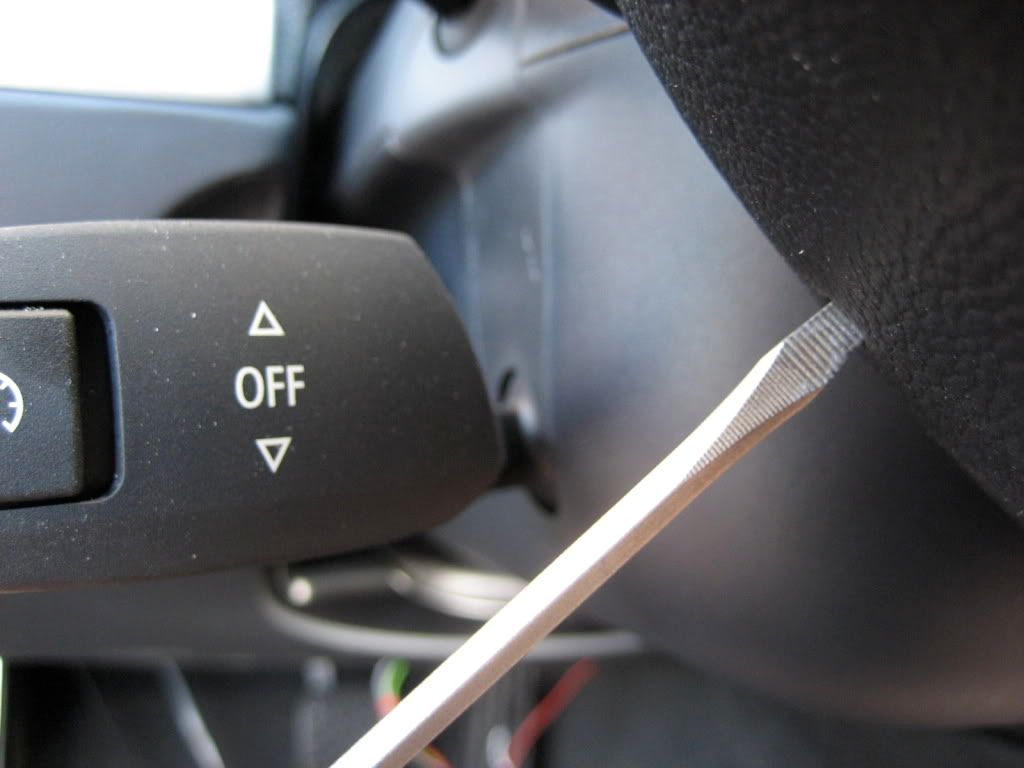 Push on it with the moderate force and pull that side of the airbag gently 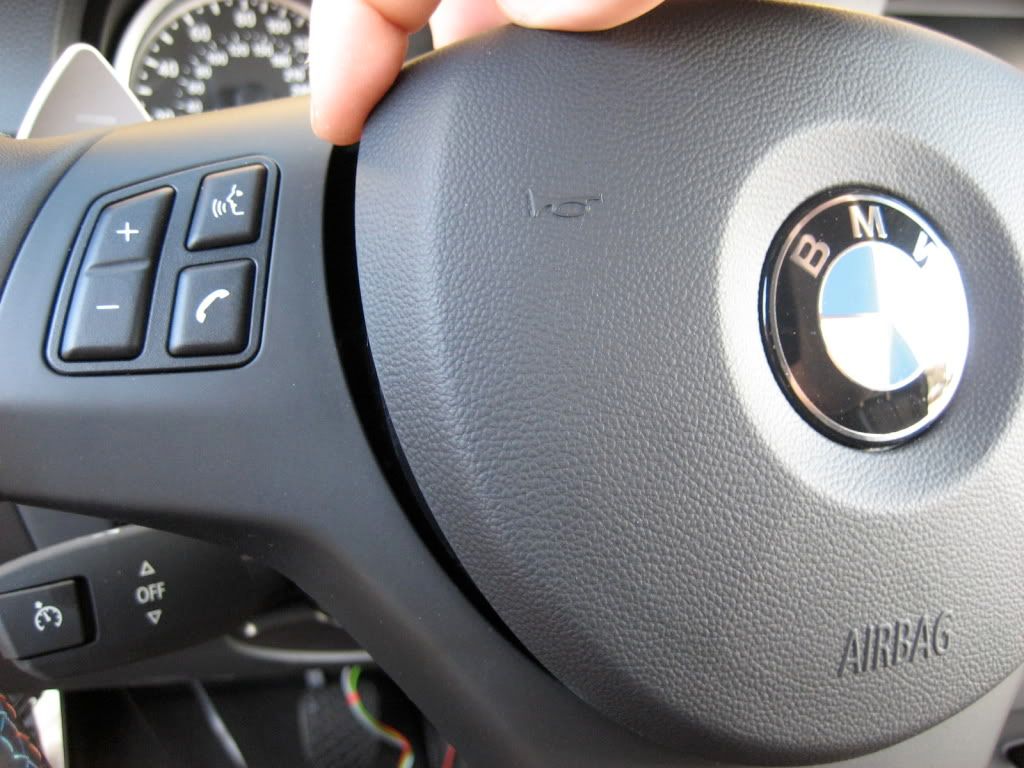 Then do the other side 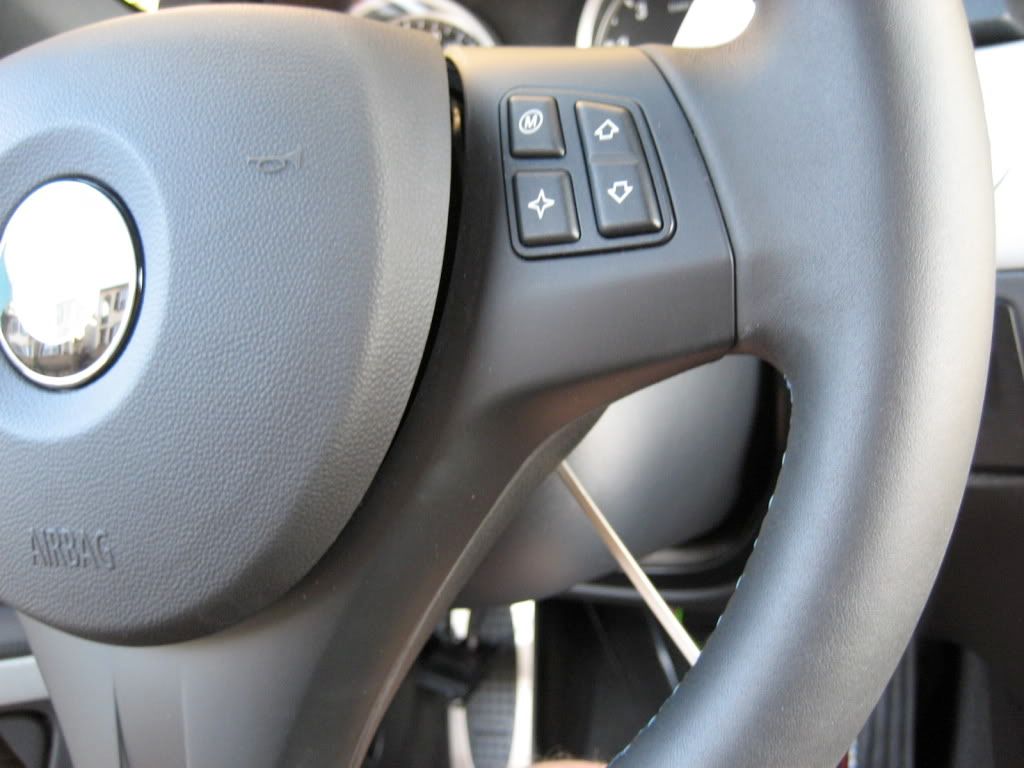 Now you can open Green and Black clips/locks with a flathead screwdriver. Take it easy and don't break them  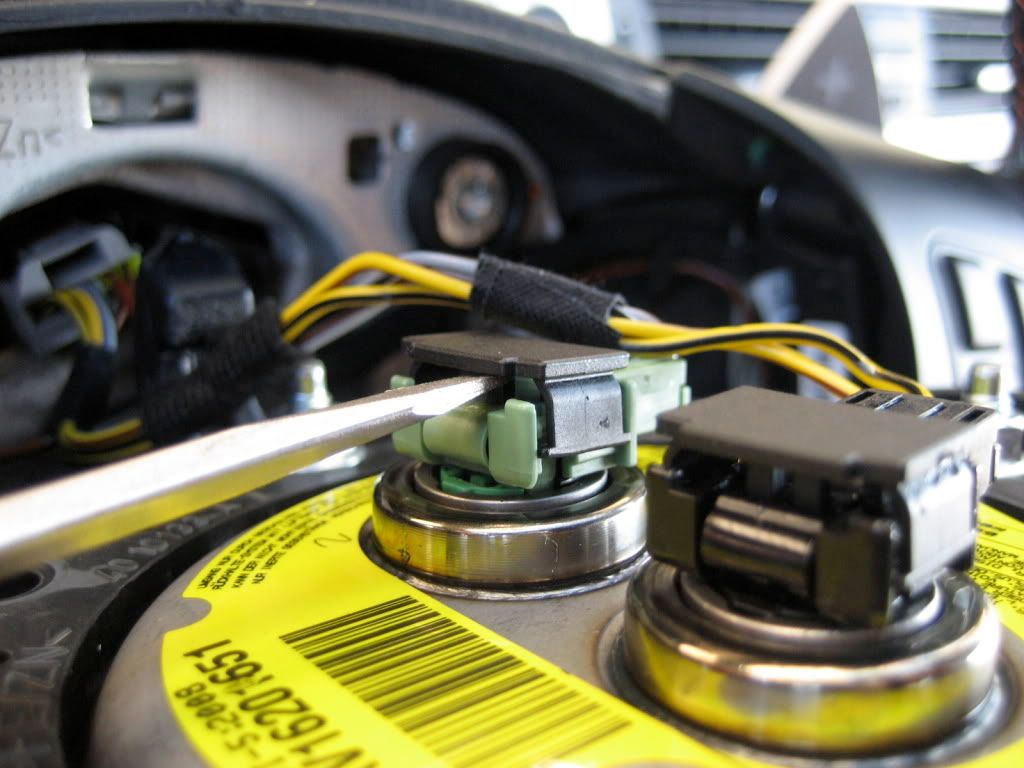 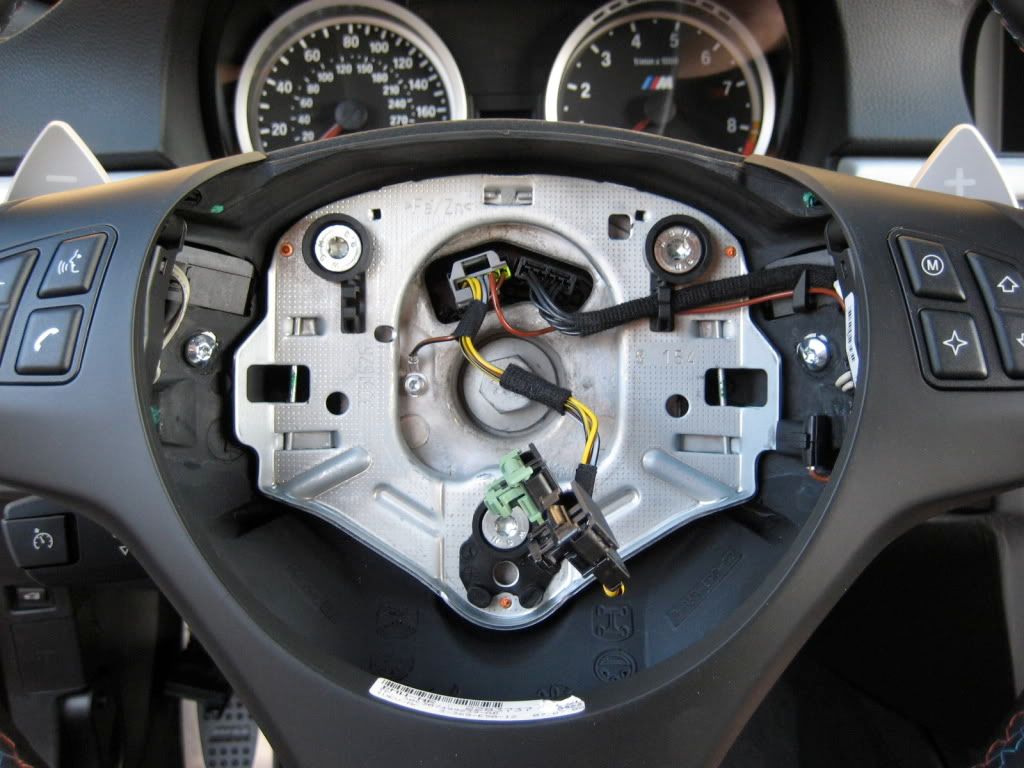 10. Disconnect the connector from the Coil spring cartridge (Grey/Yellow and Black) 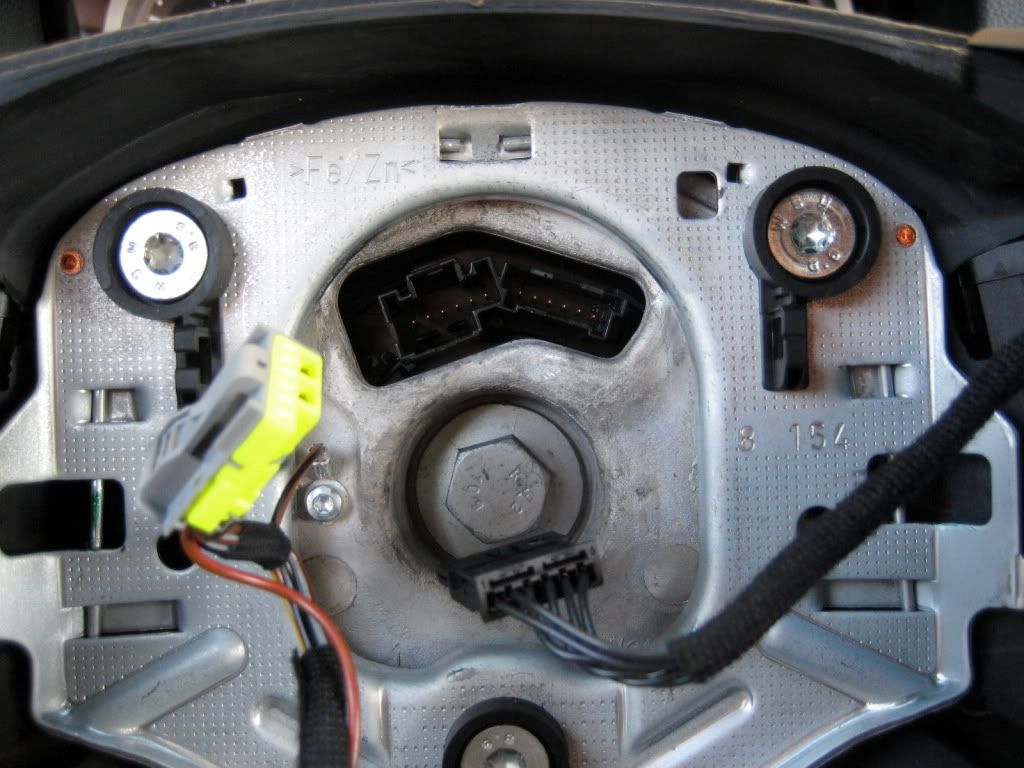 11. Now you can remove your old steering wheel by using 16mm or 5/8 socket 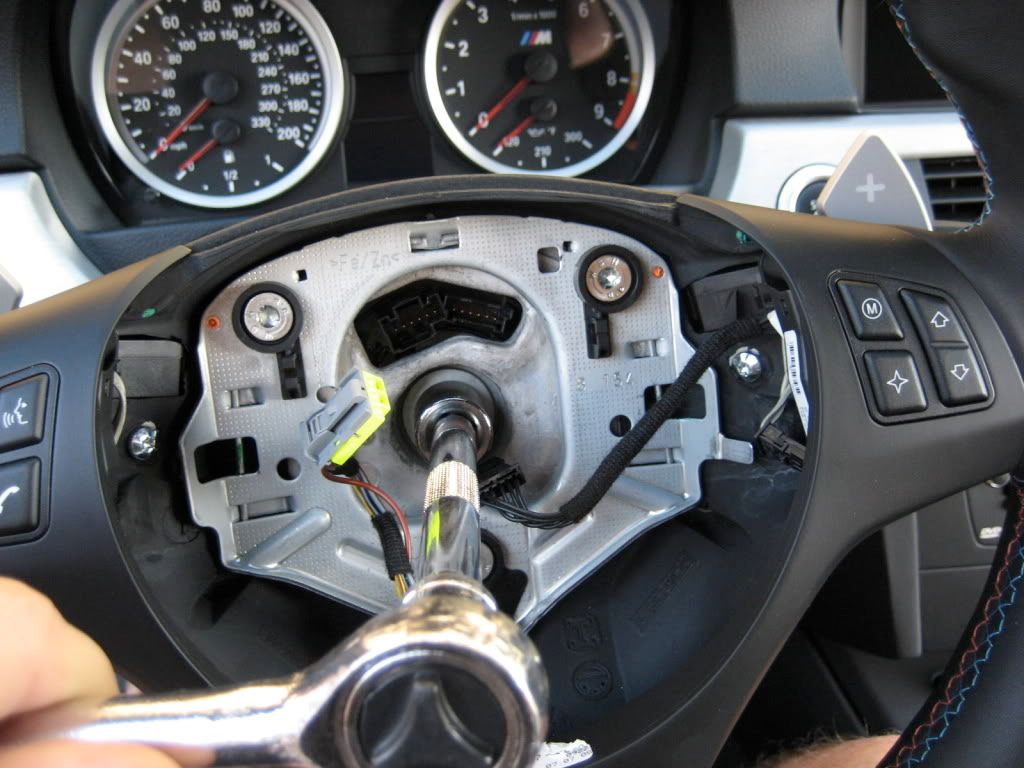 12. Now we need to remove upper/lower steering column trim. Pull the upper part first. Pull it up and do one side at a time. You can use a medium size flathead screwdriver and push it up from the inside, but be very careful and don't punch yourself ... it hurts like a B... trust me 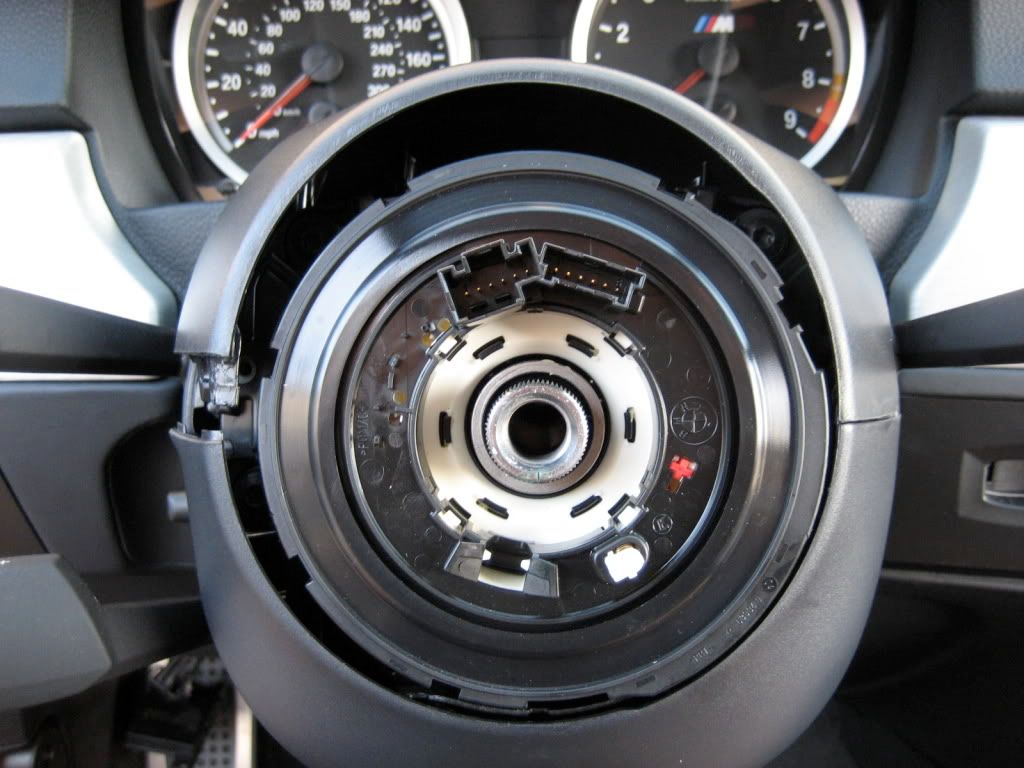 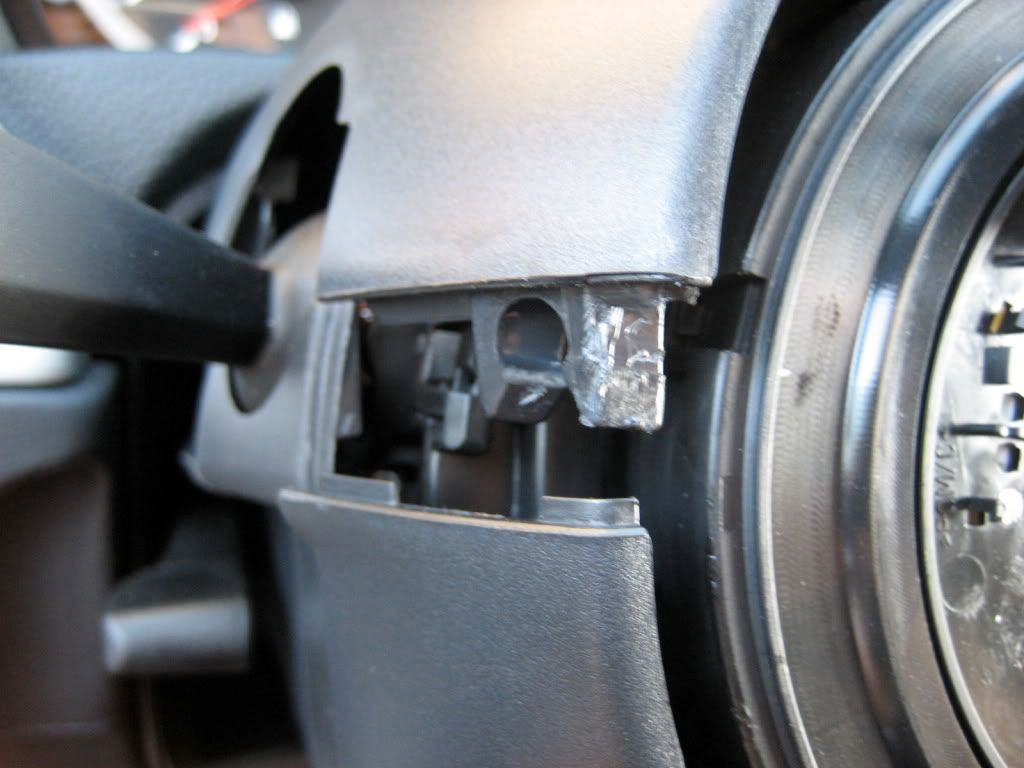 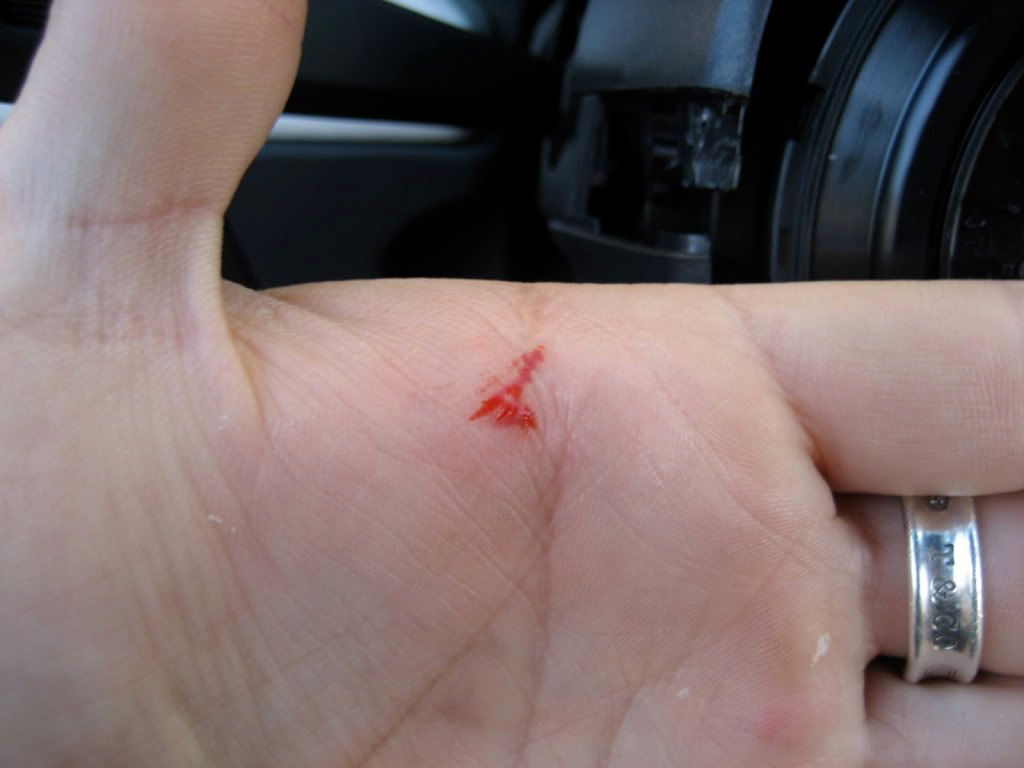 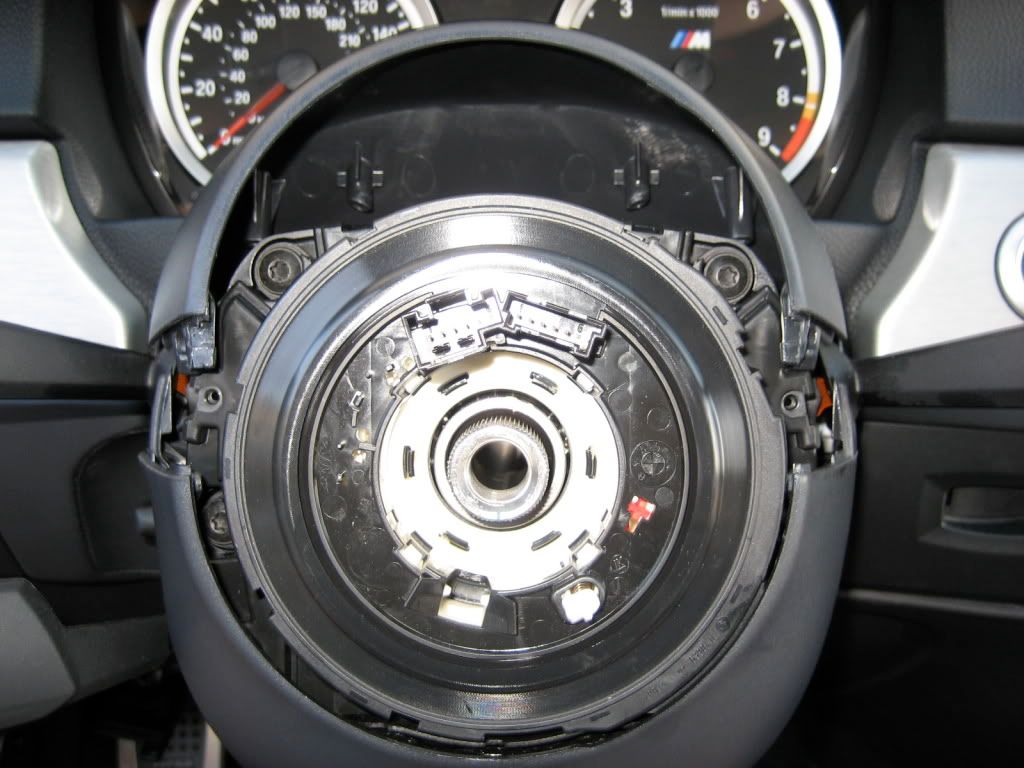 Tape the upper part to the dash 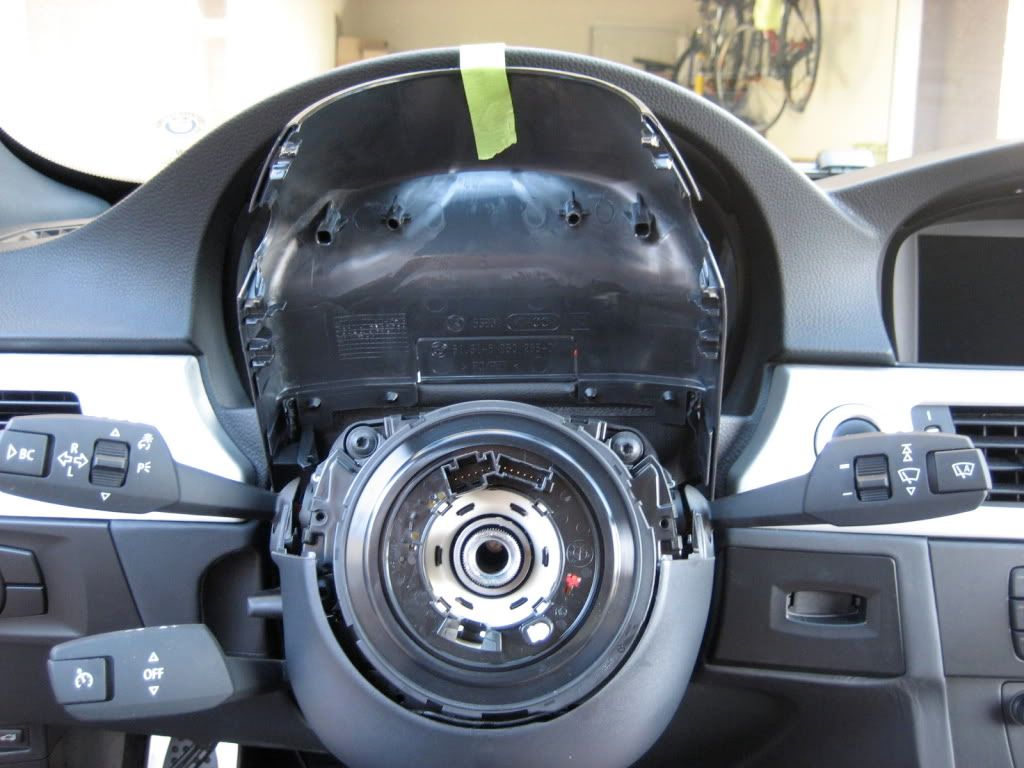 13. Remove the lower part by pressing on the tabs (one on each side) 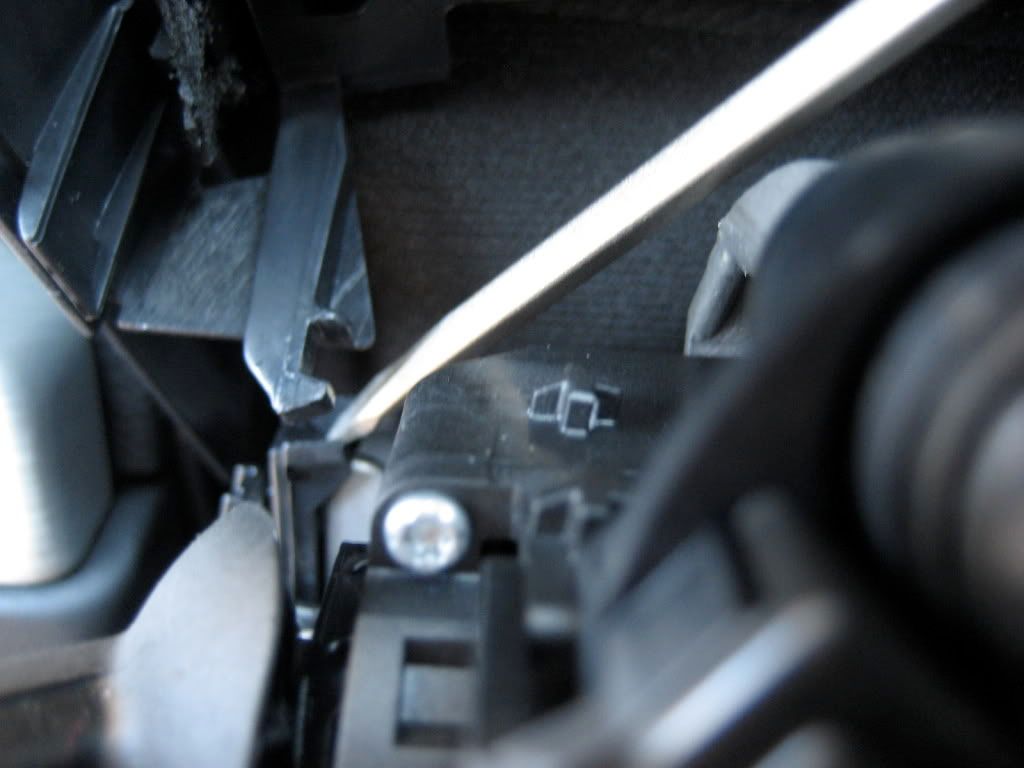 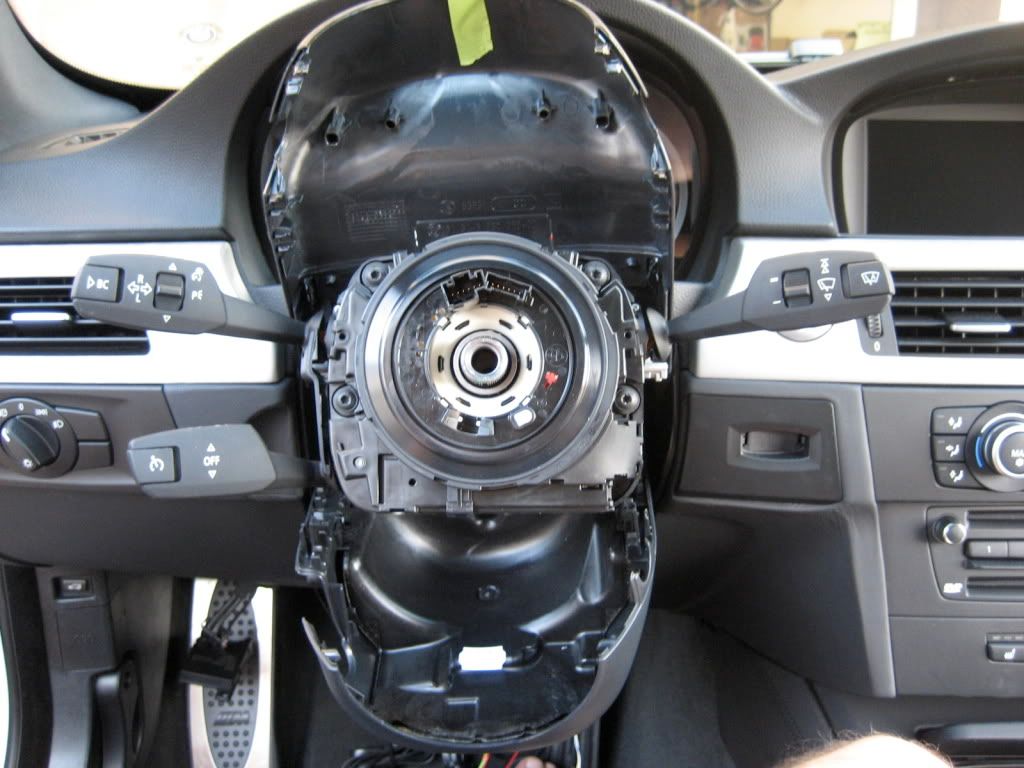 14. Now remove Coil spring cartridge with T15 torx. Unplug Black small connector on the RT side. 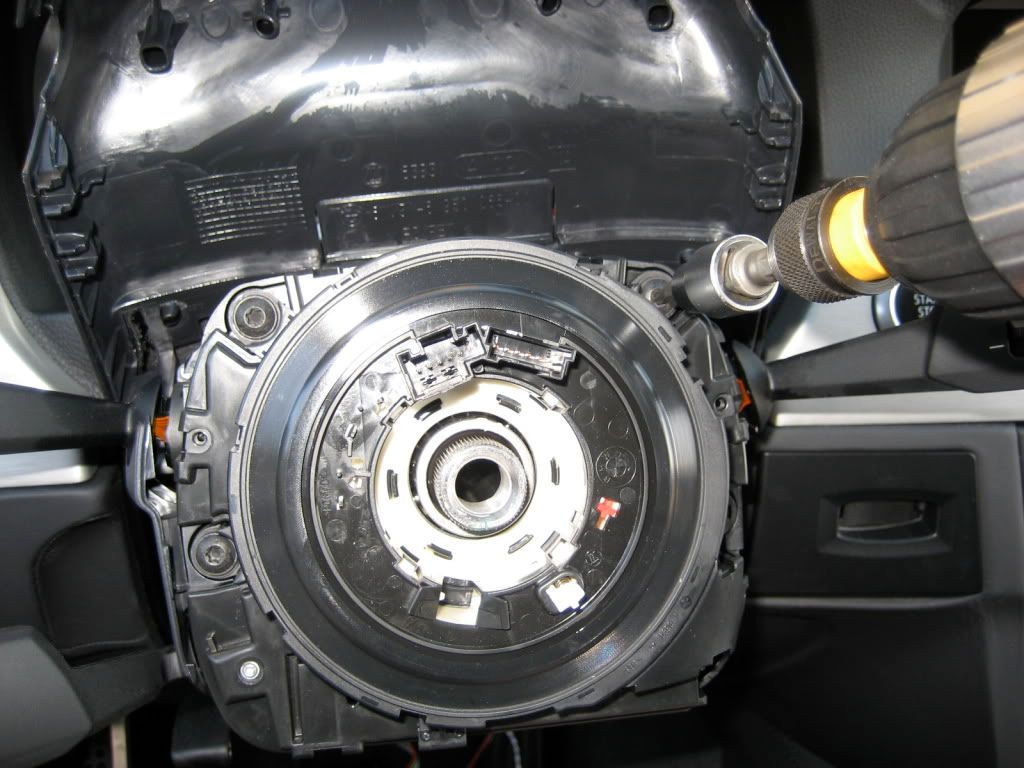 Make sure not to pull the whole assembly out of the column. Very Important. Unclip all the clips and remove just the Coil spring cartridge and nothing else. These are the clips that are holding it on the side, so make sure to unclip them 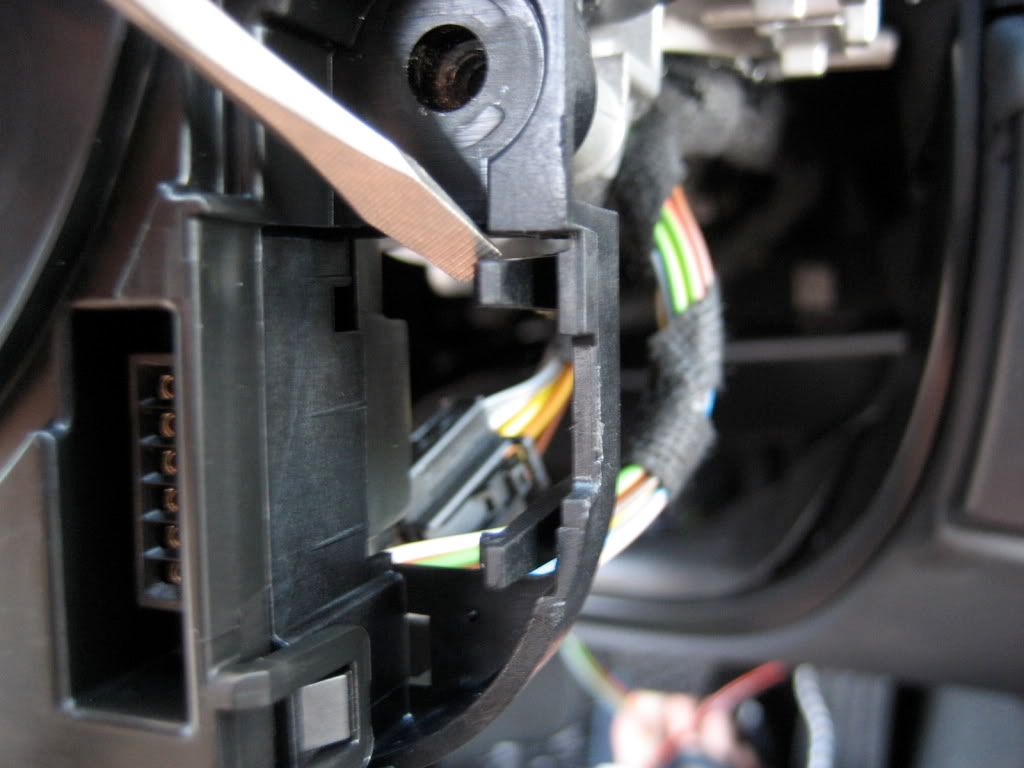 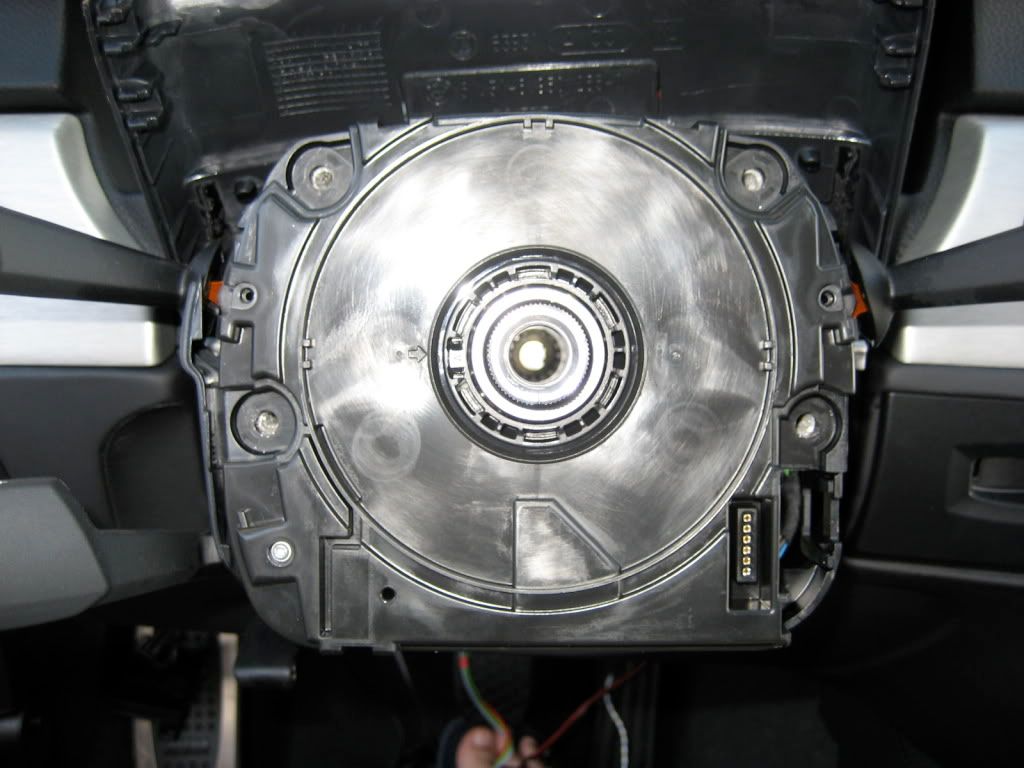 15. Install the new Coil spring cartridge that came with you new PSW. Don NOT connect the Black connector just yet. 16. Now you need to remove the center console to rout the harness to the steering column. I did it this way but you might decide to do it differently.  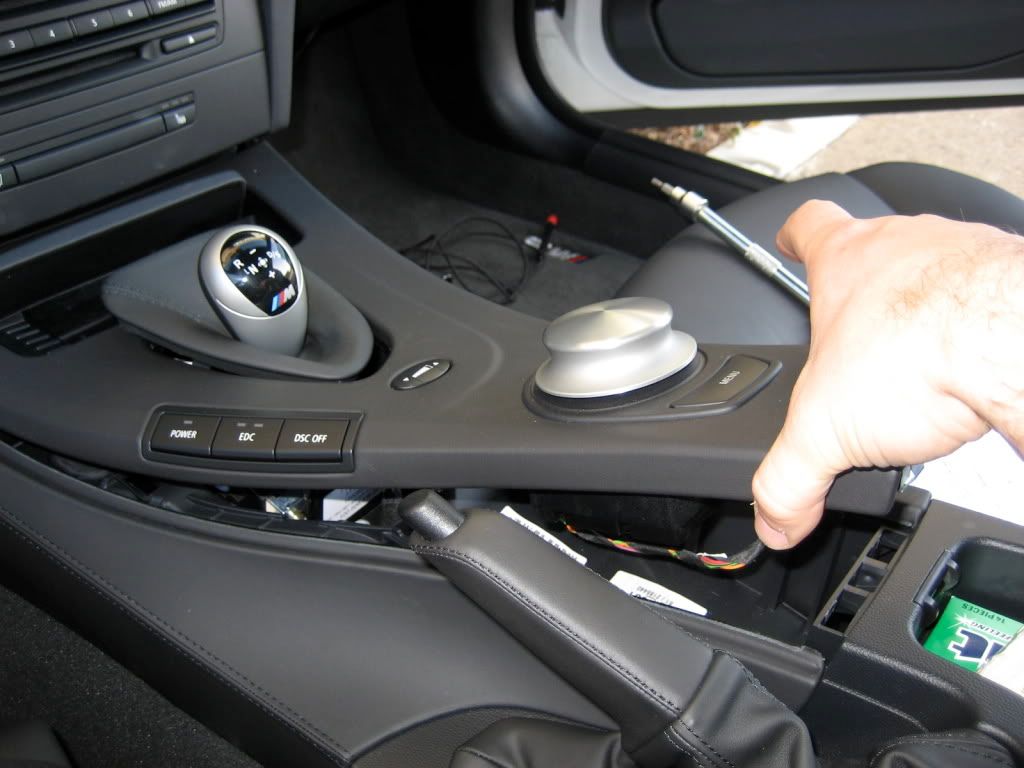 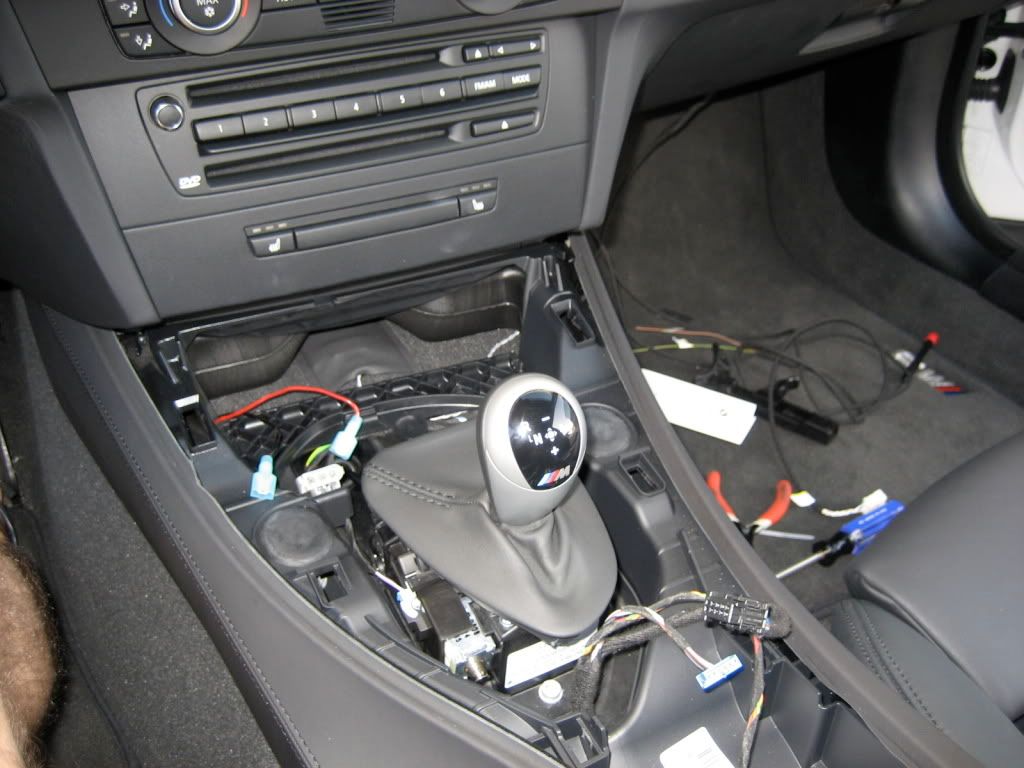 17. This is how I routed A7  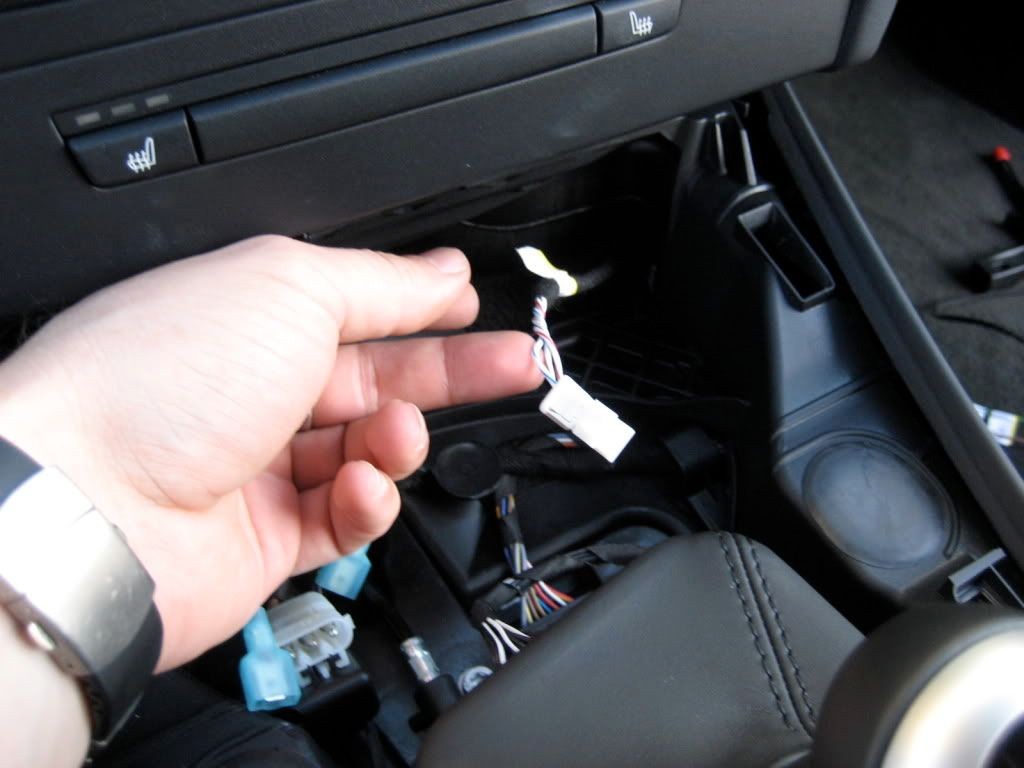 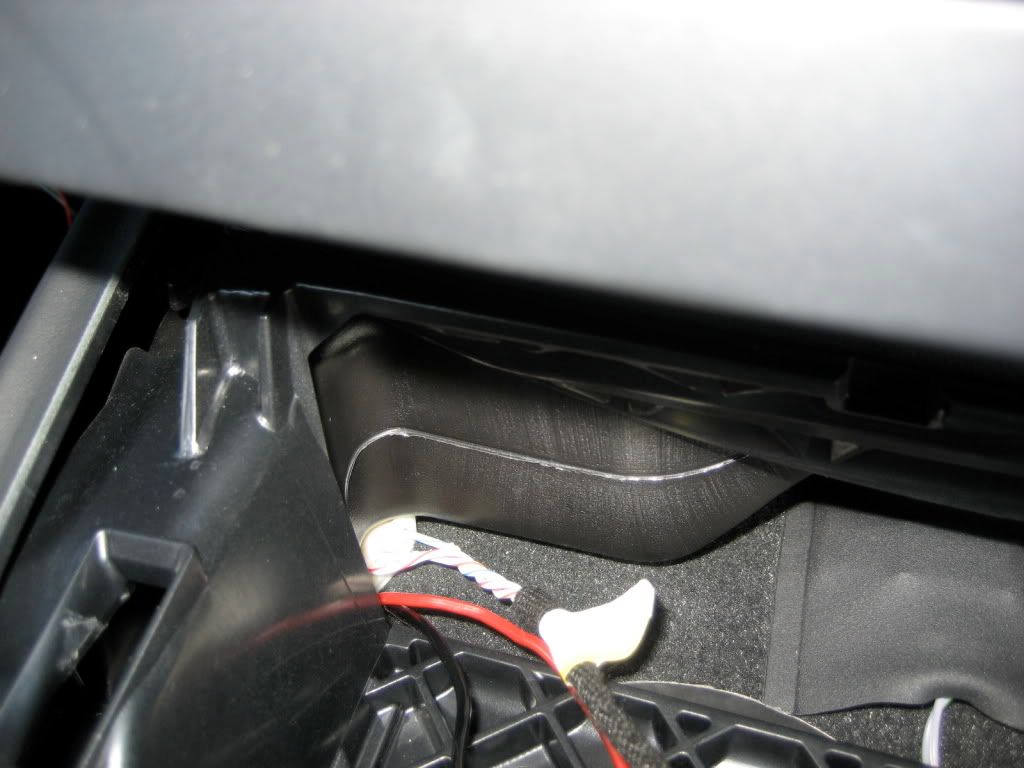 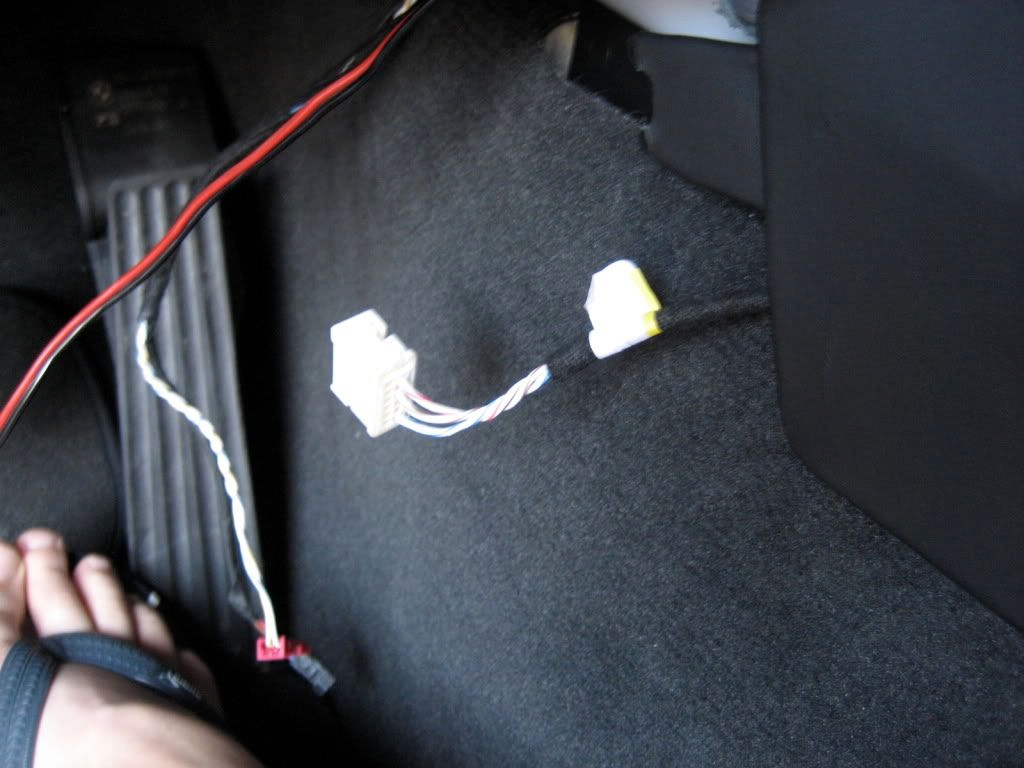 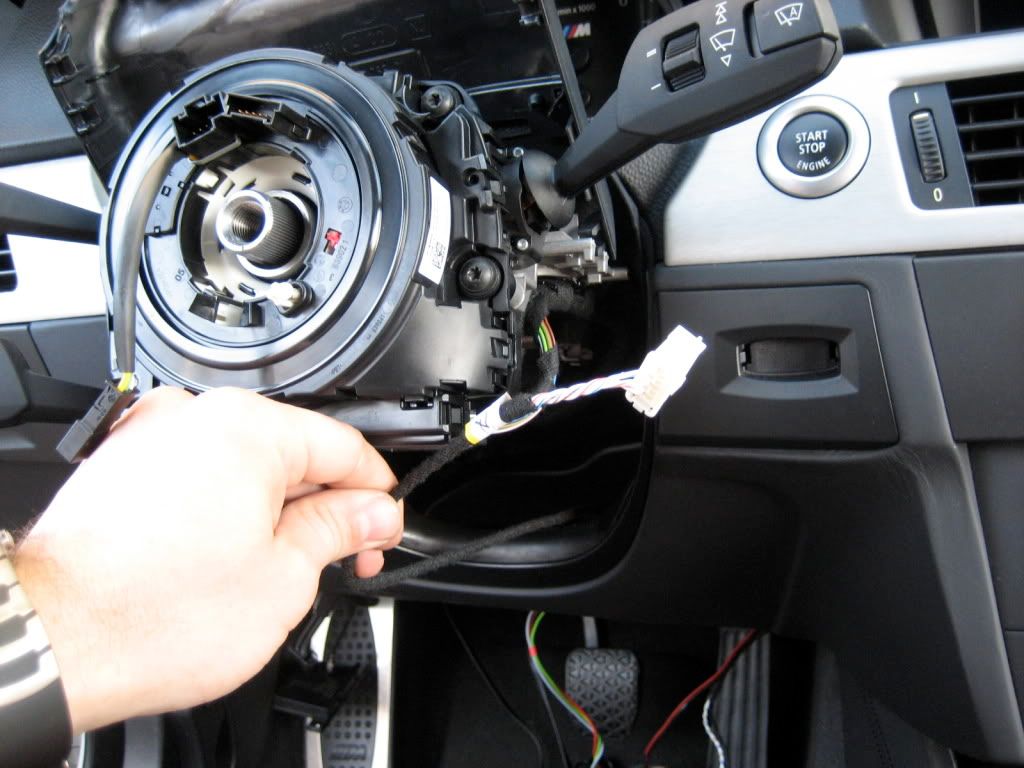 18. Read PDF instruction and remove wires from the Black connector ( the one I told you not to connect to your new Coil spring cartridge) and insert them into A7 white connector. They are numbered 1-6 and you need to insert them the same way ... #1 from Black connector goes to #1 in A7 White connector and so on ... 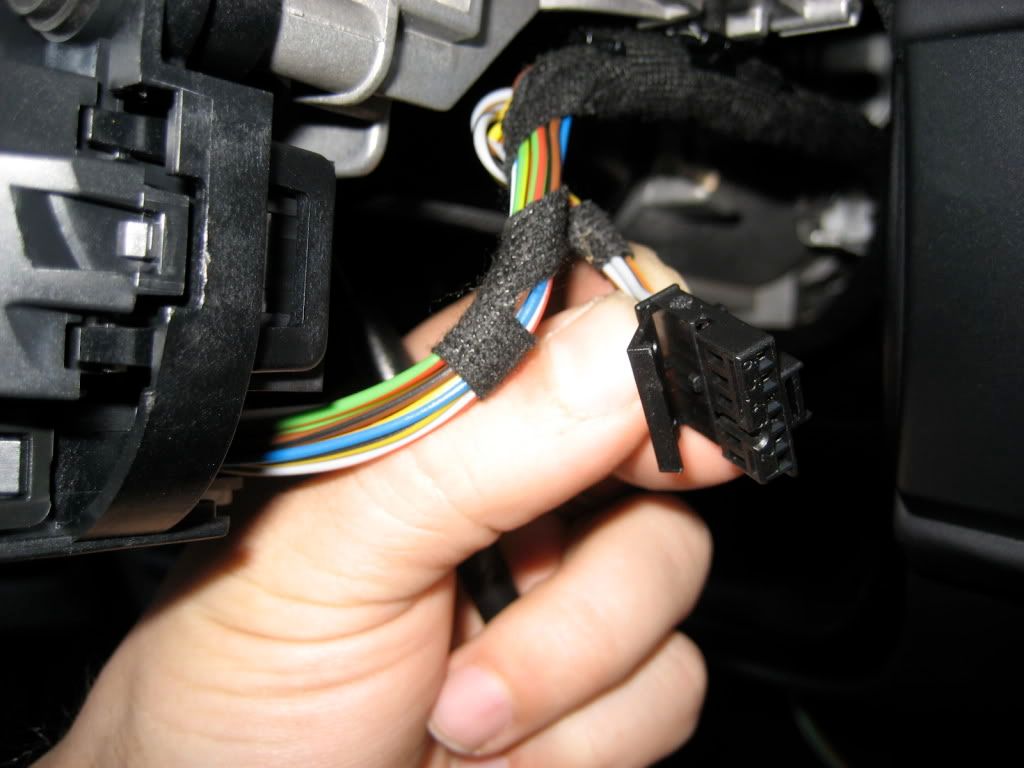  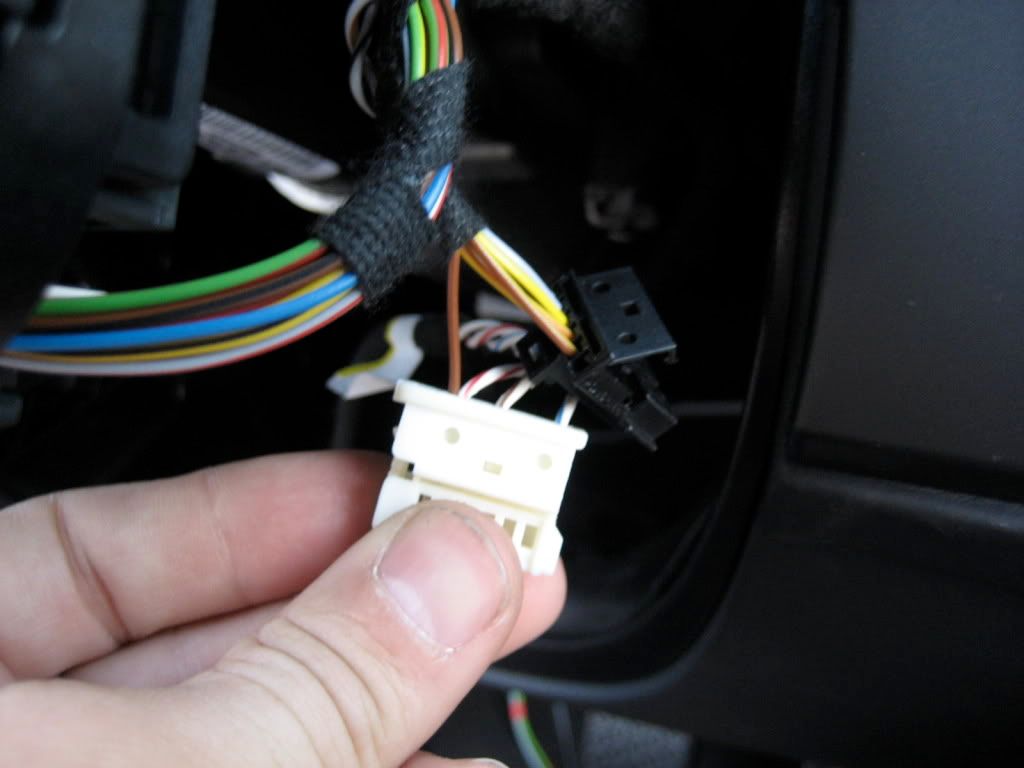 Now you CAN connect A7 White connector into you new Coil spring cartridge 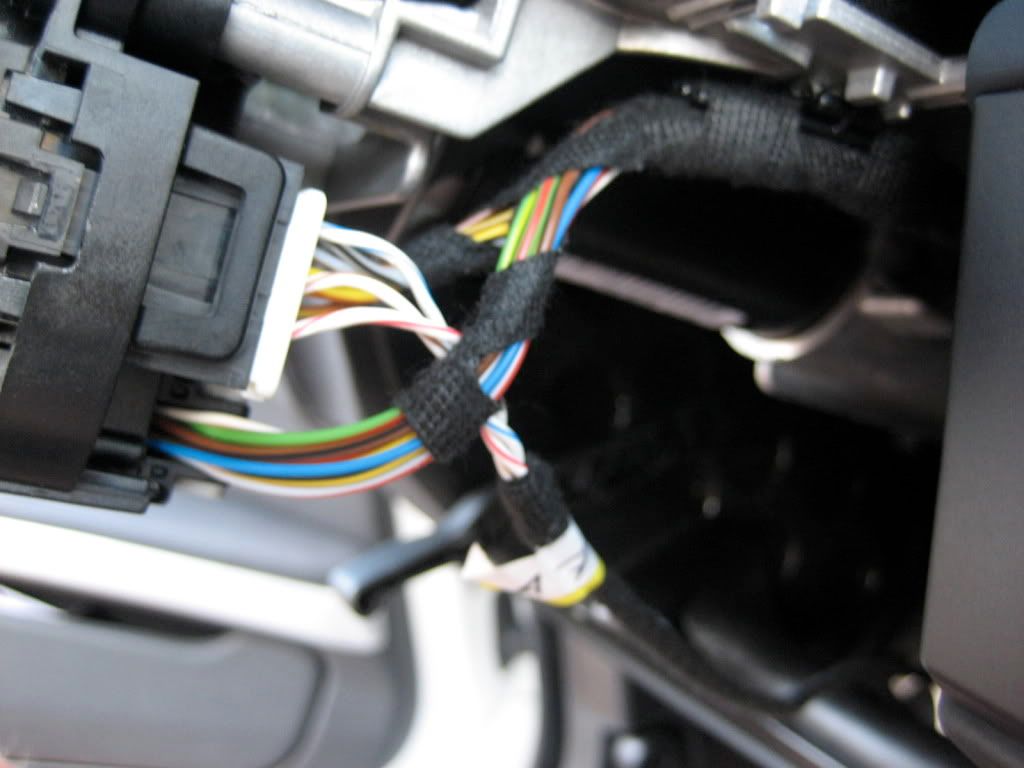 19. Zip-tie the wires together and put back steering wheel column trim.  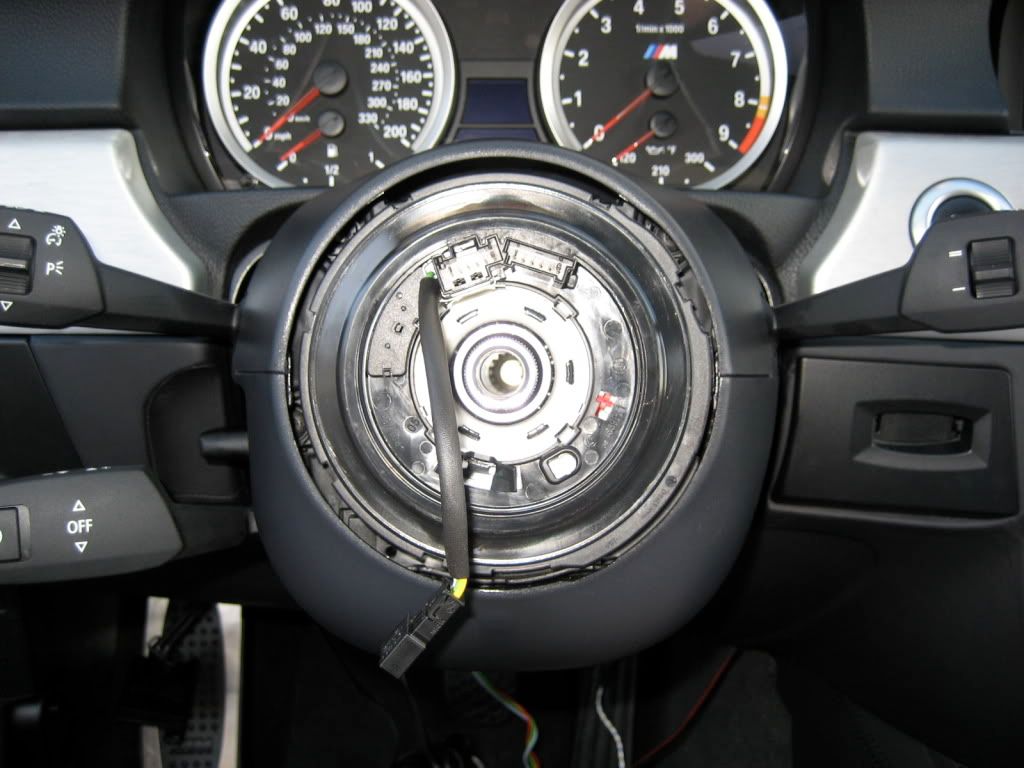 20. Transfer everything from your old wheel to your new PSW and install everything back. Read the PDF file. Connect black connector from the new Coil spring cartridge to the Green connector on you new PSW. The rest is the same. In PDF file it says to connect Black connector to Black but it is actually Green and not Black. Just FIY. It should look like this 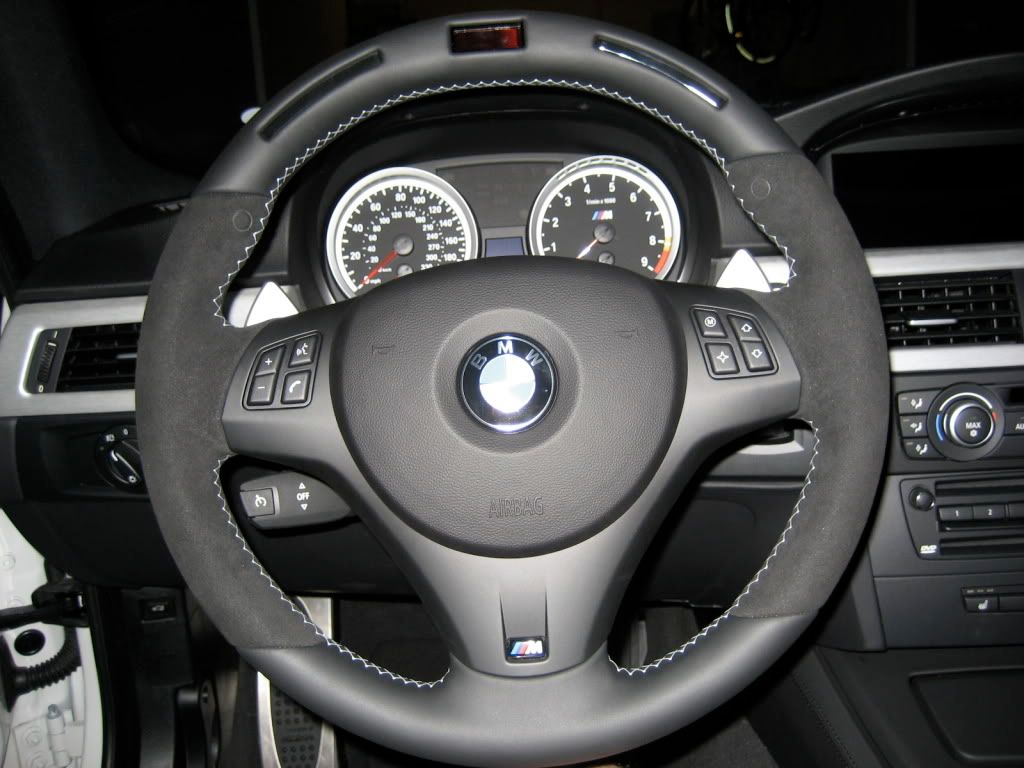 |
|
Appreciate
0
|
| 03-25-2009, 10:22 AM | #3 |
|
Major General
405
Rep 6,107
Posts |
21. Since OBDII port doesn't have two needed wire to connect A1 and A2 I decided to use cigaret lighter as the power source. I have something else taped into this power source so don't pay attention to the Red and Black wires. You need to tap A2 Braun wire in to thick Braun wire and A1 Green/Braun into thick Red/Black wire on your cigaret lighter connector.
  22. Now you can put everything back together. Connect your battery after you are done with everything, start your car and you should get this 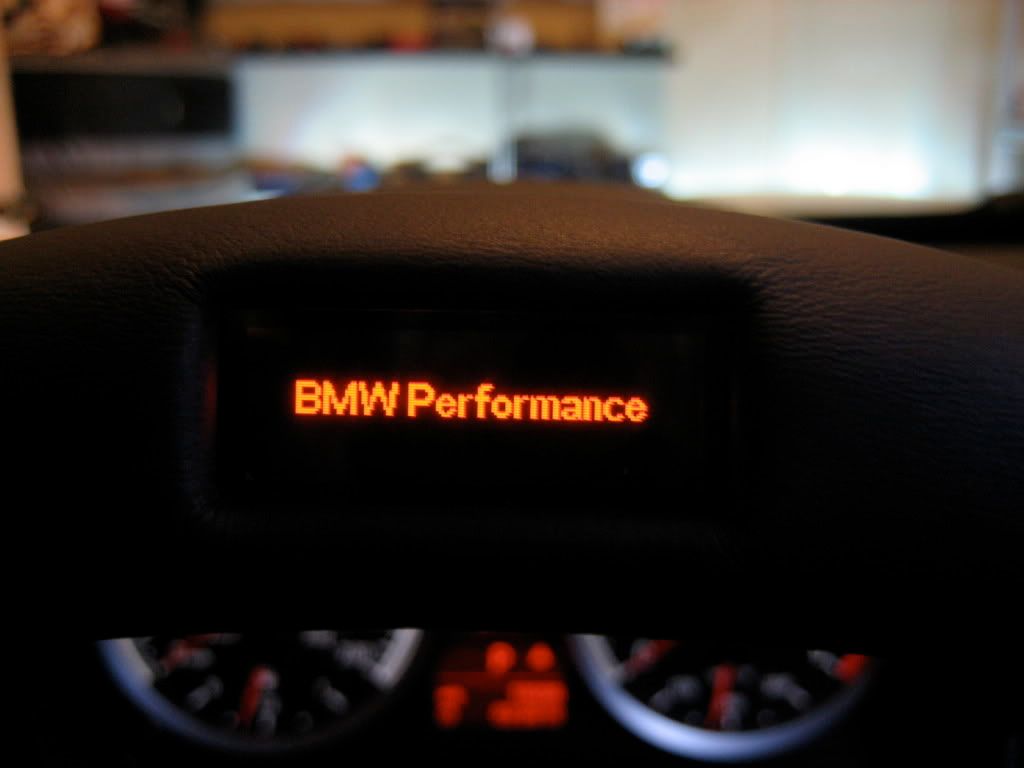 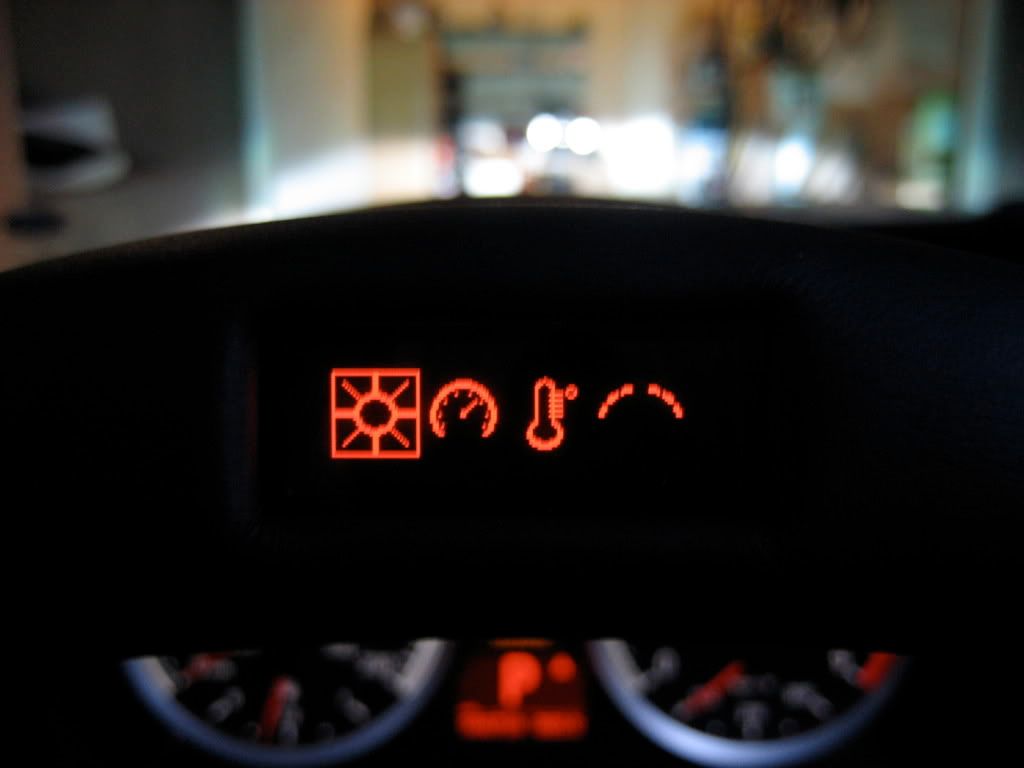 Read the Manual that came with your new PSW to set it the way you like ! I hope this will help PDF FILE HERE |
|
Appreciate
0
|
| 03-25-2009, 12:02 PM | #5 |
|
Professional Moose Racer

316
Rep 7,509
Posts |
THanks, its very thorough
__________________
Visit my blog anytime: http://www.sfpayments.com
 BMW Dream Team PNW Chapter, member #1  |HP Autowerks | AR DESIGN | BMW PERFORMANCE | STOP TECH | Volk Racing| AMS | ARKYM |
|
Appreciate
0
|
| 03-25-2009, 12:14 PM | #6 |
|
Brigadier General
134
Rep 3,132
Posts |
I'm glad someone else took the time to write a DIY. I've been getting so many PMs about the install since I'm the only person outside of you that I can confirm did it all from start to finish themselves that I felt bad for not documenting the whole thing.
And if it makes you feel any better. The steering wheel trim drew blood from my hands too. Hahahahah
__________________
2018 R35 GT-R Cicio800 | 2007 E92 335i - RB Turbos, TC Kline DA Coils, HPA M3 Suspension, Quaife LSD, Stoptech BBK, JB4, FuelIT, AR Downpipes, RDSport Quads, Stett OC, Helix IC, Volk TE-37, Vorsteiner V-35, OSS Headlights | Retired - 2015 F82 M4
 |
|
Appreciate
0
|
| 03-26-2009, 11:49 AM | #8 | |
|
Major General
405
Rep 6,107
Posts |
Quote:
|
|
|
Appreciate
0
|
| 04-09-2009, 07:32 PM | #11 | |
|
Major General
405
Rep 6,107
Posts |
Quote:
|
|
|
Appreciate
0
|
| 04-09-2009, 09:28 PM | #12 |
|
Major General
863
Rep 5,448
Posts |
Great DIY - I just followed it and it was perfect (and much better than the BMW PDF which wouldn't be much harder to follow if it was in German!). Especially helpful was the advice on wiring it into the cig lighter since it seems that not many cars have the 2 wires in the OBD II port that they tell you to wire into!
__________________
2022 X3M Brooklyn Grey
2008 E93 335i FBO 2012 Mercedes C63 Black Series Alanite Grey |
|
Appreciate
0
|
| 05-09-2009, 05:57 AM | #14 |
|
Deny everything
217
Rep 11,378
Posts
Drives: 2006 330i; 2015 X6, S1000RR
Join Date: Apr 2006
Location: Beautiful MD
|
Great DIY!!! Very detailed.

__________________
I need a drink  |
|
Appreciate
0
|
| 05-28-2009, 07:03 PM | #17 |
|
Brigadier General
123
Rep 4,249
Posts |
Excellent work! Actually doesn't look too bad when it's all spelled out like that. I'd guess 2.5 - 3.5 hours for a home mechanic - taking his or her time...
|
|
Appreciate
0
|
| 05-28-2009, 07:04 PM | #18 | |
|
Brigadier General
123
Rep 4,249
Posts |
Quote:
|
|
|
Appreciate
0
|
| 02-24-2010, 05:17 PM | #20 |
|
Major General

143
Rep 6,333
Posts |
awesome!
__________________
2017 BMW M4 DCT Lease Transfer: https://f80.bimmerpost.com/forums/sh...8#post23736398
|
|
Appreciate
0
|
| 03-17-2010, 03:34 AM | #21 |
|
Banned
219
Rep 3,012
Posts |
I just finished this. Dear god, I hope I never have to do it again. I did three things at once:
OEM To sport wheel upgrade. Paddleshift Retrofit Performance Steering Wheel upgrade. For having never done any of it before, what a confusing mess. Worst of all, when I had it all together I pulled back to adjust the wheel and realized I hadn't put the 16 mm wheel bolt back in and ripped my clock spring apart which I spent another hour fixing. FML. Looks good though, haha. |
|
Appreciate
0
|
| 06-22-2010, 07:03 PM | #22 |
|
Colonel
 
127
Rep 2,224
Posts |
I recently got this wheel and the supplier said it's plug and play on a 6MT 335i. It came with no cables or module. I called the local dealership and they thought the same thing, but that it needs coding once installed.
I am confused now. Anyone shed some light?? |
|
Appreciate
0
|
 |
| Bookmarks |
|
|