

|
|
|
|
 |
|
 |
BMW Garage | BMW Meets | Register | Today's Posts | Search |
 |

|
BMW 3-Series (E90 E92) Forum
>
DIY: Spearco FMIC (intercooler) install
|
 |
| 10-24-2007, 01:14 AM | #1 |
|
Major General
 
405
Rep 6,107
Posts |
I decided to go ahead and to do this installation myself. It wasn't very easy DIY but it's all done. I took some pictures and I hope that it will help you or at least you'll get an idea on how to do that.
This DIY is just an idea on how it can be done and I am not responsable for anything. Do it at your own risk . Make sure you have a standart selection of automotive tools ... You will need for sure: 8mm socket 10mm socket Torx T30 Torx T25 Air body saw or Dremel 1. First thing you need to do is to put your car on the jack stands to have free work space. 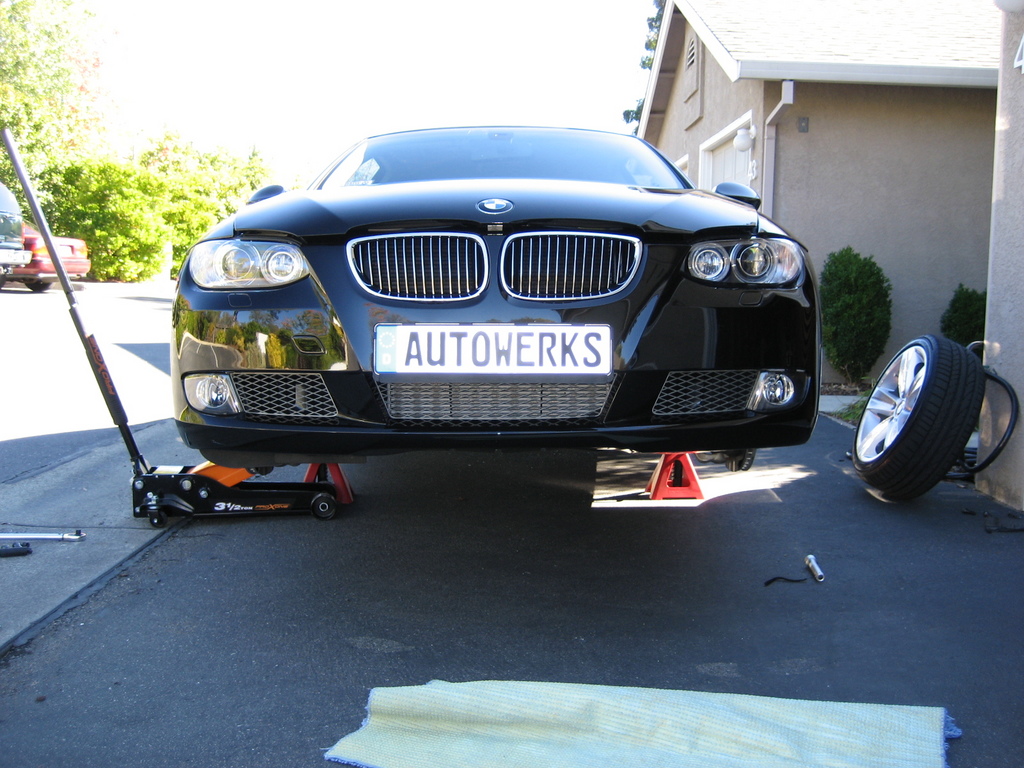   2. You will have to remove your front bumper, wheels, both driver and pass. side inner fender covers, and factory plastic dust pan. Here is very good DIY on how to remove front bumper. Thanks to AU335 http://www.e90post.com/forums/showthread.php?t=80133   3. After those parts are off , remove the both the factory boost tubes that connects to the intercooler on the intercooler side by removing the springs retainers. driver side   passenger side  4. Remove factory intercooler by uncliping 2 black clips and unscrewing two Torx T25 bolts from the core support black clips    Torx T25 bolts   Now intercooler is off ... here you can compare the size of the Stock intercooler to Spearco Stock  Stock vs Spearco  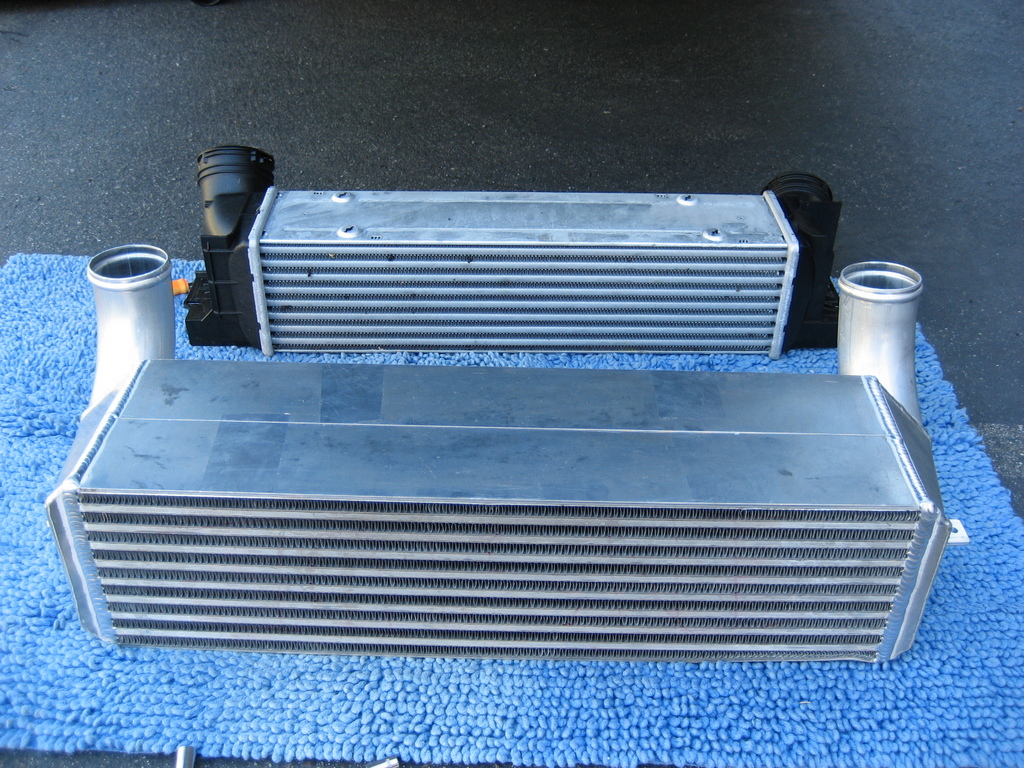  5. Remove the pass. side turbo to intercooler boost tube. To remove the factory hose clamp, find the seam and inseart a flat head screwdriver and pry apart. Make sure not to damage factory silicone hose. I used that orange tool with the small hook to pull it off. Make sure to pull it very easy. Boost tube  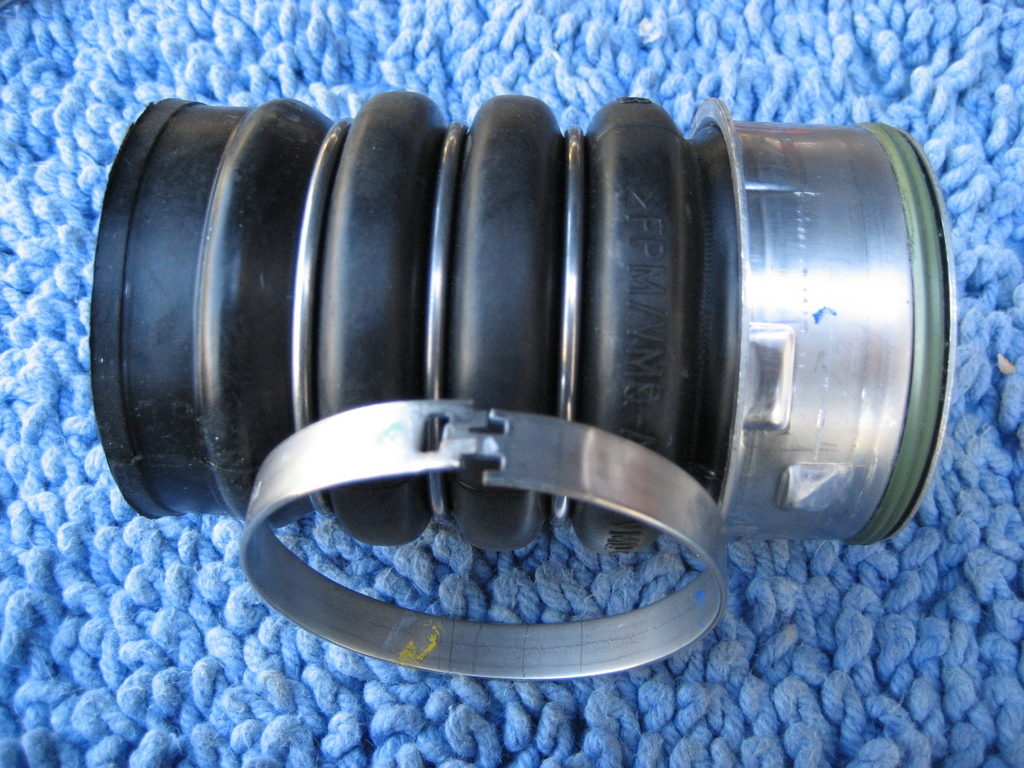   6. Disconnect the intercooler to BOV pipe from the fan shroud. No picture but you will see that clip on the pipe later 7. Loosen this clamp 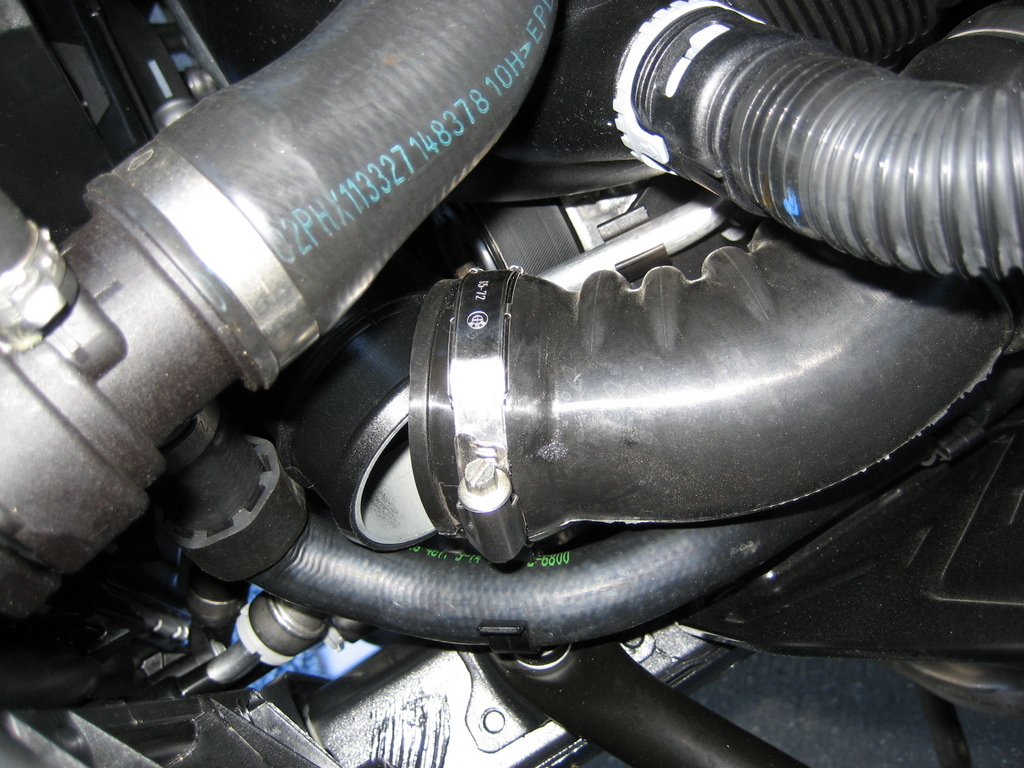 and remove that pipe from the bottom of the vehicle ( turn it clock wise ) turning  pipe is off (you can see that clip from step 6 here)   8. Here is the fun part. Now you need to trim the core support using an air body saw or dremel. You need to use a caliper and set it to 0.75" (3/4) , then place the caliper against the back enge of the core support and make a line across the entire bottom part of the core support you can see black line from one side to the center of the core support 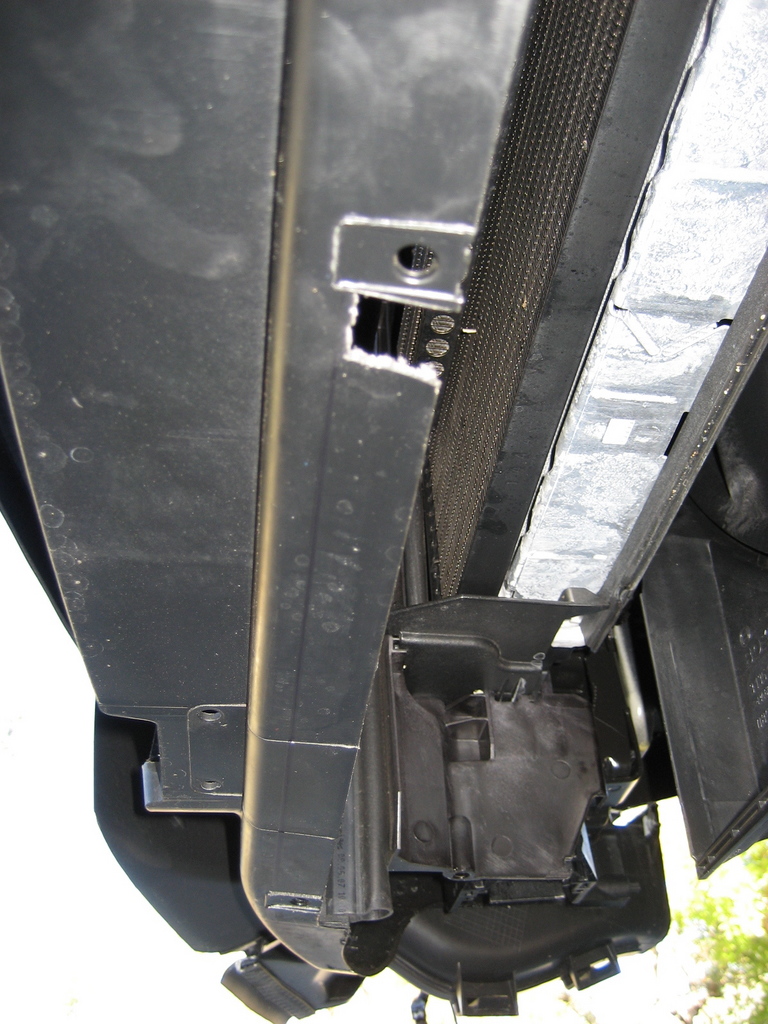 than trim it  9. Now you need to try to fit the new intercooler in, to see if you did a good job. 10. Install the supplied 45 degree silicone hose to the factory pass. side turbo to intercooler pipe. Slide two supplied hose clamps onto 45deg. silicone hose loosely.   Now install second supplied silicone hose onto the driver side of the new intercoller with 2 hose clamps ( you can tight one down and leave the second loose)   11.Now you can install the new intercooler into the vehicle. Slide the other end of the previously installed 45 deg. hose onto pass. side inlet of the intercooler. Make sure the " L " brackets that are welded to the intercooler slides onto the back of the factory fan shroud. ( No pics of the L brackets, sorry, but you will see them on the intercooler) pass side 45 degree silicone hose 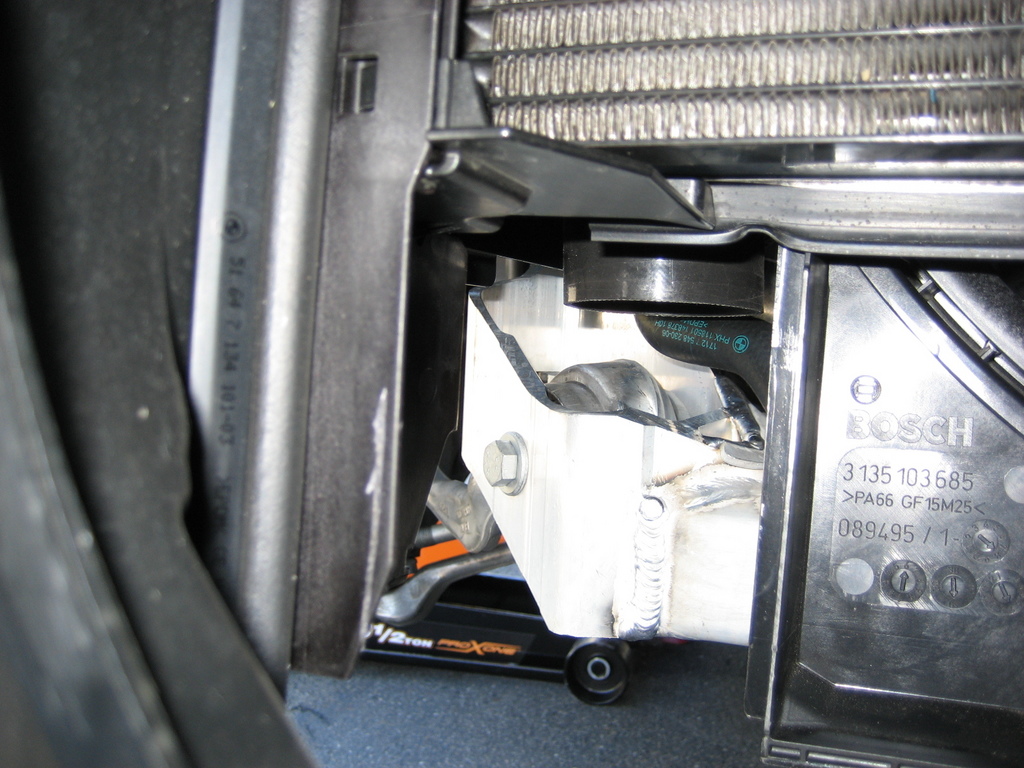 sliding it in 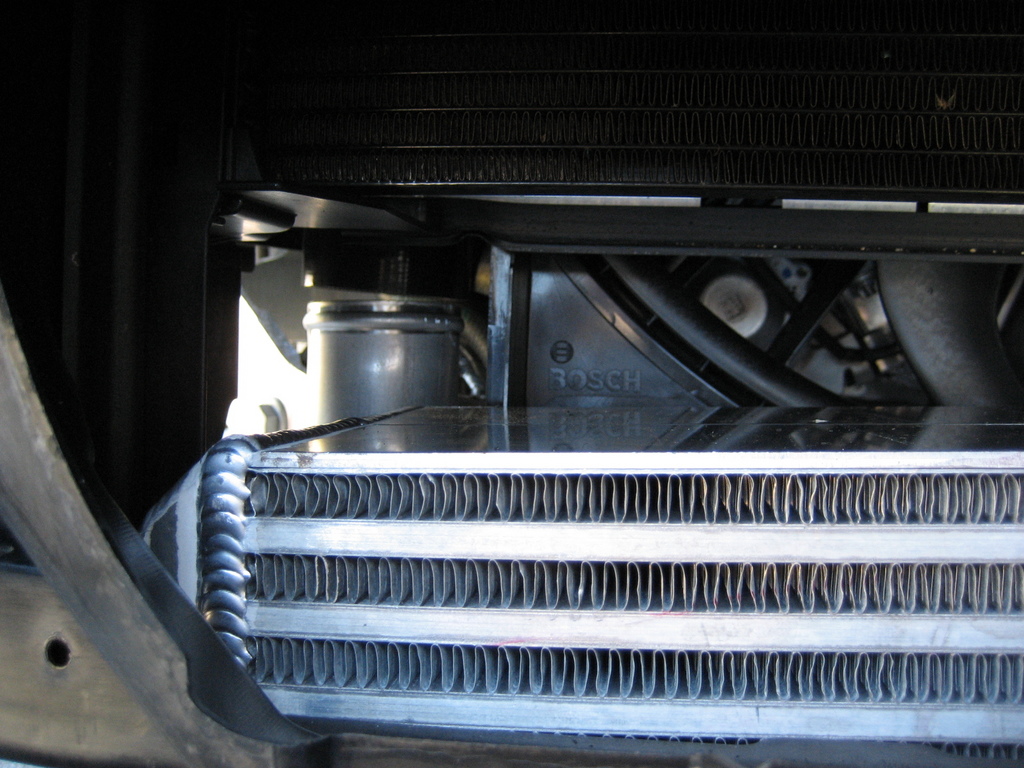  driver side 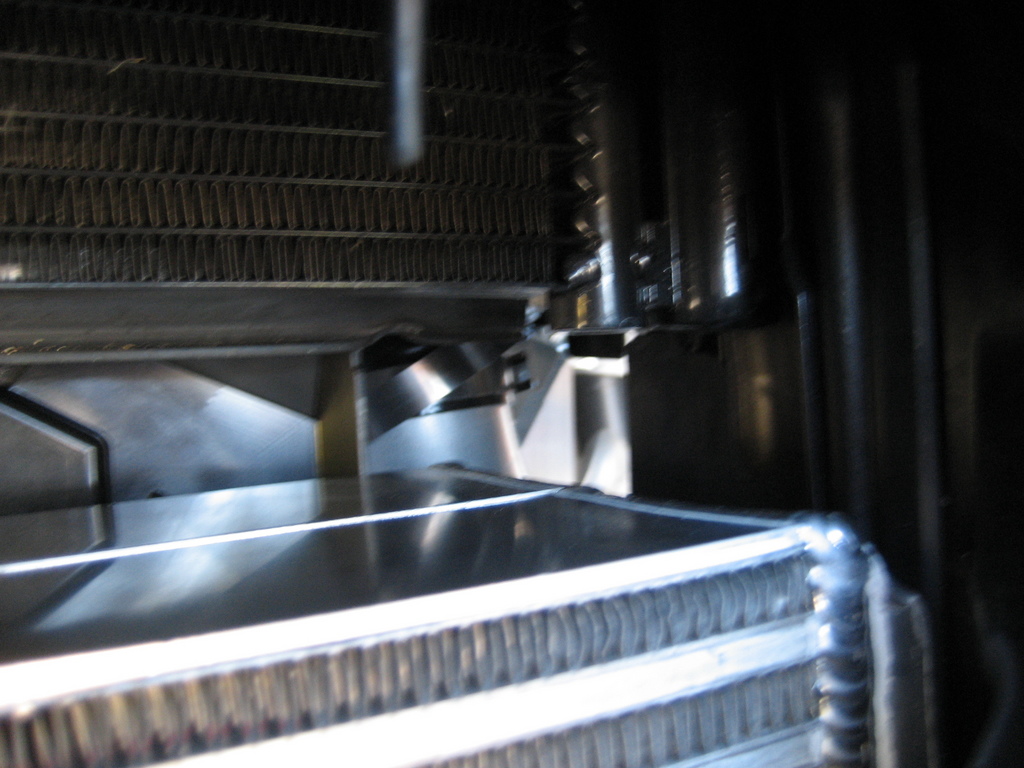 12. Make sure everything fits right and then you can screw the intercooler to the core support using those two factory Torx T25 screws. 13. Woo Hoo ... Here it is  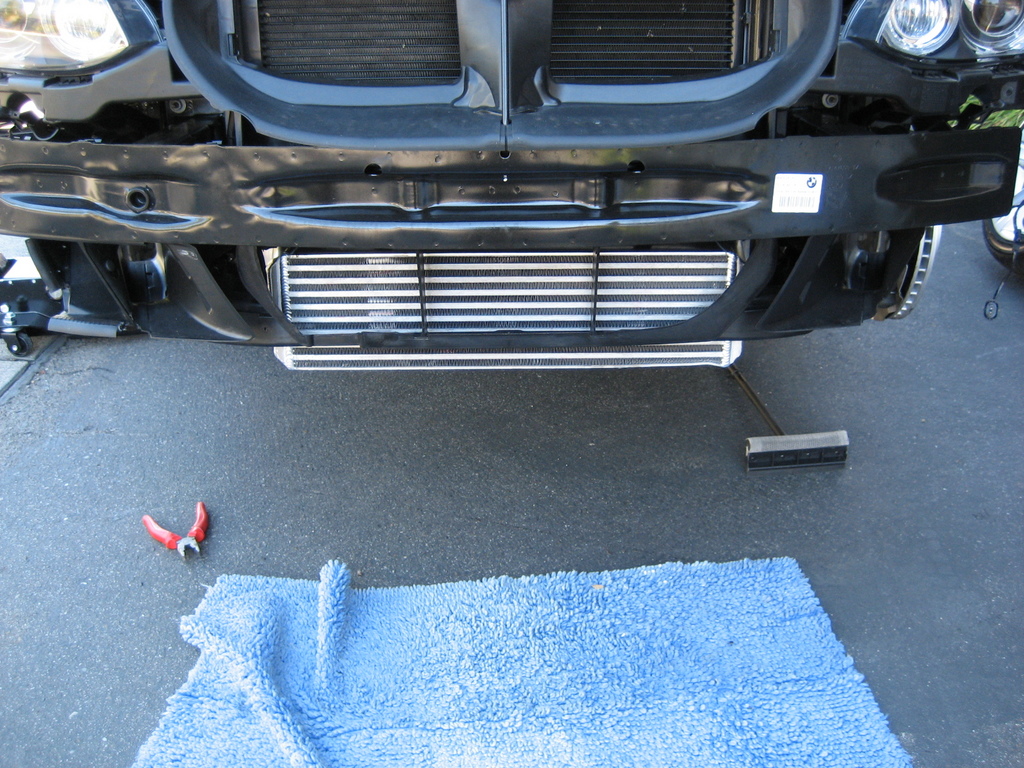 14. Now another FUN part. You will need to insert the one ( longer straight) end of the supplied boost tube into the other end of silicon hose coupling( driver side ), that was previously installed on the driver's side new intercooler inlet. The other end of supplied boost tube you will need to insert into the hose on the factory BOV securing using the factory hose clamp. To do all that, I would recommend to take off two parts of your intake, so you can have more space there. part of the intake off  supplied silicone hose that you mounted on the intercooler's inlet ( driver side)  15. Now tight everything down and make sure all the connections are good. 16. Put everything back and go and test your new Spearco intercooler.     I hope it will help you ! DO IT AT YOUR OWN RISK. Last edited by Moderator; 10-24-2007 at 11:35 PM.. |
| 10-24-2007, 01:39 AM | #3 |
|
Back Again
2
Rep 204
Posts |
I don't know what exatly FMIC do for car (yet), but this is really clean and well explained DIY. Im sure it will help alot who want to this mod.
Thanks! Great work 
__________________
What's next?
|
|
Appreciate
0
|
| 10-24-2007, 01:45 AM | #6 | |
|
Major General
405
Rep 6,107
Posts |
Quote:
|
|
|
Appreciate
0
|
| 10-24-2007, 02:06 AM | #10 |
|
Major General
405
Rep 6,107
Posts |
haha ... sorry man i am tired and it's time for me to go sleep ...
I'll post more pics ... I need to wash her and then I'll post better ones ... |
|
Appreciate
0
|
| 10-24-2007, 04:28 AM | #11 |
|
If You Aint First, You're last !!!
81
Rep 2,509
Posts |
no pics?
__________________
 08 BMW BSM 335i 6MT (Sports, Premium, NAV, PDC, AS, IPOD, HD Radio, Rear Sunshade, OEM Alarm) Angel iBright V3, Luminics Fog Bulb, Turbo Tuner, K&N Drop in Filter, Dinan Exhaust, Dinan Pedals, Vorsteiner CF Front Lip, and CF Rear Diffuser. Ordered:08/25/07 Started: 09/09/07 Finished: 09/14/07 On Ship: 09/15/07 Arrived: 10/08/07 Delivered: 10/10/07 |
|
Appreciate
0
|
| 10-24-2007, 10:24 AM | #13 | |
|
Moderator
132
Rep 6,775
Posts
Drives: TiAg E92 335
Join Date: Oct 2006
Location: Raleigh, NC
|
Quote:
 So, your front mount intercooler comes to the rescue and cools off your intake charge from incoming air passing through it before that previously compressed air gets jammed into your throttle body. So, your front mount intercooler comes to the rescue and cools off your intake charge from incoming air passing through it before that previously compressed air gets jammed into your throttle body. Doba_S... very nice write-up! Thanks. 
__________________
-Michael.
Berlina Black S2000 CR is now in the garage   l 19" Rial Daytona Race l KW V2 l Eisenhaus Race Exhaust l |
|
|
Appreciate
0
|
| 10-24-2007, 12:46 PM | #14 |
|
Accountant with 335i

15
Rep 199
Posts |
did you change out your bumper grilles/ during the process??
just curious cause they were silver before and now are black
__________________
2007 Titanium Silver w/Black Dakota - Brushed Alumin trim Sport, Premium 6speed
|
|
Appreciate
0
|
| 10-24-2007, 04:52 PM | #15 |
|
born to be turbocharged

24
Rep 1,347
Posts |
Hmmm, I thought this IC doesnot need any cutting. It looks like it's sitting too low, doesn't it?
Thx for the nice DIY
__________________
Disclaimer: All this message was written with recycled electrons.
|
|
Appreciate
0
|
| 10-24-2007, 05:25 PM | #16 |
|
ASR Turbos+LSD+Meth= :D
73
Rep 1,517
Posts
Drives: E92 335i
Join Date: May 2007
Location: Miami, FL
|
great job... please let us know the need for the trimming? is it because u cant fit it infron t of the radiator from underneath without having more space? If i were to get one and take it to a professional shop, do you think they would trim that peice?
__________________
 2007 335i Coupe Mods: Check the Garage |
|
Appreciate
0
|
| 10-24-2007, 11:30 PM | #17 | |
|
Major General
405
Rep 6,107
Posts |
Quote:
|
|
|
Appreciate
0
|
| 10-24-2007, 11:32 PM | #18 | |
|
Major General
405
Rep 6,107
Posts |
Quote:
|
|
|
Appreciate
0
|
| 10-24-2007, 11:35 PM | #19 | |
|
Major General
405
Rep 6,107
Posts |
Quote:
|
|
|
Appreciate
0
|
| 10-25-2007, 01:33 AM | #20 |
|
Major
 
61
Rep 1,120
Posts |
Well done and nice DIY! You must be one of the verrrrrry few who have ever even attempted this!
__________________
2007 BMW 335xi 6MT TiAg
|
|
Appreciate
0
|
| 10-25-2007, 02:26 AM | #21 | |
|
Major General
405
Rep 6,107
Posts |
Quote:
|
|
|
Appreciate
0
|
| 10-25-2007, 10:48 PM | #22 |
|
Drives Smart

54
Rep 2,393
Posts |
Is the engine running any cooler than usual? Or is that just the oil cooler than helps that
__________________
 08 BMW ///M5 Space Gray/Black 6 speed Engine: RPi GTS exhaust, RPi Scoops, Carbon Filter Delete Exterior: Glossy Black Kidneys, LUX V3, OEM LED License Plate light, Bruce License Plate Adapter |
|
Appreciate
0
|
 |
| Bookmarks |
|
|


