|
|
|
|
 |

|
 |
BMW Garage | BMW Meets | Register | Today's Posts | Search |
 |

|
BMW 3-Series (E90 E92) Forum
>
How to revive a hammered jet black 328i
|
 |
| 11-15-2014, 07:48 PM | #1 |
|
New Member
8
Rep 15
Posts |
How to revive a hammered jet black 328i
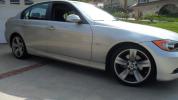
This jet black 3-series was truly hammered. It exhibited just about every form of defect conceivable; hard water stains, chemical etching on the quarter panel, heavy marring all over, heavy contamination and to top it all off the paint had very deep swirls (the depth of actual scratches) that indicated someone took a rotary to the paint without washing it first. The purpose of this thread will be to demonstrate that even paint in this abysmal condition can be revived without a repaint, and to shed some light onto how to achieve these results.
This was the condition of the paint prior to starting work. Note that the car is supposed to be jet black, but it appears to be gray (or a washed-out black) because the marring and swirls ruin the paints ability to reflect light; it is diffused across a thousand tiny scratches instead of reflecting from a single point as it would in corrected paint. 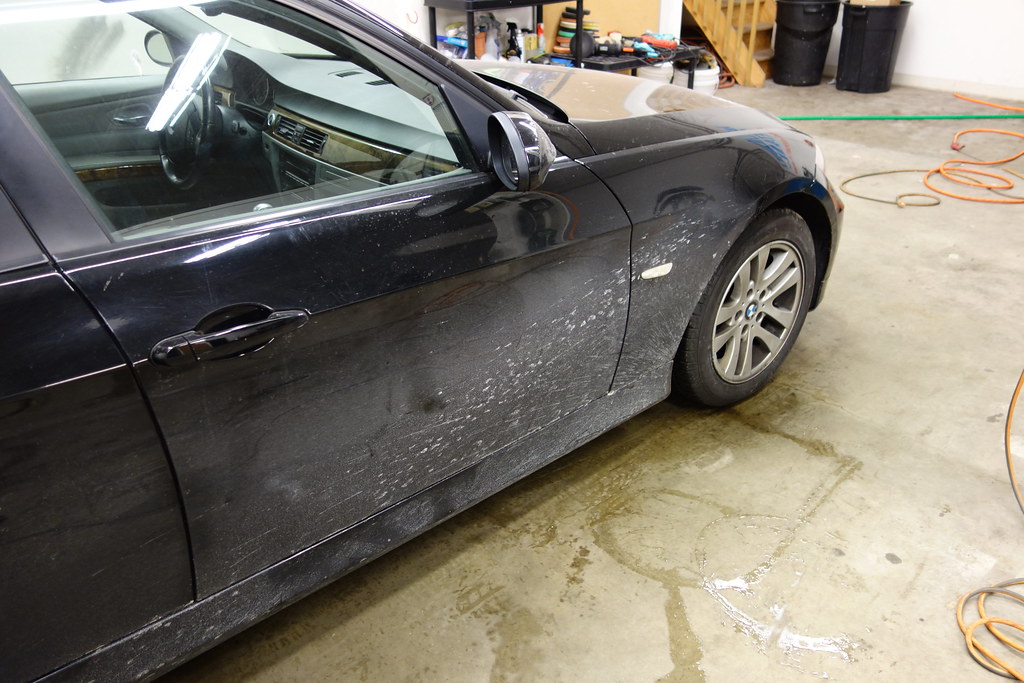 159 by Pinnacle Auto Detail - CT, on Flickr 159 by Pinnacle Auto Detail - CT, on Flickr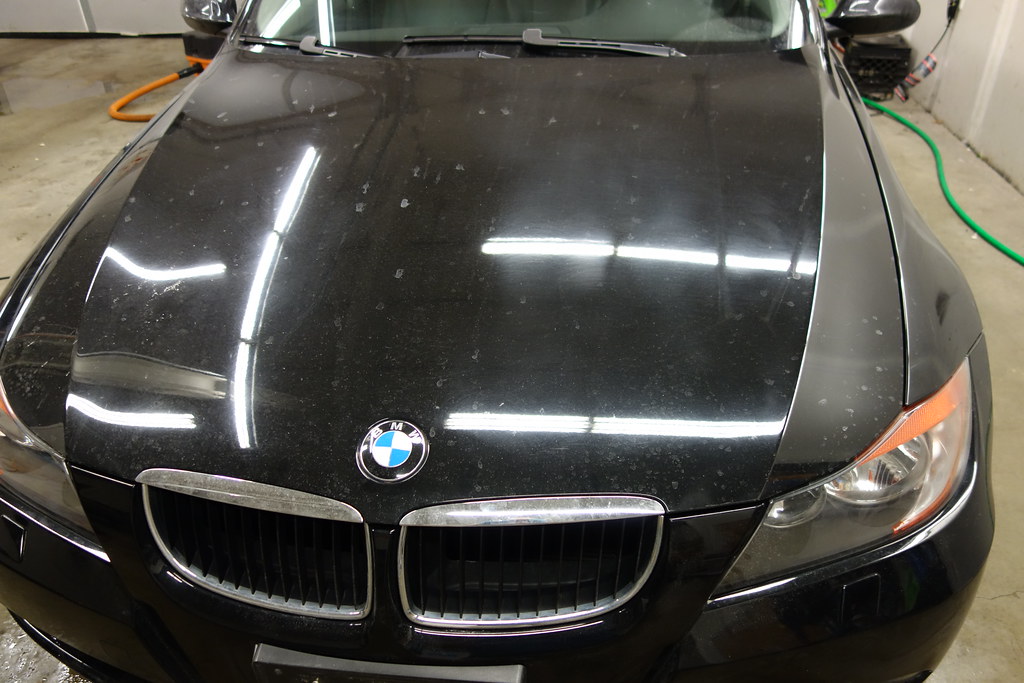 163 by Pinnacle Auto Detail - CT, on Flickr 163 by Pinnacle Auto Detail - CT, on FlickrBrake dust on the wheels- this was from months or even years of accumulation: 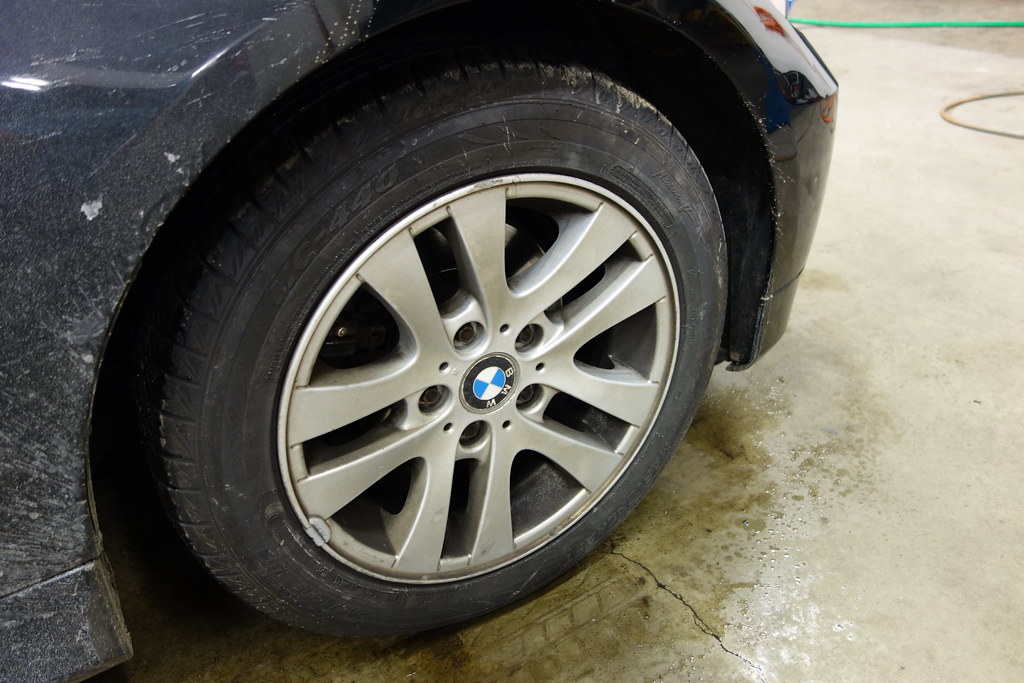 161 by Pinnacle Auto Detail - CT, on Flickr 161 by Pinnacle Auto Detail - CT, on Flickr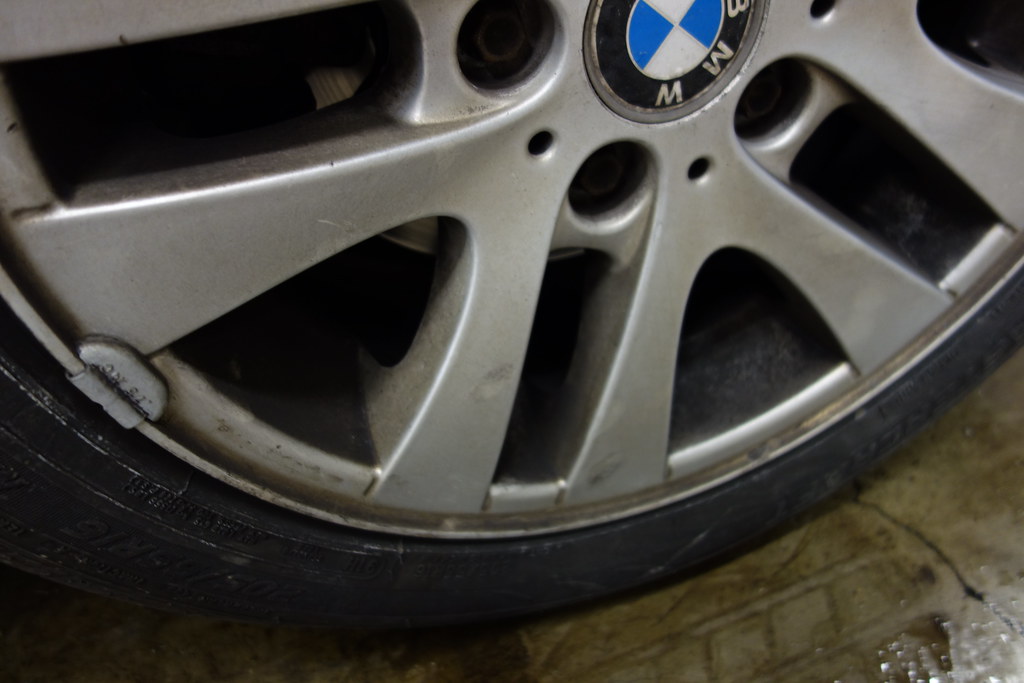 162 by Pinnacle Auto Detail - CT, on Flickr 162 by Pinnacle Auto Detail - CT, on FlickrClose-ups of the paint showing just how horrible it looked, note that the swirls and marring were visible under just the overhead fluorescent lights: 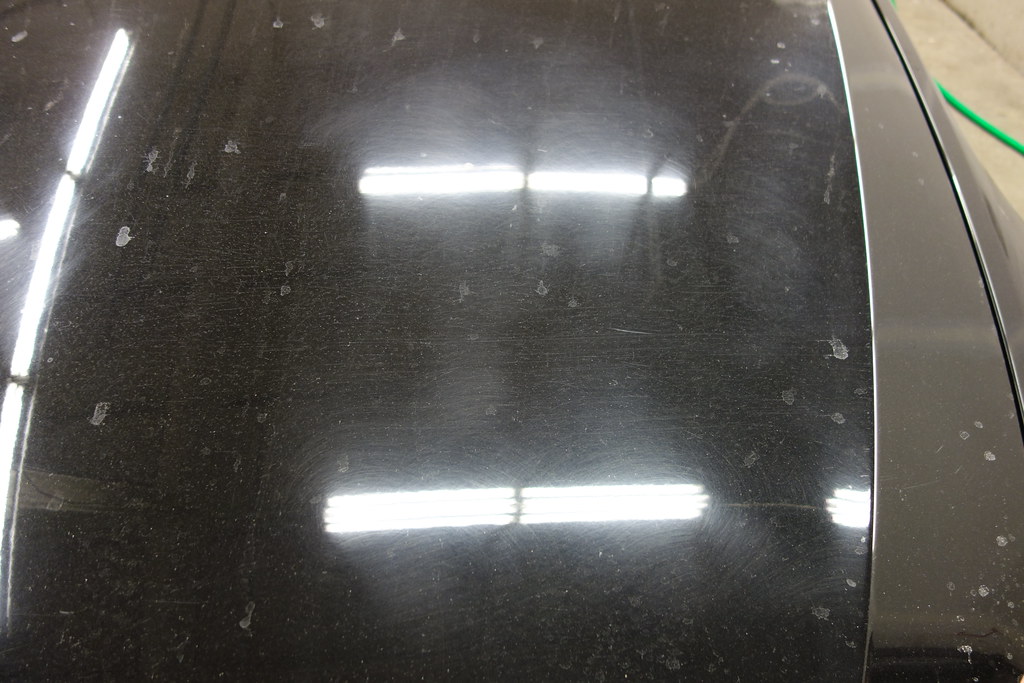 164 by Pinnacle Auto Detail - CT, on Flickr 164 by Pinnacle Auto Detail - CT, on Flickr 168 by Pinnacle Auto Detail - CT, on Flickr 168 by Pinnacle Auto Detail - CT, on Flickr 169 by Pinnacle Auto Detail - CT, on Flickr 169 by Pinnacle Auto Detail - CT, on Flickr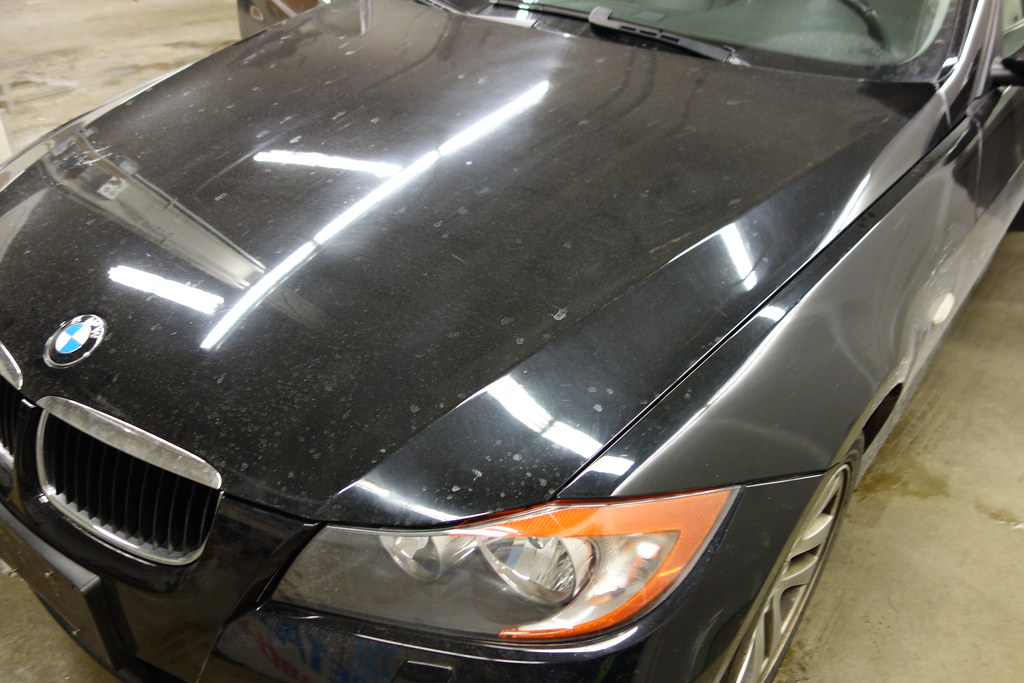 216 by Pinnacle Auto Detail - CT, on Flickr 216 by Pinnacle Auto Detail - CT, on Flickr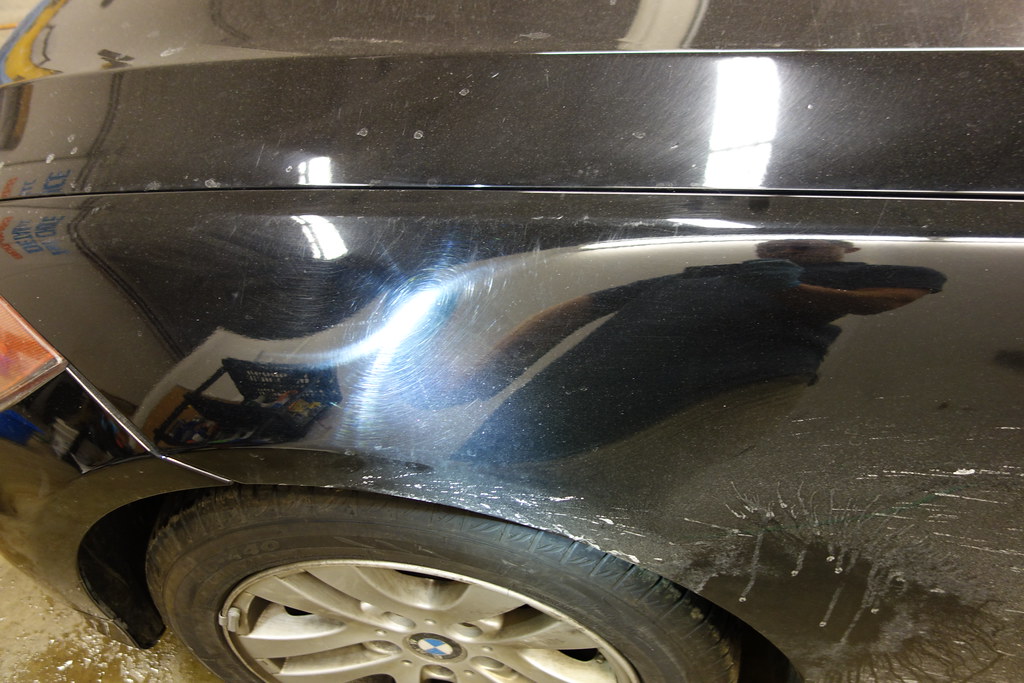 228 by Pinnacle Auto Detail - CT, on Flickr 228 by Pinnacle Auto Detail - CT, on FlickrNow to get started you want to wash the car thoroughly. Since a car in this condition has lots of contamination and embedded dirt, it would be smart to presoak the lower portions of the side panels, front bumper and rear of the car with APC (Optimum Power Clean, Meguiars APC, etc). Let this dwell for a few minutes without drying, doing this will help to loosen up bonded contaminants. If youre familiar with using chemical decon products, use something like Carpros Iron-X or Tar-X in place of the APC (you can soak the entire car with this). These products will change color while theyre working, giving you a nice indication of whether or not youve achieved even coverage. Make sure you rinse the body, including all cracks and seams thoroughly after using one of these products. For wheels as dirty as these were, Sonax Full Effect or Wheel Cleaner Plus will work great, just let the product dwell for a few minutes before agitating, and be sure to rinse thoroughly after agitating. Next use a clay bar or decon towel to remove the remaining contamination from the paint and prep it for polishing. A decon towel or mitt (Nanoskin, Opti-razor, etc) will lightly marr the paint regardless of the grade that you buy, but this shouldnt be an issue given that well be polishing after and the marring is very light, so buy the decon towel if you want to save time (much quicker than clay). Work in small sections, keeping the paint lubricated with the provided lube or a QD (Optimum No Rinse works great), lightly gliding the clay or decon towel over the surface until the paint is smooth. After this step dry the car and tape off any trim or moldings to avoid staining them with polish. 3m 233+ green tape is the best available in terms of adhesive strength and ability to conform to curves, but regular blue painters tape will suffice too. After youve completed these steps you should have something that looks like this, clean and decontaminated but still full of swirls and marring: 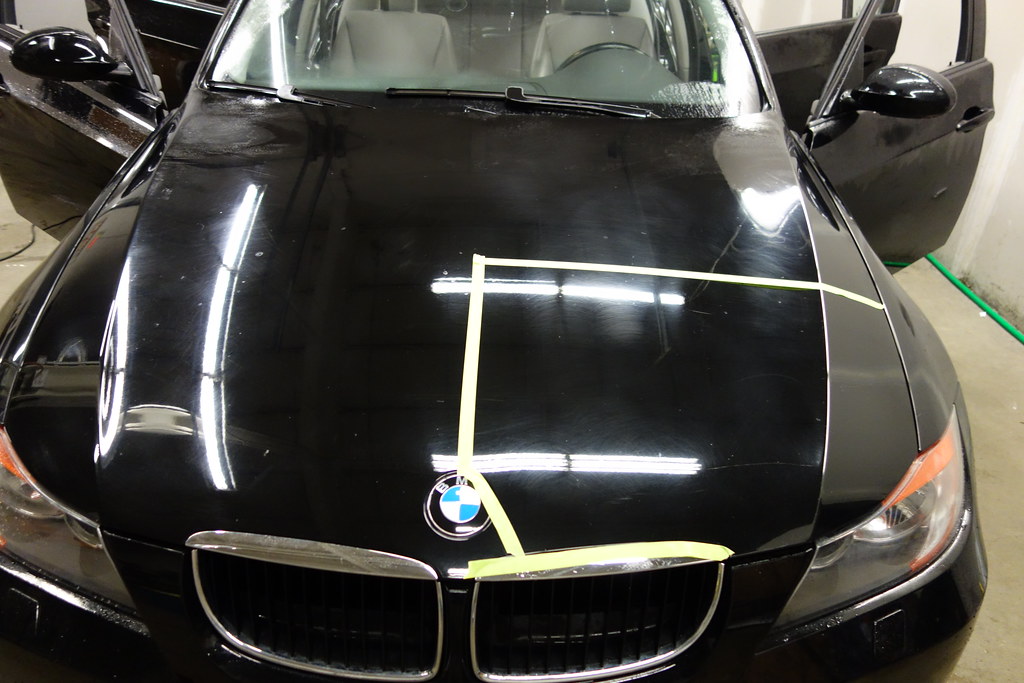 231 by Pinnacle Auto Detail - CT, on Flickr 231 by Pinnacle Auto Detail - CT, on Flickr 235 by Pinnacle Auto Detail - CT, on Flickr 235 by Pinnacle Auto Detail - CT, on Flickr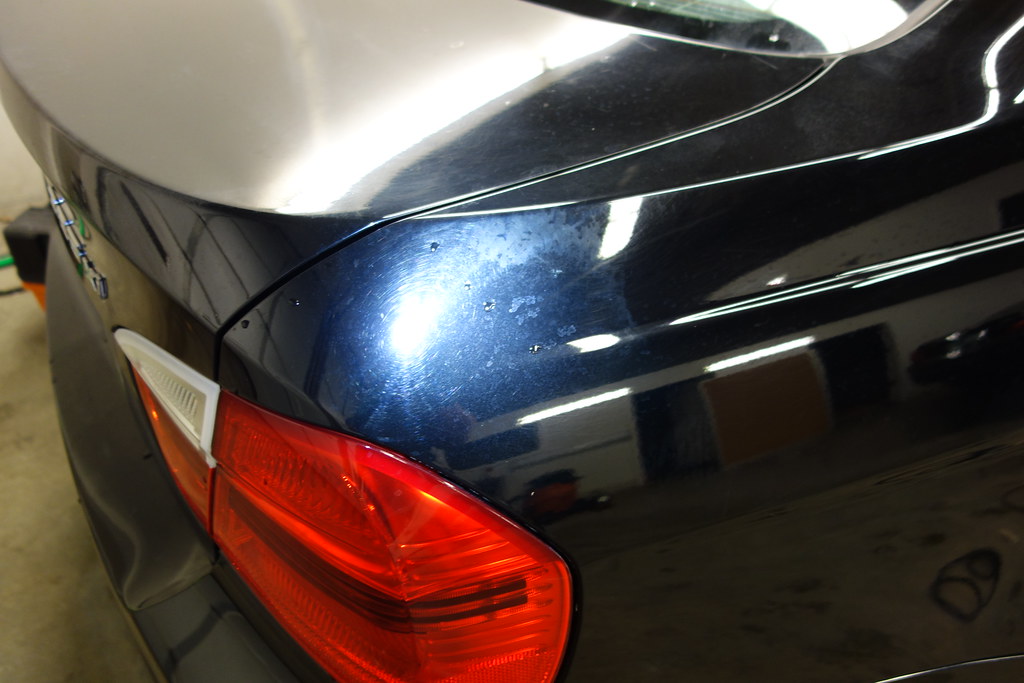 008 by Pinnacle Auto Detail - CT, on Flickr 008 by Pinnacle Auto Detail - CT, on Flickr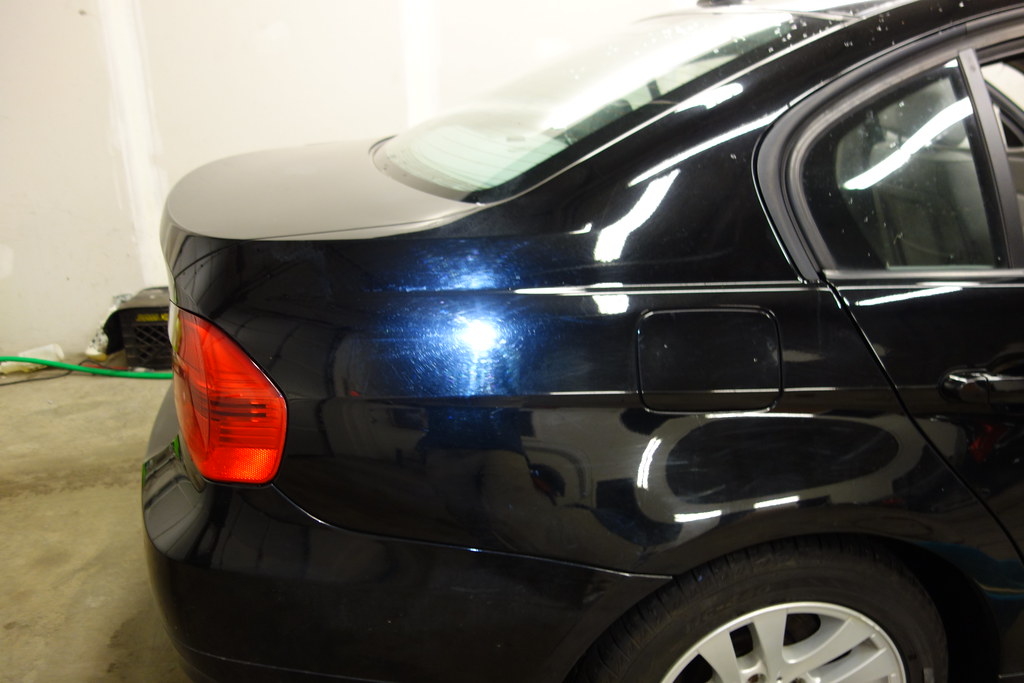 005 by Pinnacle Auto Detail - CT, on Flickr 005 by Pinnacle Auto Detail - CT, on Flickr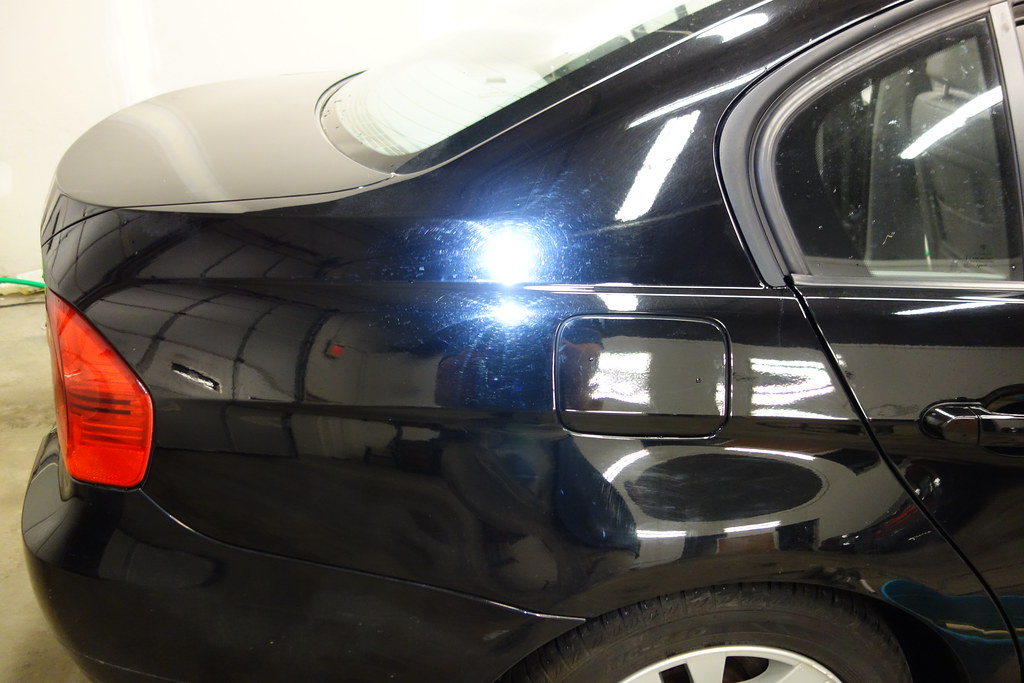 004 by Pinnacle Auto Detail - CT, on Flickr 004 by Pinnacle Auto Detail - CT, on FlickrNow weve reached the polishing stage, as you can see in the pics above Ive taped off a roughly 2X2 area to test different pad/polish combos before tackling the rest of the paint. Doing this ensures that you have the optimal combination to remove defects and leave a refined finish without making extra work for yourself. When it comes to these 06-07 jet black BMWs (this particular one is an 06) youll find that removing defects is relatively easy, but finish polishing without leaving micromarring or hazing is difficult. The solution to this is to use a finishing product without fillers that is easy to use, my favorites are HD Polish and Meguiars 205. I prefer these two products to others such as Menzerna SF4500 because both HD Polish and M205 use SMAT technology, which basically means that the abrasive particles dont break down over time. This also means that these products provide uniform cut at all times and work quickly; 2-4 passes with light pressure at slow-moderate speeds (1-2 per second) is all thats necessary (versus 6-7 with SF4500 using diminishing abrasives). Use these products on a standard foam finishing pad to ensure proper refinement of the paint. Remember that overworking these products just results in the lubricants drying up and subsequent dusting, so just work the polish appropriately and remove it. If marring remains try a second application, and if youre working in direct sunlight an occasional light mist of water on the pad can aid in preventing dust. If your paint requires more aggressive defect removal (as this car did), you can achieve this by stepping up to a microfiber finishing or cutting pad (Meguiars or Optimum are great). These microfiber pads provide more cut because each individual strand becomes coated with abrasives, yielding more surface area than a comparable foam cutting pad. To prime these pads, apply your compound liberally and work it into all of the fibers with your fingers. If youre using a product such as Meguiars D300 (which is pink in color), you should see that your entire pad, even the edges, have turned pink once the pad has been properly primed. As far as compound selection goes, something like Meguiars D300, HD Adpart, Menzerna 2500, etc will provide a lot of cut with a finishing or cutting MF pad. If you have heavy defects like this car had, step up to something like Meguiars 100 or 101. You can mix either of these with D300 to reduce cut, extend working time and provide a more refined finish (a 70/30 M101/D300 mix with an Optimum MF pad were used in this case). The Meguiars compounds mentioned above are also SMAT products, so work them for 2-5 passes and remove the product. After each panel clean the pad with compressed air or a stiff bristled brush, doing so removes spent abrasives and abraded clear coat particles and allows you to continue compounding without negatively affecting cut or finishing ability. After brushing reapply the product in 5-6 pea-sized dots around the pad. If you find that your pads fibers have become significantly clogged and cutting ability degrades, switch to a new pad. You may go through as many as 6-8 pads on a car such as this. After youve completed your compounding and polishing steps clean out all the bodys cracks and crevices with a MF towel or boars hair brush and QD. After this you can apply a sealant or wax, if ease of use is paramount you cant beat Optimums Optiseal, if durability is a concern use something like Sonax Polymer Net Shield or Collinite 476s>. If youve done everything right your paint should look something like this: 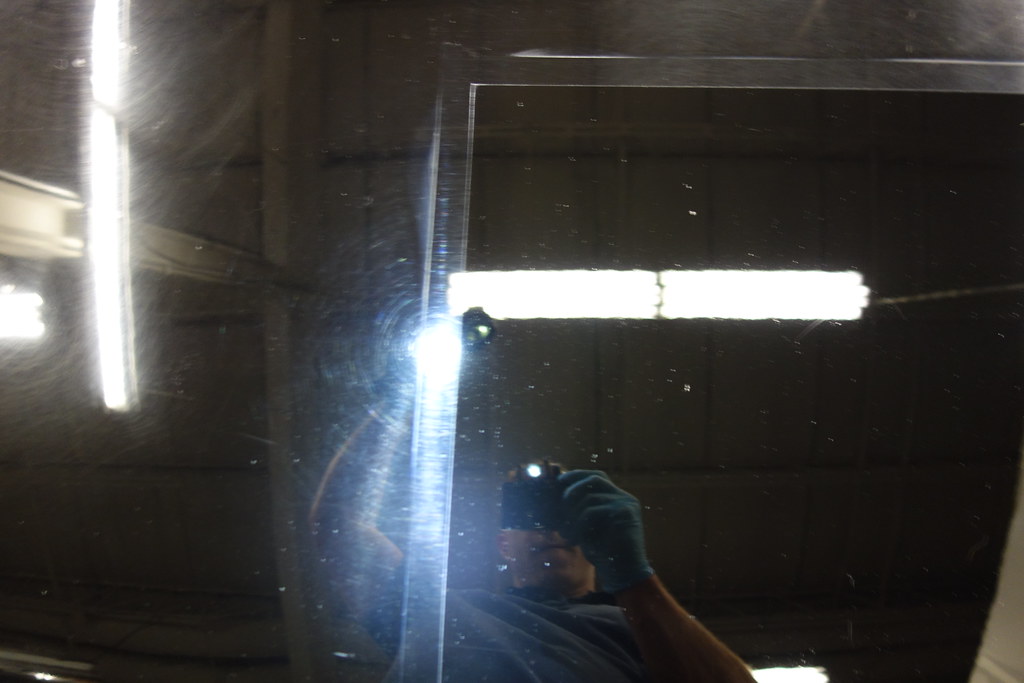 309 by Pinnacle Auto Detail - CT, on Flickr 309 by Pinnacle Auto Detail - CT, on Flickr 308 by Pinnacle Auto Detail - CT, on Flickr 308 by Pinnacle Auto Detail - CT, on Flickr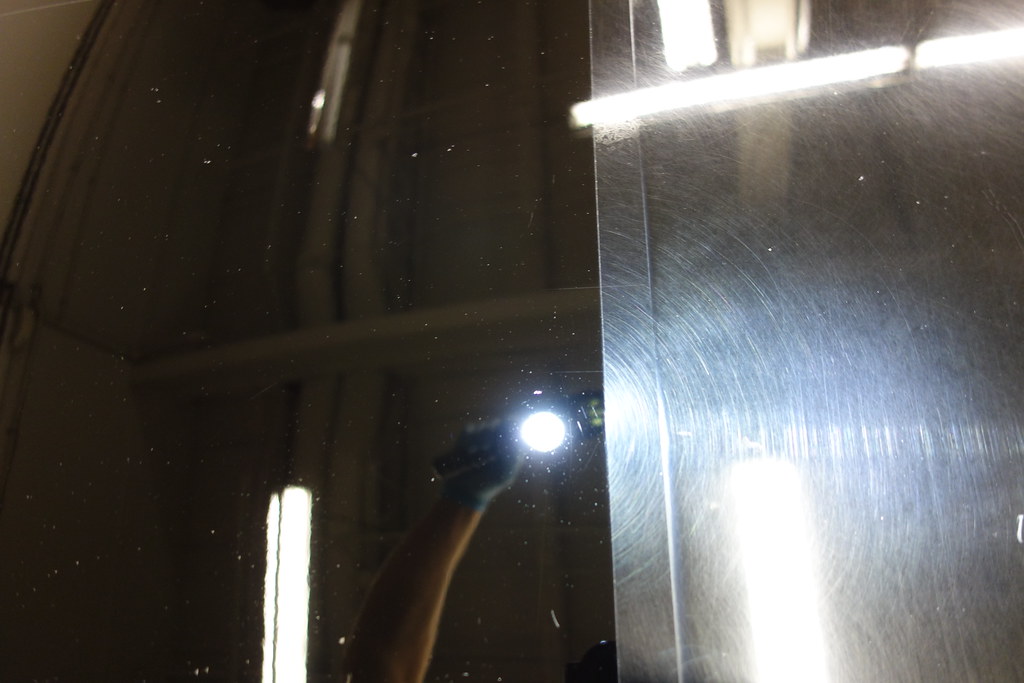 316 by Pinnacle Auto Detail - CT, on Flickr 316 by Pinnacle Auto Detail - CT, on Flickr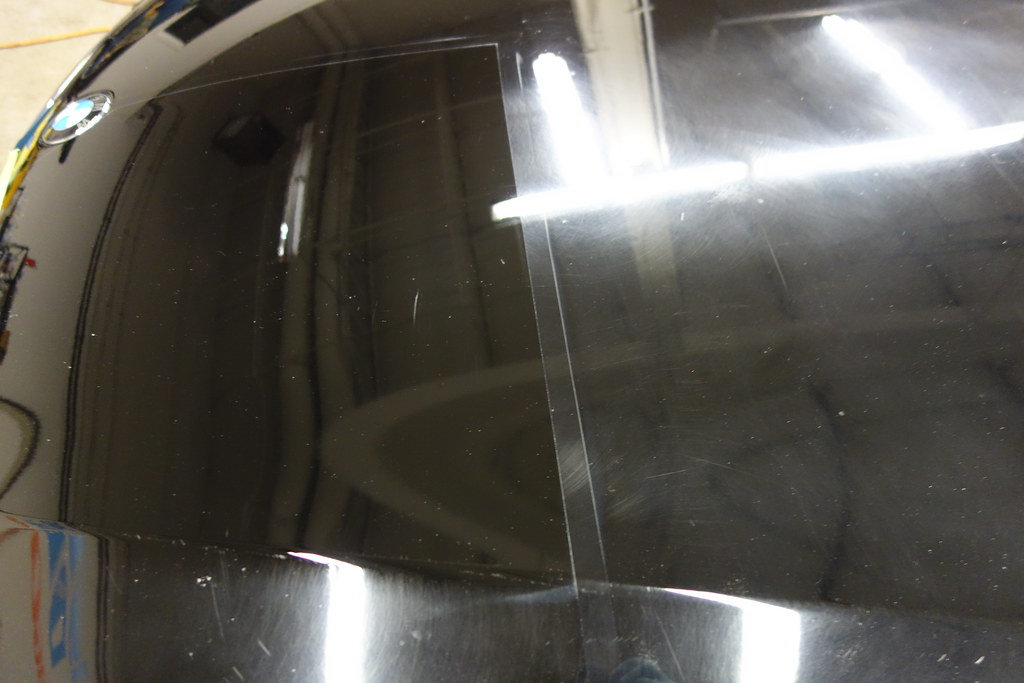 317 by Pinnacle Auto Detail - CT, on Flickr 317 by Pinnacle Auto Detail - CT, on Flickr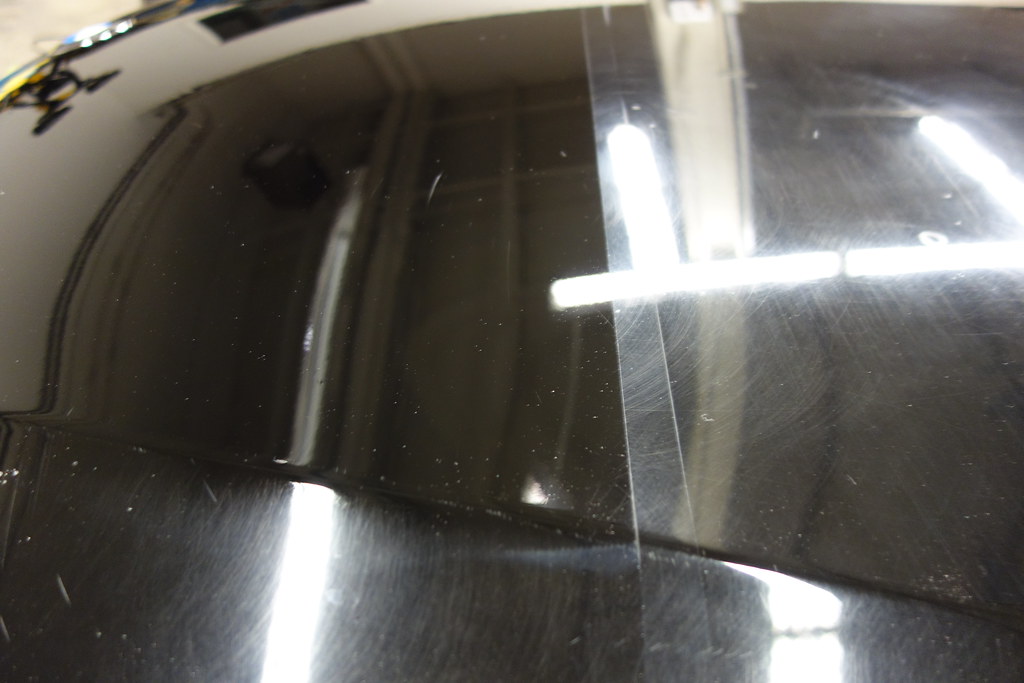 318 by 318 by 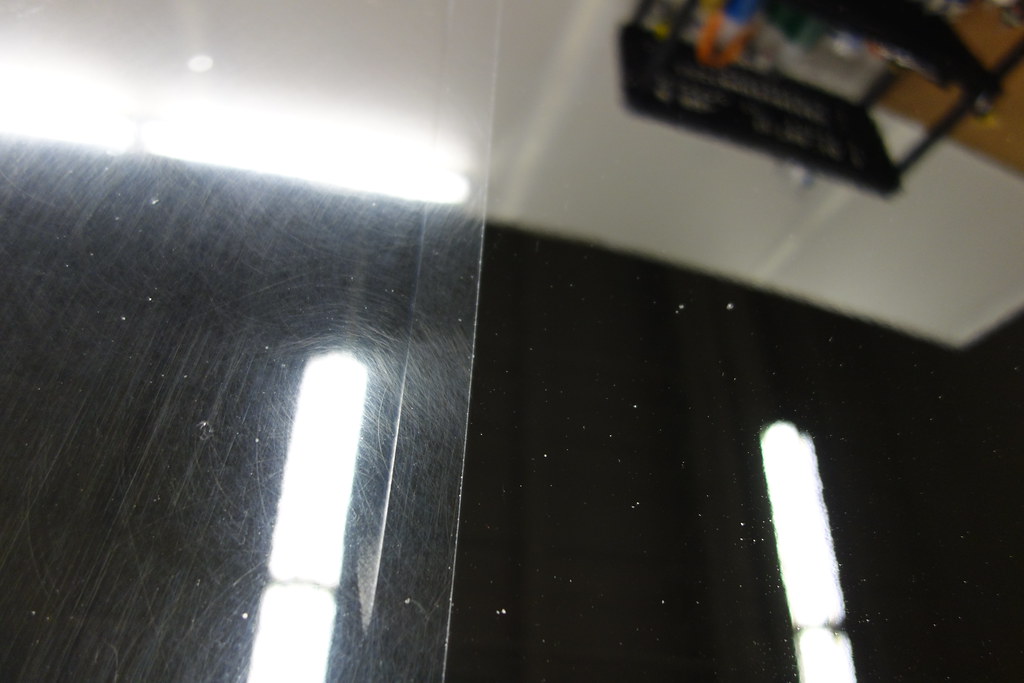 337 by Pinnacle Auto Detail - CT, on Flickr337 by Pinnacle Auto Detail - CT, on Flickr 337 by Pinnacle Auto Detail - CT, on Flickr337 by Pinnacle Auto Detail - CT, on Flickr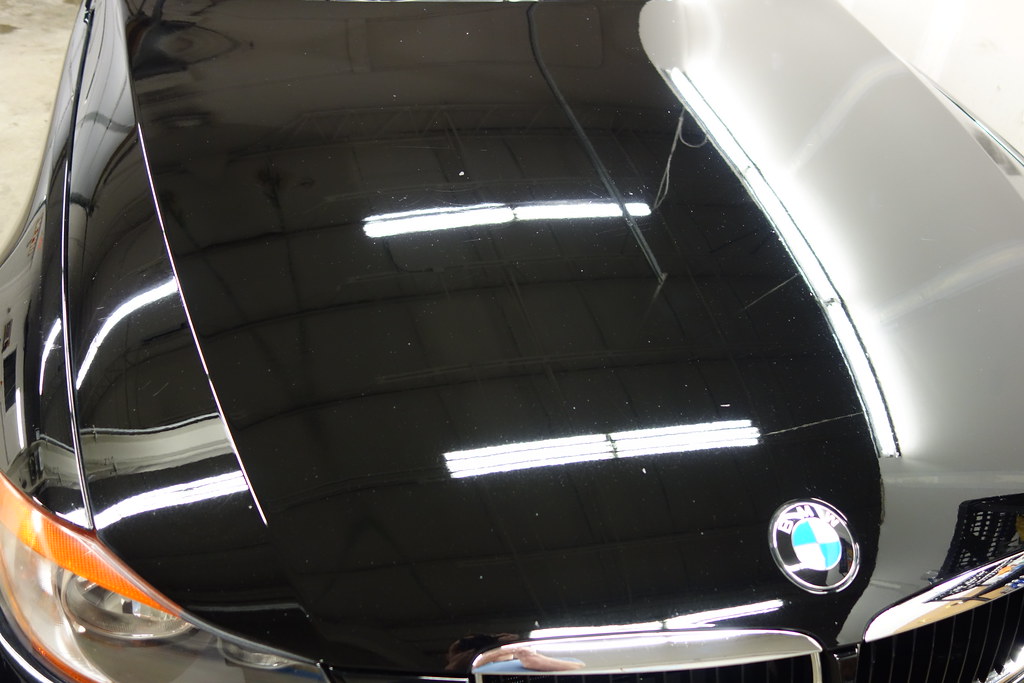 097 by Pinnacle Auto Detail - CT, on Flickr 097 by Pinnacle Auto Detail - CT, on Flickr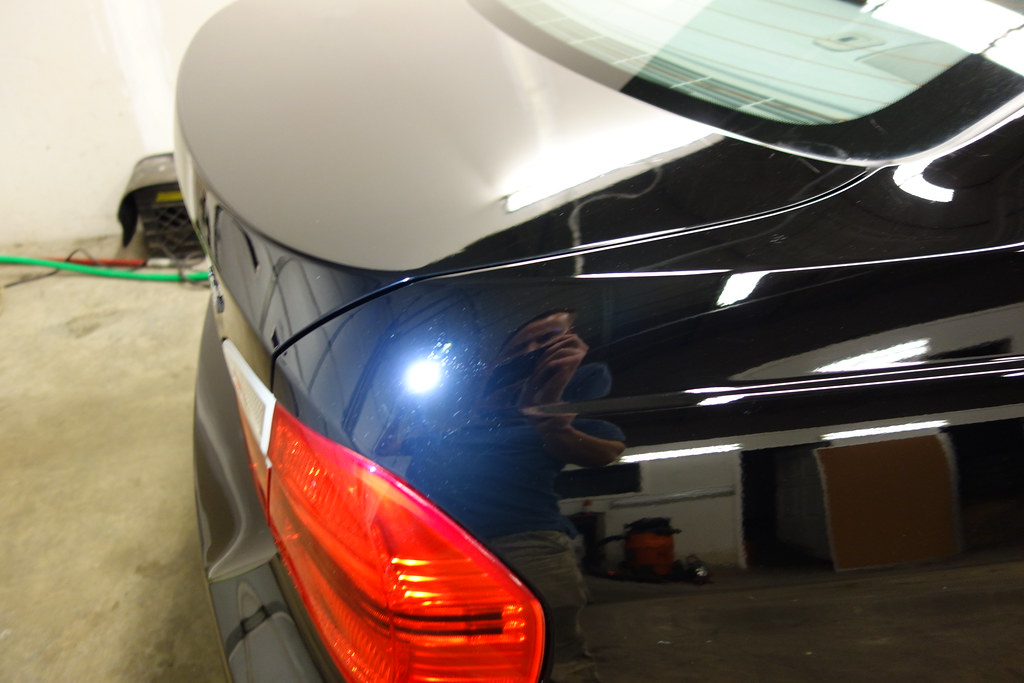 132 by Pinnacle Auto Detail - CT, on Flickr 132 by Pinnacle Auto Detail - CT, on Flickr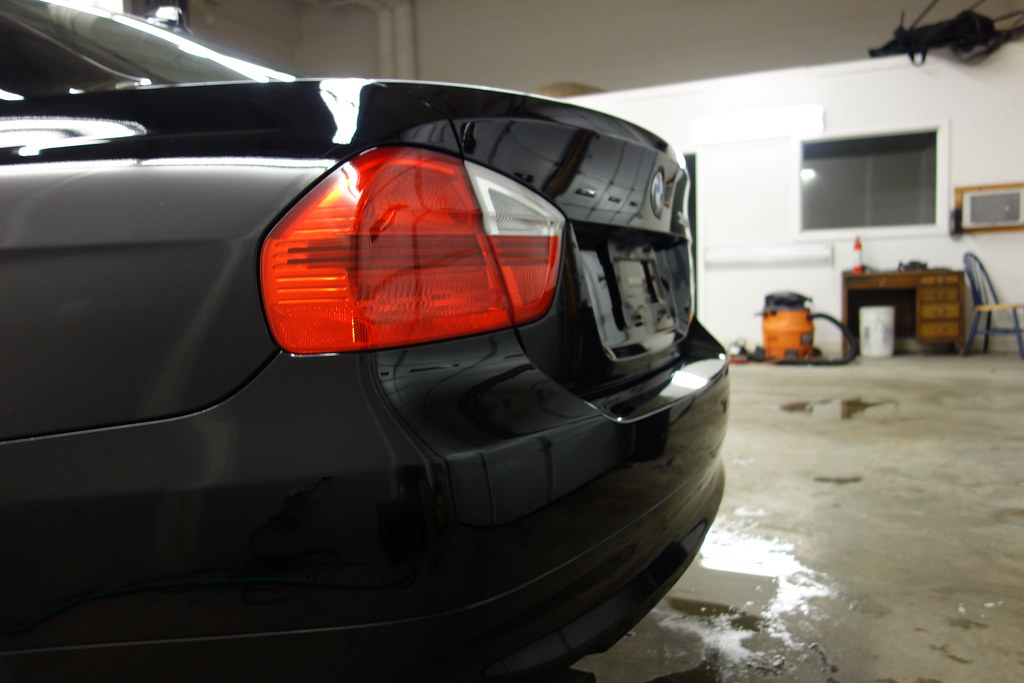 080 by Pinnacle Auto Detail - CT, on Flickr 080 by Pinnacle Auto Detail - CT, on Flickr 064 by Pinnacle Auto Detail - CT, on Flickr 064 by Pinnacle Auto Detail - CT, on Flickr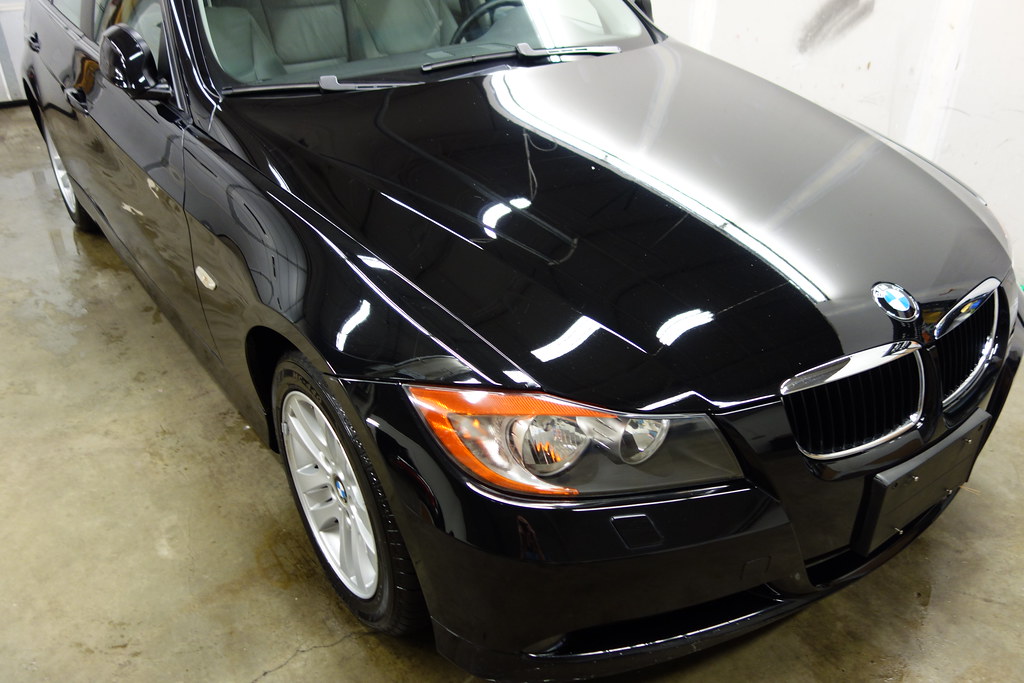 061 by Pinnacle Auto Detail - CT, on Flickr 061 by Pinnacle Auto Detail - CT, on Flickr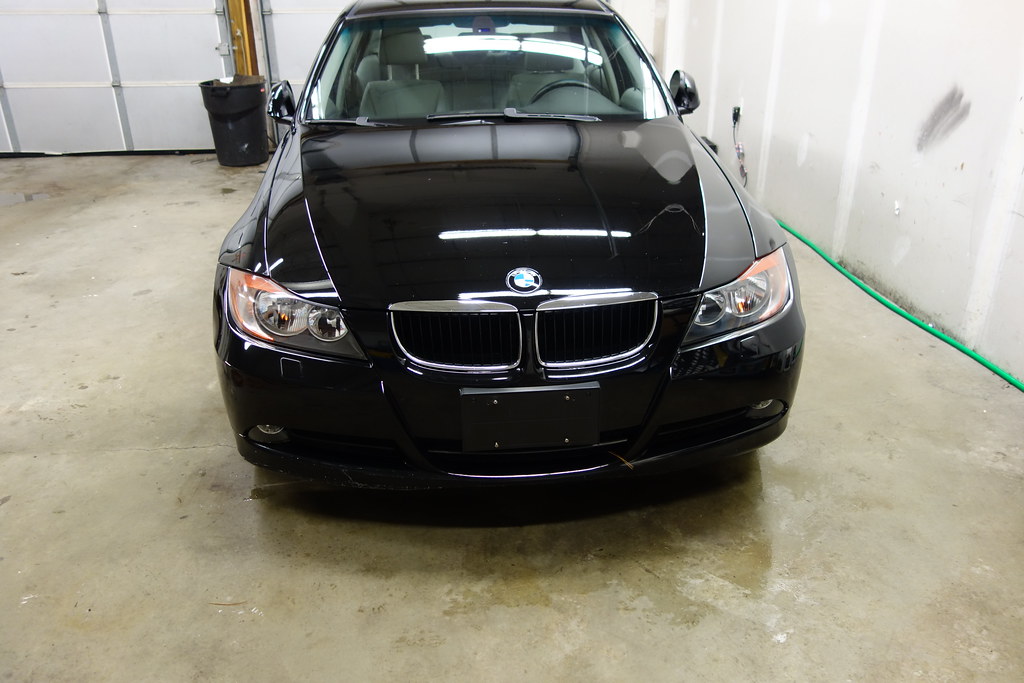 095 by Pinnacle Auto Detail - CT, on Flickr 095 by Pinnacle Auto Detail - CT, on Flickr 101 by Pinnacle Auto Detail - CT, on Flickr 101 by Pinnacle Auto Detail - CT, on Flickr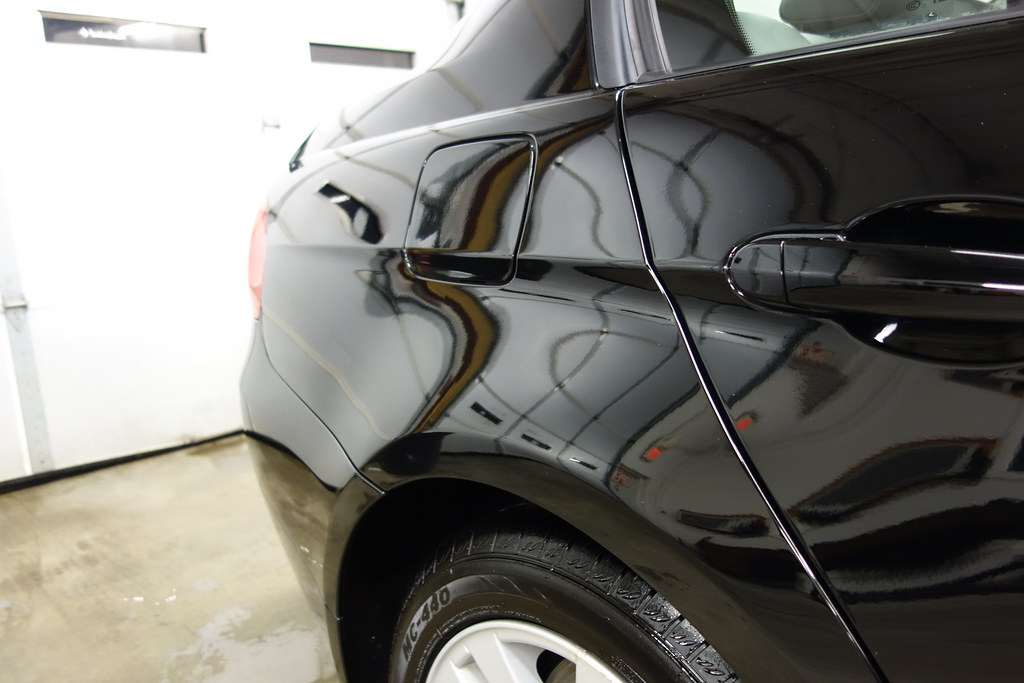 102 by Pinnacle Auto Detail - CT, on Flickr 102 by Pinnacle Auto Detail - CT, on Flickr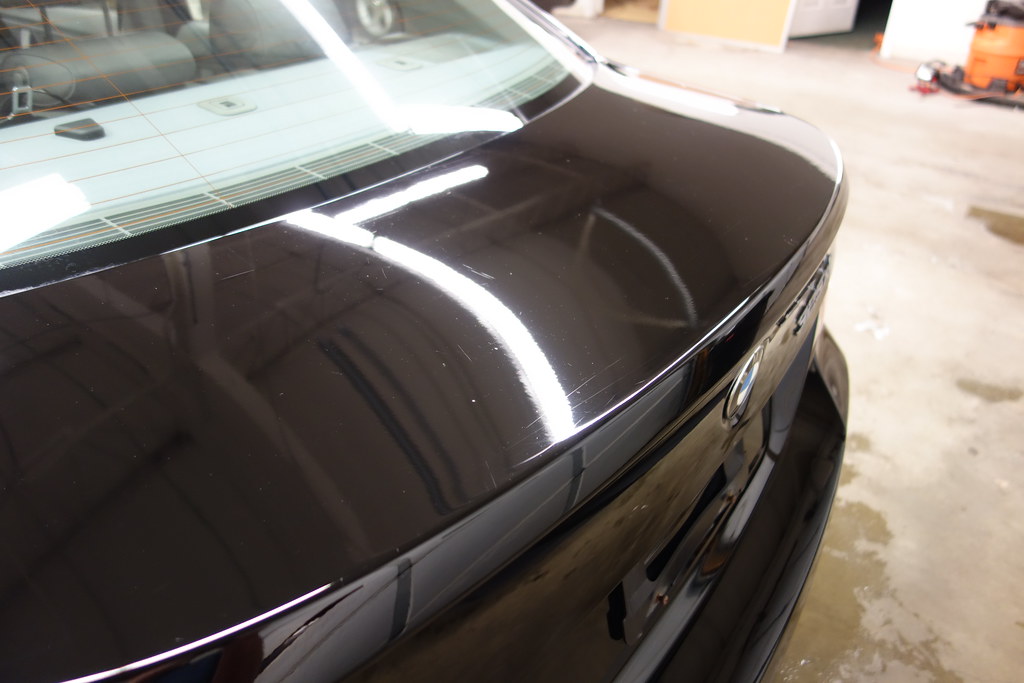 108 by Pinnacle Auto Detail - CT, on Flickr 108 by Pinnacle Auto Detail - CT, on Flickr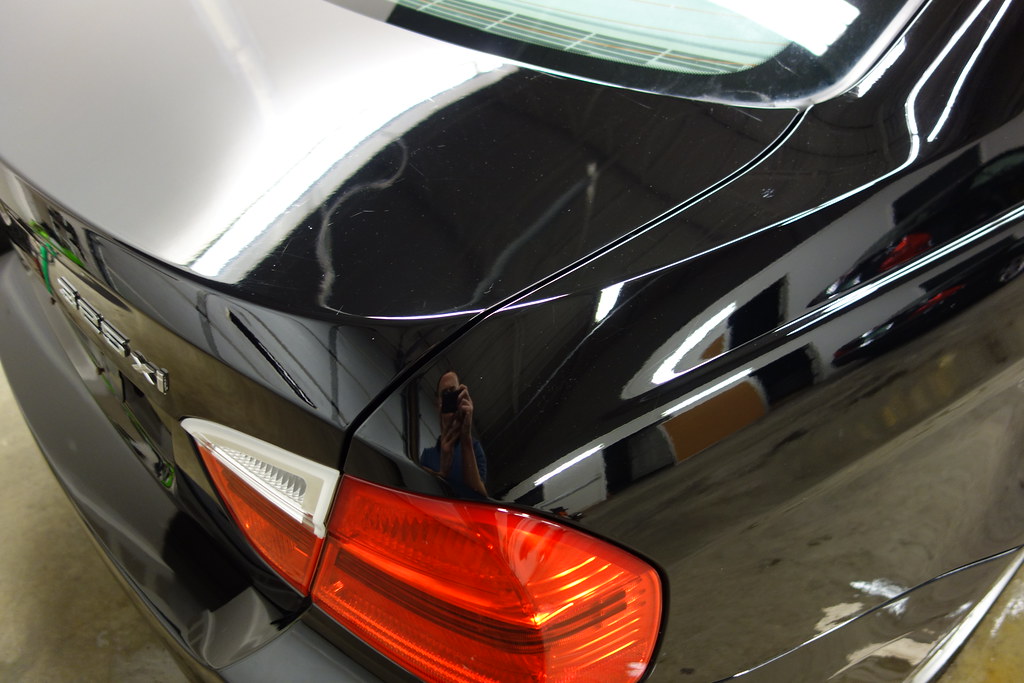 107 by Pinnacle Auto Detail - CT, on Flickr 107 by Pinnacle Auto Detail - CT, on Flickr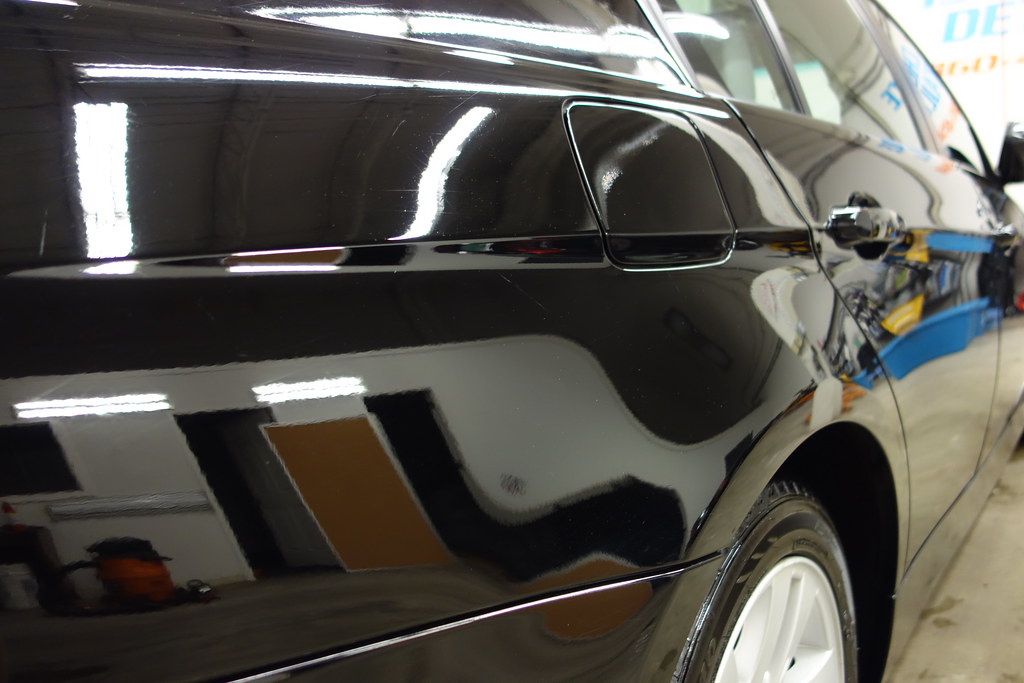 120 by Pinnacle Auto Detail - CT, on Flickr 120 by Pinnacle Auto Detail - CT, on Flickr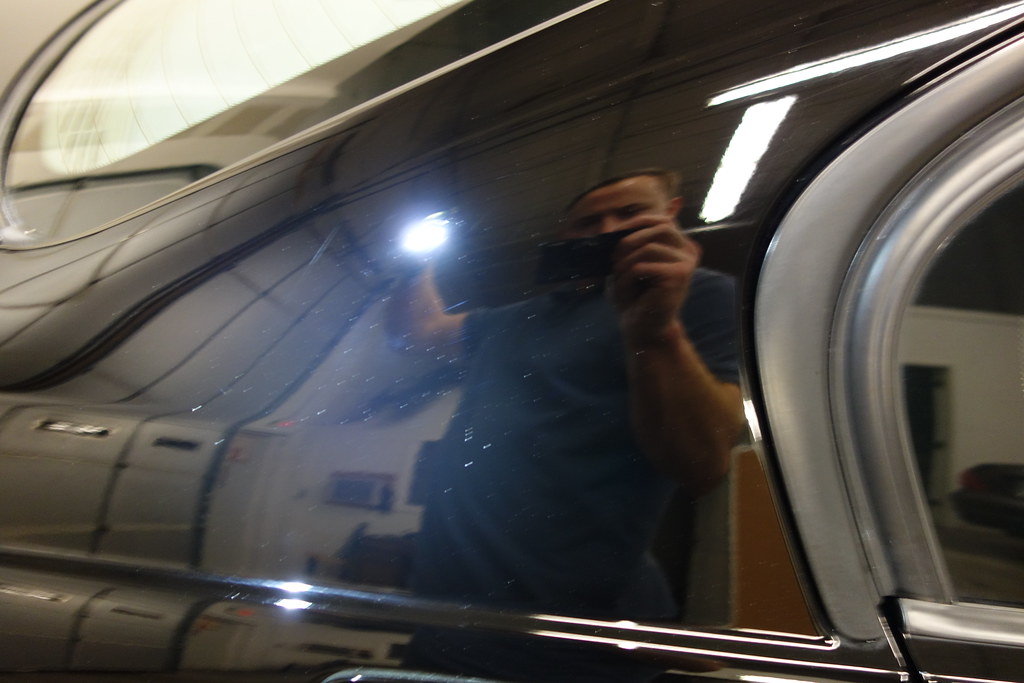 130 by Pinnacle Auto Detail - CT, on Flickr 130 by Pinnacle Auto Detail - CT, on Flickr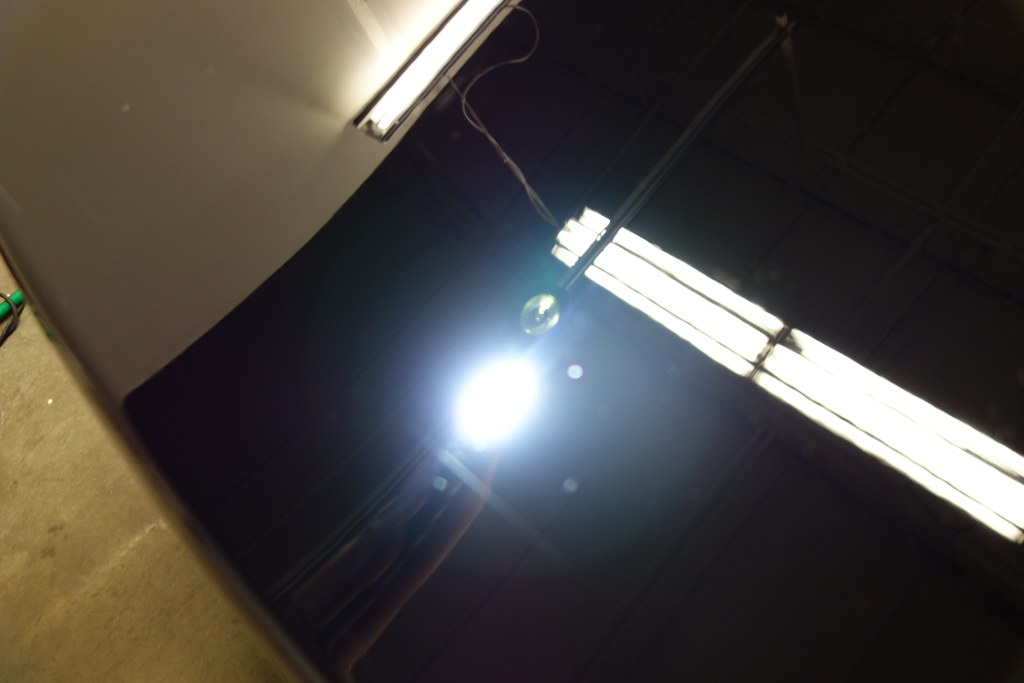 137 by Pinnacle Auto Detail - CT, on Flickr 137 by Pinnacle Auto Detail - CT, on Flickr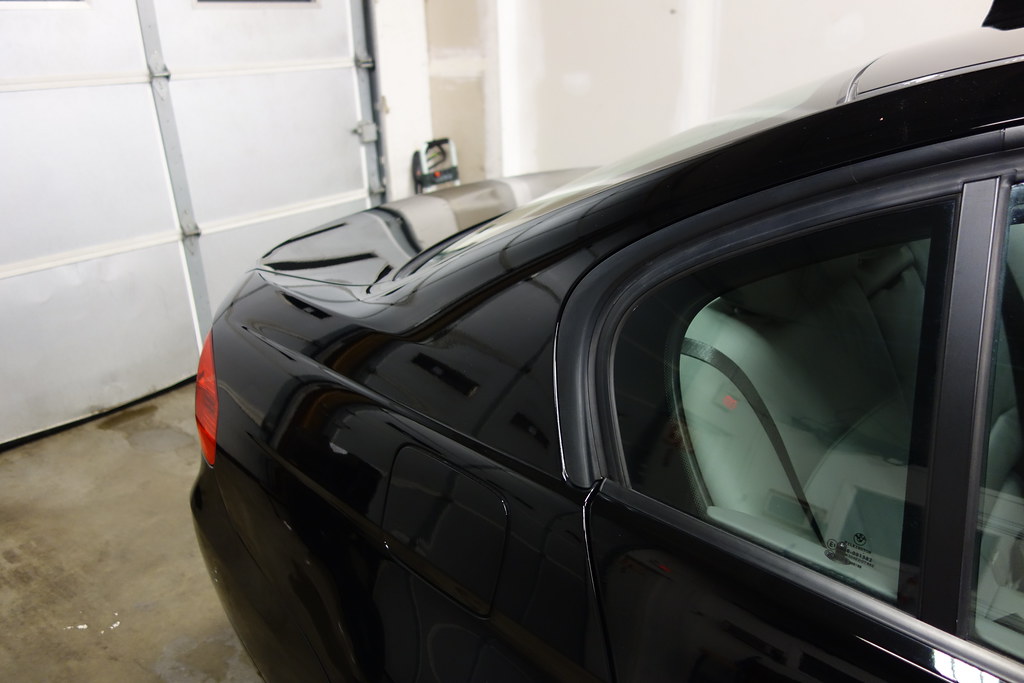 157 by Pinnacle Auto Detail - CT, on Flickr 157 by Pinnacle Auto Detail - CT, on FlickrNote that in this case I wasnt going for full correction; approximately 80% correction rate was the goal. Any questions or comments are welcome.
__________________
Mike Donoghue
Pinnacle Auto Detail - Paint correction, coatings and more - serving all of CT http://www.pinnacleautodetailct.com/ |
| 11-15-2014, 10:19 PM | #4 |
|
Major
 
173
Rep 1,117
Posts
Drives: 2010 E90 328i 6MT ZSP BSM
Join Date: Mar 2014
Location: K/W and GTA, Ontario, Canada
|
OMG that's an amazing transformation. Phenomenal skills you have there OP!
Question for you on claying using nanoskin. If ONR is used as lube, what should the mix ratio be? Should it be the recommended clay lube ratio (1:64), or should it be the quick detailer ratio (1:16)? Thanks! As well, how many steps of compounding/polishing were used to achieve the above result? |
|
Appreciate
0
|
| 11-16-2014, 12:21 AM | #5 |
|
Brigadier General
 
2203
Rep 3,336
Posts
Drives: X5 & E90 WTCC Widebody Racecar
Join Date: Feb 2013
Location: Chicago West Burbs
|
Wow! Great work!!! Night and day difference!
|
|
Appreciate
0
|
| 11-16-2014, 07:32 PM | #6 | |
|
New Member
8
Rep 15
Posts |
Thanks everyone!
Quote:
When I use ONR as clay or nanoskin lube I use it at 16:1 dilution ratio, it's only 8oz per gallon and provides extra lubrication. The car in the first post received a two step, the compounding step was M101 & D300 mixed on an Optimum MF pad, the polishing was done with HD Polish on a black Lake Country foam finishing pad. There were probably two applications of the compound on this car (maybe three on certain areas) but I still consider it as a two step because no intermediate polishing was needed; I went straight to the finishing pad and HD Polish. I used the Rupes 21 for the majority of the work, the Rupes 75E was used for the tighter areas.
__________________
Mike Donoghue
Pinnacle Auto Detail - Paint correction, coatings and more - serving all of CT http://www.pinnacleautodetailct.com/ |
|
|
Appreciate
0
|
| 11-16-2014, 07:49 PM | #7 |
|
Major
173
Rep 1,117
Posts
Drives: 2010 E90 328i 6MT ZSP BSM
Join Date: Mar 2014
Location: K/W and GTA, Ontario, Canada
|
Thank you for the detailed response OP! I have a porter-cable DA polisher. Is that tool capable enough to product similar results as yours?
|
|
Appreciate
0
|
| 11-17-2014, 05:07 PM | #14 | |
|
New Member
8
Rep 15
Posts |
Thanks guys!
Quote:
The Porter Cable will have significantly less correcting power than the Rupes 21, so it will take much longer to achieve the same results, but it can be done. The finishing will also take longer because the Rupes leaves a more refined finish than short stroke machines, so you may need more intermediary polishing steps.
__________________
Mike Donoghue
Pinnacle Auto Detail - Paint correction, coatings and more - serving all of CT http://www.pinnacleautodetailct.com/ |
|
|
Appreciate
0
|
| 11-18-2014, 01:15 AM | #15 | |
|
Major
68
Rep 1,324
Posts |
Quote:
__________________
Was: 2008 335xi sedan 6MT Black Sapphire Metallic
Is: 2014 Tesla P85D (Blue Metallic) Wife's: 2013 Infiniti G37 S sedan 6MT, Black |
|
|
Appreciate
0
|
| 12-05-2014, 10:23 AM | #16 | |
|
New Member
8
Rep 15
Posts |
Quote:
__________________
Mike Donoghue
Pinnacle Auto Detail - Paint correction, coatings and more - serving all of CT http://www.pinnacleautodetailct.com/ |
|
|
Appreciate
0
|
| 01-02-2015, 04:02 PM | #17 |
|
Banned

247
Rep 966
Posts
Drives: F30 335i M sport
Join Date: Aug 2009
Location: Orlando, FL
|
Nice job! It looks like you sold the old car and bought a new one.
|
|
Appreciate
0
|
 |
| Bookmarks |
|
|