

|
|
|
|
 |

|
 |
BMW Garage | BMW Meets | Register | Today's Posts | Search |
 |

|
BMW 3-Series (E90 E92) Forum
>
DIY: Blinder M47 Front and Rear Laser Jammer Install.
|
 |
| 12-22-2009, 03:17 PM | #1 |
|
Lieutenant
 40
Rep 555
Posts |
DIY: Blinder M47 Front and Rear Laser Jammer Install.
Supplies:
I bought everything I needed from Home Depot for ~$15.00 --Bolt(s), Nuts, and lock washers(8 sets; 2 set for each jammer receiver) - The installation kit in the blinder came with these but I wanted something more secure when mounting on bumper etc., I didn't want my $750.00 jammer on the road hanging. --Angle Brace with holes pre-stamped (L shaped) Home Depot item SKU: 0 30699 41790 2 Description: Angle Punched Zinc Plated 1- 1/4 " x 48 " Tools: Roto-Zip or Dremel; I used both. Screw Drivers Instructions: (Front Jammer Receivers) 1) Remove front Bumper; Look at post number two: http://www.e90post.com/forums/showth...g+front+bumper 2)Determine mounting position and drill tiny hole and mount accordingly to instructions. Here is where I mounted mine:  3) Run wires in engine bay. Here a a few pics of where I routed it: (The wire 's are taped together with electrical tape for cleaner install and are directed with my finger tip.) 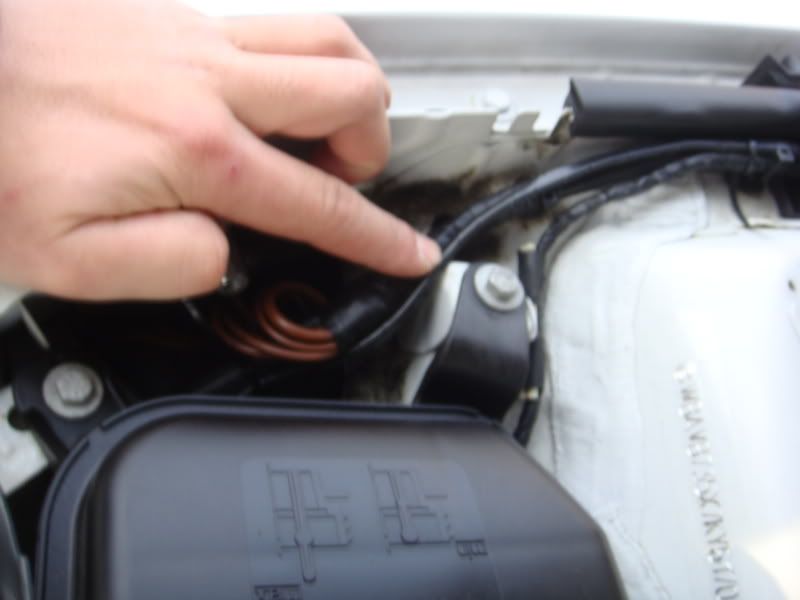 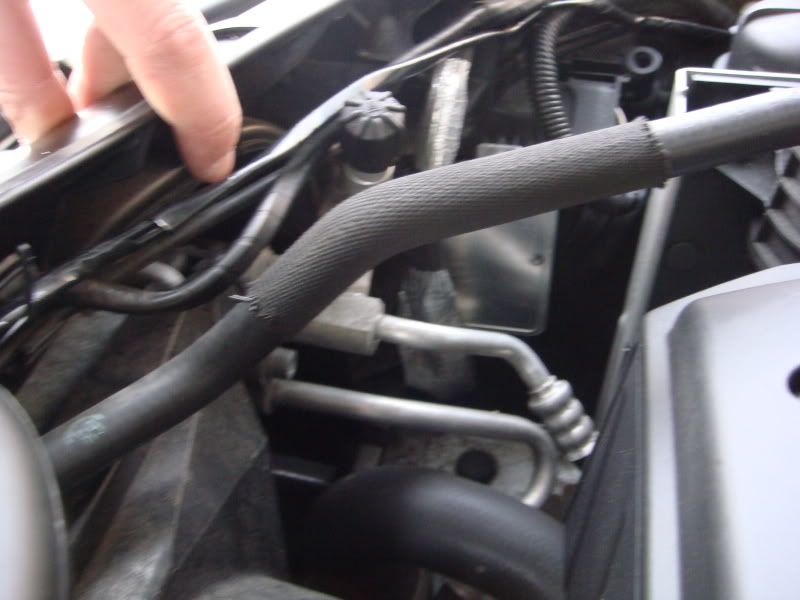 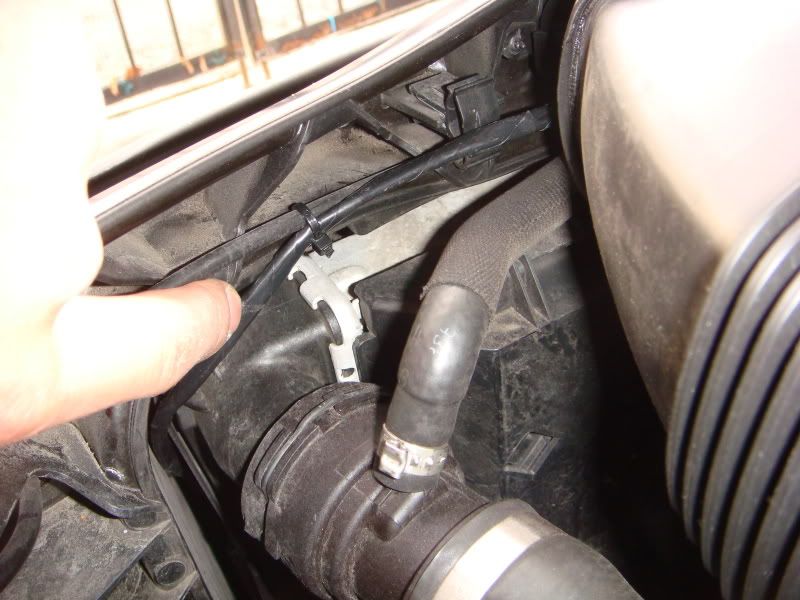 4) Open your ECU and remove the DME to drop jammer wires into passenger leg area. If you use this area to wire it, you will not need to drill/modify your firewall. Look at this link for the location of the hole leading to passenger leg area and how to remove DME: http://www.e90post.com/forums/showth...rocede+install 5) Install CPU of Jammer in the area underneath your glove box. 6) I used fuse slot #28 (homelink, I don't need this option) for power and the screw in area for ground. Take a look at this link to see what I'm referring to; Post #2, Picture 7: http://www.e90post.com/forums/showth...radar+hardwire 7) I pulled out the center trim(where the shifter is) and routed my LED Visual alert light here: 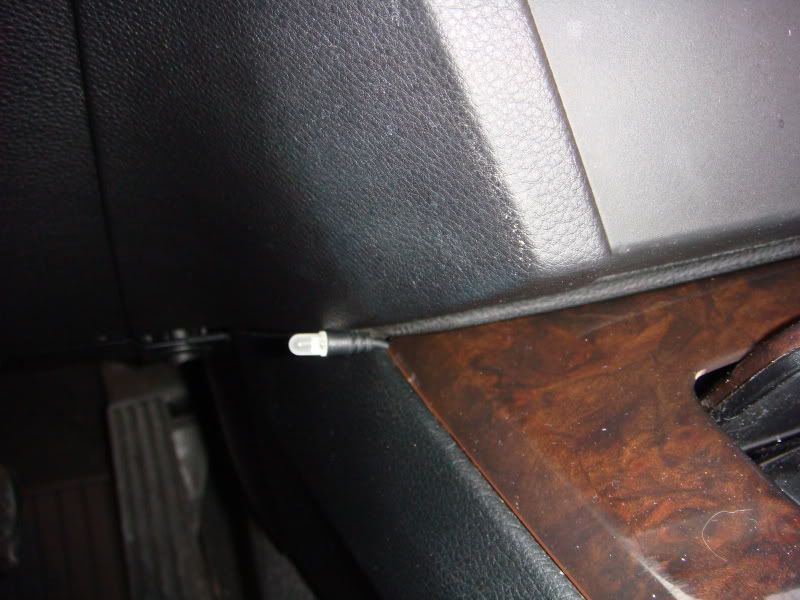 8) I installed the on/off switch in the driver-side panel under steering column. If you take a look at this pic, about an inch(in picture) to the left, is the switch: 9) Plug in the two front jammer receivers to the Jammer's CPU. 10) This is where I mounted the audio alert:  11) Level unit Now put everything back in together and you're finished with the front! Installation for Rear: This took me a couple of days to devise a way where I didn't have to drill into my body for anything permanent. Here is how I did this: 1) Take off rear license plate 2) Cut the L angle brace to 22 inches with rotor zip. 3) Trace where your license plates will be covering and cut off excess, leaving just the top(so you can mount the receivers). 4) Install Jammers on the angle brace. Here are some pics: 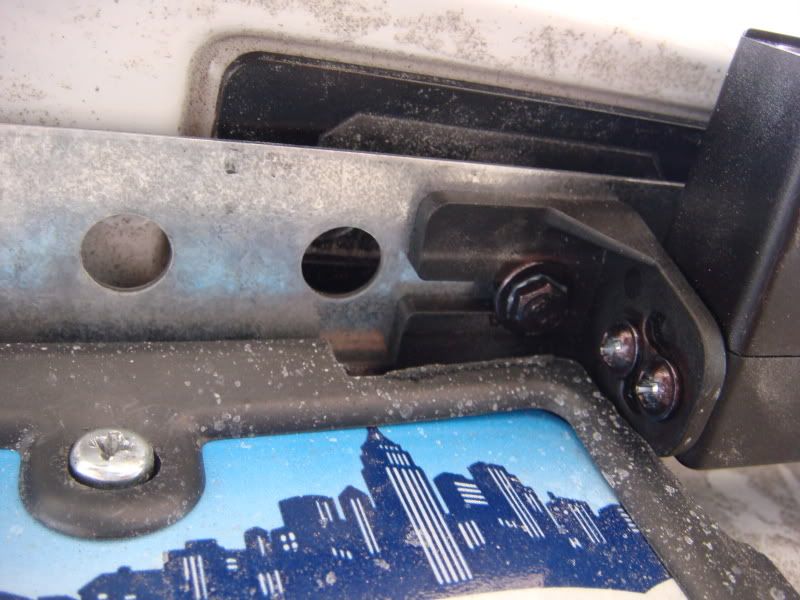 5) Test fit on car. Mark where the trunk handle is and cut, so you can have access to your trunk as normal. 6) After cutting, install the jammers that are on the brace and put your license plate back as normal. Here is a picture installed: 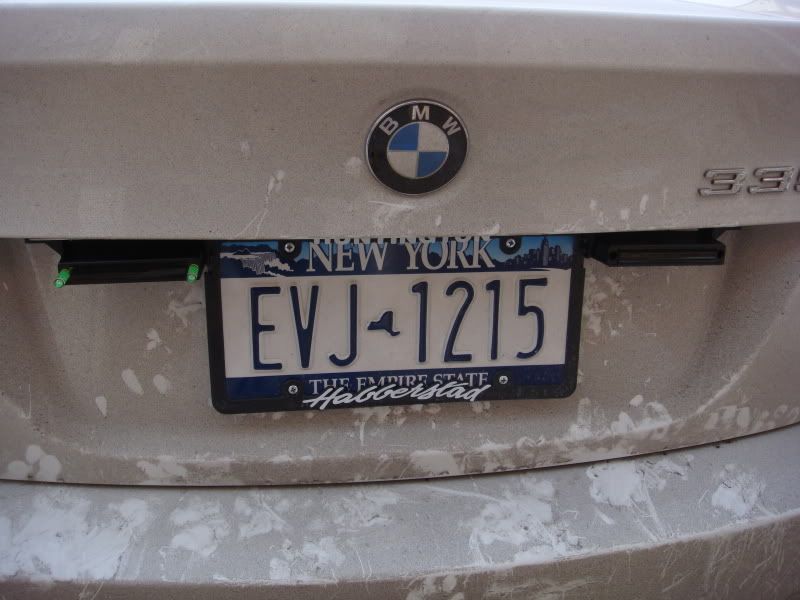 7) Remove trunk liner; Use this DIY to remove liner: http://www.e90post.com/forums/showth...ighlight=trunk 8) Remove passenger side license plate light (you do this from inside the trunk, there is a tab). 9) Cut a corner of the passenger side license plate light just enough to pass the wires through to inside the trunk. Look carefully at the picture and you will see where the wires are fed into: 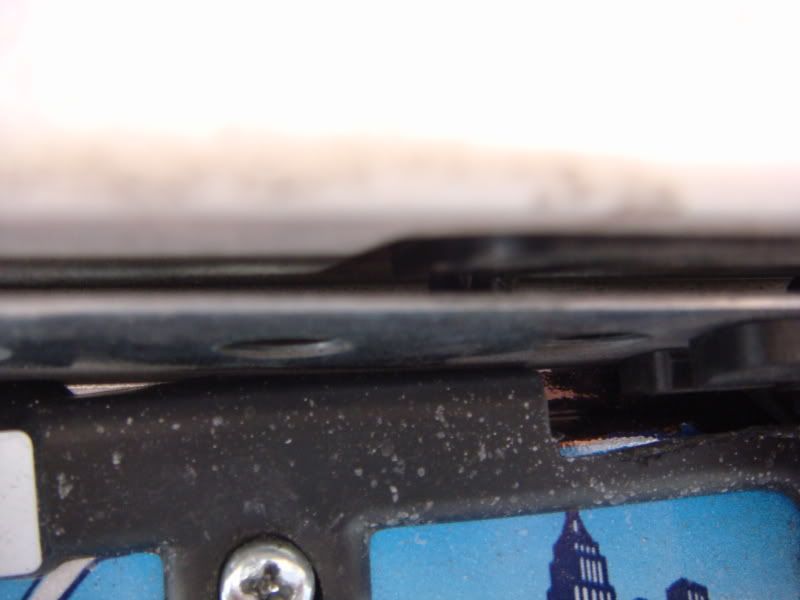 10) Run wires neatly with zip-ties with the factory wire behind the trunk liner. 11) Feed Line out into the seal on the trunk lid; I cut a slit just enough to pass the wire. Here is a picture: 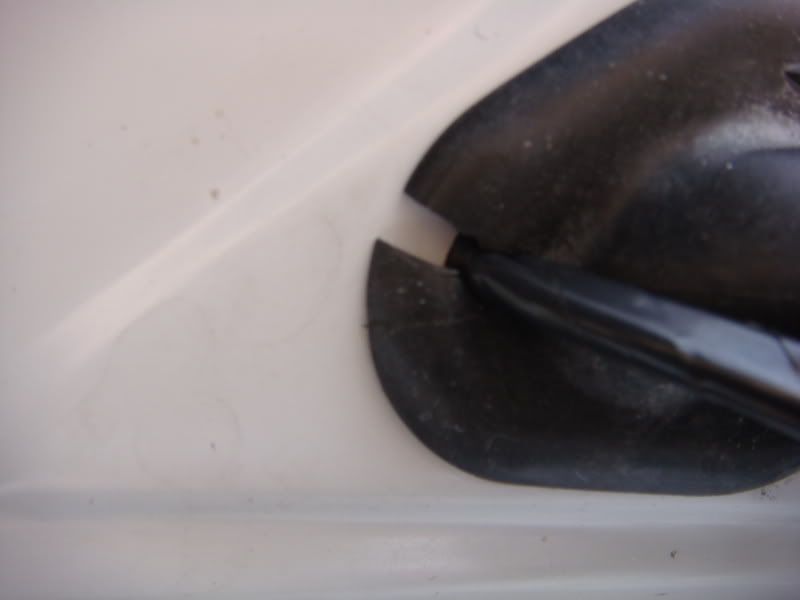 12) Feed the line into the body seal; I cut a slit just enough to pass the wire. Here is a picture: 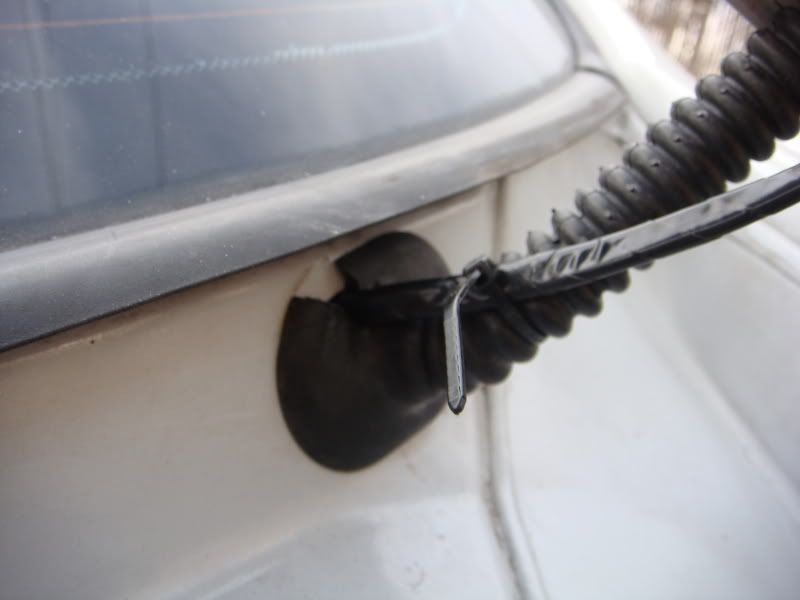 13) Remove rear passenger side bolster. To do this, you must release the rear passenger side seat (passthrough). Once you remove the bolster, you will see a few bunch of wires. Feed your Jammer Receiver lines through neatly. Here is a pic: 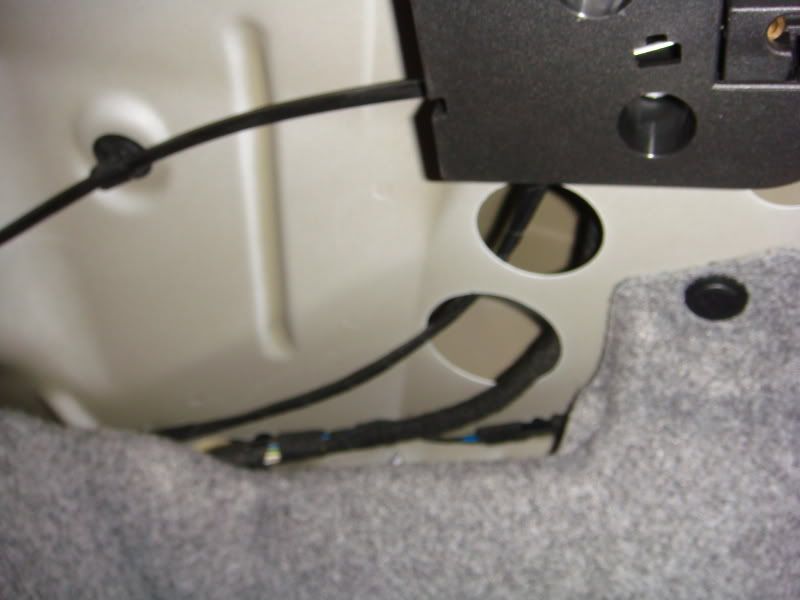 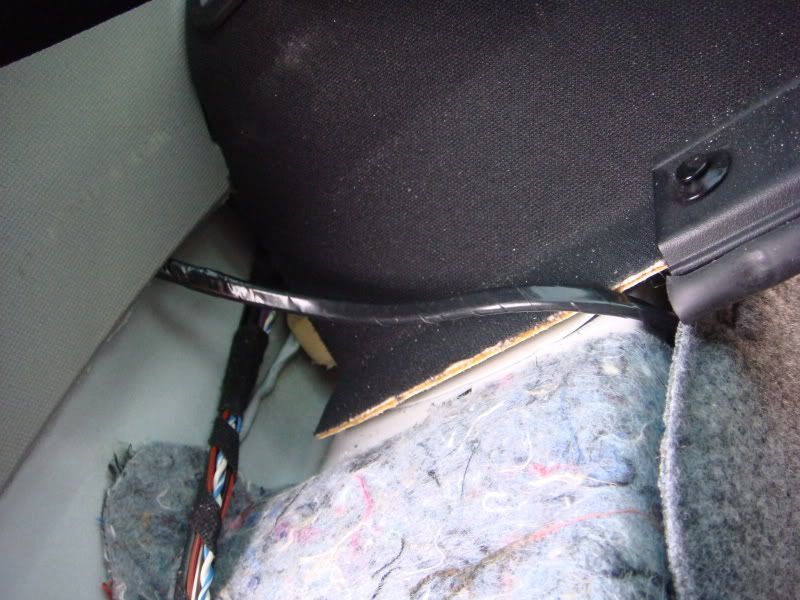 14) Run Wires underneath interior trim/seal(black felt-like strip that runs the area around the window. Here are a few pictures: 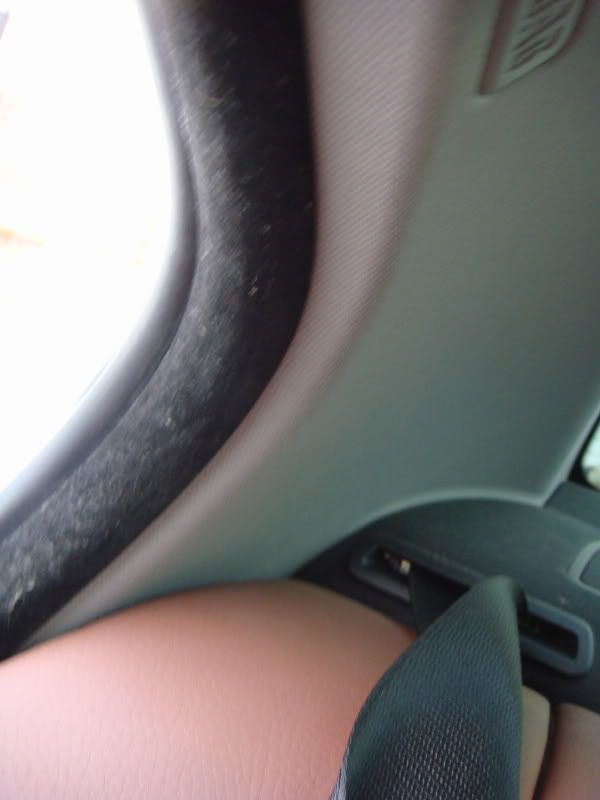    15) Route into underneath glove box and plug into CPU that is already there from the front jammer install. 16) Level unit and get going! Here is a picture:  17) Drive safely and within speed limit! |
| 04-08-2010, 02:19 PM | #2 |
|
Banned

262
Rep 5,018
Posts
Drives: VALNCYA
Join Date: Jan 2009
Location: Jersey
|
Rough install man ill have to post some up of my pasport :0
|
|
Appreciate
0
|
| 04-10-2010, 08:27 PM | #3 |
|
First Lieutenant
16
Rep 363
Posts |
wont a cop just pull you over anyways if he sees you flying down the street and cant get a read on your speed? never really understood these things.
radar detectors are nice though. |
|
Appreciate
0
|
| 04-10-2010, 08:52 PM | #4 | |
|
Lieutenant Colonel

79
Rep 1,670
Posts |
Quote:
|
|
|
Appreciate
0
|
| 10-24-2010, 09:40 PM | #5 |
|
Registered
0
Rep 3
Posts |
This install will get the Job done, but is a bit rough. I installed the M47 heads using all weather double sided tape. (heavy duty stuff, dont miss) I was able to get away fron the trunk install without any hardware and the heads cannot be removed by hand alone.
http://www.radardetector.net/forums/...2011-335i.html You will need to join and post a few things to see the pix. |
|
Appreciate
0
|
| 11-17-2010, 02:41 PM | #7 | |
|
Second Lieutenant
24
Rep 269
Posts |
Quote:
|
|
|
Appreciate
0
|
| 12-05-2010, 05:12 PM | #8 | |
|
Private
 7
Rep 63
Posts |
Quote:
|
|
|
Appreciate
0
|
| 12-12-2010, 10:46 PM | #9 |
|
The Man
17
Rep 348
Posts |
I'll point out the irony of your post. You went to all this money to install a useless piece of techno hardware, and you don't have a front license plate. In Texas that's an EASY ticket. I would suggest you venture over to Rhoplate.com and get yourself the nice pretty no drill your front bumper license plate bracket. And I speak from experience when dealing with laser radar......
__________________
2007 328i (01/07 Production)
Monaco Blue / 2014 MSport 328i - Glacier Silver Modifications: Blacked out Kidney Grill || Bluetooth Retrofit || Ipod Retrofit || Rear Power Outlets || Euro Switch || Blacklines |
|
Appreciate
0
|
| 12-13-2010, 11:29 AM | #10 | |
|
Second Lieutenant
24
Rep 269
Posts |
Quote:
In my car however, where he has that button, I have other OEM buttons and that whole bracket has a bunch of shit in the back so I can't drill out a hole to put the switch anywhere in that area. Back to the drawing board  |
|
|
Appreciate
0
|
 |
| Bookmarks |
|
|


