|
|
|
|
 |

|
 |
BMW Garage | BMW Meets | Register | Today's Posts | Search |
 |

|
BMW 3-Series (E90 E92) Forum
>
DIY: E92 Headlights - a poor mans OSS
|
 |
| 01-30-2011, 02:12 PM | #1 |
|
loves his turbos
17
Rep 225
Posts |
DIY: E92 Headlights - a poor mans OSS
First and foremost - using this DIY is at your own risk. I am mechanically inclined as i have worked on planes for the past 10 years, and cars even longer. This is fairly straightforward, however, if you mess something up it could be VERY costly to replace.
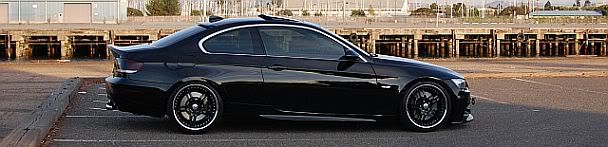
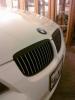
So, i decided to paint the chrome pieces in my headlight black because i dont like chrome, and i think they look way better this way. And, i had a day to burn, so why not do something fun! I am glad i did it, but in the end, im not sure if the amount of work required was worth it. If i was not a tinkerer, and fairly confident in my mechanical skill i would have paid for it. I have a feeling most of the cost that companies charge for this work is spent on advil. Tools you will need: -heat gun -screwdrivers (3) - 2 regular sized flatheads - 1 small flathead -spray paint -sandpaper (i used 400 grit) -T20 torx driver Tools you might want: -super glue -paper towels -radio -coffee/beer MOST IMPORTANT THING YOU NEED: PATIENCE!!! i cant stress that enough. this will take about 5 hours all told, and i felt like i could have slowed down. to that end, i broke a piece, so i could have certainly used a break. PLEASE, take your time. With that said, here we go..... 1. Remove your front bumper and wheel well linings. if you dont know how, look it up or just wing it like i did. its fairly easy, and you cant progress without doing it 2. Once the headlight is removed, take it apart.(1 screw) 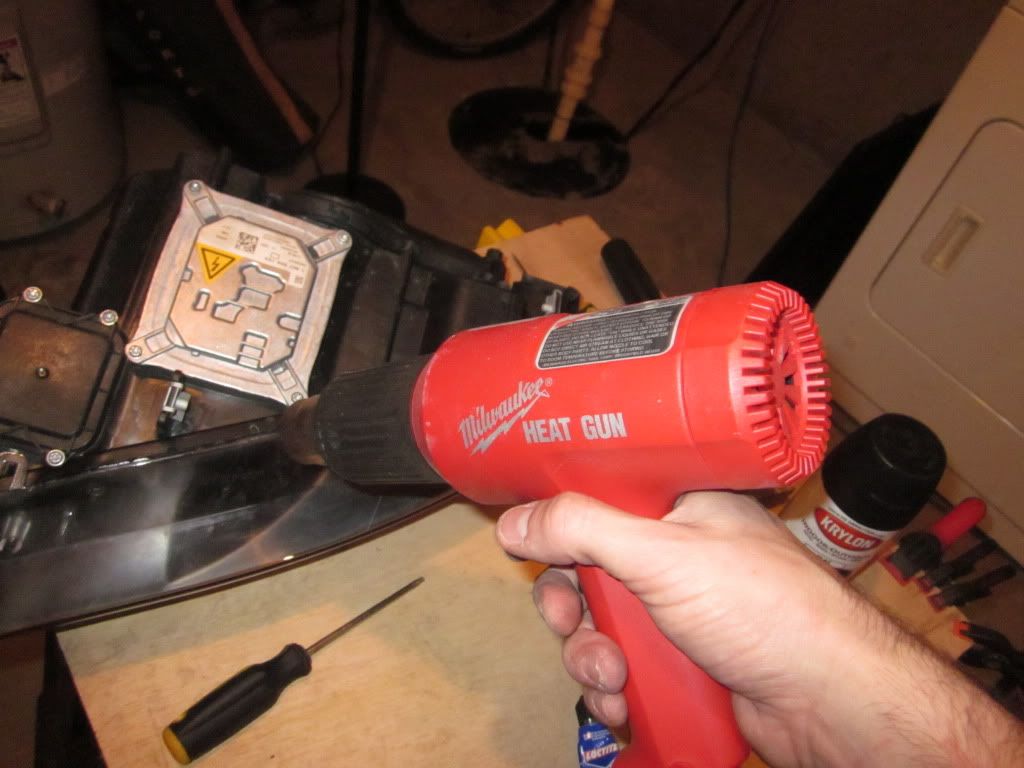 You will need to use the heat gun to heat the adhesive, and then slowly and carefully pry the two pieces apart. it takes a little time, just move around the perimeter of the housing and youll be fine. Also, there is one screw on it. There is a piece of rubber, and its underneath it. dont forget about it! 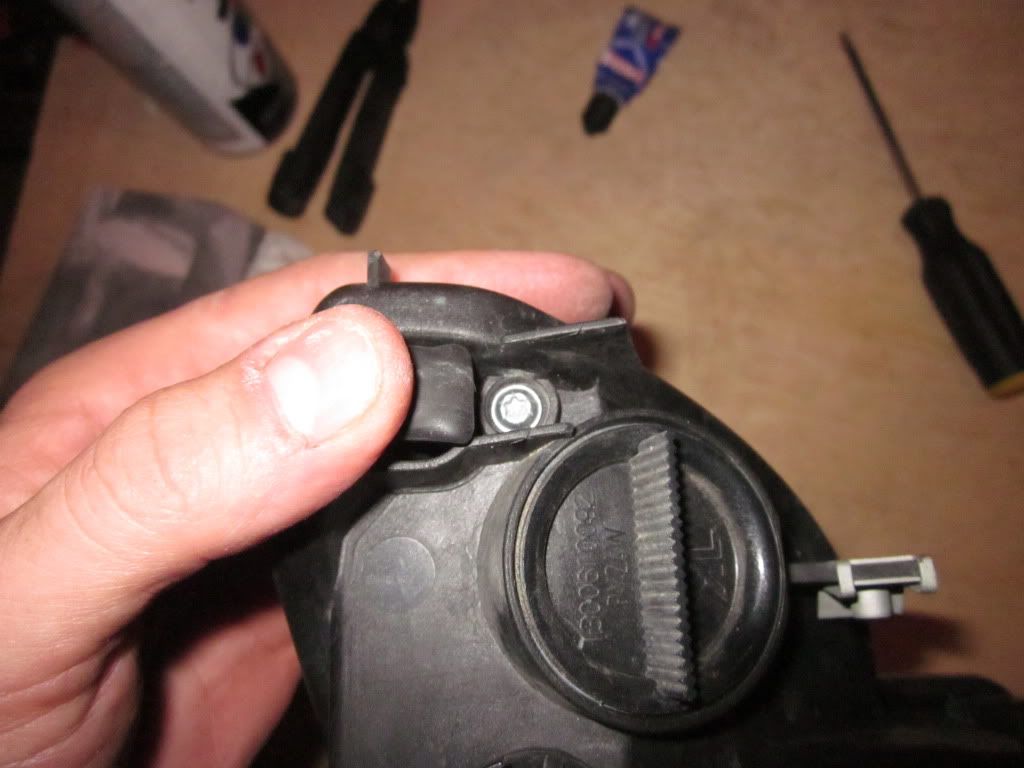 BUT WAIT---- when you are splitting the housing, you will see wiring. you need to unplug that clip before you separate them completely, or you will tear the clip apart. i know, i did it NOTE-- it seems that no error will be thrown if these plugs are not plugged in. so, if you desire to lose the small LED in the corner of the housing, just leave it undone and it wont be on anymore  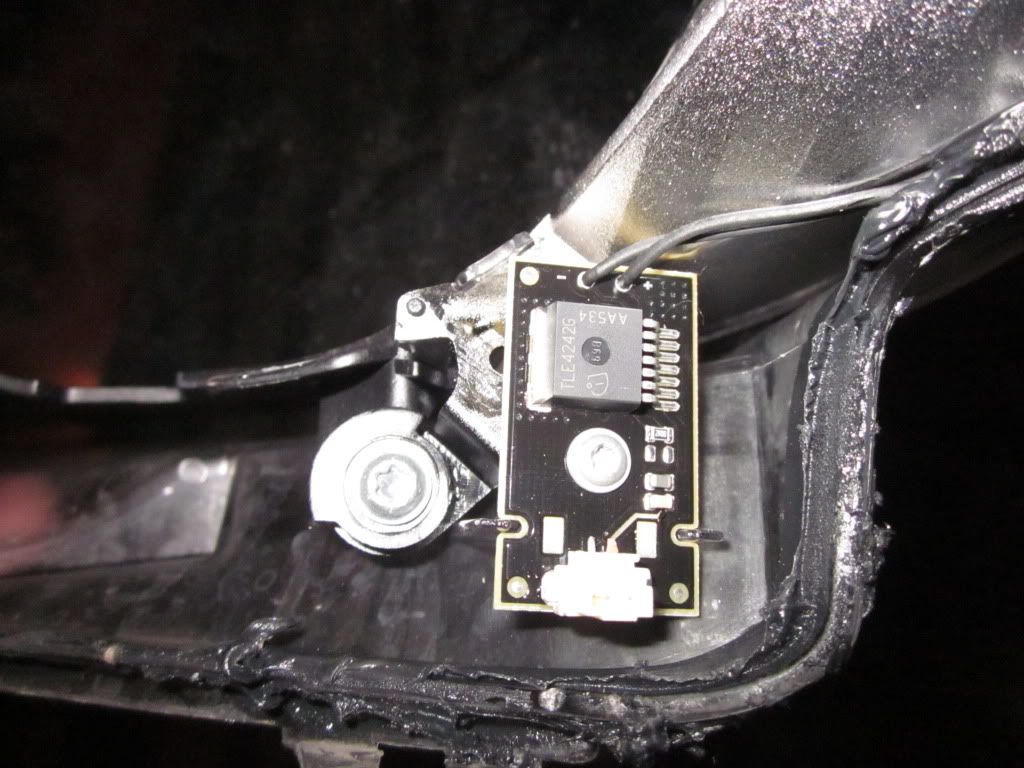  moving on moving on3. Remove the angel eyes.(1 screw) 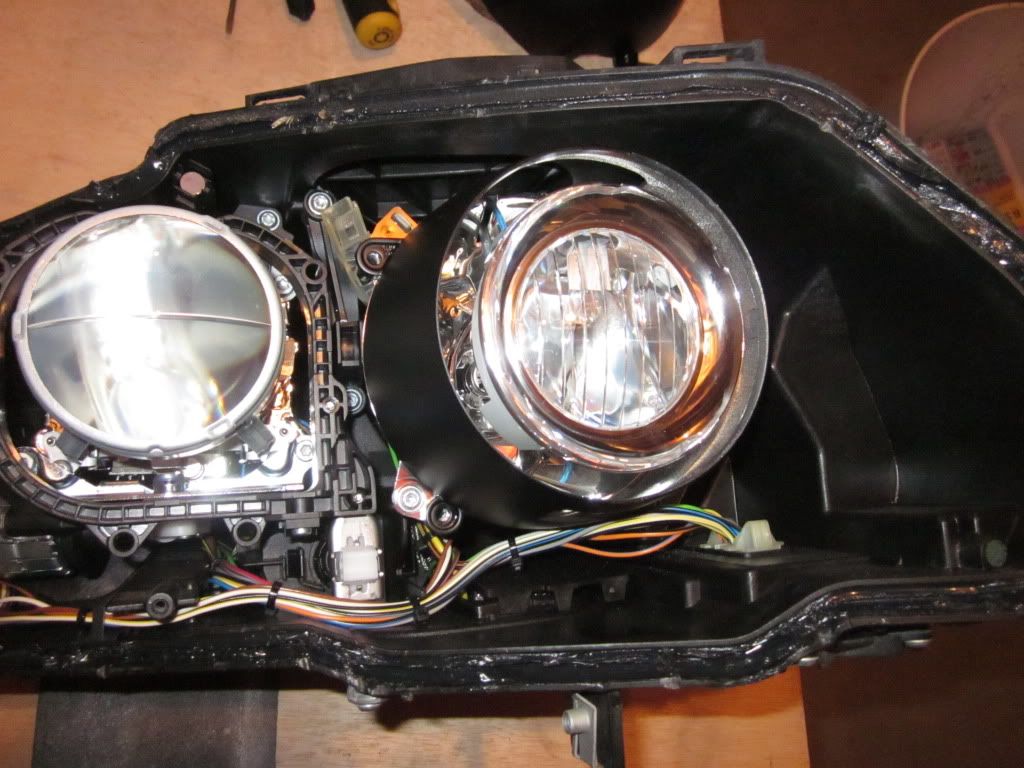 turns out, they are just pieces of glass that are snapped in place and reflect light, unlike the e46. but no worries, its easy to do. use the small screwdriver to gently pry the plastic holding it apart, give it a wiggle and it will come out. its in 2 pieces on the inner light. for the outer lens, its one piece. for that one, unclip one side and gently pry it up so you can see underneath it. Then, slowly pop out the lens one side at a time. 4. Unscrew the to plastic pieces that you want to paint.(5 screws) there are four screws on the inner, and two on the outer, although one is already removed during the angel removal. also, on the outer, there is a clip in the middle portion. its come out easy, so dont force it, just use the small screwdriver if you have to. 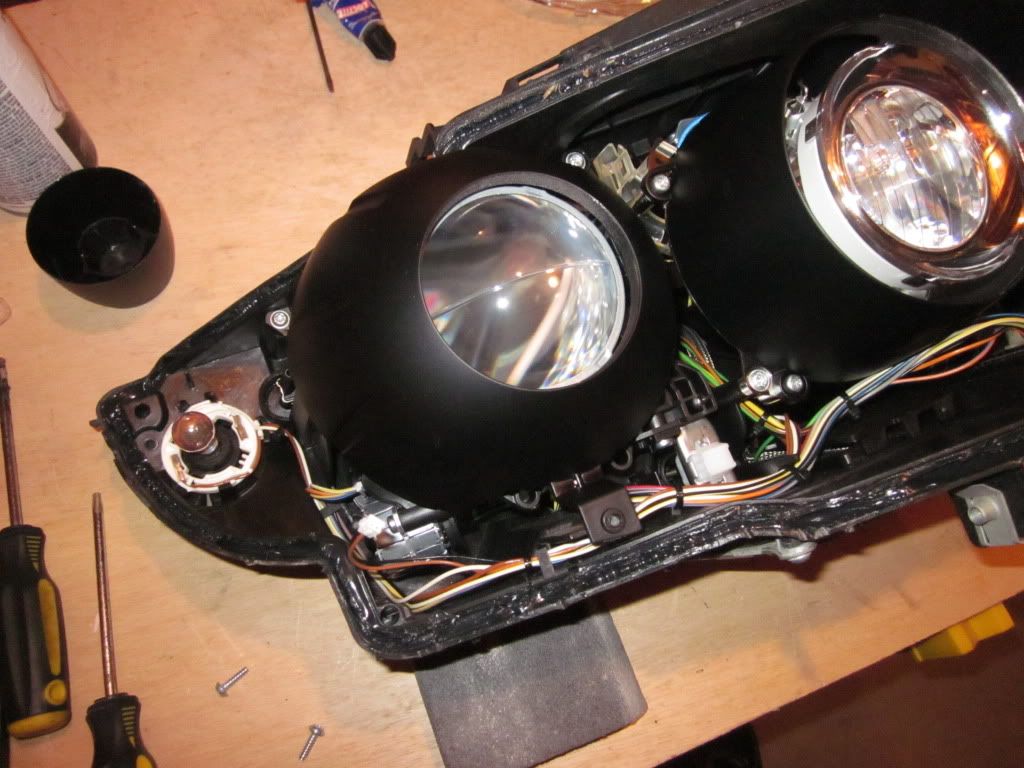 5. Sand and Paint!!! i used flat black. but really the choice is yours 6. At this point, everything else is reverse order, so im not going to write it out. if you made it this far, putting it back should be the same amount of work. NOTE-- when reattaching the lense to the housing, i reheated the glue on the housiong and pressed them back together. i cant say whether this is the best solution or not, but its the one i used. if you feel that more adhesive would be beneficial, by all means use more All in all, im satisfied with it. but, i still have the same bulbs, so not that much has changed yet...  heres the final product: 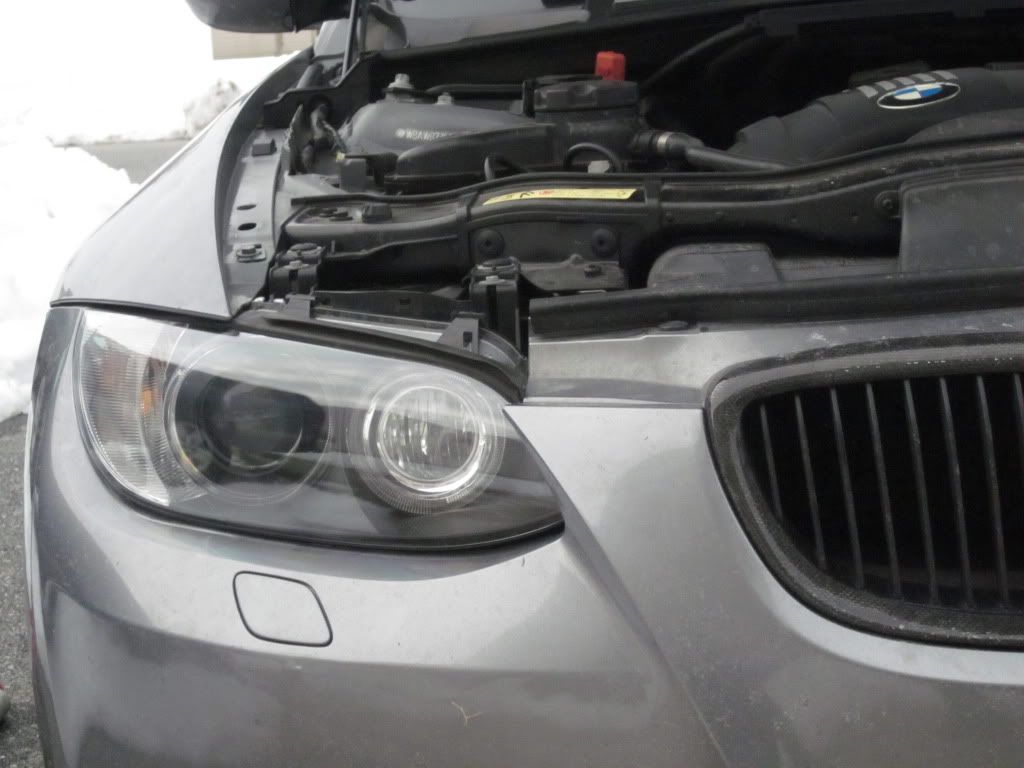 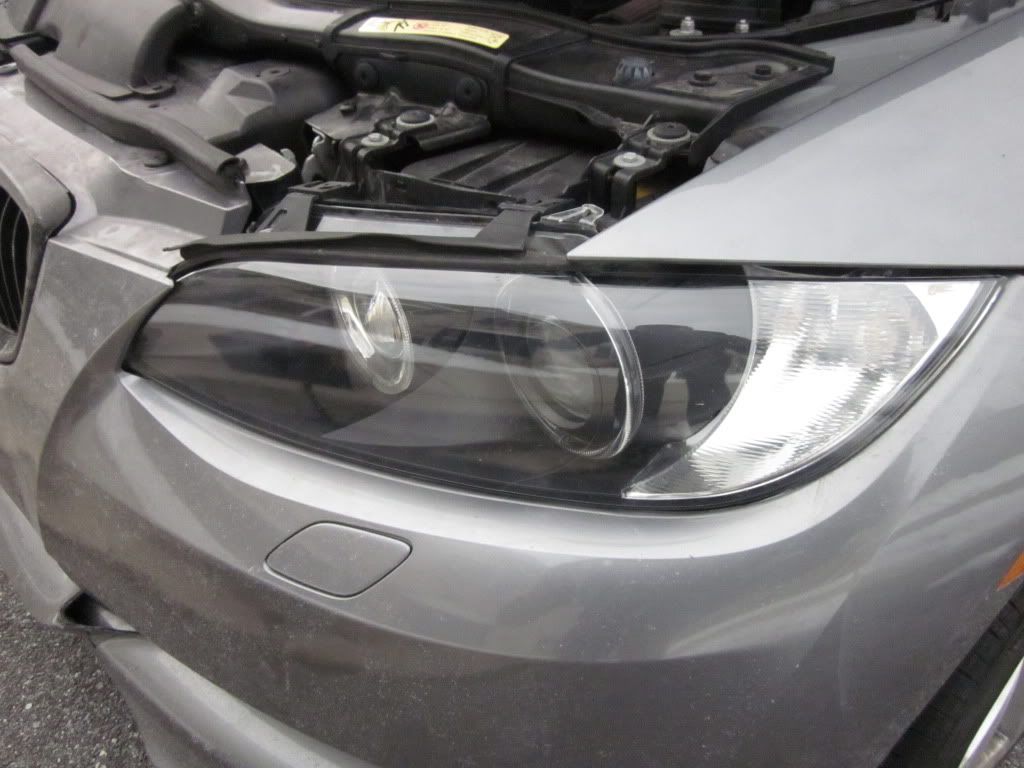 Last edited by kcalhoun27; 01-31-2011 at 12:31 PM.. |
| 01-30-2011, 06:21 PM | #4 | |
|
Enlisted Member
 7
Rep 37
Posts |
lol
Quote:
__________________
 N u know thats the cleanest shit uve seen... N u know thats the cleanest shit uve seen... |
|
|
Appreciate
0
|
| 01-30-2011, 06:54 PM | #5 | |
|
Private
 0
Rep 65
Posts |
Quote:
 |
|
|
Appreciate
0
|
| 01-31-2011, 12:10 PM | #6 |
|
Professional Moose Racer

316
Rep 7,509
Posts |
Great DIY, so did you use super glue to re-seal the housing back together?
__________________
Visit my blog anytime: http://www.sfpayments.com
 BMW Dream Team PNW Chapter, member #1  |HP Autowerks | AR DESIGN | BMW PERFORMANCE | STOP TECH | Volk Racing| AMS | ARKYM |
|
Appreciate
0
|
| 01-31-2011, 12:28 PM | #7 | |
|
loves his turbos
17
Rep 225
Posts |
Quote:
|
|
|
Appreciate
0
|
| 01-31-2011, 02:28 PM | #9 | |
|
loves his turbos
17
Rep 225
Posts |
Quote:
|
|
|
Appreciate
0
|
| 02-01-2011, 02:18 AM | #10 |
|
the.tsukinousagi

118
Rep 1,538
Posts
Drives: 2015 F82 M4
Join Date: Jan 2008
Location: Vancouver, BC
|
going to probably attempt this, this weekend
|
|
Appreciate
0
|
| 02-01-2011, 05:15 AM | #11 | |
|
loves his turbos
17
Rep 225
Posts |
Quote:
|
|
|
Appreciate
0
|
| 02-05-2011, 09:42 PM | #13 |
|
Major General
 
422
Rep 8,004
Posts
Drives: '08 E90 335i, '99 E36 M3
Join Date: Apr 2009
Location: Houston, TX & Atlanta, GA
|
Good info here!
|
|
Appreciate
0
|
| 02-14-2011, 02:41 AM | #14 |
|
the.tsukinousagi
118
Rep 1,538
Posts
Drives: 2015 F82 M4
Join Date: Jan 2008
Location: Vancouver, BC
|
i am halfway done pretty much, seperately the lights wasnt as bad as I thought, i did the heat gun method with a few butter knives haha
|
|
Appreciate
0
|
| 02-15-2011, 06:43 AM | #16 | |
|
the.tsukinousagi
118
Rep 1,538
Posts
Drives: 2015 F82 M4
Join Date: Jan 2008
Location: Vancouver, BC
|
Quote:
http://www.e90post.com/forums/showthread.php?t=488828  |
|
|
Appreciate
0
|
| 02-20-2011, 02:44 AM | #17 | |
|
First Lieutenant
 
18
Rep 370
Posts |
Quote:
 |
|
|
Appreciate
0
|
| 02-20-2011, 03:49 AM | #18 |
|
Captain

23
Rep 702
Posts |
just baked my headlight at 200F 10mins, the glue soft moderately around the edge and easily pry open just in 3mins
 . but remove the bumper and the headlight took me 3 hours to do. . but remove the bumper and the headlight took me 3 hours to do.applied several layer of paint clear coat makes it glossy black.  LED ring + blackout Last edited by qclik; 02-20-2011 at 08:14 PM.. |
|
Appreciate
0
|
| 01-28-2012, 04:50 PM | #20 |
|
Lieutenant
60
Rep 587
Posts |
So I just tried this... Couldn't get the headlights apart. Tried everything! Baked them in the oven, hair drier, heat gun... Nothing worked. The sealant wouldn't budge. Maybe BMW started using a better sealant on LCI models
 Every time I'd heat the housing up and try splitting them apart, the plastic housing and lens would deform from being hot, before the sealant would let go. Not too mention, the headlights were a complete bitch to remove once the bumper was off. |
|
Appreciate
0
|
| 02-22-2012, 12:21 AM | #21 |
|
Major
 78
Rep 1,127
Posts |
There are two screws that you need to unscrew underneath rubber pieces. I will put money you didn't unscrew these.
__________________
|
|
Appreciate
0
|
| 03-14-2012, 11:22 AM | #22 |
|
The Artist
63
Rep 927
Posts
Drives: 2011 E90-LCI & 2008 E82
Join Date: Jun 2010
Location: Yorktown, VA
|
I want to see a completed POORMAN OSS on someones LCI
__________________
 Betty White - 2011 E90LCI 328i - SOLD Black Betty - 2008 E82 135i |
|
Appreciate
0
|
 |
| Bookmarks |
|
|