

|
|
 |
 |
 |
|
 |
BMW Garage | BMW Meets | Register | Today's Posts | Search |
 |

|
BMW 3-Series (E90 E92) Forum
>
DR-JEKL's 335i Intro & Build Thread
|
 |
| 07-28-2013, 08:16 PM | #419 | |
|
Captain
    52
Rep 968
Posts |
Quote:
|
|
|
Appreciate
0
|
| 07-28-2013, 08:46 PM | #420 | |
|
Major General
  
898
Rep 6,285
Posts |
Quote:
Jin is correct as its the nature of the gears to form a fine putty like grit from normal wear and tear. |
|
|
Appreciate
0
|
| 07-28-2013, 08:59 PM | #421 |
|
Jedi samurai ninja turtle

619
Rep 3,021
Posts
Drives: X3 M40i 2018
Join Date: May 2012
Location: Sydney, Australia
|
Nice one, should have run a magnetic oil drain plug through the bottom to see the metal content, would be interesting to see.
Do they make magnetic plugs for our tranny's? |
|
Appreciate
0
|
| 07-29-2013, 12:18 AM | #423 |
|
Major General
  
898
Rep 6,285
Posts |
I didn't have the time to do that or take pics, but i still have the used fluid so i will do that this week.
|
|
Appreciate
0
|
| 07-29-2013, 12:22 AM | #424 |
|
Major General
  
898
Rep 6,285
Posts |
Well mine is a manual (unsure of if the DCT is less harsh on fluid) and whilst the friendly bmw SA had stamped the service book that they had changed the tranny fluid last year at the dealer service (8k kms use) I reckon I had dumped the original fluid from the tranny (damn it was rank as, with an extremely strong offensive plastic type odour)
|
|
Appreciate
0
|
| 09-29-2013, 12:55 AM | #425 |
|
Major General
  
898
Rep 6,285
Posts |
I'm selling my E92 335i.
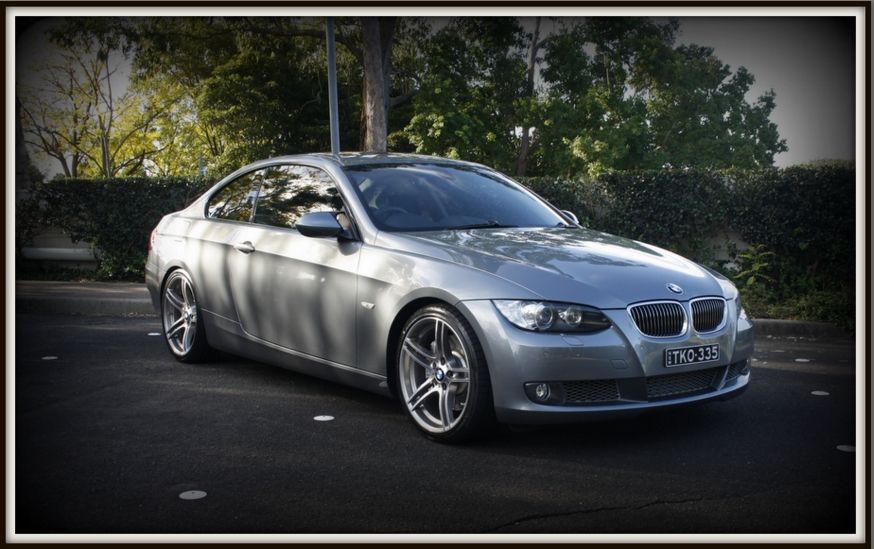 I'm in no desperate need to sell and I'm happy to keep the car it's just that I haven't driven her in a month (it has mainly been used as a weekend car since I have owned it) I'm getting married in the new year and don't quite have the time lately to complete the build and start hitting the track and strip like I had originally intended so I'm listing it for sale. This car is very clean and it took me near 6 months of searching to find a car which met my standards and the best thing was its a manual! I have invested quite a bit of $ and time into this car to transform it into a subtle neat example of what I believe how the E92 should be. http://www.carsales.com.au/private/d...?Cr=26&sdmvc=1 I also have a full F&R suspension/brake/diff 3:15 ratio/subframe with all control arms F&R with bnib BC BR coilovers from a 2010 m3 which can be purchased in addition to the asking price of the car. The buyer can continue to develop this car and essentially turn it into a wolf in a sheeps clothing with upgraded turbos meth/E85 and with the m3 setup it would be a killer package (at this price for the performance it offers there isnt much else out there to match it up against that has luxury comfort and performance) If you have any enquiries please PM me or sms me to arrange for an inspection please no timewasters or lowball offers as I mentioned I'm in no rush to sell and I believe the price is quite fair considering the condition this car is in and the amount I have invested in the car. Cheers Shane |
|
Appreciate
0
|
| 09-30-2013, 03:04 AM | #427 |

161
Rep 1,460
Posts |
M3 diff and parts
Who is going to put there hand up for the M3 Parts ?, That back end is a must for the performance nut
 don't miss out they are as rare as rocking horse SH+T don't miss out they are as rare as rocking horse SH+T  GLWS Shane |
|
Appreciate
0
|
| 09-30-2013, 04:52 PM | #428 |
|
Major General
  
898
Rep 6,285
Posts |
|
|
Appreciate
0
|
| 09-30-2013, 04:53 PM | #429 | |
|
Major General
  
898
Rep 6,285
Posts |
Quote:
If I was to sell all the M3 running gear it will save someone a lot of time hassle and organising that's for sure! |
|
|
Appreciate
0
|
| 10-07-2013, 07:45 PM | #430 |
|
Major General
  
898
Rep 6,285
Posts |
Well I spent a few days cleaning my car, and for all the cars i have owned every 12 months i give the undercarriage a good high pressure clean steam clean scrub with detergent and spray paint calipers/rotors and dress plastic wheel arches:
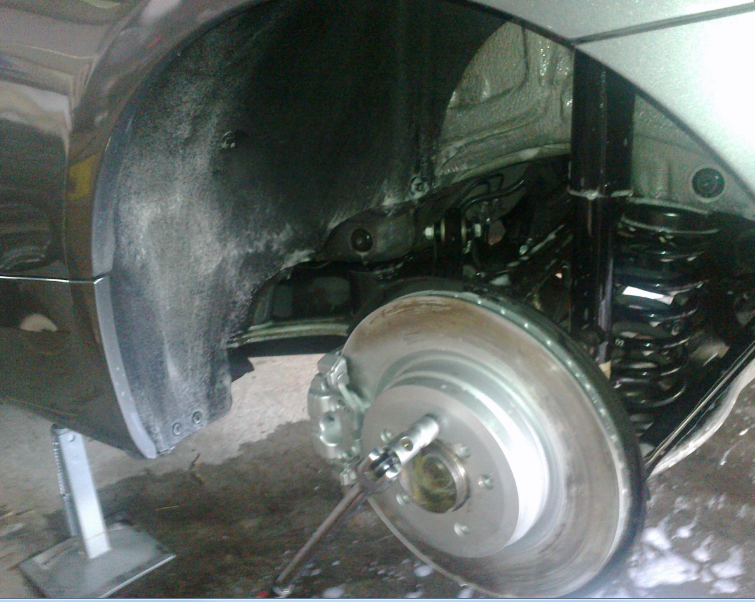 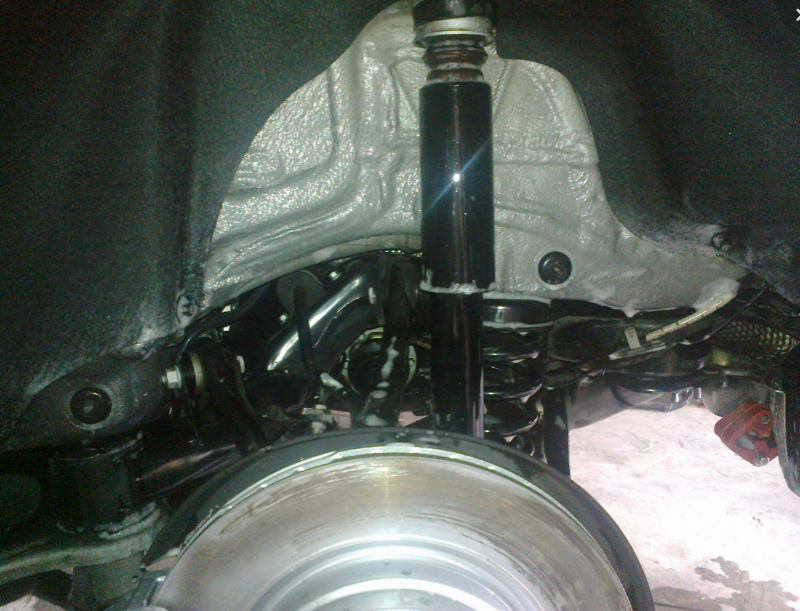 The car wasn't really all that bad, as in the last 12 months she hasn't been driven a great deal, and no dirt roads/mud! A few of you guys have asked about my custom polished BMW PE, sorry for the delayed pics! Whilst I had the car up on car stands I decided to remove the PE clamps (which clamp the mufflers to the midpipe) as they look ugly and decided to tig weld the mufflers so it looks all oem and factory Prior to polishing: 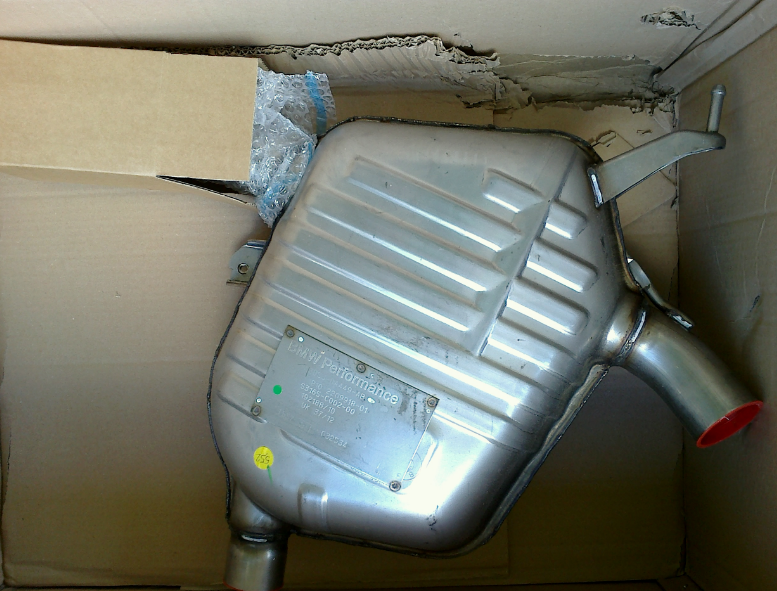 Polished & installed: 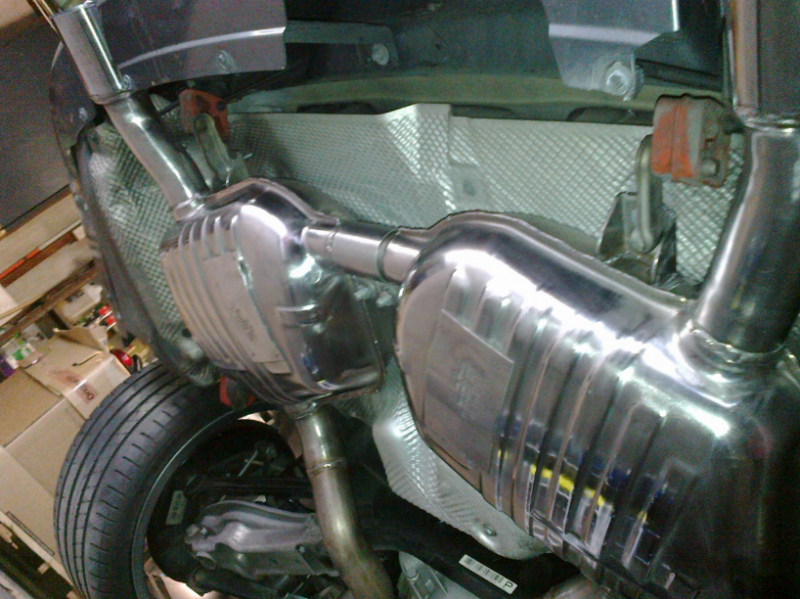 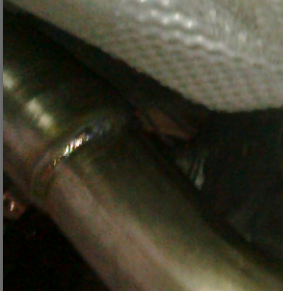 And whilst I have the car up for sale I cant help but continue to mod the car and bought a LCI starter which i shall install tonight  Last edited by DR-JEKL; 10-07-2013 at 08:40 PM.. |
|
Appreciate
0
|
| 10-07-2013, 08:38 PM | #432 |
|
Major General
  
898
Rep 6,285
Posts |
|
|
Appreciate
0
|
| 10-07-2013, 11:24 PM | #433 |
|
Colonel
 
171
Rep 2,682
Posts |
Did you just spray the rotor hats silver? Do you just cover the face of the rotor, spray it and let the brakes clean the excess off?
__________________
|
|
Appreciate
0
|
| 10-08-2013, 12:04 AM | #434 | |
|
Major General
  
898
Rep 6,285
Posts |
Quote:
Basically you start by washing & scrubbing all brake components with a good scrub/detergent mix to remove the brake dust grime & then rinse and then dry (I use my petrol blower to dry after cleaning) then give the rotor hubs a light run with 1200 grit paper (dont worry about sanding the calipers as they have a rough porous surface finish due to them being cast) then clean with a wax grease remover, and if you want you can mask the mounting hubs. Then mask off the inner wheel arches with newspaper and secure with masking tape (to prevent having your wheel lining covered with overspray) and you're ready for painting. I use duplicolour caliper paint (the hi temp spray is suitable also- which i believe SCA currentley have a special on for the caliper paint) but just be careful the nozzles are extremely sensitive and awkward to use but once familiar they are an excellent nozzle. I recommend trial painting on something prior to prevent runs or severe overspray. When painting use a series of thin even coats in a sweeping motion (and at least 12 inches away to prevent runs) rather then one or two thick coats (wait 10 mins between each coat or I use a AEG heat gun in between coats to speed up the process - or just steal your missus blow dryer) as the viscosity of this paint is extremely thin and runs easily if heavy handed. Then once your done, I sand the inner hub of the wheel and the mounting face apply a thin layer of grease to the mounting face, the mounting hub on the rotor and also a very fine layer of grease to each bolt after cleaning. I spray in controlled strokes and basically there was minimal overspray onto the actual rotor face. You can either dab the overspray off with a rag doused in thinners and then as you stated just let the remaining overpsray be removed during the normal braking process (obviously you don't want the entire rotor face to be covered in paint 2mm thick and expect that to be removed a sit may glaze the pads. When rims are mounted and torqued up quite often crevice corrosion occurs due to the dissimilar materials (alloy wheel onto a iron hub) which in itself is no big deal but what occurs is when trying to get the wheels off the hub they are jammed on. For a backyard mechanic this is no big deal you tap the inside tyrewall with a soft face mallet, but if you're getting your tyres changed at your local bob jane/ kmart they will just wallop the christ out of it, or lever it off with a bar and potentially damaging your rims. (the same goes for the bolts, if you have ever had a stripped wheel nut or broken stud you know what a PITA it is to replace when a bit of simple routine preventative maintenance could have prevented it from occuring) |
|
|
Appreciate
0
|
| 10-08-2013, 12:18 AM | #435 | |
|
Colonel
 
171
Rep 2,682
Posts |
Quote:
I always find it a bitch to remove my wheels after they've been on for a while due to the corrosion. What's even worse is that I have non hub-centric wheels and so the aluminium hub centric rings are pretty much now welded on... It's impossible to hammer, kick, whatever the wheels off. What I did was actually loosen all of the nuts and just leave a couple on. Then I just jack the car up slightly and lower it down slowly using a jack. The weight of the car and the weight shift is due to the tyre/suspension is enough to pop the wheel off the hub. I'm not sure how healthy this is for the lug bolts but from a visual inspection it doesn't seem to damage the threads or the bolt itself and they continue to work fine. I think I'm going to get Pete to cut the hub centric rings off when the car's in the shop and maybe I'll try run without hub centric rings or use plastic ones in the meantime if I notice vibrations. Just worried they'll melt when I'm at the track. But yeah, I'll have to do the sanding/greasing thing to the hub/mounting face the next time I remove the wheels. Brake component grease is ok?
__________________
|
|
|
Appreciate
0
|
| 10-08-2013, 12:20 AM | #436 |
|
Major General
  
898
Rep 6,285
Posts |
Well as I had mentioned previously I had removed my exhaust clamps for a cleaner look and i reckon it has helped me fool myfriendly local rego inspector!
The normal guy i use was booked out all week (who simply does a brake check, indicator and headlight check and bam you're done) and I couldn't wait that long so I gambled with another workshop who is close by to where I work. So during my lunchbreak (I work in an industrial/seedy part of town) I dropped in for the inspection and its obvious that he doesn't see too many bmw's as he had no idea how to start it or where to put the key fob and initially asked does this need an inspection as cars that are less than 3 years old dont need an inspection. I explained that my car was almost 7 years old, and then he continued on that his mate imports mercs bmw from the uk and sells them. We went through the light check all good, then he drives off to do a brake test comes back pops the hood looks around then calls over his offsider. They both start pointing to an area in the engine bay that im guessing is where the intake & BOV is and started expecting the worst (removing the CP to place the oem item in to pass rego then have to re-install the CP). They then put the car up onto the hoist and im thinking oh c'mon give me a break, and they immediately start scrutinising the mufflers brakes and entire driveline. I'm thinking yeah the bastards are going to fail me because i have a few illegal 'mods'. He then walks over and says is this thing turboed did you get the turbo kit from the UK as i can see a badge on the mufflers that says bmw uk (referring to the bmw performance uk plaque) I had to laugh and said no mate she's all factory standard and i sthe 'top of the line' 3 series and he then responds with ahh yeah that explains why it looks so neat all that black plastic piping on the intake pipe and filters looks very neat (referring to the active autowerke charge pipe and AFE intake) we thought it must be like a HSV type BMW?  (Guess it pays to choose black oem stealthy style mods to beat the rego check nazi's) (Guess it pays to choose black oem stealthy style mods to beat the rego check nazi's)Car modifyer +1 rego nazi's 0  |
|
Appreciate
0
|
| 10-08-2013, 12:29 AM | #437 | |
|
Major General
  
898
Rep 6,285
Posts |
Quote:
Hmm yeah you shouldn't have to do that, your removal method should do no harm at all if you have two bolts still secured. But after 12 months my wheels simply fell off when i removed them due to the protection the grease offers. TBH most waterproof bearing greases will be fine (TBH i found a tube of unlabelled red grease at work and have been using that!) and if you lived closer I could give you some, as we use 20L drums of it at work and i normally just take a glass jar full of it home for the odd jobs i need. Also funnily enough i noticed there is less corrosion on the mounting face of the rim when i use spacers (Alloy wheel mounted to alloy spacer, rather then alloy rim mounted to the iron rotor hub) which as a mentioned before is due to the dissimilar metal corrosion |
|
|
Appreciate
0
|
| 10-08-2013, 12:50 AM | #438 | |
|
Colonel
 
171
Rep 2,682
Posts |
Quote:
I'd love it if my wheels just fell off haha. When I installed these new wheels and hub centric rings, due to the rust on the hubs (I didn't sand them down) the rings didn't fit properly. I basically had to get them on as much as I could (maybe 1mm overlap) and then I mounted the wheel and threaded a bolt and screwed it on. that forced the hub centric ring onto the hub and it's been stuck ever since. I think it's going to need to be cut off... Wish I'd just sanded and greased lol. Thanks for the offer of the grease haha. I only have a small jar of some high temperature brake grease which is supposed to be use on the pads etc but I can't see why it wouldn't work for the hubs too. I'll give that a go next time.
__________________
|
|
|
Appreciate
0
|
| 10-08-2013, 02:01 AM | #439 | |
|
Major General
  
898
Rep 6,285
Posts |
Quote:
Well personally i prefer the hub centric rings to be secured to the rotor hub, as that way you wont lose one during a tyre change (once again at a local bob jane kmart if the hub centric ring sticks to the inside of the wheel bore then falls out without the tyre jock not noticing he could potentially mount the rim sans hub centric ring) just ensure the hub centric ring is greased so the wheel doesnt jam onto it. |
|
|
Appreciate
0
|
| 11-03-2013, 05:41 AM | #440 |
|
Captain
    35
Rep 809
Posts |
I have a major detail coming up and have taken delivery of stage 1:
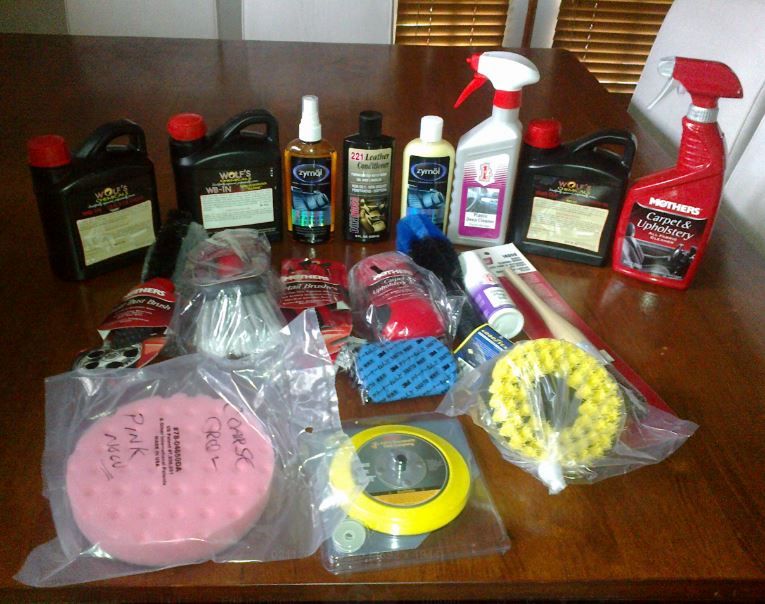 I have always been a zymol guy, but decided to try the duragloss leather conditioner. After a steam clean of the seats and then applying the zymol cleaner with a soft brush the duragloss conditioner was added to produce a clean soft finish (I have always found the leather to be quite hard in the bmw in comparison to my lexus) the duragloss product also has a leather scent, and actually smells great and adds ambiance to the cabin. Those wolf chemical products are also bloody fantastic! One is a quick detailer for which i use after washing the car and drying with a waffle weave towel just add a spray to the paint before removing the moisture residue from the car. It adds brilliant depth and gloss to the paint. The other is a plastic sealant for which i use for trim pieces such as engine bay plastics etc which gives it a very clean appearance yet doesn't look artificial like some wet look armourall type silicon products do. Ad lastly the third is a spray on mask which was put to the test today when going on a cruise with a few guys from the f3o forum up through the vineyards. All the bug guts literally just hoses off! As for it preventing rock chips hmm i doubt it... Talking to Pierre from carcareproducts he has recommended the menzerna range for paint correction (the menzerna range is formulated for bmw merc etc as they have a really hard ceramaclear coating which deems conventional products somewhat useless), so i will be purchasing a heap more gear again shortly! |
|
Appreciate
0
|
 |
| Bookmarks |
|
|