Ok Everyone Here it is!!...... I hope!
(embedded pics for fun, linked pics for info)
### If you read this. It is a historical document. Not a guide. You do something stupid, you'll get that prize all on your own ####

Besides: I could teach it to you, but I can't understand it for you.
This was my install of the Dynavin N7-Pro into a 2008 335i E92 N54. Long Post, but I am hoping someone can swing through and either enjoy the story or maybe find something useful!
I recently got the 335i (end of 2019). It is great and I am really digging it (my first, fast(for me) car!!). The handling is amazing, the power is show-stopping, and the ride quality is second to none! The only thing this thing lacked was a more up to date entertainment/navigation system.
The requirements:
Bluetooth
Nav (either built-in or from phone)
ability to connect a back-up Camera
Maybe Sirius-X/M radio (unless it cost more than base unit)
and Carplay (new to me as of researching this project)
MOST Importantly: I did not want a big blank bezel around a sexy touch screen. If at all possible, I wanted it to look stock!
I looked around and saw a few different options. However, I saw, time and again, that some companies had a nice product that many would report as being quality and worth it, but these companies had no US-based representatives. In the few instances, I have seen a posted/reported issue take days or weeks to get contact, answers or resolutions.
With this in mind, I went the Dynavin route. Feature-wise, it had everything I was looking for and more. Technical wise, the technology is new enough I feel like it will last a few years before needing an update. The weighing factor in this decision was that Dynavin has US-based reps and an amazing distribution company in J&T! This gave a 'Local' based contact - that I found was immeasurably appreciated and allowed for a faster install, a more streamlined button-up, and a better overall understanding than I started with.
Now to the Fun Bits!!
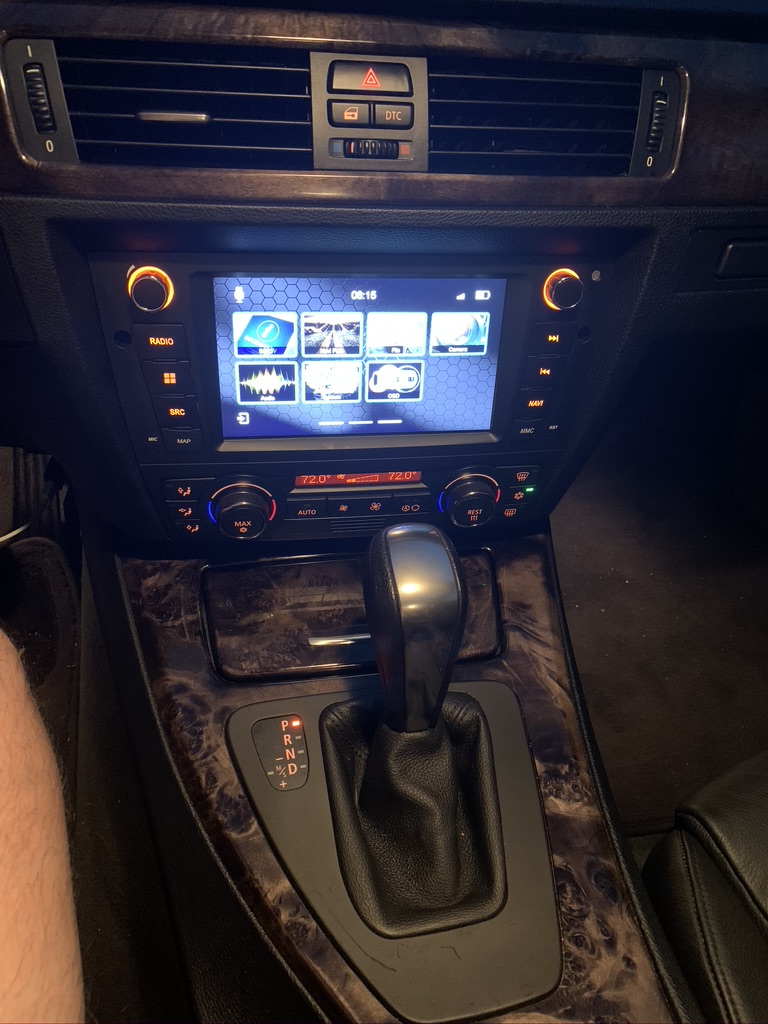
### Finished Product!! Figured I would give you some sexy bits first!
https://drive.google.com/file/d/1MGV...ew?usp=sharing
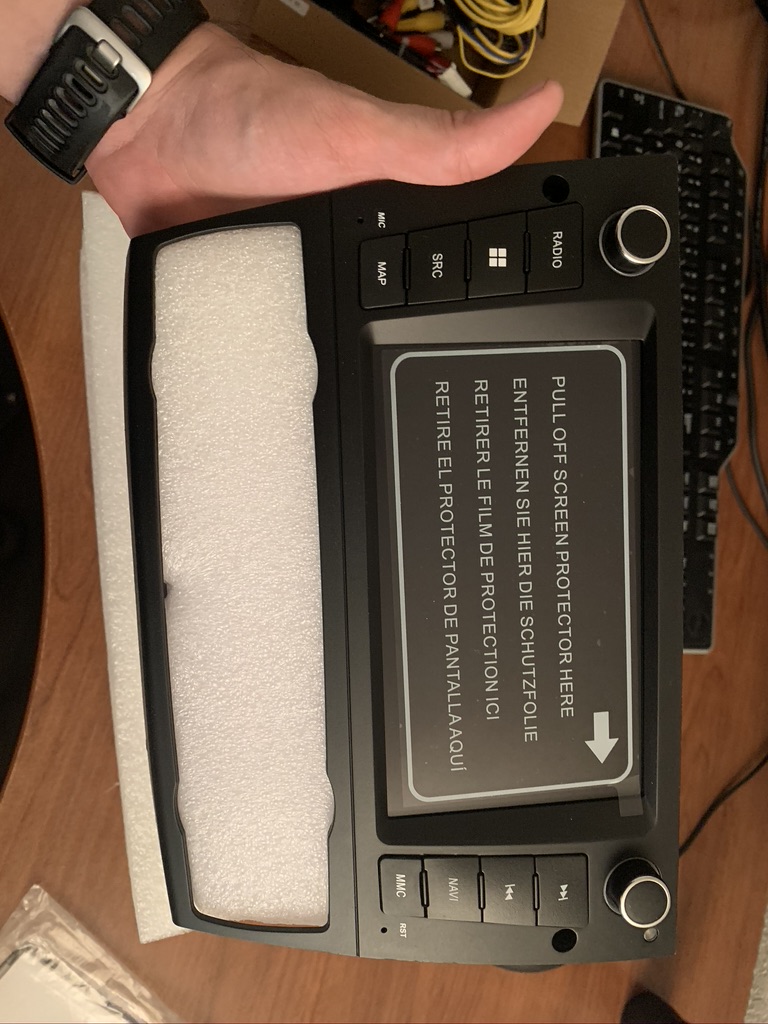
The package was received in good condition: thank you, shipping gods, for protecting my infotainment investment!
https://drive.google.com/open?id=1_r...t713M-NEVTWEsB
Unpacking it was fun. The packaging was very well prepared and executed. It was nice and cozy, without the cheap peanuts of yesteryear.
https://drive.google.com/open?id=1Ll...Orhfsp5X0mVIkO
https://drive.google.com/open?id=1o6...fKcth_x3Cv-LB3
https://drive.google.com/open?id=1Ew...Y7tQYI6m1l0GW7
https://drive.google.com/open?id=1Wl...7H7UUwPO7ZRE0t
https://drive.google.com/open?id=1WU...dnEMLmxVou2fIc
https://drive.google.com/open?id=1w8...z7Td-NCgqZsNcH
https://drive.google.com/open?id=1hf...Lu5YbJ4ZR7GsL_
The Unit came mounted into the new bracket from Dynavin, reducing material prep. It also came with a relocation bracket for vehicles with the extra buttons below the AC Controls. My vehicle did not have those. But I may see if i can find one of these button sets, and maybe wire in some auxiliary circuits later on (who doesn't like to play right!?)
With it all unpacked, I found that the provided harnesses were pretty much plug and play! It was very intuitive and easy enough for me not to mess it up haha!
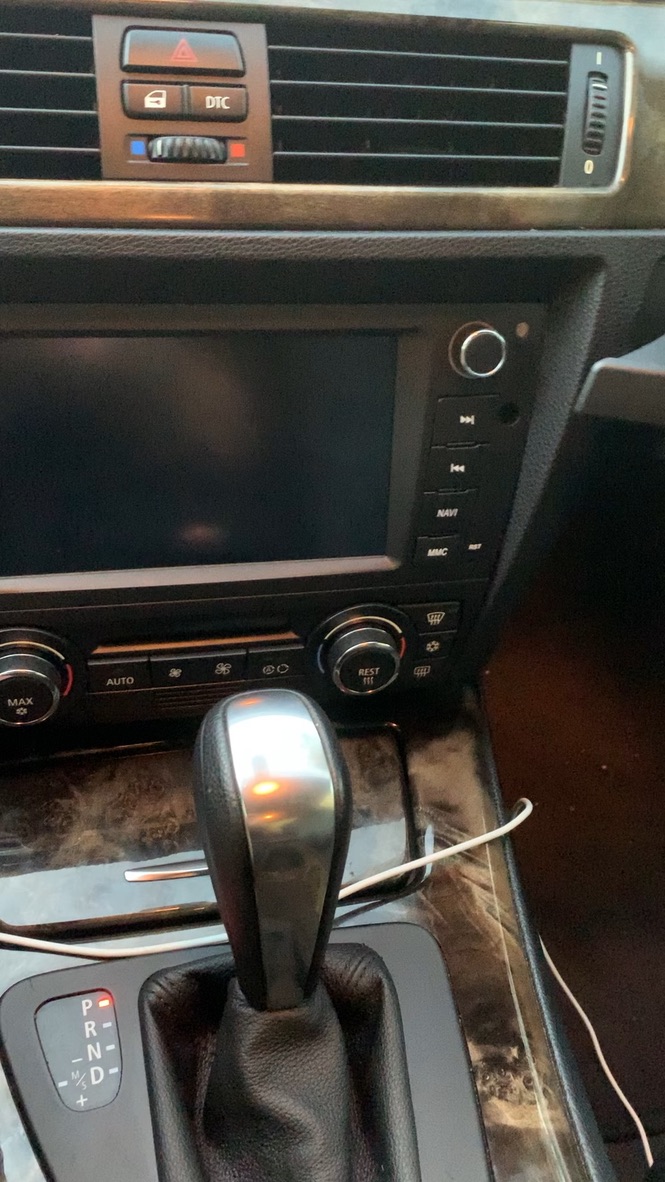
Now, with the unit pretty much connected and ready to go, I just needed a gaping hole to put it in

!
So to the 335 I go!

I started with some towels over the shifter and center console area. I threw it in neutral and put on the E-Brake to keep from going anywhere. I also used the parking place stop for the rear tires and a 35 lb weight for a front tire to make sure it didn't roll anywhere.
The dash dismantle process is well documented. I have the pics here, but you can easily find the sizes/tools needed with a basic set or looking online. The AC Controls cliped right into the Dynavin mount and I was able to trim the edges just like the pics provided by them.
I did find a cheap $20 set of trim pry-bars to be invaluable in this!
https://drive.google.com/open?id=1Qb...d9ebbByOAhBK80
https://drive.google.com/open?id=1tY...pvAkbfC8f8ucvp
https://drive.google.com/open?id=14O...aQVEfzOFDGp3w8
https://drive.google.com/open?id=1Hh...rJdeQnk4BGA1qY
https://drive.google.com/open?id=1H1...n0i7kUWAkGfjIb
https://drive.google.com/open?id=1i1...z7YUEVhvXmy6I_
https://drive.google.com/open?id=13M...NaPeiKWYMy9rLE
https://drive.google.com/open?id=1eO...ug0VR3Rfa_W620
https://drive.google.com/open?id=1U9...cevK5rhNPI-Fk_
Unfortunately, no real good pics of the unit halfway out and connected. Suffice it to say, that if you had the 'Square hole and Round Peg' game as a kid - just re-live that for 5 minutes.
The only caveat to this was the audio connections. Since I have the Logic 7 system, ny PDC is from my rear speakers only, but my nav, phone is from the fronts. So.. I got a couple of 1 Female to 2 Male RCA Splitters and just hooked those up! I did 'cross' so that each channel/side was getting a front and rear of that side. All works well with this setup and sound comes through perfectly fine! - Big thank to Jeff on this, as I did not know the Electrical or Sound system nearly as well as he, and he was able to give some great input and troubleshooting advice for this -
https://www.amazon.com/gp/product/B0...?ie=UTF8&psc=1
Pic for fun
https://drive.google.com/open?id=1pL...cIDD1l7Fco92da
Ran the 12 VDC Constant to the Fuse Box behind the Glove Box
https://drive.google.com/open?id=1iW...oempg54af1syaE
Used a fuse tap and found one of the comfort access fuses to piggy-back off of
https://drive.google.com/open?id=1X6...z6LRjnMcnBMm3Z
It is important to note: This is where I did a quick op check of the Dynavin and all ancillary components. Played music, made sure nav had gps, used the mic and made a call, connected carplay, etc. Better to test now and have a DOA (dead on arrival) component - which happens and sucks, but is nothing in the scheme of things. I also connected the backup camera and tested it- but more on that in a minute.
For the Mic - I ran the wire under the driver dash, to the a-pillar cover, over headliner, and next to Rearview mirror
https://drive.google.com/open?id=1Qi...hZ-GbL_GEWFvFA
https://drive.google.com/open?id=1SQ...QXTUfgV60Tafvw
https://drive.google.com/open?id=1LG...Hmmu7cRg-bOfjA
https://drive.google.com/open?id=1ZE...qRyfyOwObTcZvs
Can you see it?
https://drive.google.com/open?id=1r5...3NF2DUjzBMxR8P
https://drive.google.com/open?id=18J...1o59-ff-yXT1hv
For the GPS Antenna, I mirrored this to the passenger side. I stuck it to the frame in front of the airbag. (no pics).
After this, the unit is basically installed and just needed to be shoved into the dash and the screws installed. This process took about 2 hours and required maybe 3-4 different tools (prybar, torx bit, phillips, couple cuss words it went smooth- I ain't gonna be lulled into complacency damnit!)
BUT WAIT, There's more!!
Now I installed a Back up Camera!
https://www.amazon.com/gp/product/B0...?ie=UTF8&psc=1
and a relay
https://www.amazon.com/gp/product/B0...?ie=UTF8&psc=1
For this install, I had to remove a few more panels to get the wiring back there!
https://drive.google.com/open?id=15H..._datkRetcBh3OZ
https://drive.google.com/open?id=1Ov...kcxJ1pjtYeYHda
https://drive.google.com/open?id=1NJ...bvrobAYCkXN52s
This got me to the trunk. I don't have the pics for that yet but a quick description:
Remove interior panel by removing the cover on the trunk bottom lip, then a few pop rivets and tie off point behind passenger seat. Also, i have the pass-through folding seats, made this pretty convenient. For the Camera circuit.
I connected the Relay to the passenger back up light for the remote/switch to the relay. 12 vdc constant ran to the relay from Battery. Connected the Normally Open (NO) contact to the Camera hot and both relay and camera to ground.
This is important - the N7 Pro does not need to connect the 12 vdc power from the back of the unit to the BackUP camera. This power is for a separate camera-input I believe.
Dynavin has a couple of wiring harness pictures with the wiring requirements. Don't do like I did, I chased rabbits in my wiring cause i had connected the 12 VDC hot and Back-Up trigger, to the camera. This does not need to be done on MY car. Yours may be different and I cannot speak to that, so when the time comes, may your journey end the way you want it to.
After this, Set the N7 Pro Settings to 'After Market Camera Enabled'- This is the new firmware as of the beginning of the year. The N7 now auto-detects the PDC, from the MOST connection, and the Camera. It used to require selecting the desired settings. No more of that!! haha.
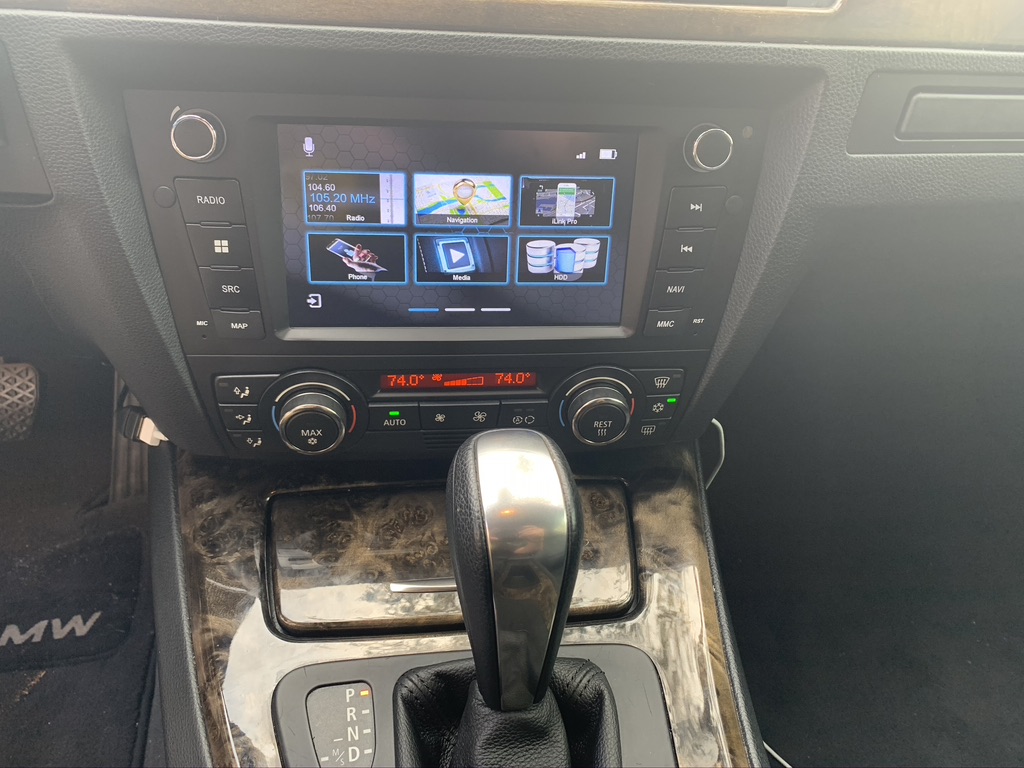
Now, I just buttoned it all up and put on a custom image for the load screen and now I am set!!
The N7 has some preset EQ's which is nice but can also customize that as well. Volumes on all input types are adjustable and selectable.
Overall, I could not be happier!!
Thanks, Jeff and J&T Crew and Dynavin!
I will be posting some more at a later date. I will be getting a 'vehicle-mounted' USB Connection for the Carplay connection. This will be mounted (most likely ) in the arm-rest. More to come! It never ends!!
Thank you all for reading!
TL

R
Shit was good. Made electrical mayhem. Then listened to cool tunes and saw behind me!