|
DIY E90 N54 Valve Cover Gasket
Seems this DIY has never been done but it needs to be. It's really not that hard and the dealer charges $1000+ to do this. Ridiculous.
Disclaimer: I am not responsible for any damage done to your car following this tutorial. Worked perfectly for mine so it should for yours as well.
**Before you begin - DISCONNECT BATTERY! You'll be messing with electricity and fuel - not fun!**
Some have stated the 26 bolts need to be replace, some say it is not necessary. BMW stated it is not a common practice, only if a problem is noticed and 99% of the time it is not needed.
Here are the part#'s (thanks to user "joe-" for part#'s):
7544369 bolts x 26
11127565286 gasket
11127548063 bolts x 3
11127556977 bolts x 2
Torque specs: 7-7.4 lbs
Pic of new Valve Cover Gasket:
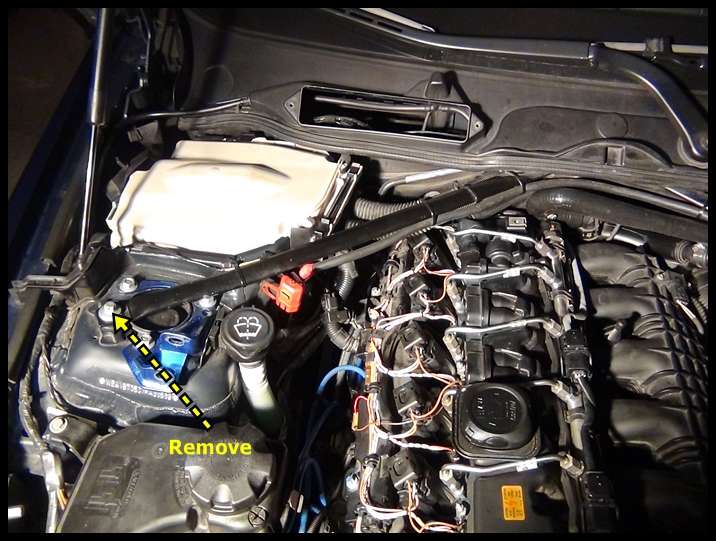
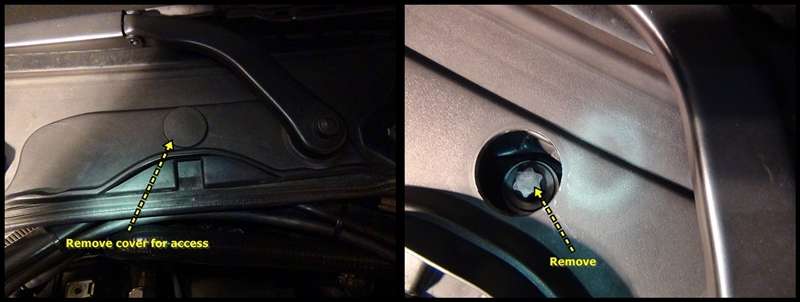
 Remove passenger Side Cross Bar:
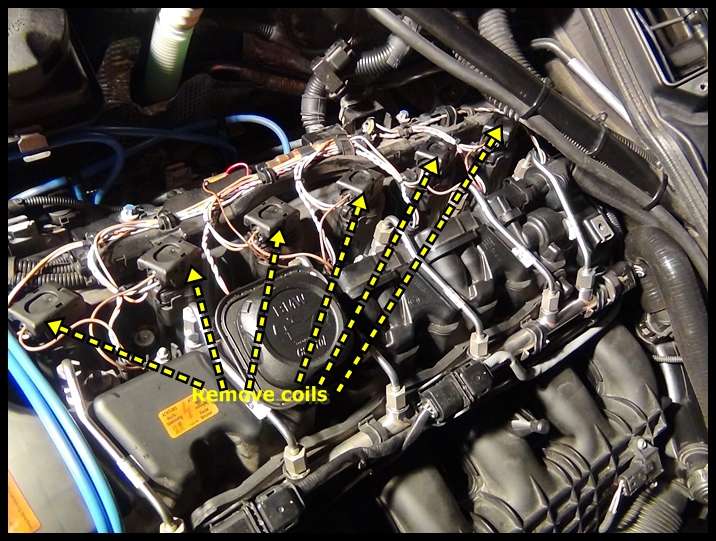
 Remove Coils:
 Remove O2 Sensors:
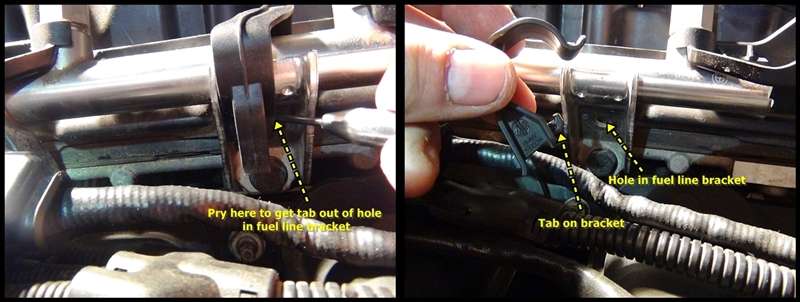
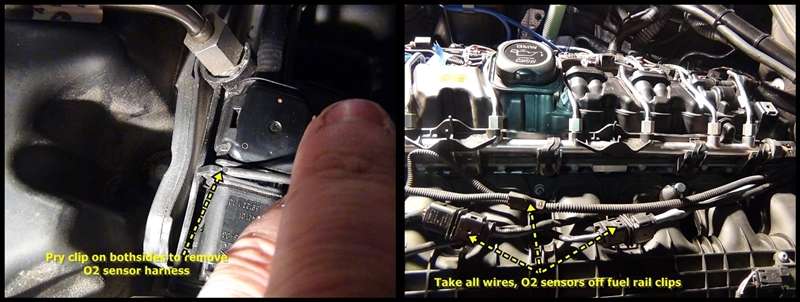 Remove clips on Fuel Rail to get access to bolts:
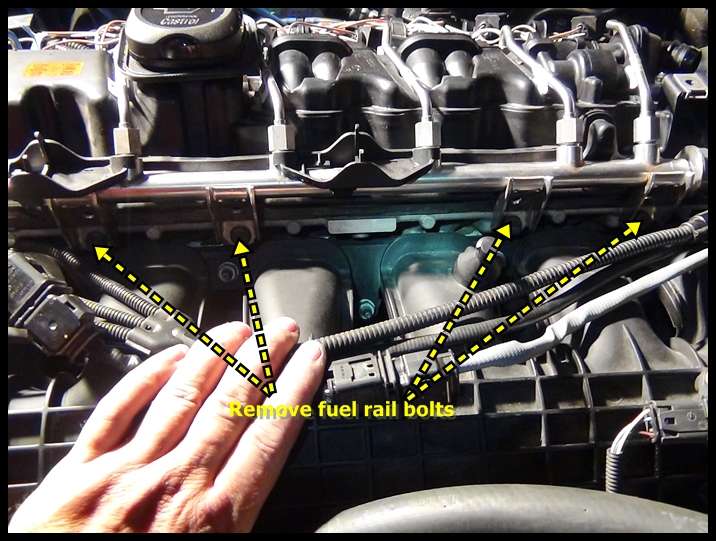
 ...and remove bolts:
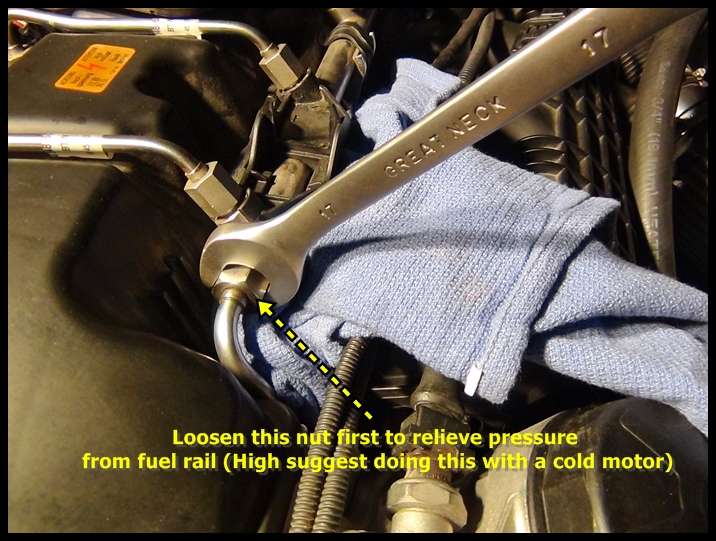
 ...and remove Fuel Line Fitting (HIGHLY suggest doing this with a cool motor to avoid pressure release issues):
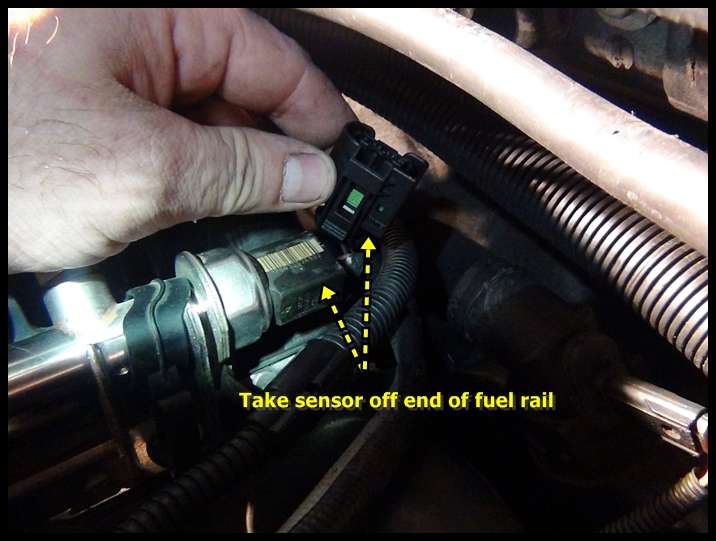
 ...and take Sensor off end of Fuel Rail:
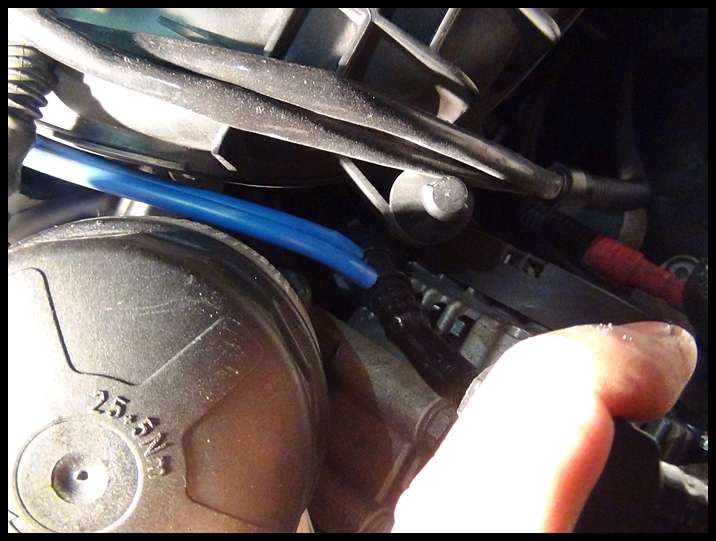
 Remove vaccum lines off of Booster Line:
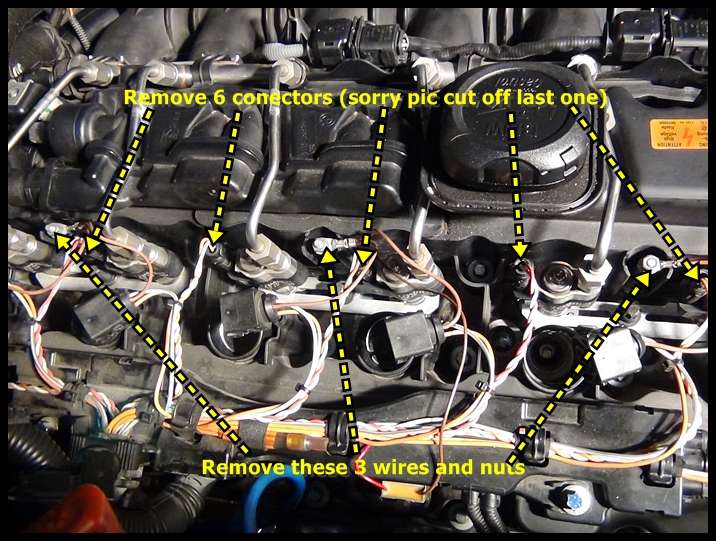
 Remove the six (6) connectors on Fuel Injectors, three (3) nuts & wires on Ground Posts with wires, lastly remove three (3) Ground Posts:
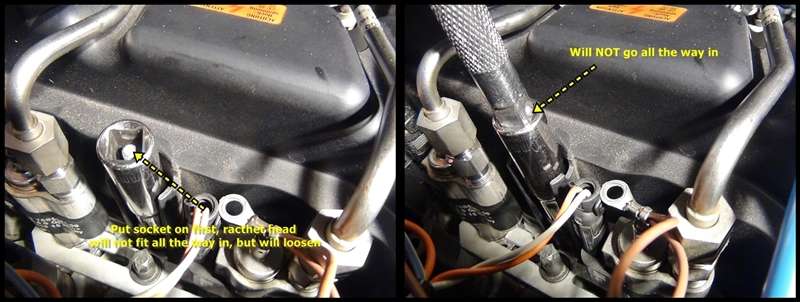
 You do NOT need an extra long socket to get Ground Posts out - simply put socket on Ground Post and then socket/rachet halfway in socket hole:
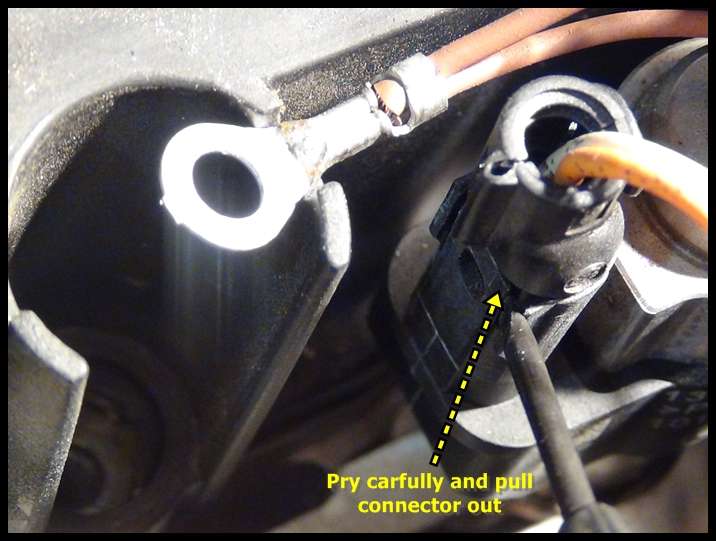
 Pry open tab CAREFULLY to get connectors off Fuel Injectors:
 Remove fittings on all six (6) Fuel Injectors and remove entire Fuel Rail:

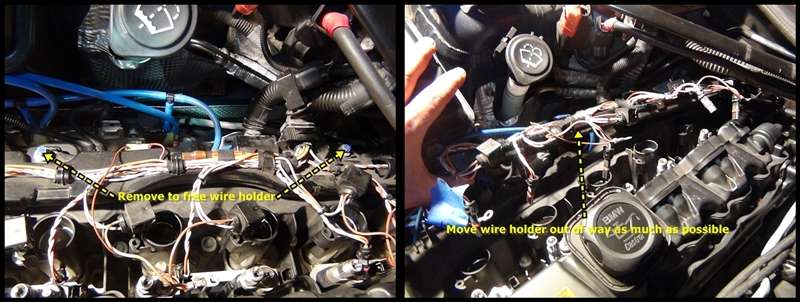
 Remove Wire Holder connected to valve cover (by this point all wires, connectors, etc should be disconnected) - Note the blue-headed that BMW says need to be replaced. I disagree
 Remove Positive Battery Terminal:
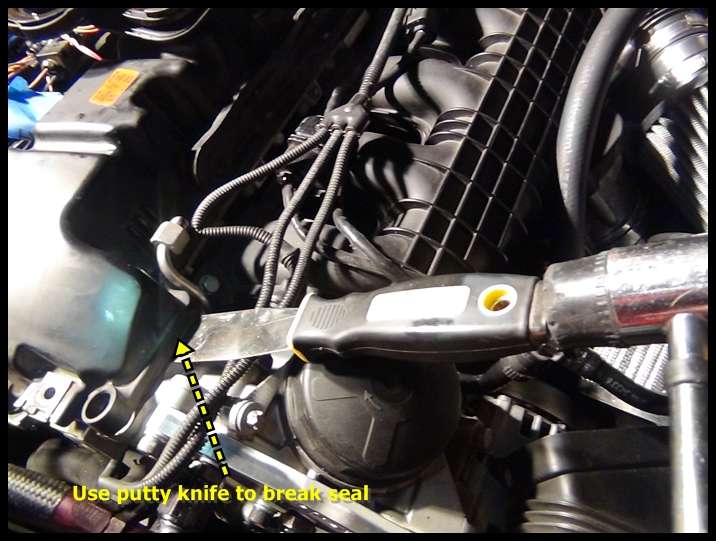
 Valve Cover should be able to come off now. Use a putty knife and seperate Valve Cover from Head - do NOT force it or you could crack it. Also, don't gouge the head with any tool you use. I was able to get it loose by just lossening one side:
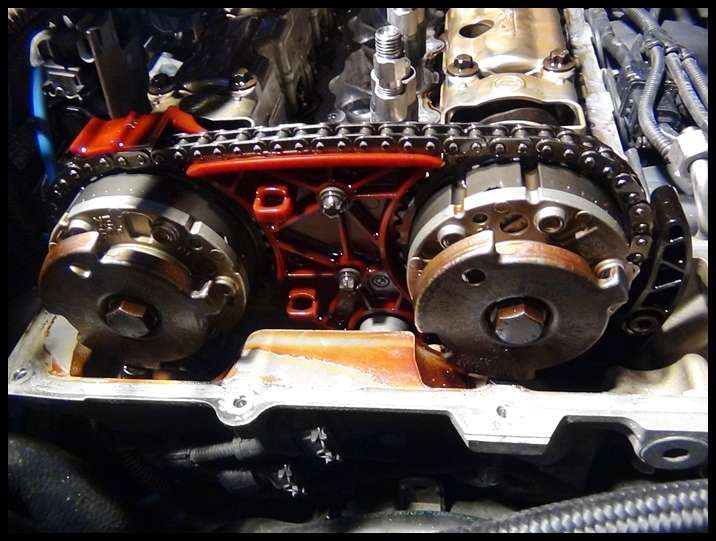
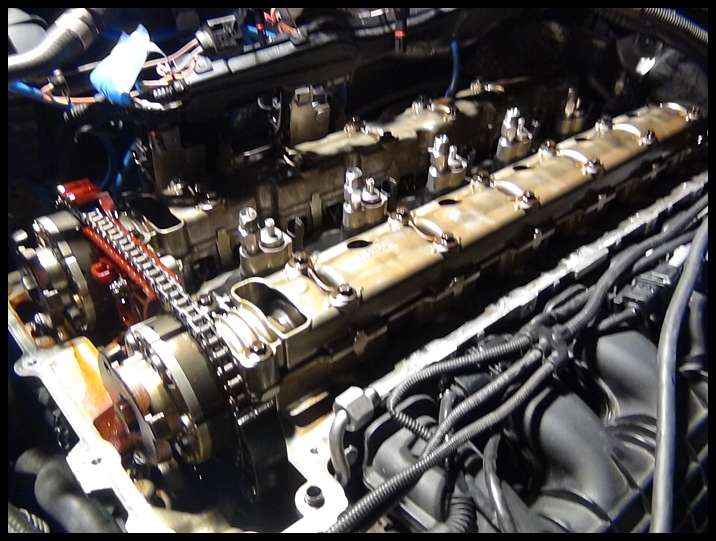
 Cool pics of motor with Valve Cover off - look at that sexy motor LOL:
 Get all Gasket material off of Valve Cover and Motor, being careful not to let anything fall into Motor. As you can see below, there's no way this old Valve Cover Gasket was sealing! Had a talk with Rob Beck today regarding
this and the gasket not sealing can cause a lot more issues than one might think. The head breathes into the Valve Cover. If the gasket is leaking, it pressurizes your crank case and can cause issues with Turbos, etc. I'll let Rob chime in and elaborate on this.

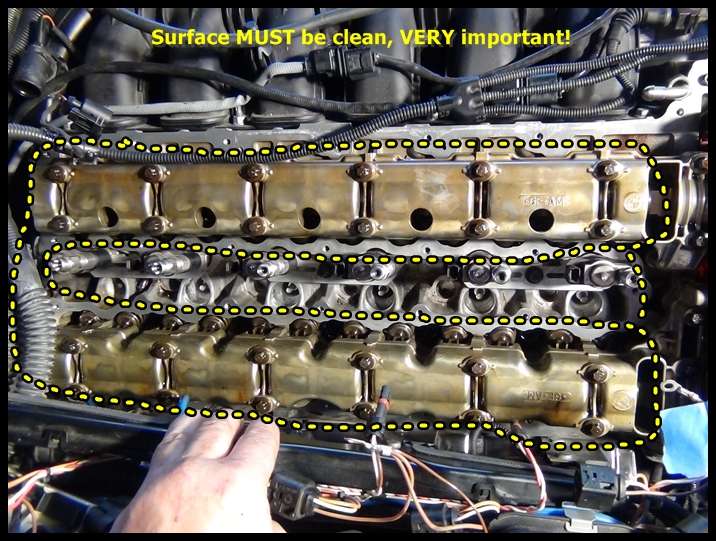
 Clean surface on Motor of all Gasket material - Very important! If you leave it dirty, you will be sorry:
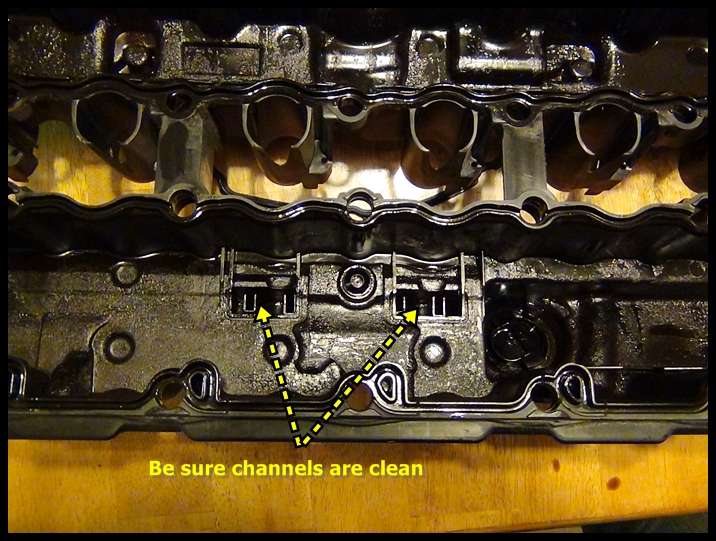
 This picture illustrates where the Head breathes into the Valve Cover - have to give Rob Beck credit for this, I had no idea! LOL:
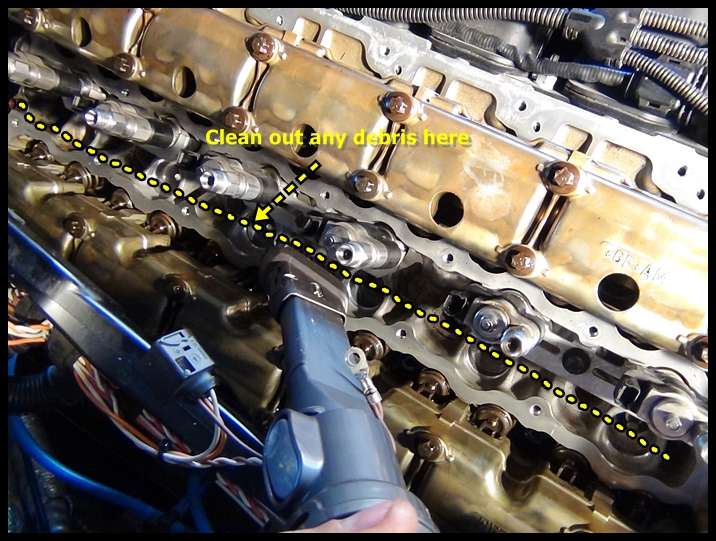
 Clean out debris here (I found a bunch of burnt June Bugs in mine! LOL):
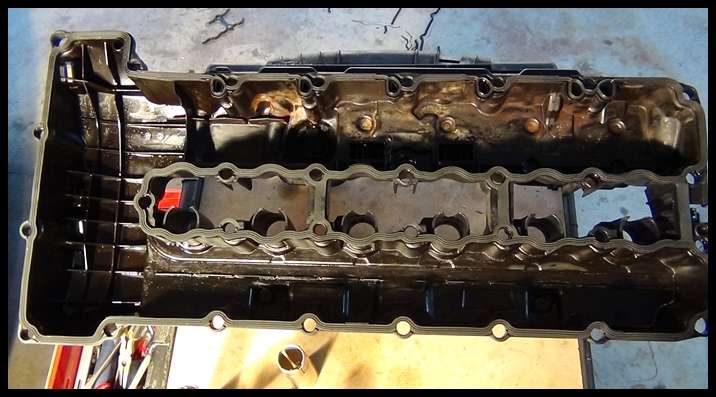
 New Valve Cover Gasket installed - just push it on:
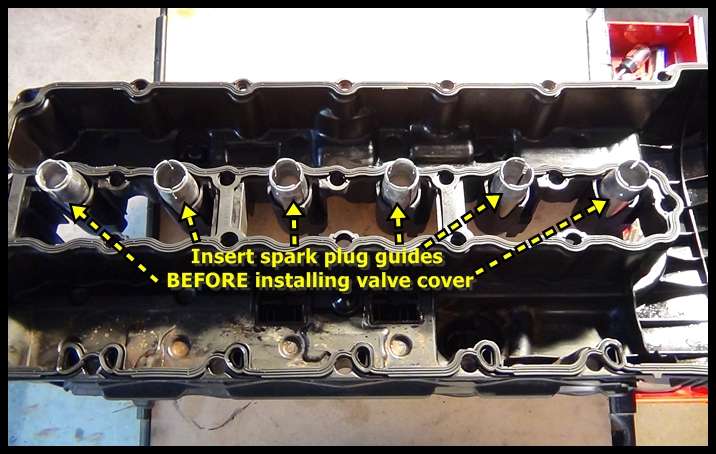
 Insert Spark Plug Guides into Valve Cover before installing it on motor:
 Installing Tips:
Really couldn't get pics of this. It's easiest with another pair of hands. Move everything out of the way, the ECU wires go behind Valve Cover easily. Take care not to scrape the Gasket so it falls out. It's really not that
Installing Tips:
Really couldn't get pics of this. It's easiest with another pair of hands. Move everything out of the way, the ECU wires go behind Valve Cover easily. Take care not to scrape the Gasket so it falls out. It's really not that
difficult - took my wife and I about two minutes to install.
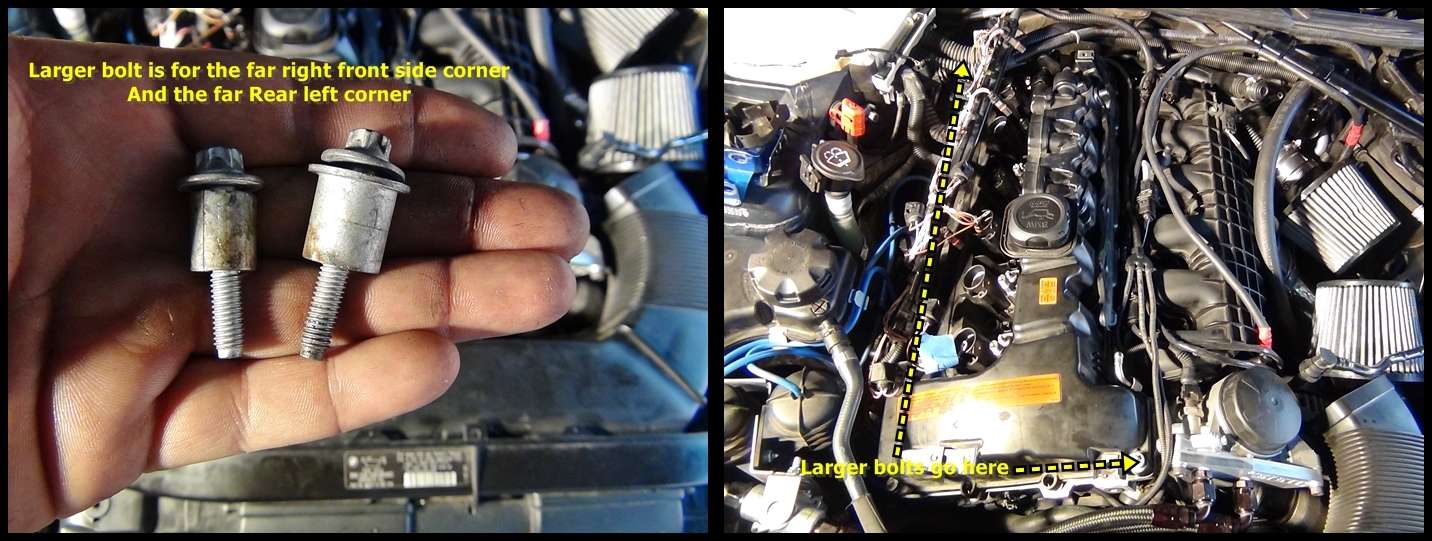
When putting in bolts, torque down to only 7lbs of torque. Anymore and you will strip the head. Do a bolt pattern - front to back, etc. There's a larger bolt that goes in the right front corner and one that goes in the left
rear corner (as you're looking at the car):
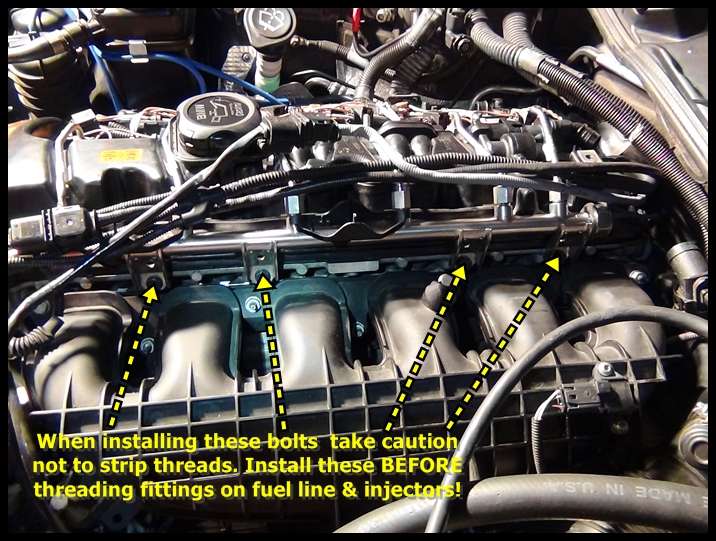
 TIP: When installing the Fuel Rail, install the bolts first - before you start any fittings otherwise you may strip a bolt hole in the head, like I did (I retapped them easily but much easier if you just don't strip them LOL).
I'd like to send out BIG thanks to Rob Beck for his tips on this job. I appreciate it, man!
Robc
__________________
JB4 G5, Stage 3 LPFP, Stage 2 MOTIV PI, VM 6466 ST, Custom OCC W/ SS lines, ER FMIC, ER CP W/HKS BOV, M3 control arms, M3 guide rods, M3 upper links, M3 front & rear sway-bars, HPA rear toe arms, Wavetrac LSD, HPF Gen 2, DEFIV kit, KW clubsport, Delrin solid SF bushings, stoptech rotors, Rogue Tranny Mounts, 1M bumper, M3 CF hood, M3 fenders, M3 OEM sideskirts, Mtech rear bumper, CSL trunk, MORR VS8.2 rims 245/295
Last edited by robc1976; 11-29-2012 at 02:35 PM..
|