Note: Not responsible for any damage to you or your car, this worked on my car so will work on yours.
***This tutorial assumes you know how to get your car secured on jack stands, if in doubt do
NOT attempt this DIY!
Tools Need not in pic (2 jacks if possible & block of wood, (1) for a safety catch in case jack stand fail (I saw this happen and will NEVER forget it)....safety 1st). The 2nd jack is for jacking up suspension up to ride height.
Torque specs:
upper & Lower control arms to knuckle 122 ftlb (165 Nm)
upper & Lower control arms to subframe 74 ftlb (100 Nm)
Suggestions:
Alignment is 100% neccessary, no ifs about it! your car will ride like a POS afterwards.
I suggest coating all bolts with bolt penatrating formula, applying anti-seize to all bolts and replacing your tie-rods with these below so you only have to do a lignment once. (see link)
http://www.hpashop.com/BMW-E8X-E9X-Z...Rod-E8x-9x.htm
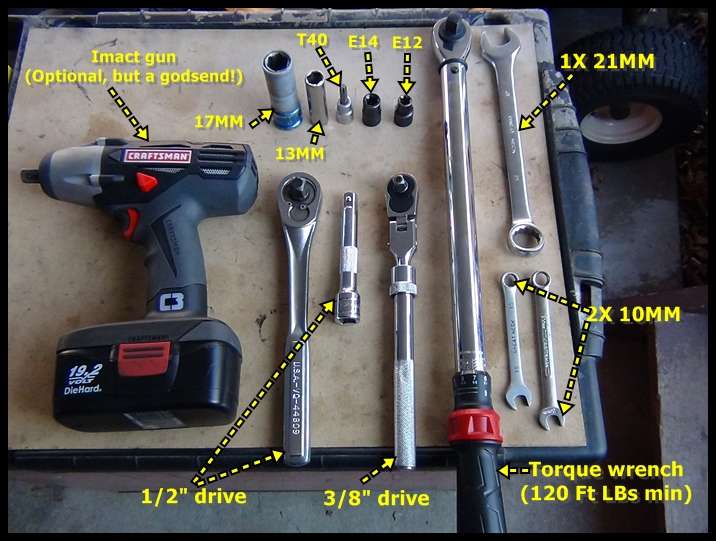
Tools: (besides jacks and block of wood):
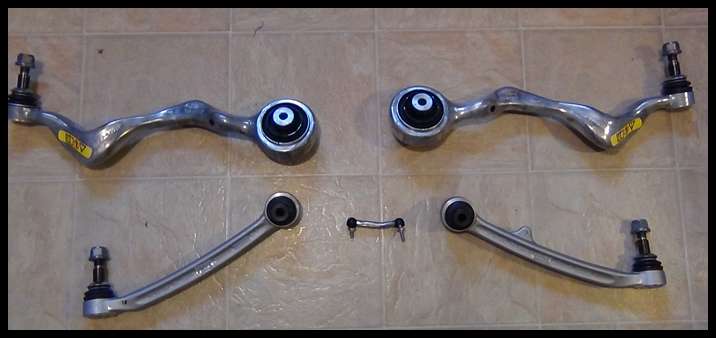
 Pic of M3 Control arms:
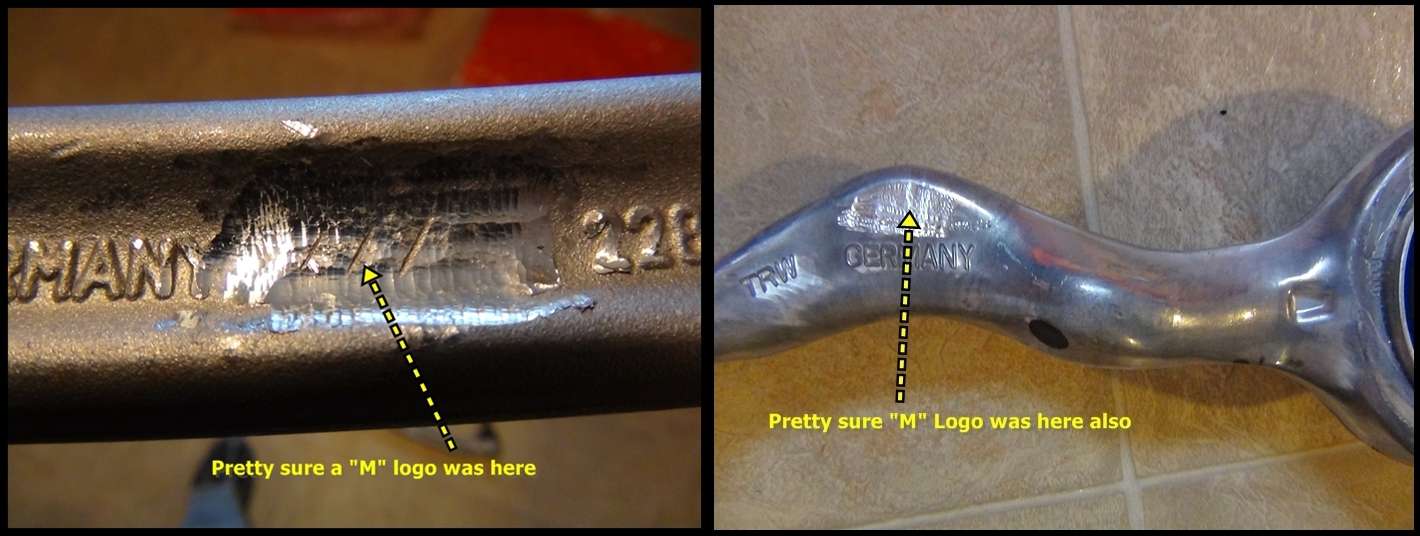
 Pretty sure "M" Logos where here LOL!
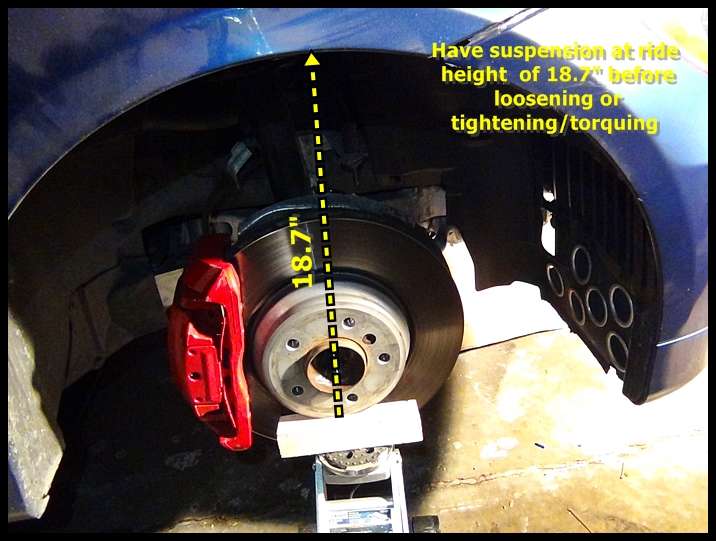
 Step #1:
 (Jack suspension up to ride height (18.7" from bottom of hub to fender)
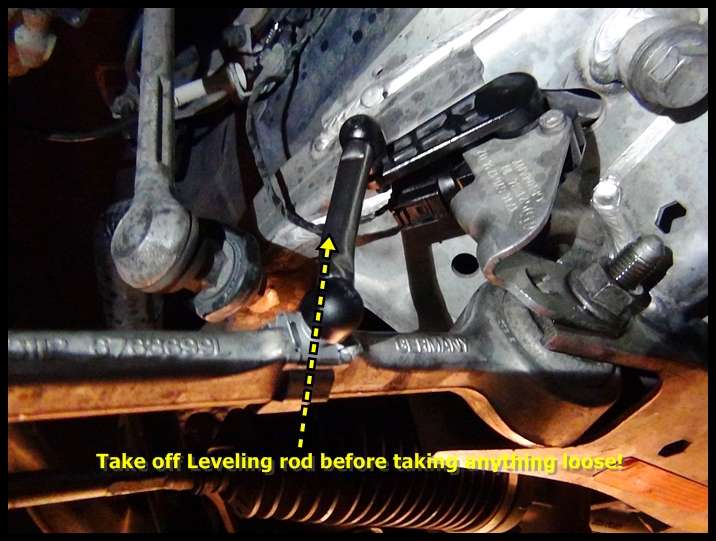
 Step #2:
 Take off under belly and take loose the headlight adjusting rod (use 2-10MM wrenches) so you do not accidently forget
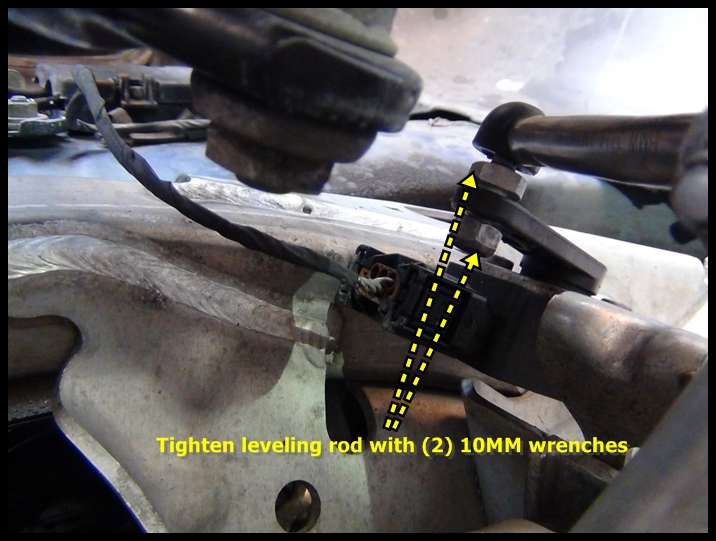
 Pic of where to tighten/loosen rod:
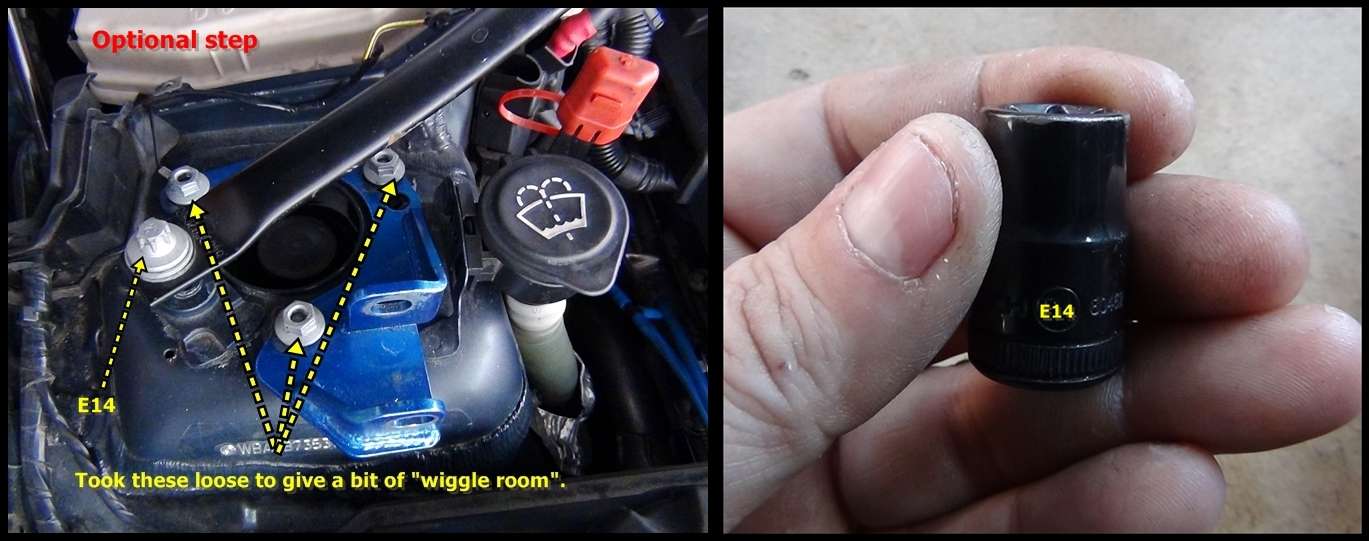
 Step #3:
 (Optional step, I did this to get a bit of "wiggle room" You can also take out your adjusting nipple...mine was already removed prior:
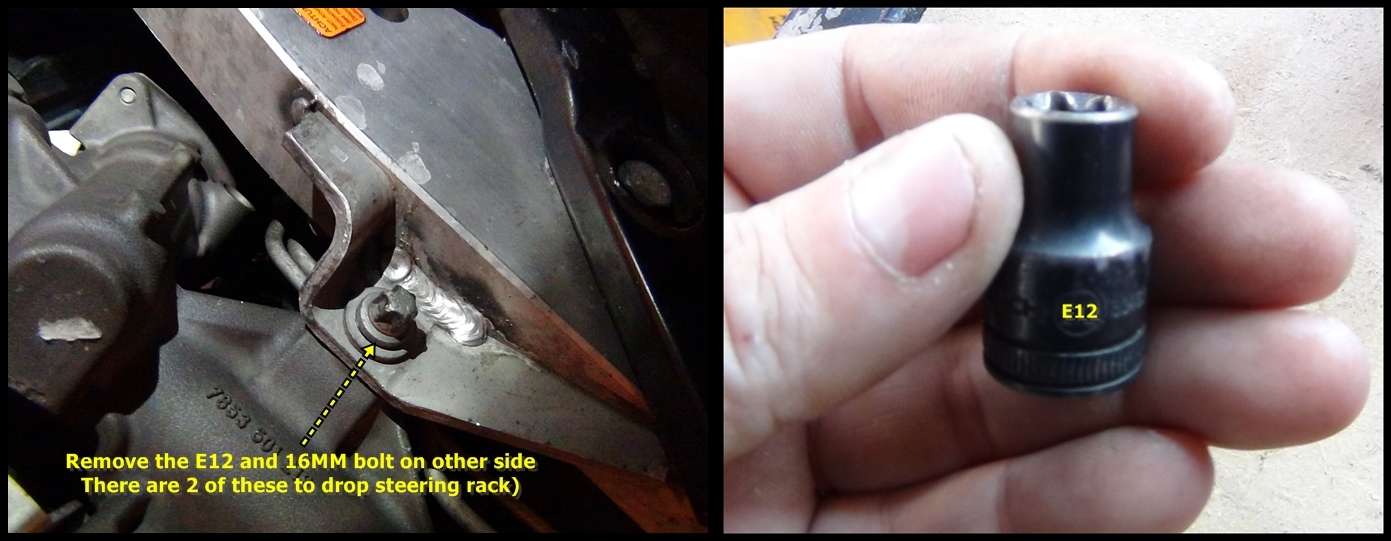
 Step #4:
 Drop steering rack
 Step #5:
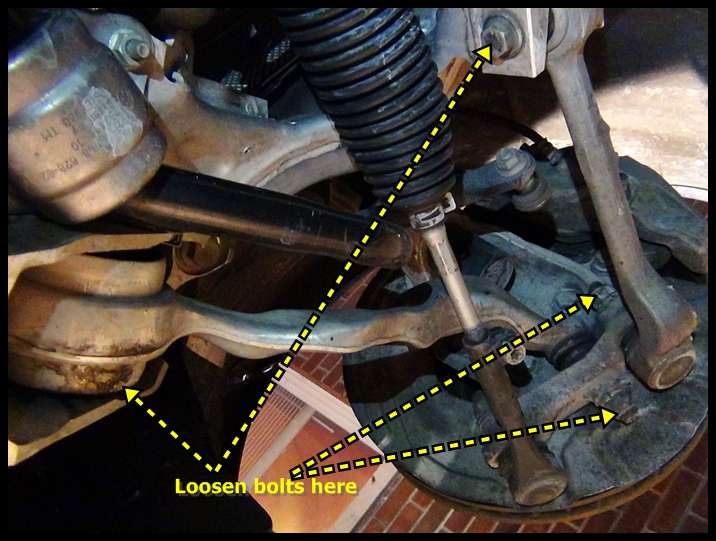
 Loosen all bolts to Upper & Lower Control Arms & remove old POS!
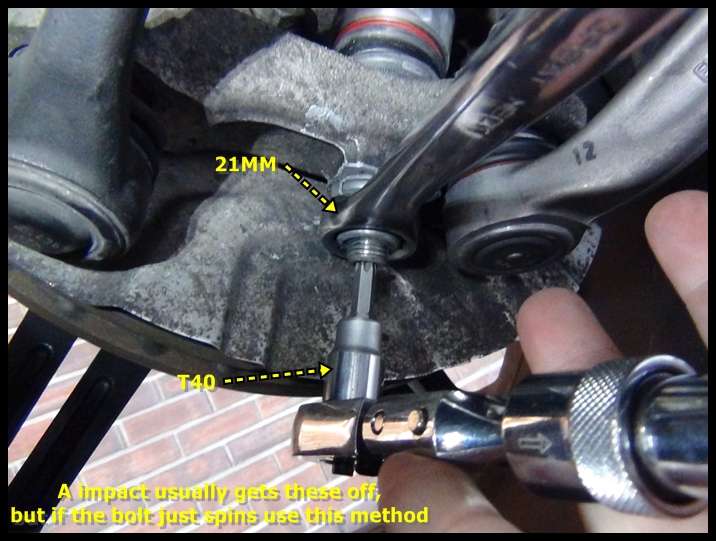
 If impact is not used or bolts just spins use this method:
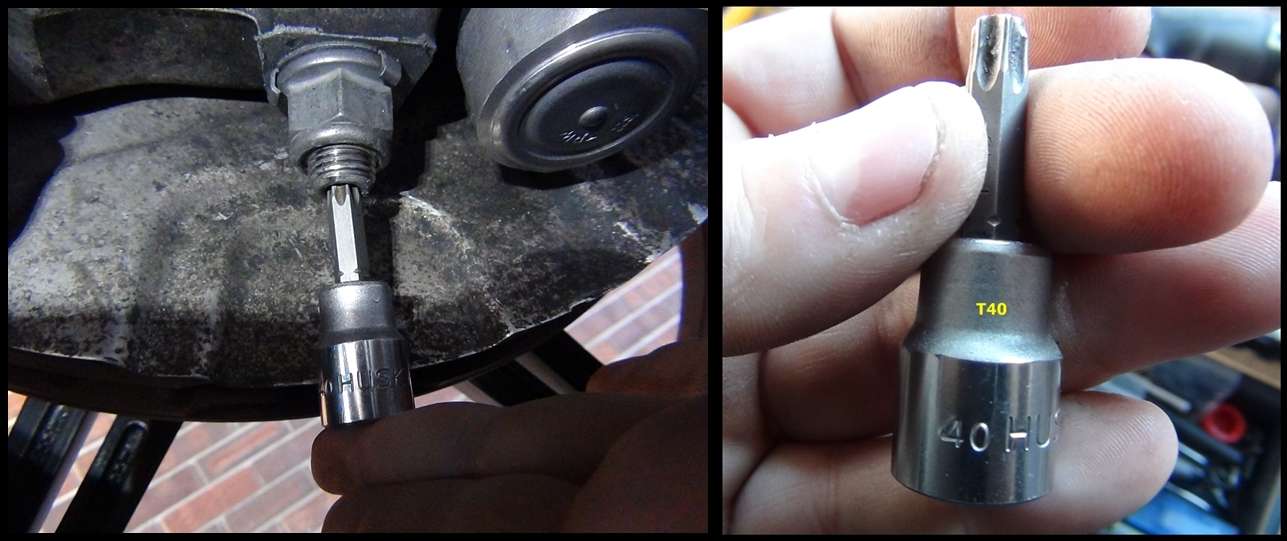 A shop that installed my springs cut a slot in the stud to stick a screwdriver in for leverage and did not use the correct T40 in the end. This prevented me from being able to use the correct method and the bolt was stripped on there....luckily a impact lifted it just enough so I could get a hacksaw blade under it to cut it off (lost 2 hours of time) I was a bit PO!
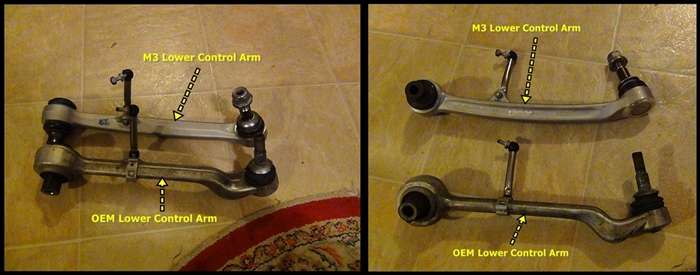
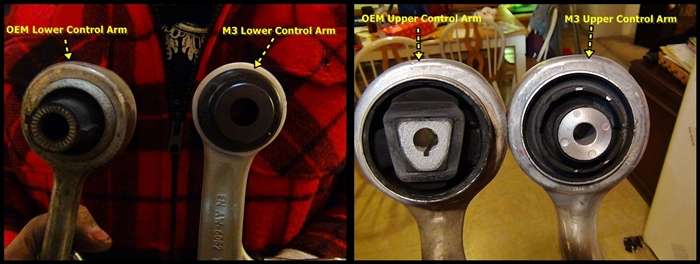
 M3 Upper & Lower control arms compared to OEM:

 Movement of the M3 Lower control arms at subframe:
 Step #6:
 Reverse all steps (dont forget to put new leveling rod in):
 M3 arms installed:
 (I will be replacing my Tie-rod ends also with these linked below)
http://www.hpashop.com/BMW-E8X-E9X-Z...Rod-E8x-9x.htm
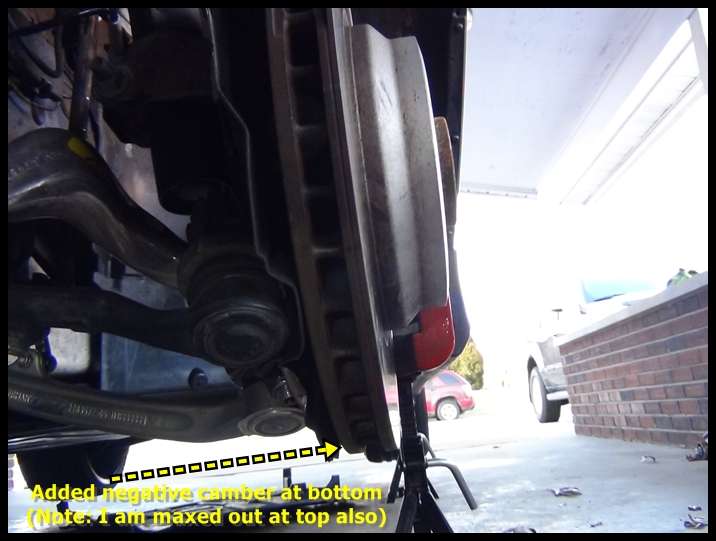
 More camber at bottom!
Very easy tutorial, hope this is of help to somone!
Rob
__________________
JB4 G5, Stage 3 LPFP, Stage 2 MOTIV PI, VM 6466 ST, Custom OCC W/ SS lines, ER FMIC, ER CP W/HKS BOV, M3 control arms, M3 guide rods, M3 upper links, M3 front & rear sway-bars, HPA rear toe arms, Wavetrac LSD, HPF Gen 2, DEFIV kit, KW clubsport, Delrin solid SF bushings, stoptech rotors, Rogue Tranny Mounts, 1M bumper, M3 CF hood, M3 fenders, M3 OEM sideskirts, Mtech rear bumper, CSL trunk, MORR VS8.2 rims 245/295