Over the last couple of days, I thought i'd maximise the holiday downtime to install the EOS PI kit that i've had sitting here for a few weeks, months even..
I delayed the PI install due to the break in period of the clutch, and also knowing that Terry was also working on a JB4 controlled PI integration! Previous to this latest integration, the PI was being controlled by the AIC6 as a standalone, and only being fed the boost signal by the JB4. This new JB4 controlled integration means that things like temperature, safety mechanisms, auto tuning logic and other endless possibilities that the JB4 provides will also be worked! #teamJB4 is certainly the right camp to be in, and glad that i chose them right from the beginning.
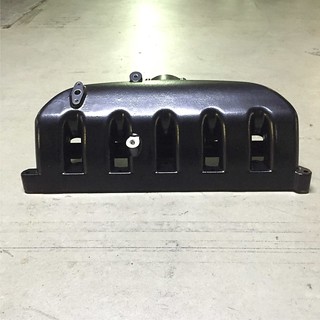
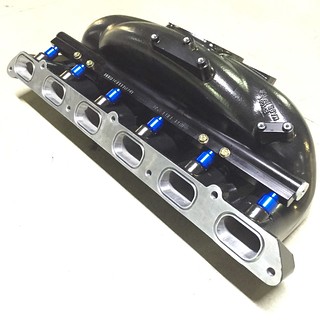
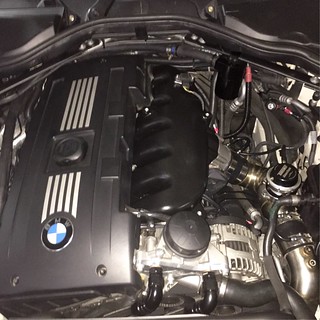
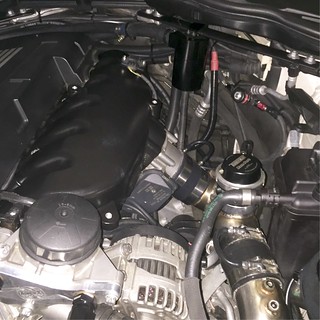
So lets start with some sexy pics of the manifold itself,
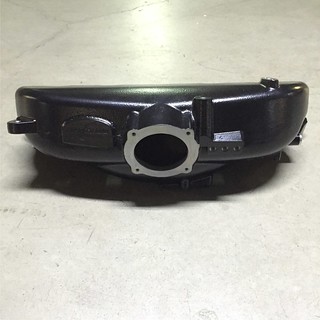
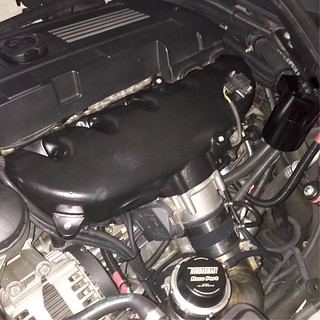
Evolution of Speed Cast aluminium manifold replacement, with fuel rail and port injection built in! The cleanest PI integration that is available on the market, and replacing yet another plastic component (which you should know by now that i hate), throttle body flange is kept in the stock location so all your current charge pipes fit, and finished in a durable black powder coat!

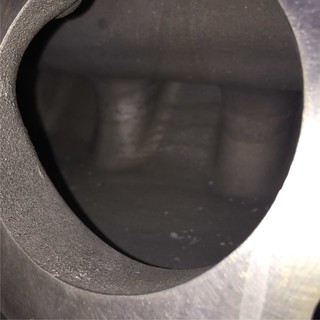
The interior shots:
The installation is pretty straight forward - Remove stock manifold, install new manifold, and JB4 wiring..
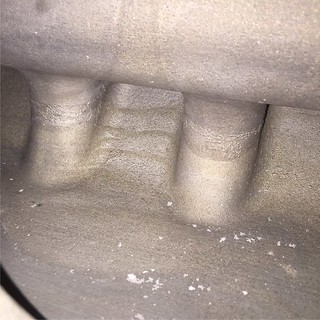
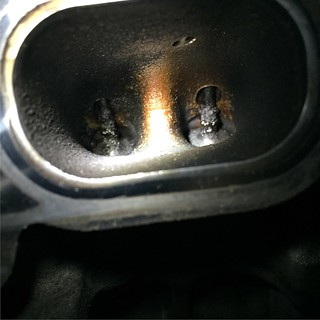
I took some photo's of my valve's whilst i was there, not as bad as i thought it would be for 68K km's, but i'll be looking to book in a walnut blast with Advan soon..

There were 3 tricky bits that i got stuck on, and thanks to
martymil being awake when i posted on the forum, he helped me out with providing a wire that was needed for the JB4, uploading of the AIC6 maps, and a new fuel rail hose that i had threaded... LOL!
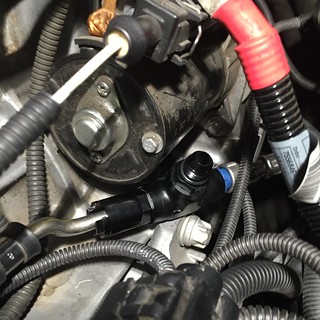
So here are the parts i would recommend that everyone upgrades when installing the fuel fitting on any PI kit. Most, if not all kits ship with the push lock fuel fittings... These are finicky, not always guaranteed to go on properly first go and no guarantee to stay on either - this will lead to potentially your fuel tank emptied into your engine bay!

The one provided with the EOS kit was especially
shithouse, a disaster waiting to happen, which would not stay on the fuel hose at all! (I've given this feedback directly to them already). Ofcourse i discovered this at 2:30AM, so had to abort install, put everything back together so that i could go and purchase the right parts the next day.. FUN FUN!!!
 EDIT: Eric from EOS saw my review and has reimbursed me for the cost in purchasing the new fittings... How's that for after sales support, and overall customer experience?! Other vendors should take note!
Here's the comparison of the provided EOS fitting (top) versus the new Aeroflow components i put together (bottom):

The
problematic plastic push on fitting:
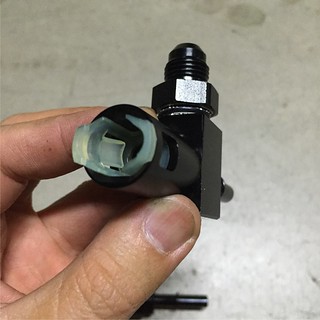
The Aeroflow upgraded "i ain't going nowhere c*nt fitting":
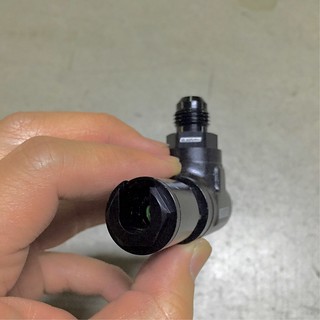
As you'll notice with the Aeroflow upgraded fitting, it's a threaded fitting which means it is secured around the hard 5/16" fuel hose, with no chance of it coming off! With something as dangerous as fuel, you'll want to make sure you've got the most secured solution for it!
Here's what it looks like all installed:
The part numbers for these Aeroflow components if you are interested are:
- AF815-06BLK
- AF817-01BLK
- AF938-06BLK
- AF808-01BLK
- AF174-06
The manifold installed looks completely stealth and stock, much better than the stock manifold which has the plastic 'criss cross' plastic for reinforcement, which is a perfect design for dust and shite to settle into, making the engine bay look dirty all the time.. I won't have that problem anymore!

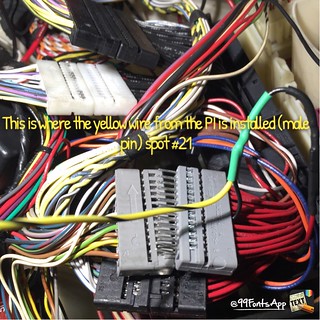
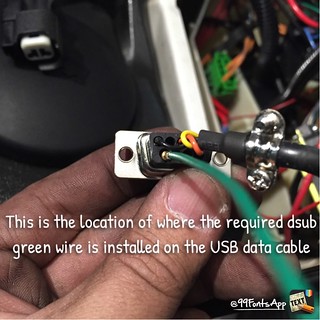
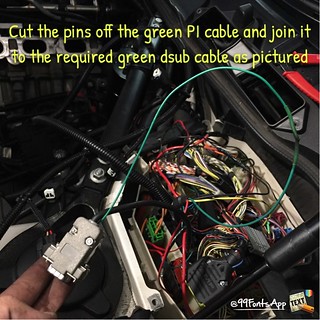
The other tricky part of the install was the ever so confusing and cryptic install words from Terry with no defined pictures on what needs to be done.. When it comes to something as important and complex as wiring - this should definitely be explained thoroughly with supporting images, step by step, beginning to end. I've given Terry the feedback and uploaded these pictures to his thread, so hopefully it helps future members in their installs.
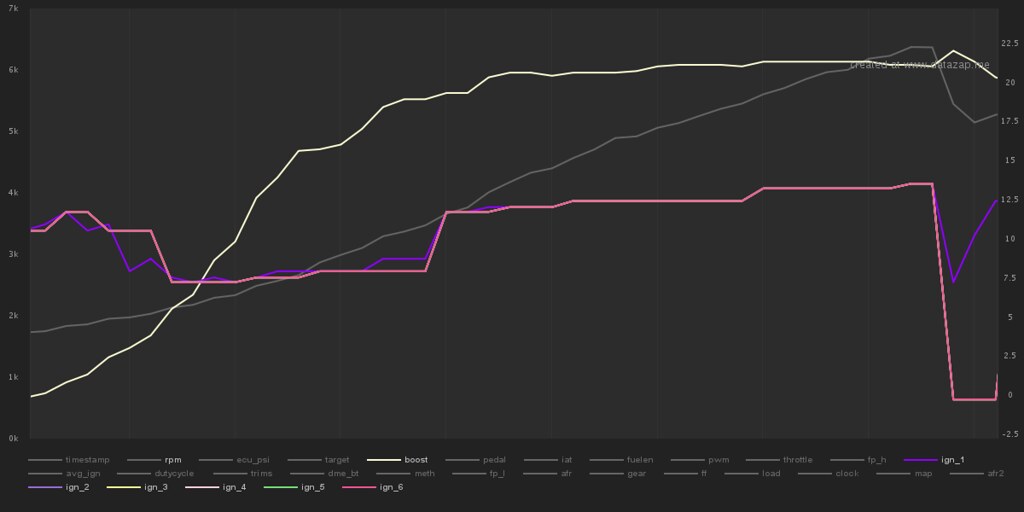
Finally, the wizard behind my tuning is Trebila (David), and here's my first PI log without any revisions. I've got a new map with revisions which i need to provide back to David when i get the chance.
***
Album for larger pics: https://www.flickr.com/photos/139097...57662932728002