Quote:
Originally Posted by Blaze439

I actually used pry bars. The eBay tool doesn't work.
|
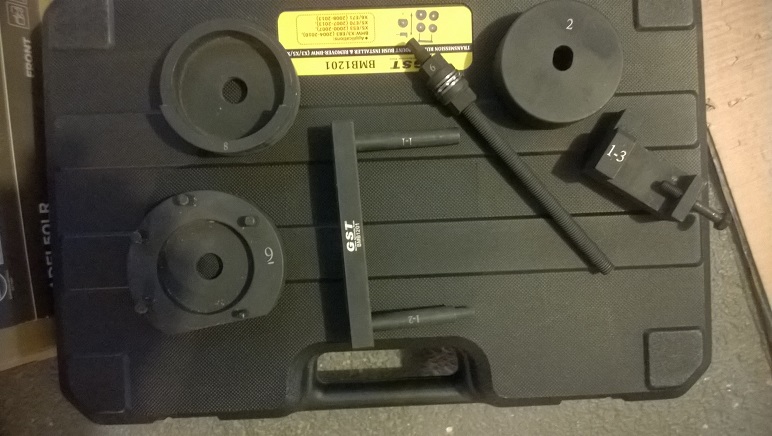
That tool, if same as I used, doesn't directly work on e90, but with some additional steps worked for me. I had replaced my mount some while back. Had taken some pictures which I will post here.
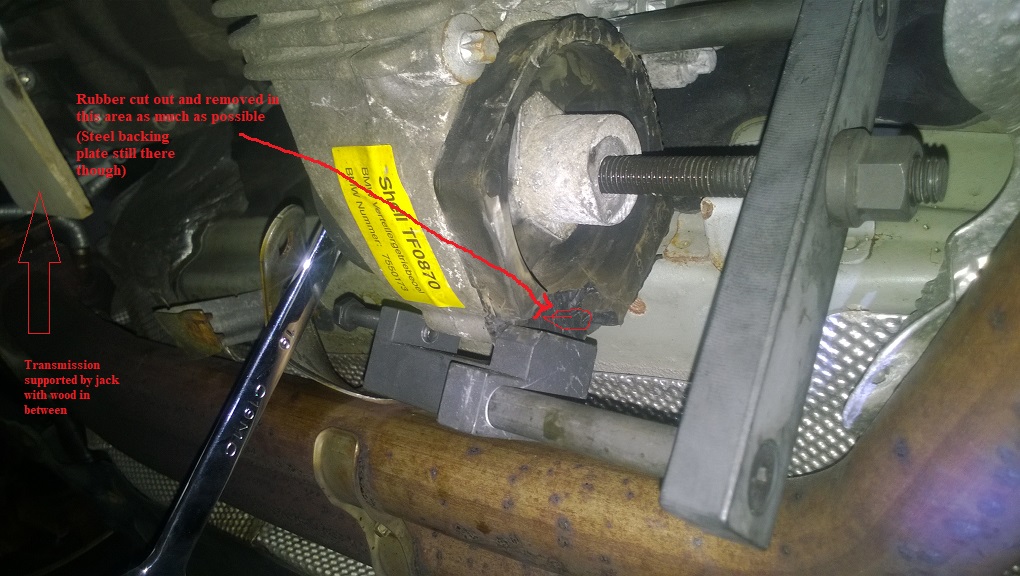
(If anyone uses these steps I described below, one of the pieces (number 1-3 in the picture below) of the tool is used in a loose position and it is likely to fall down during assembling or removing the tool. Your head will be under the tool and looking at it. This piece being a substantial size cast iron can hurt you seriously when it falls down on your head or face!!! Take precaution against this and wear face and head shields!!)
This is the tool I used:
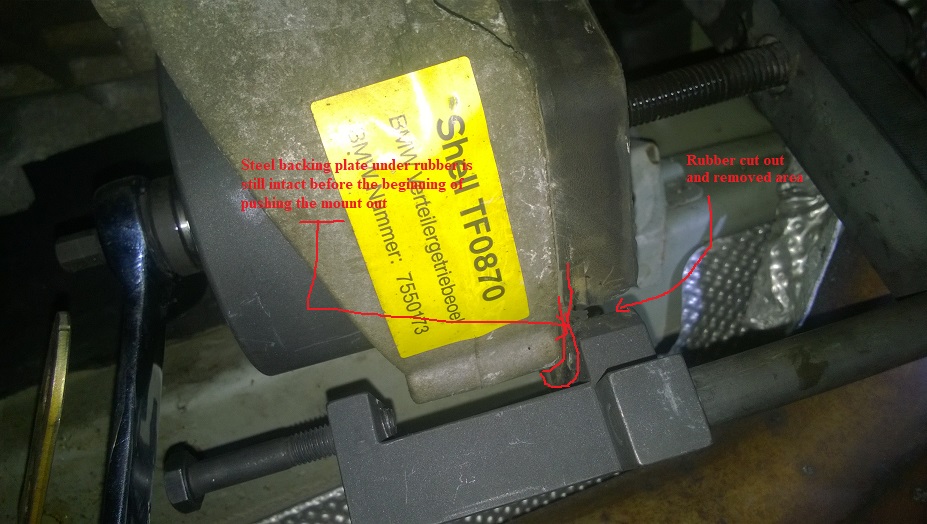
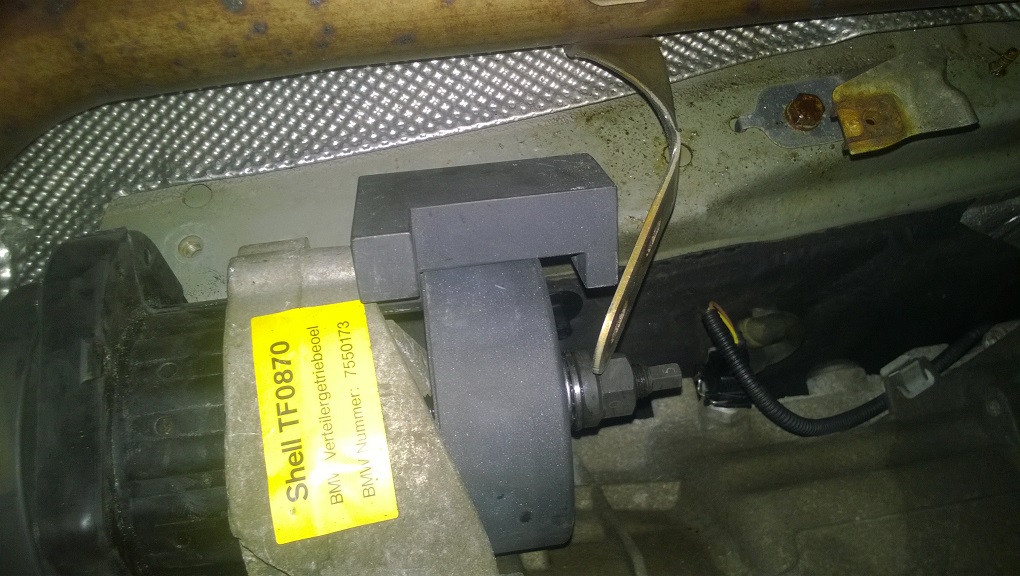
I first cut off and removed as much as possible rubber from the mount at one corner and then attached the tool in the configuration as these two picture shows:
 Note that the small rectangle like piece is not secured and will fall down when tool is not tightened on the mount. This presents serious hazard of that piece falling down to your head or worse on one of your eyes when putting the tool on or removing it off.
 If anyone wants to do the same, be very careful with this! Full face and even head protective gear will be good to have.
Then tightened the tool until the mount moved out on the center a few mm's. Stopped there, removed the tool (again be aware that piece can fall on to your head or face!. Pried out the backing steel plate where I had cut the rubber off and also with dremel cut it enough out to be able to pry it out of the way to clear that section off the tool, as the following pictures show. Then assembled back the tool on the t-case.
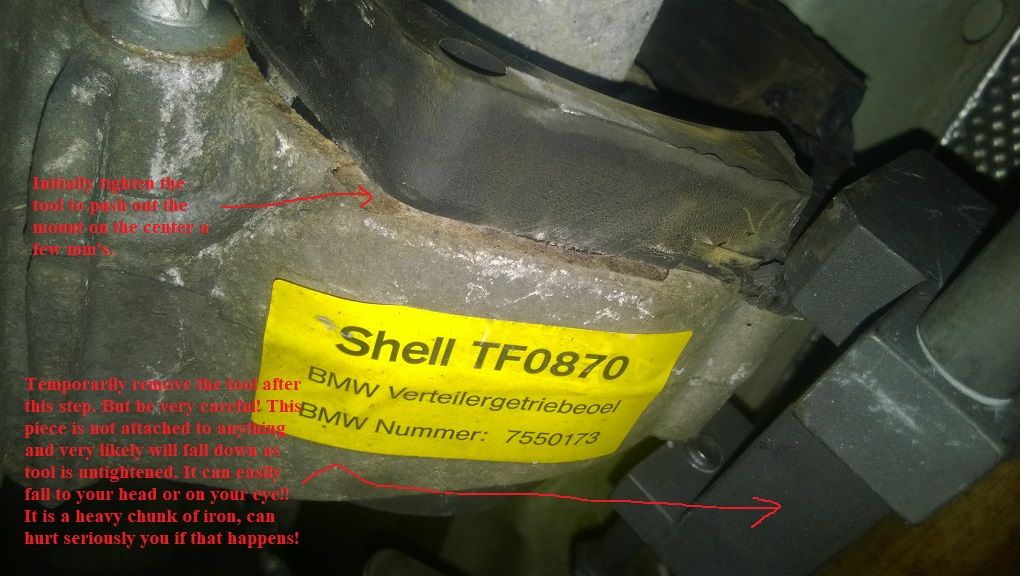
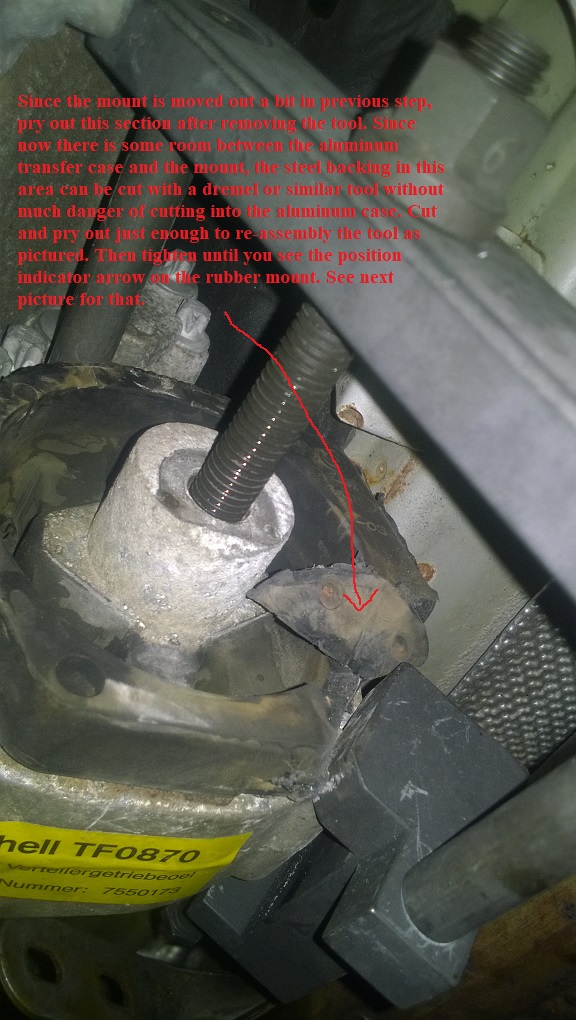
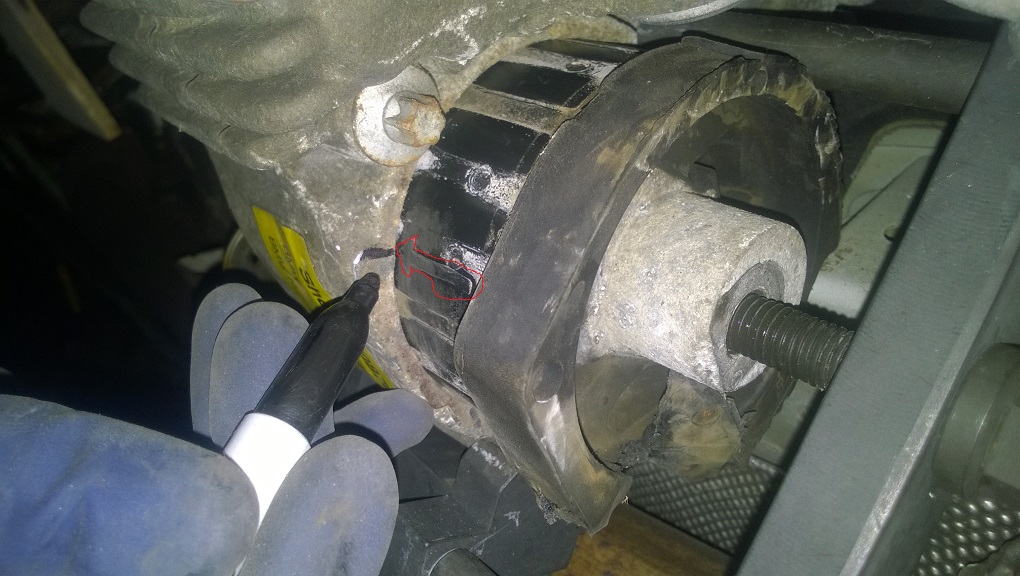
Tightened tool until the arrow position indicator mark molded into the rubber mount became visible. Marked the corresponding location on the mount, so to put the new mount at the same spot. Fully tightened until mount came out fully. Again that piece will fall down on you once the tool is not tight on there anymore!! If you do this, expect that it will fall down and take precaution!
Cleaned up the hole with some sand paper, put very light coating of dish washer liquid on the rubber mount to aid in putting it back. The TIS says to use a special paste or something, hard to find. Placed the new rubber mount aligning the arrow molded on its side with the mark made earlier. Put the tool back again this time in this configuration as shown in the following pictures. (Here I used that rectangular piece in a different orientation as seen in the pictures, and in this configuration it is really going to fall the moment tool is loose!!! Take caution and precaution, if you do this!)
Goes in much easier then it comes out, as expected since corrosion is cleaned up.

I had put a scissors jack under the transmission with a piece of wood in between. This allowed to adjust the angle tilting up or down the transmission a few degrees as needed to be able to position the tool in the tight spot there.
Also like any similar bushing tool, coating the threads of the middle rod with some fresh oil helps to prevent it from binding and aids by reducing the friction between rod and nut threads.