All the details are here!
But I gotta vent here. This took most of the entire weekend to complete. I'm talking the planning, cardboard cutting, metal cutting, final welding. A lot of thought went into this section and I am actually pretty proud of how far this has come.
I completed the passenger frame rail and will complete the driver side soon!
On to the pictures. The Radiator core support was really challenging, but the final welding was pretty fun! I think I'm getting better at the welding here.

Close up on my sexy welds. Probably my best ever!

he work on the frame rails. First, cut the pieces you need with cardboard. So quick and easier to fab than the metal.
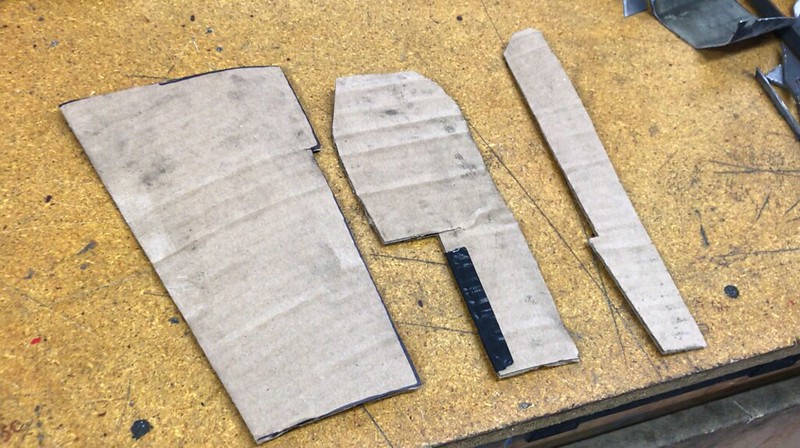

Then cut it out of steel. I am using 16ga (.054") mild steel.

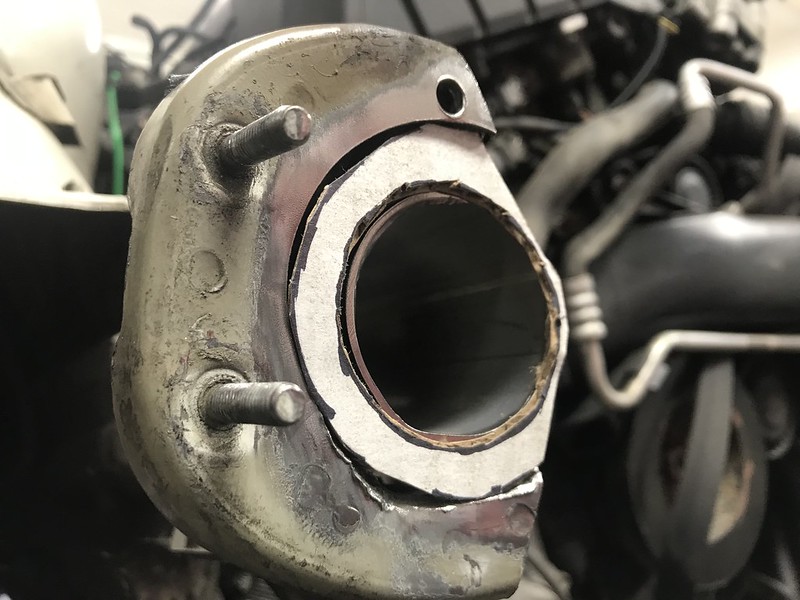
I decided to use a 2.0" stainless steel 16ga exhaust pipe to REDEFINE where the bumper bracket shock mounts within. So I faced it to the frame rail mount and tacked it in...for now

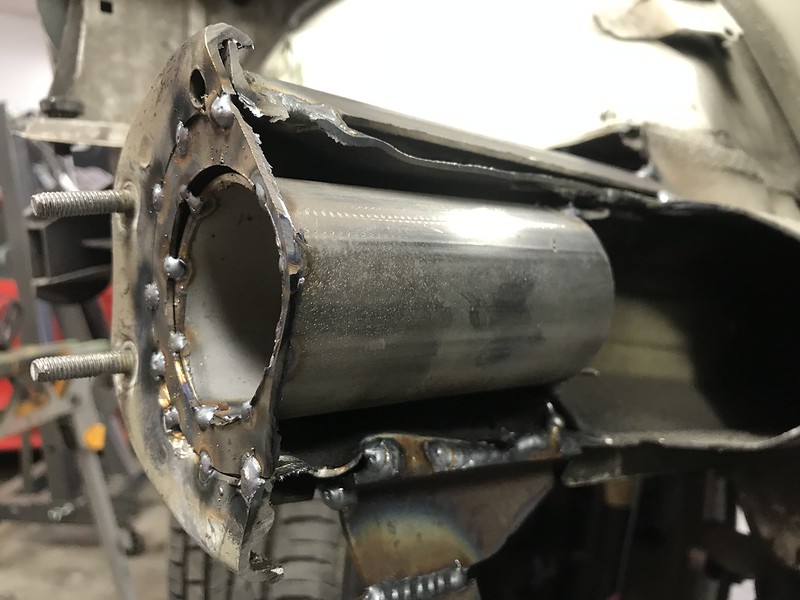
Traced a circular support bracket to help brace it in. This will get welded.
Then tacked it all up.
Now that that's all complete, it's simply a matter of placing the sheetmetal pre-cut parts, lay it over, hammer and shape it as needed, tack, shape, tack, shape, then final weld until you're happy with the final product.
I'm happy with the final product. I don't know for sure but it just feels stronger than stock. Maybe it is!
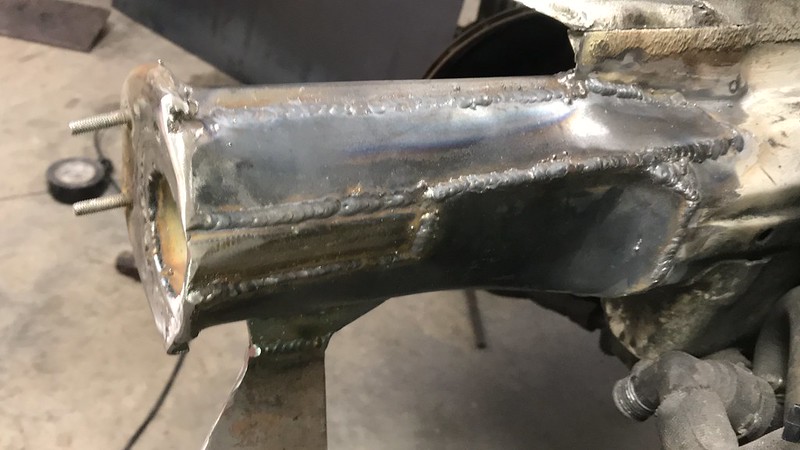


In this last photo, you can see how the radiator support bracket is integrated. That thing ain't going anywhere!

These pictures really don't do it justice. I was able to show the process in much more detail in the video here. Click at your own will!