Not sure if this is the right place for this, but Im starting a BMW trailer project for my e91!....Im pretty stoked about it and have found a parted out 92 rear clip with rear doors for next to nothing and will be picking it up when the weather gets nicer, or maybe sooner!
I have done my research image wise, there is some cool stuff over on the other "e forums" and a few guys over the years have built these trailers with some very very nice results.
here are a couple of links:
http://www.flickr.com/photos/79512356@N00/5663580154/
http://www.e30tech.com/forum/showthread.php?t=86667
So there are several "styles" if you will...pure utility, bbq/party and form and function....which is what I think I will be going with....
Some guys keep the trunk, others do not, leaving an open bed like a pick up.
Im going with a "trunk'd and tonneau'd" version and possibly a hard top tonneau with pistons.....Here is my sketch so far....Im sure there will be plenty of revisions along the way....
If anybody has expertise with trailer tongues and proper structural specs, let me know...
also, I would love some feedback with your ideas of what features should be on or in my trailer...
Heres my list:
• A built in cooler
• lockable trunk space
• lockable hard top tonneau
•Spare tire space?
Other than that, I need advice on DOT regs, wiring details and how to make or source a fiberglass hard tonneau...(not made of money here, salvage yard or used would be perfect!)

Ill be painting the trailer to match the car eventually as well....should be pretty cool!
thanks for checking in
JP
UPDATE:
Did a little color sketch: Ill work some dimensions in there this weekend.

Trailer tongue will be either 2x2 3/16 wall x 60", a little less than 1/2 under the trailer or 2x3 3/16 x 60"...a little less than half under the trailer....
1-7/8" ball should be fine.
DOT regs are being researched this weekend.
UPDATE:
So I found out a bit more about trailer regs whether you are building your own or buying somebody elses......
State and federal regulations regarding trailer lights, which is overseen by the Department of Transportation (DOT), address the placement, function, and visibility of trailer lights for passenger car and light truck towing.
Safety Chains
Safety chains must be crossed and attached to the tow-bar or trailer hitch assembly. They must cross as near as possible to the tow-bar or trailer hitch.
Tail Lamps
There must be at least two tail lamps on the rear of the trailer, mounted at a height of between 15 and 72 inches on the same level, widely spaced. These two lamps must consist of at least one red light visible up to 1,000 feet and a white license plate light visible up to 50 feet.
Stop Lamps
There must be two red lights of a red, amber, or shade in between mounted on the rear of the trailer, visible up to 300 feet in sunlight. These can be part of another lamp assembly.
Signal Lamps
Signal lamps of a red, amber, or shade in between must be mounted on the rear of the trailer, spaced as widely as possible, and visible in direct sunlight from a distance of 500 feet on a trailer 80 inches wide, or 300 feet on a trailer less than 80 inches wide.
Minimum Lighting
Any trailer not required to have lighting, such as those for agricultural uses, must have a minimum of one red light in the rear, visible up to 1,000 feet, and two red reflectors visible at all distances from 100 to 600 feet.
got this info at answerbag.com...
It looks like I will need to add some marker lights up front and will probably use the donor car's side marker lights....other than that, I think I will retain a 3rd brake light just for added safety. The trailer will be lockable, and I had a thought regarding a secret parking brake for security purposes. I could retrofit a parking brake handle and cable inside the trailer.....that way, even if they steal the wheels, the trailer will still not move....unless they put it on a flatbed.....

Arranged for a trailer this morning and will be picking up the donor car in 2 weeks!
UPDATE:
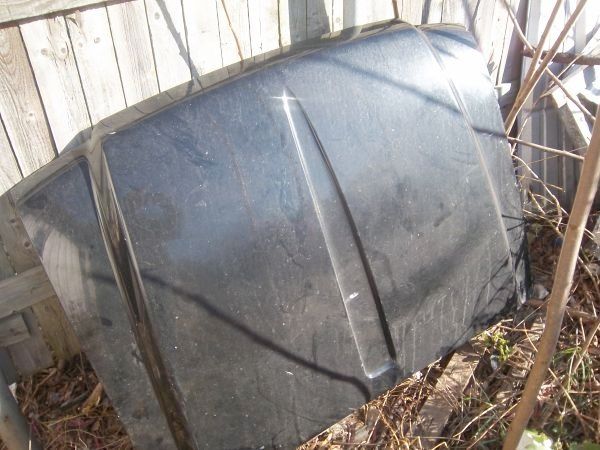
I found a nice "tonneau cover" for the trailer...I think if I modify this properly, it will work well and fit in the opening....(That opening can be adjusted to suit...or I can make the tonneau cover wider.....though it wont need much)
Im picturing using only the center section where it bulges up (so it does not look simply like a hood that was tossed into place) .... and adding some fiberglass to create a nice smooth edge along the bottom along with a channel for the rubber gasket. The fiberglass work will follow the shape of the top of the trailer.
the hood will face forward...so the roundel is at the back....it will also be hinged at the front....(remember the old 2002s?) Im doing this as a safety feature as well...hinging at the back may create issues....I would hate to have that thing fly open!
whatdya think?...see where the roundel will fit?
picking up the carcass in 2 weeks!
UPDATE:
small update...
I have canned the hood idea and will be going with a fiberglass tonneau cover from a 6' truck bed.....it will be cut to fit.
I am also going to use these hood hinges from a 78 mustang...(I like the fact that it recesses into the bulkhead...which I will have to build and weld into the trailer opening....
The pistons I choose will determine how high the cover lifts...so I have to do a little research there.
Im picking up the bones this upcoming weekend!...
UPDATE:
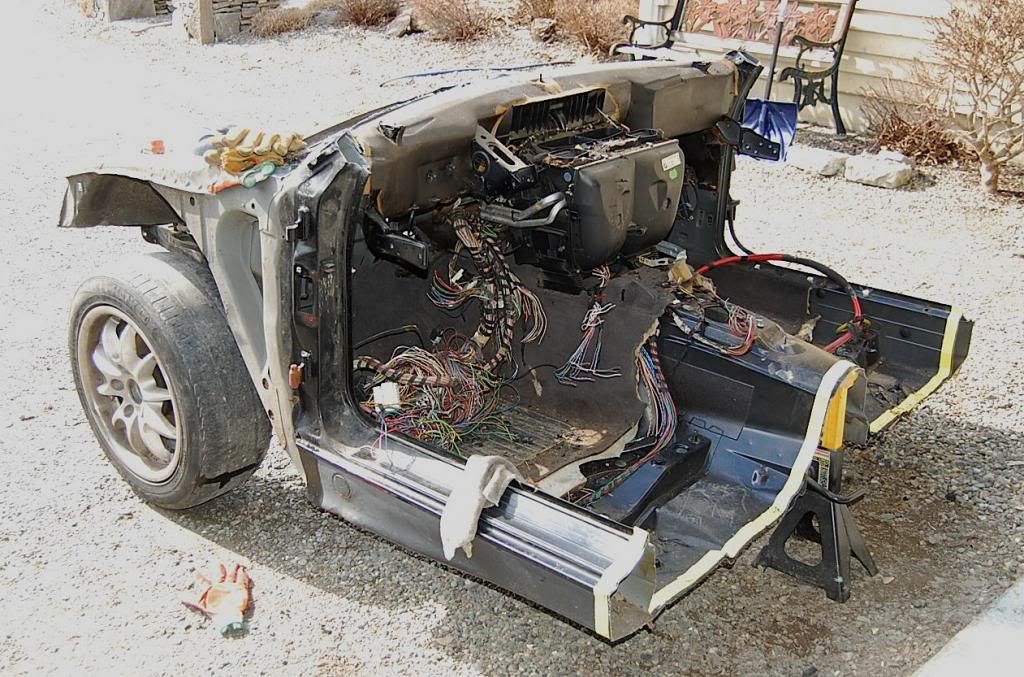
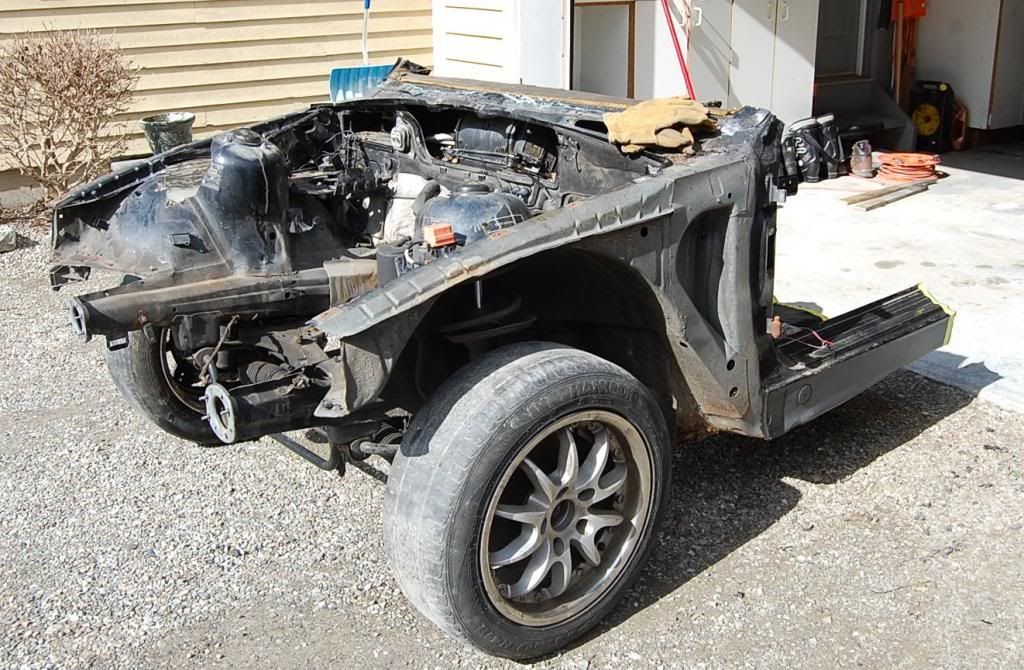
GOT IT!....the donor car is finally here!....Now the fun can begin...
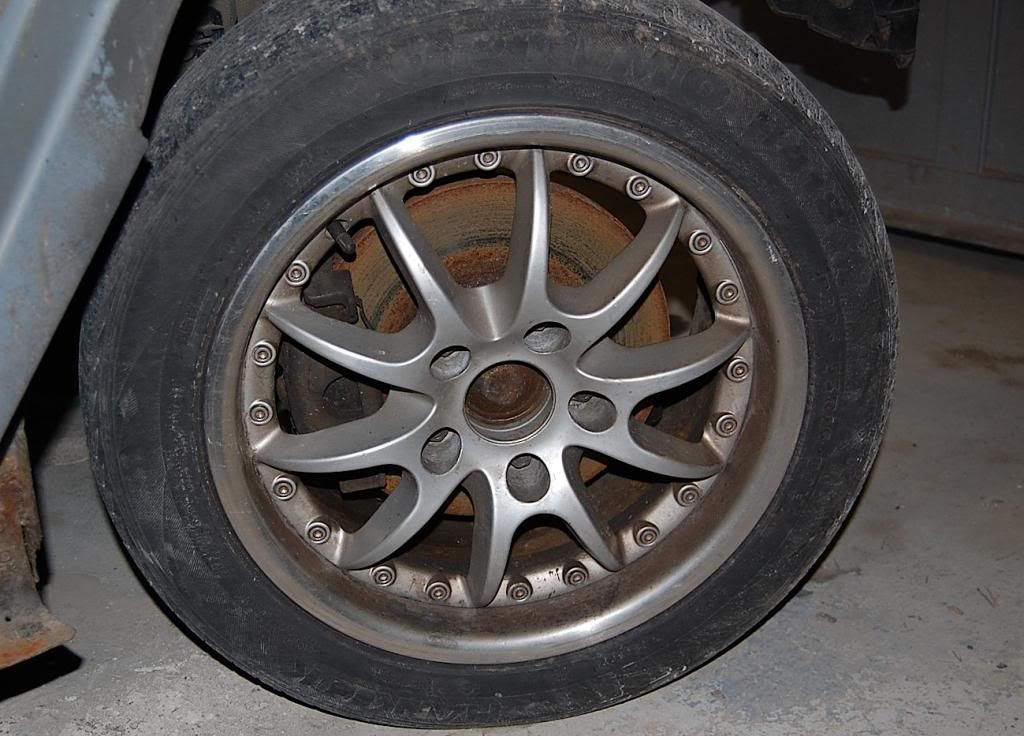
I ended up getting the whole shell..front suspension and all..4 tires and wheels...
The car is fairly solid with some minor rust under the tailgate...The rear diff is still in place...which may come out if that does not mess with the integrity of the structure....(advice there is appreciated)....

Sorry for the bad picture...Ill take some clear ones this week and post em up....
First thing will be to back it into the garage...a challenge because I have to kick the wife's car out....I could be sleeping in it if Im not careful!
the Ill start taking measurements and stripping the rest of the car out...
Ill be trying to recoup some costs so if you guys know of other bimmerphiles that need some 1992 E36 325i parts let me know...(in a pm or email, please).
UPDATE:
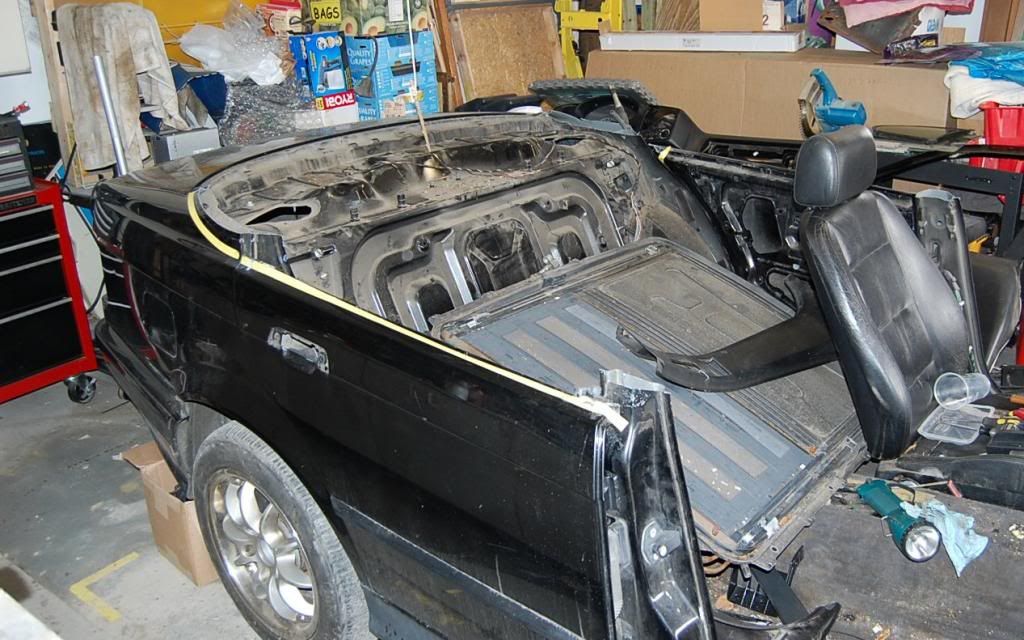
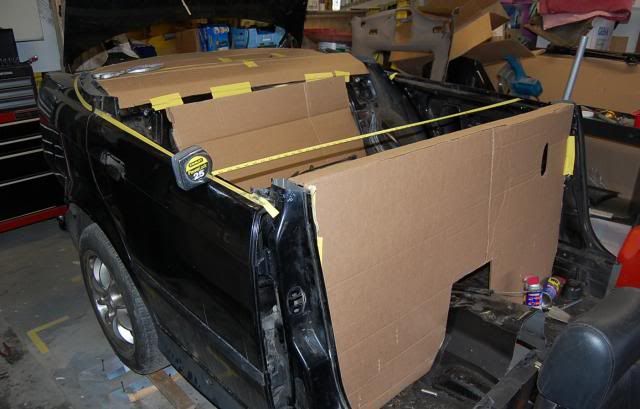
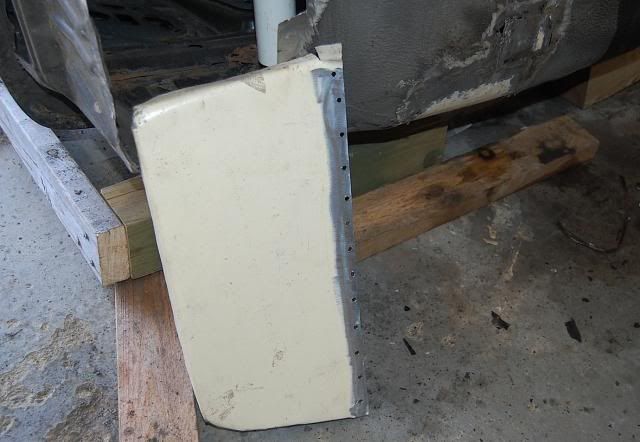
Okay, so I have been making progress on the project....
the yellow tape is where Im planning on making my cuts.
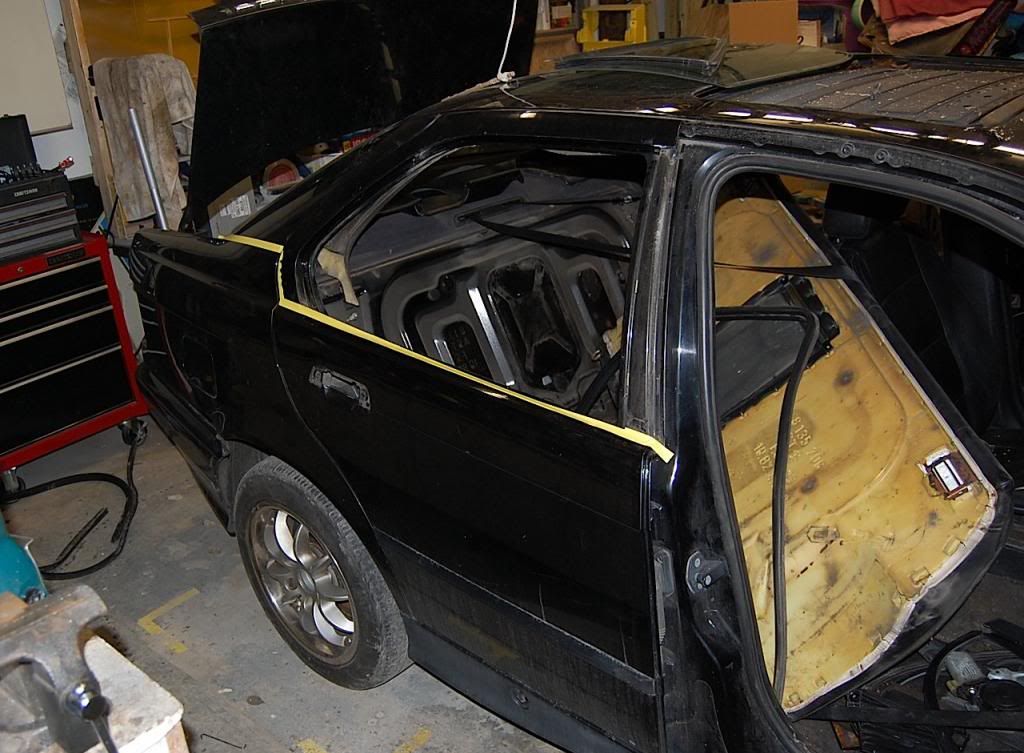
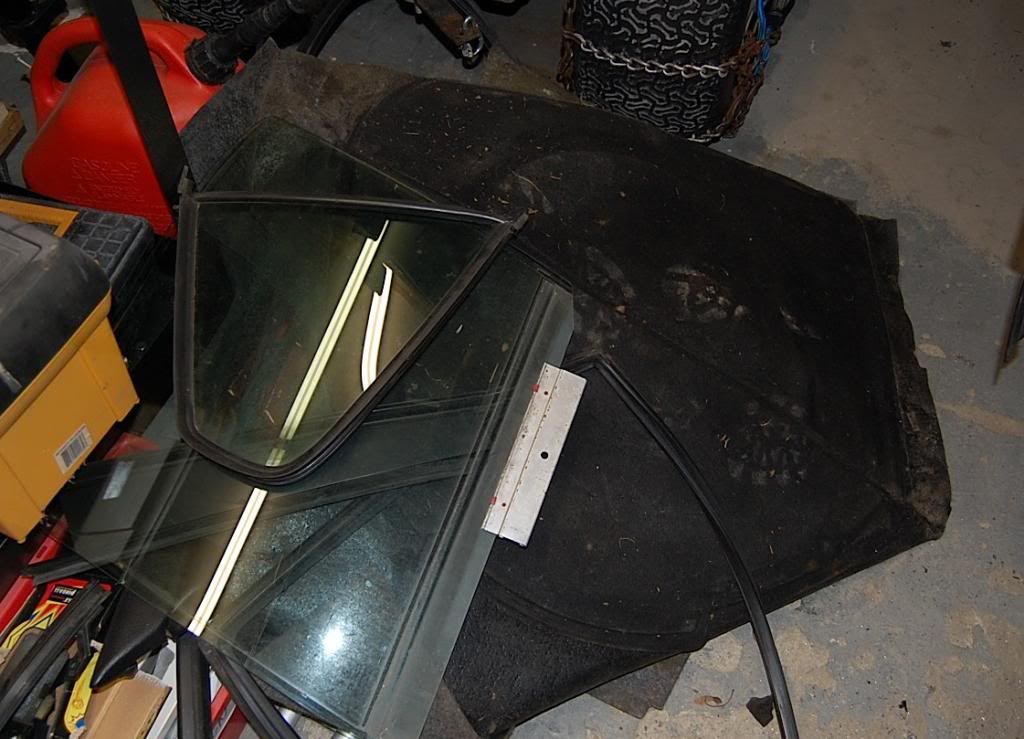
I have been getting all the parts out of the car that I think will be useful to somebody including door windows, window motors, rubber trim, and anything else that is removable.
There will be a big pile of parts!
The wheels that are on it now will look cool until I can find a couple that will match the wagon....
and the hinges came in....
So now its down to seeing how fast I can get this thing stripped out...and mapped out. I want to be as ready as possible before cutting the front end off.....
thanks for looking...
UPDATE:
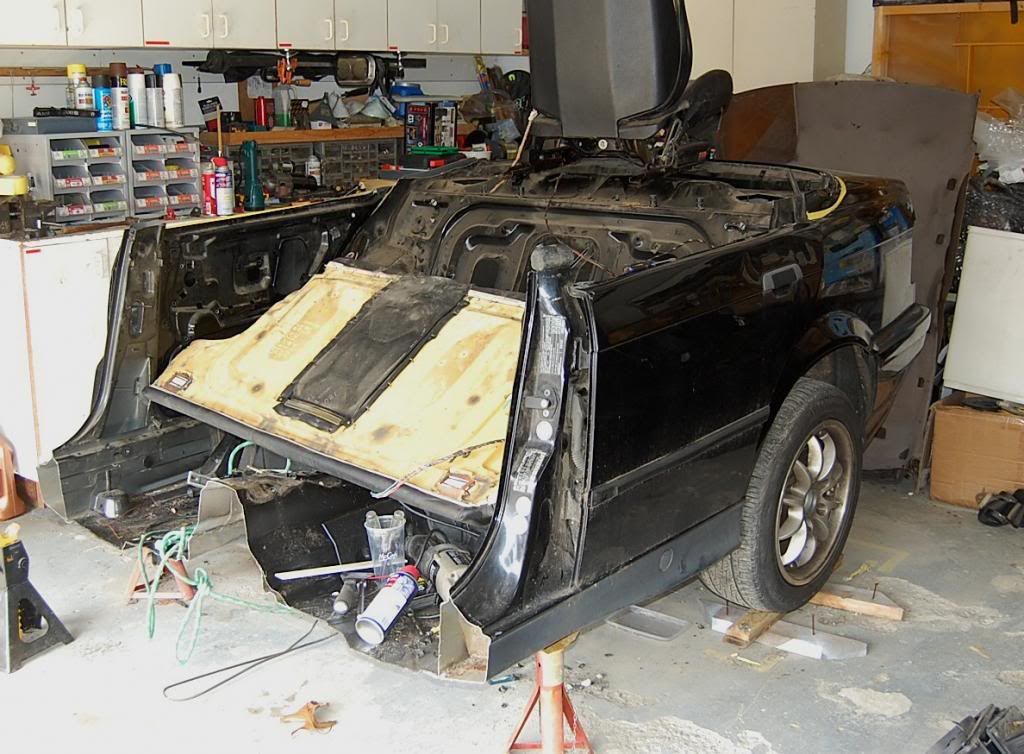
First cuts!....
wow it looks really different now!.....All in all it went well....The Sawzall is your friend for this one...I cut above the lines to leave myself extra material in case I need it.....Now all thats left is the floor....maybe tonight....

Im keeping the larger part of the roof panel for sheetmetal and may end up using other off cuts for structure....
Im going to start a running tally on costs and try to sell the parts I have saved off the car to help fund this wacky project......
So far I have had the following costs:
Donor Car: 200.00
Trailer plug: 25.00
Diesel Fuel: 50.00
Hinges: 25.00
Sawsall blades: 15.00
Total so far: 315.00
I will have the following future costs:
trailer tongue material: 100.00
Tires: 100.00
Tail lights: 50.00
stabilizer jacks: 30.00
Trailer tongue wheel: 40.00
Future costs for the above: 300.00
Additional costs include sheet metal, primer, paint, bondo, and a host of other items like DOT inspection, registration, plates, ect......
It certainly adds up....Hope I can sell some of those extra parts!
I will definitely be able to recoup about 100.00 at the scrap yard......
UPDATE:
Okay...some real progress made last night....NOW its beginning to look like something.
Ill have to back the wagon up to it to get an idea for the final tongue length...that and to make sure body lines look good...this may also help me figure out what the heck to do with the front panel....
couple of more interesting shots;
comments welcome...any ideas for the front panel...Im kinda stumped on that one! I was thinking of adding a kidney grill in there somehow...but it might look tacky....
UPDATE:
So no good project worth its salt would be rewarding without complications!
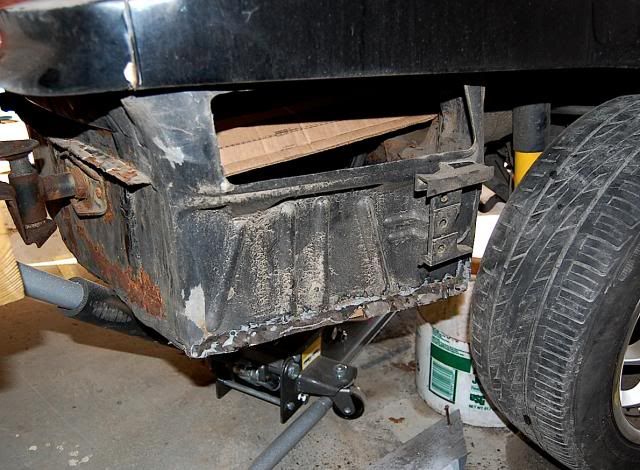
Found some rust through under the trunk lip that had been bondo'd and was coming back through in nice large rust areas...luckily, I have caught it before it rotted past the double weld seams that go into the trunk and below the bumper....
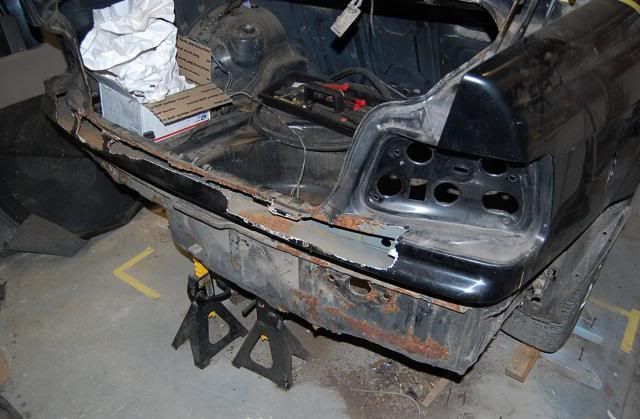
If I can find a panel for this section, Ill get it...but for now Im planning on honing my welding skills here....(of which I have very few at the moment!)
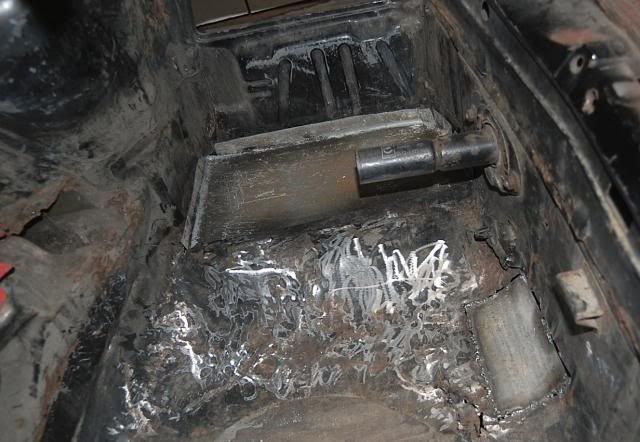
The trunk floor was bashed in on the battery side and surprisingly hammered back into reasonable shape in about an hour...
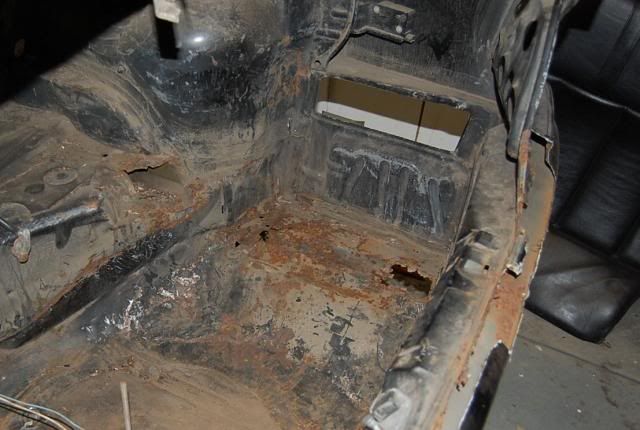
There are a couple of rust through spots where the battery was....and a mysteriously missing support rail that used to exist just to the left of the battery tray/trunk floor.
The fun is just beginning....I have started to make some cardboard templates to get a feel of how this thing is going to look, as well as figure out how to build some structure into the front end so that the trailer toungue and support arms will have a solid area to mount to....
Time to flip this thing on its back and remove the differential and drive shafts and get an idea of what I have to build off of....
UPDATE:
So Ive managed a little more progress...though I realize Ive had to take a few steps backwards to get to the point I can move ahead again...
I decided to take care of the rot in the trunk area first because I need to give that area structure again before flipping the beast on its back to figure out my welding procedure for the trailer tongue/under body supports/frame rails.
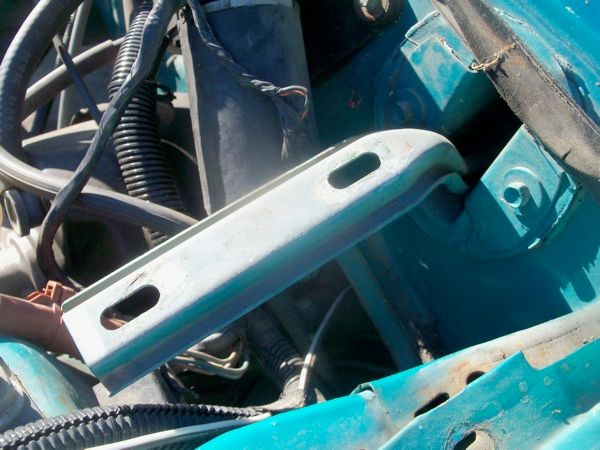
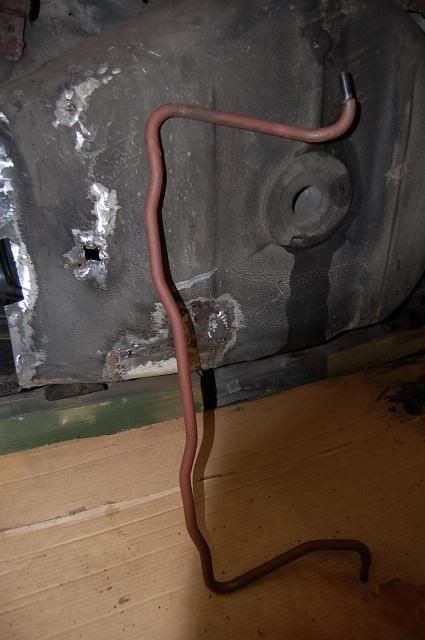
The passenger side bumper mount has been seriously compromised with that support brace having been cut out of the car inside the trunk....
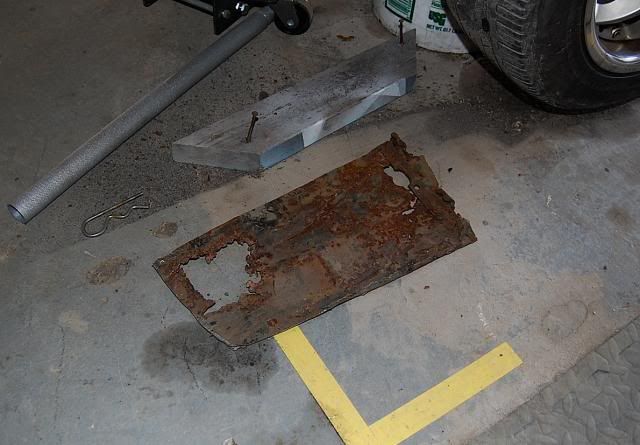
Im going to weld a steel pipe in its place, which should be just fine...recreating that octagonal shape in steel will take (me) too long and Im not sure if I can do it anyway with the limited resources I have here for metal fab.....
So heres where Im at: Welds cut out of outer floor pc....
floor under the battery area to be replaced:
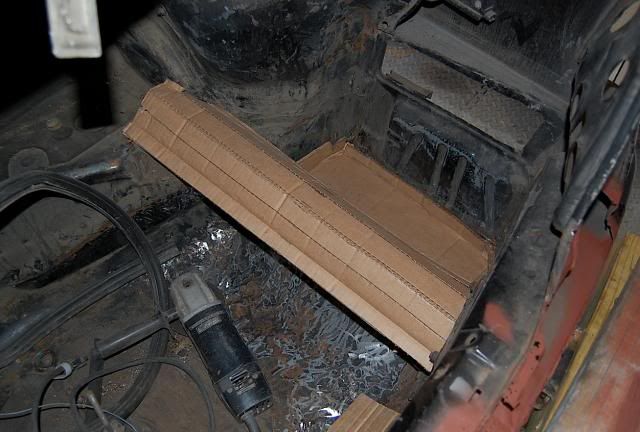
view inside the trunk: You can see the mock up of the support brace and below that, the cardboard template for the floor piece.
Ive begun fabricating the cradle which Im mounting to the bumper brackets...this will allow the trailer to be rolled on its back.....
more later!
UPDATE:
Update:....budget news: sold a wiper relay-15.00...bought some nice smoked tail lights 60.00....
Figured out that I need a minimum of 7' for the trailer tongue. This length will reach the rear differential support which is very solid. Ill be able to build a bracket or two and bolt or weld the tongue in at that location as well as 4 other points up toward the front of the trailer. (I found that the front has more flex than anticipated....These cars are really well designed) So in tying the front end and back end together using the trailer tongue as a frame member AND adding two other braces to further strengthen the floor pans, I should be good to go!....
More pics to follow soon
UPDATE:
I have decided the trailer will get the following goodies:
1) Hinged hard tonneau cover with locking handle INSIDE the trunk. there will be no visible hardware on it at all...
2) working and lockable trunk
3) front tailgate with inside handle and lock
4) trailer tongue wheel
5) rear support feet that swivel out of sight when not used
6) matching paint
7) faux dual exhaust
8) matching wheels
its a big long list that I will try to achieve over time....stay tuned!
UPDATE:
Got a bit more done last night!....(yawn!) My welding skills leave a lot to be desired...but its amazing how much more strength that floor has now with just that smaller piece tacked in place. Its got a ways to go yet, but Im happy so far.
The larger piece where the battery was is just held in place now by a floor jack...but the fit there will be good...Im overlapping this piece like the original was and seam sealing the outside.
the little piece is butt welded so had to be cut to fit right in the hole I made...which was tough to do...Im going to have to get creative with the weld puddle here and there!
(mig)
thanks for watching my progress and I enjoy any comments.
UPDATE:
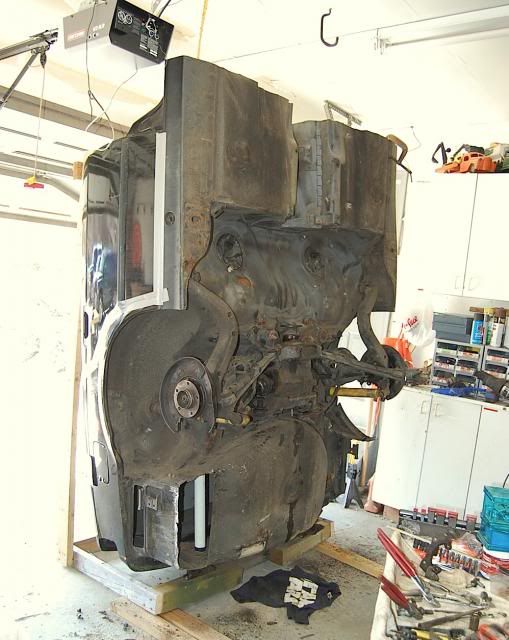
Okay...so some real progress made yesterday....A friend of mine came over to help out and we got a lot done!......
Looks like Im crating it up for truck freight, but no......

In order to be able to work on the underside items, including the welding, removal of the drive system, and cleaning up the floor pan..I decided to simply turn the thing over...well, at least I thought it would be straightforward...Ended up having to get pretty creative to do it safely. (Found out ya cant just throw the thing around!)
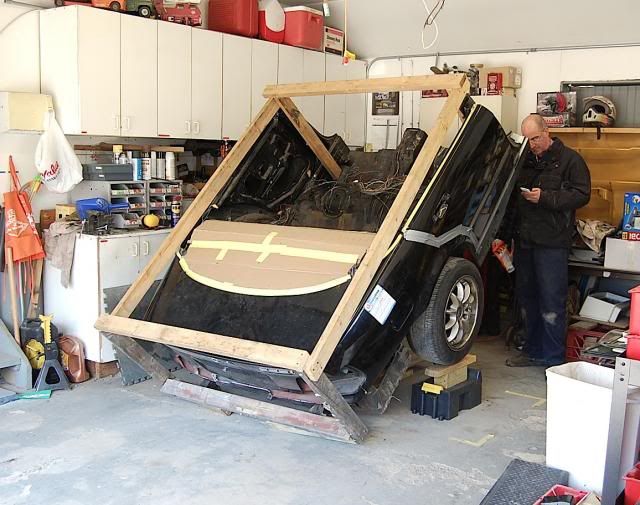
I used my big floor jack and lifted the trailer from the rear diff cradle. It was not enough......so we began propping the wheels up on different items until I could get the ramps under there...then I had to start propping the jack up...(In the end, I had it up on sturdy milk crates with a platform of plywood and 2x4s so the jack could continue to roll!....
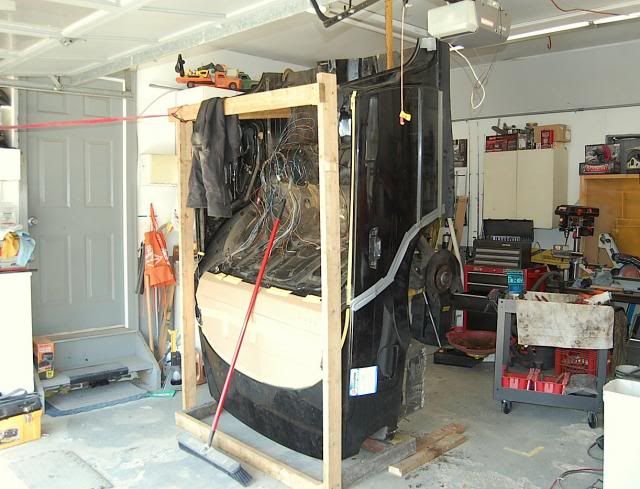
Then it was just time to go for it and get it to go that last little bit. That rear diff is HEAVY!.....
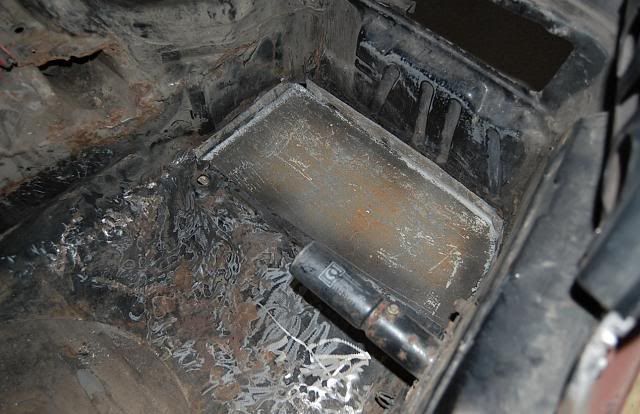
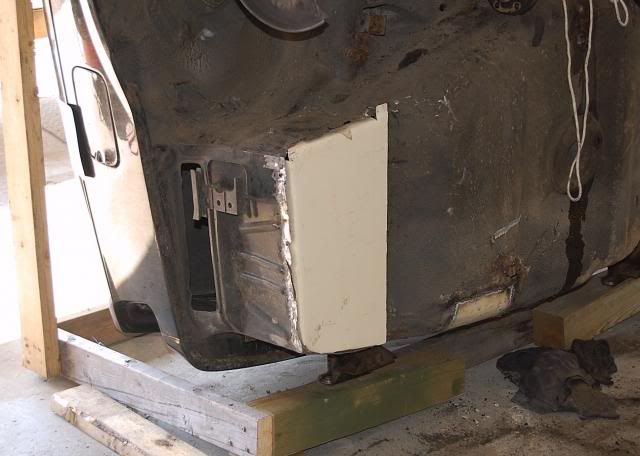
You can see in this pic, inside the trunk, I bolted a "permanent" trunk brace. I found some nice 3/16 tubing that I flattened on one end, shaped, and bolted in place up by the fender well. it fits tight against the bumper shock mount and stiffens the whole right side up nicely!
And the piece from underneath that will be welded in place for the battery tray area...
The rear diff is out along with the drive shafts now...also took out the brake system, ect to shed as much weight as I can.
Now, we talked about the doors yesterday...and I may be thinking about keeping them functional. what do you guys think about that?
Ill weld over the door handle area and make some latch releases for inside the trailer. Not sure if I want the doors to show or not.....I was originally thinking of a nice smooth sided trailer, but the functionality of having working doors is appealing!
thanks for looking and any feedback is of course welcome!
UPDATE:
A bit more done.....
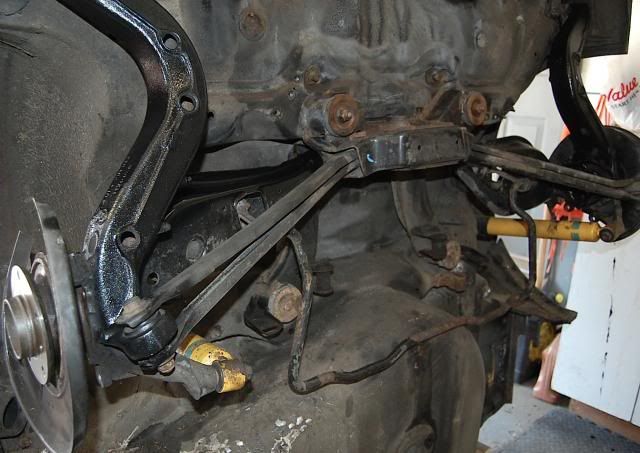
without the rear diff and driveshafts:
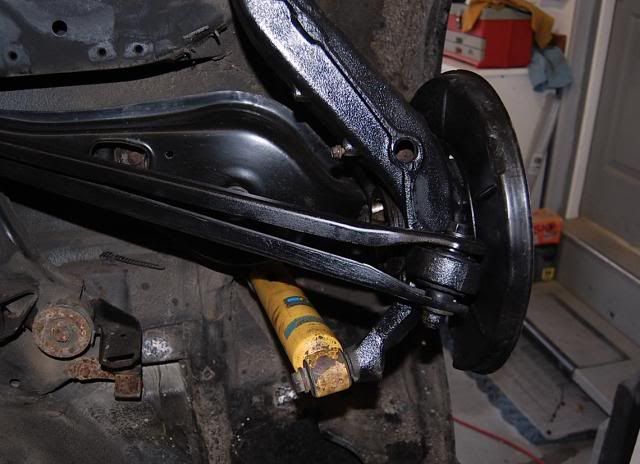
Question: (I think I know the answer....which lower control arm is the bent one?)
Welding progress: needed to cut out another couple of rotted sections that grinding revealed....

Battery tray piece prepped a bit:
Started cleaning up the suspension pieces...got some paint on the (trailing?) arm...looks good...Going to paint the inside of the drive shaft spline housing with rust preventative paint and undercoating...should hold it a while....
more later...
thanks for looking
UPDATE:
A bit more done.....
without the rear diff and driveshafts:
Question: (I think I know the answer....which lower control arm is the bent one?)
Welding progress: needed to cut out another couple of rotted sections that grinding revealed....
Battery tray piece prepped a bit:
Started cleaning up the suspension pieces...got some paint on the (trailing?) arm...looks good...Going to paint the inside of the drive shaft spline housing with rust preventative paint and undercoating...should hold it a while....
more later...
thanks for looking
UPDATE:
Some more progress at lunch today!....
The lower control arm on the drivers side had a pretty bad bend in it on the front side. I ended up taking the whole thing out and clamping it in my vice. I added some heat and kept adding pressure on the vice until the part was straight again...hey, it was worth a shot and it worked!
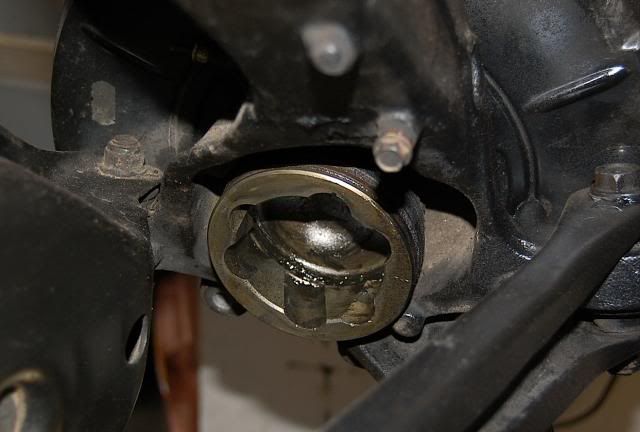
I got the driveshafts out but it was not pretty. I used a nice combination of correct procedure and all out cutting, bashing and wrenching.....lol...in the end, the correct procedure wins out every time! Here is the back of the outer drive shaft housing...which used to contain the CV joint, ball bearings and was covered by the CV boot.
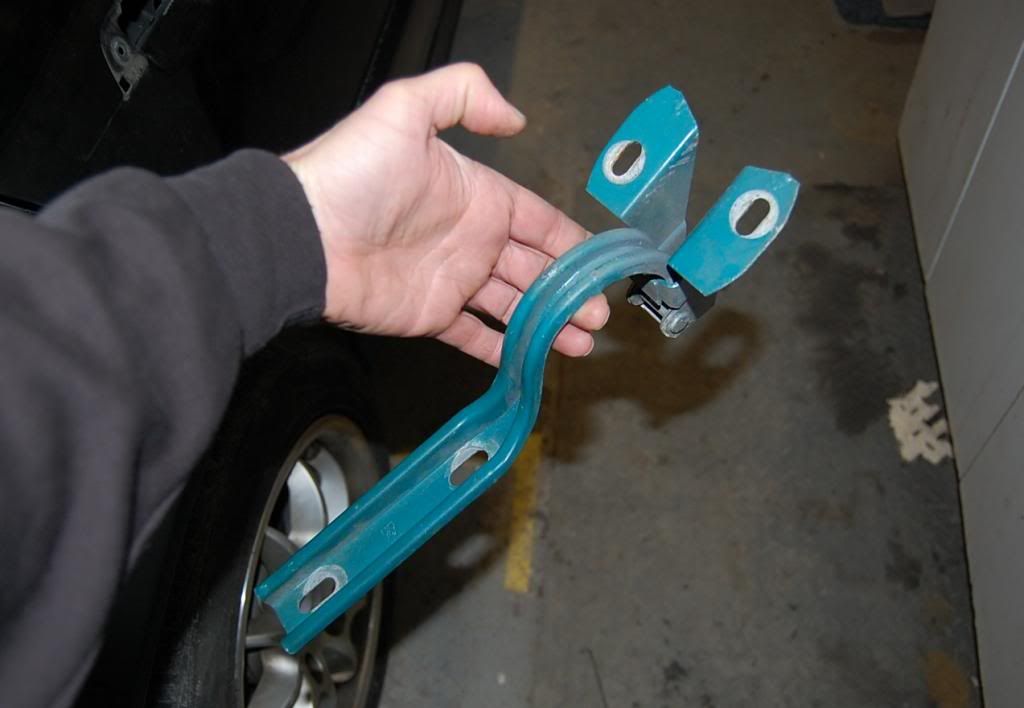
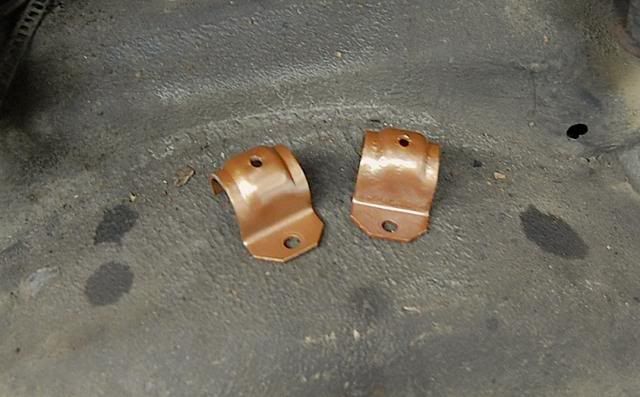
Got the sway bar out, too...one of the links was broken, so Im glad I took the whole thing out...here are the center bushing brackets with a coat of copper metallic paint....eventually they will be body color "barrique red"
Sway bar with its first coat of oxide primer....its in rough shape...but sound.
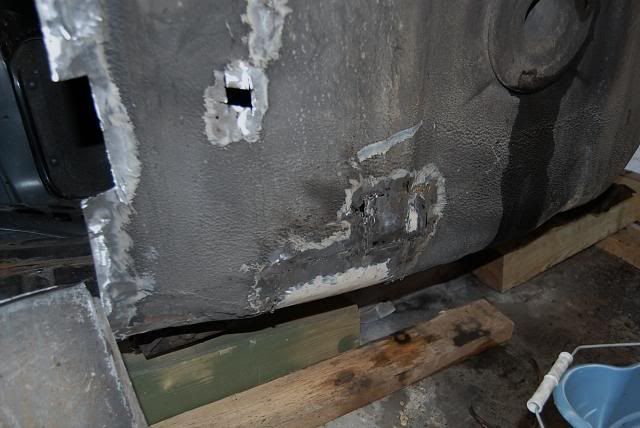
welding progress:
One or two blow through spots...the metal gets really thin wherever it had rusted, or split....I turned the welder down a bit more and found I had just a bit more time to form the weld spot.....
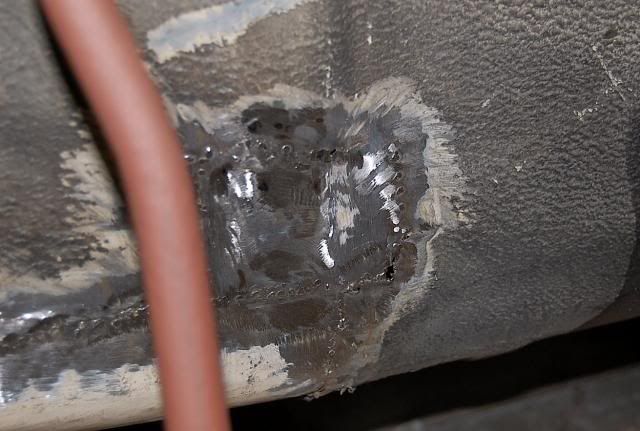
you can just make out the shape of the metal patch.....I have been wanting to try matching a profile like this one....there was an indented ridge in the trunk floor that came back through this spot so I shaped the metal to match....it worked well....
welding skills getting better, but its still very slow going....such a noob!
thanks for checking in!