After researching on the forums, there hasn't been a complete DIY install for e92's with i-Drive so i vowed to make one after i figured out how to get my own amp and sub installed.
Credit to
etik for the wiring guide on his DIY. I'll be referring to his wiring diagram for the inputs.
Things I used :
Low Voltage Trigger -
LVT2 at cardomain.com
This simulates the 'Remote' wire for the amp to turn on and off the amp.
Aftermarket Amp Interface Adapter -
Stinger SLOCII at cardomain.com
This will convert a signal from your stock amp to RCA for inputs on your amp. Basically a High-level to Low-level converter.
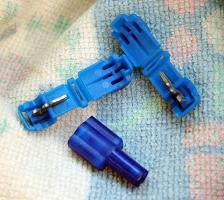
T-Taps - You can find these at your local auto store or any electronics related store
They allow you to tap into a wire without splicing or cutting. You do not need these but i high advise it as it is way easier than cutting a wire and soldering/taping back together(there's not much room to play with harness when you have it out).
FYI - i did not have enough ground cable so i used another red power wire. Please do not follow my way as you should have seperate colors but because i'm experienced, i know im not going to mistaken my two red cables.
The Battery on our e92 i located on the back right side. Take off the cover by turning the black knob and the whole side unit comes out to reveal the battery.
I used the exisiting +positive connection for my 12v for the amp, circled in RED
I used the frame chasis for ground, circled in Yellow

The stock amp for our e92 with i-Drive is located in the rear left of the car. It's under a plastic cover. Simple pull it off to reveal the amp below. Slide the black connector out sliding the locking sleve in teh direction of the arrow. It may be very hard to do so. I used a pair of needle nose pliers to pull it. When you slide it out, it will push the connector away from the amp and unhook.
The red arrow shows the direction that you should be sliding the locking sleeve.
THe yellow arrow shows which way the harness will start to slide out as you slide the locking sleeve.

Once you have the harness out, pull the black foam back a bit to reveal more of the wires and you will see that the wires are actually twisted in pairs. The pairs are +/- for speaker outputs.
You will be tapping into these wires -
SUB LEFT
Red/White +
Brown/Yellow -
SUB RIGHT
Red/Blue +
Brown/White -
These wires will serve as the input for the Amp Interface adapter.
Tap into these wires using the T-Taps
Also, while you are tapping wires, you should tap one extra wire from any pair of positive speaker output for your Low Level Trigger (LVT).
FRONT LEFT
Blue/White +
Blue/Brown -
FRONT RIGHT
Blue/Black +
Blue/Brown -
REAR LEFT
Yellow/Red +
Yellow/Brown -
REAR RIGHT
Blue/Green +
Blue/Brown -
CENTER
Black/White +
Black/Brown -
REAR LEFT WOOFER
Yellow/Red +
Yellow/Brown -
REAR RIGHT WOOFER
Blue/Green +
Blue/Brown -
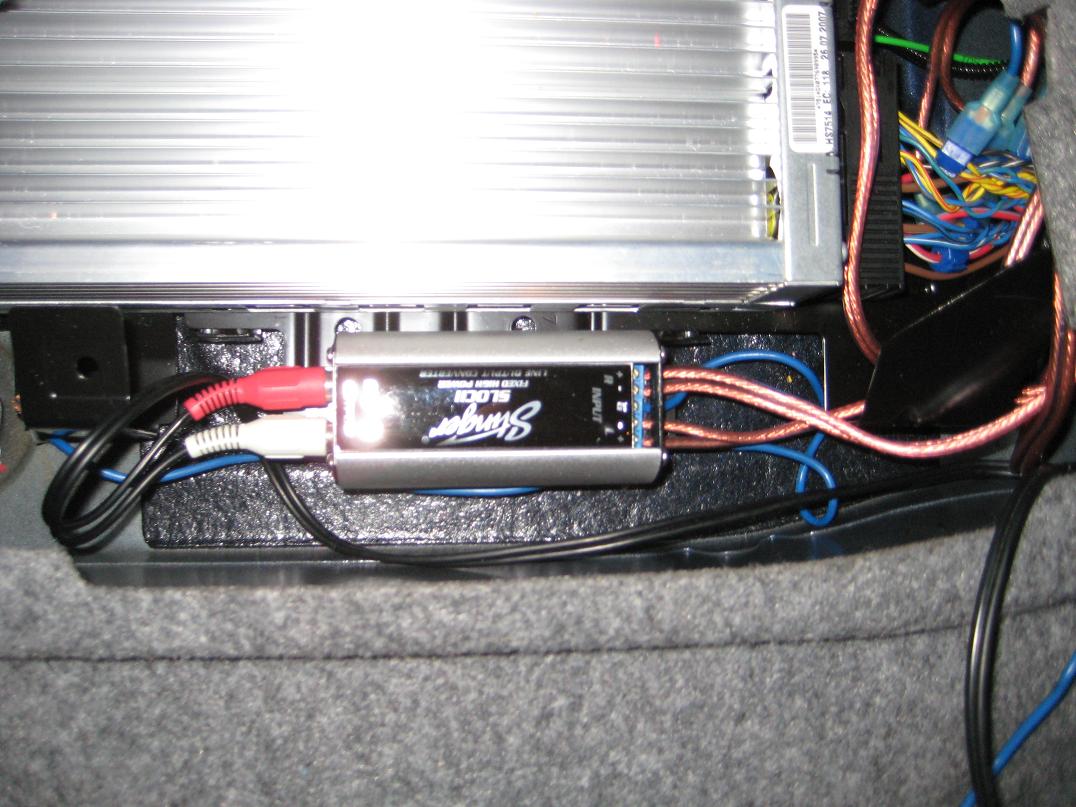
After you are done tapping the wires, follow the instructions on the Amp Interface Adapter. It's really easy as all you're doing is plugging Left +/- and Right +/- to their corresponding holes.
I double-sided taped my Amp Interface Adapter right next to the factor amp. Connect RCA cables to it and plug the hardness back into the factory amp and you're done with this area and ready to connect to your amp.
You have +12v from battery which goes to +12v on your amp. Ground goes to Ground. Which brings us to remote so now we have to wire the LVT.
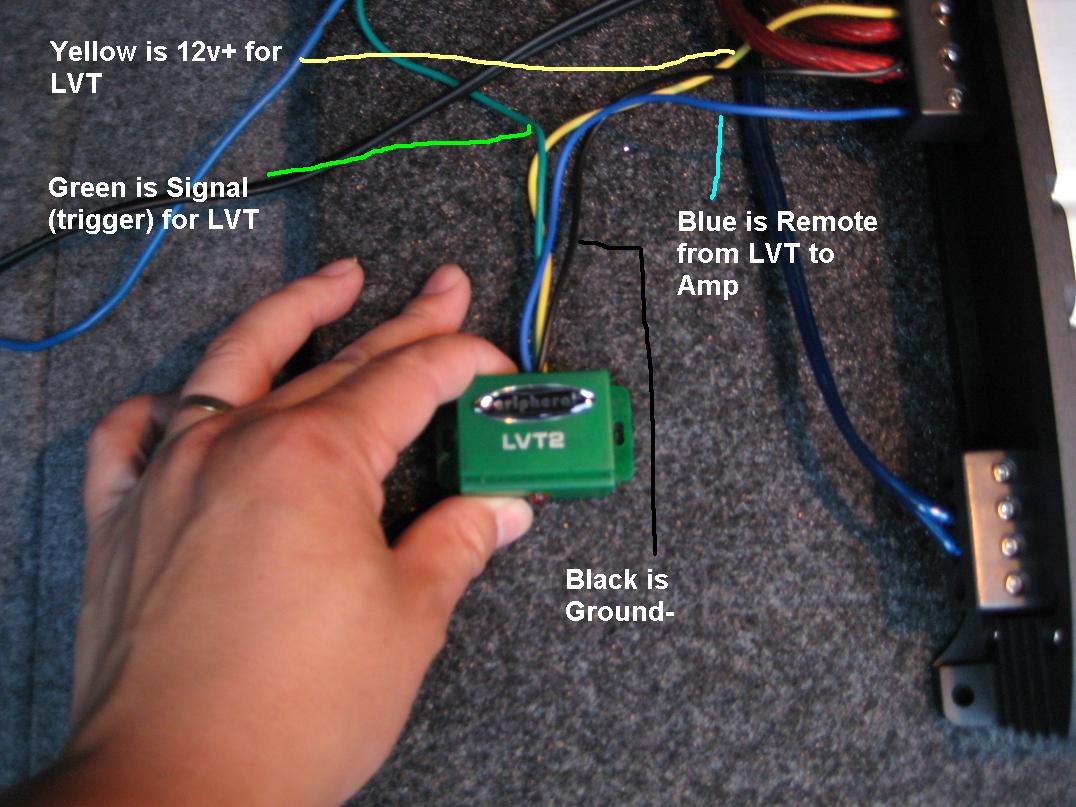
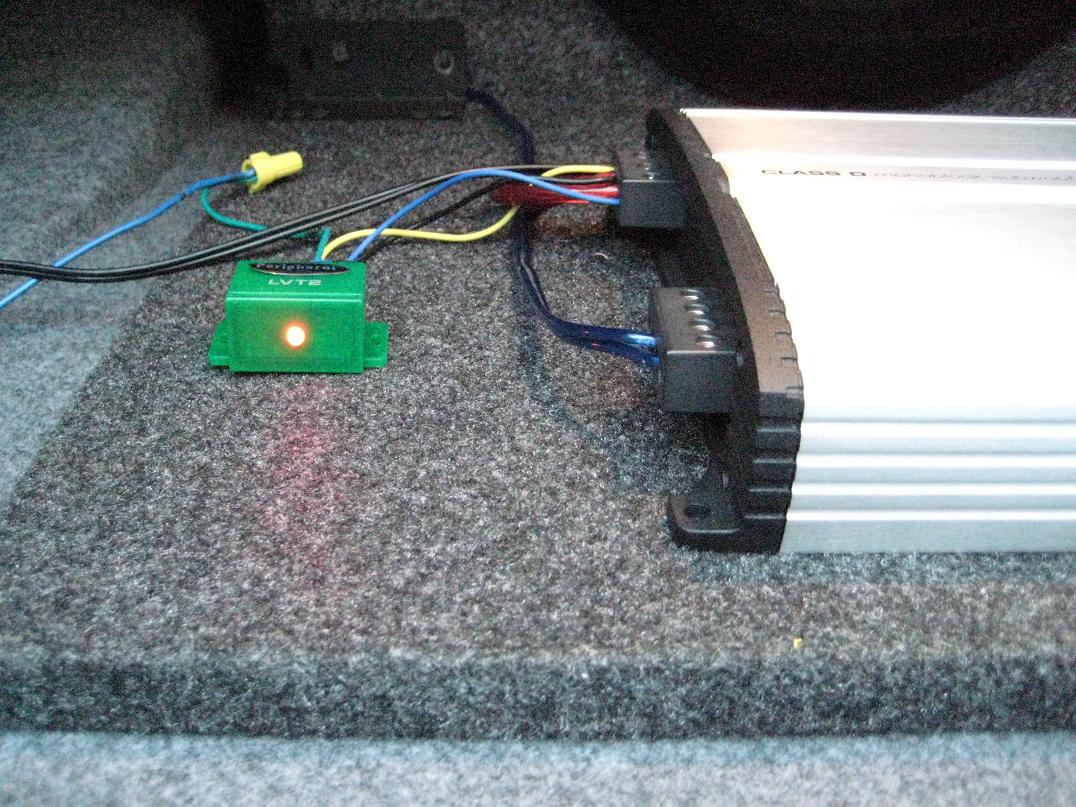
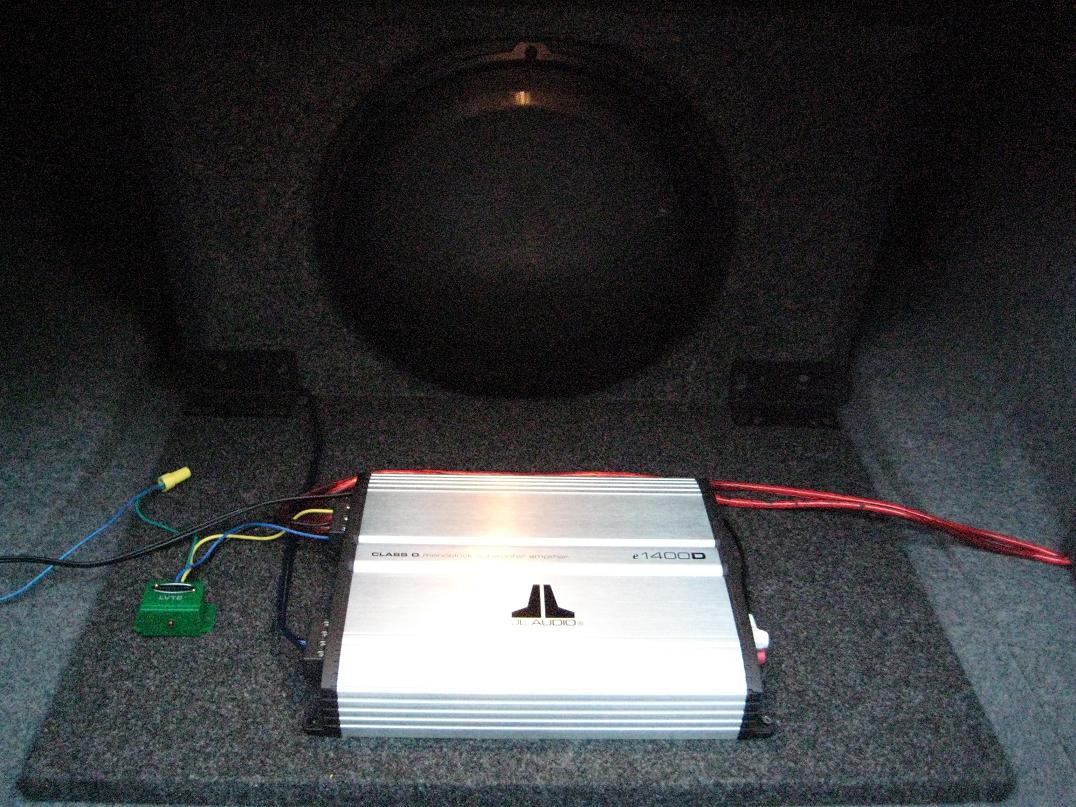
THe LVT requires +12v,Ground-, and signal or trigger(which is the extra wire you tapped earlier from a speaker output). I decided since i have the amp right there, i can feed off the already supplied wire runs for positive and ground on my amp. I just daisy chainged off the amp as shown. The LVT will now have a blue wire, which is the remote to power on and off the amp. Connect the RCA's from the amp interface adapter to the amp and you're done with the amp.

That should be it!
Note: you may notice that the amp is still on after locking the car, but it only stays on for a few minutes. i think the car still feeds power after you turn off your car but only for a few minutes..
Connect your sub to your amp and begin tuning and enjoy the baSS baSss BASs!
I used a JL e1400 monoblock amp to power my JL 13w3.

Only thing left to do is to go to local plastics store and get a custom acrylic cover for the amp and to hide the wires with either carpetting or wire loom.
Enjoy!
