Earlier this summer, we were made aware that 3-series/M3 and 1-series models with a production date of 3/09 and later were not prewired if the "Alarm" option was not specified during the ordering process. This is not new to BMW as e46 models overseas were subject to this in the past - however, most US bound vehicles were prewired.
This unique comfort controller can be installed by anyone with the help of our detailed installation manual. Installation requires little electronic skills and is done without cutting wires or soldering! The module comes with all wires and parts needed. No need for extra key fobs. Everything is done with the original key remote. The control unit was designed by our certified engineer, having years of experience on Porsche and Mercedes Benz vehicle electronics. It was developed according to all European and American (CE, FCC) directives and constitutes a state-of-the-art electronic onboard control unit. Over-voltage protection, reverse polarity protection, safety shut-off and absolutely minimal standby power drain can be taken for granted.
Product Features:
Individually programmable
Configure all functions of the module to meet your personal preferences via our signature blinker setup menu.
Factory BMW Alarm Emulation
Emulate the factory BMW alarm confirmation door locking/locking chirps and blinking LED as a visual deterrent against thieves or vandalism. remoteKEY is even compatible for 3/09+ models not prewired for the factory BMW alarm!
Passive / Invisible mode
Turn the whole module off with an easy key sequence. Ideal when letting someone else drive your car.
Reversible plug-in installation
Remove any time allowing sale or return of a leased vehicle in it's original condition.
Remote window control
Open and close the windows and the sunroof separately by remote without activating the top.
Folding Mirrors
On models equipped with motorized mirrors (premium package), fold mirrors in and out by remote. If equipped with Comfort Access -door handles can also activate mirror folding.
Automatic door unlocking
Automatically unlock the doors when turning the ignition off. No more pulling the door handle twice.
USB Port for easy updates
This module can be updated using any Windows PC / Laptop with Internet connection.
Unique design features only to be found in remoteKEY:
- Fully E13 tested and certified: E13 10R-02 4133
- Ultra-low power standby mode (less than 0.1mA)
- InstallAID LED shows correct installation and status
- Intuitive Setup menu for easy customization
Models Supported:
2006+ e9x 3-series, including M3
Installation: While the steps are quite detailed, installation should take no more than 60 minutes for the novice installer. If you are not experienced with your BMWs wiring, please consult professional installation.
Important: Remove key from ignition and negative battery cable before proceeding in order to prevent error lights from appearing during installation process.
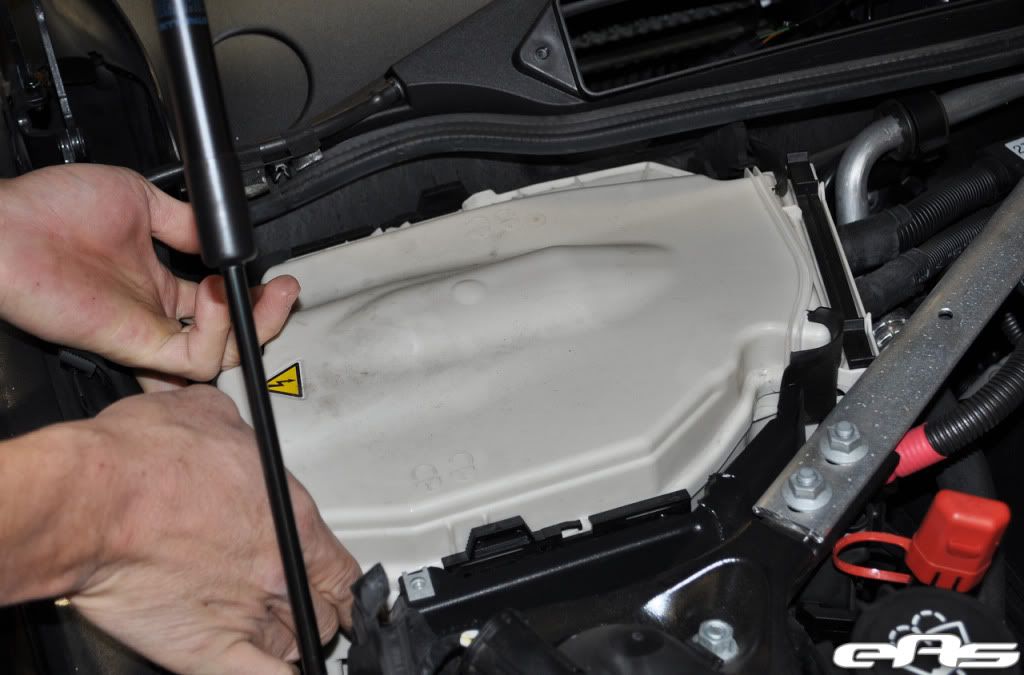
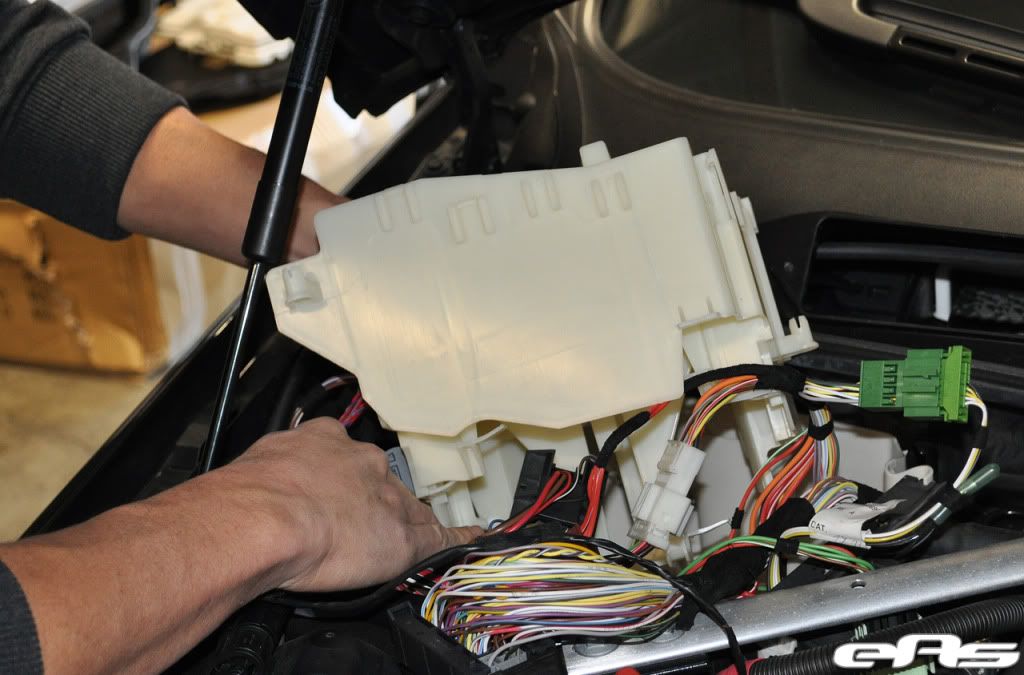
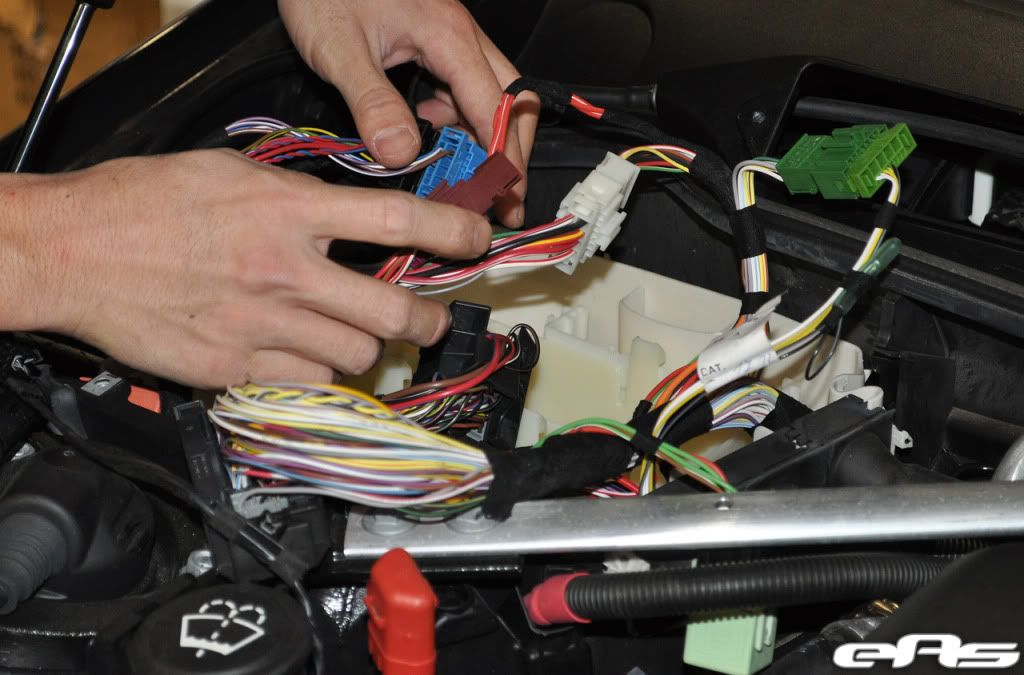
Remove passenger side control box cover to expose DME container
Noting positions of locking tabs on lid, remove hook and slider tabs and remove cover
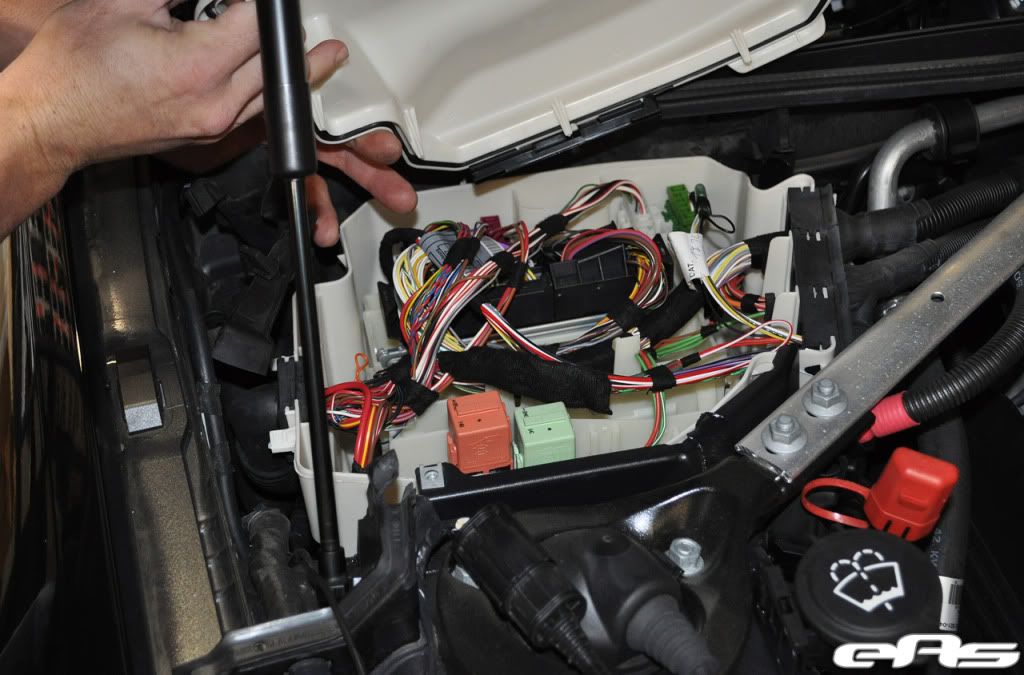
Remove relays and connectors from DME grid and set aside. Connectors are keyed to go back in only one direction
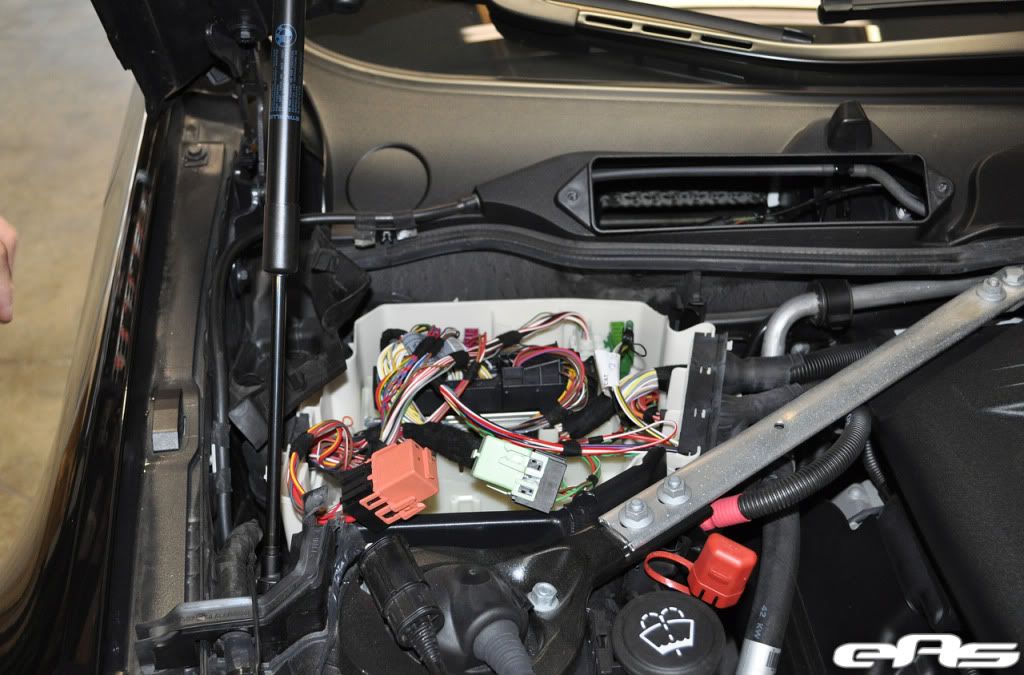
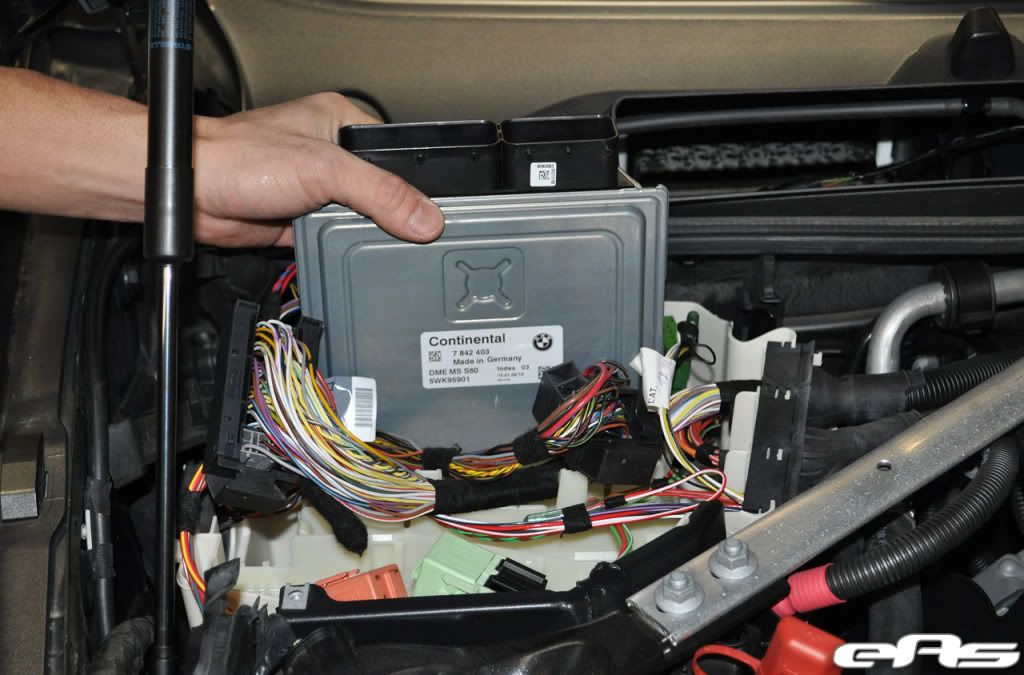
Slide DME from grid and set aside
Remove grid from control box, some cables may still be fastened in place by zip ties
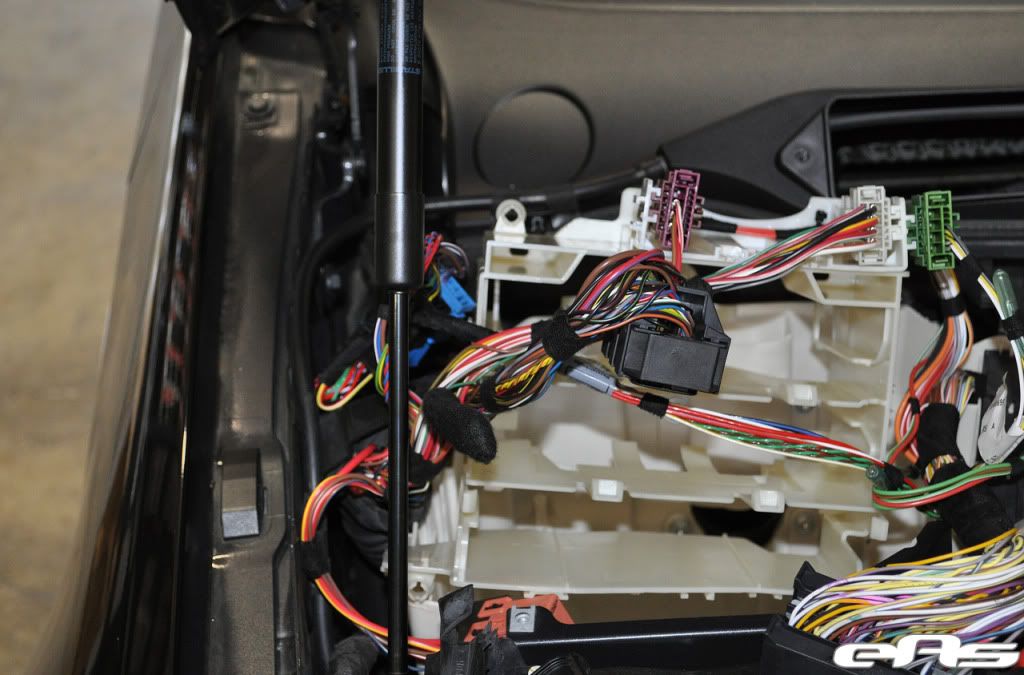
Cut zip ties with cutters
Remove DME grid
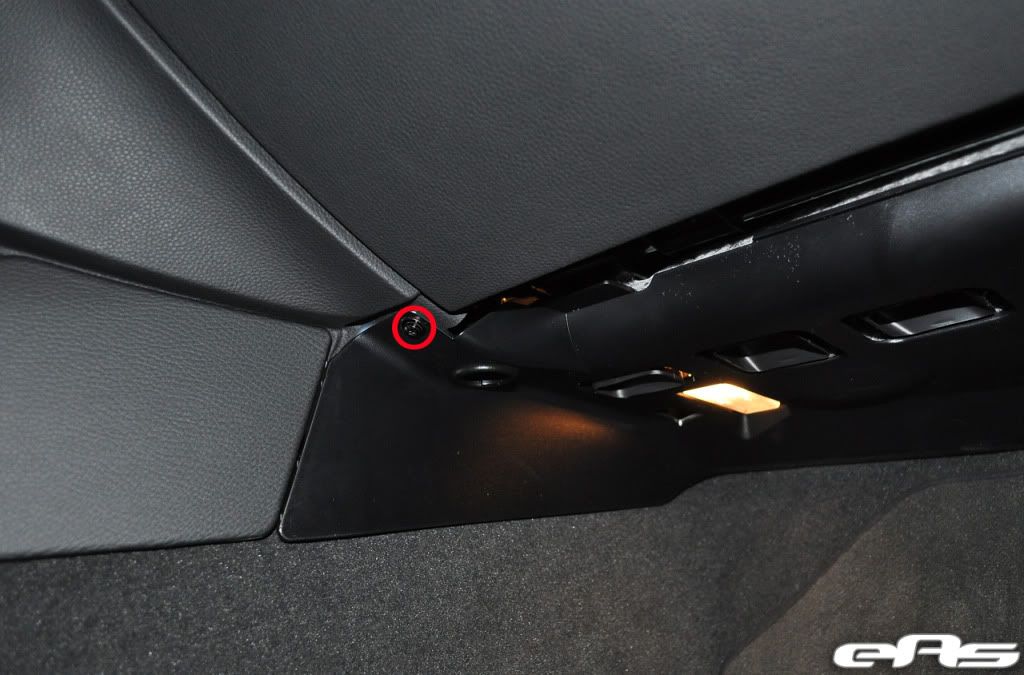
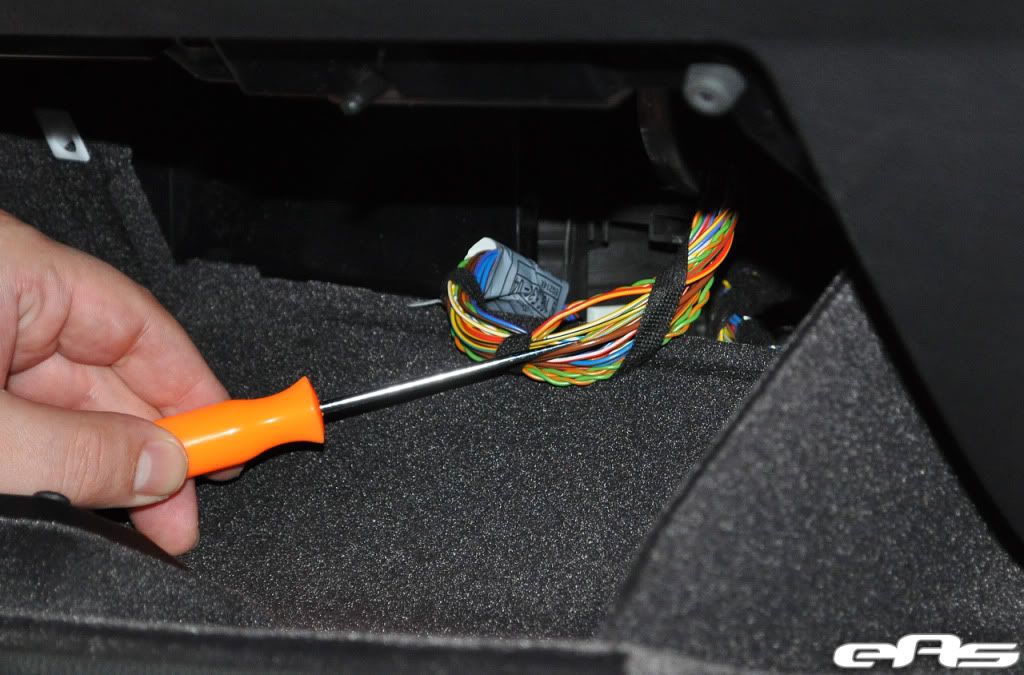
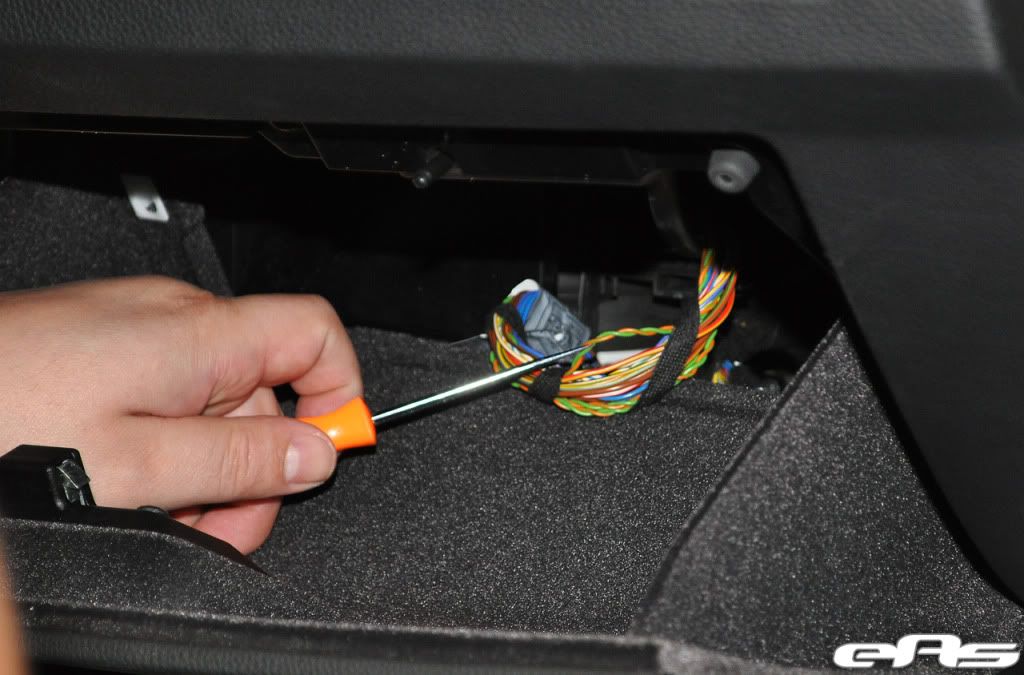
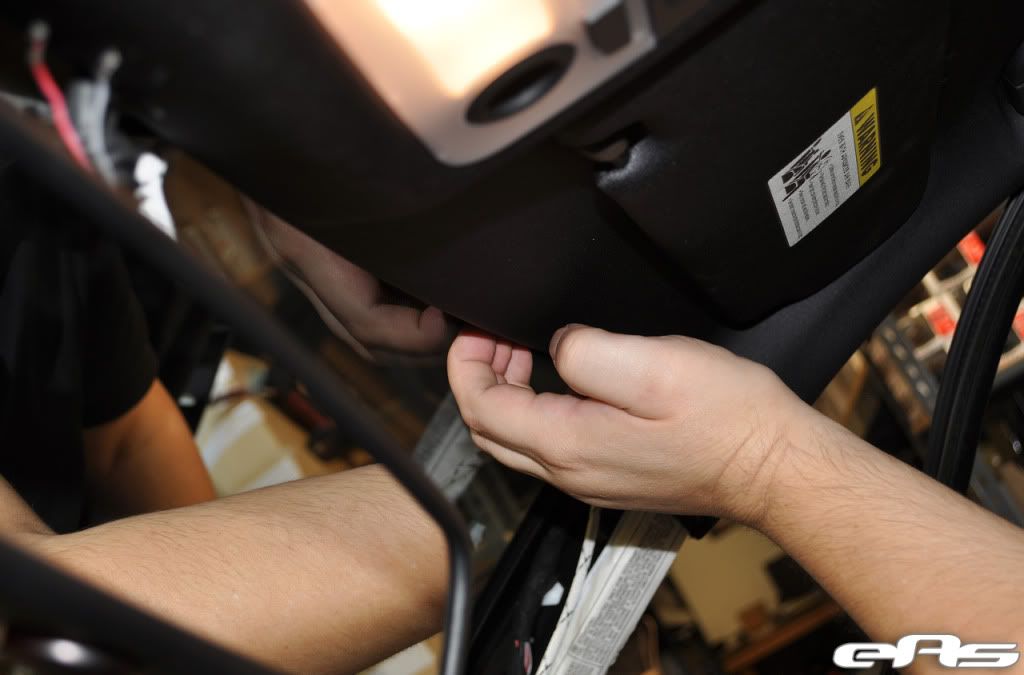
Moving into cabin area on passenger side, remove (2) torx screws in order to remove kick panel underneath glovebox. Location of 1st torx screw
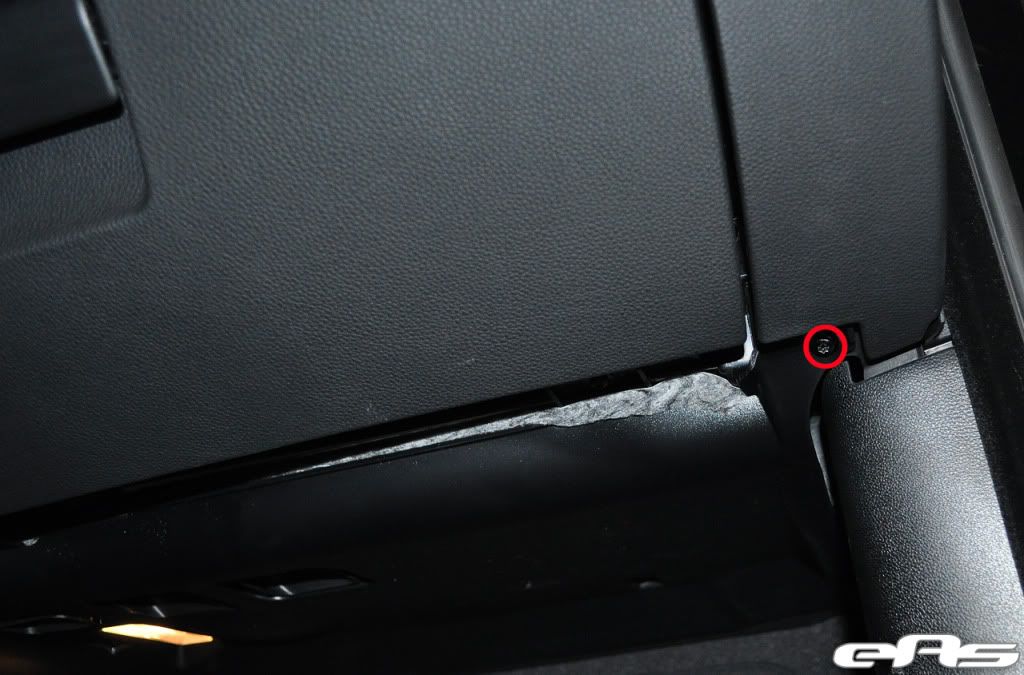
Location of 2nd torx screw
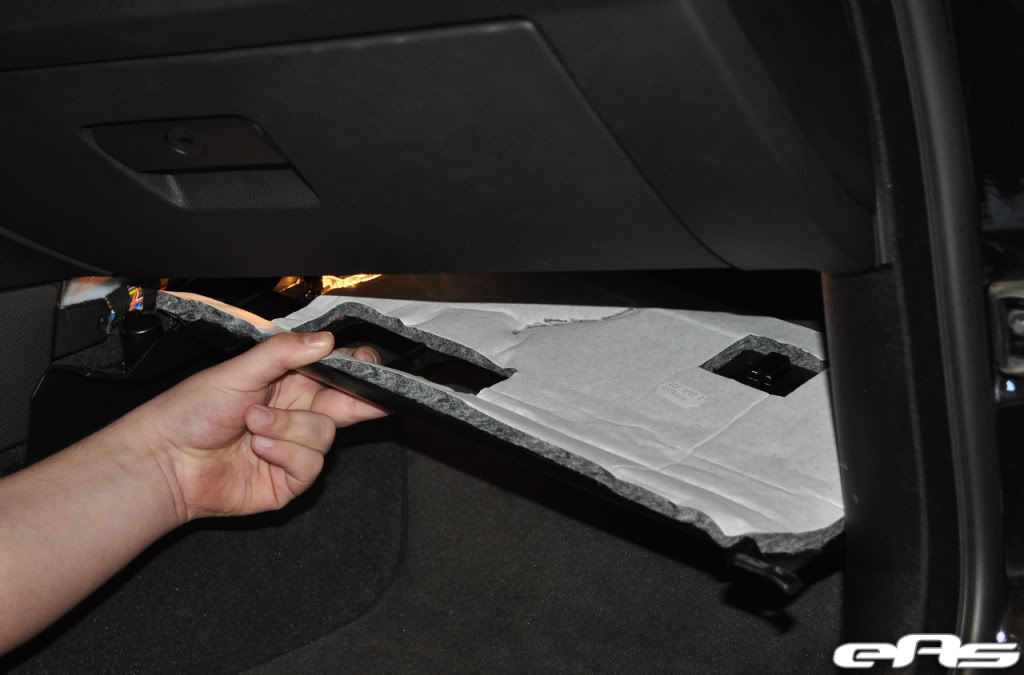
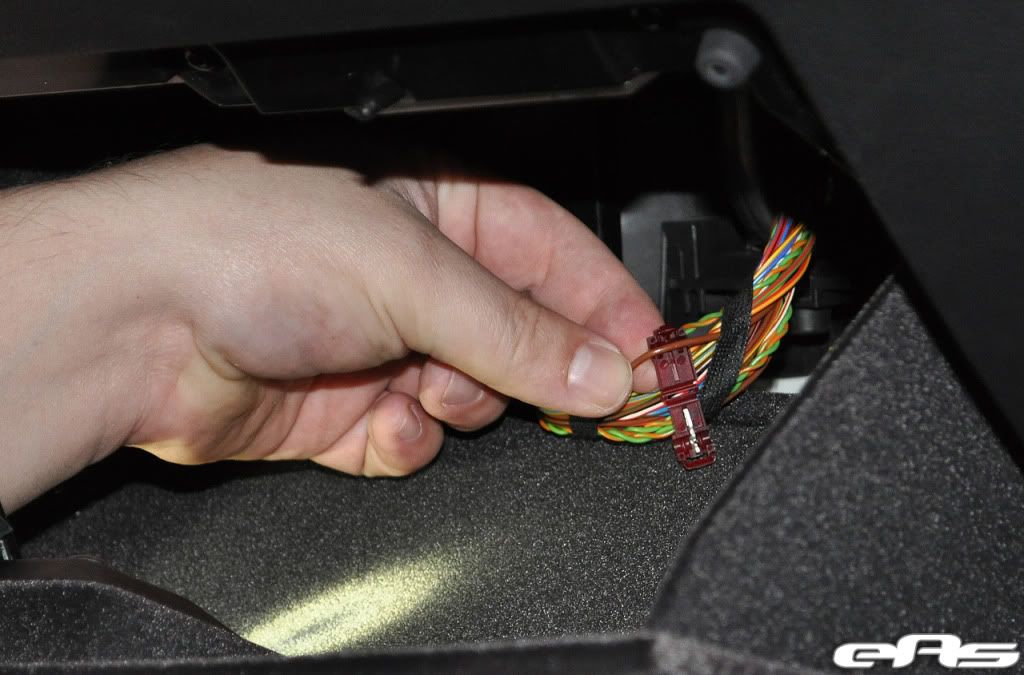
Remove kickpanel
Using a thin piece of wire or coathanger, insert wire into opening at bottom of control box to allow easier routing of cable to cabin area
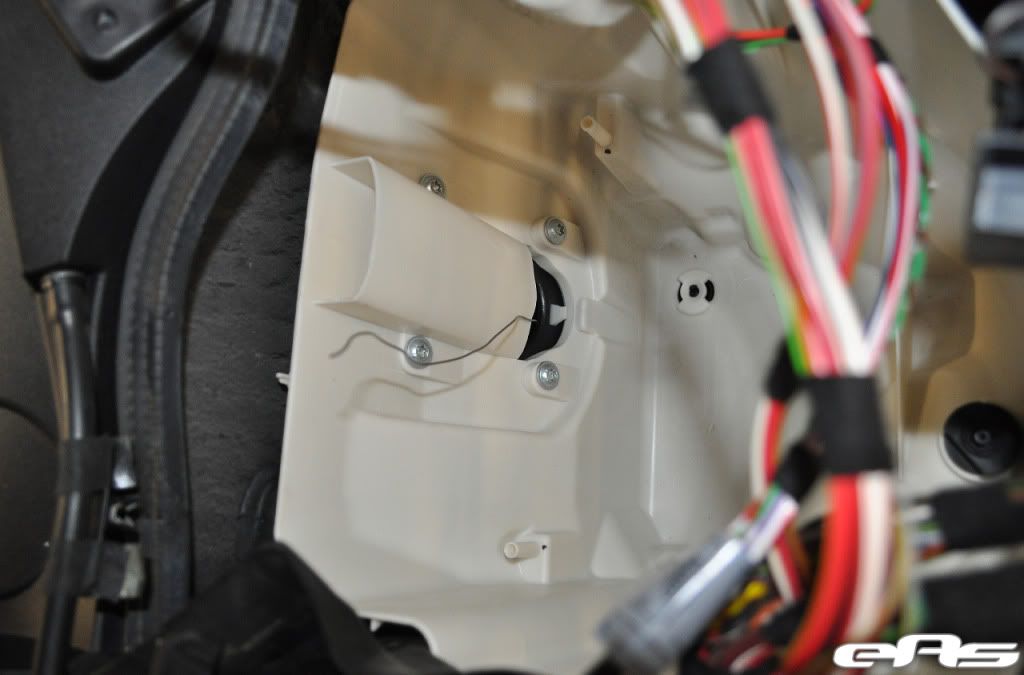
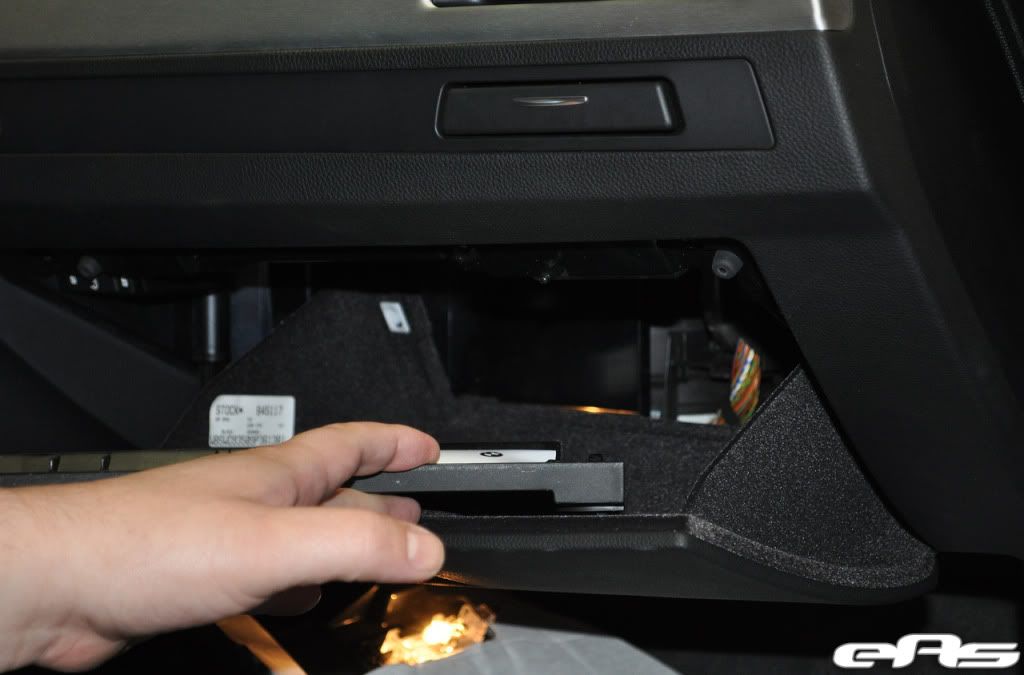
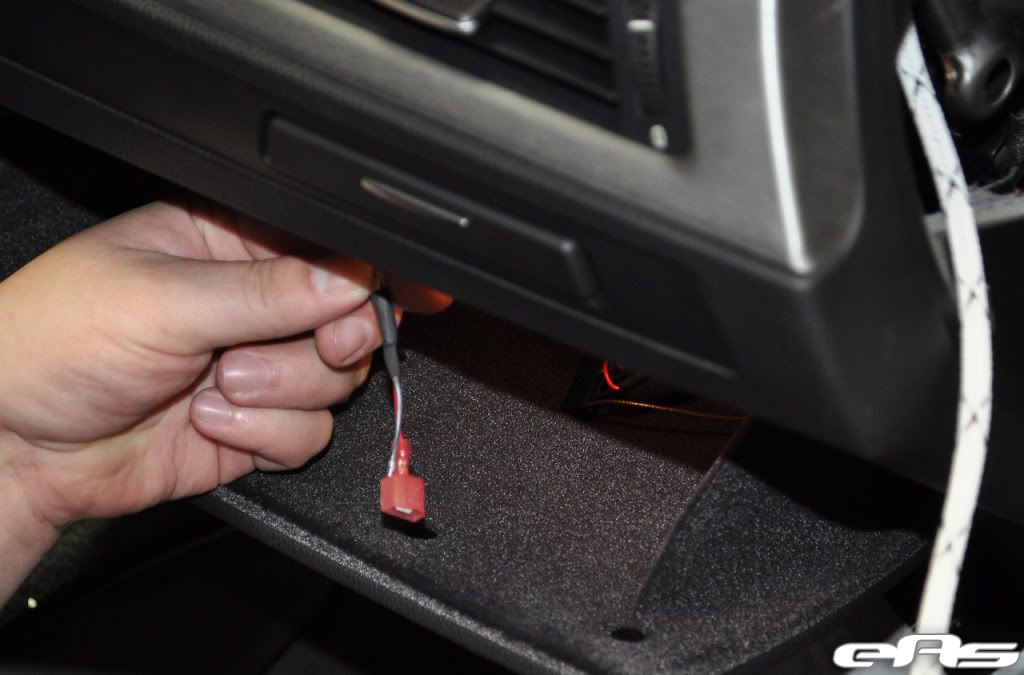
Remove fuse access panel in glove compartment
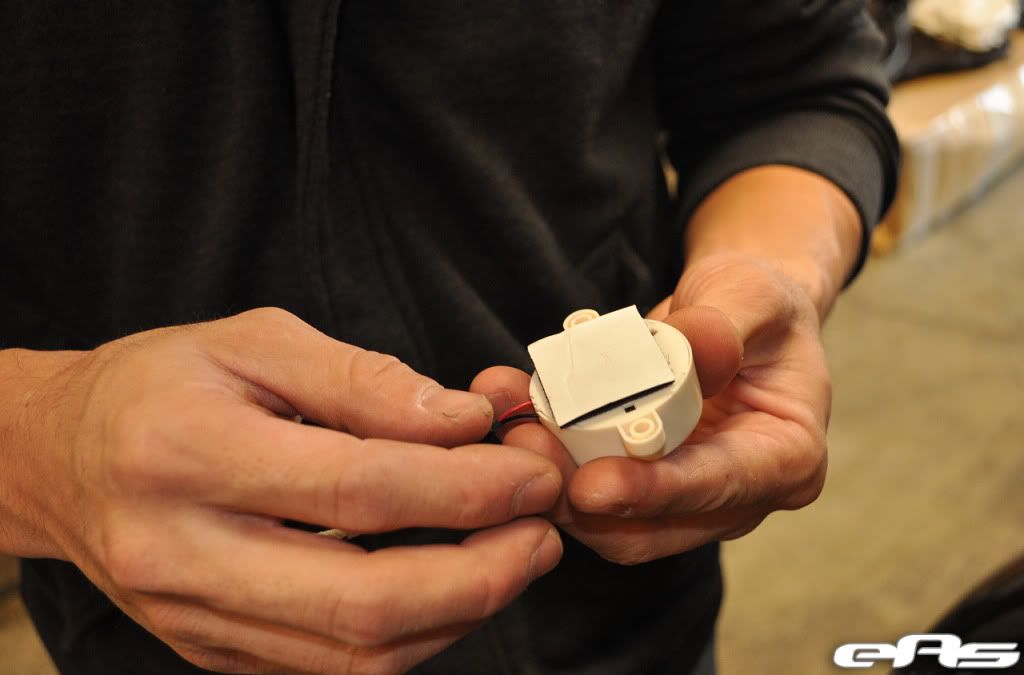
Route pieze buzzer harness from glovebox to bottom side of floor panel and prepare for routing to engine area
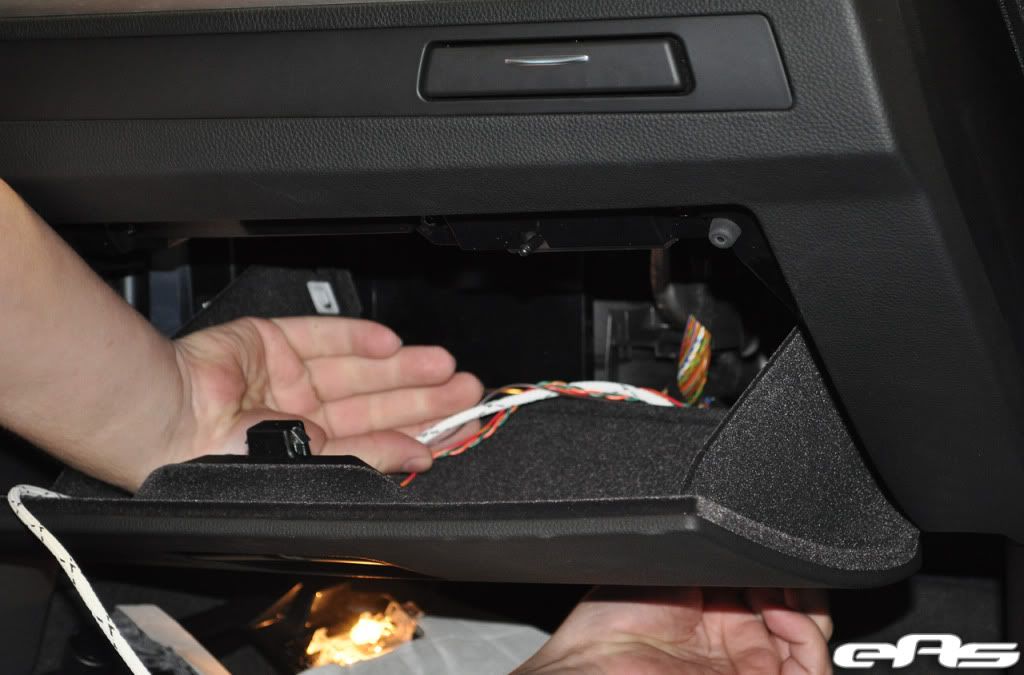
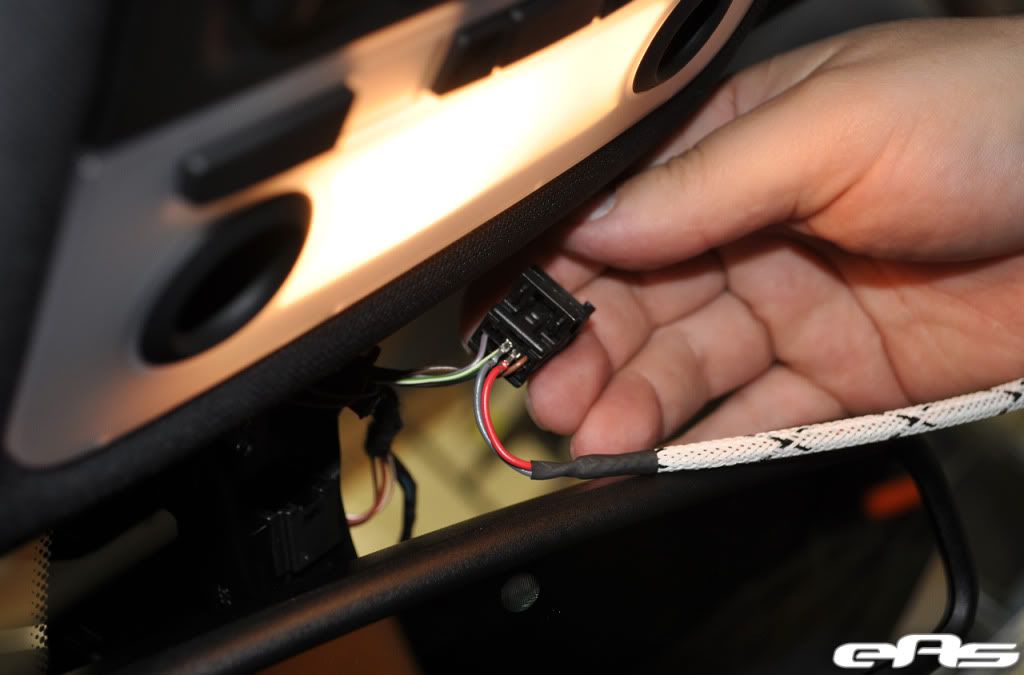
Grab connector (2-pin) from underside of glovebox
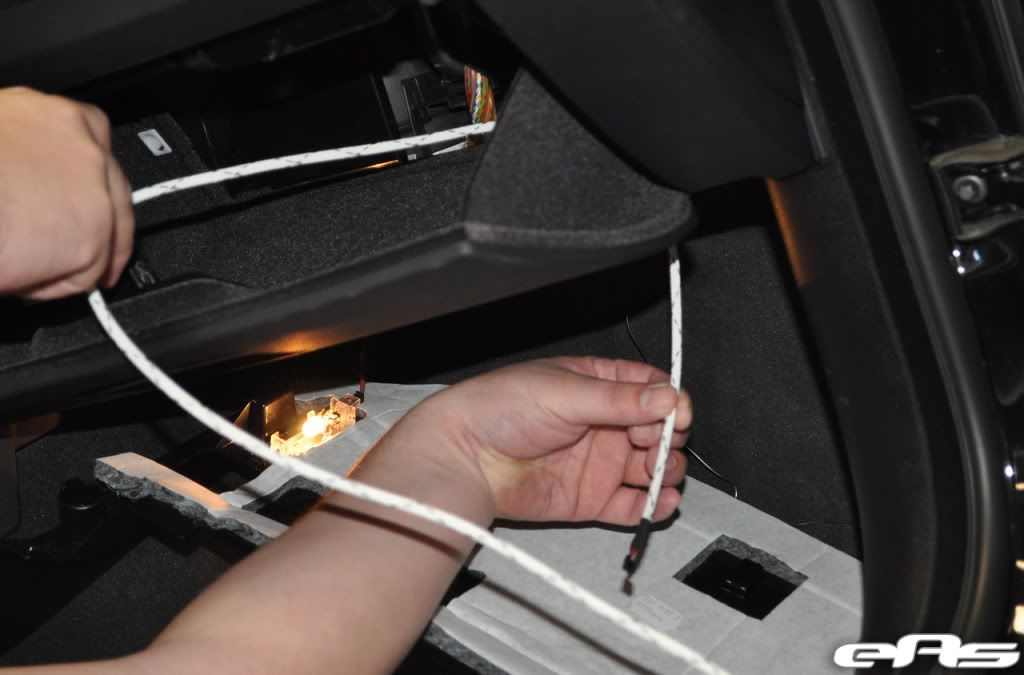
Using electrical tape, secure wire to the bailing wire routed earlier securely
Secured connector
From engine side, slowly pull on wire until connector appears on engine side, leaving enough slack in the cabin area to plug the remoteKEY module into
Using supplied velcro, apply to piezo buzzer
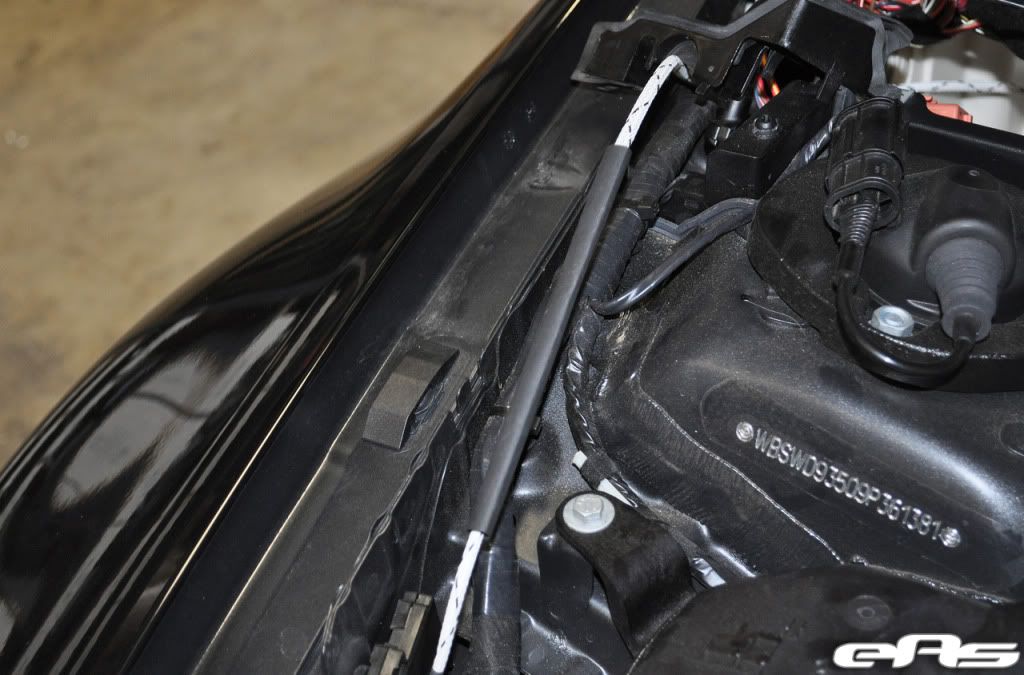
Secure piezo to clear/empty sport under hood. In this shot we used the location just below the negative remote terminal
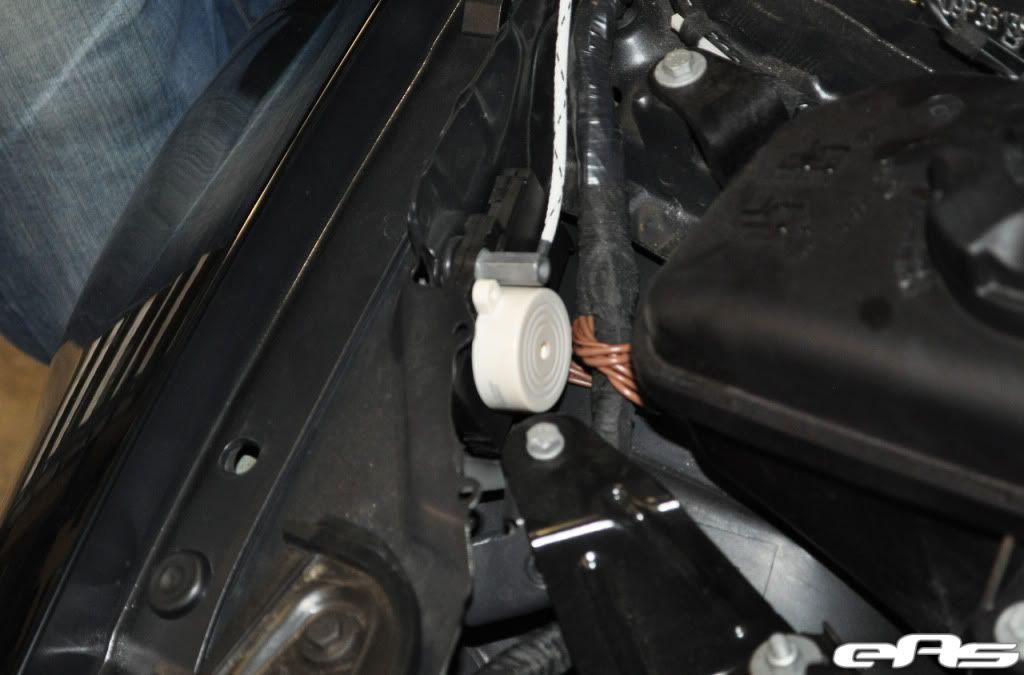
Route cable from control box underneath grommets to piezo buzzer
Connect 2-pin connector to piezo buzzer, making note of color matching
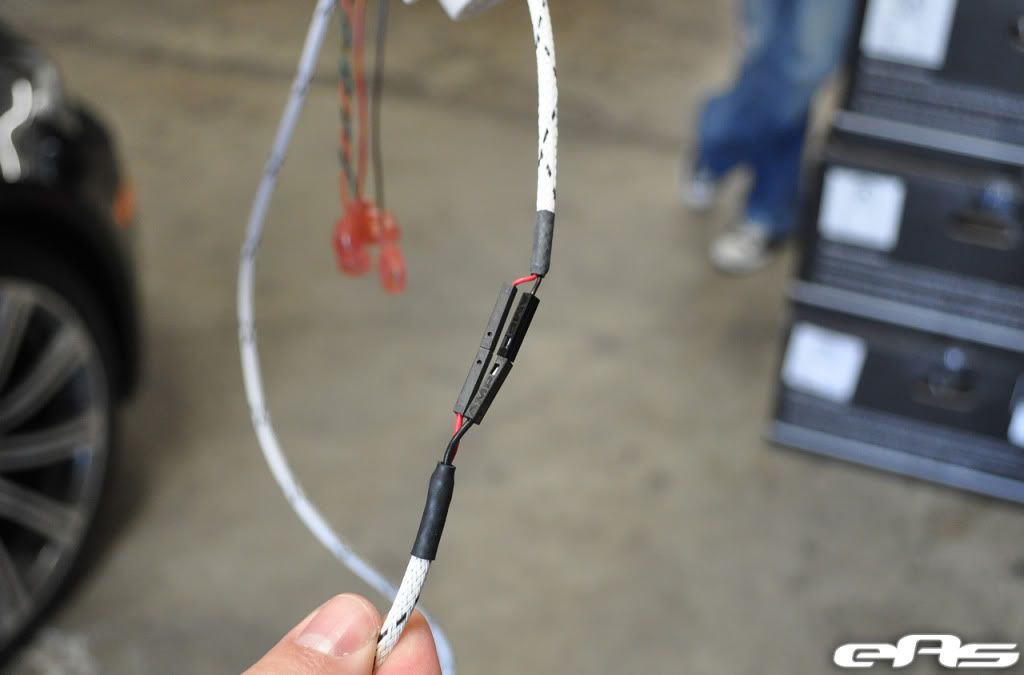
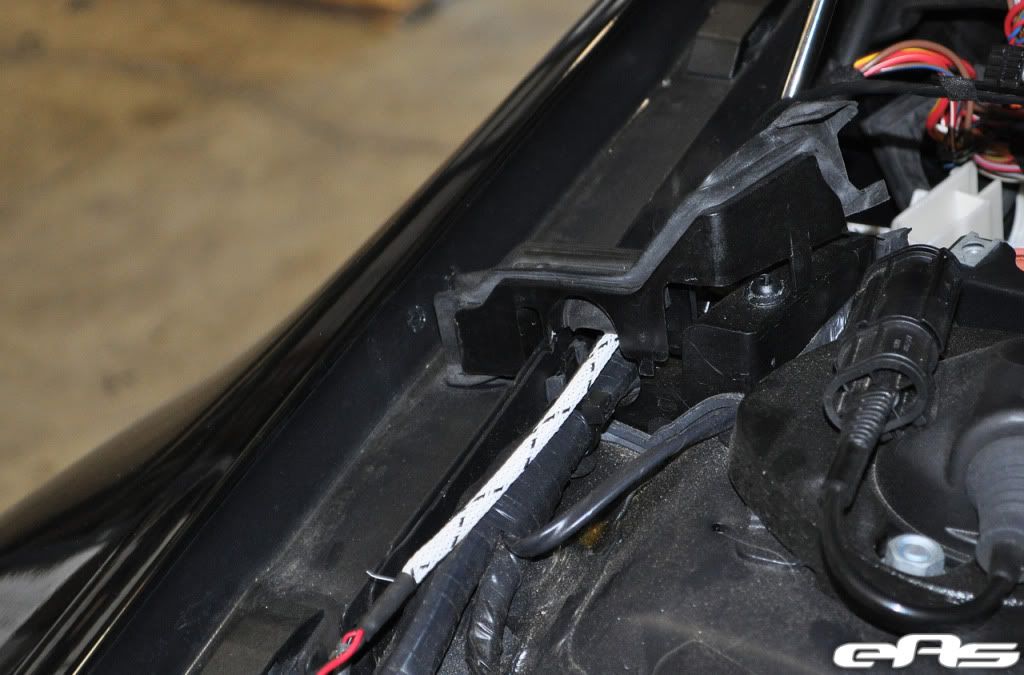
Optional: Use heatshrink tubing to lock connectors into place. Electrical/Friction tape can be used as an alternative
Apply heat to heatshrink tubing
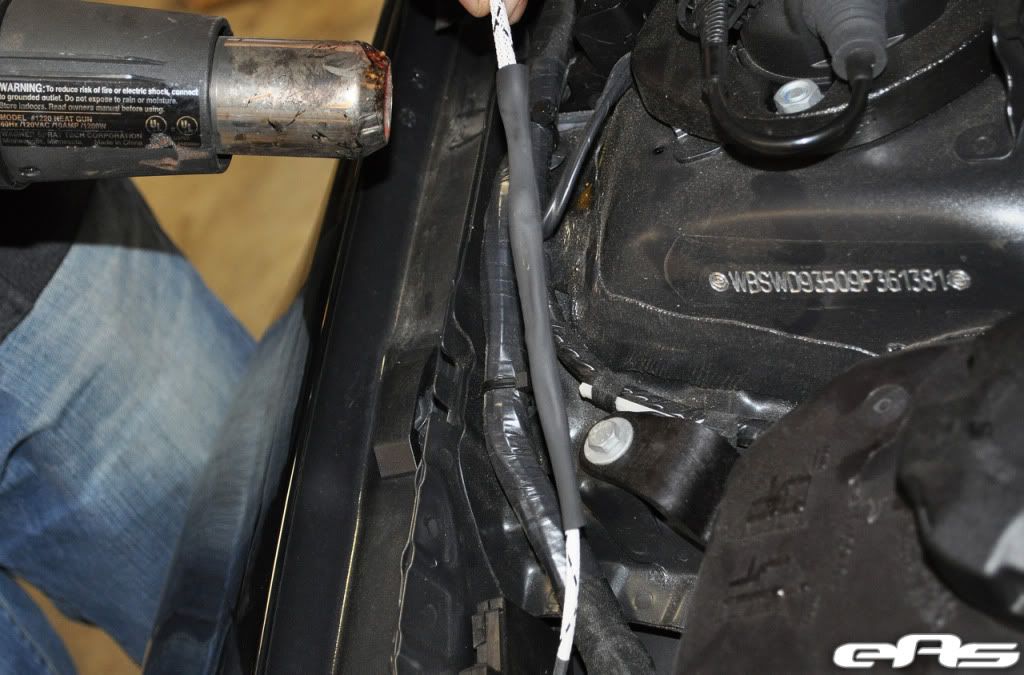
Connection tucked away under stock wiring

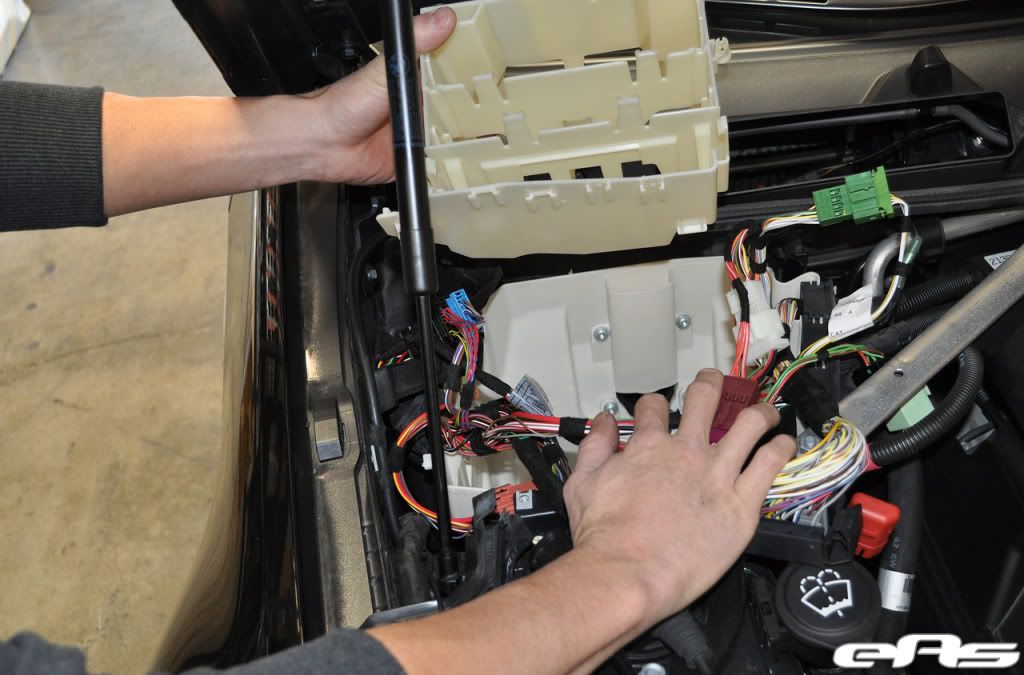
Replace DME grid into control box
Replace DME computer and return harness connectors/relays to original positions. Reconnect battery.
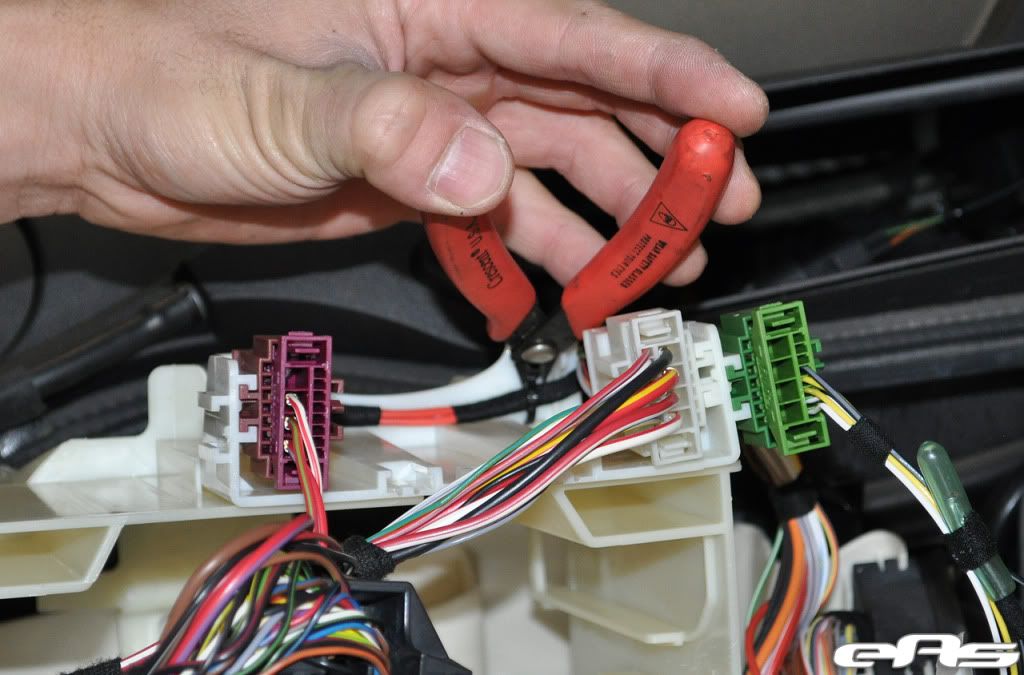
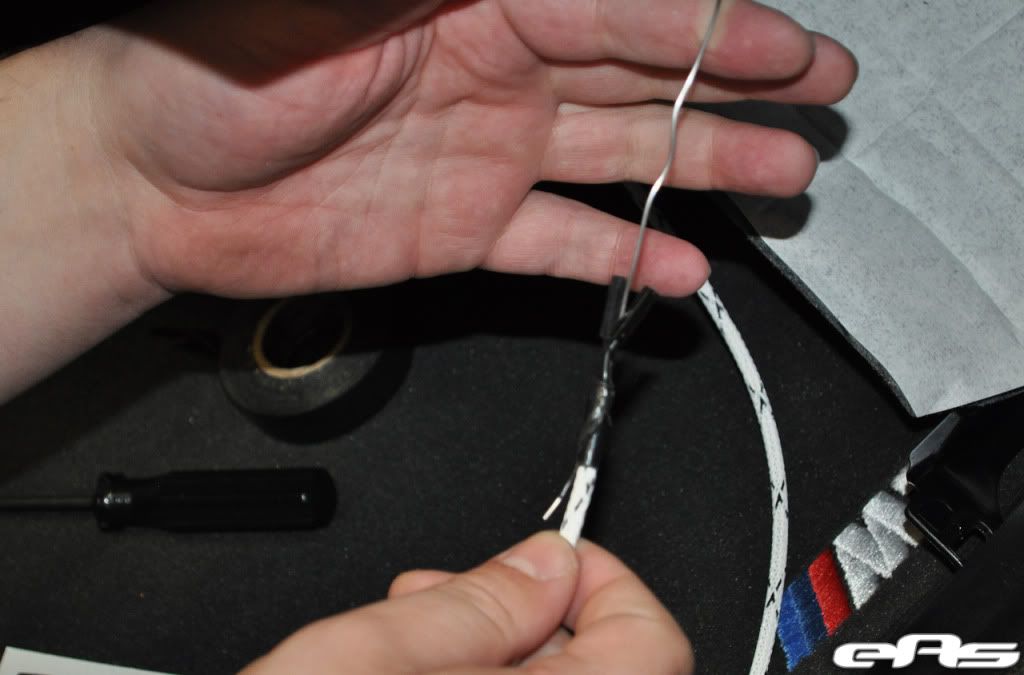
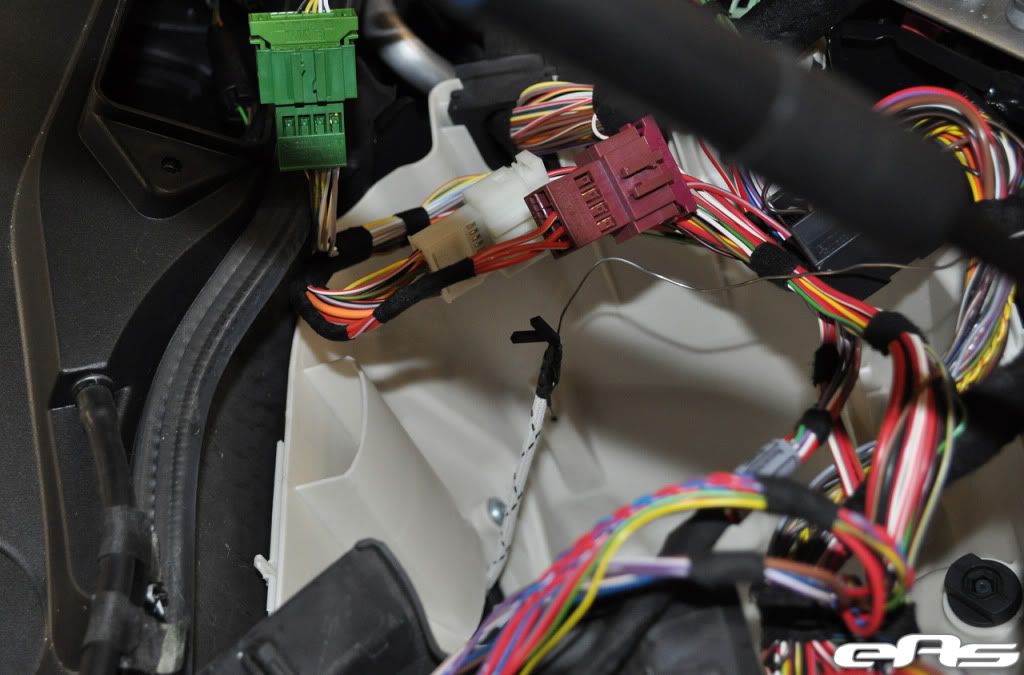
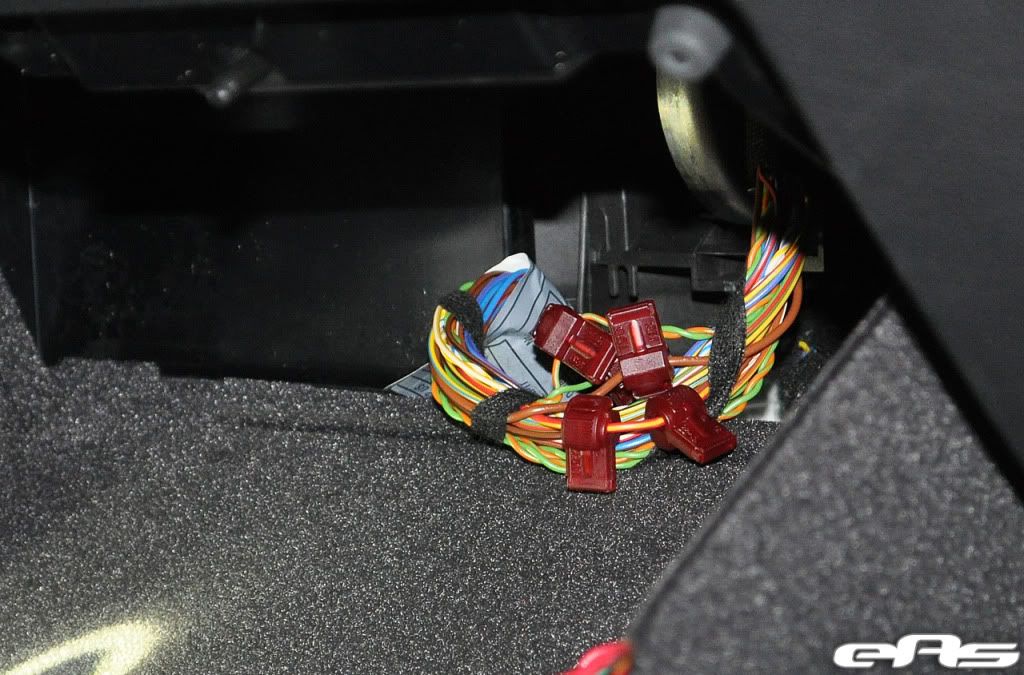
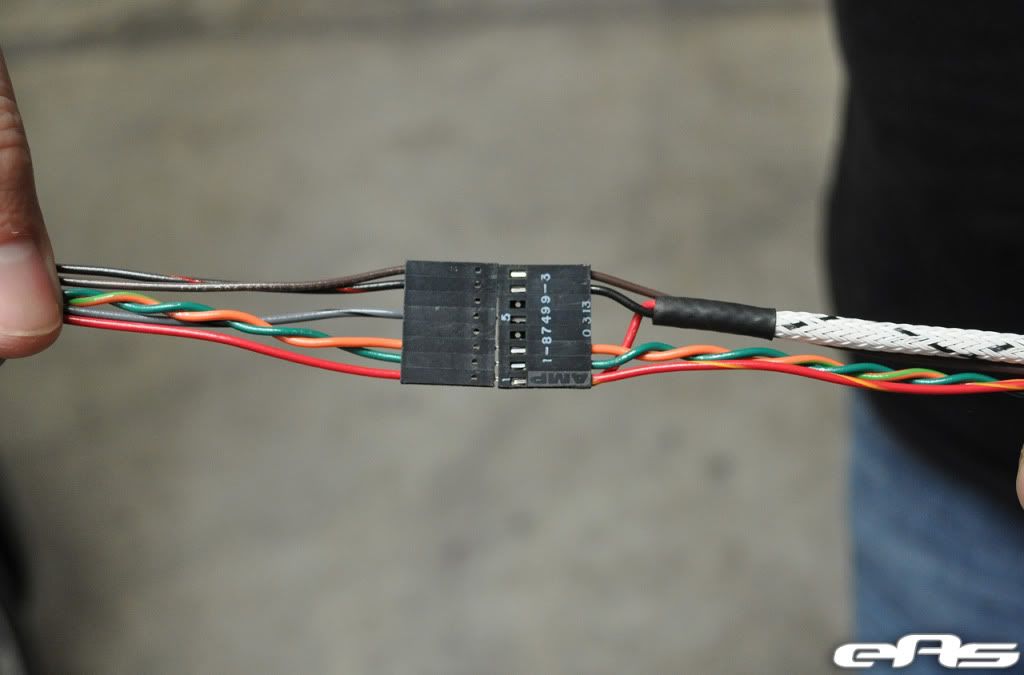
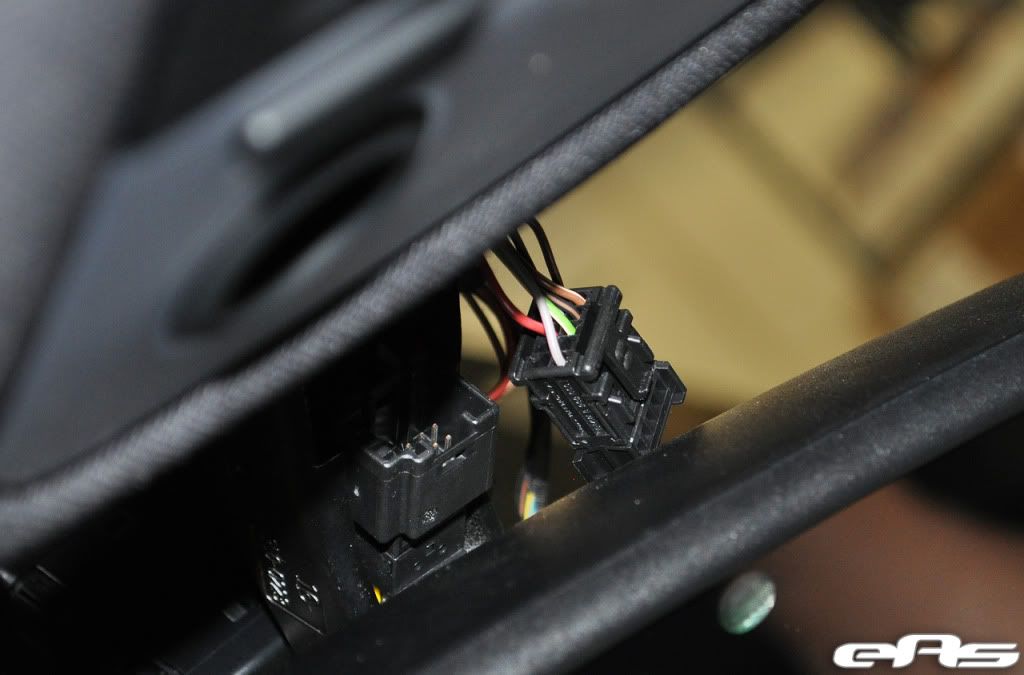
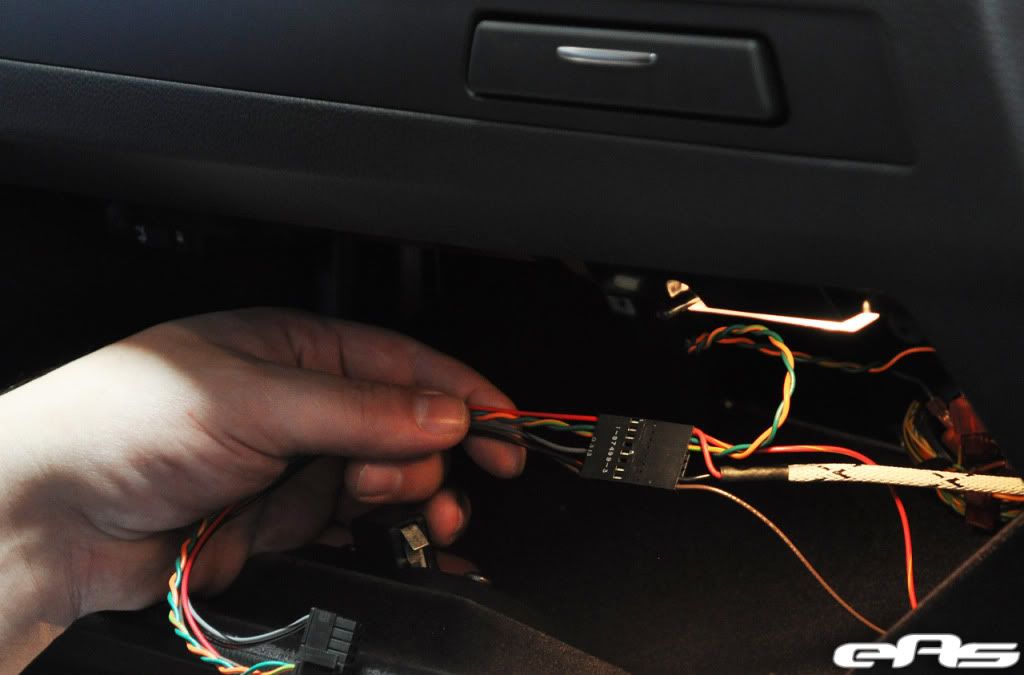
Access wiring bundle in glovebox. Connections are as follows: Red/Yellow wire - +12V power, Brown - Ground, Twisted pair Green/Orange & Green - CANbus. Pictured is pointing to Ground wire
Twisted pair Green/Orange & Green. There will be (3) Twisted pair bundles present, use only a single pair - do not cross between pairs!
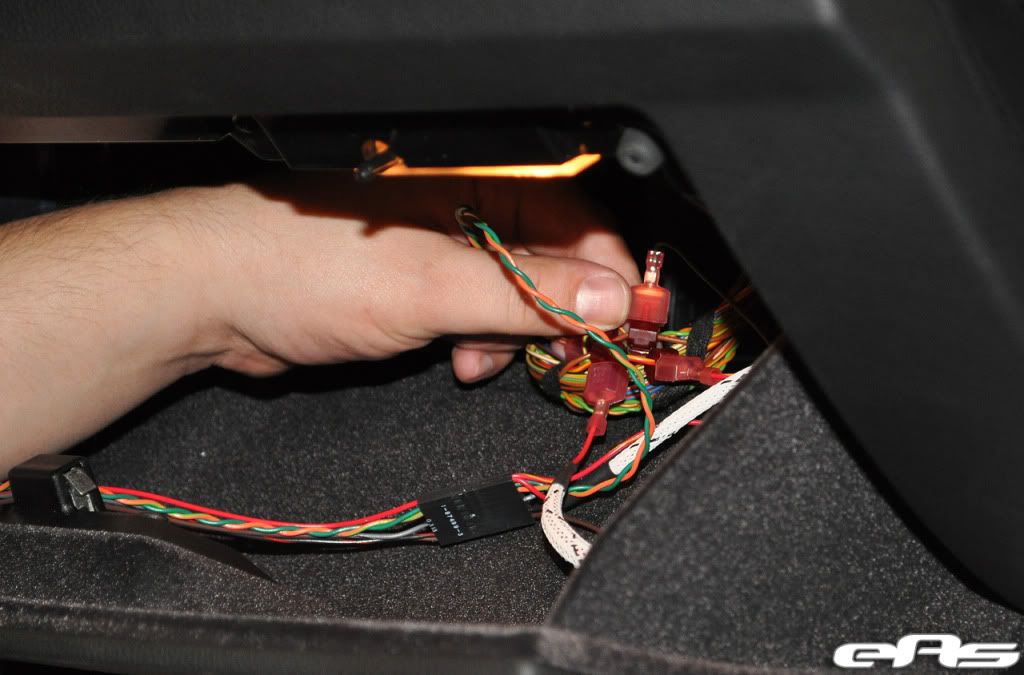
Using supplied T-Tap, fasten over Ground (Brown) wire
Using Pliers, lock T-Tap into place over Ground wire
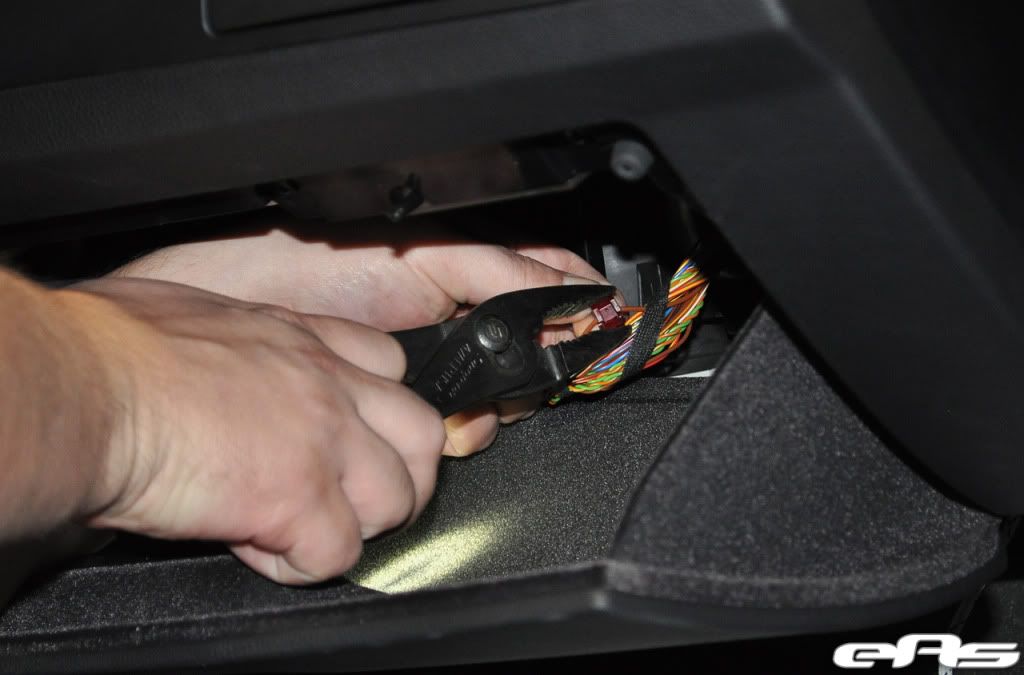
Repeat for Twisted pair Green/Orange & Green wires and Red/Yellow. Red/Yellow wire will require (2) T-Taps, a total of (5) are used in all
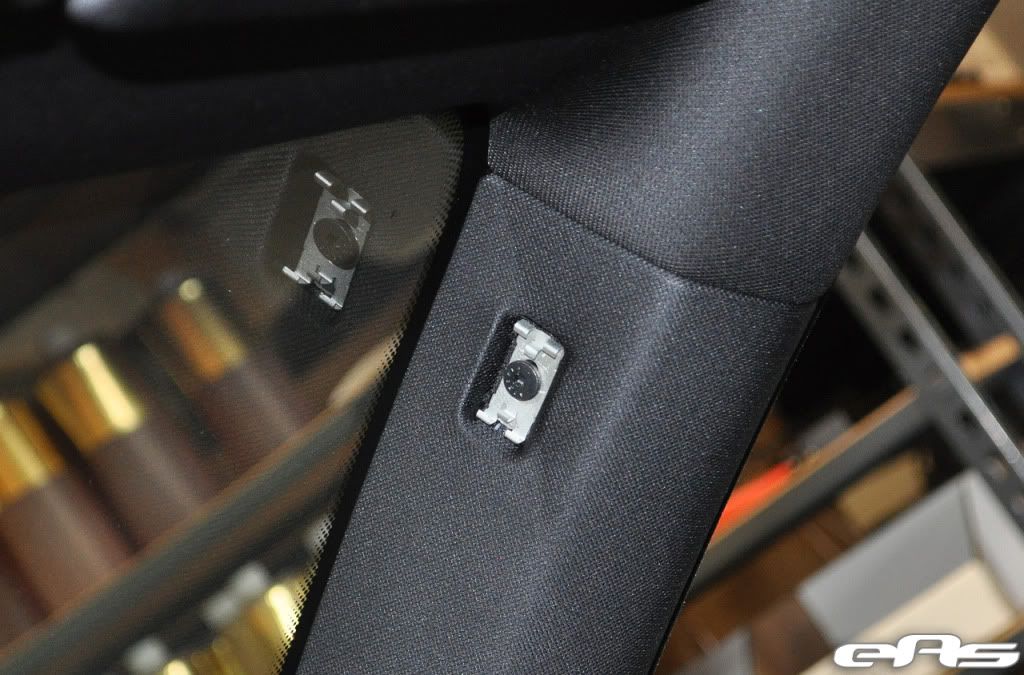
Using a pick or small screwdriver, remove AIRBAG badge from passenger side A-pillar
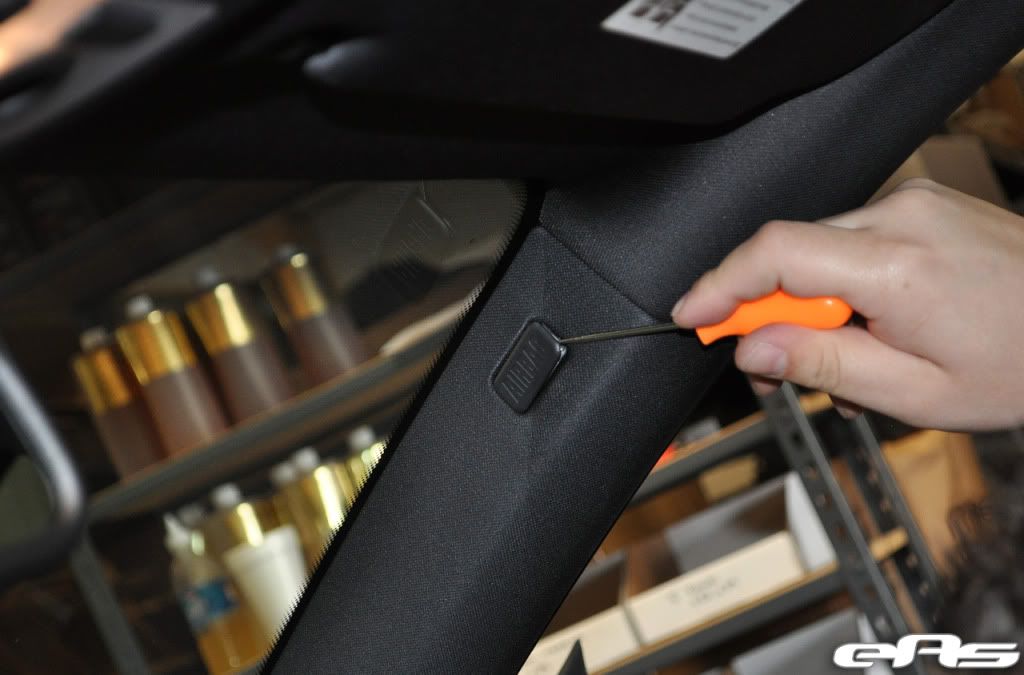
Remove torx screw
Pull door seal from perimeter of A pillar to allow easier removal
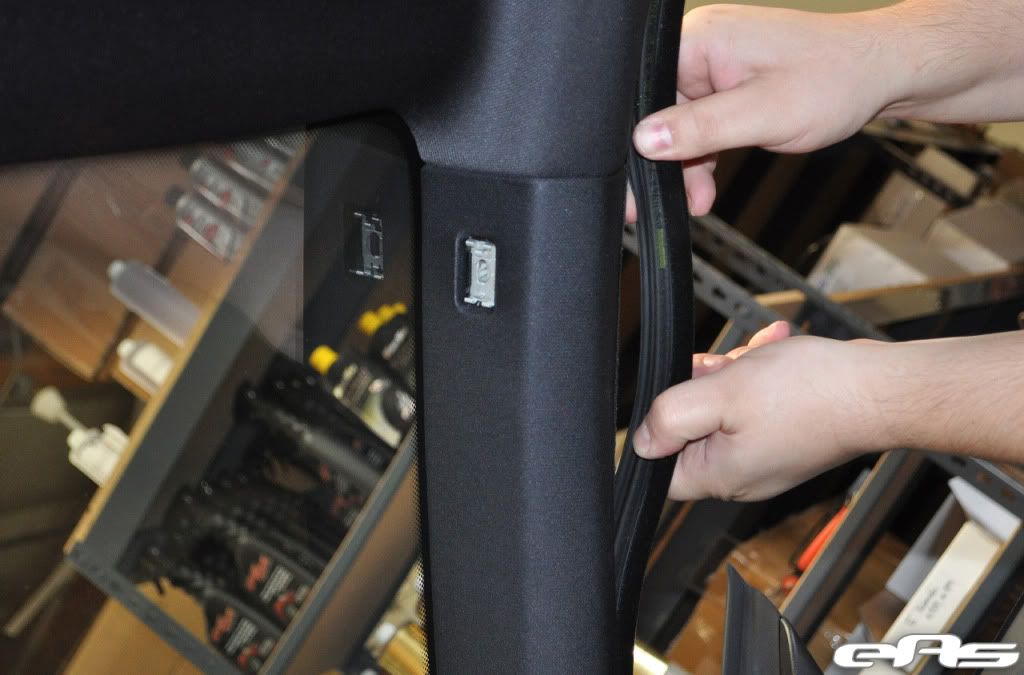
Remove A pillar cover
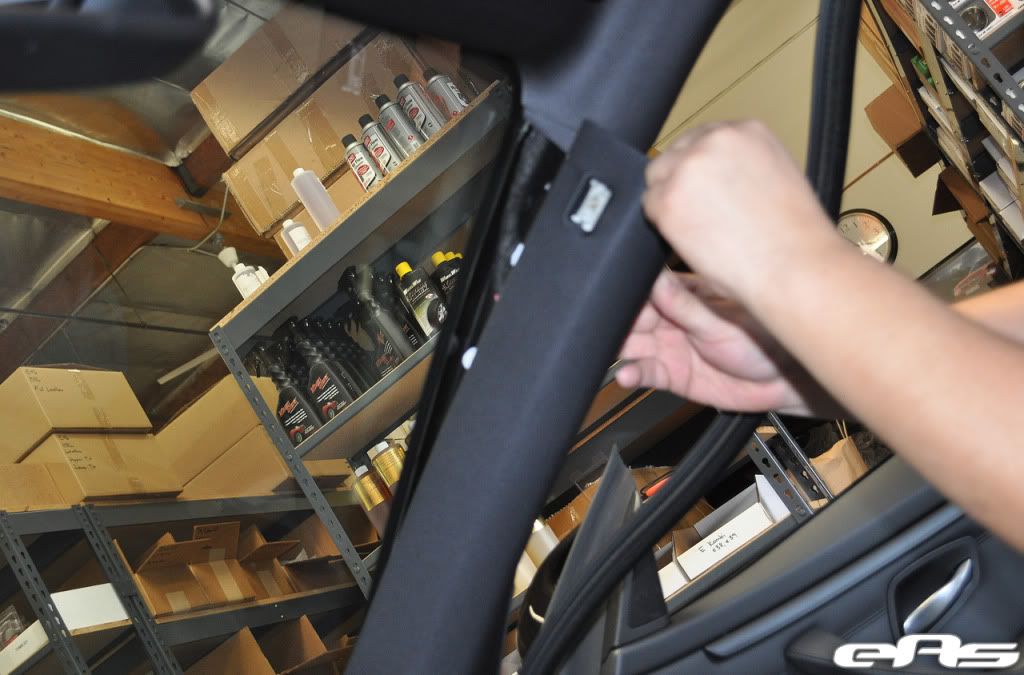
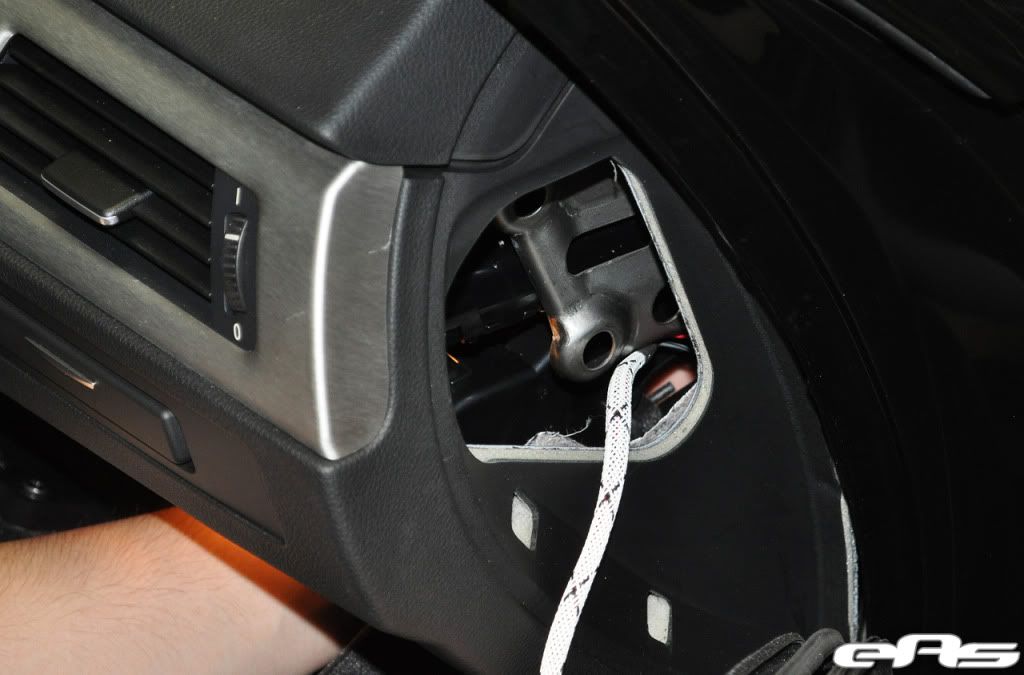
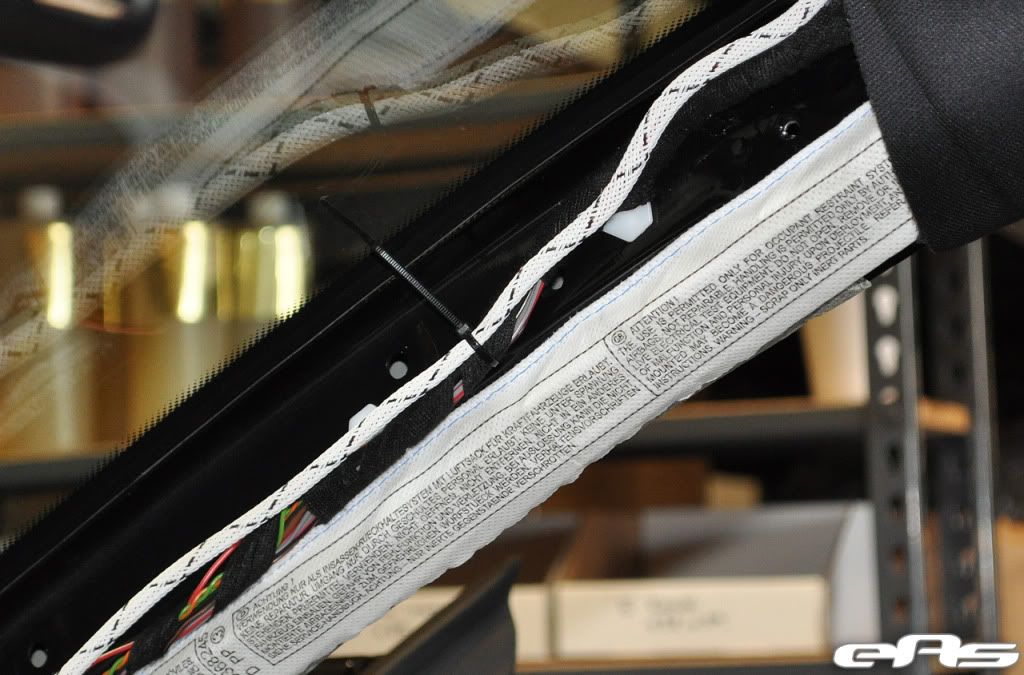
A pillar cover removed, showing airbax curtain and wiring harness
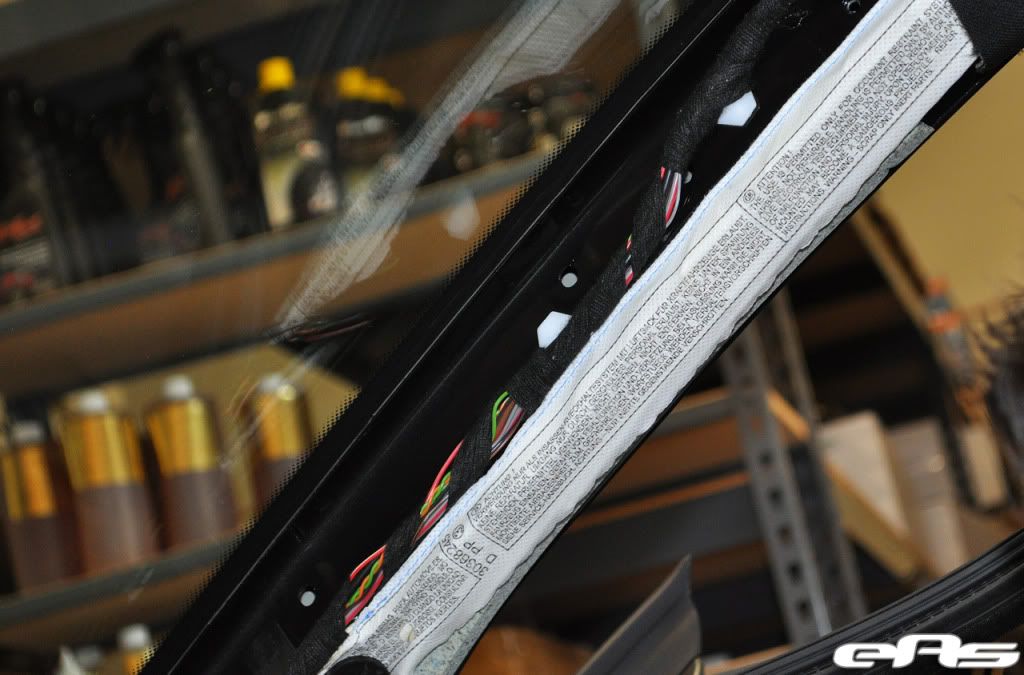
Remove access panel for wiring routing, this pops out of place
Route mirror LED harness through access panel
Pull LED mirror harness through other side (correct side has bare terminal and spade connector (pictured)
Plug spade connector to Red/Yellow wire. Grey/Black wire will insert into pin 5 of remoteKEY harness, to connect with same color on other side of connector (wire not shown in connector)
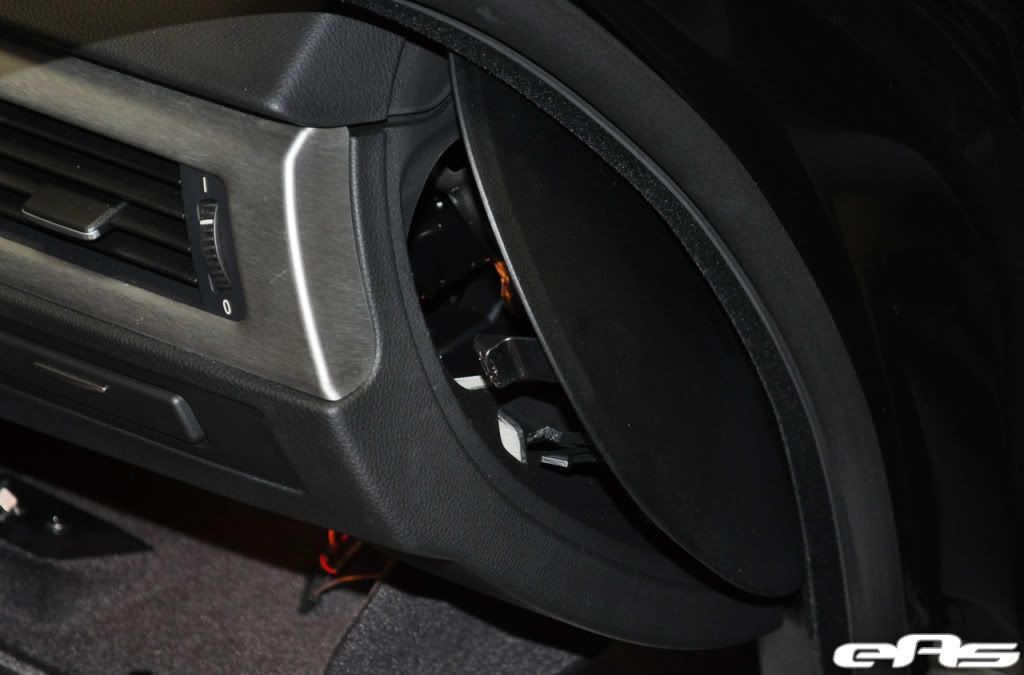
Pull harness through dash opening, preparing to route towards mirror
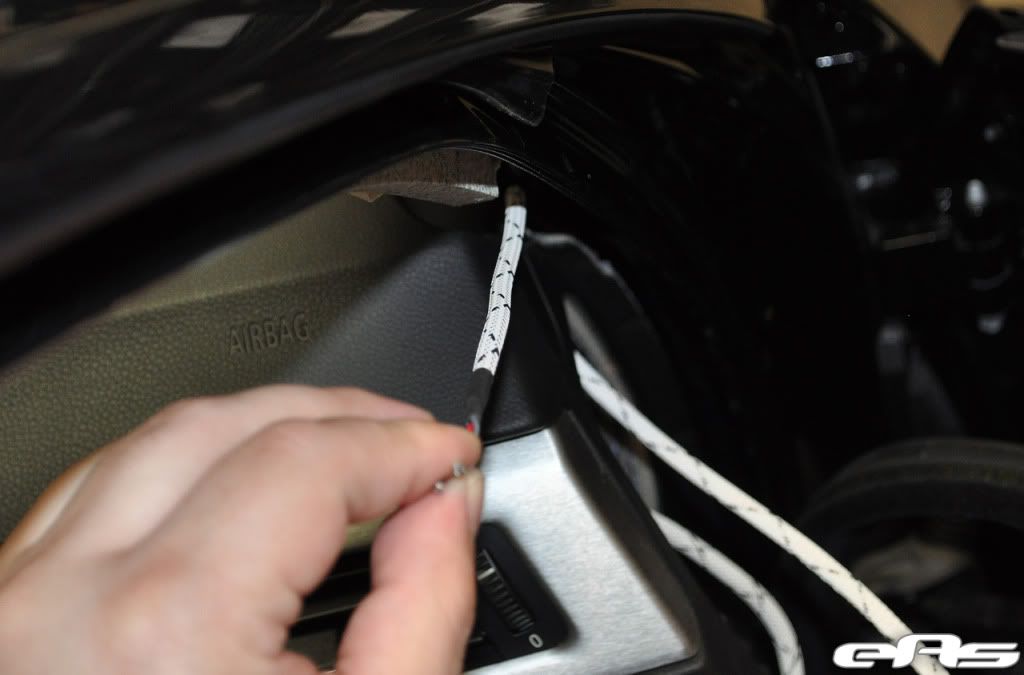
Remove plastic mirror wiring shroud
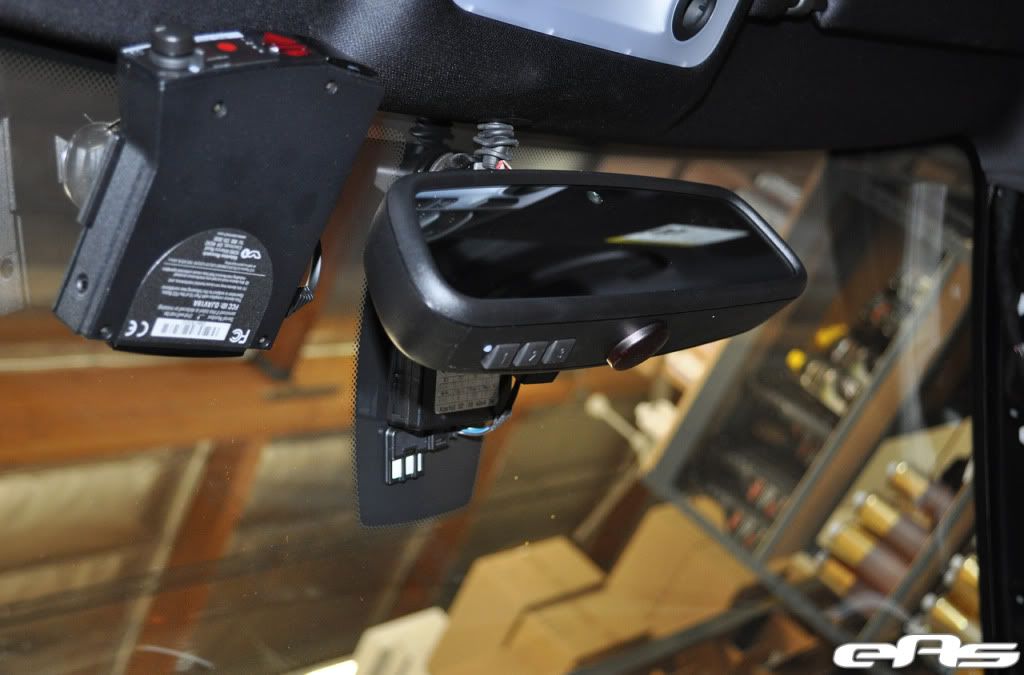
Access mirror connector and remove from disconnect from BMW side
3/09+ Production Date: Insert red wire of LED harness into PIN8 of mirror connector, Grey/Black wire into PIN9.
2006-2/09 Production: Remove wires from PIN8 & PIN9 and insert red wire of LED harness into PIN8 of mirror connector, Grey/Black wire into PIN9. Connect mirror plug housings back together
Tuck LED wiring harness underneath headliner routing back to glove compartment
Plug remoteKEY harness into LED mirror harness, note colors are lined up correctly
Plug remaining spade connectors into harness
Connect remoteKEY harness. Blinking LED will signify CAN activity verifying a proper install
Secure LED mirror harness with zip ties, taking care not to impede curtain airbag from deployment
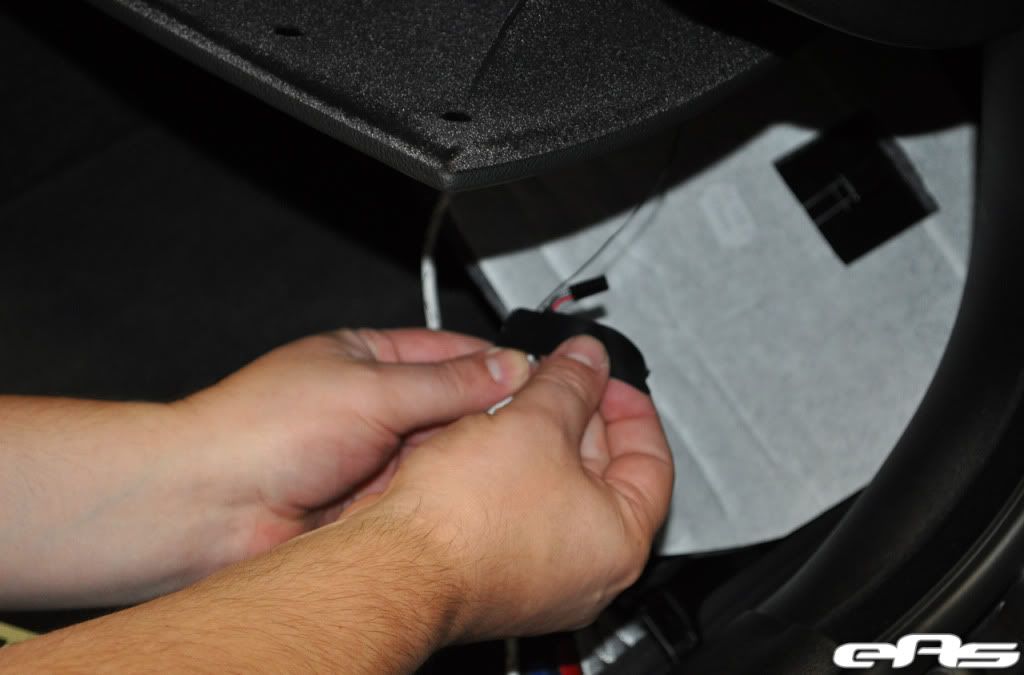
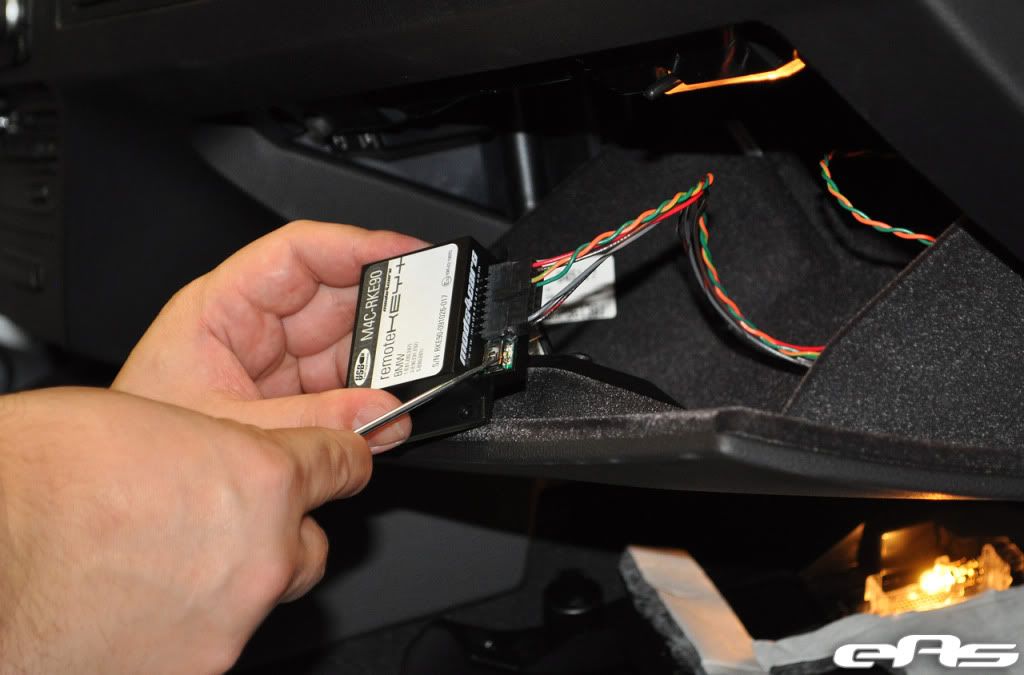
Return all trim panels to original positions and tuck remoteKEY module/harness away in glovebox.
Installation is complete!