First of all, Do this at your own risk! Although this is somewhat an easy task, you are dealing with the brakes in your car! I take no responsibility for the mistakes that you make and this is just a guide for those who want to do the work themselves.
Now, since all of that mumbo jumbo is out of the way--
You will need the following:
17mm socket (For lug nuts)
18mm socket (Front Brakes)
16mm socket (Rear Brakes)
C clamp
Brake Cleaner
CRC Disc Brake Quiet
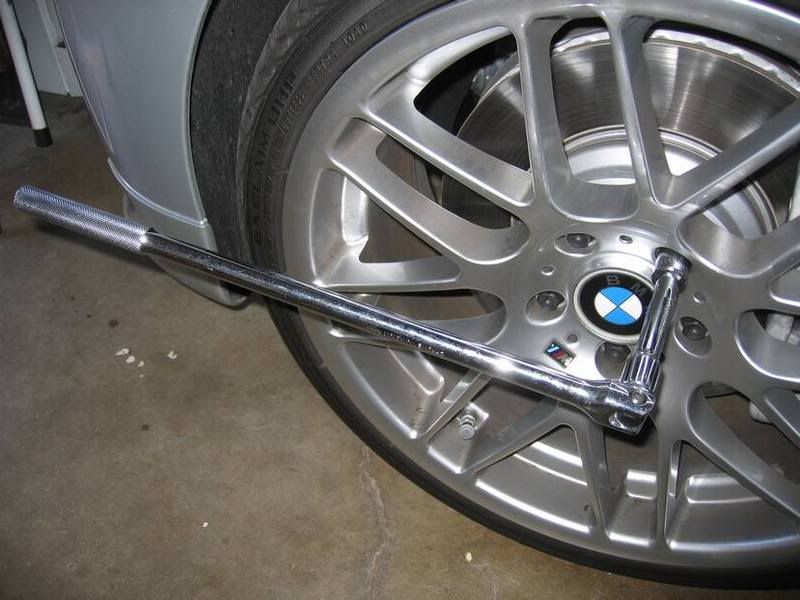
1. Take your 17mm socket and wrench and crack loose the bolts on your wheel. Just crack them loose. Do not completely loosen the bolts since your car is not jacked up. This is much better than trying to loosen the bolts while the wheel is spinning when it's up in the air.
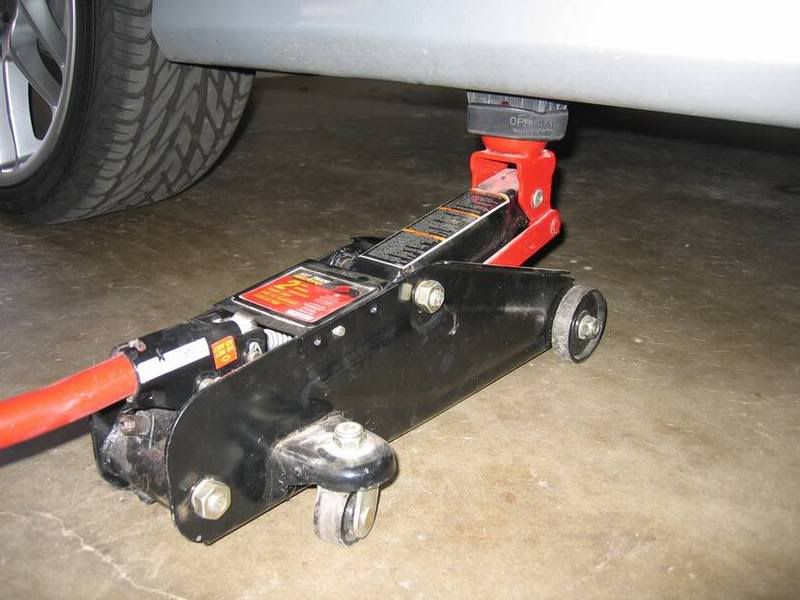
2. Once every lug is cracked loose, then jack up the car. I used a hockey puck for a spacer in between my jack and the car. Support the car with jack stands.
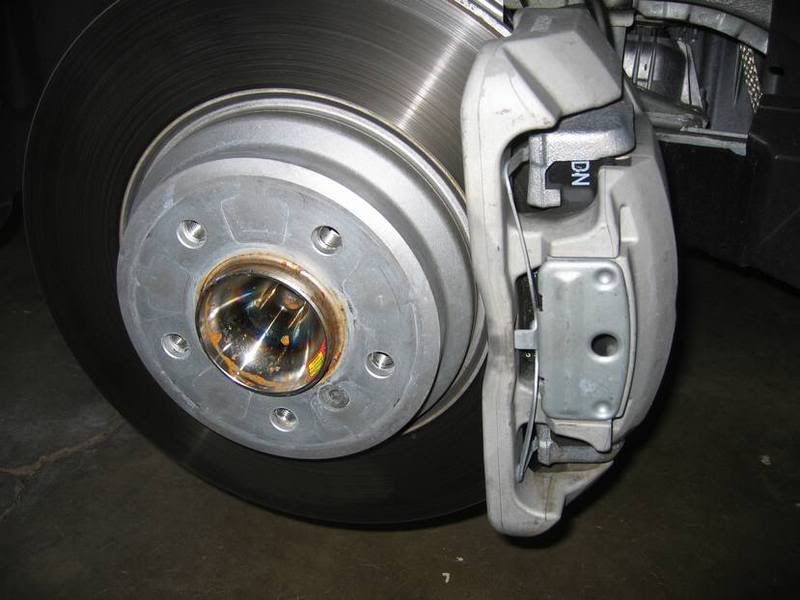
3. Once the wheel is off then it will look like this.
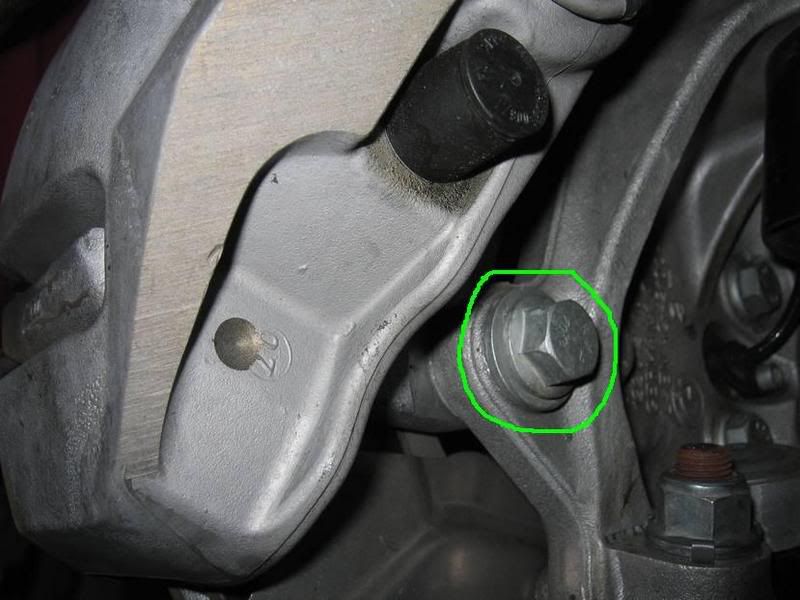
4. Find the two 18mm bolts (16mm for the rear) in the inner side of the caliper. There is one at the bottom of the caliper and one at the top. In this picture you can only see the bottom bolt, but it looks the same as the bolt on the top.
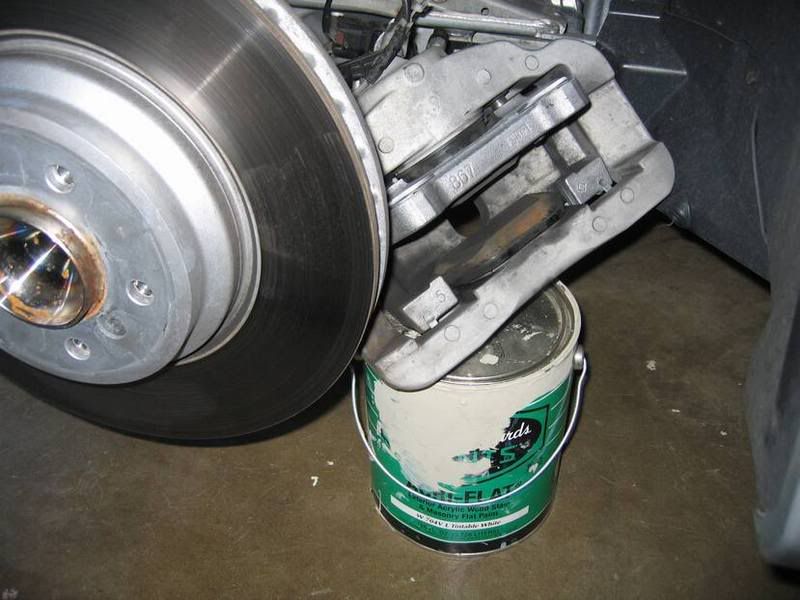
5. Before taking these bolts off, find a stand of some sort. I've always used a gallon paint can in the past since it's the perfect height for the caliper to rest on while changing the pads. So take the caliper off of the rotor and rest it on your stand.
6. Find the brake pad sensor. There is only one sensor in the front and one in the back. My sensors were on the driver's side front wheel and the passenger's side rear wheel. Take off this sensor by pulling it straight out. Sometimes the metal clip will stay on the OEM pad but this can easily be taken off once the pad has been changed.
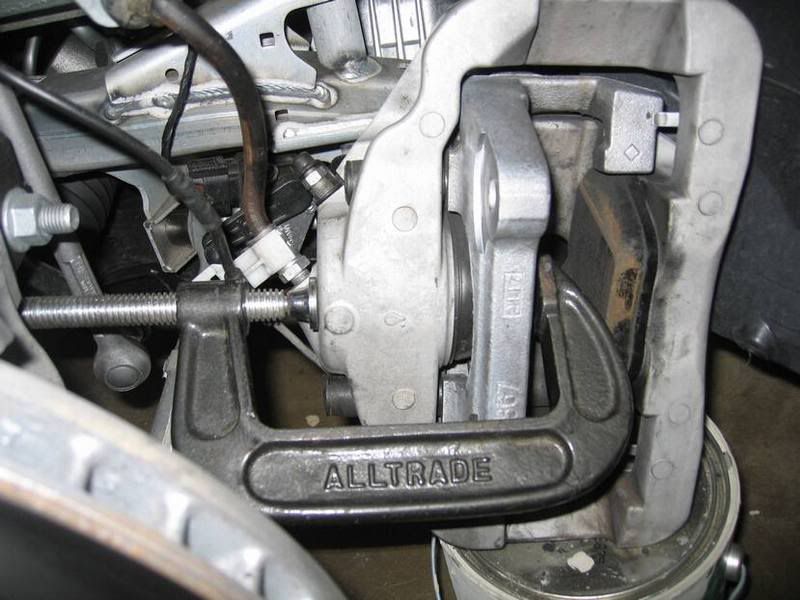
7. While your old pads are still in place, Get your C clamp and put one end on the inner pad and the other on the outside of the caliper. Tighten the C clamp to put the piston of the caliper back to the original position creating a bigger space for the new pads. DO NOT OVER TIGHTEN! YOU WILL FEEL WHEN THE PISTON WON'T BE ABLE TO TRAVEL ANY MORE! This is very important to do especially for very worn pads. The more the pads wear the longer the piston needs to travel. Keep an eye on the fluid in the brake fluid reservoir. The C clamp will be pushing the fluid back into the reservoir making the reservoir fill up more so make sure it doesn’t overflow.
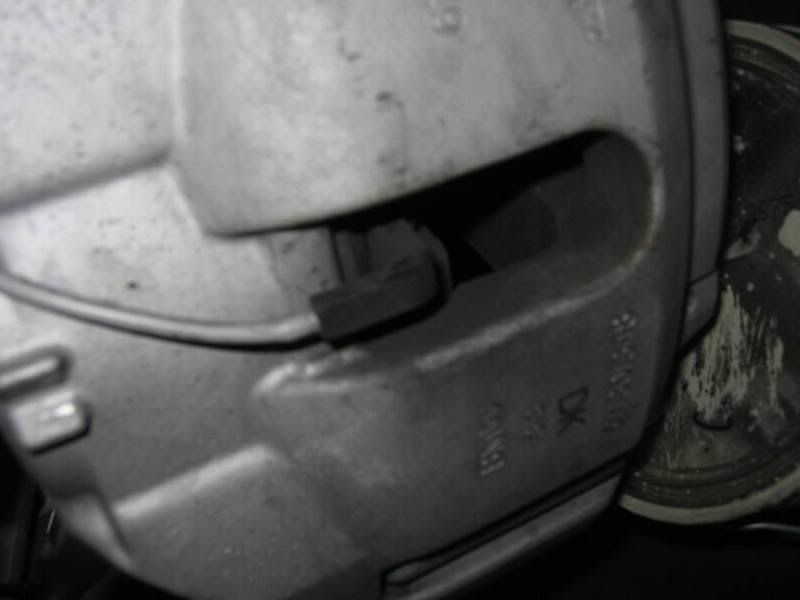
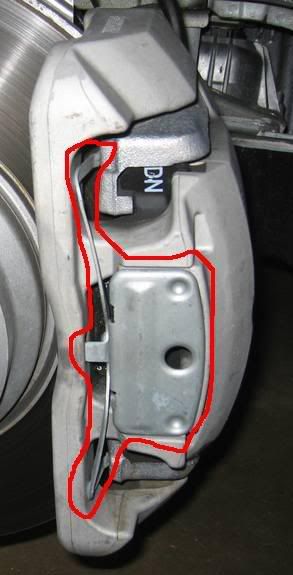
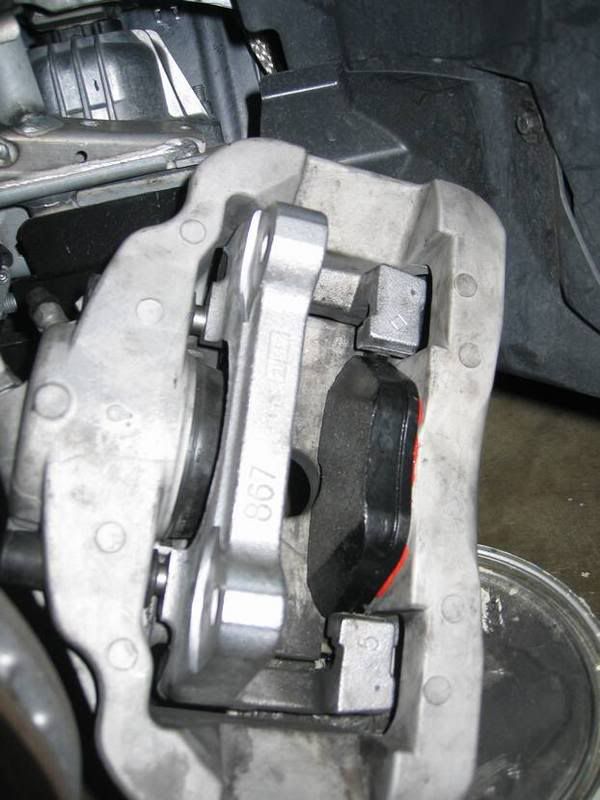
8. Once the C clamp won't tighten any more take out the old pads. There is a clip also that needs to come out to make the installation of the new pads easier. The clips is circled in the picture here.
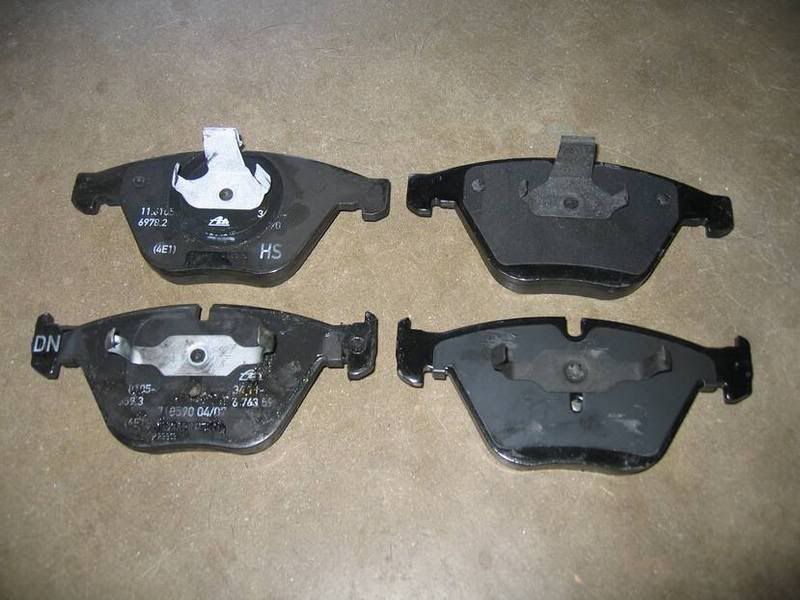
9. Make sure your new pads have the same characteristics as the older pads--same shape, same size, springs, etc.
10. Apply Brake cleaner to all parts of the caliper that makes direct contact to the pad.
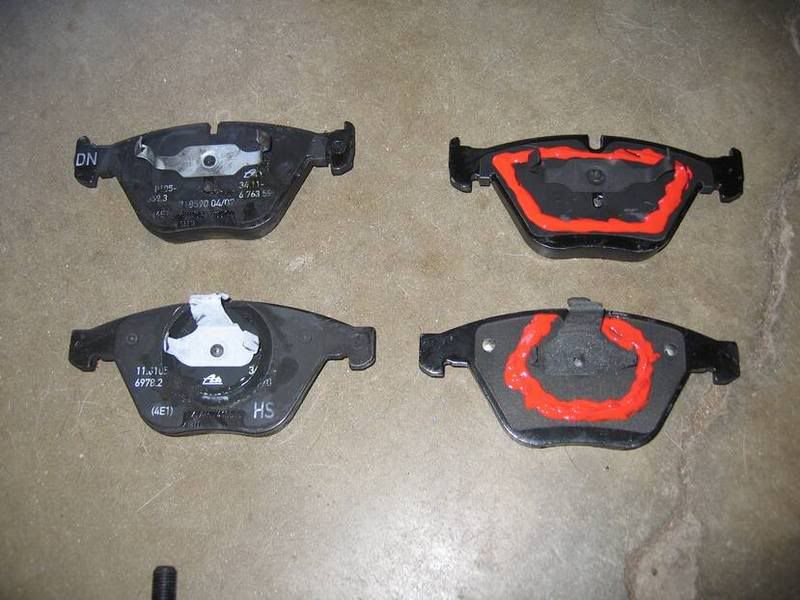
11. Although the pads have their own "anti squeal" backing, I like to use the CRC Disc Brake Quiet to make sure there is a really good contact between the pad and caliper. I put this wherever the caliper touches the pad. Don't freak out about the orange. It will turn black in no time. The dirt will stick to it and turn black.

12. Pop the new pads back into place making sure that the springs (on the pad) are all where they should be. Make sure the springs aren't crimped or bent backwards. When the pad is in place, you should feel a nice pop to let you know that the pads are in the correct position. Do this with both sides.
Don't forget to re-install the brake sensor!
13. Now slip the caliper over the rotor and reinstall the bolts just to hold the caliper in place. This should easily fit over the caliper since you used the C clamp to make the space bigger. Do not tighten the bolts yet.
14. Re-attach the clip to look like the picture. It might take a couple tries to get it in place, but when it is in place you will know it. The clip shouldn't move or be loose at all if it is installed directly.
15. Tighten the two caliper bolts, install the tire, and torque the lugs down. Make sure nothing is underneath the car and lower the car.
16. Get in your car and pump the brakes. The first push will seem very light. This is because you are pushing the pads all the way to the rotor. You are positioning the pads on the rotor. I do this after every caliper, but you can wait to do this once the whole job is done.
17. Once you have done all steps 1-16. It is now time to bed in your brakes.
Follow these instructions here.
http://www.zeckhausen.com/bedding_in_brakes.htm
Follow these instructions if installing Cool Carbon Pads:
http://www.coolcarbonperformance.com/bedding.html
Now have a great time with your new brakes!
