Its been a little while, but I got a lot of work done over the weekend....
the elephant in the trailer...that rusted out area under the tail lights and trunk, was screaming "fix me" so it was time to start learning how to form sheet metal...well "learn" is subjective...but I did manage to learn alot about how sheet metal works when you try to bend it and its limitations, ect....
I also did not cut myself on any new metal!...that is a new miracle.
Now, before any of you say, "Why didnt you just replace the panel with a new one?"....well...two reasons...I need to get good at this stuff....and this was a challenge....and then there was the budget.....There is very little left in that department, so there we are. (that just sounded like 3 reasons, but who's counting?)
I first cut out more of the rear section and cleaned up any interior rust as best I could with grinders, files, sandpaper, wire brushes, ect....(I was trying to keep debris out of the lower section of those two panels where they disappear out of sight and then come together with a long series of welds and folded seams.....I figure the debris will just accelerate any rusting that might occur there)
Once that was done, I started figuring out how to piece together new metal to fill the voids. It went better than expected...but slow...very slow...learning and doing are two different things...but, they say you learn BY doing..who knows.
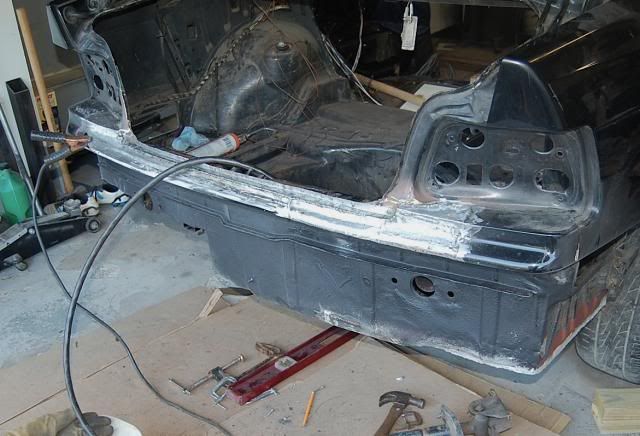
I dont have any pics of the pieces going in...I was in production mode...but here are some pics as it is now. I still have a lot of finishing to do, but the metal is close to the right shape for the most part...
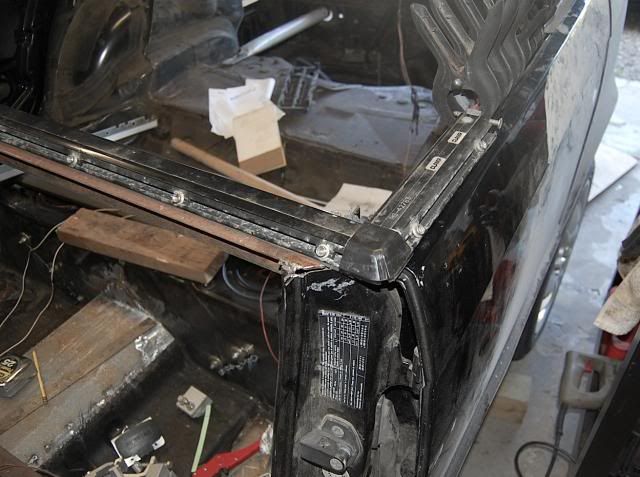
The trunk seals and latches and the metal along the drip edge follows the line of the bottom of the trunk......Im happy with that....

this side is still a bit rough, but it shows some of the process...I wish every weld was smooth and flat, and I wish all my weld lines were actually straight, or close to straight, but....that said, weld penetration is MUCH better...the welds are strong and now if I make a bad weld it is because I hang on too long in one area and burn through...(trust me, I would rather have that than a cold weld that pops apart!)
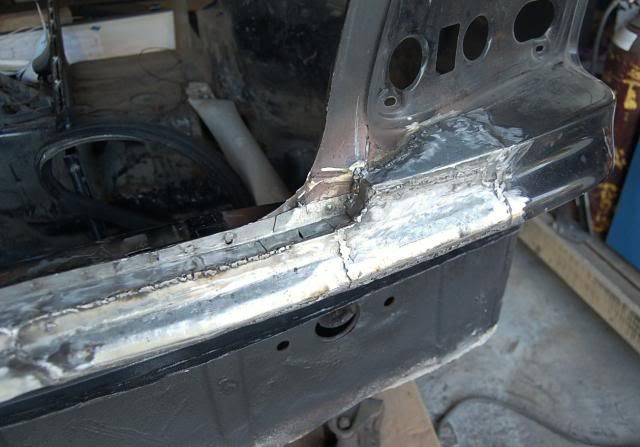
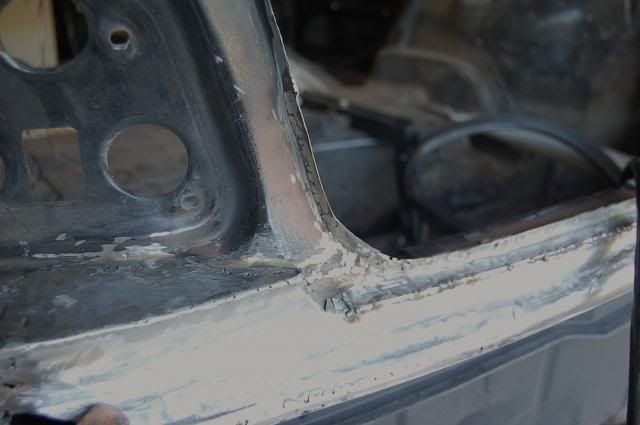
I was trying to show the weatherstripping lip that I rebuilt here in the corner...it bends and blends on its way down to the bottom edge which runs all the way along the width of the trunk....in many areas I had to rebuild both edges...the one from the inner part of the trunk, and the new one....(no wonder this took so long!)
The only hole left!....and now that looks easy!....
I started here. that top piece was the first one welded in. plug welded and then seam welded...it should stay put!...heh, heh..
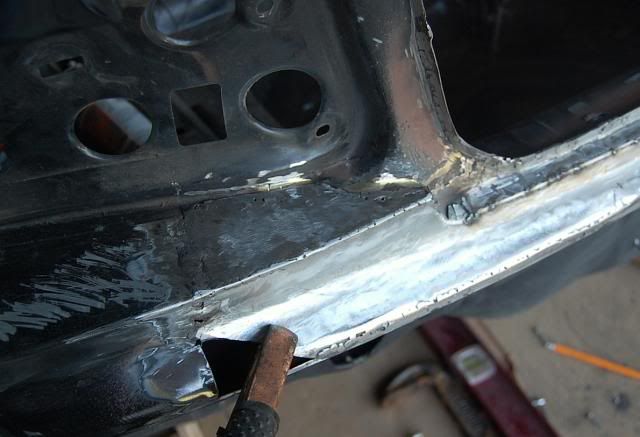
A little redundant looking, but I began finishing the area behind the bumper supports...they will get wire brushed and undercoated as they are CRUSTY....but the panel looks pretty good.
Now, on to the front edge....Here is my tonneau cover's frame on the leading edge of the trailer. This will hinge right where you see it....I will have to figure out some hidden hinges for it and may or may not be able to use those 68 mustang hinges I bought....we will see...
I had to shorten the width by an inch here so it just lined up the the fold on the outside of the top of the doors. I have to bring it in another 2" over the length of the doors as these cars are streamlined and taper in towards the back. Ill be fitting the top with new snaps temporarily then getting an upholsterer to make me a nice new top this summer!...!:
Now the parcel shelf is another elephant in the trailer. it steps up quite a bit. I think I have it figured out...but how this will look in the end is up in the air!
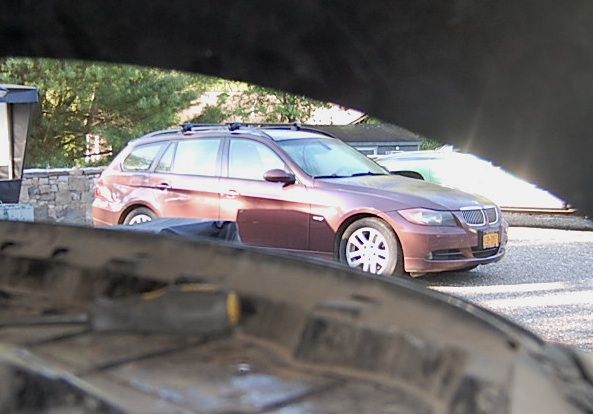
more curved metal and drip edges, and rain gutters, and a curved trailing edge on the tonneau......Here you can just make out the parcel shelf out of focus...who cares about that....look at that wagon through the raised trunk!

Door handles:...filled in...thats about it...they will open from the inside only. unless I want to get fancy and put some actuators in there that pop the doors open with a key fob!......
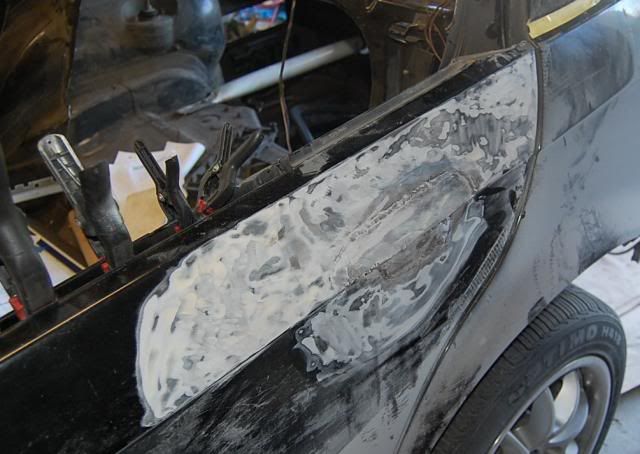
quite a bit of bondo on this side....it was still pushed in more than a 1/4 inch from a previous hit...and the body shop did not get it straight...but it worked and looked okay.....I straightened it back out from the inside with various tools and the good ole persuader hammer....
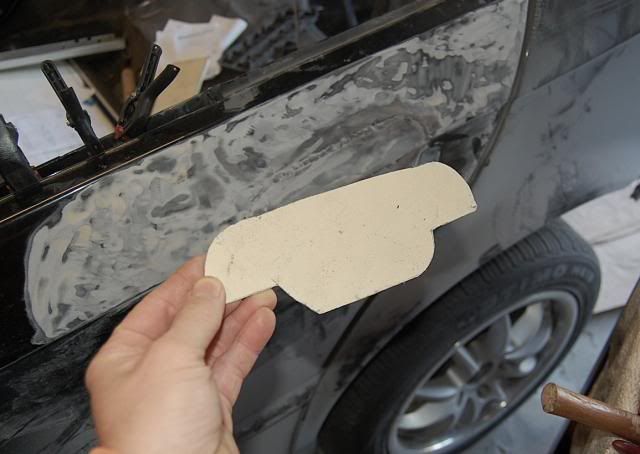
template
Whew!...thats about it for now...more work today finishing up the rear panel and getting the doors rain gutters in place, the parcel shelf cut and filled, ect....
thanks for checking in!
JP