Ok, I had a bit of a trial by fire, but I did learn a few things.
You will need a 5/32nds drill bit, preferably a cobalt one, since the brake pedal is steel. You will also need a 9/64ths (or even smaller) drill bit for the set screws used on the gas pedal and dead pedal. I also used some masking tape and a clamp. You will also need a #15 torx driver (just like a screwdriver, but with a star end). A shorter torx screwdriver is best. You will also need a pair of needle nose pliers or a small socket wrench with the correct size socket for the nut. (Don't remember which size though). Use eye protection when drilling.
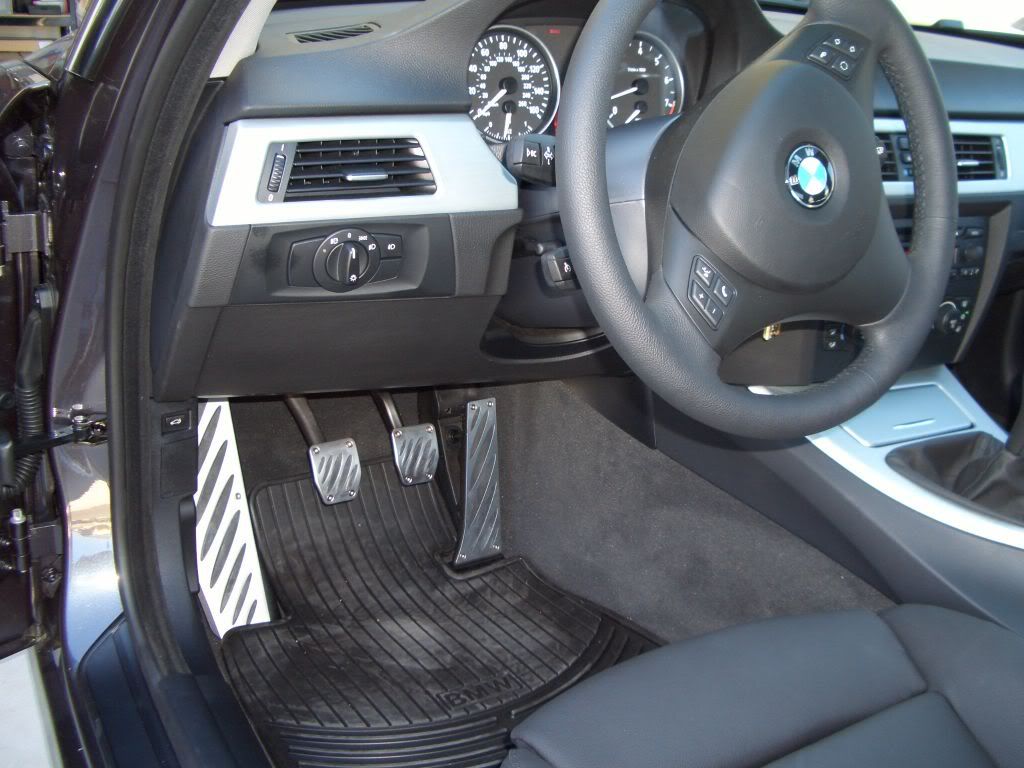
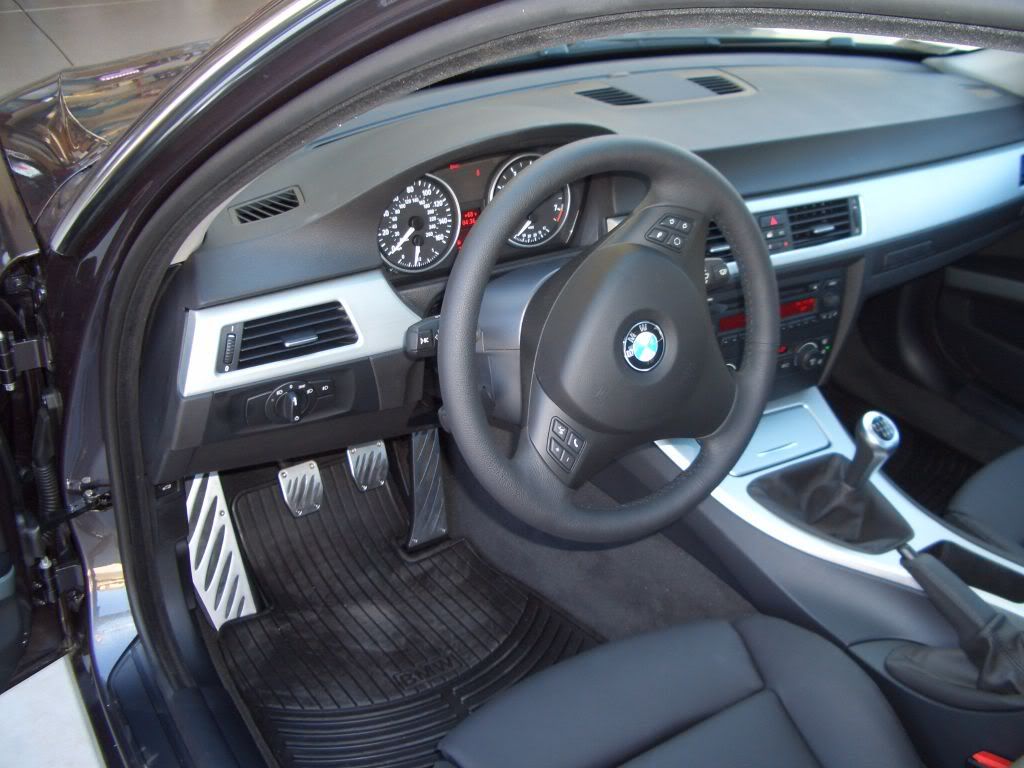
First, I removed the rubber pedal pads from the brake and clutch pedals. (There is nothing to remove from the gas pedal and dead pedal). Then I put masking tape over the pedals to mark the holes. The kit provides paper templates, but they were kind of flimsy and move around too easily. Next, I put the aluminum pedals over the existing pedals and marked the hole locations with a marker. Then I used an awl to punch starter holes in the plastic pedals. I used a soup can under the brake pedal to give me some support when tapping starter holes with the awl.
I started with the clutch pedal. After I drilled the first hole, I put a screw through the hole to hold the aluminum piece in place better while I drilled the rest of the holes. Just add a screw after each hole is drilled and this will keep the aluminum pedal in place and you will get the rest of the holes perfect. The plastic pedals are easy to drill. Since the brake pedal is steel, it's quite a bit harder. Make sure you get the first hole in the right spot. Then use a screw through the first hole, and a light clamp to keep the pedal in place while you drill the next hole. Be careful not to mar the surface of the aluminum with a clamp though. A rag or a few layers of tape between the clamp and the aluminum will help. Then keep adding screws as you drill the rest of the holes and this will keep the drill from "walking" as you drill.
Next, remove the screws and aluminum pieces and remove the masking tape. Put the rubber inserts in place on the aluminum pieces, and replace them on the pedals. Then put the machine screws in place and secure them with the nuts. Tighten them securely, but don't overtighten too much or the plastic pedals may crack.
I did the gas and dead pedal last. Use the set screws for these. They bite right into the plastic and require a smaller hole than the rest of the pedals. A 9/64ths bit or smaller is good for these holes.
One thing I will say is MAKE SURE you use the set screws that bite into the plastic for the gas pedal, not the machine screws that use nuts. The machine screws with nuts are too long and will prevent you from getting full throttle unless you file them down. There are no instructions with the kit, and if you drill holes in the gas pedal big enough for the machine screws, the holes will be too big for you to use the set screws that bite into the plastic. Use the smaller 9/64 drill bit (or even smaller) for these holes.
They kit provides at least 4 extra machine screws and nuts, and I ended up using the wrong ones. After I was finished I noticed 4 extra set screws... Oops. I noticed that the screws and nuts on the back prevented full throttle. I had to file the screws down and that took care of it, but it was as pain!
The dead pedal uses the set screws too, and the aluminum piece goes right on top of the existing plastic dead pedal. The set screws at the top of the dead pedal were hard to get at, as they are pretty high up, and the dash gets in the way. You may not be able to pre-drill them at all. This is why I recommend a shorter torx driver. It's hard to fit a drill up there and I just ended up pushing hard without predrilling and the screws managed to bite in and self tap.
Hopefully this will help the rest of you save some time doing the install. Have fun!