Follow us on Facebook 

Hey guys,
A number of folks were wondering what our banner ad means when it says 'precision work done in house on our CNC machines.' I am proud to say that we in fact do everything in house -
nothing is outsourced.
As many know, most 335i and 135i models have a challenging stock differential. Unlike most cars, most 335i and 135i models have a differential where the ring gear is WELDED to the unit. Note: Just about every car on the road has a ring gear that is BOLTED to the unit.
In order to add a Quaife, Wavetrac, OS Giken unit to your 335i or 135i, you need to re-use the ring gear and pinion in your differential. Not so easy since the ring gear is WELDED to the stock unit!!
So, in order for us to upgrade to a Quaife, Wavetrac, OS Giken etc. we put our machines to work and created this incredibly accurate process to to separate the ring gear from the carrier and prepare said ring gear it to be bolted to the new aftermarket unit.
This is a quick tutorial. We wanted to do the best job possible, so we configured our CNC lathes and mills to handle this challenging task. The end result is beautiful =)
VAC Performance Built Differentials are built to last with the highest quality components, procedures, and technical expertise in the industry. We have been building BMW differentials since the 1980s - 2002, E46, E92, street, race - we have done it.
How is a VAC Performance Built Differential made (this is not a complete list, but most major operations are covered)
1. Photograph and inspect every differential for damage/missing parts etc.
2. Drain and inspect fluid looking for shavings or anything odd with the fluid.
3. Remove cover, inspect ring gear, confirm gear ratio.
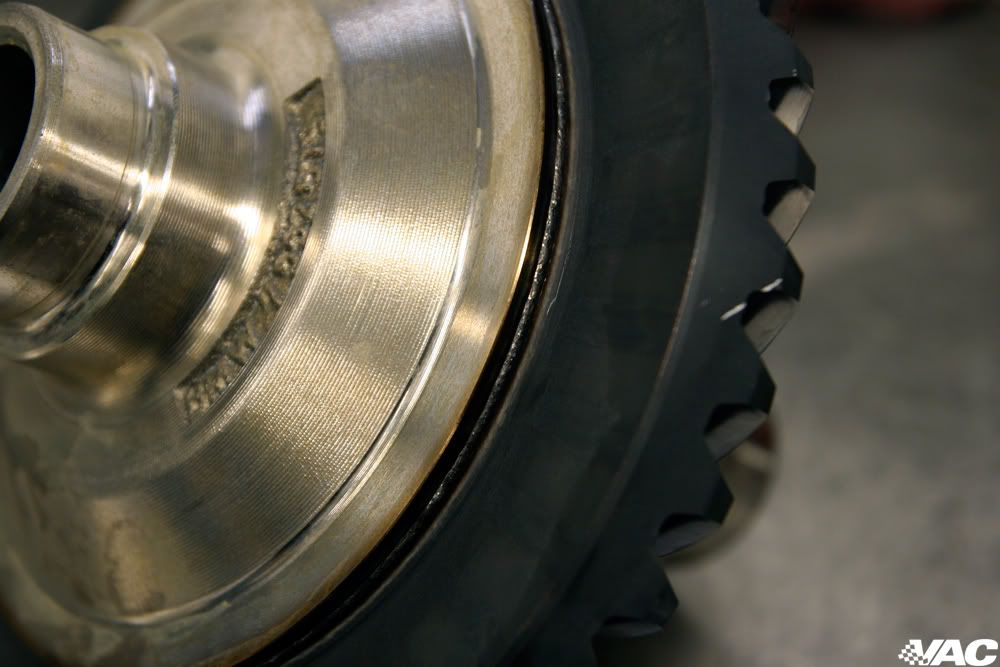
Pictured: The infamous welded ring gear. Note how it is actually welded to the carrier.
4. Test backlash before dissassembly.
5. Remove axle shafts, old side cover seals, snap rings.
6. Carefully remove the carrier.
7. Remove inner races from carrier.
8. Clean up the carrier, and prep for CNC operation.
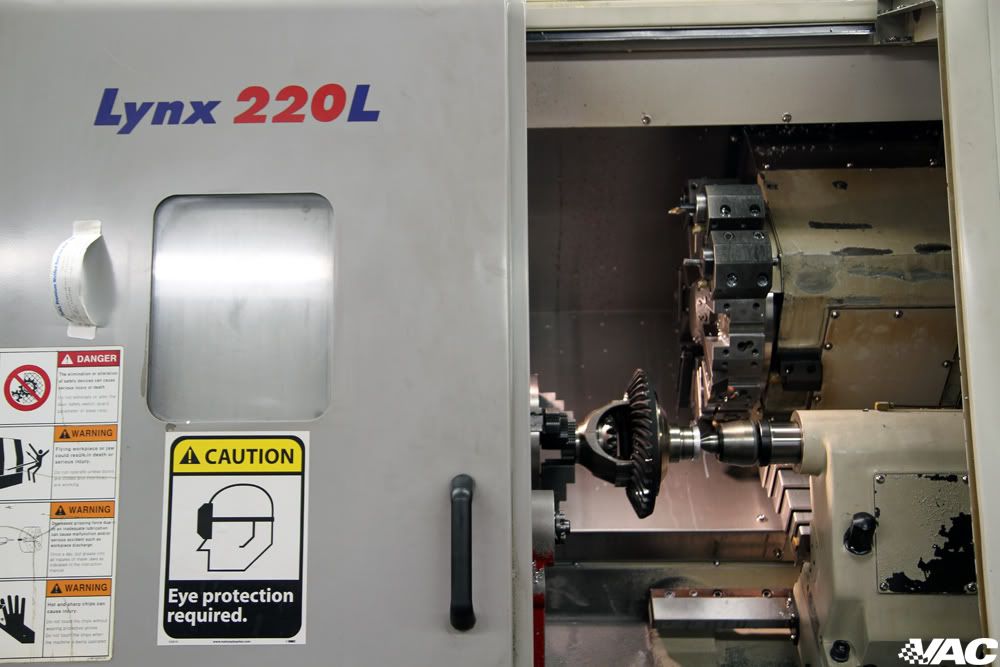
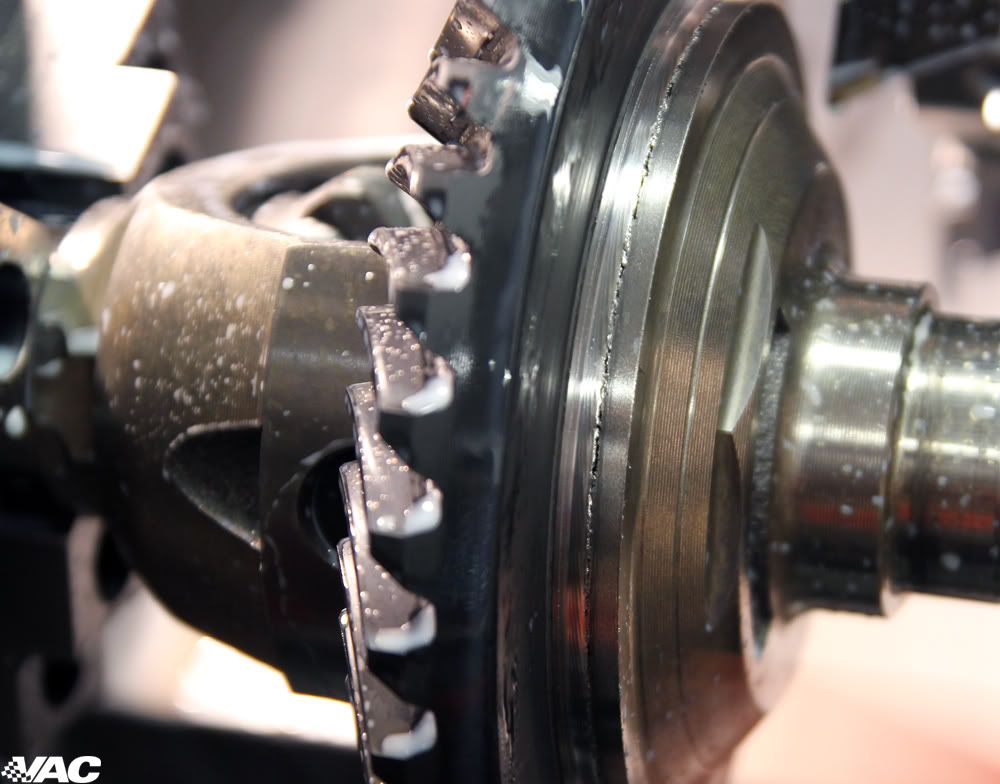
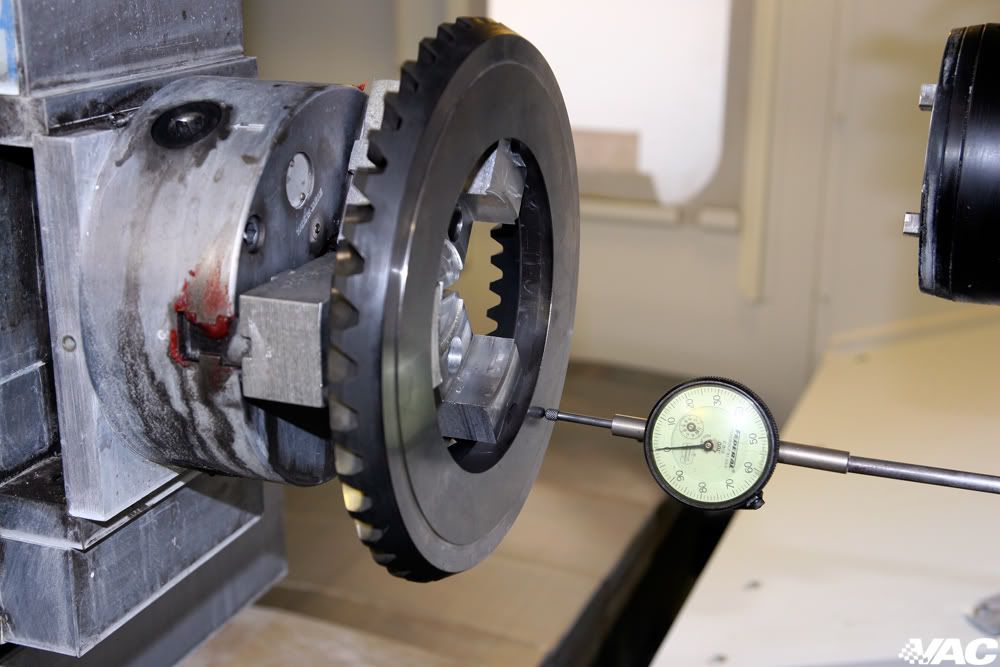
9. Set up the carrier in our ultra rigid and precise CNC lathe.
Pictured: Stock welded ring gear/carrier on one of our lathes.
10. Machine away weld that secures the ring gear to the carrier.
This is an extremely robust weld.
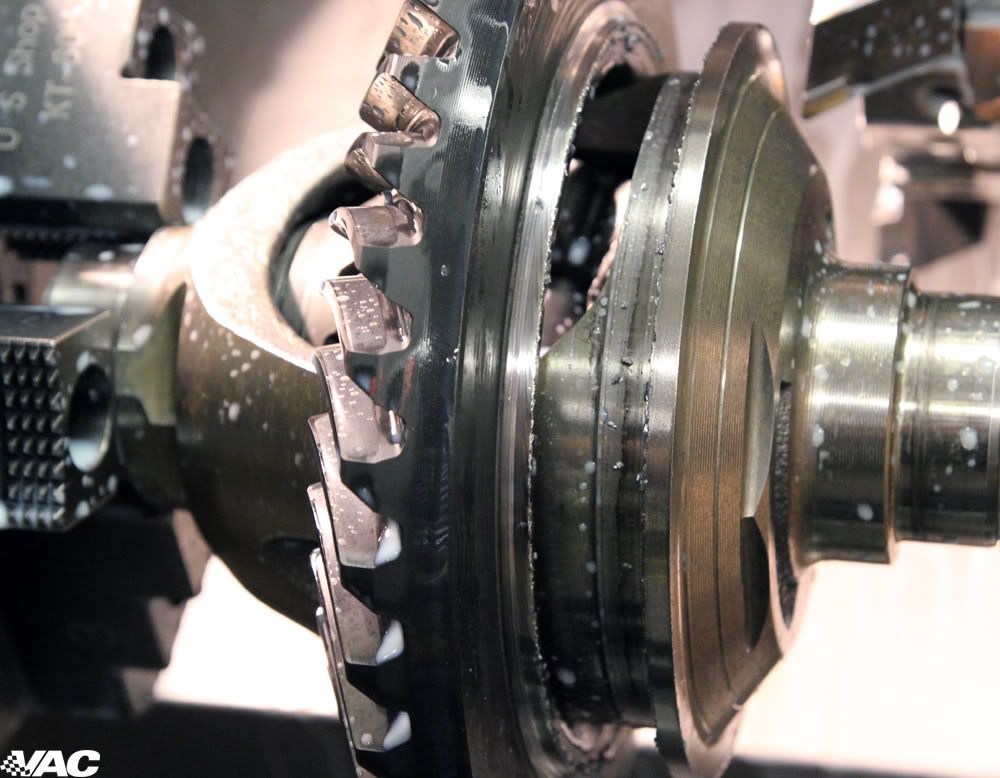
11. Remove the resultant step (weld) so it is flat enough to machine.
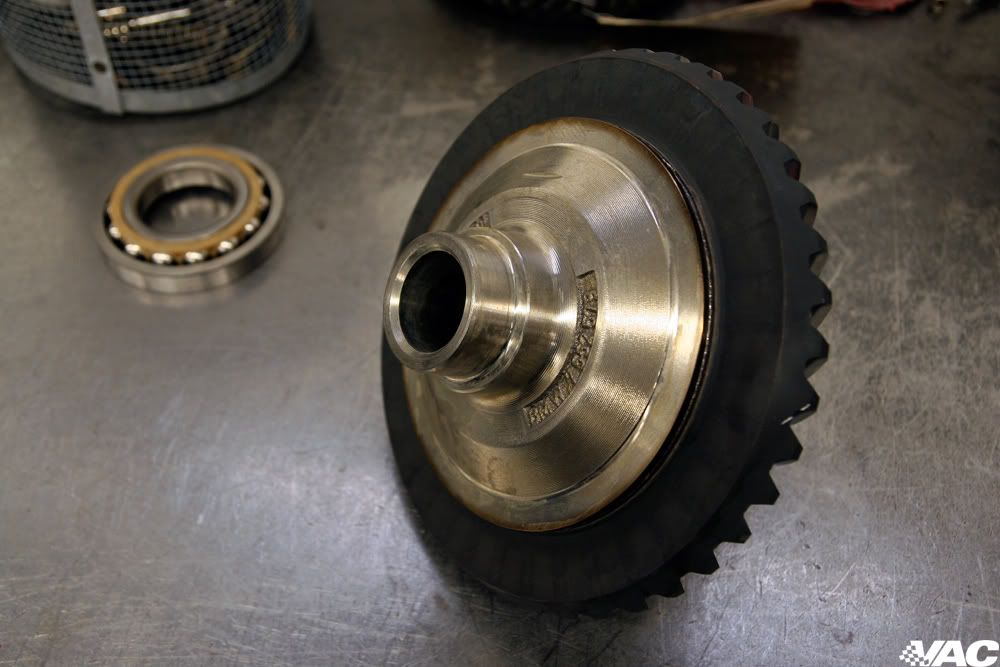
Pictured: stock ring gear separated from carrier.

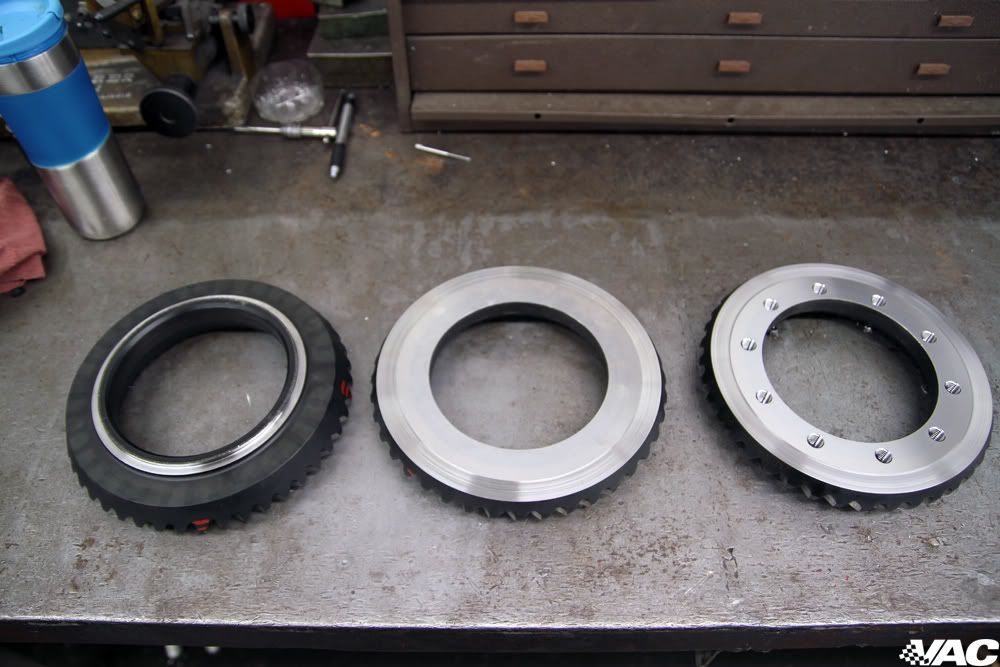
12. Machine the ring gear flat (to ensure a precise mating surface for the new unit)
Pictured: Separated ring gear | fully machined ring gear | drilled/tapped ring gear
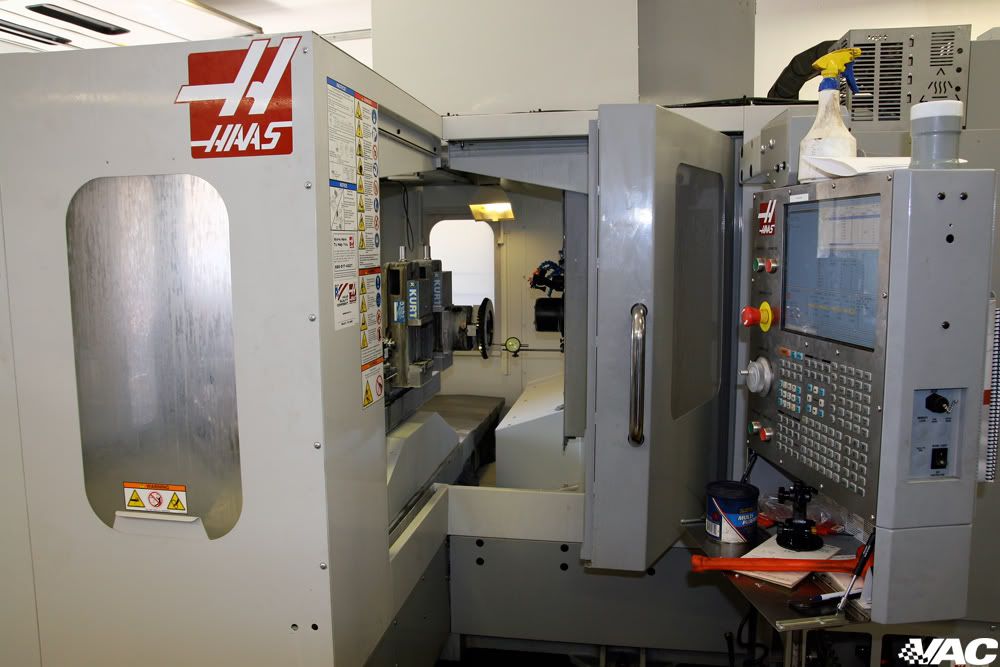
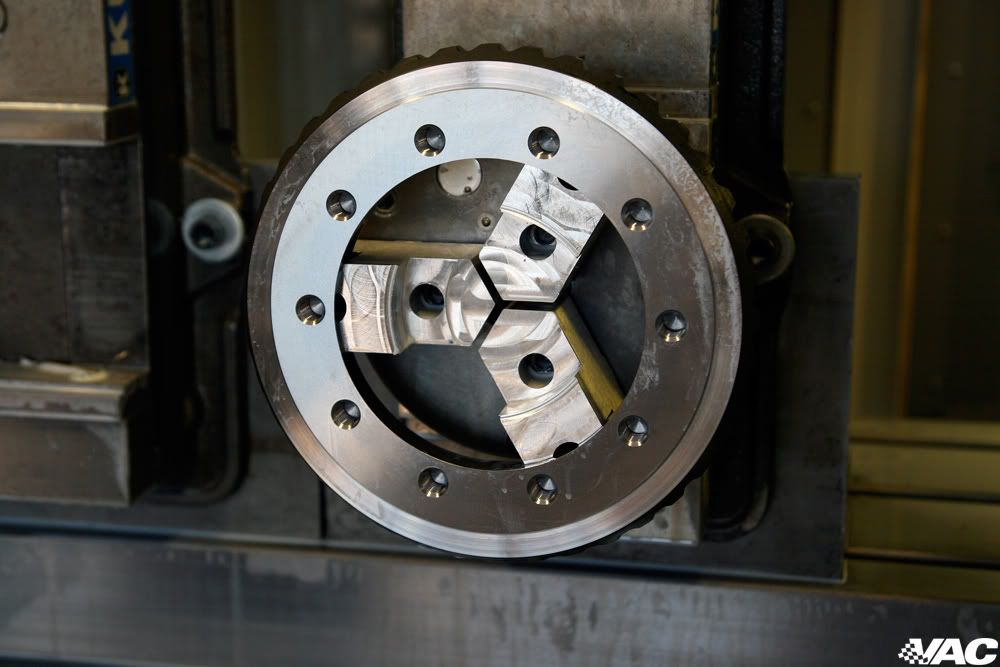
13. Set up the newly finished ring gear on our CNC mill.
Pictured: Machined ring gear on our HAAS 5 axis machine.
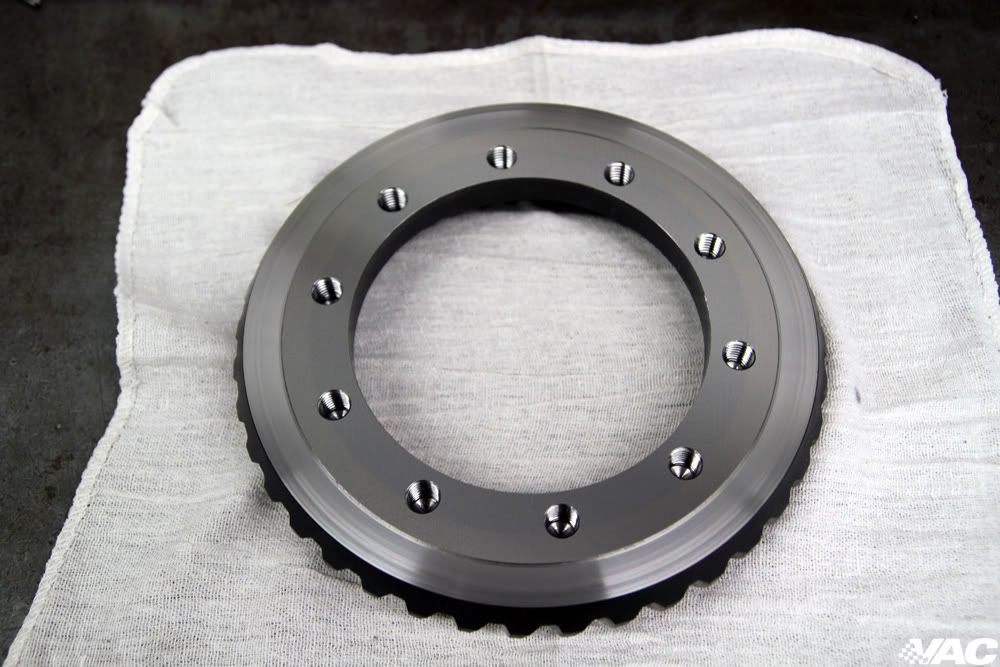
14. Machine the ring gear to make it compatible with the limited slip unit.
Pictured: Completed ring gear still in the HAAS mill.
 Before:
After: Note how we machine the entire face, not just the area where the LSD bolts. Our machining method ensures ideal accuracy and reliability. Not sure that anyone takes it this far.
Before:
After: Note how we machine the entire face, not just the area where the LSD bolts. Our machining method ensures ideal accuracy and reliability. Not sure that anyone takes it this far.
15. Assemble the limited slip unit.
16. Pressure wash and paint the housing.
17. Soda blast and clean the differential.
18. Install bearings/snap rings.
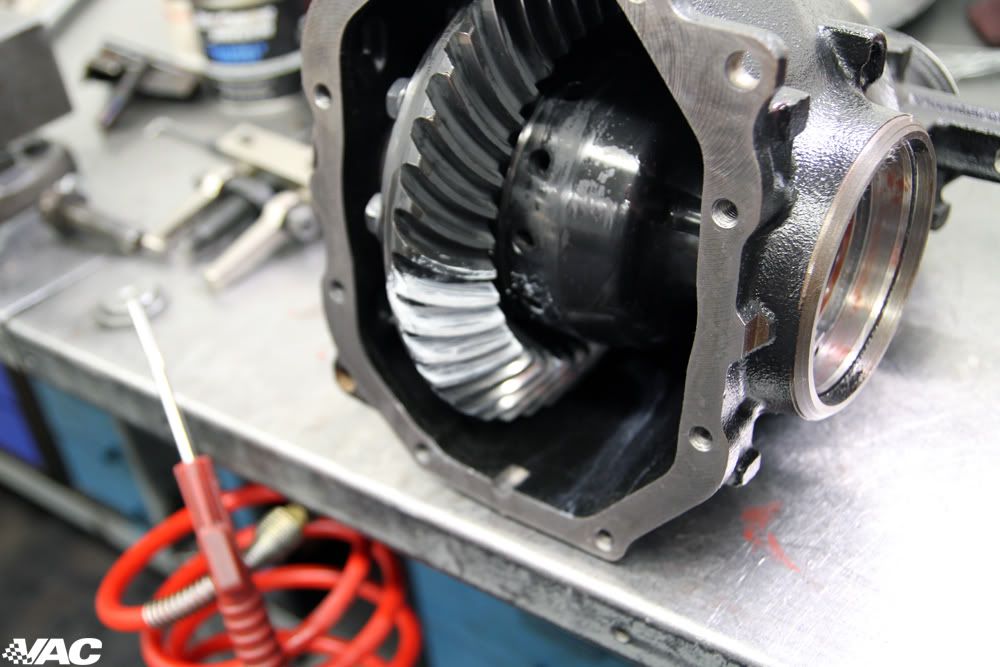
19. Check pattern, install seals, gasket material and differential cover.
Pictured: Checking the pattern on the newly assembled differential.
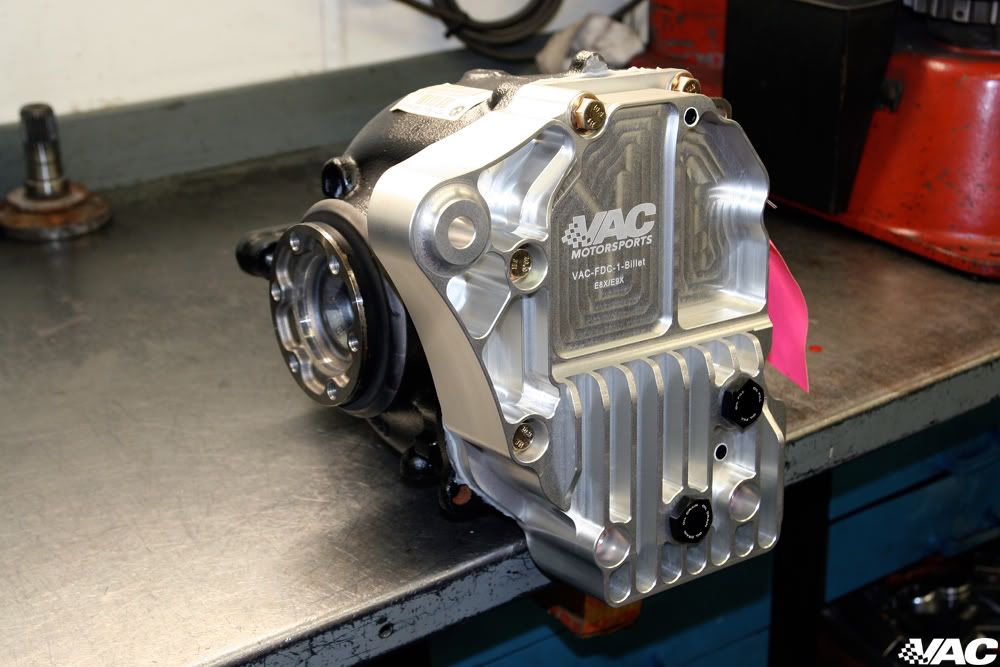
20. Tag and prepare for install/shipment. Pictured: VAC Performance Build Differential with optional Billet Differential Cover.