|
|
|
|
 |
|
 |
BMW Garage | BMW Meets | Register | Today's Posts | Search |
 |

|
BMW 3-Series (E90 E92) Forum
>
Elmo's E92 335i
|
 |
| 03-07-2013, 02:31 AM | #45 |
|
Captain
 52
Rep 968
Posts |
car is coming a long man, how's your new note?
looking forward to seeing the air ducts update as I have priced up painting and fitting for the M3 bar... so think i will be doing it mid April. got to get wheels as well as the oems dont suit the M conversions that well.... thoughts? |
|
Appreciate
0
|
| 03-07-2013, 02:55 AM | #46 | |
|
Private First Class
 22
Rep 175
Posts |
Quote:
Trust me on this, once you get the full kit you'd want to buy new wheels hahaha I've put a hold on my engine mods, saving up for some new wheels and coilovers. I want to slam the car so bad!!! |
|
|
Appreciate
0
|
| 03-07-2013, 03:00 AM | #47 | |
|
Major General
 
907
Rep 6,285
Posts |
Quote:
 Out of curiosity may I ask how much is fitting and painting (You can PM me if you don't wish to make it public) |
|
|
Appreciate
0
|
| 03-08-2013, 10:27 PM | #50 | |
|
Banned

72
Rep 2,934
Posts |
Quote:
 |
|
|
Appreciate
0
|
| 03-09-2013, 07:30 PM | #52 | ||
|
Private First Class
22
Rep 175
Posts |
Quote:
Buy the BMW performance exhaust already hahaha Quote:
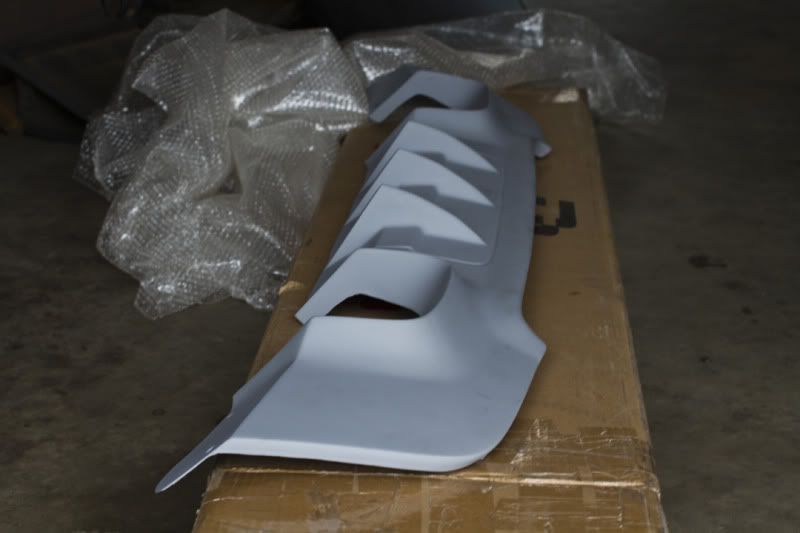
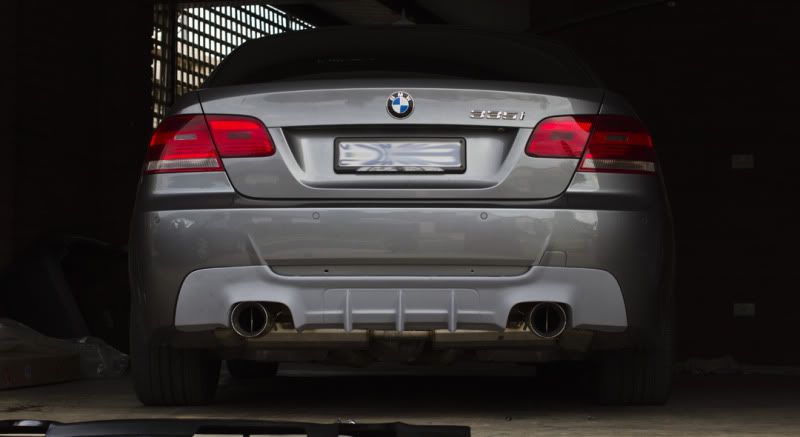
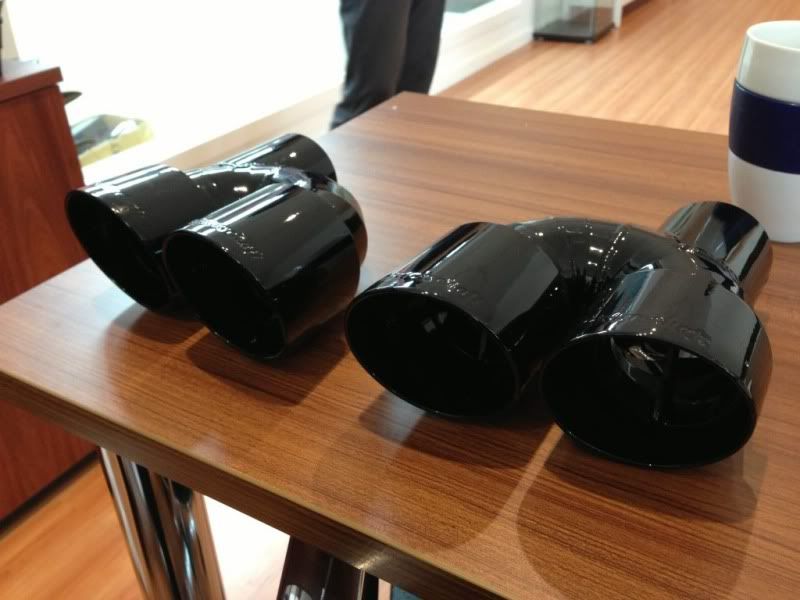
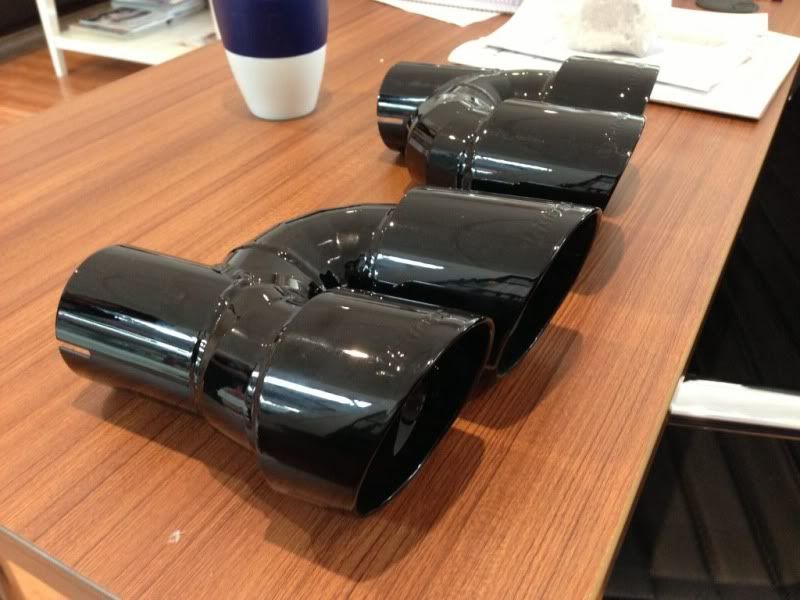
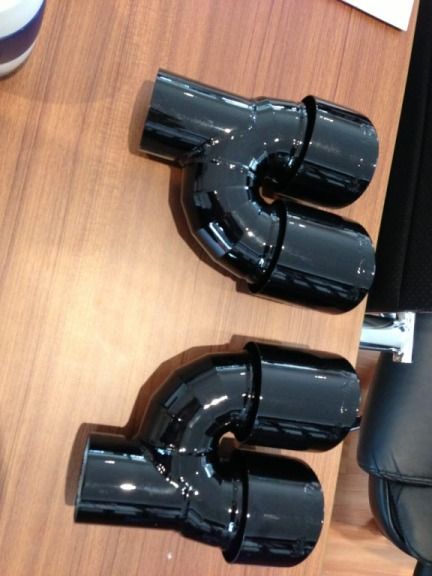
Big thanks to Jin & Steven at Active Motorwerkes for checking the car and installing the tips and diffuser. Luckly the problem wasn't a big issue, Jin replaced some of the hoses, old one is starting to crack. Happy with the Meisterschaft quad tips and Duke Dynamics diffuser (great fitment)  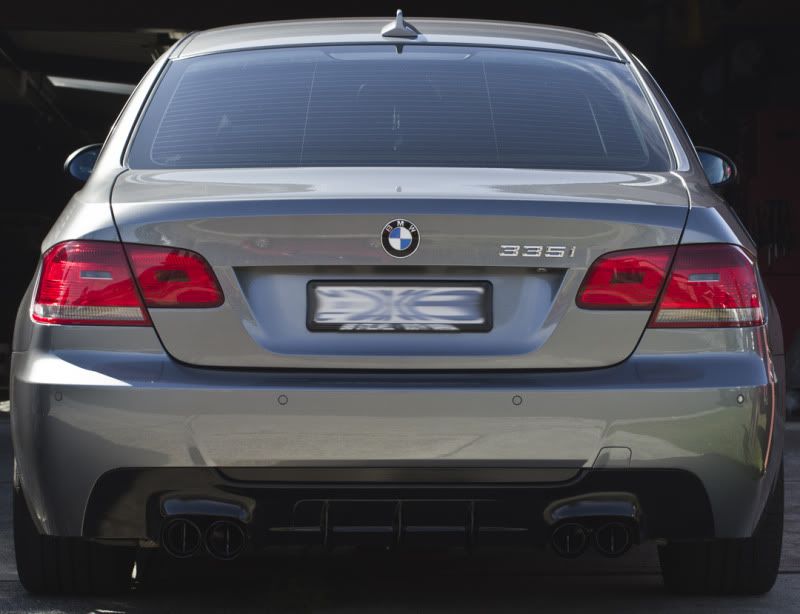 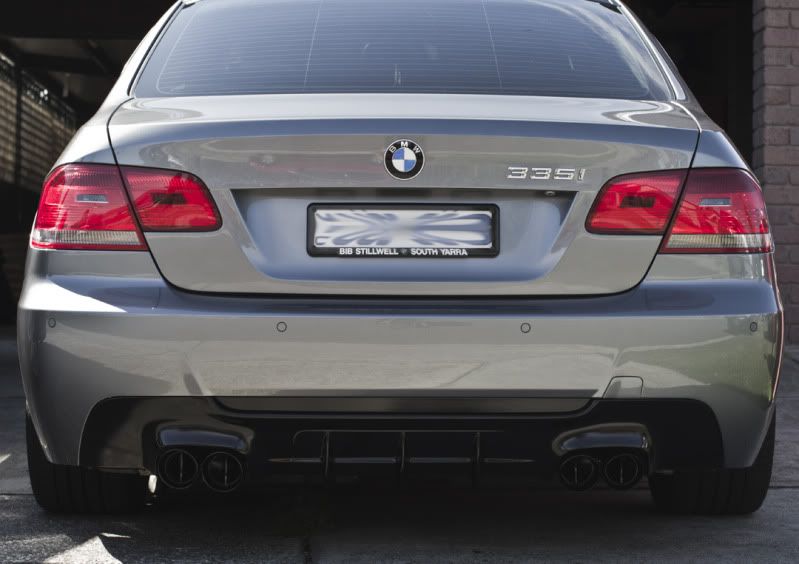 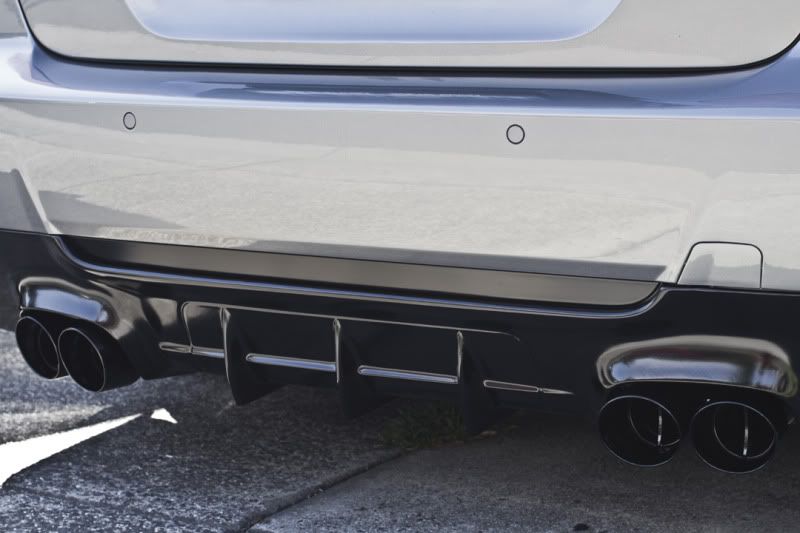 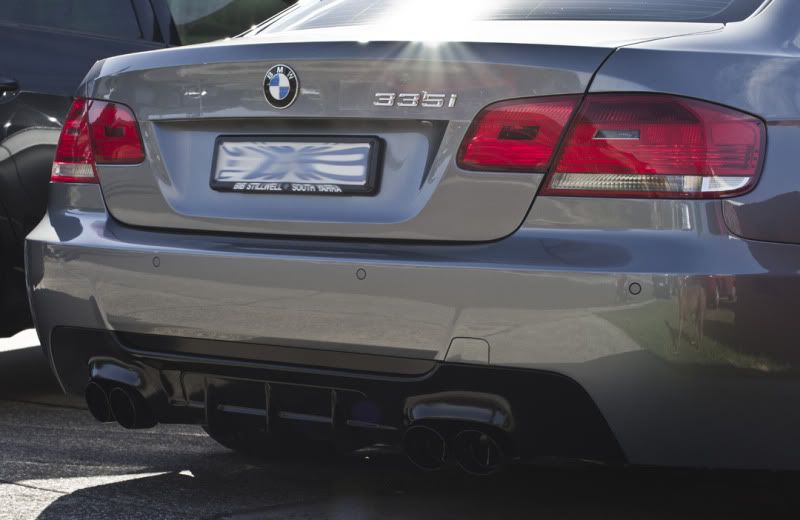 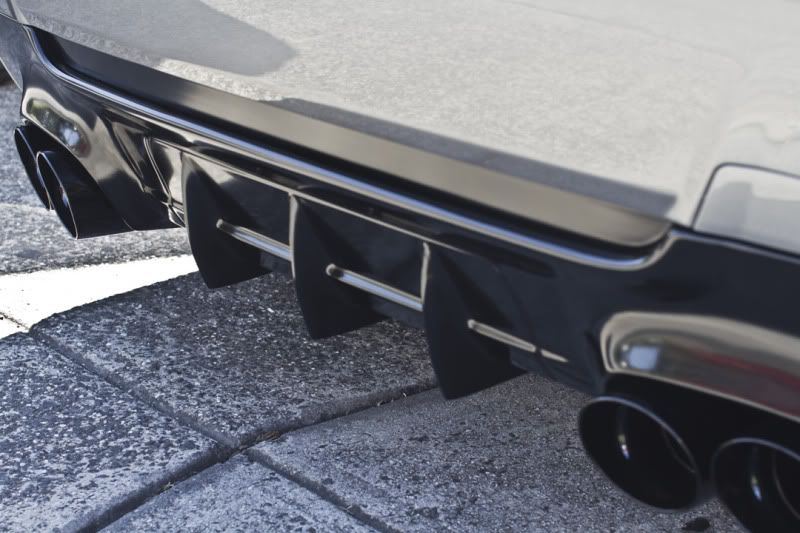 Now I have to save up for coilovers and matte black fat concave or dish wheels. |
||
|
Appreciate
0
|
| 03-09-2013, 08:34 PM | #53 |
|
Major General
907
Rep 6,285
Posts |
Looks damn hot, im not usually a lover of quad tips and im surprised the black tips and black diffuser look so well together generally i would prefer to have the tips contrasting to accentuate them.
This definately gives the 335i some much needed agressive look from behind!  |
|
Appreciate
0
|
| 03-09-2013, 08:48 PM | #54 | |
|
Private First Class
22
Rep 175
Posts |
Quote:
I too wasn't sure how the black tips would go with a black diffuser but once they were installed together it looks great! Diffuser is more of a flat black then glossy, it looks glossy due to the additive they used to make the diffuser scratch-proof. My first thought was to paint the diffuser with a darker shade of grey but I'm glad I went with the black. |
|
|
Appreciate
0
|
| 03-10-2013, 01:04 AM | #57 | |
|
Captain
52
Rep 968
Posts |
Quote:
i need more money man!!!  will do the front next but i am still torn on doing mtec front or m3 will do the front next but i am still torn on doing mtec front or m3get a vid up the new note! |
|
|
Appreciate
0
|
| 03-10-2013, 05:56 PM | #60 | |||||
|
Private First Class
22
Rep 175
Posts |
Quote:
Quote:
Quote:
Quote:
Quote:
|
|||||
|
Appreciate
0
|
| 03-23-2013, 01:42 AM | #63 |
|
Private First Class
22
Rep 175
Posts |
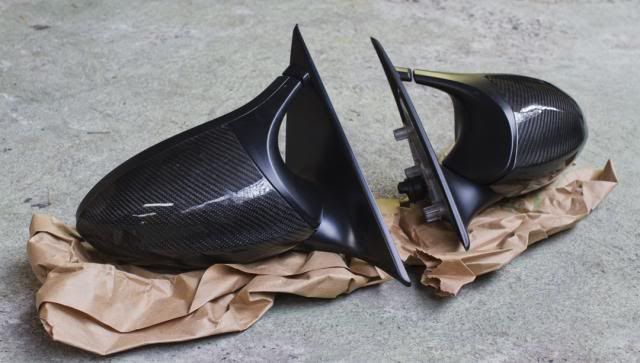
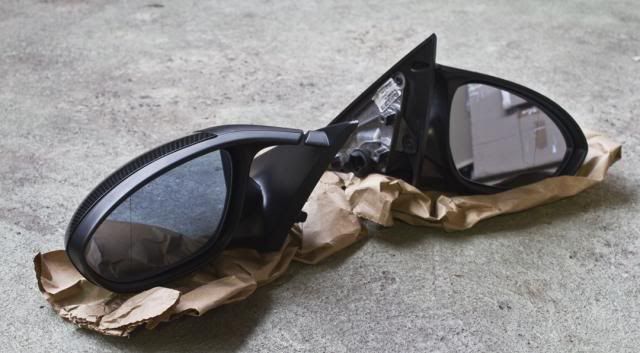
So Friday I received my oem M3 air ducts and oem M3 carbon fibre mirrors, thanks to Stu (BMR) and Shane (DR-JEKL).
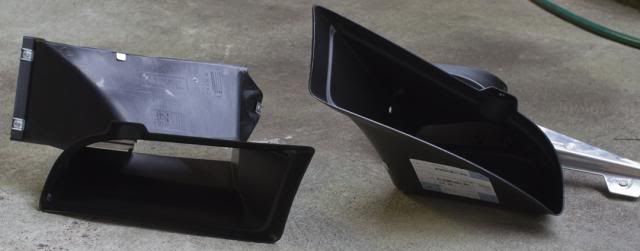   I dropped the mirrors off this morning with my panel beater who will re-paint it to glossy black. I had no plans for today so I decided to install the air ducts, it was a simple task, most of the time was spent trimming the ducts and refitting the front bar to make sure the ducts cleared. Front bar off. 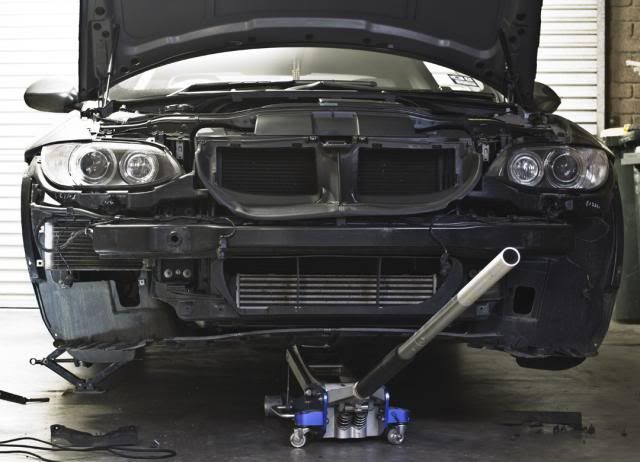 The ducts are a straight fit onto our M3 rep front bumper, anyone with a M3 rep front I recommend you going with the air ducts and fog delete, makes a big difference to how the car looks.  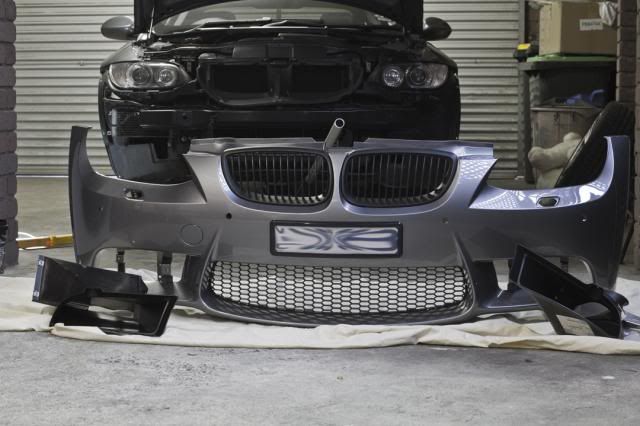 The ducts came with metal plates attached to it so I removed them for better airflow to the oil cooler. 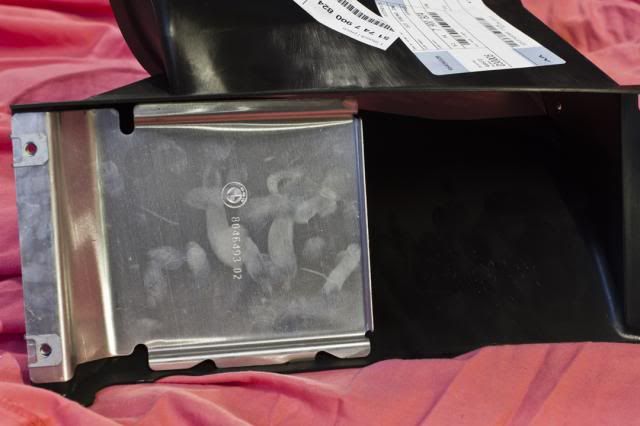  Test fitting the ducts to the bumper. 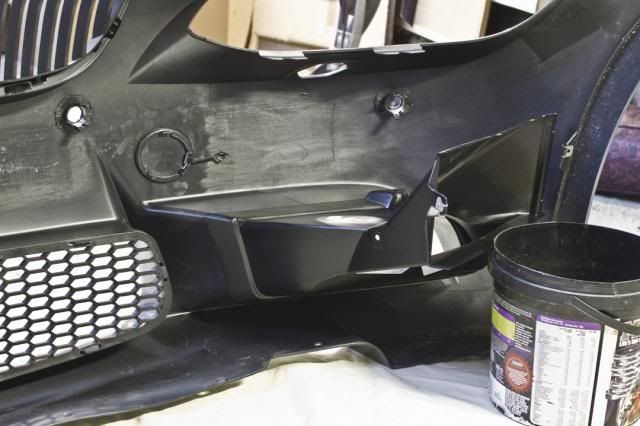 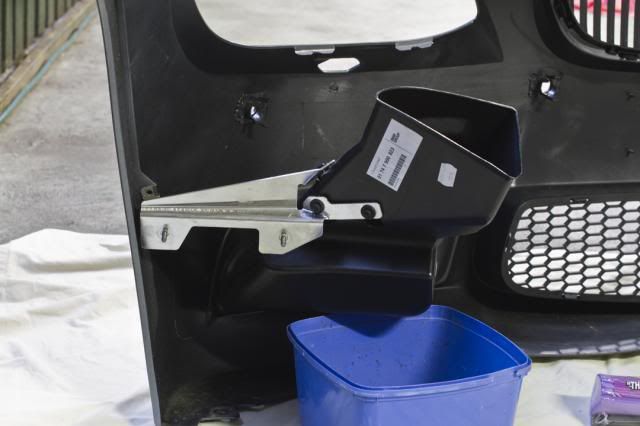 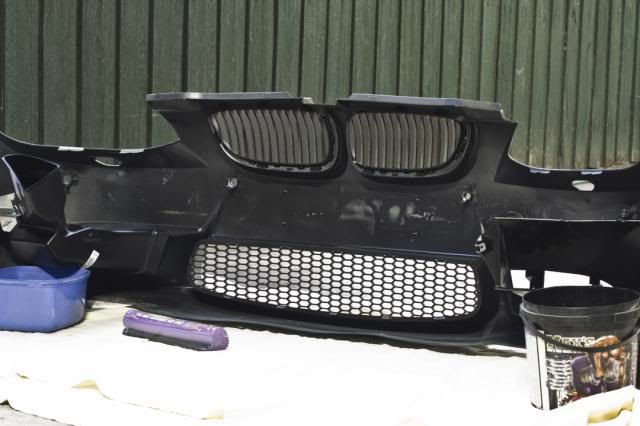 As you can see in this picture you can attach the drivers side air duct to oil cooler but you will have to trim the front duct, I decided to attach both ducts to the bumper, easier and looks cleaner. 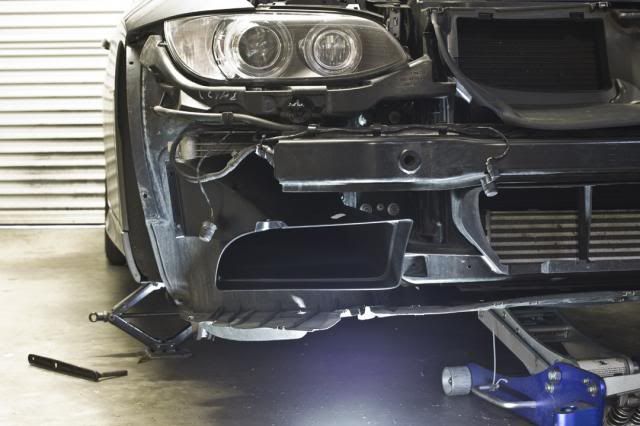 Next, was to trim off the fog grill brackets from the front bumper, using a rotary dermal makes it so much easier. Just be careful with trimming especially if your front bumper is already painted. 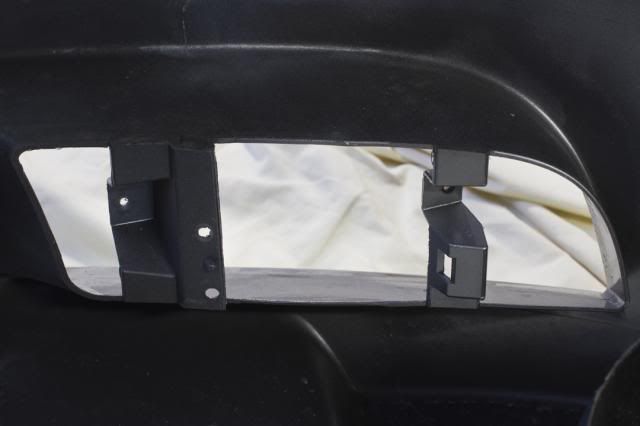 Trimming done! 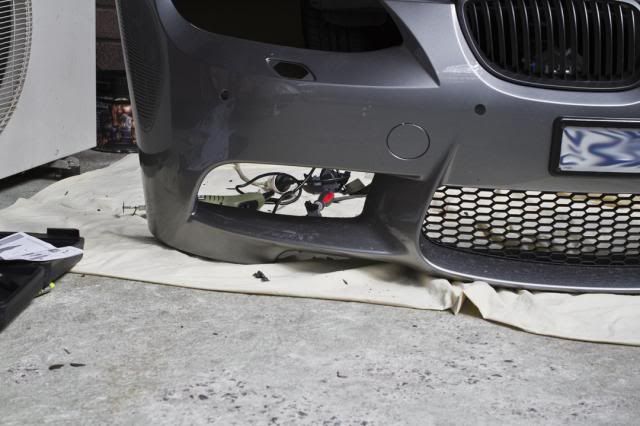 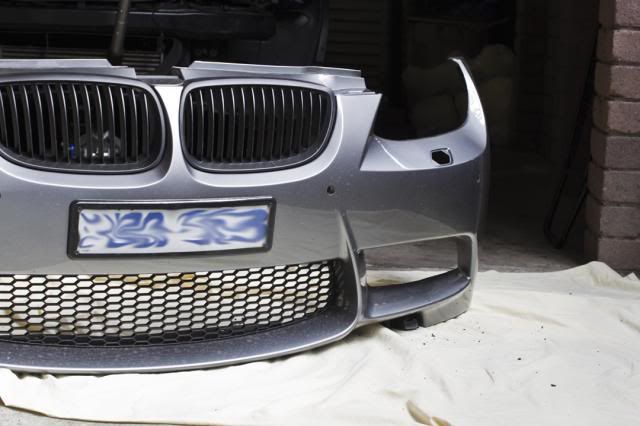 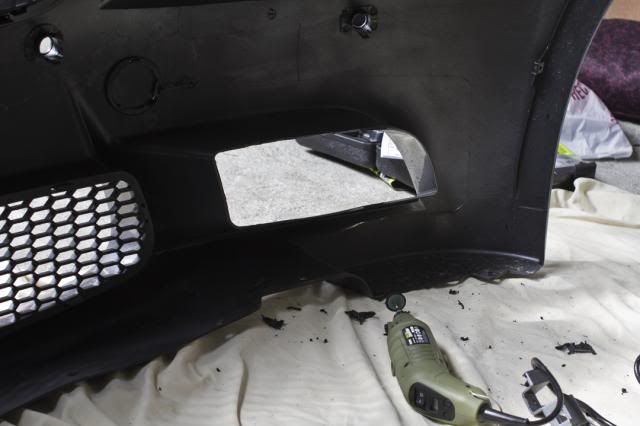 Ducts with fog grill brackets removed. 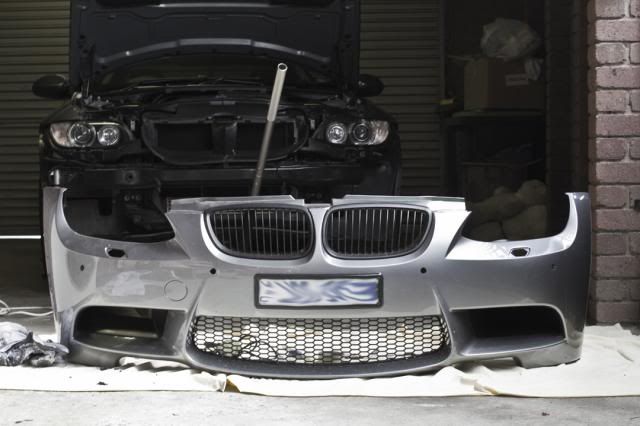 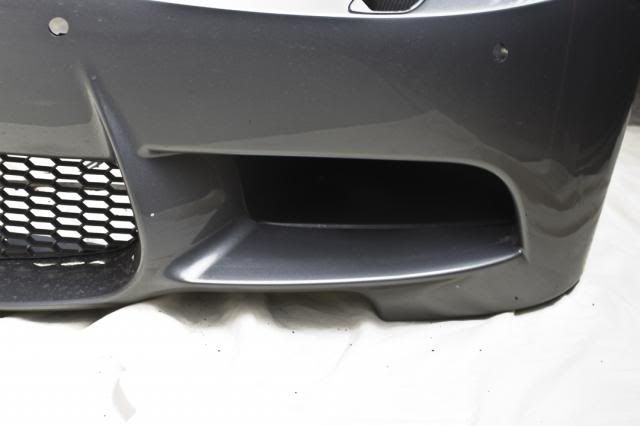 The ducts were too long, it would hit the guard liner so trimming needed to be done. Decided to use a hack saw to make it easier hahaha 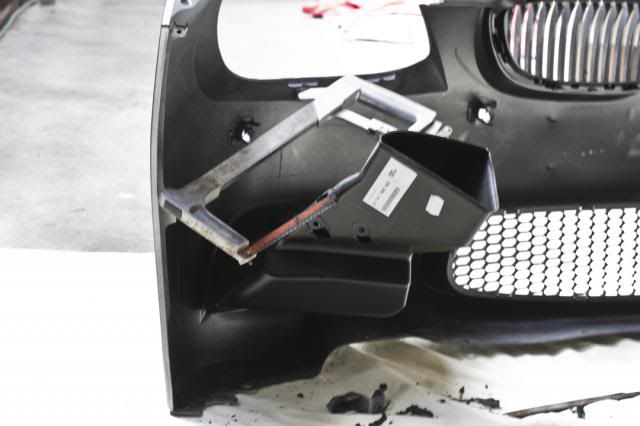 I trimmed enough to clear guard liners, cars chassis etc and not too much that you would see it from the front. 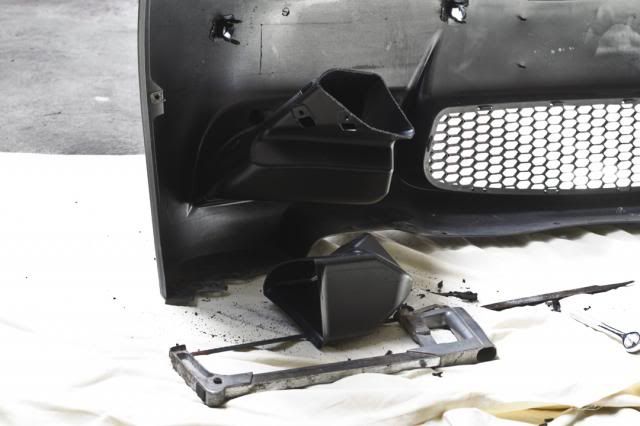 Double sided tape was used to secure the ducts to the bumper, I also used sikaflex just to be safe. 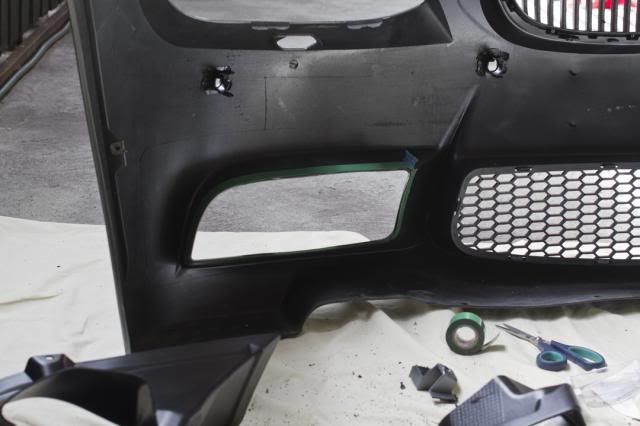 Passenger side and drivers side attached! 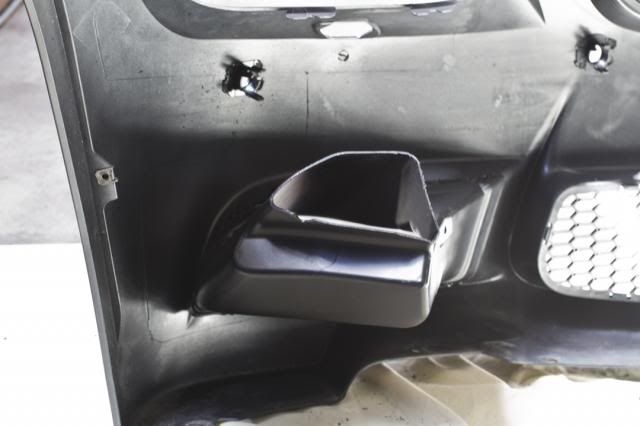 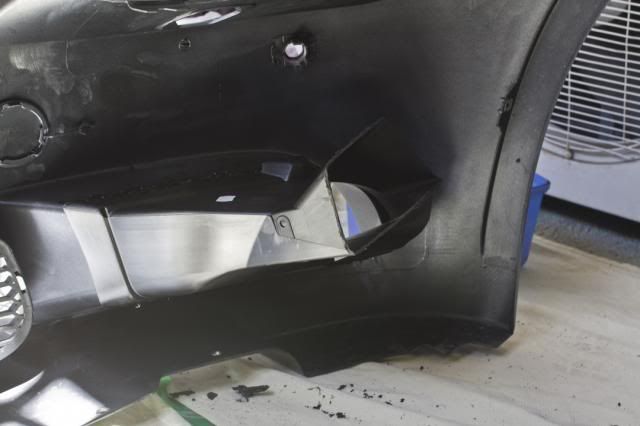 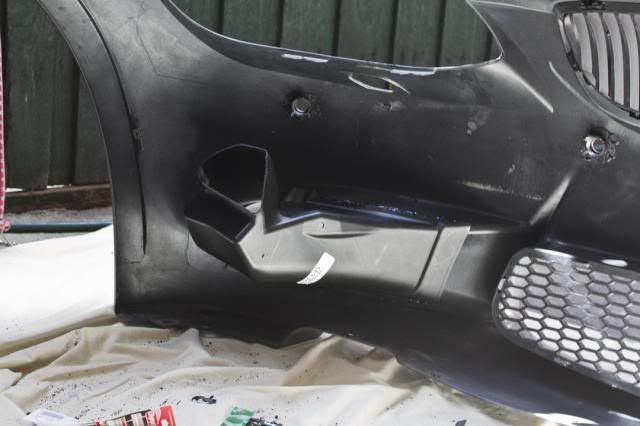 Front bumper back on! 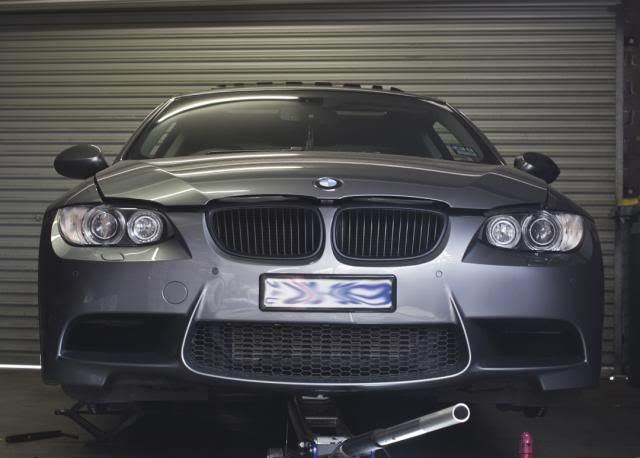 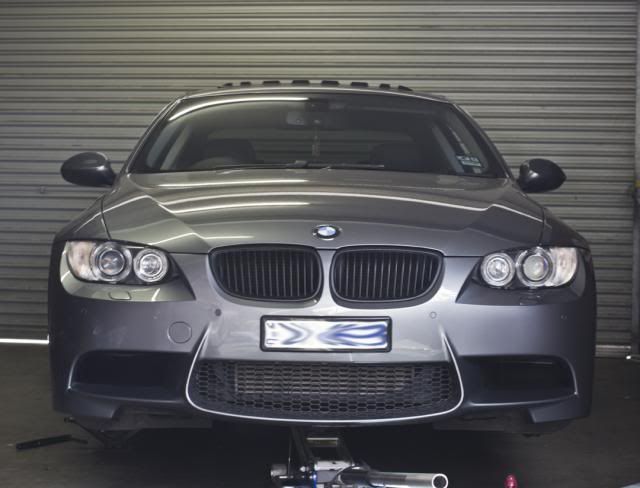  And the finish product, I'm really happy that I went with the fog delete route. The car looks so much better, I was sick of looking at the empty fog grills hahaha. 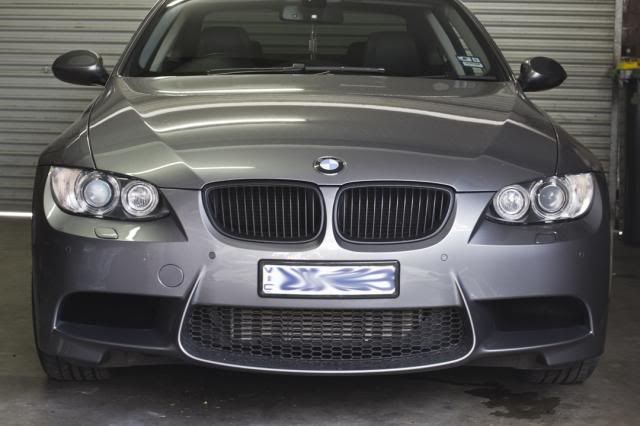 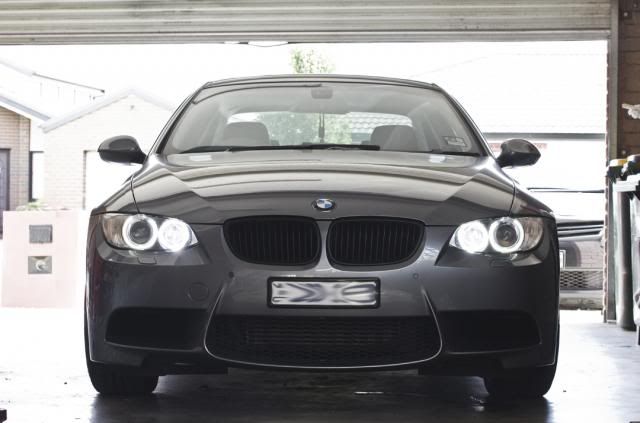  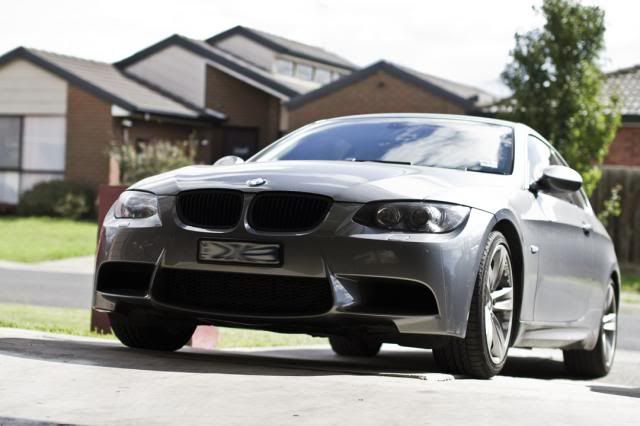 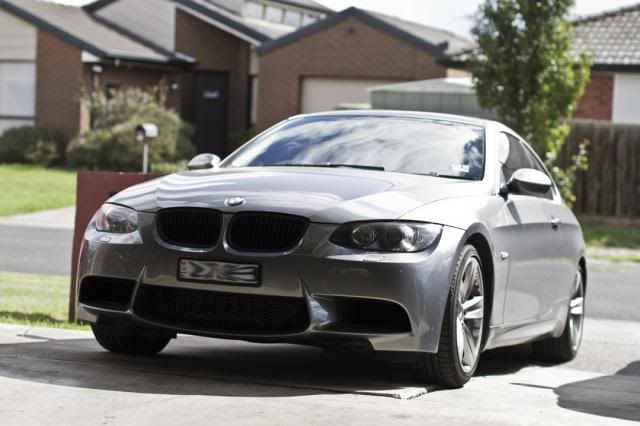 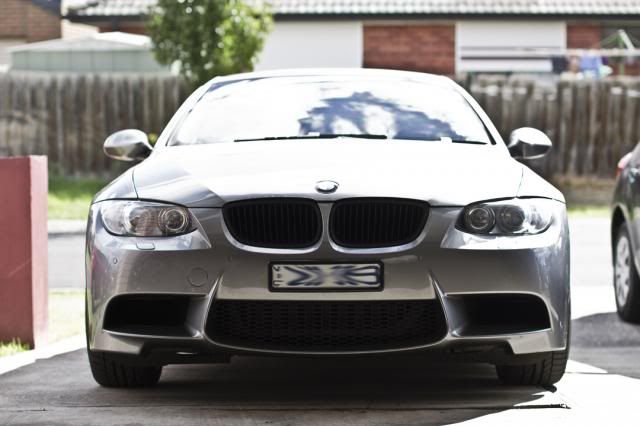   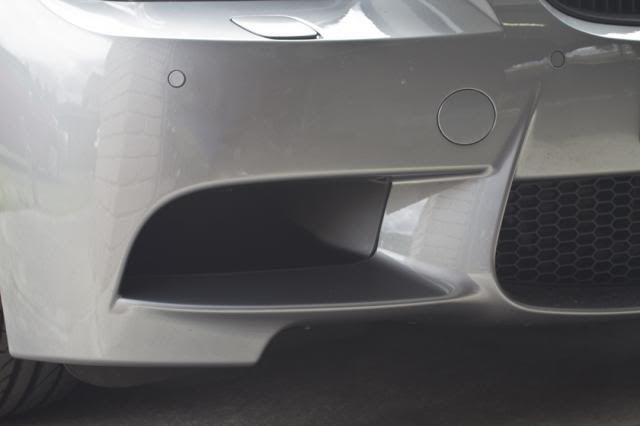 It was a simple DIY, so anyone can pretty much do it, only took me a couple of hours by myself. 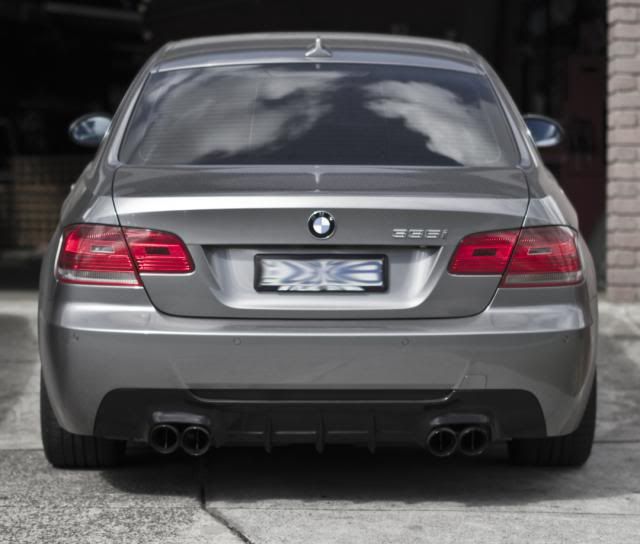 Last edited by xtremelimit; 03-24-2013 at 02:06 AM.. |
|
Appreciate
0
|
| 03-23-2013, 02:33 AM | #65 |
|
Major General
907
Rep 6,285
Posts |
Thanks for the pics Elmo it looks great as this was exactly the look I was going for along with a kerscher front lip.
I have a set of air ducts enroute atm along with a few other goodies, cant wait to get an m3 front bar and slap em on |
|
Appreciate
0
|
 |
| Bookmarks |
|
|