|
|
|
|
 |
|
 |
BMW Garage | BMW Meets | Register | Today's Posts | Search |
 |

|
BMW 3-Series (E90 E92) Forum
>
DIY e90 Springs, Shocks, Sway Bars, Exhaust
|
 |
| 01-01-2010, 03:43 PM | #1 |
|
Enlisted Member
 14
Rep 32
Posts |
DIY e90 Springs, Shocks, Sway Bars, Exhaust
Wanted to share my experience when I replaced the springs,
shocks, sway bars, and exhaust on my new 335i e90. I replaced the stock sport zsp parts with Eibach Pro Springs, Koni adjustable yellow's, Eibach sway bars and Borla exhaust. When I did all the work I was careful to use a torque wrench to remove various nuts and bolts. I wrote these values down to help with reassembly. I know it's not perfect but at least I had some values to start with because I didn't have a service manual. Use your own judgement. I noticed a lot of the suspension DIY posts didn't show any torque values. I also took pics so I hope this helps someone. I work pretty slow and it was much slower taking notes and pics. It took me a full day and a half to complete every- thing but nothing seemed too difficult. So here goes: 1. Jack up all four corners of the car. There are six jack points. The front one is a metal plate centered between the front wheels, This one is very unstable. I would never consider using a jack stand here. I used one of my hydraulic jacks here but always had 2 side stands on the front side jack points as I raised the car. The rear jack point is the differential body but not the differ- tial cover. I used 4 jackstands on the 4 side jack points. Since these jack points are indented into the plastic, I cut up some pieces of wood from an old hockey stick handle that fit into the indentations perfectly. Then I used some 2x4 lumber on top of the jackstands so none of the underbody plastic would be damaged. Once jacked up safely, remove all 4 wheels. 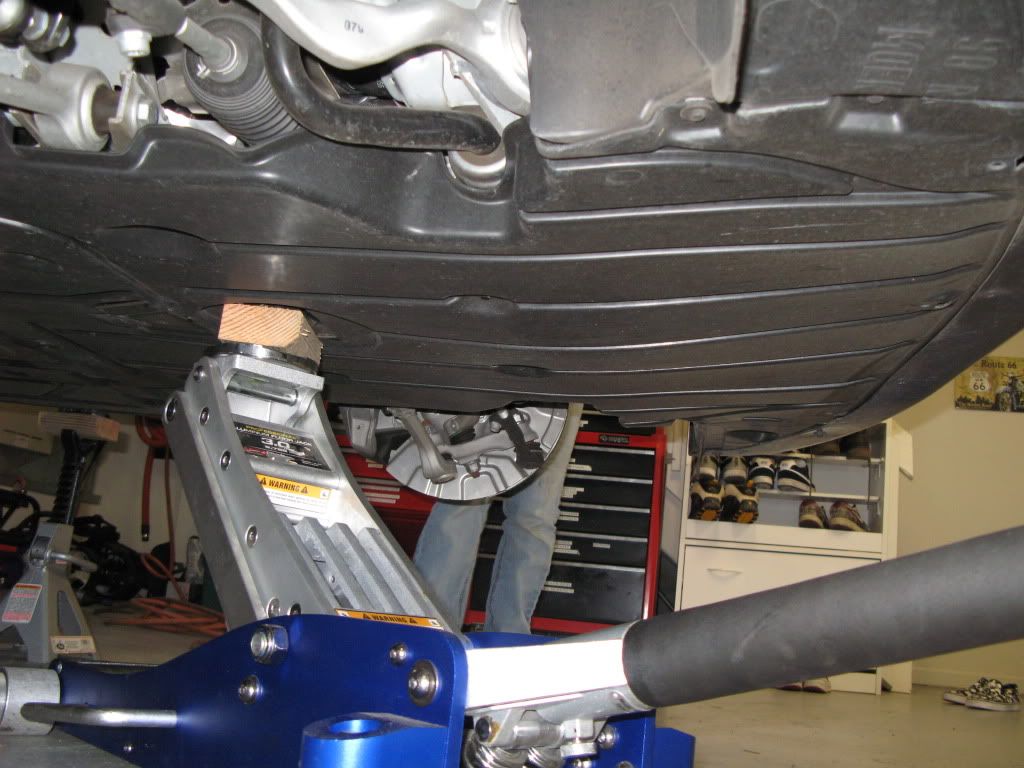 Jacking up using front jack point. 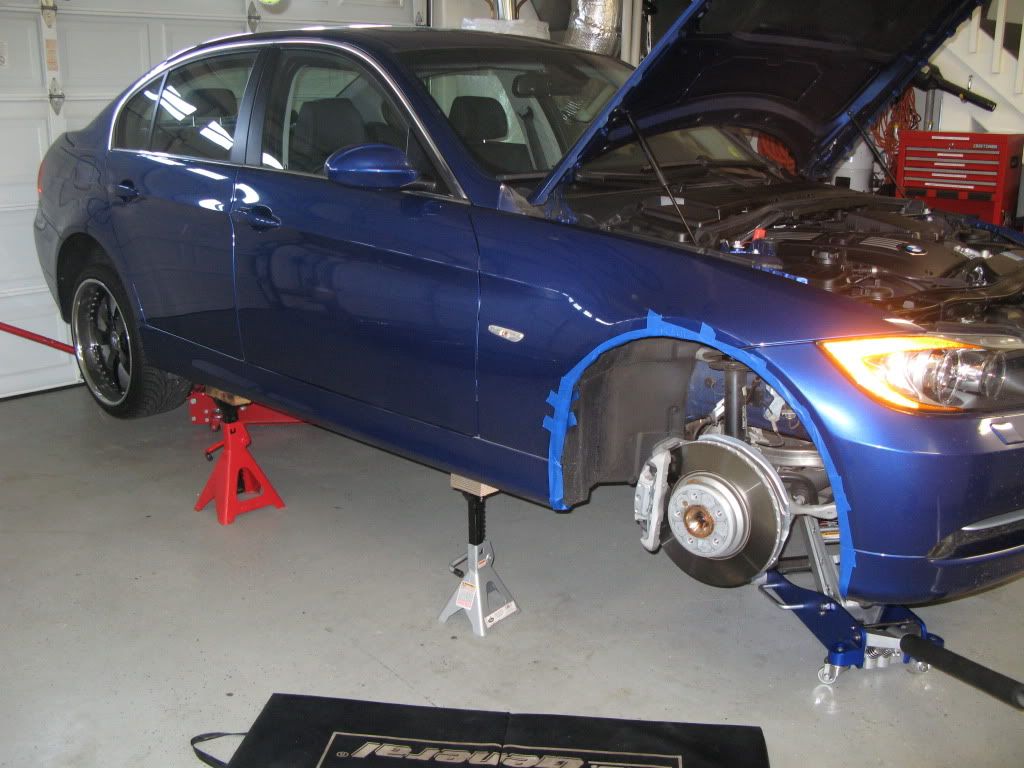 All four corners jacked. Notice tape on front fender for protection. 2. I worked on front suspension first. Remove front undercover. There are 16 8mm sheet metal screws holding it on. 3. Remove front sway bar link top nut. Use 17mm endwrench and 16mm socket. (34 ft/lbs.) 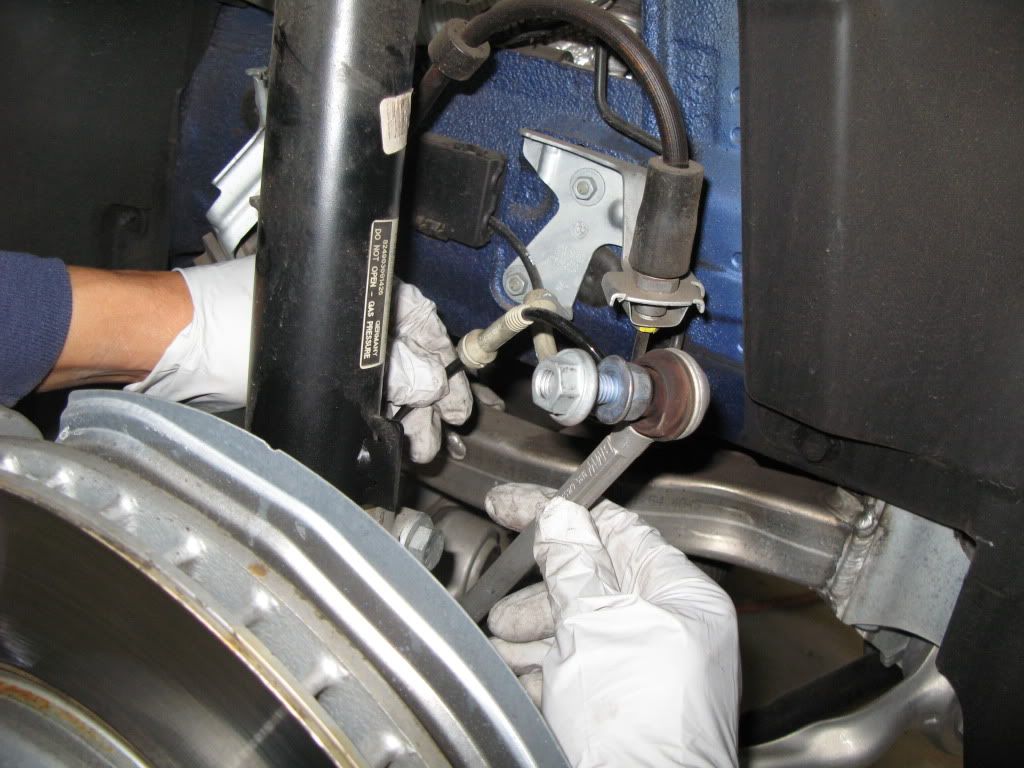 Sway bar link freed. There are also wires to be unclipped from strut. 4. Loosen compression bolt and nut on back of front strut. Use 18mm endwrench and 18mm socket (55 ft/lbs.). Now is a good time to spray penetrating oil around the pinch mount to help remove the strut later on. On driver's side pop off the headlight sensor arm from the lower control arm. Use a flat bladed screw driver. 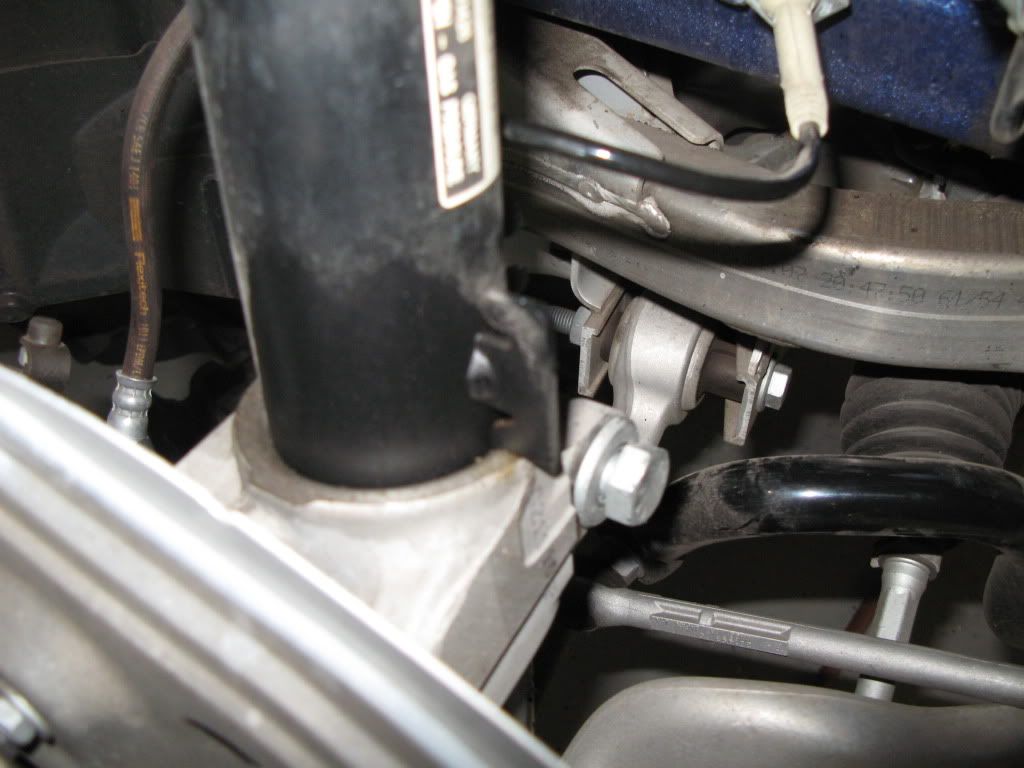 You can see the pinch bolt and nut are loose but still on. 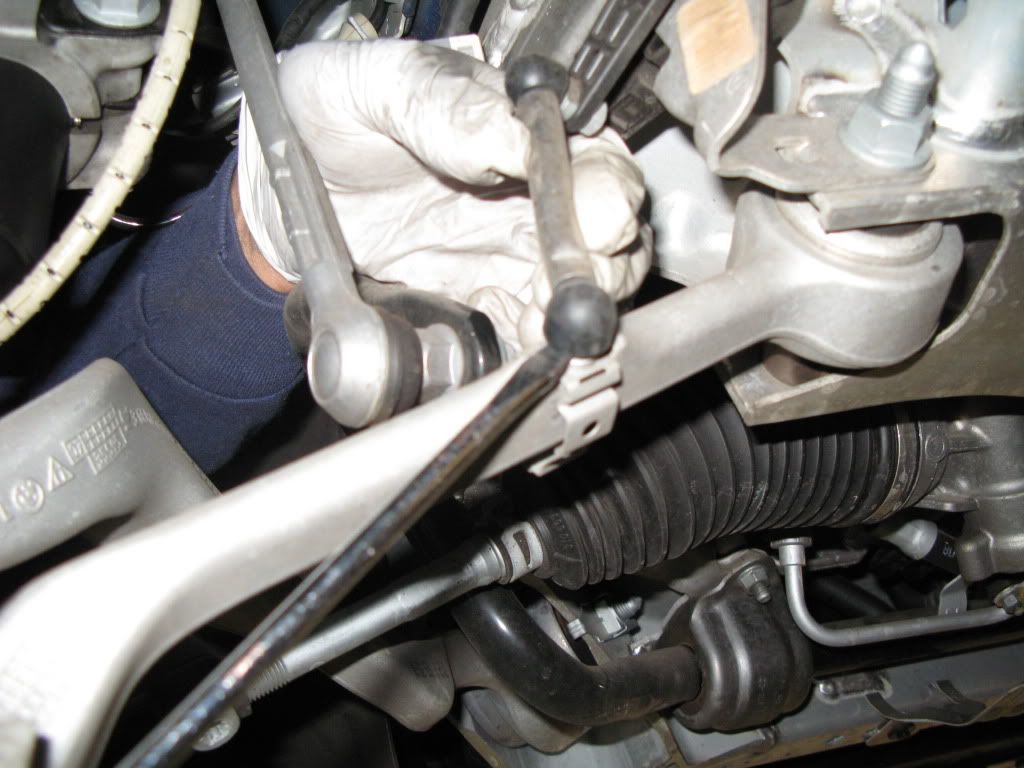 5. Remove 3, 13mm nuts on top of strut mount. Use 13mm socket and endwrench. (30 ft/lbs.) There is an alignment nipple which I marked to remind me to mount it correctly during reassembly. 6. Compress spring using Autozone Spring Compressors (free rental and much better than Harbor Freight). Use 19mm ratcheting end wrench (Harbor Freight) 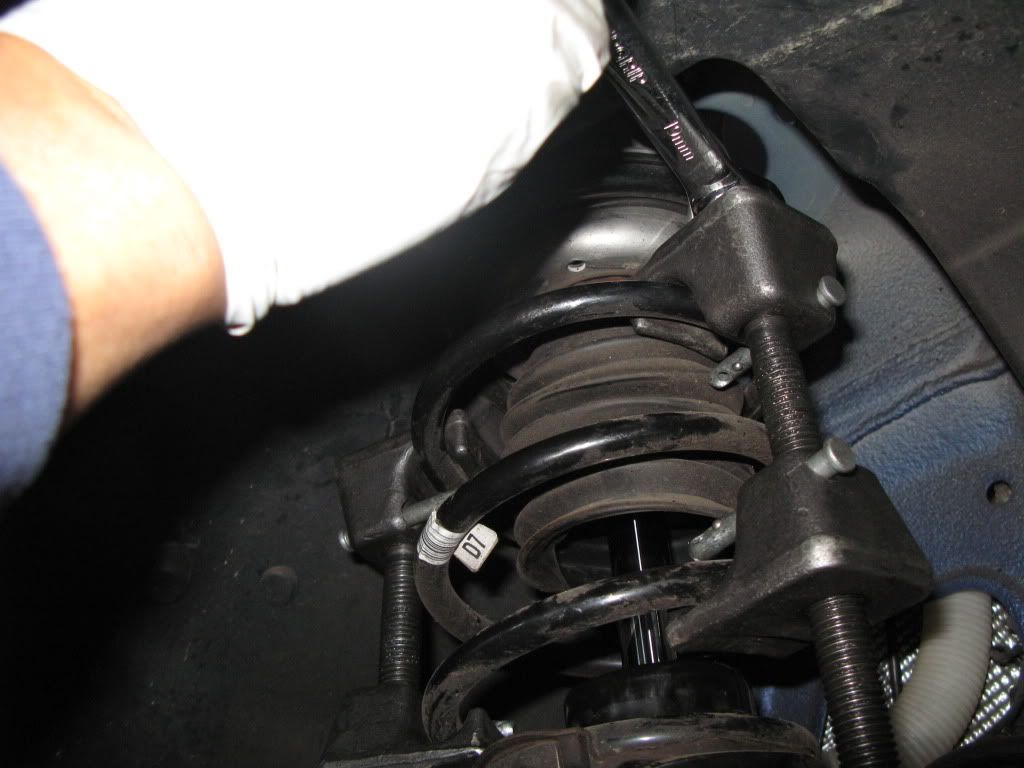 7. Push steering knuckle/brake rotor down so top of strut clears fender. Remember the tape on the fender just in case. 8. Slide off black top ring but mark alignment with nipple for re- assembly. 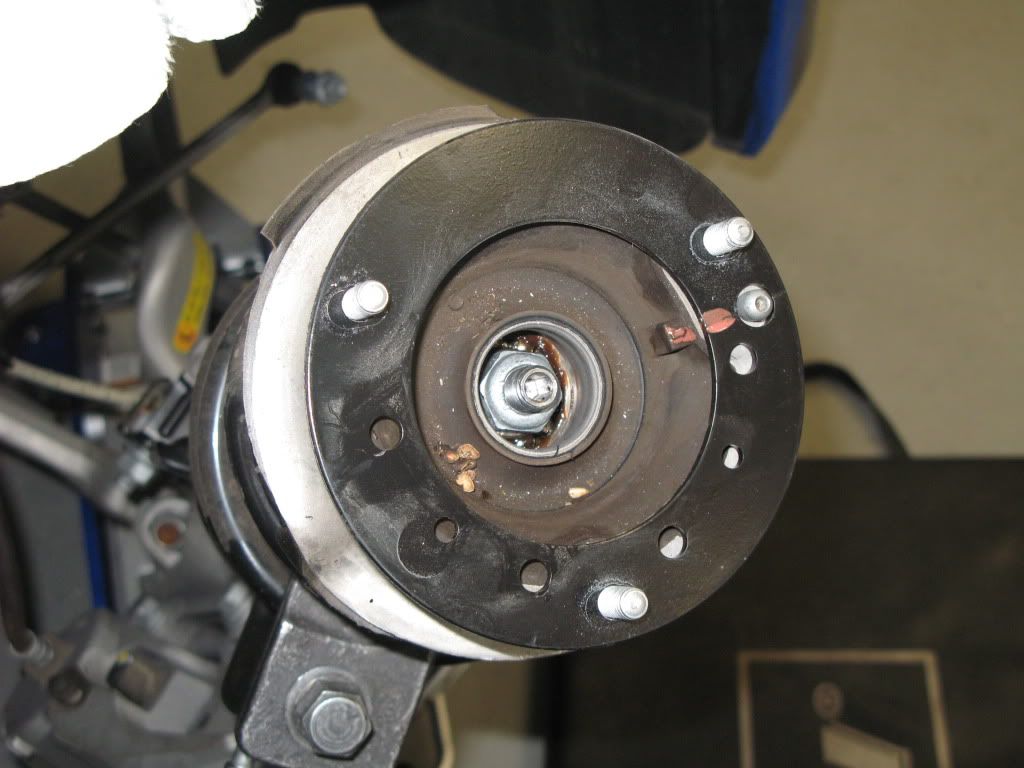 Notice alignment nipple 9. Remove plastic top cap to uncover 21mm nut on top of strut. 10. Remove 21mm nut (55 ft/lbs). Use 21mm socket and MAKE SURE COIL SPRING COMPRESSOR is still fully compressing spring. Otherwise, car parts and your body parts may be damaged! 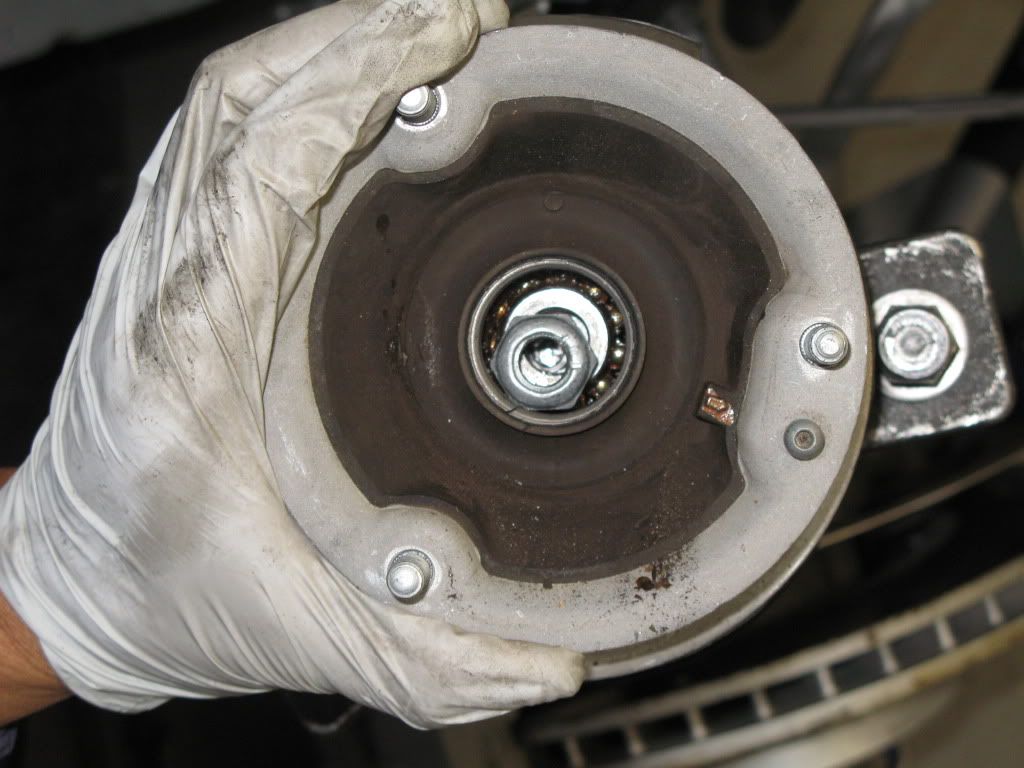 11. Carefully remove swivel hat, washer and spring from top of strut. Remove strut assembly from pinch mount by spreading mount with pry bar and using hammer from bottom of strut. 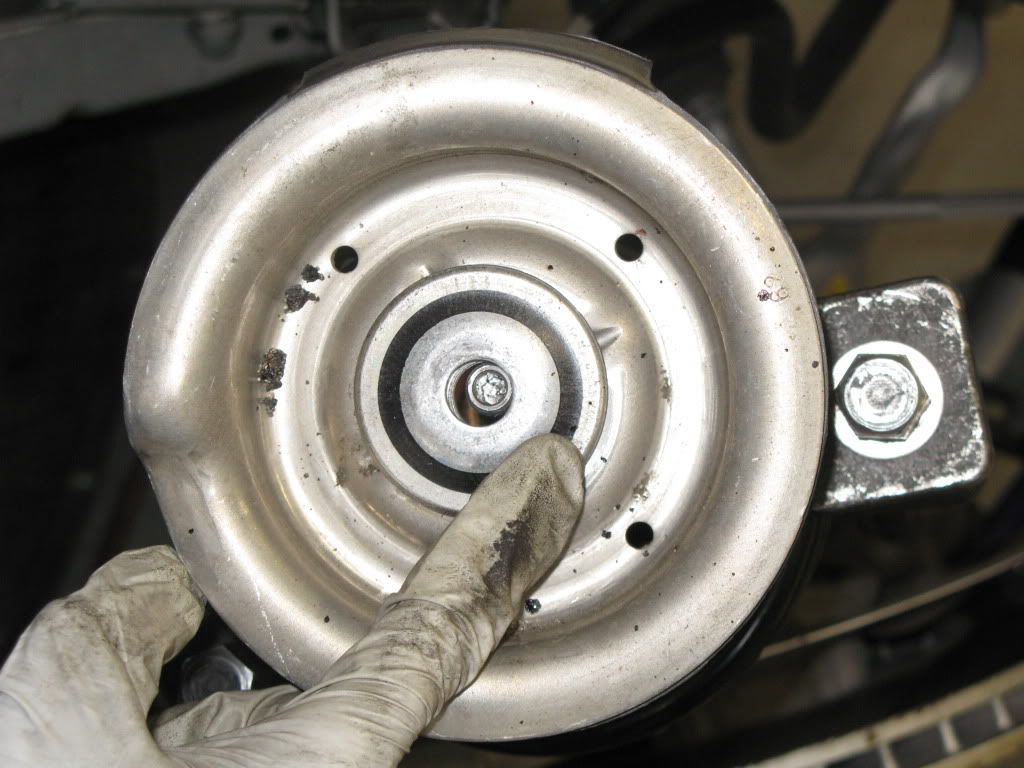 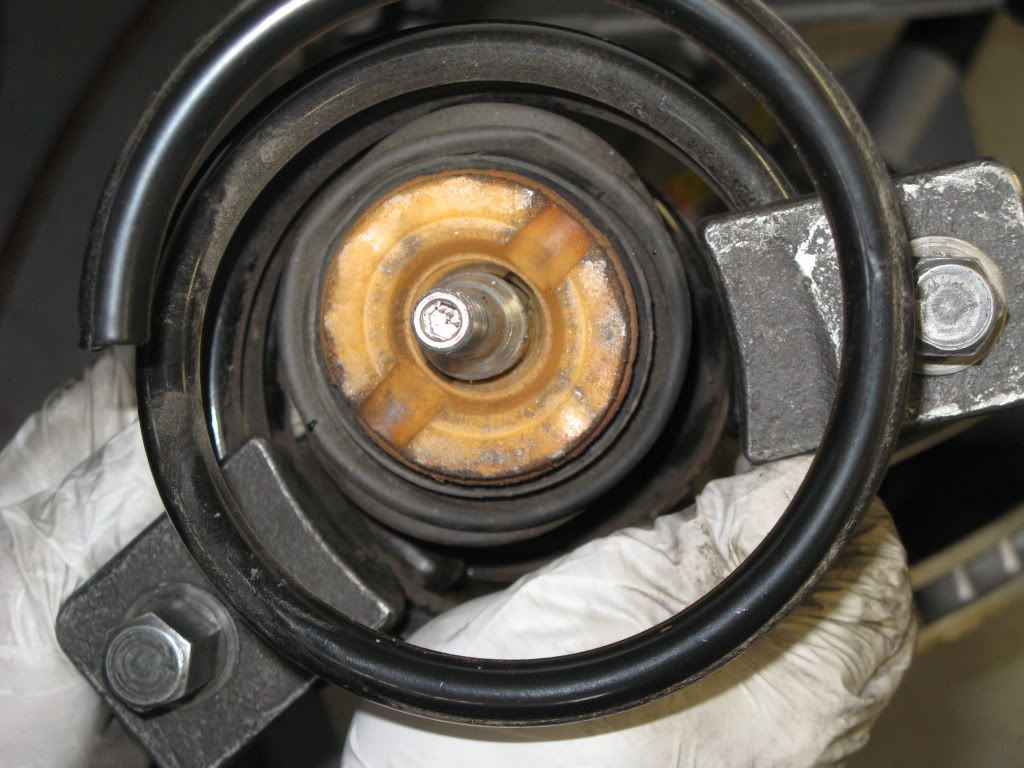 12. Remove spring compressor from spring. 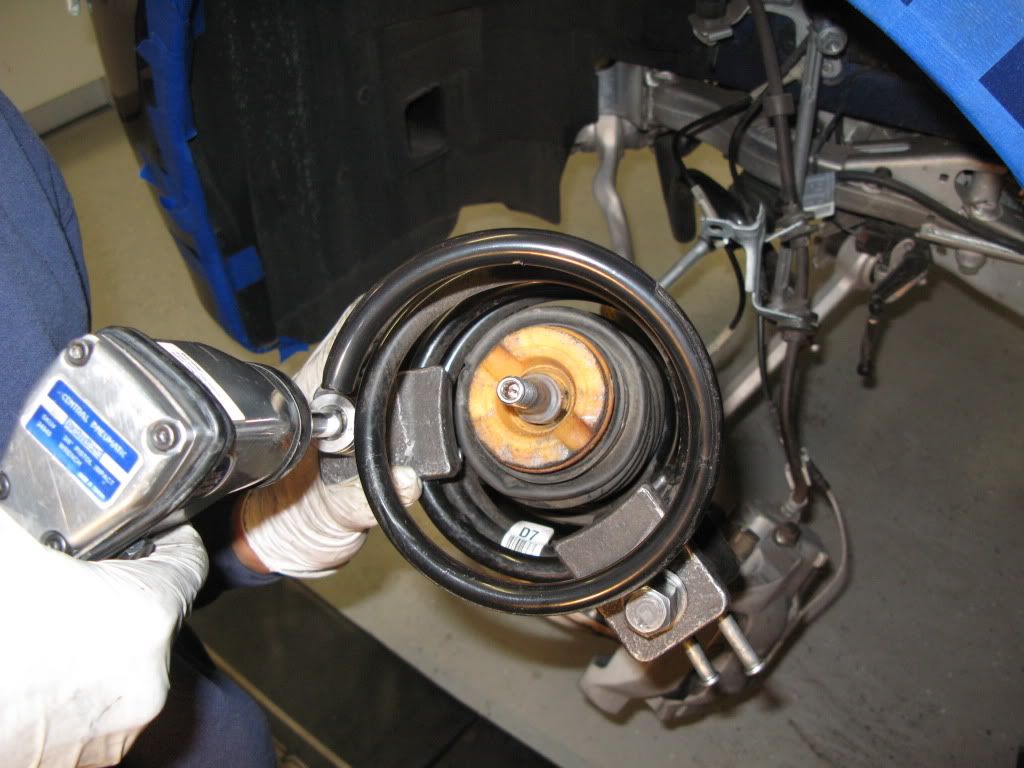 13. Place OEM lower rubber spring cushion onto new Koni strut. 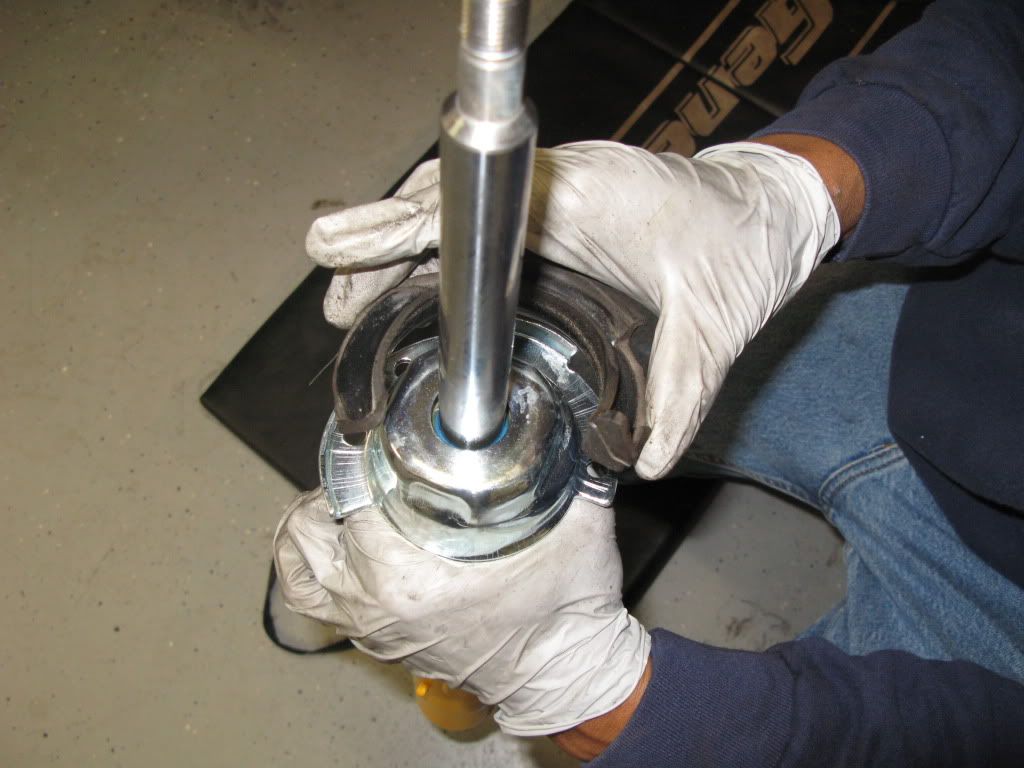 14. Place OEM rubber dust boot and bump stop onto Koni strut. 15. Place new Eibach spring onto strut and use spring compressor to compress spring. 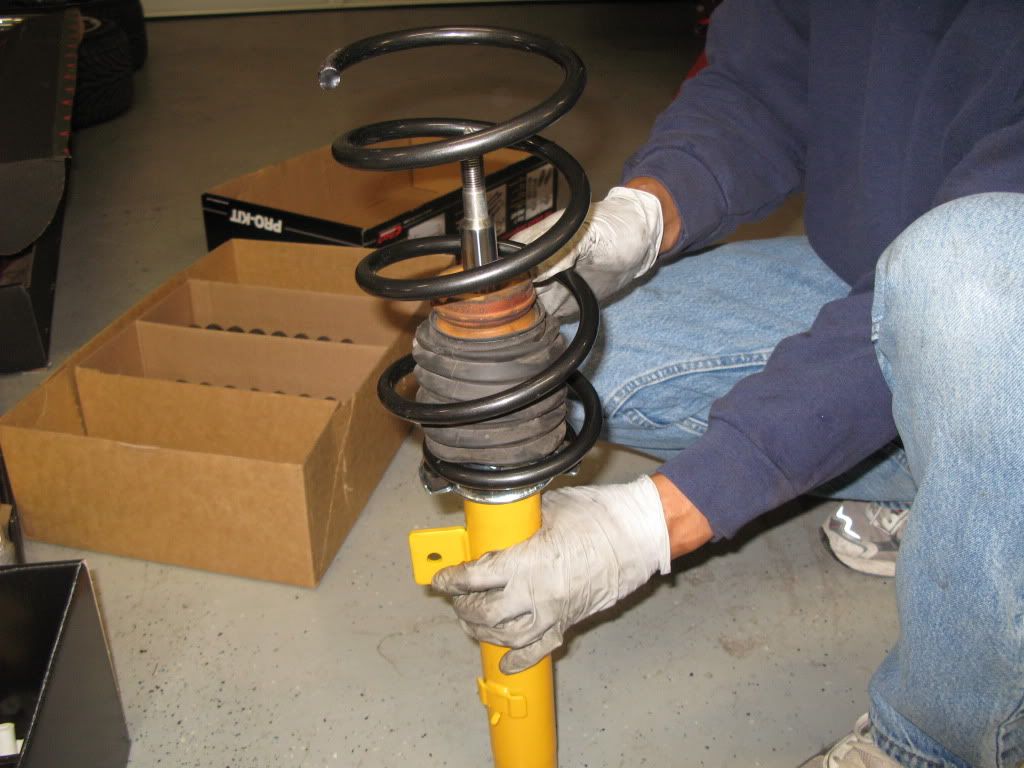 16. When spring is compressed, place OEM upper rubber spring cushion, metal spring top cap, washer, and upper swivel hat onto new strut. These are all held together on the strut by a new Koni supplied lock washer and 19mm nut. 17. Leaving spring compressor on, place new strut assembly into lower pinch mount. Make sure strut is fully seated. Then push down on rotor/steering knuckle and carefully slide upper part of strut past fender and into recess for strut. Slowly release pressure from spring compressor until it can be removed. Attach top of strut with 3, 13mm nuts. Make sure alignment nipple is properly aligned. Remember the alignment marks you made. Then tighten 18mm bolt and nut on lower pinch mount. 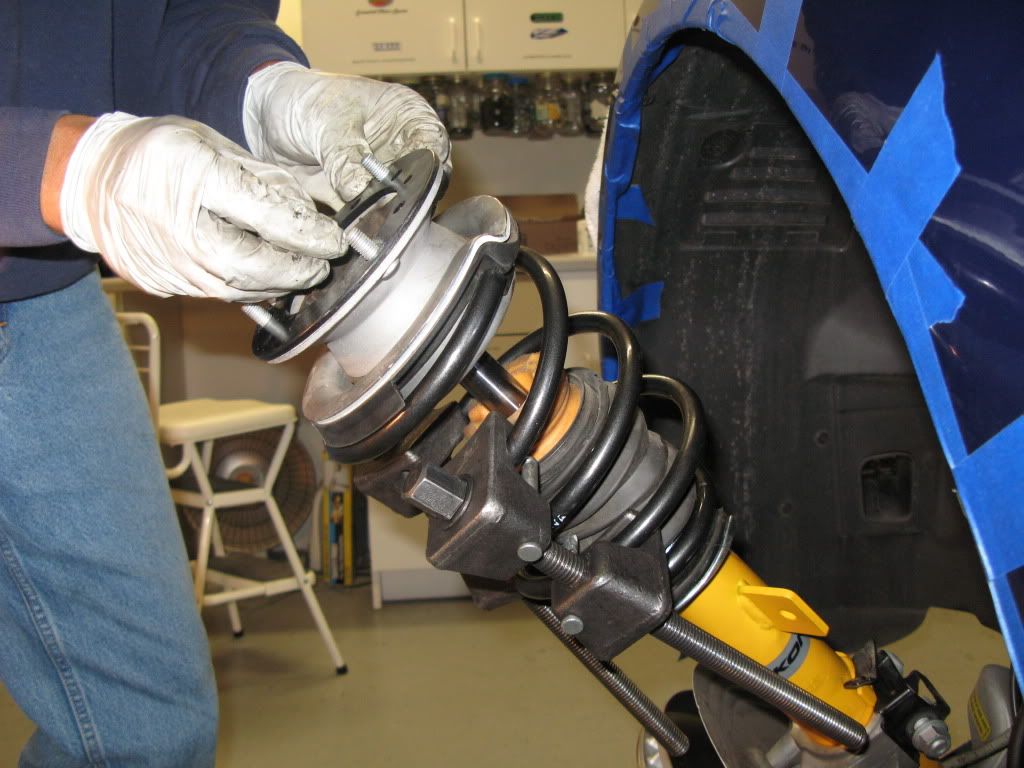 18. I didn't attach sway bar link to strut since I was replacing sway bar with a new Eibach unit. Now let's continue with the Front Sway Bar. 1. Since the sway bar link is already unbolted from the strut, just unbolt sway bar link from the sway bar. (34 ft/lbs.) 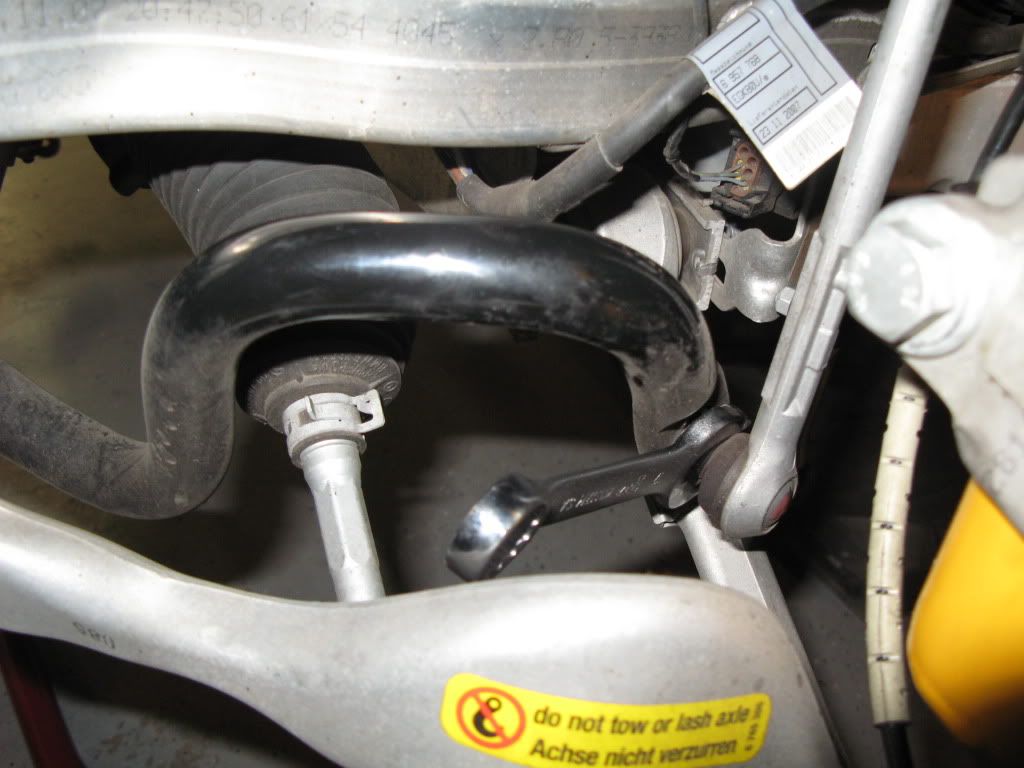 2. Remove the sway bar bushing brackets. They are held on by 4, 12 mm nuts (16 ft/lbs). Use Deep well socket.  3. Lower the sway bar down and shift it to the driver side of the car. You'll have to tip and rotate the sway bar but it comes out easily. 4. The Eibach sway bar is thicker and comes with a much firmer bushing. Liberally grease the bushing with the included sticky grease and use the OEM bushing brackets to secure the new sway bar. You'll have to rotate the sway bar to find the "sweet spot." Reattach the sway bar links and you are done. 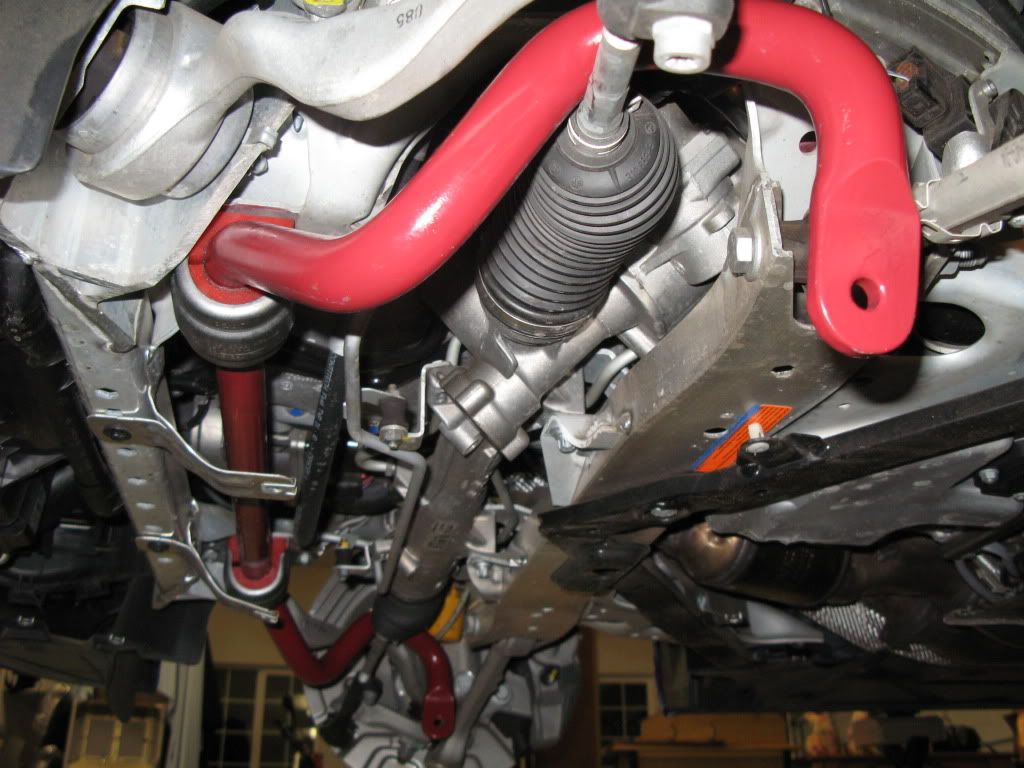 Before I started with the Rear Sway Bar I realized it would be easier if I removed the exhaust first. 1. Remove midpipe shield/chassis brace. There are 8 bolts. Use Torx T50 (15 ft/lbs.) 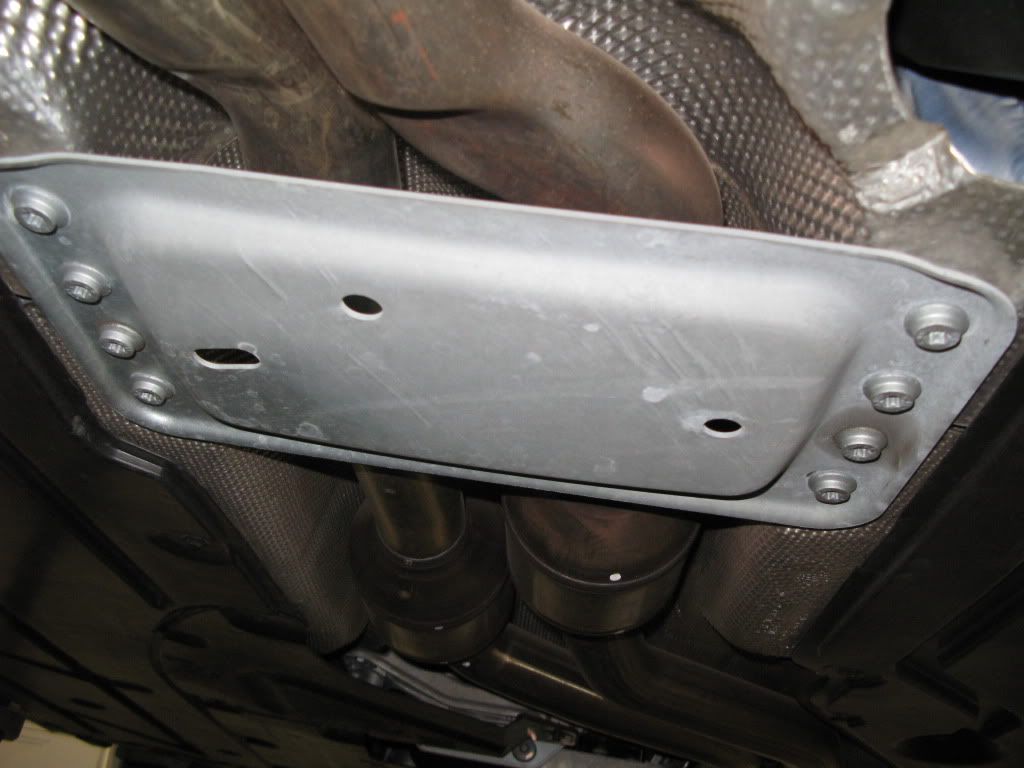 2. Support exhaust with a hydraulic jack. 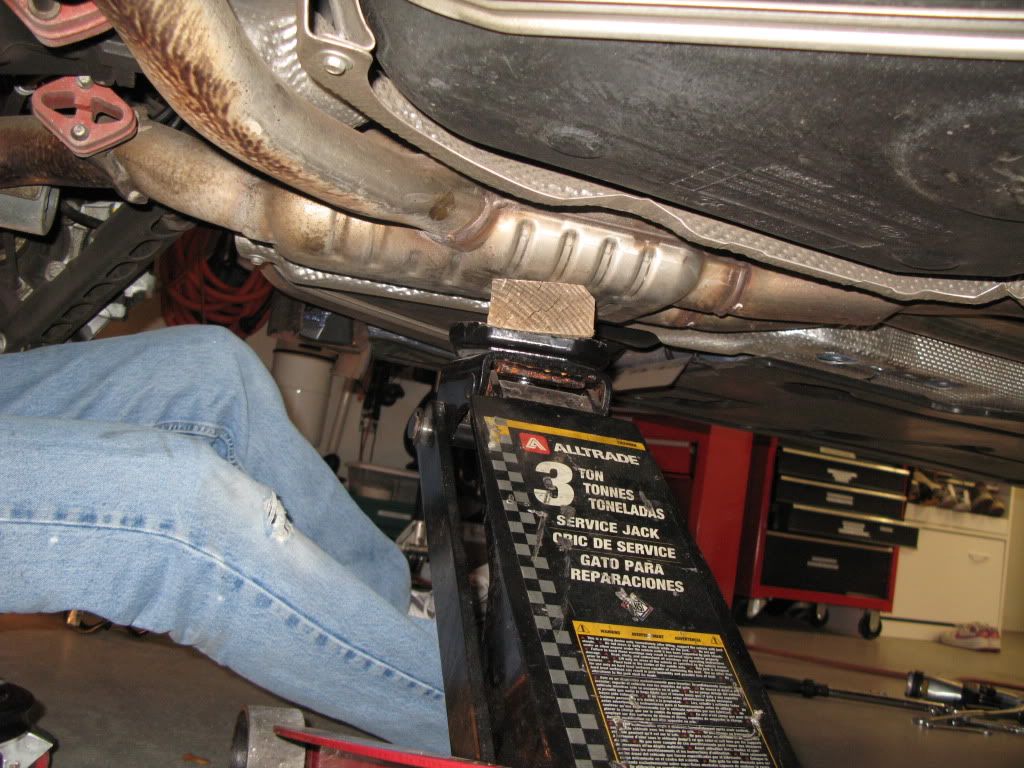 3. Disconnect mid pipes from down pipes. I used penetrating oil before- hand to make it easier. I used an extension and a universal joint. 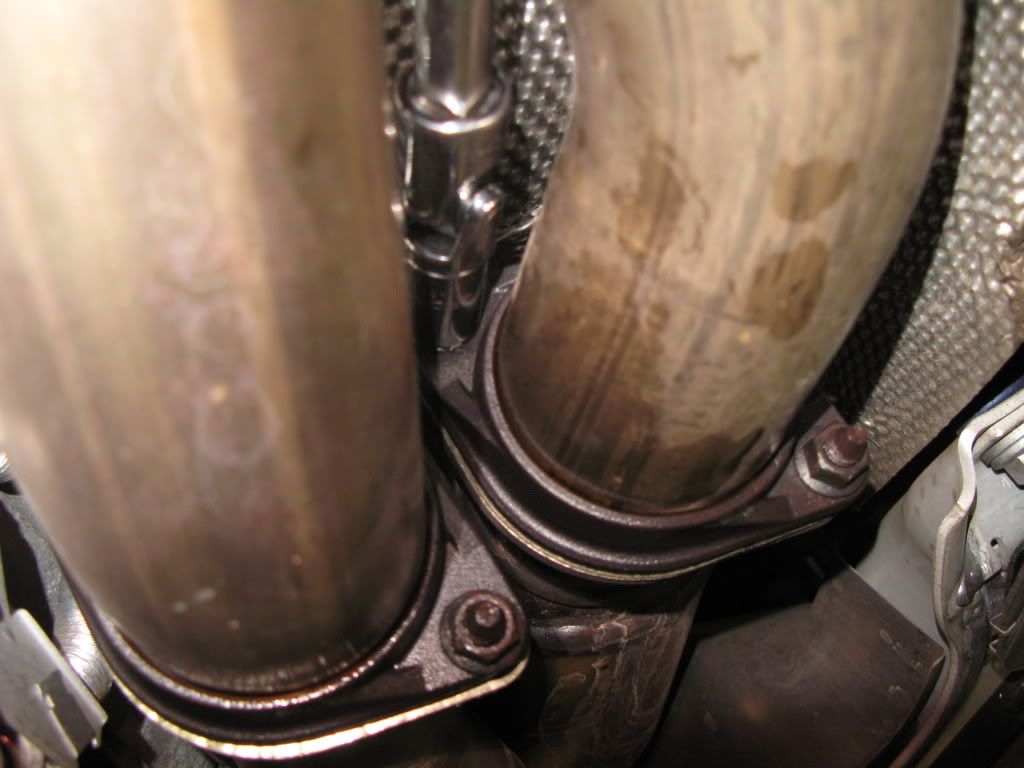 4. Remove rubber hangars from exhaust. Use pry bars. Also, disconnect vacuum line to solenoid exhaust valve at rear by the muffler. You'll have to plug this line if you are installing aftermarket exhaust. 5. Remove mid pipe brace. Use 8mm socket (25 ft/lbs) 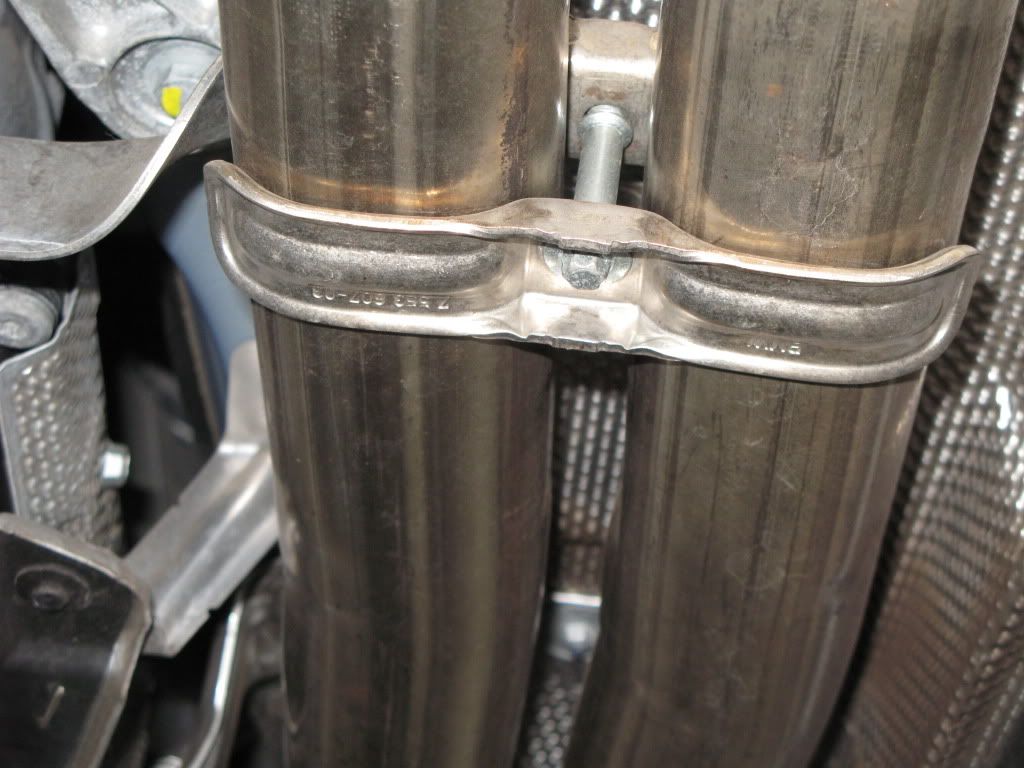 6. The exhaust is HEAVY so have a helper help you lower the jack while you stabilize the exhaust. Now we can go to the Rear Sway Bar. I wish the Rear Sway Bar was as easy as the front but IT IS NOT. But be patient and methodical and you will succeed! 1. Unclip ABS wire from upper control arm, so it is free from control arm. While you are unclipping the wires, notice there is not enough room to unbolt and remove the sway bar bushing brackets. That is the big PITA. 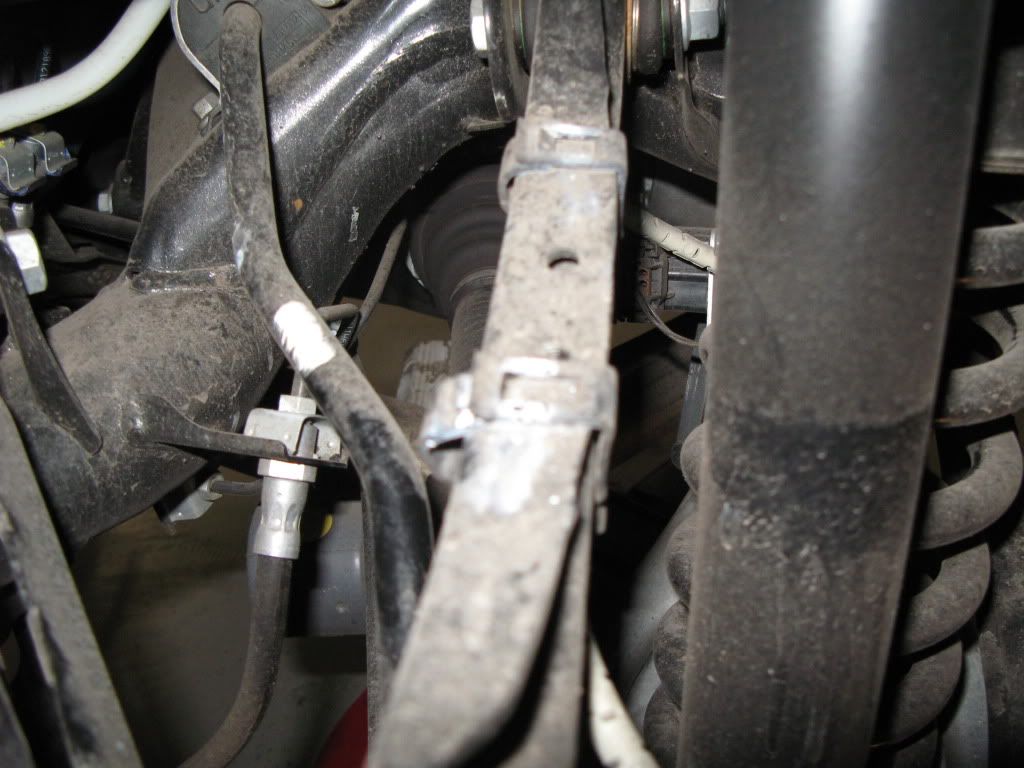 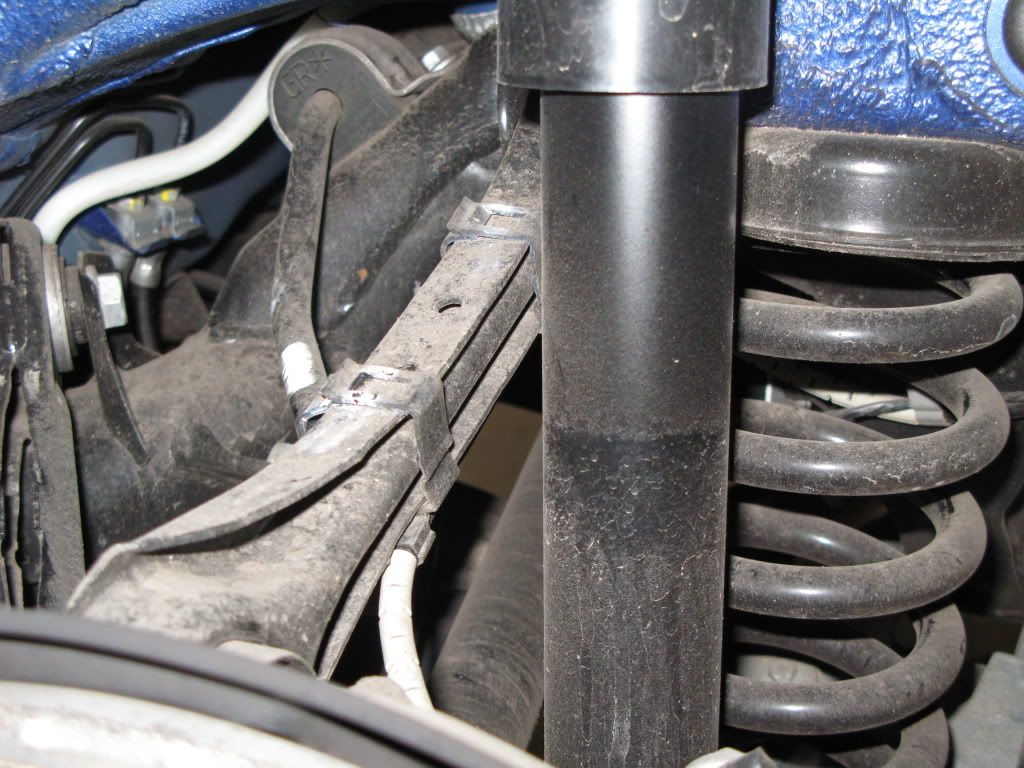 2. Disconnect sway bar from sway bar link. I used thin vise grips and 16mm socket (40 ft/lbs). 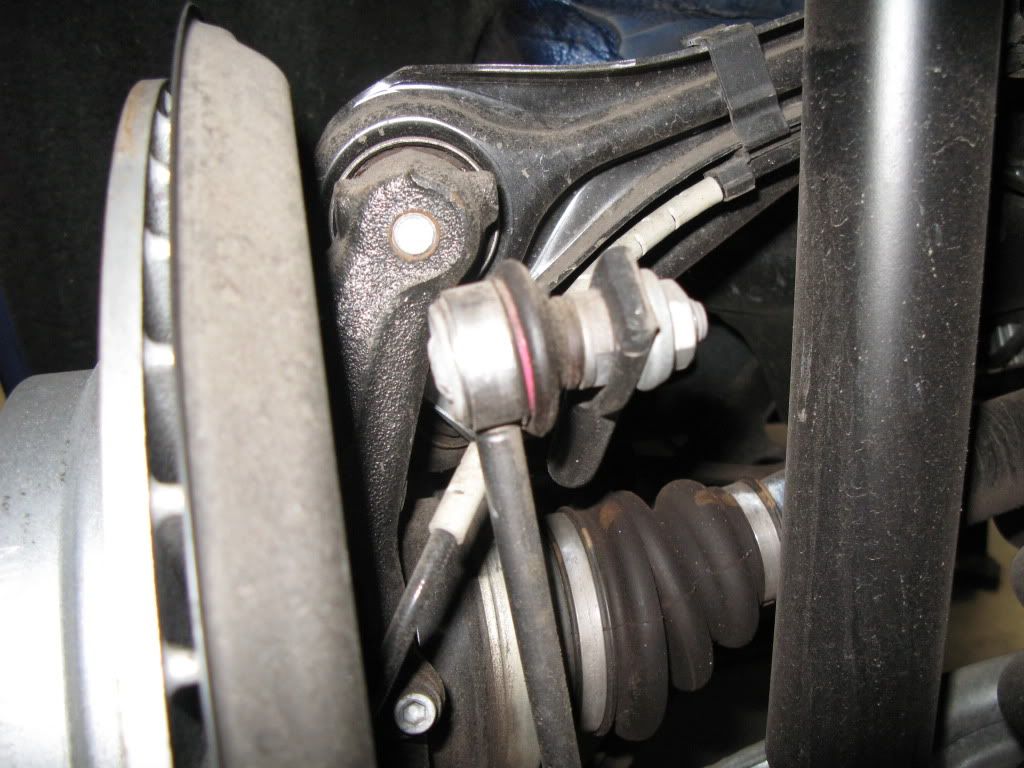 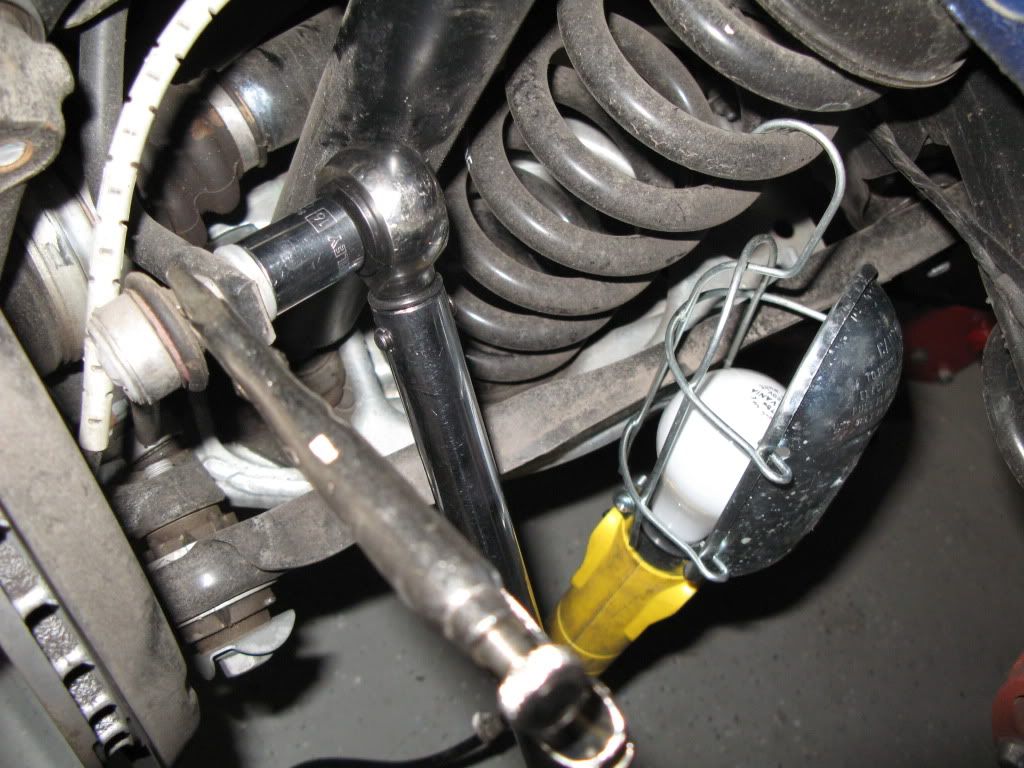 You need something to hold the sway bar link stud or else it will spin. 3. Disconnect upper control arm from rear hub. Use 18mm socket(95 ft/lbs) Rotate upper control arm up and out of the way.  4. Loosen heat shield around rear drive shaft. Use 10mm socket. In retrospect, I'm not sure this was even necesarry. I didn't need to drop the subframe/differential unit that much to get the sway bar out. I thought that it might damage the heat shield and it is very easy to loosen. Use your own judgement. 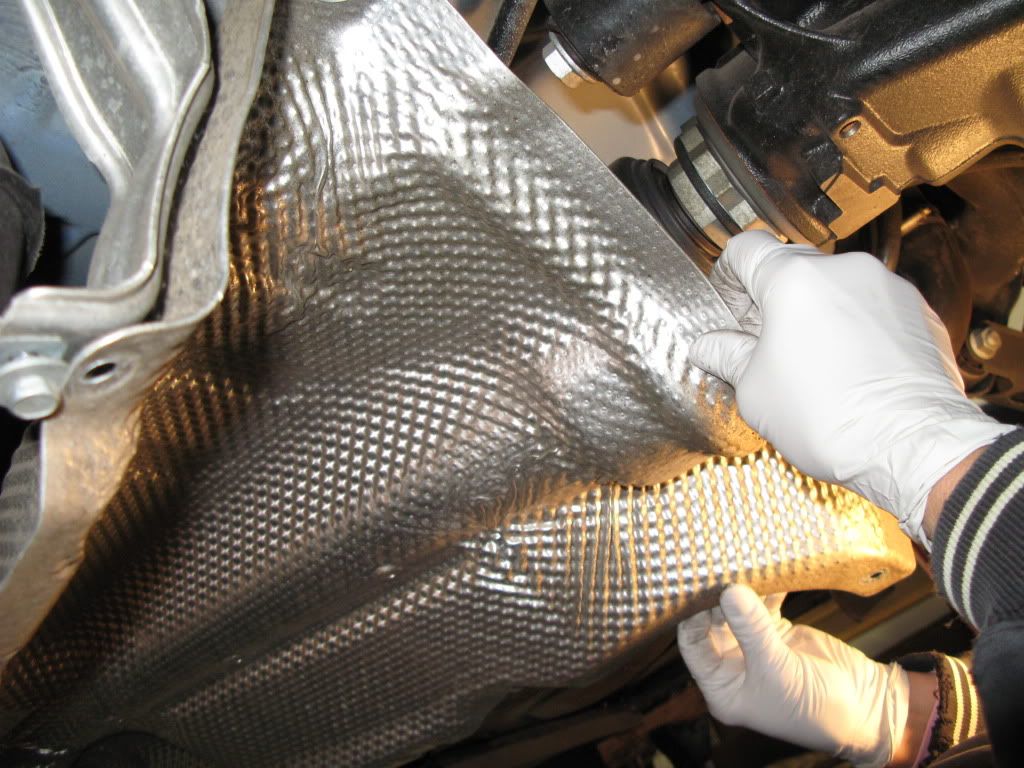 5. Loosen lower shock mount. Use 10 mm socket (35 ft/lbs). You don't have to remove bolts. Now remove lower nut from shock. Use 17mm deep well socket (15 ft/lbs). 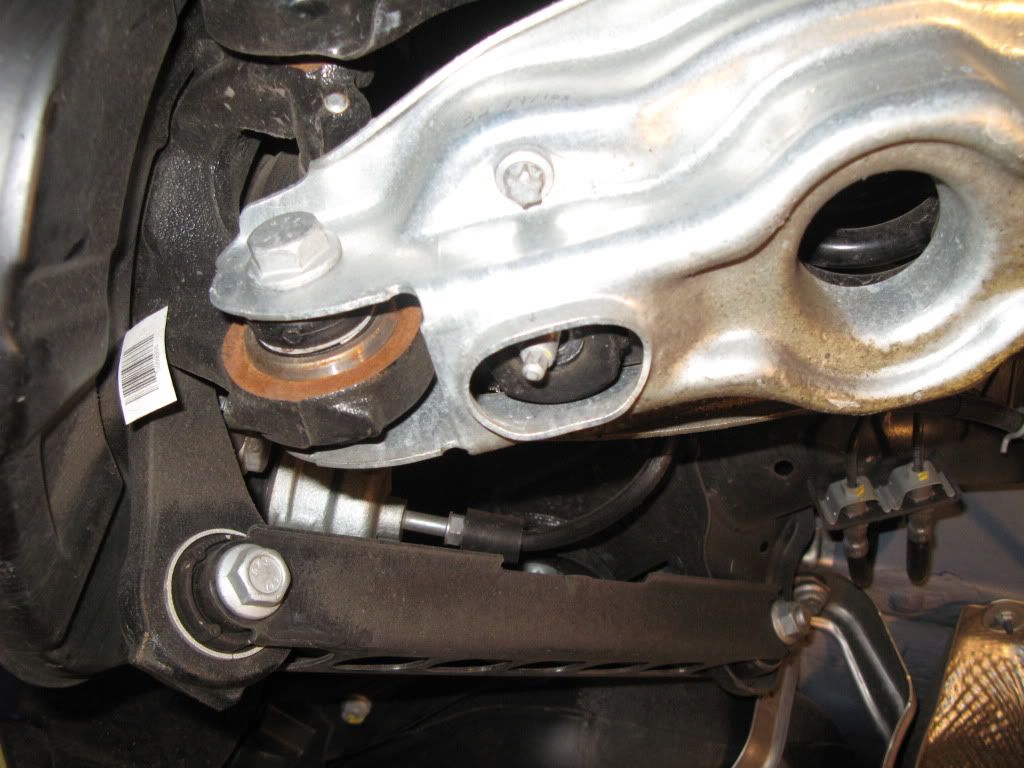 Everything is very accessible under the lower control arm. 6. Place jack under differential but NOT under differential cover. Loosen 6 subframe bolts but do not remove altogether. You can do that later if you have to lower the subframe more to remove rear sway bar. Use 14mm and 16mm sockets (65 ft/lbs). 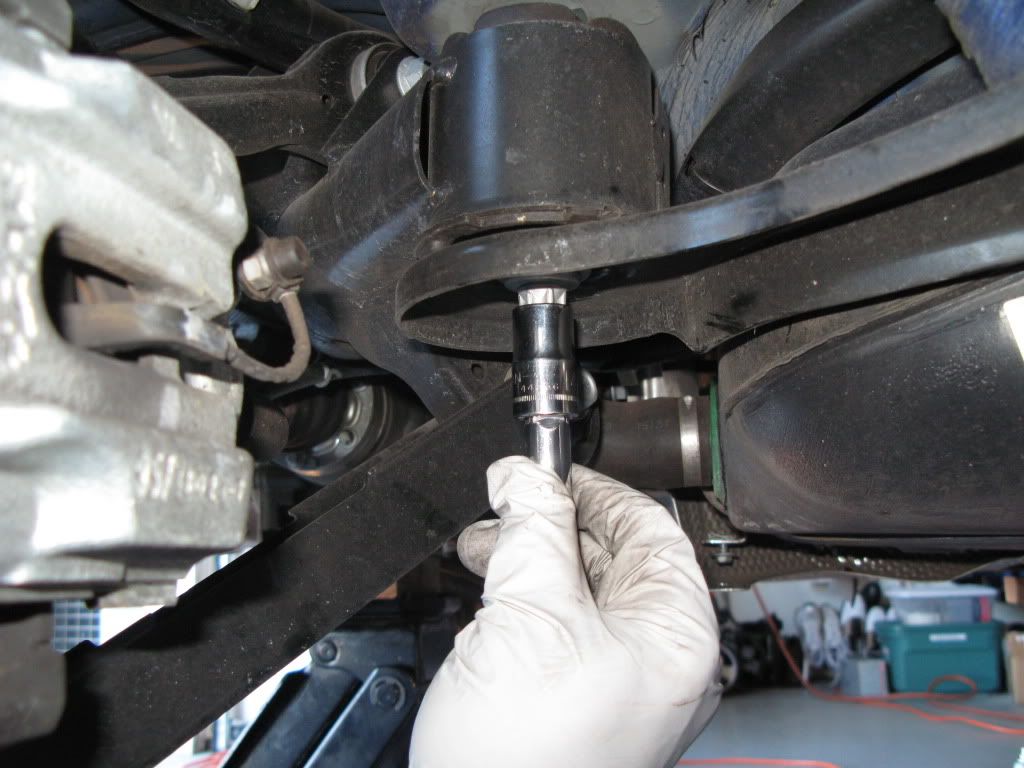 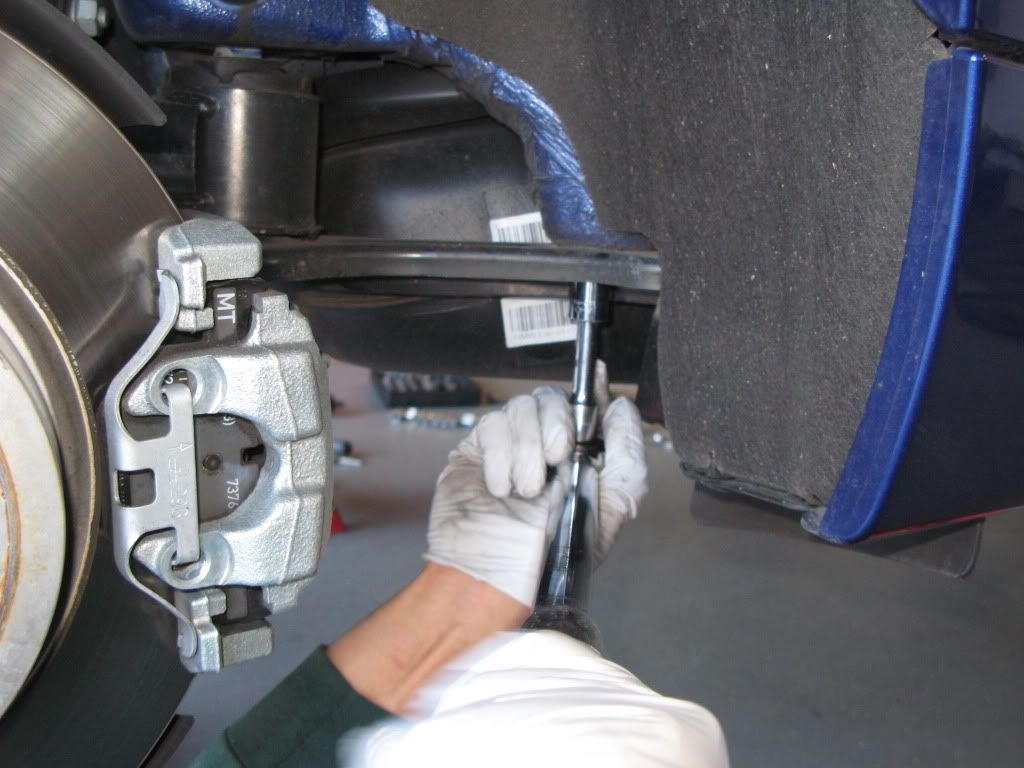 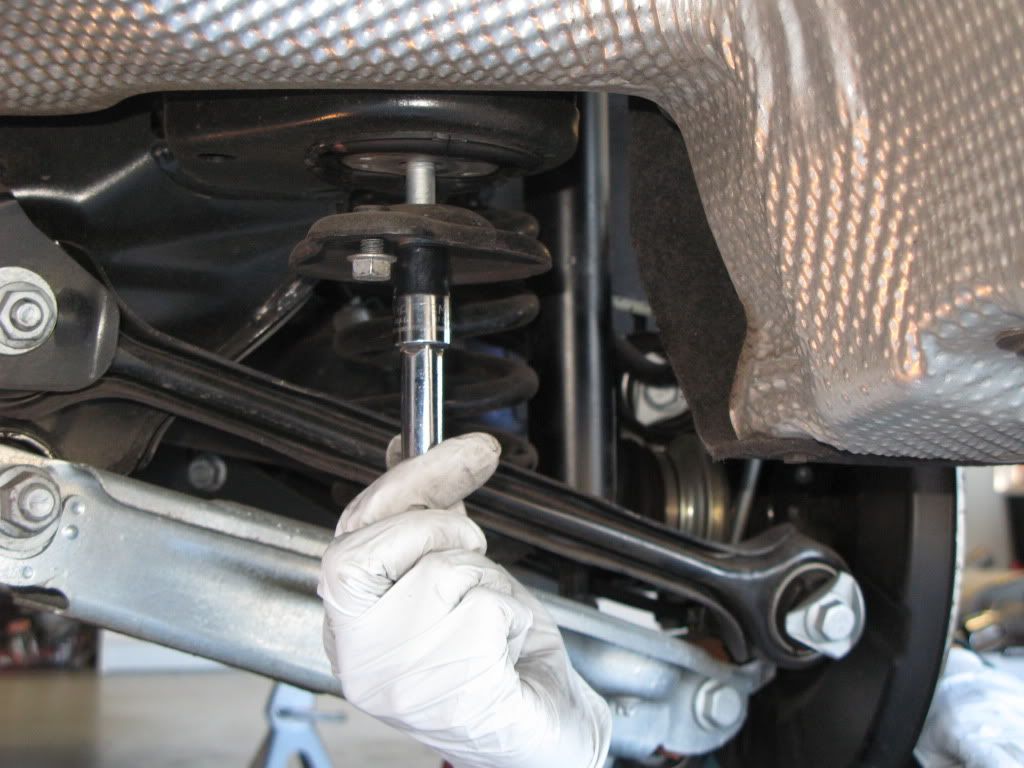 7. Remove the sway bar brackets and bushings, and pull and rotate the sway bar out from the Drivers side of the vehicle. Be patient and lower the subframe more if you have to. Just be careful not to stretch any wires too much. 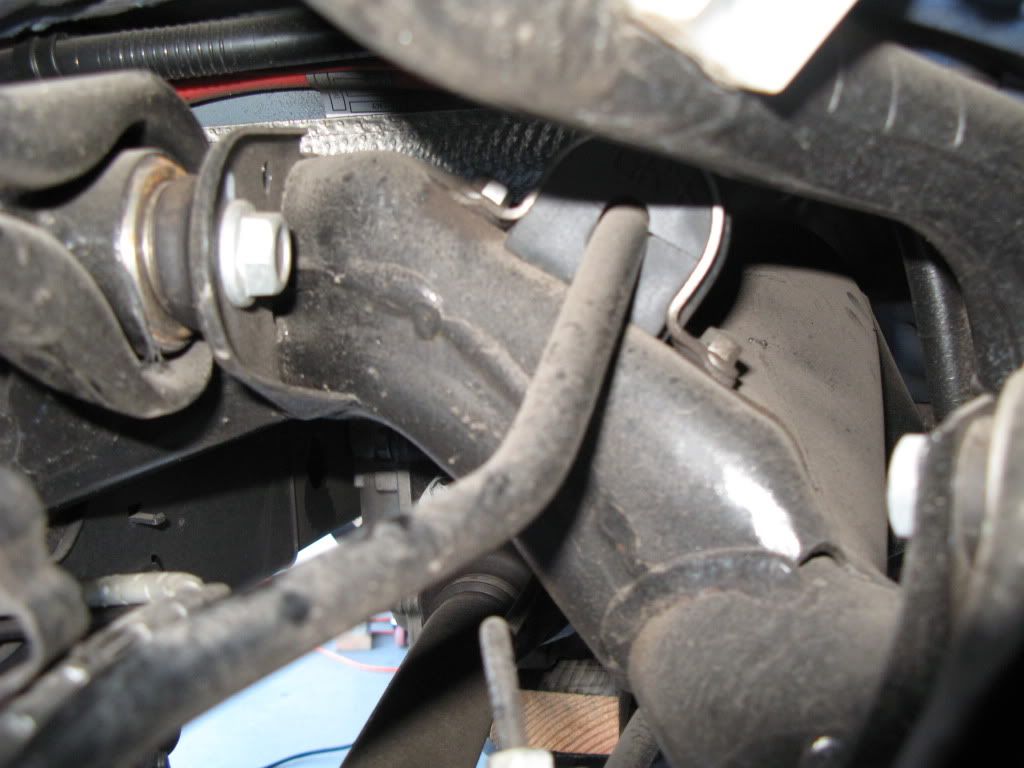 Pic from passenger side. Now you have room to remove the brackets. 8. Installed new Eibach sway bar in reverse order. Kit comes with new firmer bushings and grease. Use all the grease. Before I raised the subframe, I went on to replace the OEM zsp rear shocks and springs with Koni yellows and Eibach Pro springs. Before I continue with the Rear Shocks and Springs, I want to tell everyone I lost my notes for this part so take the next steps with a grain of salt. Let's get to it. 1. You have to take the trunk liner out to get to the top shock mounts. There is a plastic trim piece on the rear of the trunk and side liners that you have to remove. There are many plastic push type rivets to remove. The best way is to get a set of plastic tools from Harbor Freight or any auto parts store. I have both metal and plastic tools to remove trim pieces and plastic rivets and the plastic tools work the best without breaking anything. 2. Once the trunk liner is removed the top shock mount is accessible. I used 2 end wrenches to remove the shock top nut. 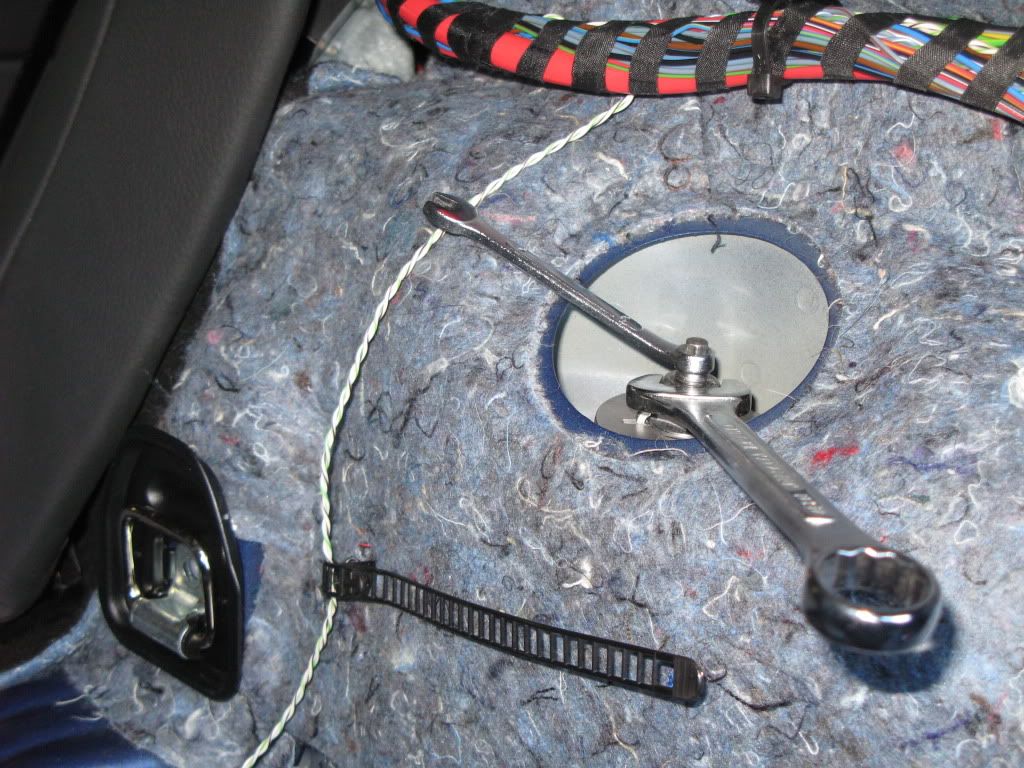 3. On a previous step during rear sway bar removal I had already removed the shock lower nut and loosened the lower shock bracket. So now it is very easy to remove the old shock and install the new. 4. Because the subframe is still lowered the rear shock spring is already loose and ready to come out. I didn't have to touch the lower control arm. 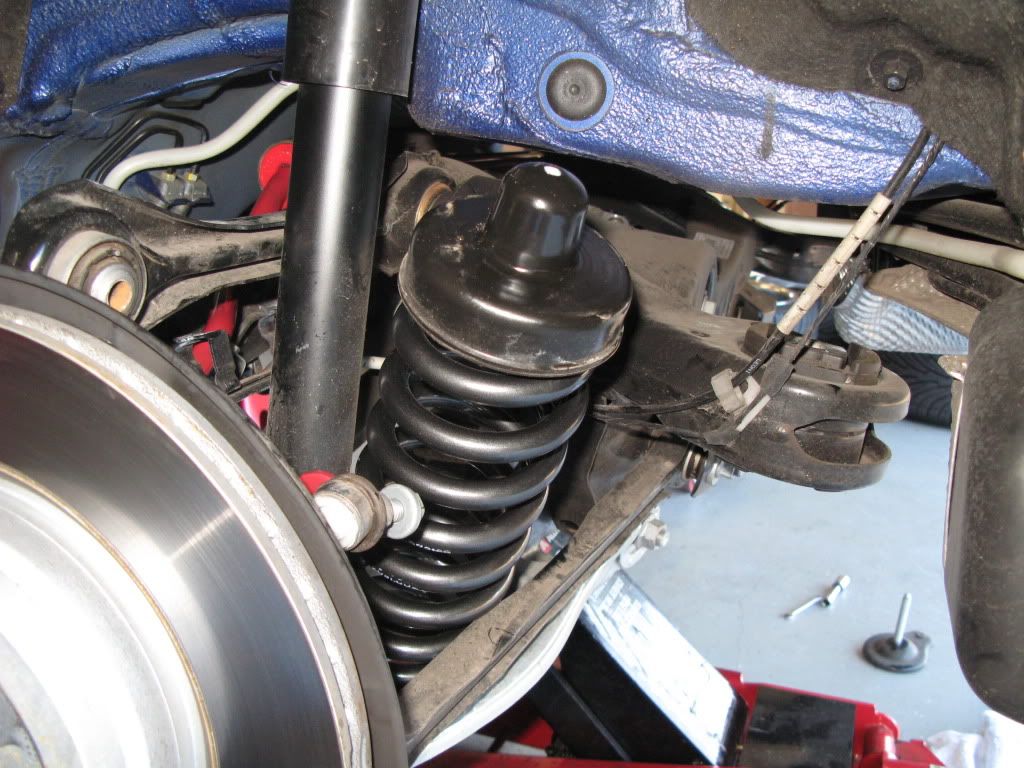 5. I replaced the OEM springs with the Eibach Pro Springs. At this point it was easy to reverse the order and get the rear suspension buttoned up and the trunk liner put back together. No extra bolts or nuts and none of the plastic rivets even got scratched, so I felt good. 6. The last thing I did was install the Borla exhaust. It came with mid pipes so I didn't have to cut up my OEM exhaust. The Borla exhaust is super light compared to the OEM. The tips are a little larger than stock. Idle is definitely louder but driving is very unobtrusive. With the stock I didn't hear any exhaust except when revving it up. The Borla works for me because it is lighter, a little louder but without any drone in my automatic trans car. If you are picky you might say it has a tiny low drone around 1600 rpm cruise but I think it sounds great for a daily driver. Pics of my car after the mods: 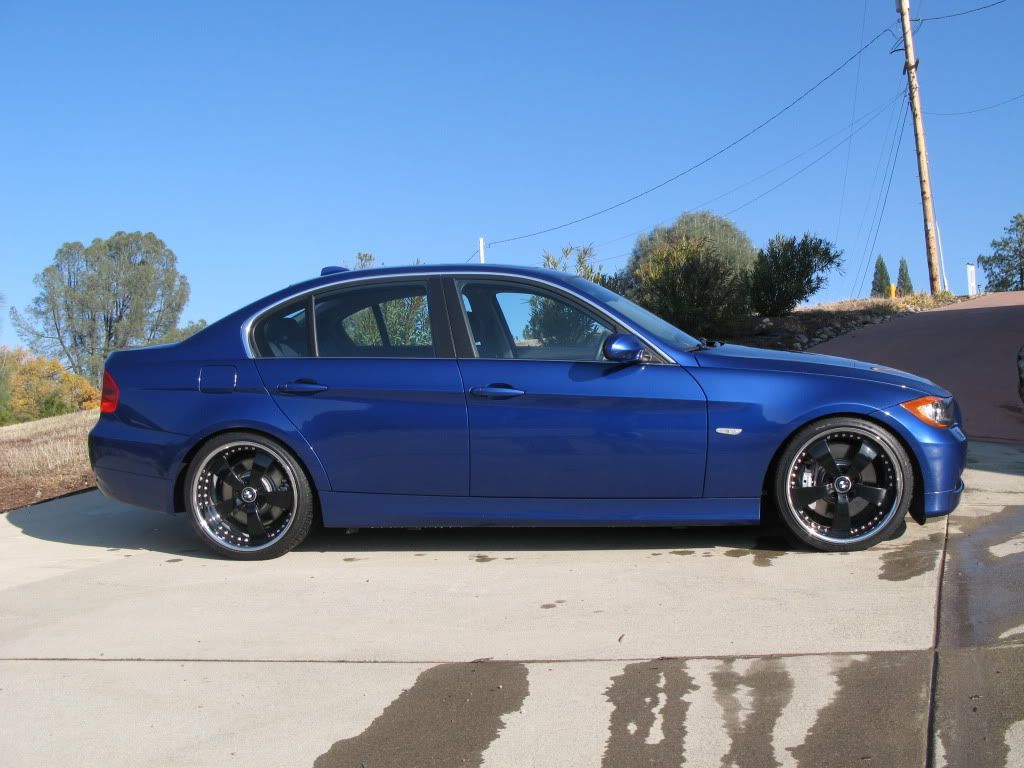 With the Eibach Pro springs expect .5 inch lower on rear and 1 inch lower on fron compared to OEM zsp suspension.  Afterthoughts: I think these mods, including the sway bars can be done by anyone with a decent set of tools. My wife has a supercharged 350z with full Stillen suspension and my son has an STi with coilovers and my previous car was an EVO 8. My 335i with zsp suspension had a too much understeer and bodyroll compared to the others and the suspension seemed harsh. Now without the runflat tires and the Koni yellows and Eibach springs and sway bars the change is significant. You can definitely feel less understeer and body roll even at daily driving speeds. Plus the ride is more compliant. My car will never see the track so I'm happy with this setup. I was thinking about KW or FK coilovers but after talking with the guys from Supreme Power I'm glad they recommended these products for my situation. Plus the shocks, springs, and sway bars were $1100 from them with no labor costs. Easy decision. If I wanted to do everything gradually and try and save money I probably would have done the non runflat tires first and then the sway bars second. But these cars do look nicer a little lower. Lastly, the Borla exhaust saved a ton of weight, fit was excellent and sound was only a little louder but not obnoxious. Hope this all helps someone, as I have received a lot of help from you guys and gals here. |
| 01-01-2010, 08:25 PM | #3 |
|
Banned

253
Rep 7,089
Posts
Drives: '06 AW 330xi
Join Date: Mar 2009
Location: North Jersey/Philly/NYC
|
Awesome diy man this will definetely come in handy when I do these mods.
|
|
Appreciate
0
|
| 01-02-2010, 08:43 PM | #5 |
|
Enlisted Member
14
Rep 32
Posts |
Thanks for the comments. This did take me a full day and a half. But I really think this could be done in 1 day. And a helper is a big time saver. It helps to have a wife/helper who is a car nut also. She even said that she could have done it with me as the assistant. The main thing is that the removal/install of both front and REAR sway bars
is doable for the average owner. Keep up the good work guys and thanks to everyone who posts here. I continue to learn. |
|
Appreciate
0
|
| 01-03-2010, 06:18 PM | #6 |
|
Major General

422
Rep 8,003
Posts
Drives: '08 E90 335i, '99 E36 M3
Join Date: Apr 2009
Location: Houston, TX & Atlanta, GA
|
Nice DIY. Do you have a list of all the tools needed? I have almost nothing. I was thinking of going to Harbor Freight and buying everything in case I decide to attempt this in the future.
|
|
Appreciate
0
|
| 01-08-2010, 10:48 AM | #8 |
|
Enlisted Member
14
Rep 32
Posts |
Hey NiVeDh. I feel your pain. Took me years to collect enough tools where I don't have to run to the store or a friend's house to get something. Anyway you're going to need a set of metric sockets both regular and deep well. Probably 3/8 inch drive. Try not to scrimp on the 3/8 drive ratchet. I prefer the pear shaped head with reversing lever and push button socket release on the head. Like the Craftsman from Sears. Then you're going to need a 3/8 drive torque wrench. Also a set of 3/8 drive extensions.
Plus a set of metric end wrenches. I was at Costco yesterday and saw a big set of tools with multiple 1/4, 3/8, and 1/2 inch drive ratchets for $90. Might be a place to start or sale items at Sears. From Harbor Freight check out the aluminum floor jack and jack stands. My son clipped a coupon from the back of a recent Car and Driver mag and got that stuff for dirt cheap. They have dead blow hammers, plastic auto trim removal tools, and a set of pry bars pretty cheap. Don't forget to get a coil spring compressor. It's a free rental from Autozone. Also, I think there was a need for a 21 mm socket that usually doesn't come with the standard kits. They usually go up to 19mm. Anyway, this should get you started. What's nice about investing in tools is that you use them over and over again. Glad to hear that there are plenty of us getting our hands dirty working on our BMW's! Last edited by jprandkpr; 01-08-2010 at 02:57 PM.. |
|
Appreciate
1
johnnyorange52.50 |
| 09-21-2010, 10:18 AM | #12 |
|
Captain
 36
Rep 738
Posts
Drives: G30 530i
Join Date: Jul 2010
Location: Phoenix AZ
|
Great write up. That looked ridiculously hard though. I might just bite the bullet and pay the $350 labour fee.
__________________
G30 530i
|
|
Appreciate
0
|
| 01-18-2011, 07:23 PM | #14 |
|
Entrepreneur

61
Rep 344
Posts |
I know this write up is a year old but I wonder if removing the mounting bolts for the rear like that is much easier than screwing around with the lower control arm. Looks uber simple that way.
__________________
2020 Lamborghini EVO
2020 Porsche 911 C2S 2020 Jeep Rubicon 2020 BMW X3M Competition |
|
Appreciate
0
|
| 01-19-2011, 11:23 AM | #15 |
|
Professional Moose Racer

316
Rep 7,509
Posts |
Great write up +1!!
__________________
Visit my blog anytime: http://www.sfpayments.com
 BMW Dream Team PNW Chapter, member #1  |HP Autowerks | AR DESIGN | BMW PERFORMANCE | STOP TECH | Volk Racing| AMS | ARKYM |
|
Appreciate
0
|
| 01-19-2011, 11:57 AM | #16 |
|
Major General
550
Rep 6,563
Posts |
do you recommend an alignment after this type of mod?
I have not read the whole thing but from the reply I already know it should be a great read when i have time. This is way out of my comfort zone (due to spring compression) but I will still read it later just for knowledge. 
__________________
under construction!  |
|
Appreciate
0
|
| 03-18-2011, 11:18 AM | #18 |
|
Captain

40
Rep 818
Posts |
Bentley manual torque specs:
Sway bar end links: 43 ft-lb, 53Nm [front] Strut shaft to top bearing: 47 ft-lb, 64 Nm Strut top bearing to chassis: 25 ft-lb, 34 Nm (be careful, these snap off easy) Strut assembly to steering knuckle M10 pinch bolt: 34 ft-lb, 45 Nm M12 pinch bolt: 60 ft-lb, 81 Nm wheel to hub: 89 ft-lb, 120 Nm [rear] shock to chassis top: M10 fastener 20 ft-lb, 27 Nm M14 fastener 27 ft-lb, 37 Nm Shock to swing arm bottom: 28 ft-lb, 38 Nm use new fasteners or blue loctite Last edited by AlanAZ; 03-18-2011 at 11:24 AM.. |
|
Appreciate
1
johnnyorange52.50 |
| 03-18-2011, 11:21 AM | #19 | |
|
Captain
12
Rep 859
Posts |
Quote:
__________________
2007 335i SG Coupe
2009 128i AW |
|
|
Appreciate
0
|
| 06-18-2012, 11:36 PM | #21 |
|
Private
 10
Rep 76
Posts |
Excellent write up.
Question, how do you change the settings of the Koni's in front since the strut tower brace crosses/run across the opening...did you leave the knob on? What setting are you on...I know its 3 and 1/4 turn from soft to full hard. Thanks Andrew |
|
Appreciate
0
|
 |
| Bookmarks |
|
|