

|
|
|
|
 |

|
 |
BMW Garage | BMW Meets | Register | Today's Posts | Search |
 |

|
BMW 3-Series (E90 E92) Forum
>
KnighTT e92 madness - Build thread.
|
 |
| 03-16-2023, 10:00 AM | #485 |
|
Captain
 
459
Rep 617
Posts |
Side questions....
My MHD boost gauge at idle is reading 0.28PSI. Is that a sign of not enough vacuum? I'm beginning to wonder if my entire VTT valve cover external PCV dual catch can system is setup properly. It doesn't have anything to dial in any kind of pressures so how do I know if it's properly working? I'm starting to wonder if that is a big issue. It changes A LOT on how the engine operates and doesn't have anything that dials it in or adjusts so it just "working" seems wrong to me. Last edited by KnighTT; 03-16-2023 at 11:22 AM.. |
|
Appreciate
0
|
| 03-16-2023, 01:20 PM | #486 | |
|
Slow.
3782
Rep 7,151
Posts
Drives: Single Turbo N54 on Meth!
Join Date: Jun 2012
Location: Boston, MA
|
Quote:
 My boost gauge shows around -18 to -20 in.-Hg of vacuum at idle. This is a physical gauge not MHD. I don't believe you should have boost in your IM at idle, it should be under vacuum. Your Wastegates should be open. Does MHD measure the the manifold PSI or CP PSI? I believe there are two separate pressure sensors. My gauge at idle: 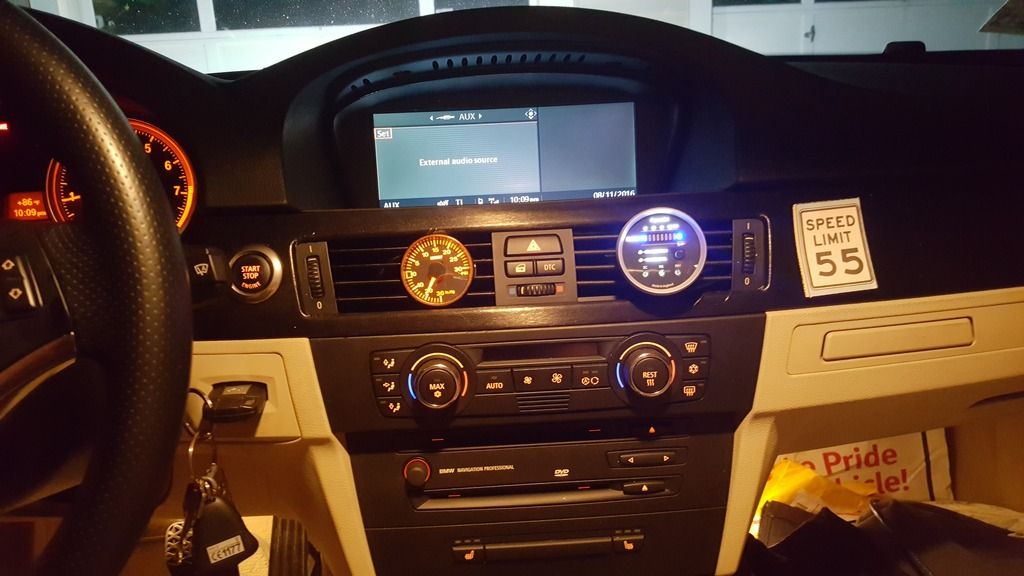 If someone can fuck up a product it is VTT. Now you probably need to buy this from them: https://vargasturbo.com/product/vtt-...-relief-valve/ 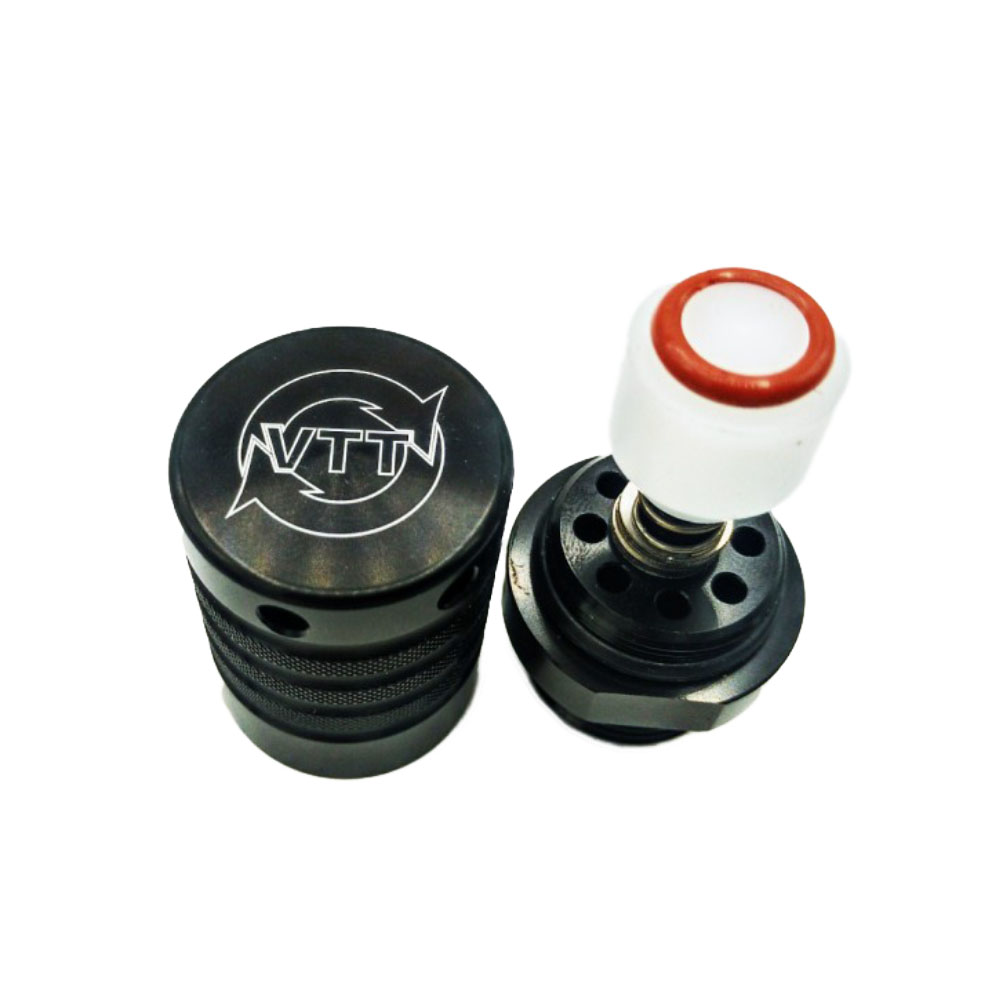 They completely knocked off Moroso: https://www.summitracing.com/parts/m...RoCZMgQAvD_BwE 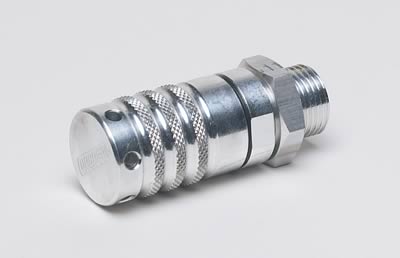 Which is a very VTT thing to do. VTT just sends everything to China to make knock offs. They do it with their turbos and basically every other part they offer. Other issues if your PCV system is fucked up is your turbos main not drain properly etc. Why don't you call up VTT and ask them why you have a whistle in your engine bay after installing their product? It is their job to help troubleshoot their product.
__________________
Last edited by Torgus; 03-16-2023 at 01:32 PM.. |
|
|
Appreciate
0
|
| 03-16-2023, 01:50 PM | #487 |
|
Captain
459
Rep 617
Posts |
Torgus
So, I went out real quick at lunch and got a vac gauge from Harbor Freight. My fav place to get a tool you hope to only have to use once....  This is at idle, tapped right into the line that goes into the intake manifold for the BOV. During start up it worked up to around 10 and then when it started to settle in it slowly worked up to almost 20 and then immediately dropped down to 14 and you can immediately hear this is when the AFRs go up. Then it sits there and bounces around 13-14. SO.....this would mean I have a leak in my intake manifold? As nothing else should be manipulating the vacuum pressure in the intake manifold at idle at that point, correct? |
|
Appreciate
0
|
| 03-16-2023, 02:39 PM | #488 |
|
Slow.
3782
Rep 7,151
Posts
Drives: Single Turbo N54 on Meth!
Join Date: Jun 2012
Location: Boston, MA
|
HF is king for tools I may use once or only a few times. There are also simple tools that shouldn't cost an arm and a leg and are hard to fuck up building to function properly.
My guess is something is wrong especially as it seems tied to when you AFRs go wonky donkey. My gauge sits at -20 like you can see in the image. Your gage got to -20 but then immediately dropped down to 14 and AFRs go bad. If you google this: vtt-cast-valve-cover.6594/page-2 It should come up with a thread about the VTT VCs cracking and VTT denying warranty etc. Not saying your VC is cracked or damage or defective in any way. But it has happened before with the exact product you have installed I believe. Maybe a bad PCV valve, gasket, valve cover fitting, etc. I know people who did the VTT valve cover put replaced every single fitting because they were 'cheap junk' in their opinion. I really suggest you call VTT. It is probably a problem they have run up against or are familiar with, whether it is of their own making or not.
__________________
Last edited by Torgus; 03-16-2023 at 02:49 PM.. |
|
Appreciate
0
|
| 03-16-2023, 08:47 PM | #490 |
|
Captain
459
Rep 617
Posts |
Ok, finding out how you are supposed to actually setup a FULL external sealed PCV system with the CNC valve cover only seems to be on one or two threads. Mostly a few pages into when the VTT Billet vacuum relief valve was released and people started asking questions about it.
This is a picture of how I installed my full external PCV system. In red is what I have realized I am missing from my setup. This part is more on VTT as they realized later, mentioned in forums, that they needed to upgrade their guides to include a check valve and the relief valve, and still haven't.  Currently I need to add a check valve to the high side as nothing is preventing the valve cover from pulling air in from this line. This would function much the same way the prior flapper valve would have. The flapper valve is removed in this setup BUT the guide didn't mention that a check valve on both the low and high side would be needed. The Vacuum relief valve allows you to dial in what vacuum is in the VC by letting it not surpass a certain level. Under boost it is always closed. Like a check valve. Under vacuum it will open at a certain level creating a controlled vacuum leak if you will. Much like the function the small hole was in the stock flapper valve. So a small amount of vacuum relief is given to the VC and it doesn't build too high. The VTT valve allows you to adjust that. I went ahead and ordered the 10AN check valve, barbed, which I can drop right in the existing high side line. I will then also set the vacuum relief valve to its lowest setting, 10", and install on the valve cover. Then test. From most of my research, this may be what is causing a ton of issues including my 2D2E code and issues with idle. Unchecked crankcase vacuum. If this resolves one issue and not the intake vacuum then I most likely am just back to fixing a vacuum leak. From my research, these two valves are necessary for the proper function of the PCV system so that has been wrong from the get-go. Praying at this point this miss has not caused any damage to the engine |
|
Appreciate
0
|
| 03-16-2023, 08:53 PM | #491 |
|
Captain
459
Rep 617
Posts |
Direct quote from VTT when they were advertising the VTT vacuum relief valve, when people started asking questions on its purpose, that was never translated to their installation instructions....
"The factory flapper is really really poor check valve and should be replaced anytime you are doing work on the PCV system. If you want to run a fully sealed system you would replace the factory flapper with a real check valve on the high side to go along with the check valve on the low side. This not a check valve itself. All this is going to do is allow you to run a fully sealed system and not supply too much vacuum to the crankcase which can cause oil starvation if it's extreme etc. It's simply a controlled vacuum leak for the crankcase." |
|
Appreciate
0
|
| 03-17-2023, 12:47 PM | #492 |
|
Captain
459
Rep 617
Posts |
Alternative vacuum relief valve option. Would go right into the port on the CNC valve cover. 10AN - Adjustable from 5-20inHg.
https://www.gzmotorsports.com/VCV101...rol-Valve.html |
|
Appreciate
0
|
| 03-20-2023, 10:53 AM | #493 |
|
Captain
459
Rep 617
Posts |
Alright, looks like the parts are going to ship today. Perhaps I'll be able to do some testing this weekend.
So, I have been doing some thinking. I am contemplating just wrapping the car. I've always loved Nardo Grey with satin black highlights. It was the plan for the 335xi originally. It's just every time I see a coupe in Nardo, or all the colors that are darn near close to it now, it just really rubs me the right way. Plus Vvivid just updated the color to be more accurate and released a better line that's easier to apply plus protective capped for application. I'm a DIY whore and the whole car would be around $330 in wrap and my time. I ordered a 5ft sample to test applying around the quarter panel. Just to see how easy it is to work with or not. We'll see. Something like this. I'd either keep the bronze wheel look or get the M2 wheels I'm looking at in satin black.  |
|
Appreciate
0
|
| 03-29-2023, 10:49 AM | #495 |
|
Captain
459
Rep 617
Posts |
The last week has been rather frustrating. I made some serious progress on one side and was really lost in the weeds on the other.
I have the front splitter and extensions on as well as the driver side splitter and extension. This is the Flow Designs kit out of Australia. Made out of 10mm thick polyethylene composite. They are made to take a beating and basically never break. I didnt want carbon as they dont really stay good looking for very long with road wear. Great quality product but they were a PITA to install time wise. They are a 100% custom install. They are decently easy to know where they line up and are meant to install but NONE of the holes used to secure them line up with stock holes. So all of the holes to secure are drilled and then you use a nut and large washer on the inside and a flush hex bolt head with washer on the outside. The kit feels very secured after install, looks great so far, hardware is good, but I wasnt expecting all the custom fitting and after 7 hours I only got the front and one side done. Oof. Beer time. Personally, I really think it actually goes very well with the LCI M-Sport. The front extensions actually seem to accentuate those angular blades on the lower L&R of the bumper. As you can see here, the splitter extensions, which can be completely removed, can be subtle or much more aggressive. They are fully adjustable. Car show mode I put it when they are all the way out.       So, back to the PCV system issues. - I installed the vacuum relieve valve and the check valve on the high side. - This immediately resolved the idle issues and AFR issues at idle. Boom! - What came next was unexpected but I had heard enough about it for it not to be a total mystery. More on that below. Intake vacuum finally where its supposed to be. AFRs were now bouncing around with within .30 +/- of 14.70.    Ok, so I let it sit there and idle for a while. It was 100% for a good 15 minutes all the way up to temp. Finally idling the way its supposed to. Now it did still pop up a 2D2E code. I think that may be due to the next issue as it may be part of a check and balances on a range of vacuum across the entire system. So, after it got completely up to temp, it stayed around the 19-20 in/Hg but I started to hear the whistling noise. It was soft at first but later got pretty loud. This was the sound of air getting sucked past the seals. Sounded like from the rear main. Well, I took apart the vacuum relief valve and started trimming the spring to get it to open at a lower vacuum. I basically got it down to not even being spring loaded anymore. The whistle would only go away, at least what was around 95% or low enough I couldnt hear it, only when basically the valve was full open. Also, the sucking noise coming from the valve was LOUD all in itself. Loud enough I knew Well, Im going to be able to hear that at every stop light inside the car. Like a vacuum is on. After a while I think the vacuum started to really pull on the rear seal and I could only get the sound to go away by basically leaving a hole in the valve cover. Long story short I have WAAAAAAAY too much vacuum in the crankcase. My guess is, as I have not been able to measure it yet, is that it is pulling about the same vacuum as the intake is pulling in. The relief valve cant correct it enough. The frustration is that I was immediately replacing one issue which was resolved with an entirely new issue I had no research on how to rectify. (At the time of writing this I probably have 20 hours of research into PCV systems now .I should start consulting) I went from not enough vacuum to way too much. Next section will be what I am doing next. |
|
Appreciate
0
|
| 03-29-2023, 03:49 PM | #496 |
|
Captain
459
Rep 617
Posts |
EXCESSIVE CRANKCASE VACUUM.
Not pressure....vacuum. I mean like a vacuum cleaner amount of vacuum. So, that is my concern. It isn't a little off, it is a big problem. Not a lot of clear information online about what would cause EXCESSIVE vacuum. - Ordered a manometer. I'll figure out a way to tap into the valve cover to measure crankcase pressure. I have a feeling this will show me there is a LOT of vacuum. - Putting in a better designed AN8 check valve on the low side. One that is spring loaded and better designed. - Upgrading the AN10 check valve on the high side. As there isn't a lot of options for AN10 check valves I upgraded the floating ball inside with a spring. This really is a good housing but the ball and “random bent disk” is a terrible execution. I removed the wrongly sized disk, which I guess is just to make sure the ball doesn’t seat on the flow side. It wasn’t the right size and a light spring did the job far better. Found the perfect sized spring and it opens with barely any pressure and closes perfectly when the flow changes. Should do the trick.  - Put a much lower tensioned spring in the vacuum relief valve. I have a few different options here to get it's vacuum trigger lower. Designed for 10-20 but I want it to open more around 5. - I ordered a different vacuum relief valve option from a performance shop that adjusts by turning the body and goes down as low as 5in/Hg by design. In case the VTT valve is a bust. - Repacked my catch cans with better stainless steel scrubber material. It didn't come with enough to really pack the chamber to condensate oil. I don't think any of this is going to resolve my issue. I'm now operating on theories and trail and error. So, here are my theories and questions. 1. The line that goes to the front of the throttle body is pulling too much vacuum(??) from the crankcase/valve cover. Maybe this is why I found a bunch of oil in the intake even though it has dual catch cans? I mean, it could literally vacuum the oil right through the catch can system and right back into the intake if the vacuum is too high, right? Seems plausible. I ordered a AN8 in-line ball valve assembly. I am going to install this between the low side catch can and the throttle. Catch can > ball valve > check valve >throttle body. Theory here is to use the ball valve to fine tun/restrict the amount of vacuum being pulled through the catch can. This should(??) reduce the vacuum in the crankcase if it’s coming FROM the throttle body source. I can use the manometer to dial in the crankcase pressure to the 5-6” vacuum it is recommended to be. Or lower if it still gives me issues with the seals. I think the seals are whistling because the vacuum is WAY over what it should be. Not the difference between 5" and 15" of vacuum the relief valve could dial in on its own. 2. Is there a leak in the intake manifold gaskets that would somehow cause excessive crankcase vacuum but still only be ~19-20in/Hg in the intake manifold? I can’t seem to et any research to point to a leaky intake manifold could cause excessive crankcase vacuum. 3. My idle is set to 900-950 RPM sue to my single mass flywheel. Is the heightened RPM at idle causing any of these issues to be amplified at idle? I’m going to take it back to stock RPM and test what the crankcase vacuum is. Once I have the manometer I can get a live feed of what is happening in the actual crankcase. I ordered the below fitting I’ll use to tap into the AN8 line coming right off the valve cover for the low side. This can then be easily removed after testing without modifying anything. Not bad for $15.  I’ll be able to use one gauge to read the intake manifold pressure and the manometer to measure the crankcase. Then I guess we can go from there. Once I can get some data, and can rule some restrictions out, then we can troubleshoot more. Last edited by KnighTT; 03-29-2023 at 03:55 PM.. |
|
Appreciate
0
|
| 03-30-2023, 02:59 PM | #497 |
|
Captain
459
Rep 617
Posts |
Resources for the next round of troubleshooting.
 To Tap into the low side line to test vacuum. Too easy.  The vacuum relief valve from GZ Motorsports is built like a tank.    |
|
Appreciate
0
|
| 03-31-2023, 10:56 AM | #498 |
|
Captain
459
Rep 617
Posts |
I have only ran the engine with these new modifications for about 10 minutes but things are looking good.
- Retorqued the intake manifold. Since there is a phenolic spacer in there I do worry about the 12 seals keeping it all together. - Left the new ball valve wide open. - Reinstalled the VTT vacuum relief valve with a lower tension spring I purchased. - Rebuilt the high side check valve with a spring and took out the bent washer design. Seems to work great. - New low side check valve that is proper low PSI to open, spring loaded, and internal seals. Also works great. Put AN8 fitting on low side right next to the valve cover. Left is intake manifold vacuum. Right digital manometer is crankcase vacuum. This was after the car warmed up for about 5 minutes. 20 in/Hg intake - 3 in/Hg crankcase.  AFR's and reading as it is warming all the way up.  I had to pick up my daughter from school before it got a full 10-20 minute runtime and I just reset adaptations for the next heat cycle. Knock on wood, things are looking great at the moment. I need to let it run for a while to see if for soem reaosn vaccum starts to increase but this is looking good. - I was indeed able to manipulate the vacuum pressure in the crankcase with the ball valve on the low side catch can. Right now these reading are with it being fully open but if I need to restrict vacuum, that will be an option. - The vacuum relieve valve is slightly open, as you can lightly hear it, and that is maintaining the 3 in/Hg. If you cover a few of the holes with you hands the vacuum will rise. I did start to hear the rear seal start to whistle when it hit 4 in/Hg so the 3in it is dialed to now may be as good as it gets. Also, I started the car a few times and in each cycle I did NOT ge a reappearance of the 2D2E code. More to come. Too soon to tell if this has resolved the issues and what may need to be done next. My theory is we are going to need to log and retune the current revisions before we get closer to final tune. I am 100% sure this at least contributed to bad data and improper performance. |
| 03-31-2023, 11:51 AM | #499 |
|
Captain
459
Rep 617
Posts |
Ran it at idle for 20+ minutes.
- Crankcase stayed at 3 in/Hg the entire time. - AFRs stable in the 14's. - Idle is consistent and just purrs. No feeling of misfires or hiccups. No codes. My hypothesis is that a lot of people who have modified their N54 (not that other engines are excluded) and have a laundry list of mysterious issues is because they do not know they are having crankcase and intake manifold pressure/vacuum issues. I would also venture even farther to say it probably has lead to damaged engines and aftermarket turbocharger issues. Excess pressure or vacuum can cause all sorts of seals and oiling issues. I don't feel like we are 100% yet as I need to go do some test driving tomorrow and get a feel for everything. Keep an eye on AFR. If that goes well, I'll speak with Wedge Performance about how we may need to take a step back or two on the tune and get some new logs to see what the next step is when the engine is running RIGHT. I can't wait to see how it drives around on the low side. Driving around in stop and go and under 45mph has always felt wrong. Clunky. I'm wondering how much this will smooth things out. |
|
Appreciate
1
Torgus3781.50 |
| 03-31-2023, 12:16 PM | #500 |
|
Slow.
3782
Rep 7,151
Posts
Drives: Single Turbo N54 on Meth!
Join Date: Jun 2012
Location: Boston, MA
|
Congrats(I hope) and that you very much for documenting so much, so clearly. This will certainly help other people who run into this. Best of luck brother.
__________________
|
|
Appreciate
0
|
| 03-31-2023, 12:38 PM | #501 |
|
Captain
459
Rep 617
Posts |
I'm going to do a write up on the external closed PCV system and drop it on the board separately.
It'll translate to any brand setup. After all of the research I did, I found so little information on how the system needs to be laid out. Even after you put the entire system in place you need to test pressures and vacuums. It doesn't just "work". There are no clear instructions. VTT has a blueprint, where others don't, but it's missing two critical parts if you get the entire system. Even more of an issue was the issues that arose had very little information online on how to troubleshoot. I basically had to become an expert at automotive PCV theory to get the entire picture. |
|
Appreciate
1
Torgus3781.50 |
| 04-01-2023, 06:10 PM | #502 |
|
Captain
459
Rep 617
Posts |
Alright.....so I definitely still have fuel issues.
Drove around the car for a couple hours last night and this morning and it was great. I did a 3rd gear pull to get a new log, to see how things looked after the PCV/AFR fixes, and the engine cut off at 5k RPM. Had to pull over. Right at 5,000RPM the engine power popped. Felt liked the charge piped popped off. Got a bunch of alerts, and had to pull off in a parking lot. Mixture control codes and injector cut codes. Cleared the codes, started it back up, felt fine and drove fine. Pulled the logs when I got home and here we go. LPFP dropped to below 40PSI right at 5,000RPM.  Rail pressure was what killed it, which looks to be due to supply. Dropped all the way down to below 500psi. I've never seen it that low before.  Since this happened right along with the LPFP dropping to 36psi, my initial opinion is the HPFP wasn't getting enough fuel supplied to maintain pressure versus it being a HPFP in itself. That is my theory anyway. Since the LPFP is new, Walbro 535, and the HPFP looks to have been replaced sometime in the last 10 years, I'm looking at the older components. - Fuel line from fuel tank to HPFP. - Fuel regulator and filter assembly. Any input would be appreciated. |
|
Appreciate
0
|
| 04-04-2023, 02:09 PM | #503 |
|
Captain
459
Rep 617
Posts |
Waiting on parts as usual. Some parts I don't really want to talk about as I talked myself into a few things that are probably way more than I need. I just want these issues to be resolved but I picked up some things that I'll probably never have a limitation issue with again and it'll support more down the road if I ever need it.
I did recharge the AC system though. It is getting to be that time of year and that was one to-do on the list that hadn't been a priority until it started to get hot. |
|
Appreciate
1
Torgus3781.50 |
| 04-07-2023, 10:47 AM | #504 |
|
Captain
459
Rep 617
Posts |
Torgus Dont hate me. I got the new line and the V2. Based on some research they resolved some problems with the V2 regulator I didnt want to try and resolve on my own.
Alright, so by the end of this my entire fueling system will be Precision Raceworks. My wallet is not happy. - PR fuel pressure regulator V2. - AN6 upgraded fuel line with the ethanol sensor adapter. Ill drop a sensor on later. The blue adapter allows you to run the line without it until then. Comes with all quick disconnect lines. - New design HPFP rigid feed line with the new LPFP sensor that is NPT and not brass. I paid $160 a month ago and for some reason this thing has already jumped up to nearly $200. - New HPFP sensor for the rail. - I will be removing the prefilter in the HPFP to free up some PSI. The 10micron filter in the new regulator will keep the system clean. - Ill also be drilling out the front of the fuel rail to a slightly larger diameter. My goal here is to remove all restrictions to the fuel system, which the V2 FPR helps with greatly and takes a load off the EKM. The other main goal is for this to uncover if there are any remaining fuel pressure issues. Either with the Walbro 535 or the HPFP itself. Then I can deal with those as the final standalone issues. Notice how the shipped version is even more updated than the unit advertised online. The plug on top for the level sensor is now wired to a port so it is plug and play. There is also a new bracket around the inlet.   Crimp connectors ready for the level sensor.  Substantial fuel filter upgrade. Serviceable and replaceable.  Also comes with all the lines, quick disconnect, that go over to the fuel pump assembly.  New fuel line from regulator to HPFP.  This was basically $4. It is the official plug that is used for the 3.5 TMAP. That way the current plug is not just stuck in there with friction. This one properly clips in place.  Im not sure when Im going to drop all of this in. Ive had a nasty chest cold for the last week and might just take it easy this weekend. I at least got some nice seat time this week and got the fuel level down lower so itll be easier to work on the fuel tank. If there is an issue with the LPFP, itll be easy enough to grab a new 535 from Summit for $129. If this uncovers that the HPFP is weak, well it is what it is then. Ill have to do some research on which one is best to replace it with at FCP Euro. At least there itll come with a warranty. |
|
Appreciate
0
|
| 04-08-2023, 07:56 AM | #505 |
|
New Member

2
Rep 6
Posts |
I've been reading that low lift cams (Schrick, for example) are great for increasing power but head work doesn't have great ROI.
__________________
|
|
Appreciate
0
|
| 04-27-2023, 03:01 PM | #506 |
|
Captain
459
Rep 617
Posts |
Well, I just signed up for MVading the Dragon in June so I guess we better get this build done.
https://www.mvadingthedragon.com/ 3 day driving event. |
|
Appreciate
0
|
 |
| Bookmarks |
|
|


