|
|
|
|
 |

|
 |
BMW Garage | BMW Meets | Register | Today's Posts | Search |
 |

|
BMW 3-Series (E90 E92) Forum
>
DIY -Illuminated sunglass tray
|
 |
| 12-25-2010, 05:40 PM | #45 |
|
Ich Liebe BMW

3
Rep 14
Posts |
Thanks for this great DIY!
Went ahead and replaced the ashtray today. All went well. No dents, no chips and no issues with the wood trim. If you are not going to use the lighter anymore - cut the metal part that connects all brown wires together - you wont need to worry about how well they are conected and hold together. Used simple LEGO part to make the spacers - just cut it in half. All in all - nice play for a cold Saturday... |
|
Appreciate
0
|
| 01-27-2011, 07:25 PM | #48 |
|
Registered
0
Rep 1
Posts |
LED
http://www.e90post.com/forums/attach...7&d=1160320603
How i can get the part number of these orange led ? |
|
Appreciate
0
|
| 06-08-2011, 06:32 PM | #49 | |
|
Deny everything

219
Rep 11,378
Posts
Drives: 2006 330i; 2015 X6, S1000RR
Join Date: Apr 2006
Location: Beautiful MD
|
Quote:
__________________
I need a drink   |
|
|
Appreciate
0
|
| 03-09-2012, 08:11 AM | #53 |
|
Captain
 36
Rep 927
Posts |
Does anyone have pictures of the LED's in the front...shining forward?
__________________
Craig Brickner
Click to Join: BMWCCA # 366493 |
|
Appreciate
0
|
| 03-11-2012, 11:18 AM | #54 |
|
Second Lieutenant
23
Rep 237
Posts |
Hey guys, I have a 2011 e90 LCI without the smokers pkg, so basically all I have is a cubby instead of what's seen here in this DIY.
Does anyone know if I pull out the chubby, I would have wires already put in the car during manufacturing - so that I can do this mod or no? Please let me know guys and thanks! -WoW |
|
Appreciate
0
|
| 03-11-2012, 09:46 PM | #55 |
|
Private First Class

4
Rep 109
Posts
Drives: 2007 BMW 328i/1995 BMW 525i5
Join Date: Feb 2012
Location: Gwinnett/Atlanta, GA
|
I just did this mod but put the LEDs on the back of the tray so I could not see them, just the glow. I'll take some pics when I get a chance.
__________________
 2007 E90 328i - 1995 E34 540i6 M Sport - 1991 318is w/s50 swap sold |
|
Appreciate
0
|
| 03-15-2012, 08:52 AM | #57 |
|
Captain
36
Rep 927
Posts |
Pics?
__________________
Craig Brickner
Click to Join: BMWCCA # 366493 |
|
Appreciate
0
|
| 03-15-2012, 11:20 AM | #58 | |
|
Captain
338
Rep 842
Posts |
Quote:
__________________
2021 G05 X5 ///M50i / Phytonic Blue / Cognac Vernasca
iStep 03/2023.50 |
|
|
Appreciate
0
|
| 03-15-2012, 01:50 PM | #59 |
|
Captain
36
Rep 927
Posts |
I have a sunglass holder here in my hand. Why didn't anyone try to use the two pipes on either side for led lights to attach to?
__________________
Craig Brickner
Click to Join: BMWCCA # 366493 |
|
Appreciate
0
|
| 03-15-2012, 01:59 PM | #60 | |
|
BimmerPost Supporting Vendor
307
Rep 13,093
Posts 
Drives: BPMsport 2012 E92 M3
Join Date: Jun 2011
Location: Kansas
iTrader: (45)
Garage List 2013 Nissan GTR [0.00]
2019 Sierra Denali ... [0.00] 1999 Nissan Silvia [0.00] 1999 Nissan Skyline ... [0.00] 1998 Toyota Supra [0.00] |
Quote:
|
|
|
Appreciate
0
|
| 03-16-2012, 08:45 AM | #61 |
|
Captain
36
Rep 927
Posts |
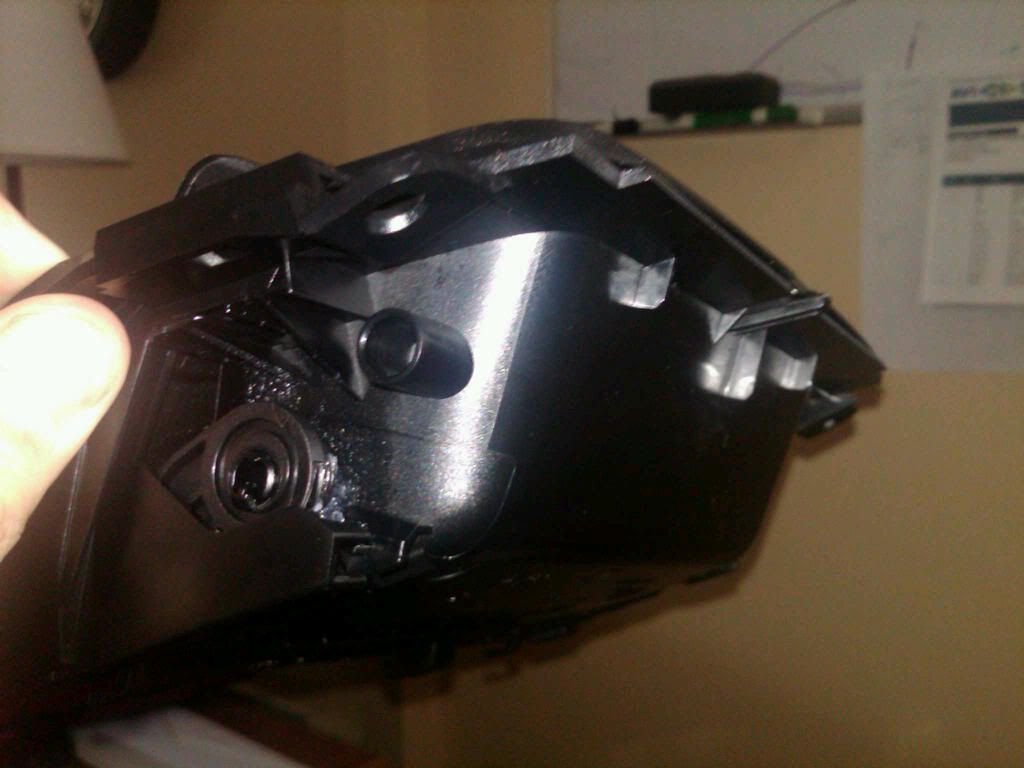
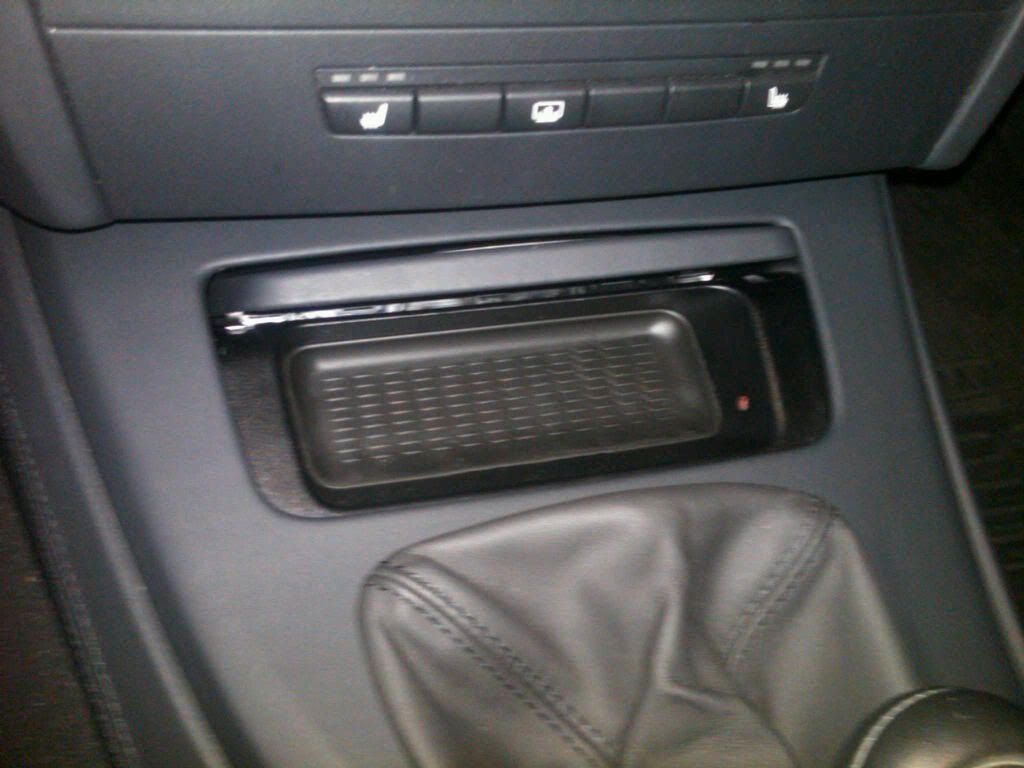
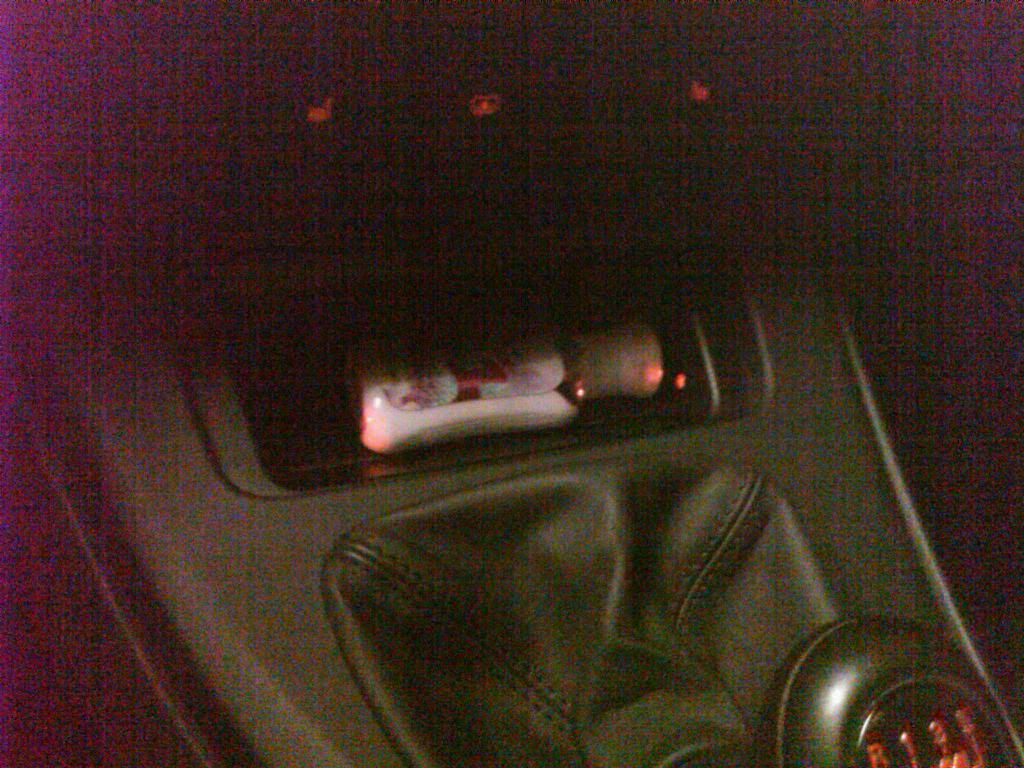
Ok, I did this last night.
Everything went good and I ended up using the pipes on the sides. I used a hot glue gun to glue it. I let it cool for about 15 minutes. I soldered the ground wire to the LED's since it had to be cut off the 12v outlet. I couldn't get the outlet out...but oh well. Putting the LED's in the side pipes went back into the console just fine. No problems with clearance. The light output has a great feature that I didn't pickup on when doing this. The lights are so far back that you really hardly notice it's lit. That is...when it's empty. The lights hit nothing when it's empty but when there's something in there...you can see the lights hitting it. Less distracting than having a light cast down there at all times. Another plus for using these pipes is that your drilling is symmetrical. I used a small bit, then a 1/8" bit. Don't push on the drill...at all. Just let it do the work. You could rig something up...like wrapping tape around the bit to stay centered in the pipe...I did it free hand. I'm happy with the way it came out. Here are some crappy phone pics. Guess I need to take one of the finished product. BRB. 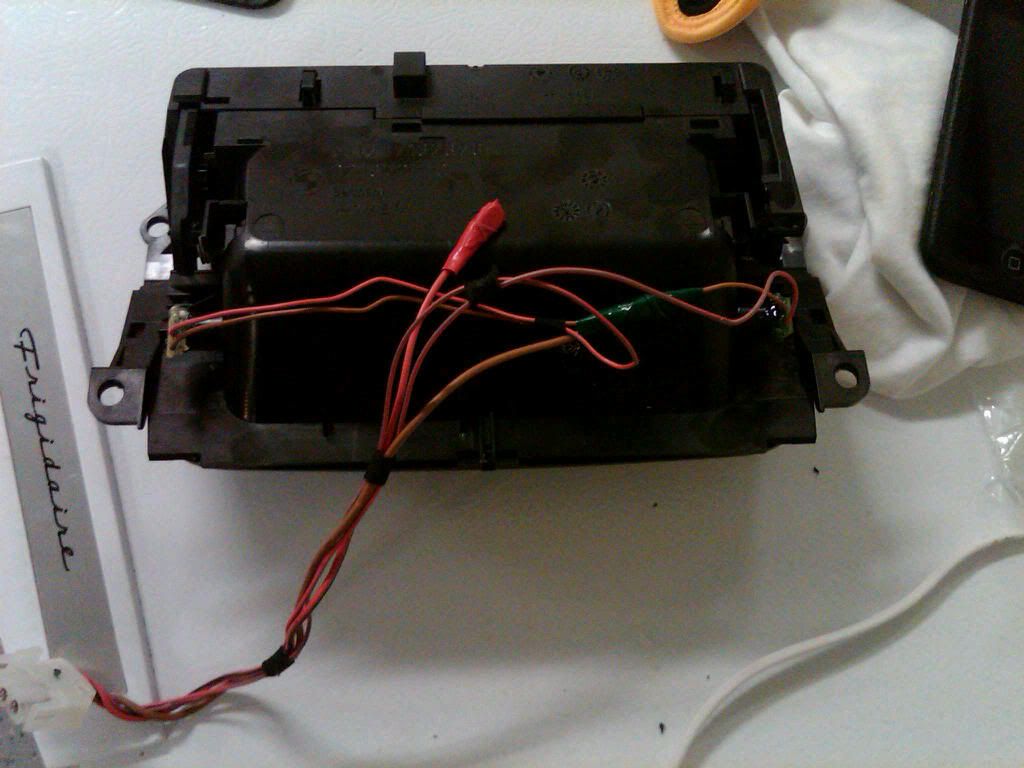 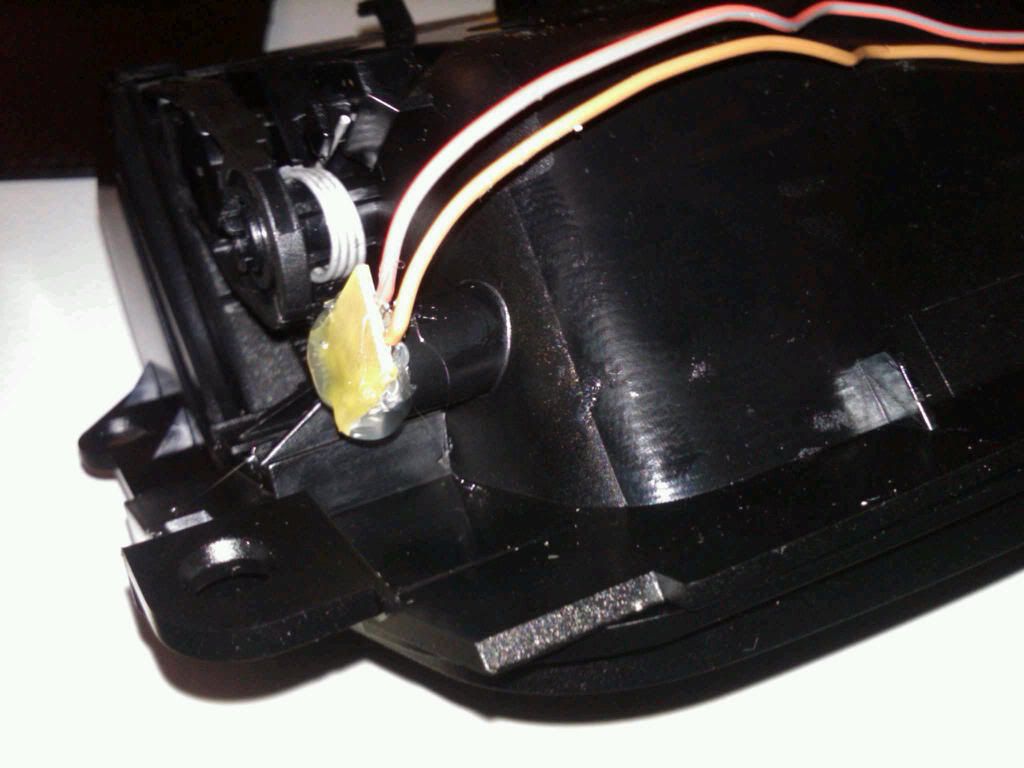
__________________
Craig Brickner
Click to Join: BMWCCA # 366493 |
|
Appreciate
0
|
| 03-16-2012, 09:05 AM | #62 |
|
Captain
36
Rep 927
Posts |
More pics:
__________________
Craig Brickner
Click to Join: BMWCCA # 366493 |
|
Appreciate
0
|
| 12-05-2012, 07:29 PM | #64 |
|
Private
 10
Rep 78
Posts |
very cool...i used the hole in the bottom of the unit where the cord holder is...the one in the pix above is approx 1 1/2" from the left edge...i broke off the cord holder - the hole underneath is rectangular and approx 4mmx6mm...i then measured the same 1 1/2" difference on the other side of the tray and used a drill to create another 4mmx6mm rectangular hole...i used a drill and then used a small hand file to make it rectangular...i then used electrical tape to tape the leds to the bottom of the tray centered in the rectangular cut outs, but with the leds toward the front of the tray holes...if you put the leds toward the front of the hole, they will shine up in between the lid and the tray...creates a nice looking backlit look...this way, i don't see little holes of light - but rather backlit...if i get a chance, i'll post some pix of the finished look...R
|
|
Appreciate
0
|
| 12-09-2012, 10:54 AM | #65 |
|
Registered
0
Rep 3
Posts |
Really nice mod to the glasses tray. Professional work. Just ordered the tray from ECS & I look forward to enhancing it w/ the lights!
Jeff |
|
Appreciate
0
|
 |
| Bookmarks |
|
|