|
|
|
|
 |
|
 |
BMW Garage | BMW Meets | Register | Today's Posts | Search |
 |

|
BMW 3-Series (E90 E92) Forum
>
DIY - E70 X5d DPF Delete (Good Reference for 335d)
|
 |
| 11-06-2020, 11:16 PM | #67 | |
|
Second Lieutenant
 97
Rep 278
Posts |
Just got the DPF out tonight thanks to all the help in this thread....going to put her back together tomorrow.
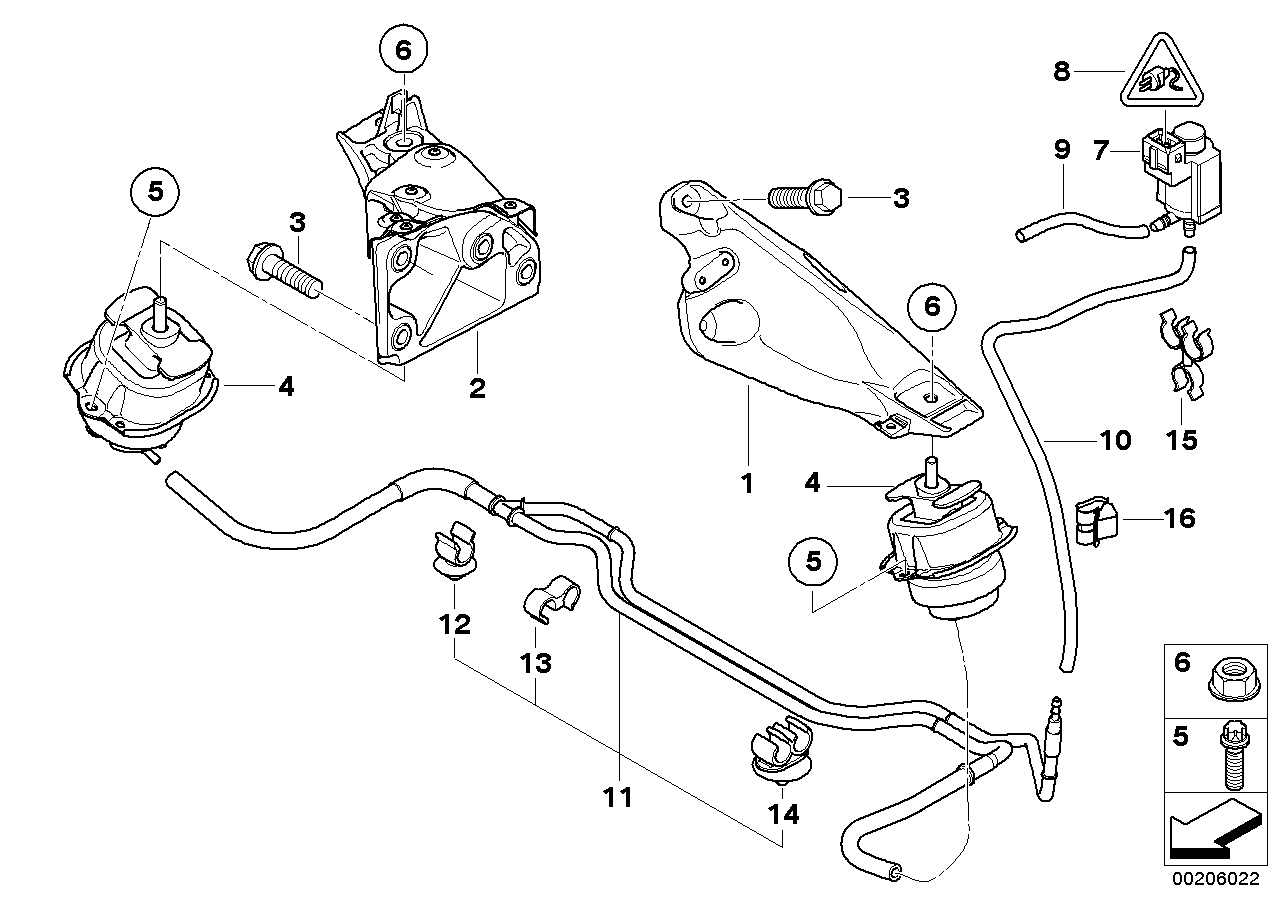
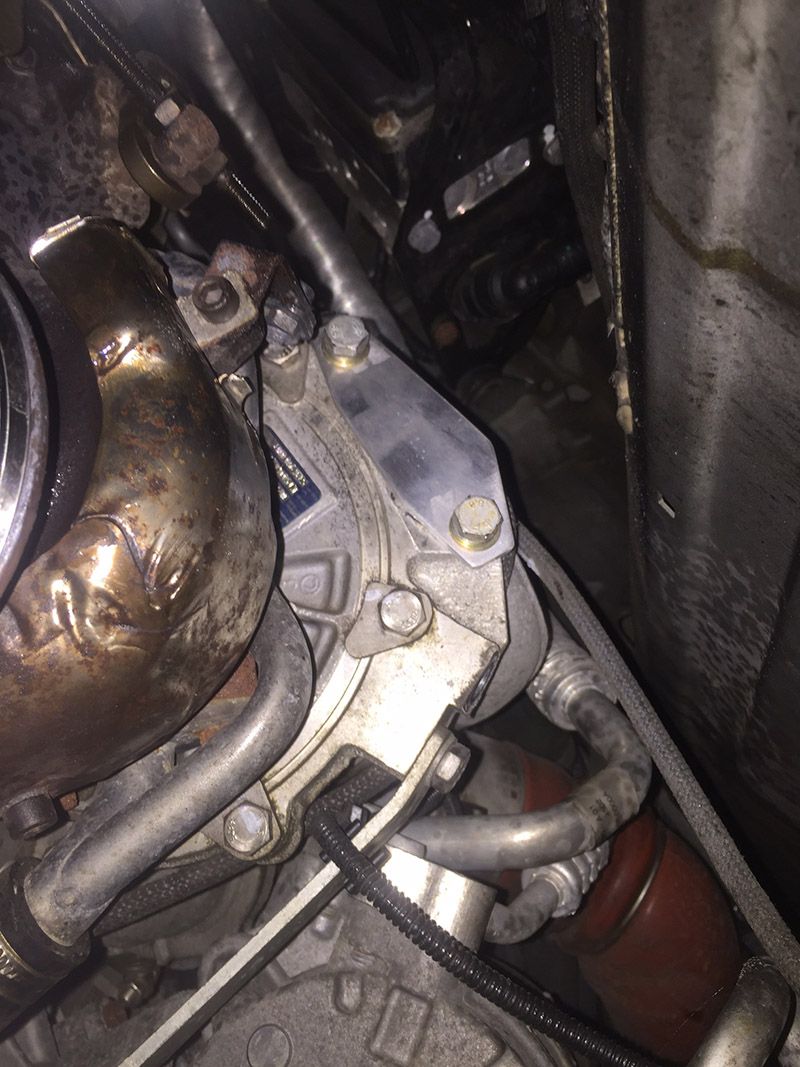
My notes on an e70: The Oxygen sensor clip was really annoying for me because I was pulling on the wrong part for like ten minutes  .I suggest looking at pictures of the various sensors to see how they look unplugged. When I realized how it was supposed to come apart it took ten seconds. .I suggest looking at pictures of the various sensors to see how they look unplugged. When I realized how it was supposed to come apart it took ten seconds. I got the dreaded fourth engine mount arm bolt out from the wheel well with an impact, two u-joints, and a bunch of extensions. The DPF would not budge/rotate at all with the V-Band clamp loose, even after spraying with liquid wrench. I ended up removing the V-Band clamp which was on there very good. I kept raising and lowering the engine a bit here and there to try to get the right combination of room to maneuver the DPF while still having access to the engine mount arm bolt from the wheel well. (Careful raising and lowering with the DPF loose as it can get wedged between the engine and subframe or body). While taking a break from under the car I ended up getting the top DPF bracket out from the top which made moving the DPF around much easier. I used my phone to record a video and get an idea where that hidden bracket bolt was. Once I got the engine mount arm bolt out I was struggling getting the DPF out with a standard 3/8 socket wedged between the subframe. I took out the heat shield which gave me more wiggle room than I thought it would and that allowed the DPF to almost slide out when I found the correct orientation. Quote:
Last edited by wcs531; 11-20-2020 at 06:45 PM.. |
|
|
Appreciate
0
|
| 11-20-2020, 12:13 PM | #68 |
|
Lieutenant

142
Rep 441
Posts |
Right behind you
Im going to try to tackle this before 12/1. I have access to a lift until that day so gotta get it done!
Yes....btw for you old heads....an OmahaDZL sighting.... And yes im still running the 335d with stage 3 plus from JR....and it is still a beast.... Love that car. |
|
Appreciate
0
|
| 11-24-2020, 11:32 PM | #70 | |
|
Lieutenant
142
Rep 441
Posts |
Quote:
Hey I cant find the instructions on pulling the vacuum canister block... Im sure thats a part of your video. Can ya link me? I need to pull that so i can unhook the cables that go to the dpf |
|
|
Appreciate
0
|
| 11-26-2020, 09:20 AM | #71 | |
|
Brigadier General
 762
Rep 3,555
Posts |
Quote:
|
|
|
Appreciate
0
|
| 12-19-2020, 08:15 PM | #72 |
|
New Member
0
Rep 9
Posts |
Thanks so much for this thread OP. This has described to me clearly what I may possibly go through with my current issue. I noticed that this is the freshest thread on this issue seeing the last post was just las month hence my post here. Sorry for the long post but I just want to be accurate about the whole thing.
I have a 2012 X5 E70 35D Diesel. Please note that we don't have any emission regulation where I am located hence I really find this issue a PITA and the SCR a complete wast of weight and space:-( Can't go to the BMW dealership because my X is a gray market import from the US. So 11 months ago, I got the dreaded 200 miles countdown and the incorrect fluid warning message. Refilling the DEF fluid didn't clear/solve the issue so I brought it to an indy BMW certified shop. They did the "process of elimination" methodology: started with draining the DEF tanks, cleaning them and checking the metering valves. Everything checked out ok. Then they went on to the NOX sensors and found NOX sensor #2 defective hence they replaced this. After replacing the NOX sensor #2. It seemed like they have eliminated everything related so I was instructed to run the X5 on a dyno for 1 hour continuously running at 70kph. They said the fault will clear out after I do this. So I did that today. UNFORTUNATELY, that did NOT reset the countdown and was down to 23 kilometers to complete shutdown. This is the LAST STAGE before complete shutdown. Of course I brought the X5 back to the shop. They said they will run some tests again and will keep me posted. They took down everything and found the DPF, exchange pipe the culprits and advised to replace these parts. Finally the parts arrive from the US and just waiting for them to install. It's been 11 months now which is ofcourse also due to the pandemic thing. Hope you don't mind my questions to the group here... 1. Do you I really need to fix the original problem 1st BEFORE doing the SCR delete? Because I suggested a SCR delete initially and they said that the delete can't be done if they didn't resolve the original problem first - which is the 200MLS countdown thing. So fix this first before do the delete...something like that. 2. Will there be any computer ECU re-coding / encoding if a SCR delete kit is installed? Will the coding be a DIY or has to be done by an indy or dealer? SCR kit plug and play?? 3. They also mentioned that I should've gotten the original OEM DEF Fluid when I first attempted to refill the DEF tanks because using other non OE brands has clogged up my system. Is this true? I thought DEF fluids are DEF fluids regardless of OE or non OE brands :-( I tried to get in touch with another indy mechanic who has a below standard shop but he was formerly a mechanic in BMW Germany and trained there for many years before deciding to come home and set up a BMW indy shop. He said that "there is a SCR delete kit that I can buy and he will install and re-program the computer then bypass the EGR as well". He will give me a quote on Monday. Does he make any sense or am I being taken for another loooong ride here? Is it as simple as that? Im hoping it is. Any thoughts will be greatly appreciated. Thanks. |
|
Appreciate
0
|
| 12-28-2020, 11:36 AM | #73 |
|
Lieutenant
142
Rep 441
Posts |
SCR issues
I hope this reply didnt come too late for you...
About a year ago I had the same issue happen....my computer was telling my car that I needed to put DEF in....there was a DEF related issue anyway. I had the countdown timer running. Knowing the system as I know it....I know that DEF is the last part of the exhaust treatment process. I was short on funds and time, so I needed to solve the problem without the full delete. I contacted some tuners about what I needed and settled on DUDMD. I had him give me a Stage 1 tune, but add on an SCR delete and a EGR delete. No "kit" needed, just the electronic tune. All remote, you can do all yourself without any wrenches, just a computer and an internet connection This will keep your DPF active....will scrub the soot, but turn off all SCR related faults including the NOX sensor past the DEF injector. That solution bought me some time until my DPF reached end of life at 164k miles and I had to full delete. Last edited by OmahaDZL; 12-28-2020 at 11:43 AM.. |
|
Appreciate
0
|
| 12-29-2020, 10:16 AM | #74 |
|
Lieutenant
142
Rep 441
Posts |
My DPF removal experience
Okay...I got it done....Im confidently going to say that doing it the second time would be quite a bit faster, but expect 20 hours or so of work the first go round. Apologies if this isnt clear, its been 2 weeks since I did this, but wrote down the notes right after I did it....so its a little bit cloudy in my memory. Hopefully it will make sense for you when your X5 is up in the air.
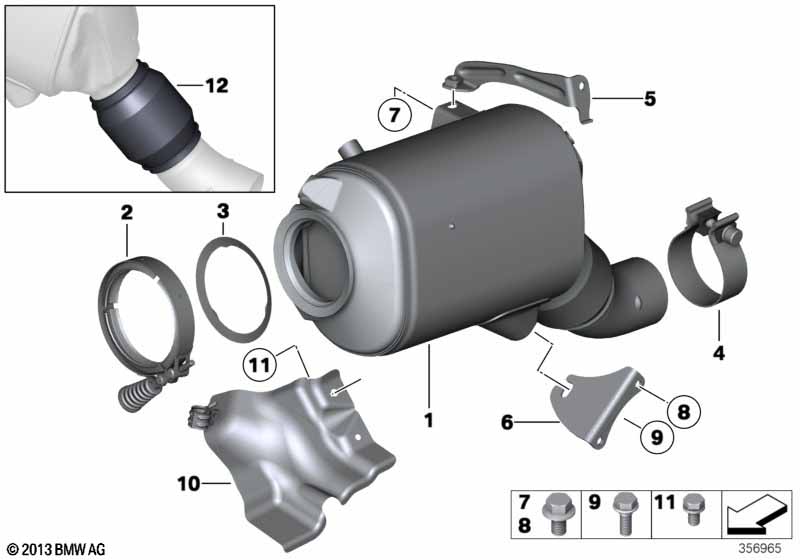
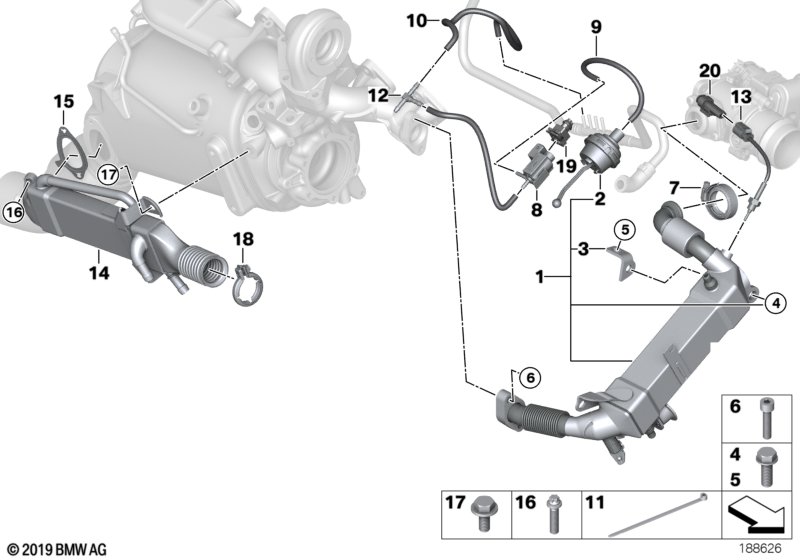
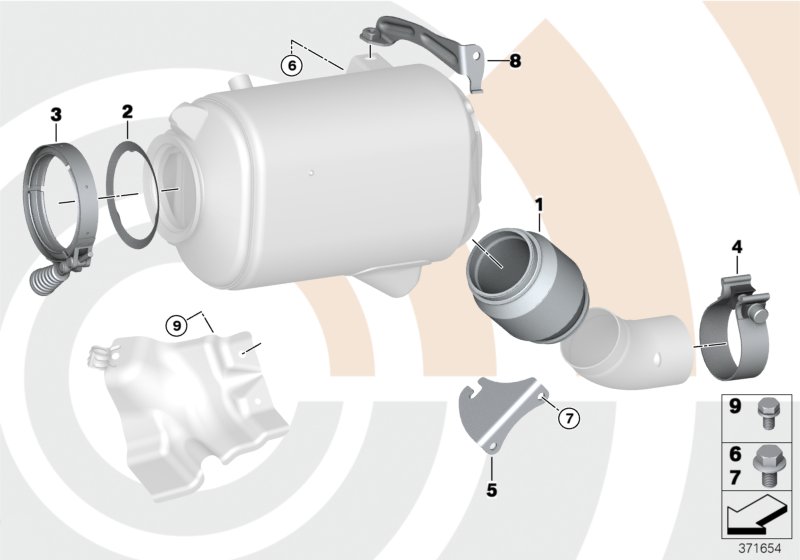
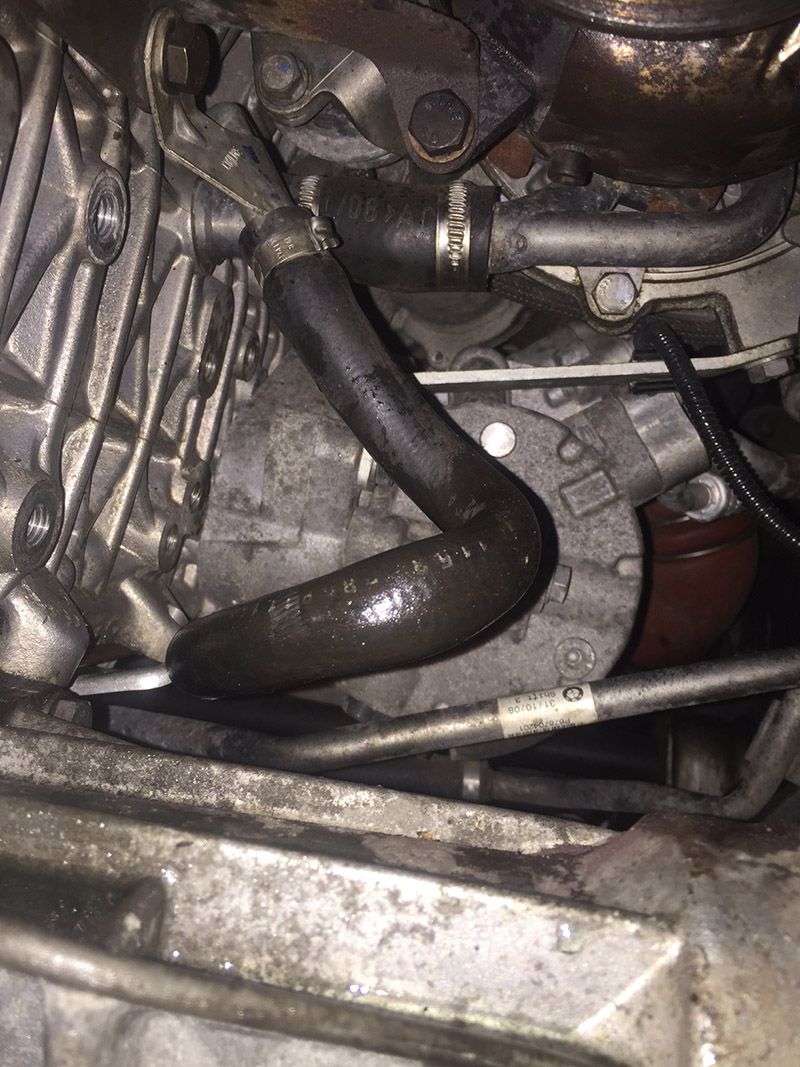
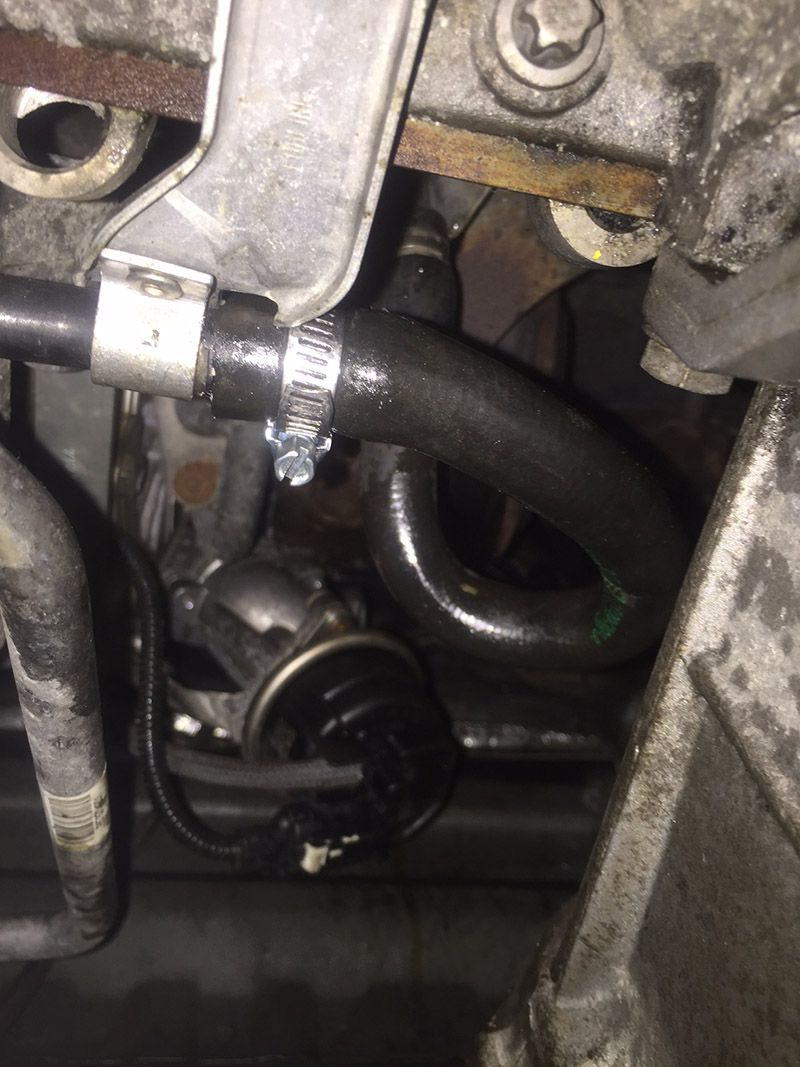
The notes I took are of things I did differently than the OP. (BTW thank you OP for starting this thread, adding pictures and getting this rolling for all of us) First, his step 4 tells you to remove the DPF brackets.... I didnt do that for a couple reasons. The first is that one of the nuts (#7) is nearly impossible to put a socket on with the square tube EGR cooler on the DPF still installed. The second reason is that you dont gain anything by pulling the brackets first. So I removed the EGR square tube first from step 5. FROM OP..."It is held on by two E10 bolts, two 13mm bolts, and a V-Band (5mm Allen) (#16,#17, and #18). These can all be accessed from the bottom of the car except for the top 13mm bolt."... I found I WAS able to access the top(front) 13mm bolt from underneath the car. First remove a small plastic shroud which I believe is the lower subframe cover held on by 2 simple fasteners. Then you have nearly direct access to the bolt with some 3/8 extensions a u-joint and a ratchet through the wheel well. Easy peasy. Obviously the EGR cooler is filled with coolant and being at such a low place on the car, you are going to have a mess when you cut each hose. Expect to get doused considerably and dont expect it to stop. Turns out, the 3/8 ratchet extensions make a perfect plug, no need to even hose clamp them...just jam them in there until you are ready to reconnect them. Now you can remove the EGR cooler and have a lot more space to move around near the dpf. And speaking of connecting them since you are now soaked, this is a great time to fix that. Have 1 new hoseclamp ready to go that fits the hose diameter (ive never been able to reuse the OEM ones). Originally i was going to union the two hoses together but that was kinda pointless. There is enough hose to run from the top connection right into the bottom hose source. Make sure to give yourself a little extra slack, you only get one shot at it. Stick it on there and clamp it down. Done! Onto the topside and the electronic portion Obviously you need to have the entire airbox off to do this job. You dont have to remove the vacuum canister bracket to do this job. It does make it a LITTLE easier, but not much. I spent a significant amount of time trying to remove it and gained nearly nothing. Id suggest leaving it where it is. just remove the connections that you need to get off and leave the bracket. I started unplugging things without paying attention to where they were...that was a bad idea, but should you be impatient like i was....there are 2 EGT connections that look identical stacked on top of each other....but only 1 stays connected. The one WITHOUT the metal clip is the valid one. The metal clip bracket one stays unconnected. All you need to have connected is that EGT and the remaining O2. While i was elbows deep in this job i did a couple of maintenance items that I suggest you do. The first is to replace that stupid plastic flex hose that is undoubtedly brittle or already cracked that is your crank case vent hose. AArod sells a silicone one that will last forever. (again you will need 2 new hoseclamps.) BMW doesnt sell the hose only....super cheap solution to a problem everyone has. Since you are removing the lower EGR cooler, just as well remove the upper as well and get rid of it all with a racepipe. I went with AArod again because its black and looks OEM and his coolant caps are very good now. Have fun! There is a lot of fumbling around and working blindly. Cuda suggested having a mirror and a headlamp, I agree entirely Last edited by OmahaDZL; 12-29-2020 at 10:42 AM.. |
|
Appreciate
0
|
| 12-29-2020, 02:50 PM | #75 | |
|
Lieutenant
142
Rep 441
Posts |
Quote:
Its important to note the method it determines if you put the "wrong def" in.... there are 2 electrodes in the def tank, it measures the resistance/conductivity between the two electrodes...it expects a certain level of resistance in the def fluid... if that isnt correct, it throws the error. But after dealing with DEF you know that it will dry into a crystal coating... which seems to screw with that reading. Those of us that have been around a long time have been through this.....the level sensor et al, are not "servicable" parts of the tank. Had they replaced your tank with a new tank, your problem would have been solved at the cost of about 3k. But no, you did nothing wrong, using OEM def doesnt help....its the design of the sensors only that are the problem. The DPF isnt the problem either...its only the DEF tank and sensors. Back in the day someone figured out what the expected resistance was and stuck an ACTUAL resistor in there and bypassed it, but that was before we had coding. So as I said in my reply to you above...This is exactly what I experienced and your simplest, easiest cheapest solution is to do what i did and get a tune from DUDMD that turns off the SCR codes. injectors...etc....he can do this remotely....you can get more HP (about 50ish), you wont have to do anything mechanically...no bolts at all.... and you will have your vehicle running again. (might wanna put the battery charger on it now) |
|
|
Appreciate
0
|
| 12-29-2020, 08:55 PM | #76 |
|
Registered
6
Rep 2
Posts |
I'm ready
I'm ready to start acquiring parts to complete this project. My biggest issue is trying to find the parts. So many different brands and can't find a single place to buy it all in one spot. Parts and tuning. Any help would be greatly appreciated.
|
|
Appreciate
0
|
| 01-01-2021, 03:06 AM | #77 | |
|
Enlisted Member
 
3
Rep 46
Posts
Drives: X5 E70 pre-lci 3.0d 6-speed ZF
Join Date: Oct 2010
Location: Outer Sth Est Melbourne
|
Quote:
|
|
|
Appreciate
0
|
| 01-31-2021, 01:38 PM | #78 |
|
Registered
0
Rep 4
Posts |
Ramps?
I see that many of you have done this on jack stands.Has anyone used ramps for the front and jack stands for the back? I have the parts, just waiting for the weather to warm up a bit.
|
|
Appreciate
0
|
| 01-31-2021, 07:40 PM | #79 |
|
Brigadier General
762
Rep 3,555
Posts |
I would say no to the ramps. I find having g the right front wheel off helps with dealing with the low pressure EGR and DPF removal. You work through the wheel well. Some of the lower plastic trim pieces get removed to do this.
|
|
Appreciate
0
|
| 02-01-2021, 08:55 AM | #80 | |
|
Registered
0
Rep 4
Posts |
Quote:
|
|
|
Appreciate
0
|
| 02-01-2021, 11:59 AM | #81 | |
|
Brigadier General
762
Rep 3,555
Posts |
Quote:
Keep in mind, once the engine is supported from underneath, motor mount disconnected and engine jacked. You're pretty much stuck in that config chassis support wise. Please plan ahead to not be chasing your tail. Too bad an engine support bar can't be used on the X5 as its fenders are plastic. Not saying it isn't impossible (a guy on NABDOG did it anyway) but i wouldn't recommend it. Its a breeze on a E90 now though. If you have a chain hoist or something more reliable than hydraulic engine puller, you could do it this way but please be very very safe. Not having the engine sitting on a support underneath gives you more room to work down below. |
|
|
Appreciate
0
|
| 02-01-2021, 04:13 PM | #82 | |
|
Lieutenant Colonel
 277
Rep 1,572
Posts |
Quote:
|
|
|
Appreciate
1
BB_cuda762.00 |
| 08-07-2021, 06:18 PM | #83 | |
|
Private
 4
Rep 61
Posts |
Quote:
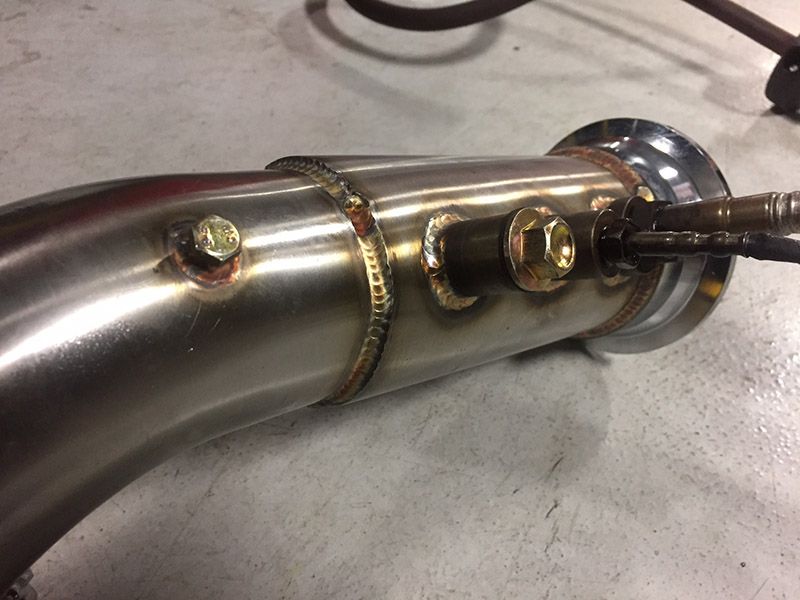
Just wanted to thank you for your efforts here. I just got my dpf out, and removed all of my exhaust. Now to put the new exhaust in and get that tune. This was an awesome tutorial. Thank you so much. |
|
|
Appreciate
0
|
| 09-06-2021, 05:22 PM | #84 |
|
Registered
0
Rep 2
Posts |
Hi guys I just joined today. This thread was very helpful when doing the install.
I have done the full delete and tune on my X5. I used the JR tune 2.0 race and new turbo back delete and exuast kit from AA Rodriquez. also did EGR/SCR delete, race throttle body, new MAP,MAF sensors pressure converters, swirl flap delete, walnut blasted CBU from intake manifold, new intake gaskets, vacuum lines and vacuum plenum. The car has 91k on it so I figured I might as well change those too while in there. My car threw a code the day before the tune/delete and exuast install, and I went ahead with the install anyway. The code is 3F01 DDE: Boost Pressure sensor, signal. When I start the car the turbo actuator doesn't move very much, sometimes not at all, not the 10mm of travel suggested I read elsewhere. When I put my vacuum pump on it and manually pull a vacuum it works every time, when I start the car it moves once maybe twice on repeat starts, then stops moving. Any recommendations? or can someone direct me to a thread for trouble shooting this? I have built a Jetta TDI with a Malone tuning and three Cummins projects. This is my first BMW. I am looking into a 335D for my next purchase. Just would like some help troubleshooting this code and the reason behind it so I can learn more. I do have a Foxwell scanner. Thanks! |
|
Appreciate
0
|
| 12-13-2021, 09:04 AM | #85 |
|
Registered
0
Rep 4
Posts |
When to tune?
Thanks everyone for this thread. I am finally getting around to doing this over the holidays. Question: Can the X5 be driven after the DPF/SCR delete without a tune? I am hoping to be Abe to take it to a local shop for the tune right after the install.
|
|
Appreciate
0
|
| 12-13-2021, 11:21 AM | #86 | |
|
Brigadier General
762
Rep 3,555
Posts |
Quote:
|
|
|
Appreciate
0
|
| 12-13-2021, 12:50 PM | #87 | |
|
Registered
0
Rep 4
Posts |
Quote:
|
|
|
Appreciate
0
|
| 01-24-2022, 11:29 AM | #88 |
|
New Member
0
Rep 5
Posts |
Dpf vacuum lines
This thread has been very helpful. Doing delete (EGR,DPF,DEF,SCR)on my 2010. I have gutted the convert and replacing the DPF and EGR with the replacement straight pipe. Wondering the two vacuum lines on original dpf just get capped?
Last edited by DaveEb; 01-24-2022 at 11:36 AM.. |
|
Appreciate
0
|
 |
| Bookmarks |
|
|