E90Post


Coby Wheel
 
BMW 3-Series (E90 E92) Forum > E90 / E92 / E93 3-series Technical Forums > Suspension | Brakes | Chassis > Eibach 28mm solid front sway bar


Reply
 
Thread Tools Search this Thread
      06-12-2020, 10:04 AM   #45
W37V
[Oo=||=oO]
No_Country
1101
Rep
2,469
Posts

Drives: e92n52 & f15n57
Join Date: Aug 2014
Location: DMV

iTrader: (0)

Quote:
Originally Posted by sky82 View Post
with the eibach front and rear sway bars did you guys use oem end links?\

been debating on the eibach kit
hotchiks kit
or m3 set
OEM. I didn't see need to upgrade them as they were fine.
Quote:
Originally Posted by freedomfries View Post
W37V

Thanks for sharing your feedback - detailed and very informative as always. I have a Whiteline 27mm front sway bar and while it reduced roll and improved steering response, I felt that it had also upset the car's balance. Upgrading to poly rear sway bar bushings restored some balance, but I'll run my stock bar again to compare. I've driven with no effective front bar when an endlink broke and that was not fun - terrible steering response and feel.

I've read that a rear sway bar "shouldn't" be upgraded without a LSD. I would be really interested to hear your thoughts on that after more seat time.
Nagh... You can run it. If you upgrade front, do the rear as well to balance out the car. It makes the car bit more planted and predictable. I don't see why people are claiming that you should get LSD. If the bar was so tight to make the rear end bounce or lose traction, sure, but you have 328. You will almost never have that much power that e-lsd can't handle. If anything get stickier tires.
I am almost FBO with 3.79 rear diff. Unless on cold tires in wet and if I don't dump the clutch, I still can't have rear end to break loose. So, if you can, upgrade both proporionally. It will make the car much more fun / predictable
Quote:
Originally Posted by avocet View Post
My last round of mods completely changed the dynamic of my chassis. The more I think I understand and think I am beginning to sort it out, a few changes send me back to square one.

Man I love this.

The way I see it, is to always try to balance everything out and do nothing to upset it. BMW spent numerous hours researching and balancing the car, so I would assume they know the best. In most cases, they find extremes and then scale it back. Under that assumption, it's fun to figure out where you can push it without upsetting anything. Like sway bars - on M3 they are slightly thicker than rest of the e9x cars. However, the thickness increase is proportional in front and rear (vs. rest of e9x). That's why I think Eibach kit or going with M3 sways is rather good choice. It mirrors what BMW offered.
Appreciate 1
      06-12-2020, 10:50 AM   #46
porsche959
Banned
471
Rep
996
Posts

Drives: porsche
Join Date: Jul 2018
Location: chicago

iTrader: (0)

Quote:
Originally Posted by W37V View Post
Today I finished the install of the rear sway bar. I only put about 10 miles since, so here is rather limited first impression. I did rear dif, whiteline inserts and rear sway bar, so all this could be attributed to either.

Car corners much flatter. The balance is restored, but now the front end feels floaty. As if I have blown shocks (which I mist likely do). Rear feels planted. HOWEVER, I have noticed rear of the car acting somewhat weird when it comes to weight transfer. The rear end feels as if it is drifting (or swaying). It's very similar experience to having tires with soft sidewall. I can feel the sway when the weight transfer occurs (direction changes). Car feels much more direct and communicative. I feel like I know where and what each tire is doing. This setup definitely transformed the car.

In regards to installation of the rear sway bar - It is not that difficult at all. You don't even need to unbolt the subframe all the way. Ignore those idiots who posted videos on youtube about 3 day to swap the sway bar.

How long did the rear sway bar take? Do you have a diy or a suggested diy you followed? Thanks
Appreciate 0
      06-12-2020, 02:26 PM   #47
W37V
[Oo=||=oO]
No_Country
1101
Rep
2,469
Posts

Drives: e92n52 & f15n57
Join Date: Aug 2014
Location: DMV

iTrader: (0)

Quote:
Originally Posted by porsche959 View Post
How long did the rear sway bar take? Do you have a diy or a suggested diy you followed? Thanks
My time estimate is skewed as I did several other things at the same time (whiteline inserts and new differential).

I used this:
https://blog.bavauto.com/13434/bmw-3...nstall-how-to/

I found that removing upper control arms to be a must. It allowed a lot of clearance and the sway bar to be rotated enough to be maneuvered out. Tbh, I think you might even remove the sway bar without completely undoing the subframe bolts. Undo them almost all the way, but leave them in. Drop the subframe and maneuver the sway bar out. You will have to do a weird angle and give it a bit of a push, but it is possible.

Here are instructions in case blog post goes away:
Quote:
February 7, 2013
While the majority of our Bavarian Autosport (BavAuto) performance swaybars (sway bars) are easy to install with common hand tools, in an hour or less, the 06-11 3-series models (E90, E91, E92, E93) do require a bit more work to install the rear bar. The front swaybar installation is very similar to the procedure shown in our DIY video (see link below). However, the rear bar requires the rear suspension subframe to be lowered. This may sound daunting, but it really isn’t all that difficult. You just need the car on jack-stands (or a lift) and you need a floor jack (or high-lift jack, for installation on a vehicle lift). Below, we’ll show a basic DIY on installing the rear swaybar on an E92 335i coupe.

PROCEDURE:
  1. Raise and support the rear of the vehicle. If using jack-stands, place the stands at the vehicle lift pads, inside the left and right rocker panels.
  2. Remove the rear wheels.
  3. Remove the two bolts (one per side) securing the load distribution bars to the forward subframe mount arm.
  4. Remove the eight bolts securing the load distribution mounting plate to the chassis.
  5. Remove the two bolts securing each forward subframe mount arm to the chassis.
  6. Remove the two bolts securing the rear of the under-chassis heat-shield to the chassis brackets.
  7. Remove the bolts connecting the muffler hangers to the chassis brackets (335i shown, others will be slightly different).
  8. Place the floor jack (or transmission jack or high-lift jack) under the differential housing and raise it until making contact with the housing.
  9. Remove the four subframe mounting bolts, two front and two rear. Note that the forward subframe mount arms will be removed with the forward subframe mounting bolts (the bolts go through the arms).
  10. Slowly lower the subframe from the chassis. It may be necessary to gently pry the subframe in order to lower it evenly. Lower the subframe about 2 to 3 inches. Keep an eye on the brake fluid hoses, ABS sensor wires and brake wear sensor wire. Do not over-stretch any of these components.
  11. Disconnect the swaybar end links from the swaybar ends.
  12. Remove the upper control arm outboard mounting bolt (upper control arm to wheel hub) for both sides. Swing the arms upward.
  13. Remove the swaybar mounting bracket bolts (two per side). Remove the brackets and bushings from the swaybar.
  14. Twist and pull the swaybar out toward one side. You may need to lower the front of the subframe a bit further, but be mindful of the hoses and wires that are still connected between the subframe and the chassis.
  15. Install the new swaybar in the same manner as removing the original. Be patient and find the correct angles to move the bar through the clearanced area between the under-chassis and the subframe assembly.
  16. Lubricate the urethane mount bushings and install them over the bar. The bushings should be outboard of the locating flanges on the bar.
  17. Lubricate the outside of the bushings and install the mounting brackets over the bushings. Position the brackets over the mounting holes on the subframe and install the mounting bracket bolts. Secure the mounting bolts.
  18. Connect the swaybar end links to the swaybar ends. We suggest that you use the forward mounting hole as a starting point.
  19. Connect the outer end of the upper control arm to the hub and install the mounting bolt.
  20. Align and raise the subframe. Work on aligning the mounts with the chassis and inserting the through bolts. Remember that the forward bolts also go through the forward support arms. NOTE: You may need to put some weight on the rear of the vehicle as you push the subframe upward in order to compress the springs enough to locate the rear mounts into position and get the through bolts threaded into place. A helper sitting in the trunk works well.
  21. Once the subframe is in place and all four of the through mounting bolts are threaded, install the four forward support arm bolts. When all bolts are threaded, tighten them evenly until all are torqued properly (see Bentley repair manual for torque values).
  22. With the subframe mounted and secured, remove the jack and reinstall the muffler hangers, load distribution assembly and heat-shield bolts.
  23. Lower the vehicle and go “break-in” your new swaybars!
Appreciate 0
      06-14-2020, 07:40 PM   #48
Tambohamilton
Brigadier General
3058
Rep
3,909
Posts

Drives: E91 330d
Join Date: Apr 2019
Location: Herefordshire

iTrader: (0)

Quote:
Originally Posted by W37V View Post
The way I see it, is to always try to balance everything out and do nothing to upset it. BMW spent numerous hours researching and balancing the car, so I would assume they know the best. In most cases, they find extremes and then scale it back. Under that assumption, it's fun to figure out where you can push it without upsetting anything. Like sway bars - on M3 they are slightly thicker than rest of the e9x cars. However, the thickness increase is proportional in front and rear (vs. rest of e9x). That's why I think Eibach kit or going with M3 sways is rather good choice. It mirrors what BMW offered.
Your logic seems sensible, but it doesn't add up.
E90 non-M: 26mm front (reduced centre diameter), 12mm rear.
E90 M3: 26mm straight in the front, 20(?)mm rear
Net result is that the front bar is ~10% stiffer, and the rear is, at a guess, 4x as stiff...certainly not in proportion to the non-M stock setup.

Sways are the last part of the puzzle, and are there just to fine tune roll stiffness. They must be balanced with the springs and shocks and everything else on the car; they don't need to bear any resemblance to each other.

And I have an E93 M3 bar on the rear of my car. It's not the correct bar for my application; I should have thought harder before buying/fitting it!
Appreciate 2
      08-04-2020, 07:20 AM   #49
MichaelE91
New Member
Czech_Republic
1
Rep
20
Posts

Drives: E91 325i
Join Date: Jan 2020
Location: Prague

iTrader: (0)

so I managed to find used m3 sway bars
https://www.ebay.co.uk/itm/274434221207
https://www.ebay.co.uk/itm/283454909916
I just hope they will perform well on E91 325i.
Just have to install Bilstein B12 kit.
Appreciate 0
      08-24-2020, 10:40 PM   #50
The Nightman
Cometh
The Nightman's Avatar
1090
Rep
1,302
Posts

Drives: Boy's Soul
Join Date: Jul 2016
Location: Boy's Hole

iTrader: (4)

Garage List
Quote:
Originally Posted by W37V View Post
The way I see it, is to always try to balance everything out and do nothing to upset it. BMW spent numerous hours researching and balancing the car, so I would assume they know the best. In most cases, they find extremes and then scale it back. Under that assumption, it's fun to figure out where you can push it without upsetting anything.
I've reached the same conclusion. The car is more balanced with the stock front sway bar and the ride is surprisingly much more comfortable, but it has also lost some precision and sharpness. I have poly rear sway bar bushings that helped so I plan to upgrade the front bushings to match.

For whatever it's worth, BMW Motorsports has upgraded front and rear sway bar bushings, so it's a safe assumption that the stock bushings have room for improvement. The stock rear bushings have a lower durometer than tofu

Front 26.5mm, 31358300884: https://www.turnermotorsport.com/p-3...m-e90-e92-e82/


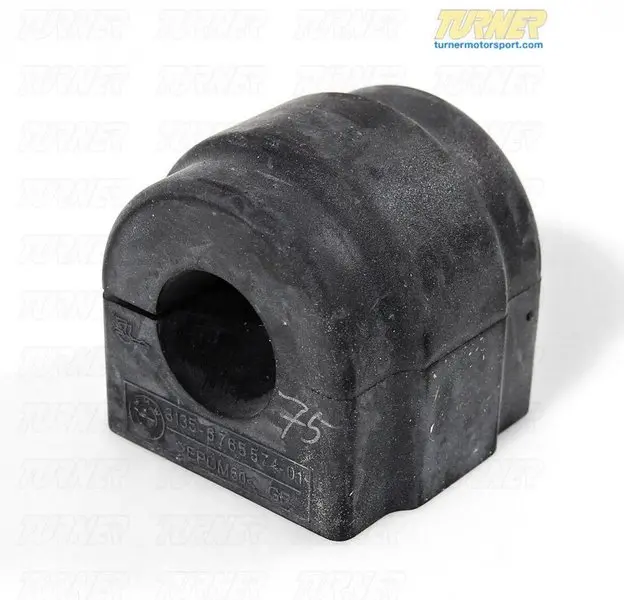
Rear 14-15mm, 33558300883: https://www.turnermotorsport.com/p-3...m-e90-e92-e82/
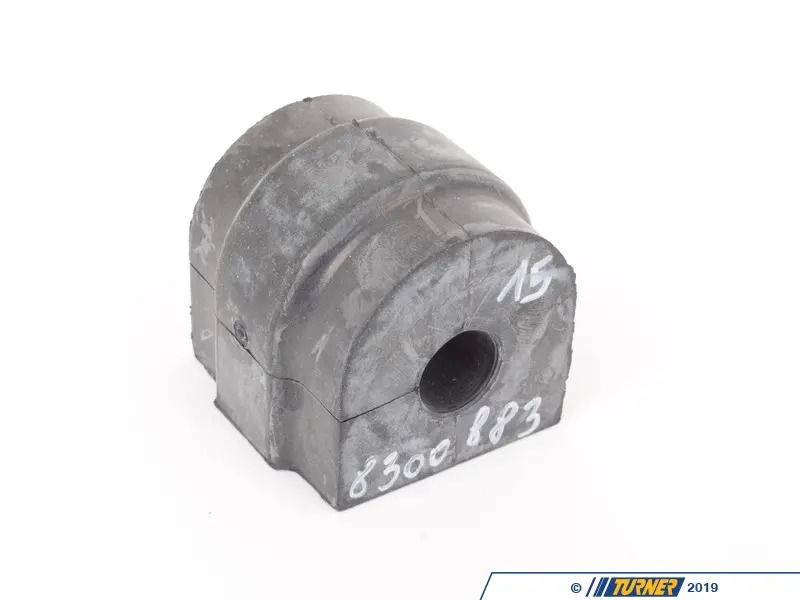
Appreciate 0
      09-02-2020, 09:21 AM   #51
NoGuru
Major
NoGuru's Avatar
772
Rep
1,418
Posts

Drives: 335is
Join Date: Apr 2017
Location: MI

iTrader: (0)

Garage List
2021 Chevy Silverad ...  [0.00]
2002 Jeep Cherokee  [0.00]
2014 CTS  [0.00]
2011 335is  [0.00]
I think I am going to do my from sway bar soon.
__________________
2011 335is DCT BQ Tuning / BMS CAI / VRSF kittyless DP's / Synapse BOV and charge pipe / 7" VRSF Race FMIC / Walbro 535 and 450 on BMP4 / E90 tune / Diff Brace / PR Coils / Relocation Inlets / DAW Stage3+ Turbos / MMP port injection / xHP Stage 3 / FPR and -6 fuel lines
Appreciate 0
Reply

Bookmarks


Posting Rules
You may not post new threads
You may not post replies
You may not post attachments
You may not edit your posts

BB code is On
Smilies are On
[IMG] code is On
HTML code is Off


All times are GMT -5. The time now is 08:03 PM.


e90post
Powered by vBulletin® Version 3.8.11
Copyright ©2000 - 2024, vBulletin Solutions Inc.
1Addicts.com, BIMMERPOST.com, E90Post.com, F30Post.com, M3Post.com, ZPost.com, 5Post.com, 6Post.com, 7Post.com, XBimmers.com logo and trademark are properties of BIMMERPOST