|
|
|
|
 |
|
 |
BMW Garage | BMW Meets | Register | Today's Posts | Search |
 |

|
BMW 3-Series (E90 E92) Forum
>
Depo FX-R 3.0 retrofit
|
 |
| 05-07-2012, 12:42 PM | #1 |
|
Private First Class
 
5
Rep 120
Posts |
Depo FX-R 3.0 retrofit
Heres pics of my retro I did. Needs a lil angle adjustment which will fix if I do a color band mod.
Depo Euro housings Black out w/silver shroud TRS FX-R 3.0 projectors Morimoto 4300k D2S HPB canbus ballast 60 uhp led rings 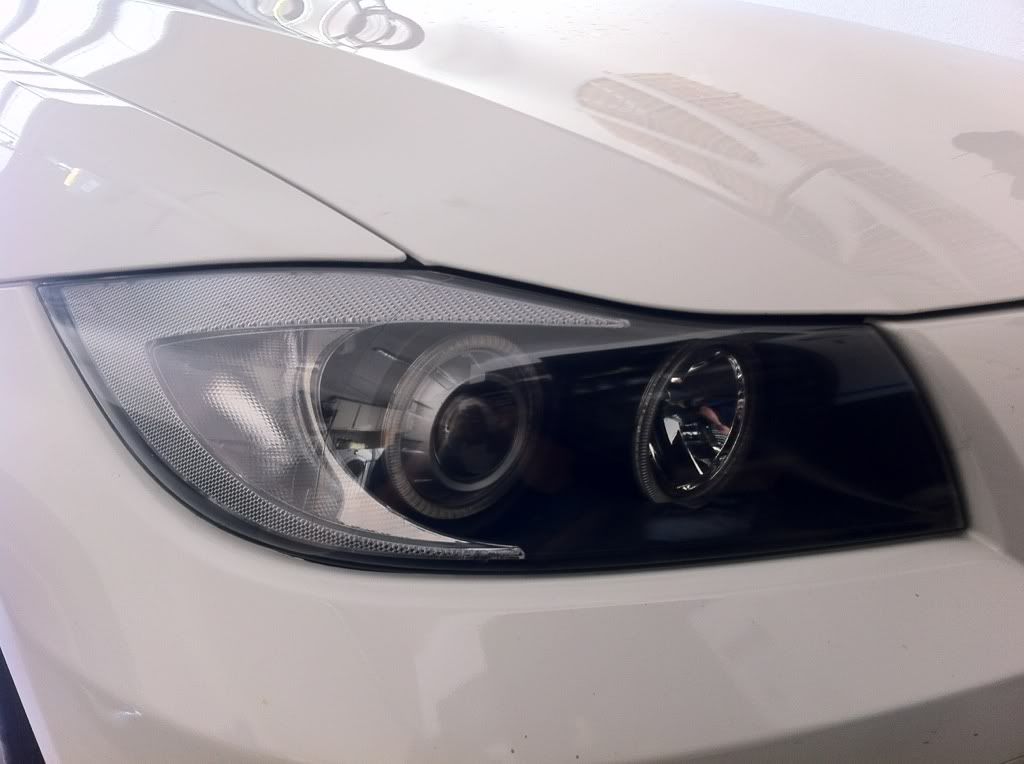 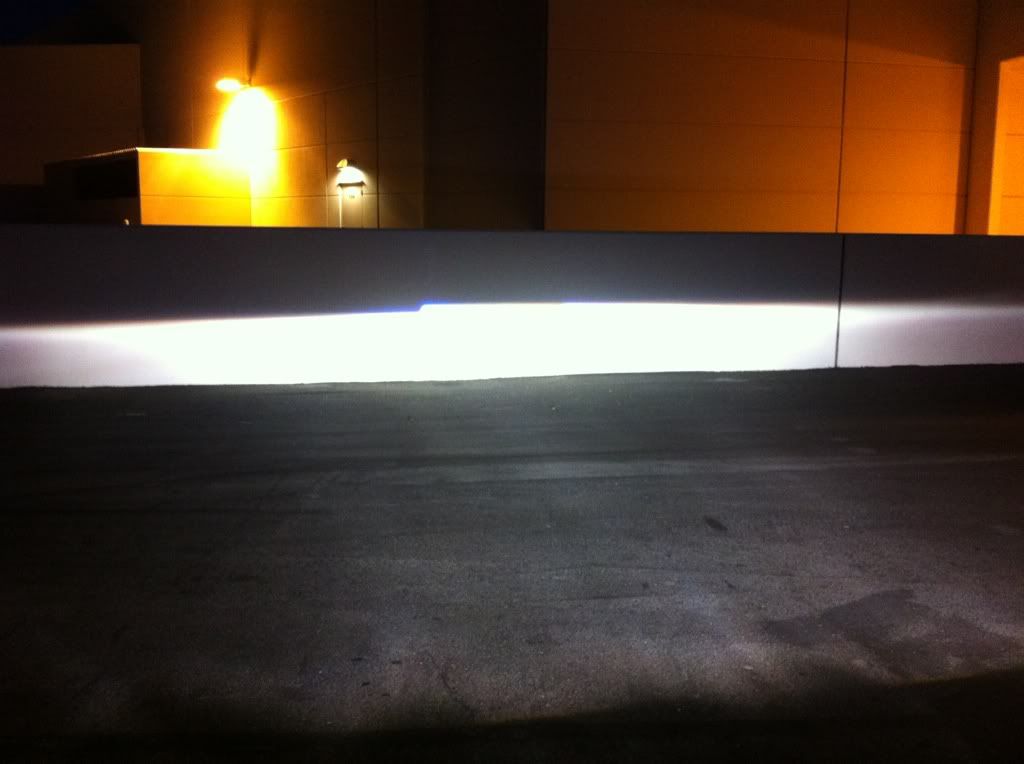 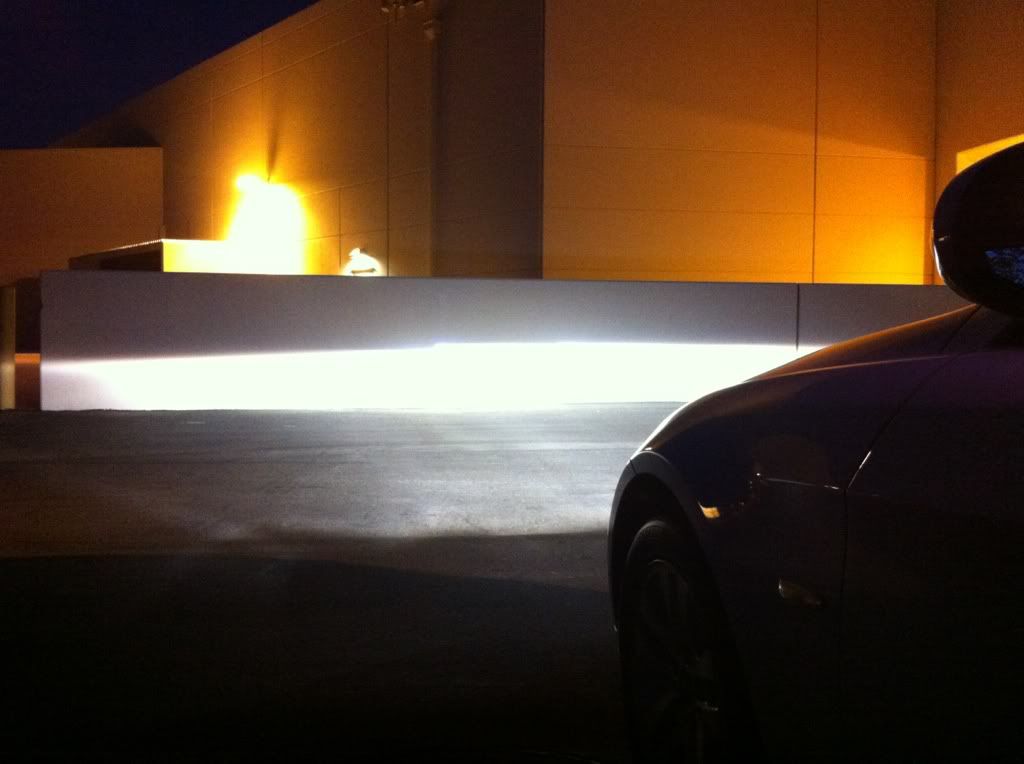 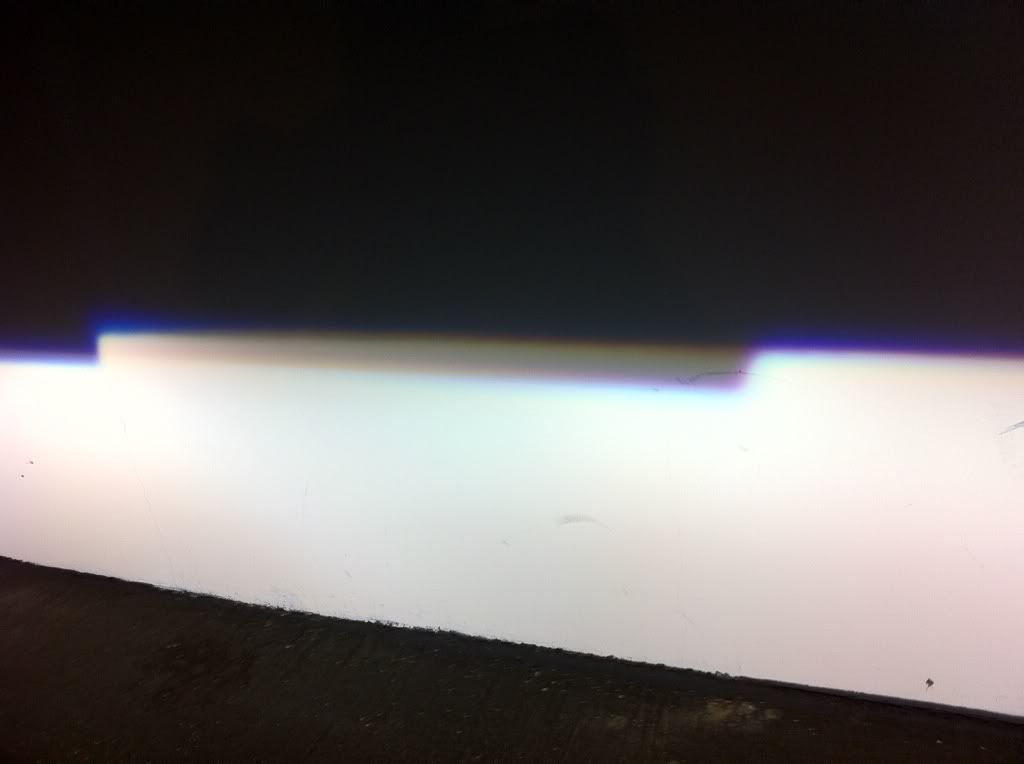 |
| 05-07-2012, 02:38 PM | #5 |
|
Mr. Nice Says Hello
636
Rep 16,662
Posts
Drives: BMW M3 | X5 xdrive 35i MSport
Join Date: Dec 2008
Location: USA
|
very nice
|
|
Appreciate
0
|
| 05-07-2012, 09:00 PM | #8 | |
|
Brotographer
88
Rep 1,741
Posts |
Quote:
|
|
|
Appreciate
0
|
| 05-07-2012, 11:23 PM | #10 |
|
Private First Class
5
Rep 120
Posts |
@Rollingstone
I know you've been waiting for the high beam shot haha. I can temporarily connect the solenoid to the high beam wire. It will probably throw a code when I hit the high beams but oh well. |
|
Appreciate
0
|
| 05-07-2012, 11:34 PM | #11 |
|
Where'd my VTEC go?
479
Rep 6,067
Posts |
Awesome! BMW needs some better projectors in their headlights.
__________________
AW/Terra | ZSP | ZPP | ZCW | iDrive | CA
Mods: BC BR coilovers | Blacklines | M-tech rear | dual exhaust | M3 steering wheel | BMW SSK | ZHP shift knob | High-kick CF spoiler | NBT Retrofit M3 front control arms | M3 rear guide rods | Manzo rear toe and camber links | Monroe rear shock mounts | Varrstoen ES1 19x9.5+20 Front, 19x11+25 rear |
|
Appreciate
0
|
| 05-31-2012, 10:12 PM | #13 | |
|
Captain
 41
Rep 642
Posts |
Quote:
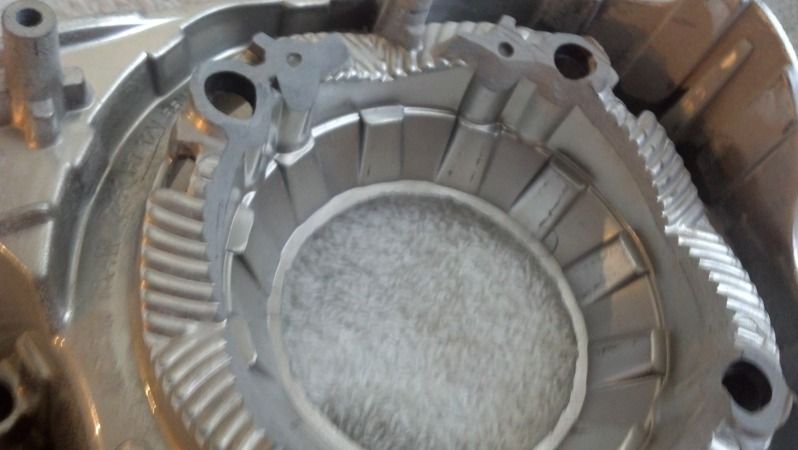
Guess which one the Depo originally had 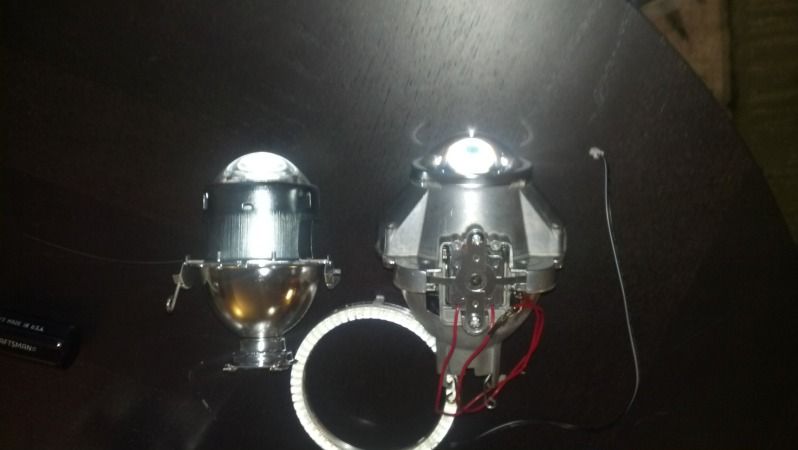 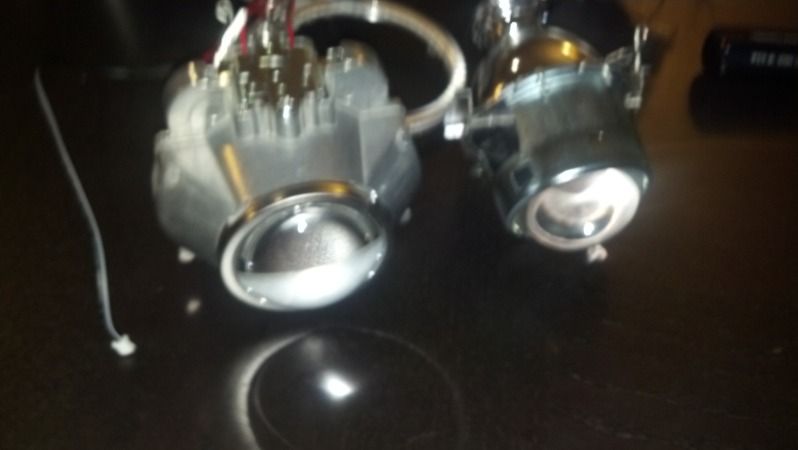 If it's not obvious already, this is not just going to easily fit. 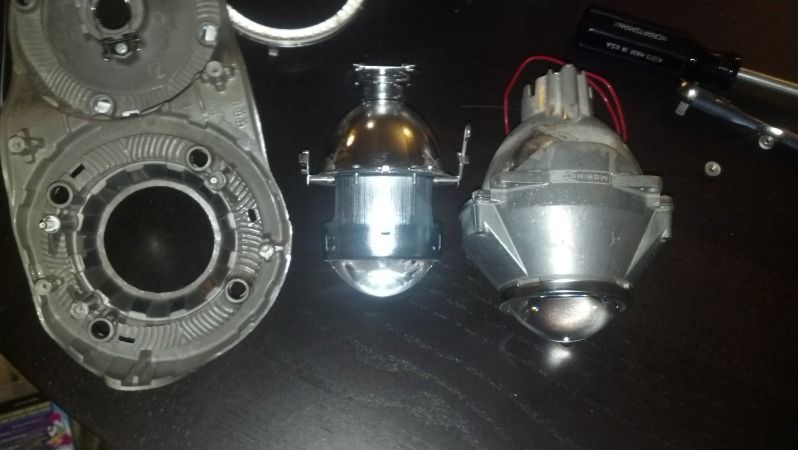 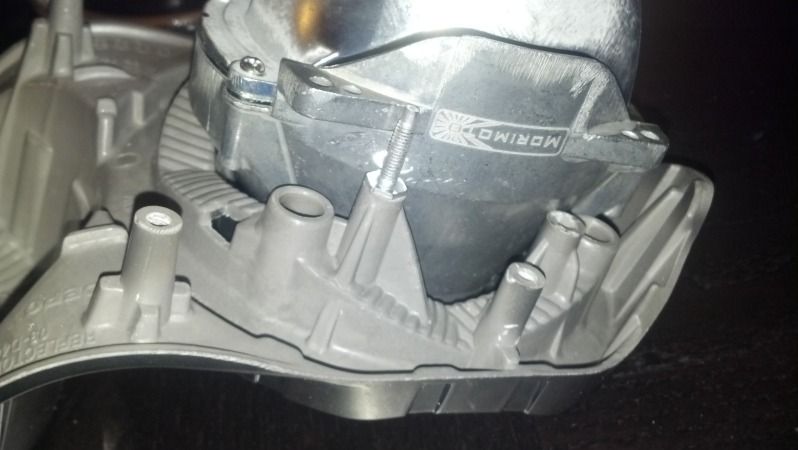 What did you do to make it fit? I didn't read much on retrofitting yet, so maybe I am missing something obvious. I can probably get it to fit flat in if I shave some material off the projector housing and the reflecttive holder that the projector attaches to, depending on how thick the material is on the projector, because doesn't look like much to play with on the holder.. Unless there is a better way. Or did I get the wrong FX-R's? |
|
|
Appreciate
0
|
| 06-01-2012, 07:50 PM | #14 |
|
Captain
41
Rep 642
Posts |
Mounting the FX-R wasn't too bad. Ended up cutting and grinding a good bit off the bezel with my dremel to get the FX-R to sit stable and aligned. I think I got it pretty damn close to how the original projectors lined up on the front.
 Yeah, the original ones were about like that. I don't think I can shave any more off without going through in order to get it closer and like I said, this is how the originals sit anyway. Going all around, it's pretty even for gap...going by eye...didn't bother using feeler gauges. A head on picture, I doubt you'd notice it at all. 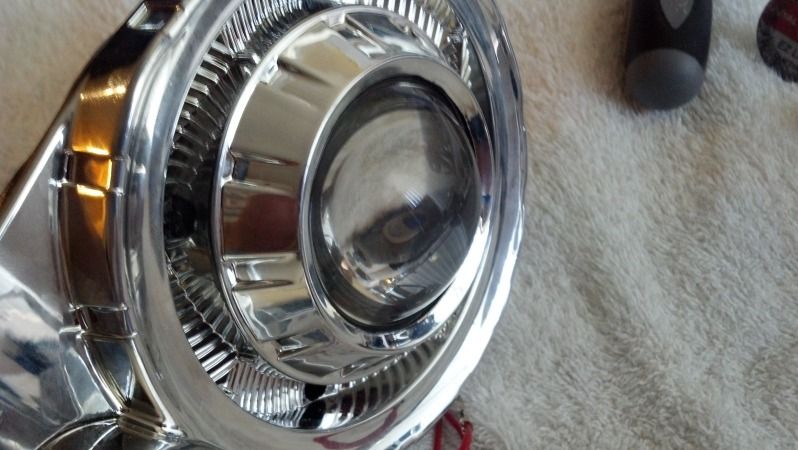 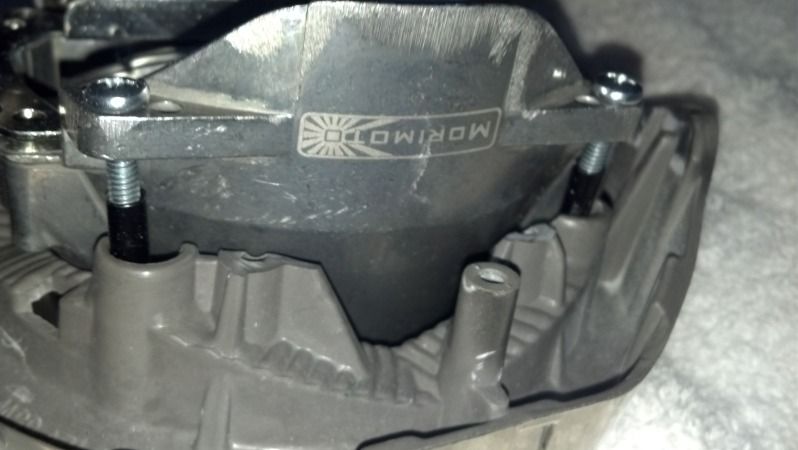 This is the hardware I used. I think it was 1/2" long 8-32nd screw post with 1" long screws. Had to shave some off the head of the screw post for it to fit in the angel eye groove. It holds it in there very well and didn't budge at all with my shacking the crap out of it, so pretty sure it'll hold up in driving conditions.  Going to blow everything out with air and clean it all down with alcohol and contact cleaner before assembly. Probably have it on my car before next week is over. |
|
Appreciate
0
|
| 06-02-2012, 12:41 AM | #15 | |
|
Banned
151
Rep 2,638
Posts |
Quote:
Great work. Thanks for keeping us all posted. What are you going to seal it with? Hopefully it is strong but easy to re-open if needed. When i take my halogens out, I might try to retrofit something in them for the heck of it. |
|
|
Appreciate
0
|
| 06-02-2012, 12:52 AM | #16 |
|
Private First Class
5
Rep 120
Posts |
Yup the fxrs are way bigger. Did the same ALOT of grinding and kinda the same mounting. You might have to grind where your screws are going thru to get more rotation adjustment. I drilled 2 holes in the actual projector for the 2 bottom screws.
  |
|
Appreciate
0
|
| 06-02-2012, 01:07 AM | #17 |
|
Private First Class
5
Rep 120
Posts |
Carefull with the chrome! Too much rubbing will rub it off! Also I cut the corner of the adjustment bracket because the bowl hit it. Circled red.
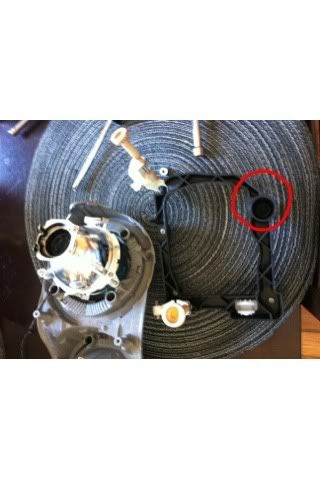 I screwed in a small bracket for support. Dont have a pic for that tho. |
|
Appreciate
0
|
| 06-02-2012, 01:20 AM | #18 |
|
Private First Class
5
Rep 120
Posts |
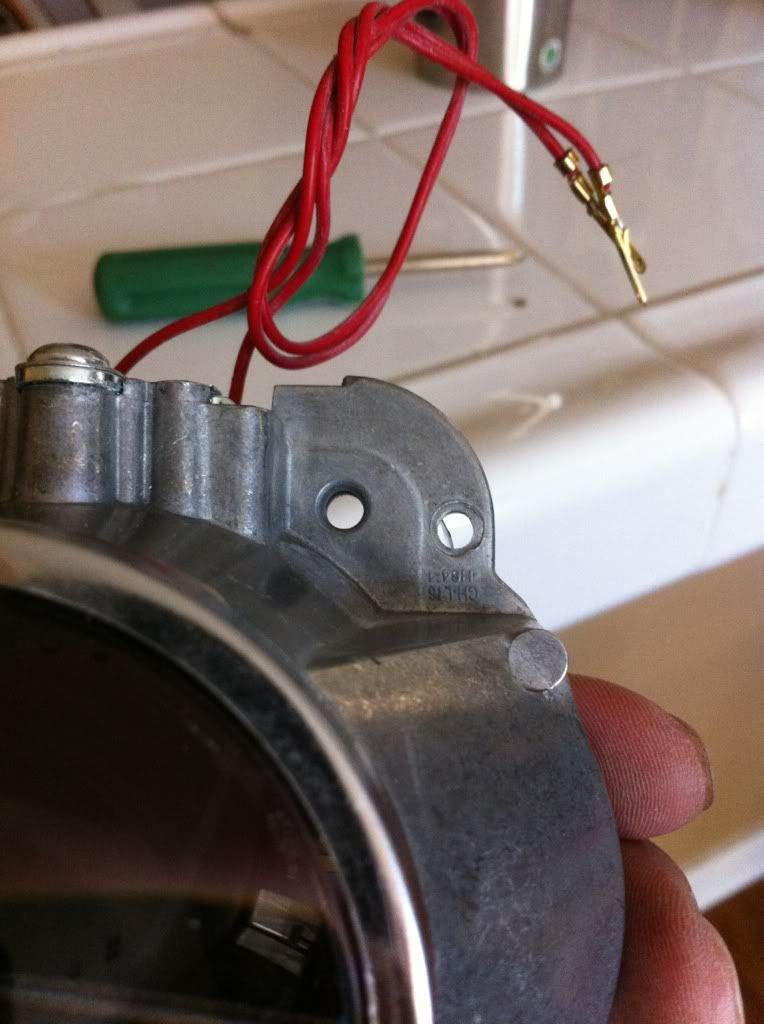
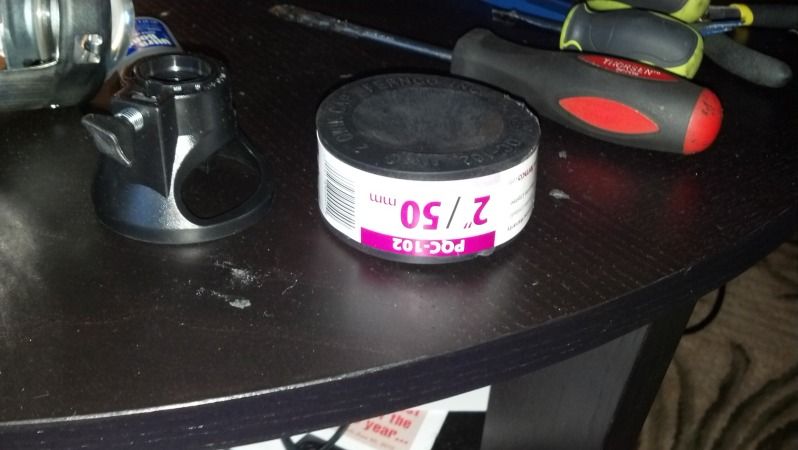
The butyl from TRS works good. Had to reopen a few times already.
Also had to bend the clips for the bulb holder. Haven't figured out a back cover cap but doesn't look hard. Don't get too frustrated when doing the adjustments. The adjuster screws like to pop out when ur at the max. You might have to adjust the length of the ball joint screw as well. |
|
Appreciate
0
|
| 06-02-2012, 02:39 PM | #19 | ||
|
Captain
41
Rep 642
Posts |
Quote:
Quote:
|
||
|
Appreciate
0
|
| 06-18-2012, 12:49 AM | #20 | |
|
Captain
41
Rep 642
Posts |
Quote:
 Cut the top off the Depo cap 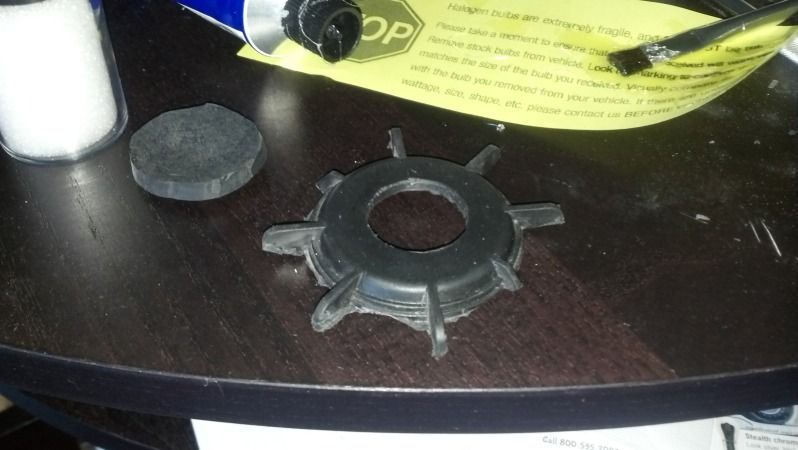 Glued the rubber cap on to the original depo cap I just cut 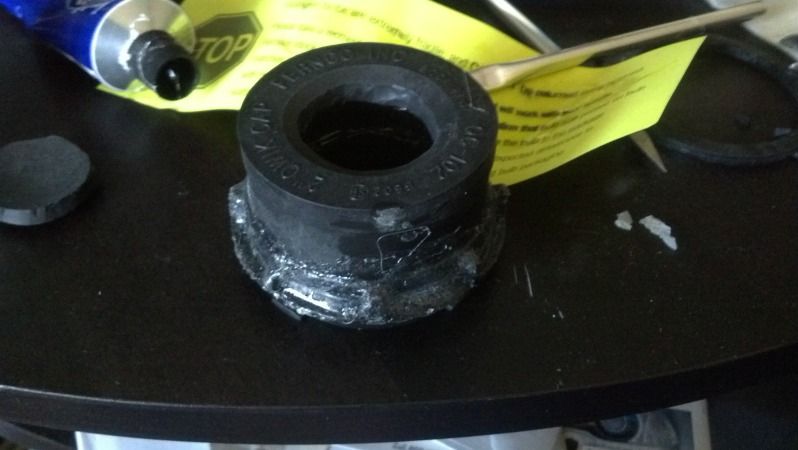 Glued a length of bike tire rubber innertube on to the top of the cap I cut off and then glued that on to the original depo cap+rubber cap 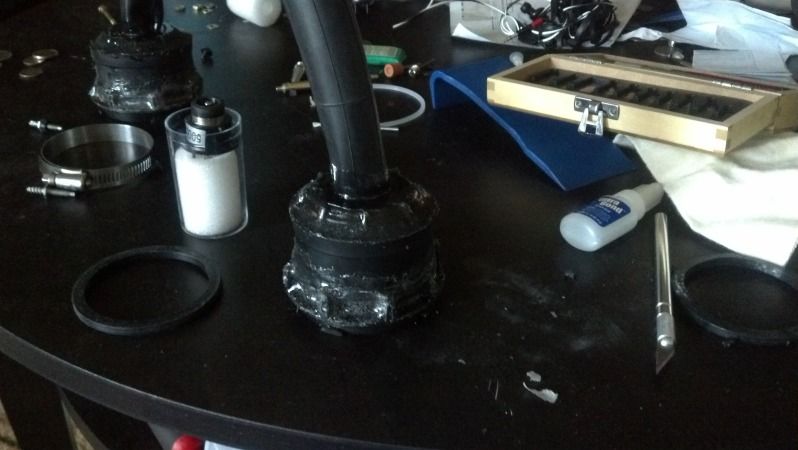 Will zip tie the rubber innertube to seal that end once I run the wires through after everything is mounted. Gives enough extra space to clear everything, without being too big. |
|
|
Appreciate
0
|
 |
| Bookmarks |
|
|