

|
|
|
|
 |

|
 |
BMW Garage | BMW Meets | Register | Today's Posts | Search |
 |

|
BMW 3-Series (E90 E92) Forum
>
DIY - E90 LCI D1S replacement.
|
 |
| 02-06-2012, 04:52 PM | #1 |
|
Private First Class
 20
Rep 171
Posts |
DIY - E90 LCI D1S replacement.
I had a chance to replace my D1S bulbs over the weekend and took some pictures. Since there isn't any DIY for the E90 LCI on this topic, I'm going to post up the steps and hopefully it will be a useful resource.
If you're replacing the D1S bulbs in your garage, you're going to need the following tools. 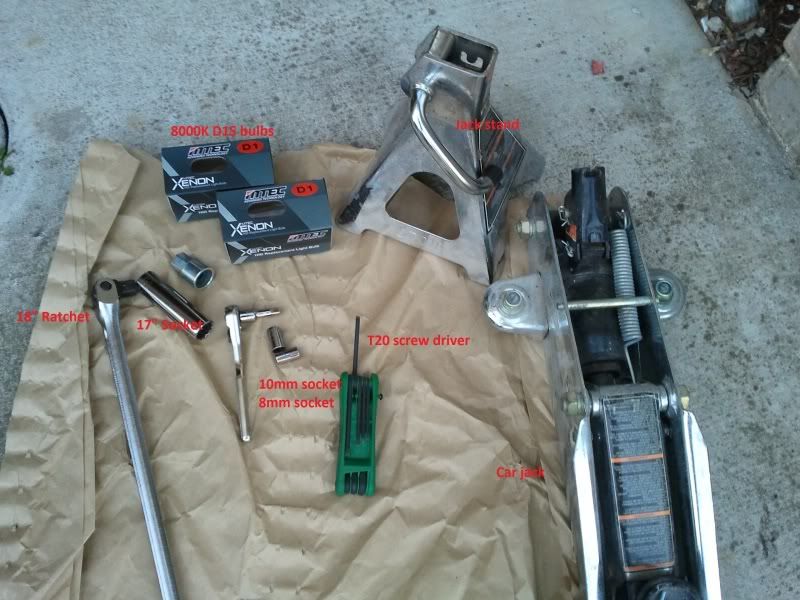 1. Locate the jacking point on the side of your car and place the car jack into its position. The reason for not lifting the wheel fully off the floor is so that we can loosen the wheel nuts slightly and with it on the ground the wheel won't spin around. If you were to jack up the car fully and then try and loosen the wheel nuts, the wheel will most likely just keep turning around. Before you jack up your vehicle, you need to block the wheels. This prevents the car from rolling. You can use wood wedges, bricks, or you can buy metal wheel chocks from any auto parts store. Place the blocks on the wheels on the end of the car that isn't going to be raised up on the jack. If you don't have any wheel blocks with you, you should turn the wheels in toward the curb. That way, if the car does roll, it won't be able to roll into oncoming traffic. 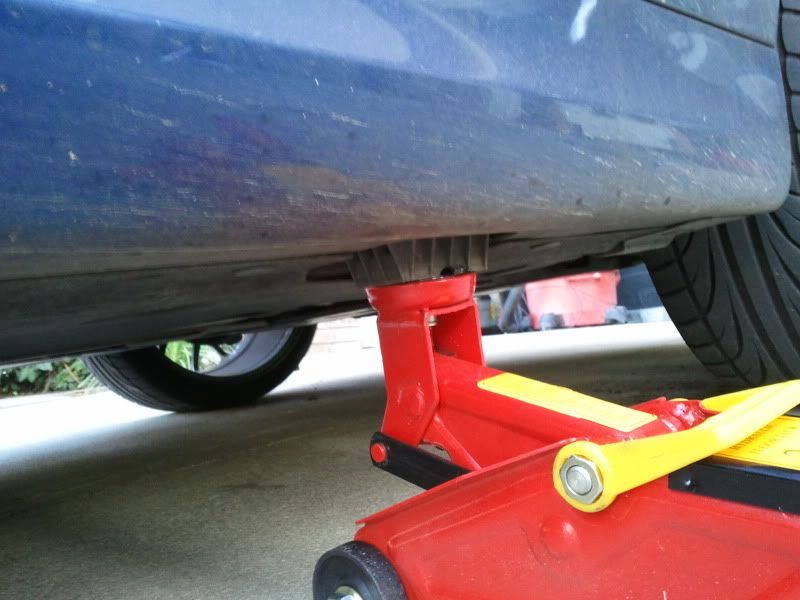 2. Use the 18" ratchet with the 17mm socket to loosen your wheels nuts. Turn the tire iron clockwise until the lug nut gives way and loosens (do not pull out the nuts). If the lug nut refuses to budge you may need to step down on the tire iron, providing extra pressure. Repeat the same steps for the remaining nuts. 3. Now raise the car slowly with the jack until the wheel is off the floor. Completely unscrew the lug nuts and remove the wheel. Never jack up a car without jack stands. Jack stands are stands you put under the car to help support it. If you don't use them and the jack falls, you can damage your car and if you are under your car, you can be crushed to death. 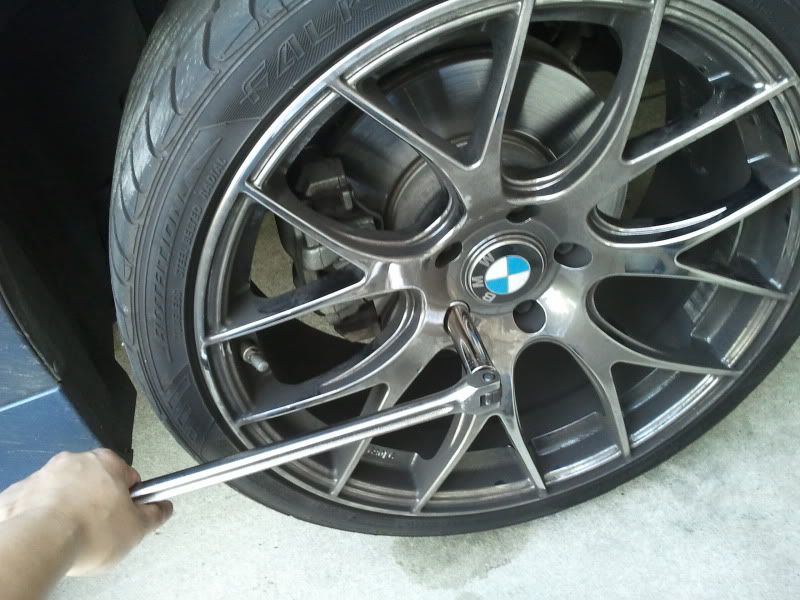 4. Remove the 5 8mm screws and 1 10mm screw on the fender trim. Remove 7 8mm screws underneath the front bumper. 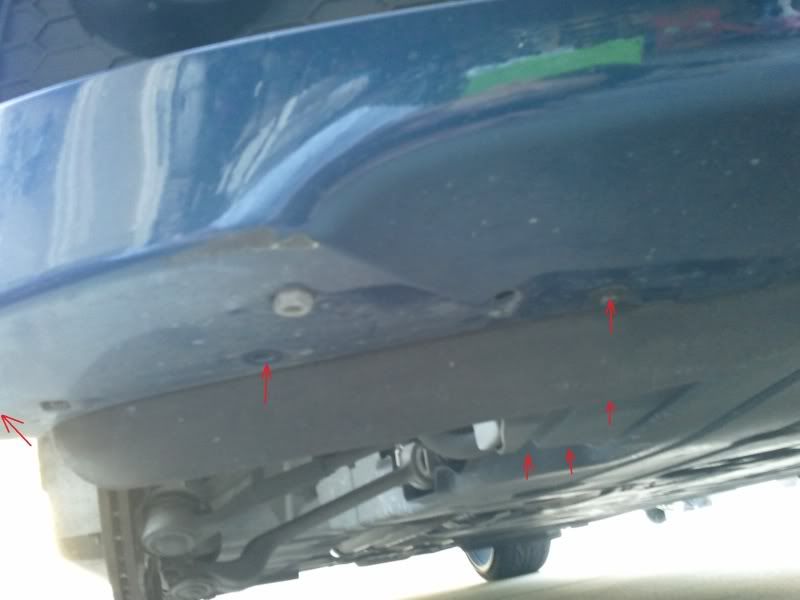 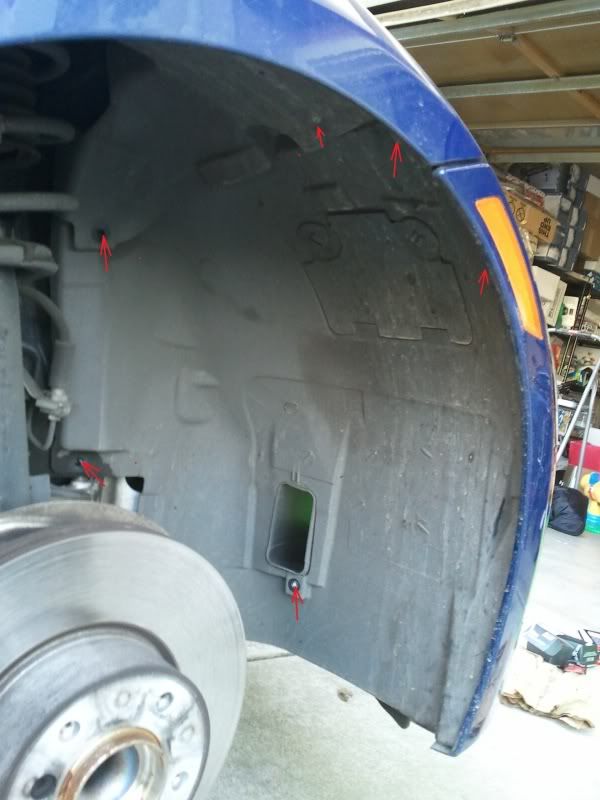 5. Slightly pull out the bumper panel and remove the fender trim. 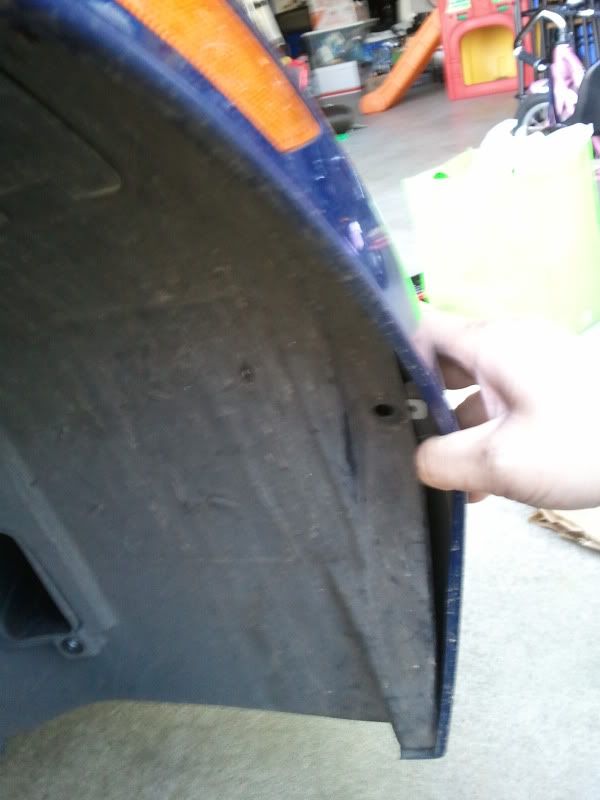 6. Remove 4 T20 screws on the D1S cover. 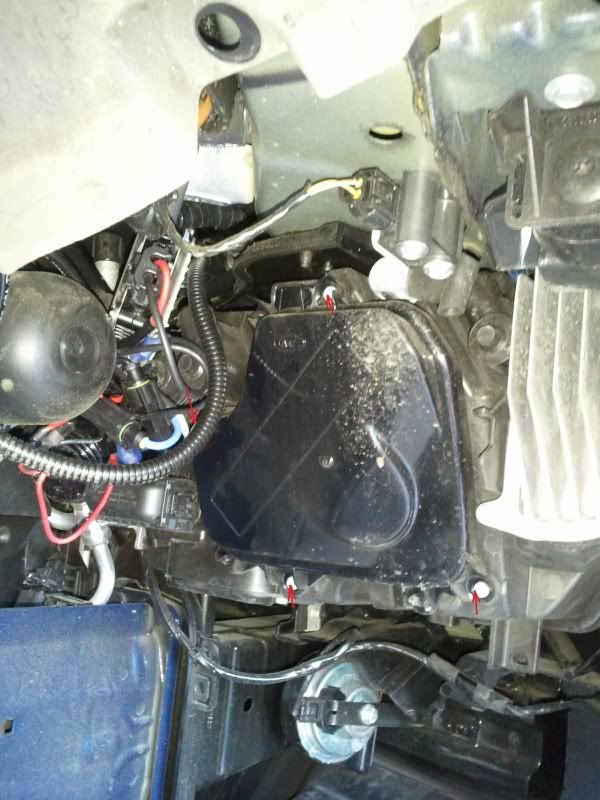 7. When D1S bulb is exposed, locate the bracket, at the top push the tap down and slide it to the left then remove the D1S connector (make a note on how the cable is connected to the bulb).  8. Remove the OEM D1S and install your new D1S. Reverse the steps to complete the installation. 9. And the result.... 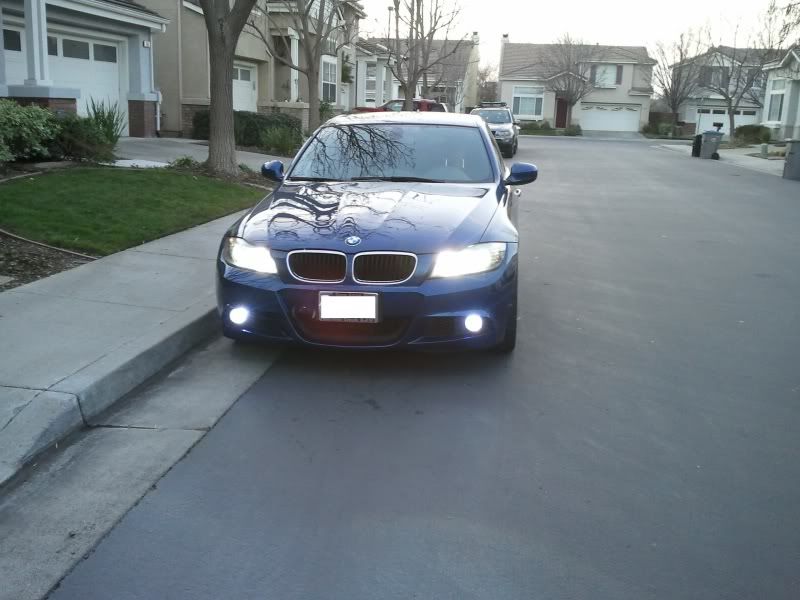 WTF.... There's a screw left over.  Just kidding!  Last edited by onephattai; 02-07-2012 at 01:18 PM.. |
| 02-06-2012, 06:56 PM | #3 |
|
Diamond Geezer
212
Rep 2,385
Posts
Drives: Jet Black 2007 328i Saloon
Join Date: Nov 2007
Location: Florida
|
thanks for this....one of my D1S just went out, bulb ordered on Ebay.
|
|
Appreciate
0
|
| 02-07-2012, 11:15 AM | #5 |
|
Captain
 32
Rep 606
Posts |
that's really a lot of work. On my pre-lci, I replaced the bulb without removing the wheel and fender trim. And the headlight black plastic cover is snapped on, no screws. maybe this is why it is a lot easier on pre-lci. I just remove the small plastic cover behind the headlight to get access to it.
|
|
Appreciate
0
|
| 02-07-2012, 01:21 PM | #6 | |
|
Private First Class
20
Rep 171
Posts |
Quote:
 |
|
|
Appreciate
0
|
| 02-07-2012, 07:21 PM | #7 |
|
Private First Class
20
Rep 171
Posts |
You can do the lazy man's way by turning the wheel outward, jack the car up and just unscrew the top 5 8mm screws on the fender lining to get to the D1S box. I'll post up the pictures soon.
|
|
Appreciate
0
|
| 02-07-2012, 08:18 PM | #9 |
|
Major
 61
Rep 1,300
Posts |
Just one note, it is recommended to use a hockey puck between the jack and the car as the jacks groves will eventually damage the rubber jack point,

__________________
Brian
Black Sapphire, Black w/Burrwood Trim & Shifter, 162's, Mtec H8 AE's, DS1 HID 6000K  |
|
Appreciate
0
|
| 02-10-2012, 03:55 PM | #10 | |
|
Diamond Geezer
212
Rep 2,385
Posts
Drives: Jet Black 2007 328i Saloon
Join Date: Nov 2007
Location: Florida
|
Quote:
One issue I had was, the metal clip holding the new bulb does not appear to be as flush as it was before removing. I think the bulb clip is secure, and the plastic cover is snapped on, but it didn't look as snug as before. We'll see how it goes  THANKS AGAIN e90post folks |
|
|
Appreciate
0
|
| 03-30-2012, 10:26 AM | #11 |
|
Registered
0
Rep 2
Posts |
HID E90 fogs?
Dumb question maybe... We're your HID fogs a oem option? My ride has standard Halogens. DIY was very useful... Unfortunately light output is hardly noticeable from the halogens drowned out by my bi-xenons.... Would love to upgrade to get something functional and matching!
|
|
Appreciate
0
|
| 09-11-2017, 10:57 AM | #12 |
|
Private First Class
38
Rep 137
Posts |
Can someone please update this post with pictures since the photos no longer work.
Is this the easiest way to replace the D1S xenon bulbs in an e90 LCI? Thanks |
|
Appreciate
0
|
| 12-29-2021, 08:23 PM | #13 |
|
Second Lieutenant

120
Rep 217
Posts |
I felt like the low beams on my 2013 E92 were looking a bit dim, so I decided to try replacing the bulbs. The housing wasn't fogged or particularly dinged up, and it sounds like the xenon bulbs do dim and change color over time.
I purchased a pair of bulbs described as "OEM Replacement for BMW #63217217509" from bimmerworld for $113, and expected to get Philips bulbs based on that description. But Hella 4300k bulbs were what showed up. From some quick research, it seems like those should be comparable quality, so I went ahead and installed them. The install wasn't challenging, but did take me 2:45 including a pause for dinner. I removed the wheels to give me plenty of space. On each side there were 14 screws to remove the paneling (7 in the wheel well and 7 underneath), as well as the 5 screws that hold the headlight back cover. My D1-S bulb had a different clasp type than what was described above. There weren't any metal clips, I just twisted the whole bulb 45 degrees counterclockwise. It took a bit more force than I anticipated...about the force you would apply to turn off a garden hose. Sitting in the garage, I wouldn't say the new bulbs are much brighter but they are definitely more of a warm white. The old bulbs were a bit cloudy compared to the new ones.
__________________
2017 F87 M2: MGM, 6MT, AA Tune, Eibach Pro-Kit, Fabspeed Catted Downpipe, Evolution Racewerks FMIC+Chargepipe, Autosolutions SSK, CDV Delete, Vorshlag Plates, PFC-08 pads, Apex EC-7 18x9.5"
2013 E92 328i M-Sport: BSM, 6MT, 3IM+AA Tune, BMW PE, M3 control arms, Eibach Pro-Kit, Bilstein B8, BMW SSK, CDV Delete, Apex EC-7 18x9" |
|
Appreciate
0
|
 |
| Bookmarks |
|
|


