

|
|
|
|
 |
|
 |
BMW Garage | BMW Meets | Register | Today's Posts | Search |
 |

|
BMW 3-Series (E90 E92) Forum
>
advice on black paint correct..
|
 |
| 06-27-2015, 12:16 AM | #1 |
|
Captain
 
38
Rep 627
Posts |
advice on black paint correct..
The forecast said it was cloudy all day so I decided to polish my car. I have a Black Sapphire Metallic BMW and I heard black cars are very hard to maintain and correct. I didn't realize it until today...
After washing the car I began to clay the hood. I had some difficulty claying the car. The black paint is easily marred with the Riccardo Clay bar and clay lube I made from ONR. First time using this clay since I got it for free with my last Eshine order. I usually use my Mother's Clay bar kit I get from Canadian Tire. Anyways I just clay the hood and went to polishing with my Griots Garage Polisher and Wolfgang Uber Compound with a LC yellow pad. I went pretty aggressive first. I know others say to usually go with the least aggressive method first but I just knew it wouldn't get the heavy swirled black car with a light polish. After 6 sectional passes, I checked the paint and there was still quite a bit of swirls left. I switched to Meguiar's MF Cutting pad and Meguairs D300. The results were a bit better but I could still see the swirl when the sun hit it. I was cramping out from gym this morning and decide to call it quits. Lesson learned do not work out when you plan on polishing. Any tips on how to get better results. I'm going to try watching some more videos on polishing and see what I can improve. I'm still new and have only polished 3-4 cars. I can't seem to get a swirl free finish like some of you guys here no matter how hard I try. |
| 06-27-2015, 12:31 AM | #2 |
|
Captain

97
Rep 812
Posts
Drives: E91 335i, B5 RS4, F31 330i
Join Date: Jun 2014
Location: Sydney, Australia
|
Maybe you need a better compound and pads. Apparently the clear coat on the European cars is extra hard.
I am going to use Scholl concepts S17 and Lake country Orange pads as was recommended for my car. Also sapphire black. I did a medium clay to remove some white paint spots and it did leave alot of fine scratches. I'm told these will come out with the orange pads and the S17. My car also needs paint correction so I'll let you know how it goes. |
|
Appreciate
0
|
| 06-27-2015, 12:38 AM | #3 |
|
Captain
38
Rep 627
Posts |
LC Flat yellow pad is the most aggressive pad, more aggressive than the LC orange pads. Also Meguiars MF cutting pad is even more aggressive than the LC pads since they are microfiber and they cut amazingly. I've used those pads on my previous 07 328i Sparkinling Graphite Metallic and it did well or maybe that color was easier to hide swirls.
Do you think I I need to go more aggressive like a wool pad? I also got Mens PG1000 compound. Maybe I'll try that with the Meguiairs MF cutting pad. Last edited by Zero_09; 07-05-2015 at 12:06 PM.. |
|
Appreciate
0
|
| 06-27-2015, 02:02 AM | #4 | |
|
Lieutenant
31
Rep 547
Posts |
Quote:
Could you walk me through your process a bit???? How much pressure are you using?? how big was your work area and finally how fast was your arm speed (i.e. inch per second)???? Did you prime the pad and how often do you clean it???? Lastly....how much product did you use???
__________________
What is absolute control???? Having the means and the abilities to exercise it at will but....chooses not to.
|
|
|
Appreciate
0
|
| 06-27-2015, 05:33 AM | #5 | |
|
Captain
38
Rep 627
Posts |
Quote:
First section I used three pennies size dabs doing 6 passes. I put on another three pennies size dabs and went at the same section again since there were still quite a bit of swirls. This time I had already switch to the Megs MF cutting pad. The first section I used the LC flat yellow pad with Wolfgang Total Swirl Remover 3.0 then switched to Megs MF cutting pad with D300. I also check if there was product on the pad by dabbing it on the windshield and seeing if it left and residue. If it did I would also occasionally spray a QD on the pad and hit the section again. One thing I really had difficult with was that claying the car. Not sure if it's black paint but it was easily marred. This is my first time claying this black car. I've clayed a lot of cars over the years and never experience the type of marring. I'm not sure if its because the clay I'm using or if black paint is easily marred or my 64:1 ratio ONR solution went bad over the winter. Just realizing this. Trying to figure out what I did differently from my previous detailing session. |
|
|
Appreciate
0
|
| 06-27-2015, 08:42 AM | #6 |
|
Major

173
Rep 1,117
Posts
Drives: 2010 E90 328i 6MT ZSP BSM
Join Date: Mar 2014
Location: K/W and GTA, Ontario, Canada
|
The most important thing I learned: Put a black mark on the backing plate so you can see the pad is actually spinning when you move the polisher around. I bet you'll see much better results once you keep the pad spinning at all times (lighter pressure).
|
|
Appreciate
0
|
| 06-27-2015, 10:30 AM | #7 | ||
|
Lieutenant
31
Rep 547
Posts |
Quote:
Quote:
do the swirl marks look a bit like tiny tick marks but somewhat uniform???? similar to this... 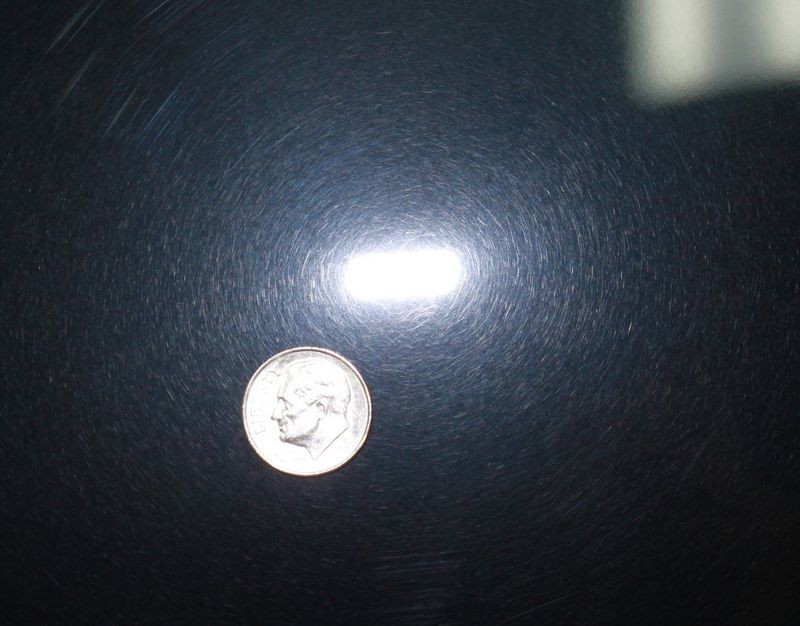 or are they more like this... 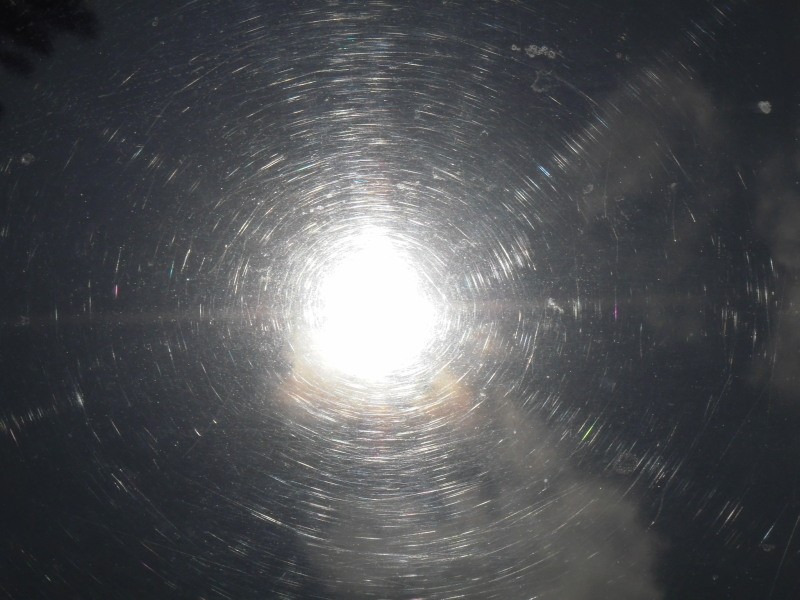 If it resemble the first pic then I have a suspicion your paint is actually soft and you are having a hard time finishing down. Soft paint tends to do that. You might have to do a second step to clear up the paint. Try using the Wolfgang Swirls remover on a white pad and hit a small section of the previously polished hood to see if this helps. Good luck.
__________________
What is absolute control???? Having the means and the abilities to exercise it at will but....chooses not to.
|
||
|
Appreciate
0
|
| 06-27-2015, 05:32 PM | #8 | |
|
Captain
38
Rep 627
Posts |
Quote:
It doesn't look like any of that. It's more scratches than swirls. I'll try to take a picture and see if I can capture it. I used to have an Snap-on 20gal air compressor I got from Costco but sold after I didn't get much use out of it. It was great a cleaning the pad though. I used it quite a bit when I polished my previous car. I might have to look for another smaller one so it doesn't take too much space in the garage. I do have 3 markings on the back plate. I don't remember where I got the idea of making 3 markings but kind of regret I did that. It's easier to gauge with one marking. |
|
|
Appreciate
0
|
| 06-27-2015, 05:34 PM | #9 |
|
Major
173
Rep 1,117
Posts
Drives: 2010 E90 328i 6MT ZSP BSM
Join Date: Mar 2014
Location: K/W and GTA, Ontario, Canada
|
Yes, I made the mistake of making 4 black marks on my backing plate which didn't do much to help determined the pad was spinning at all. I eventually cover 3 of them up with tape and left one on, and found it to be tremendously helpful afterwards. I found it one of the most important thing to do for someone new to polishing like myself.
|
|
Appreciate
0
|
| 06-27-2015, 05:40 PM | #10 | |
|
Captain
38
Rep 627
Posts |
Quote:
I made one of the black mark bigger than the rest to gauge it better just now so hope that will help. |
|
|
Appreciate
0
|
| 06-28-2015, 05:27 PM | #11 |

360
Rep 5,052
Posts |
Sapphire Metallic Black is quite hard... this makes it quite difficult to correct defects, though it makes it considerably easy to finish down.
I have found that aggressive cutting compounds and pads are required for even removal of moderate/medium defects due to the hardness of the paint. If you need to do some serious defect correction, you're going to have to be quite patient with a DA machine or perhaps even resort to something more aggressive like a rotary polisher. Here are some photos of some Sapphire Black Metallic paint that I have worked on... Before/After using Meguiar's D300 on 5.5" MF Cutting Pads (BMW 335i) 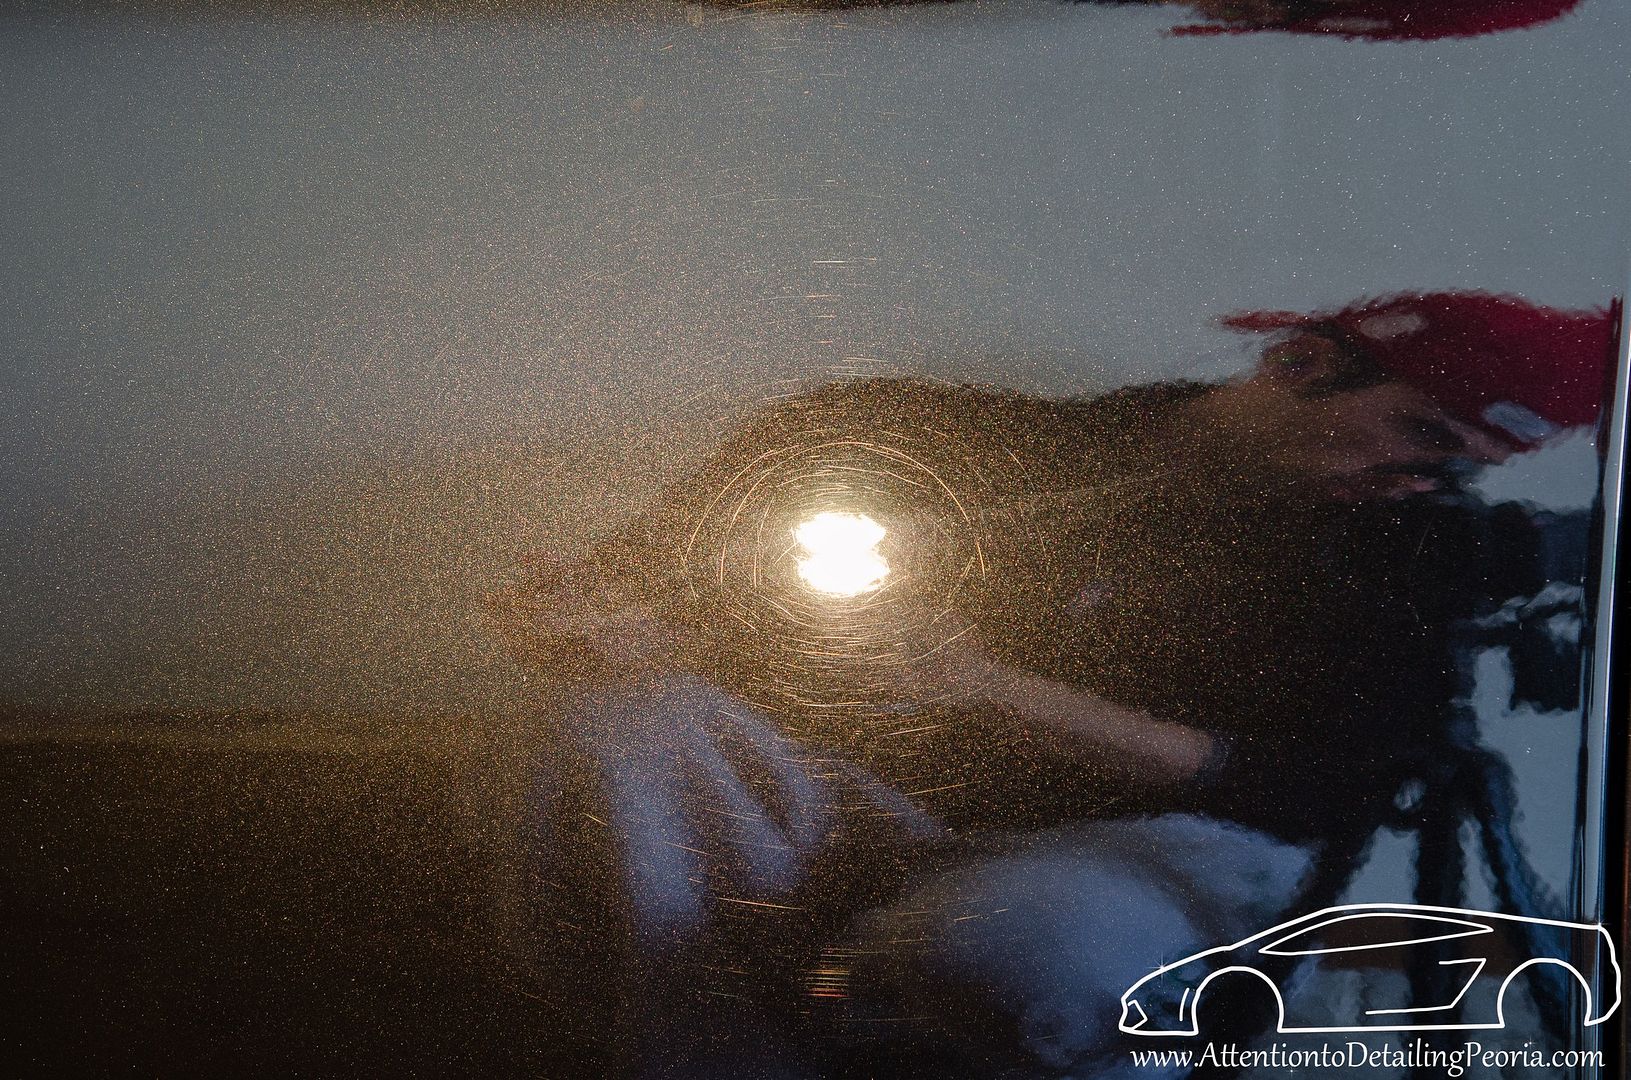 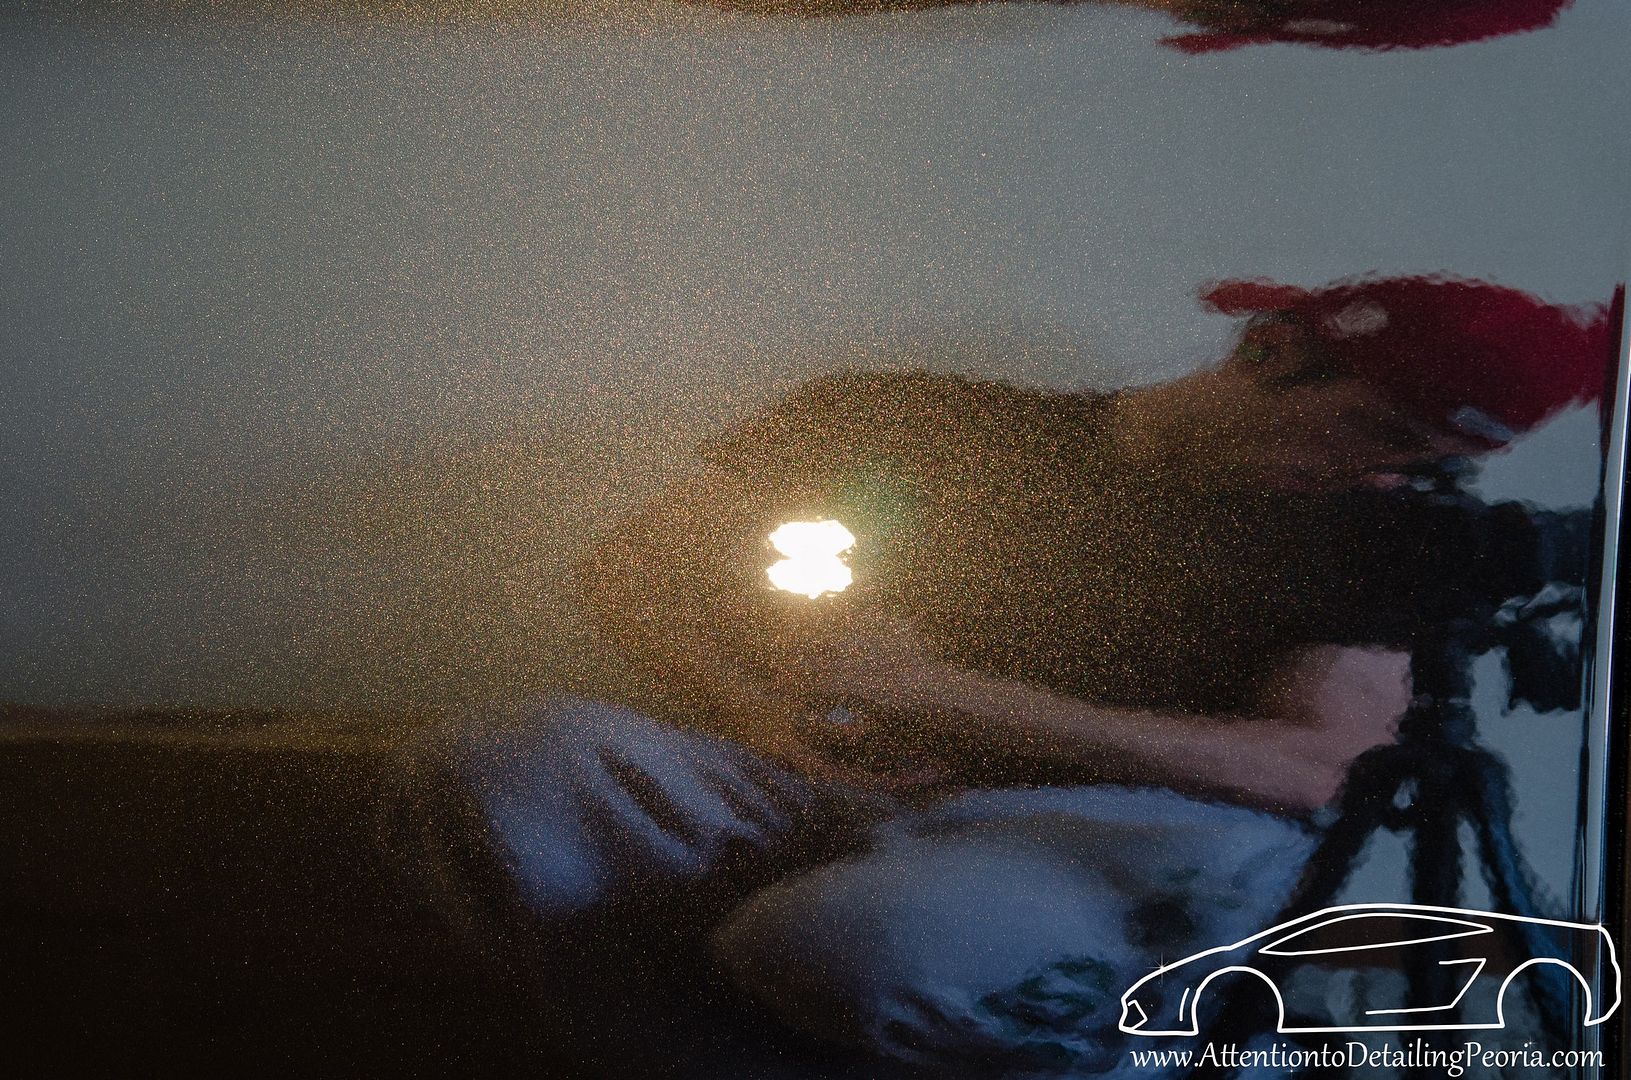 50/50 on 335i Sedan using same combination 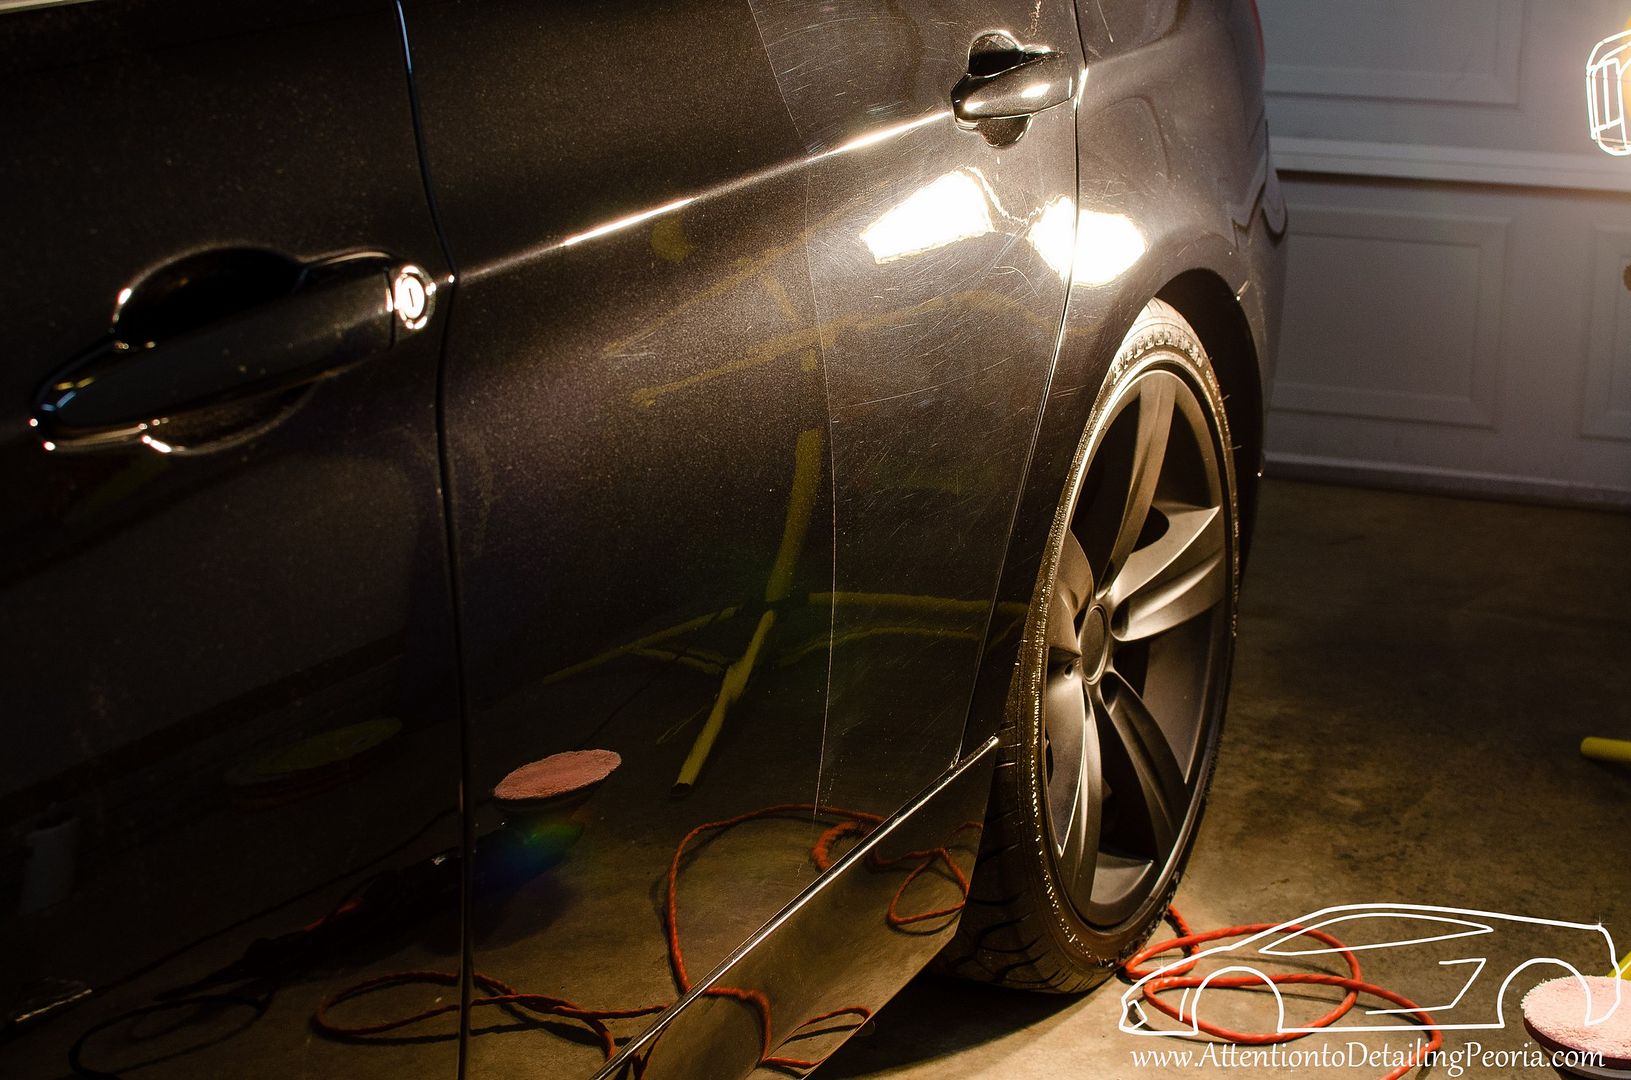 Before/Afters using Meguiar's M101 on MF Cutting Pads (BMW X5) 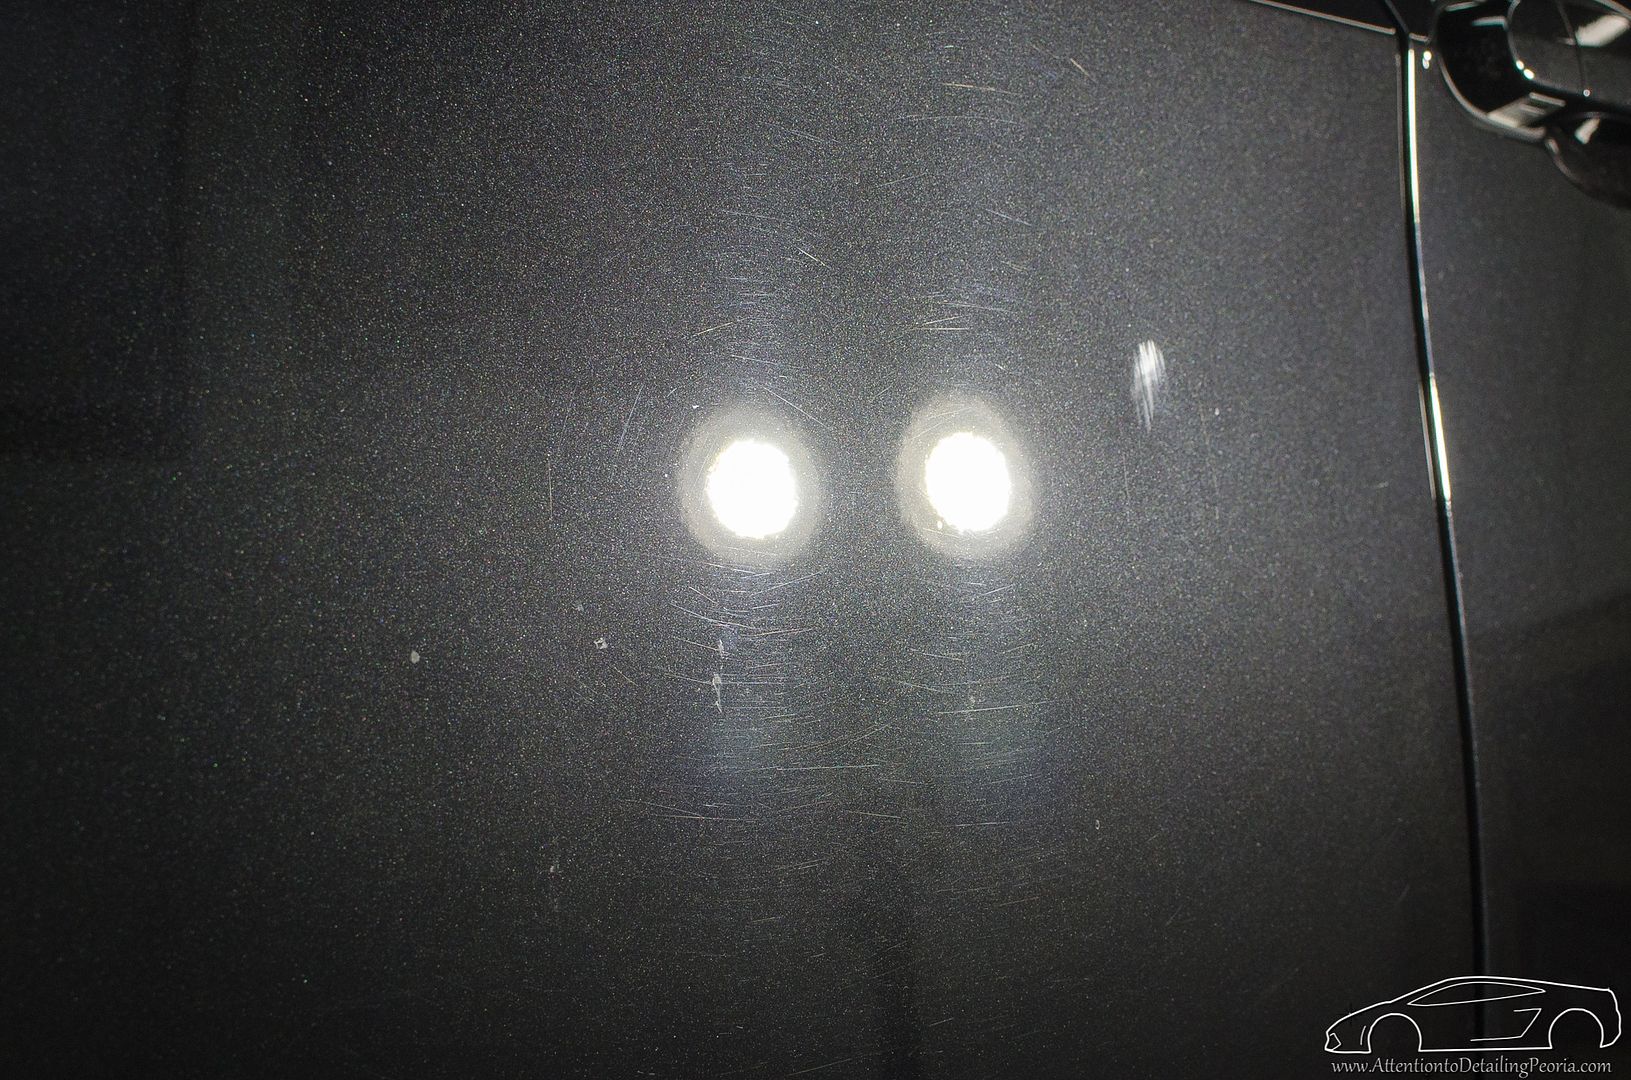 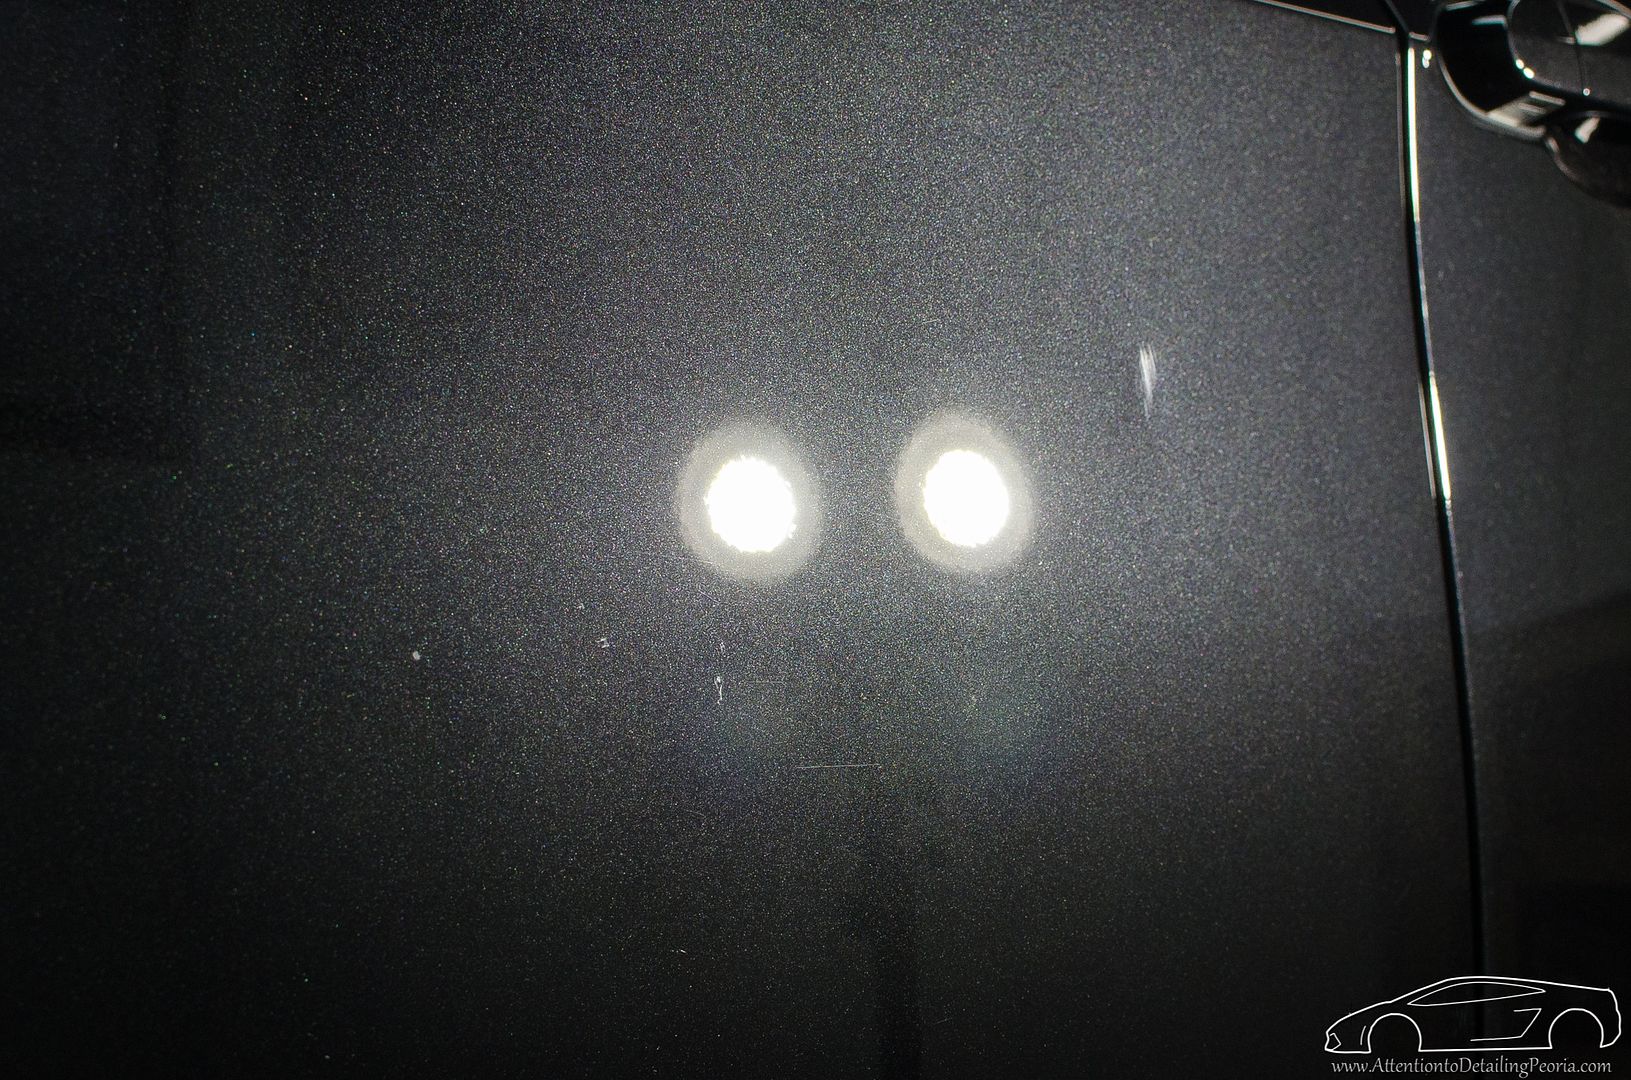 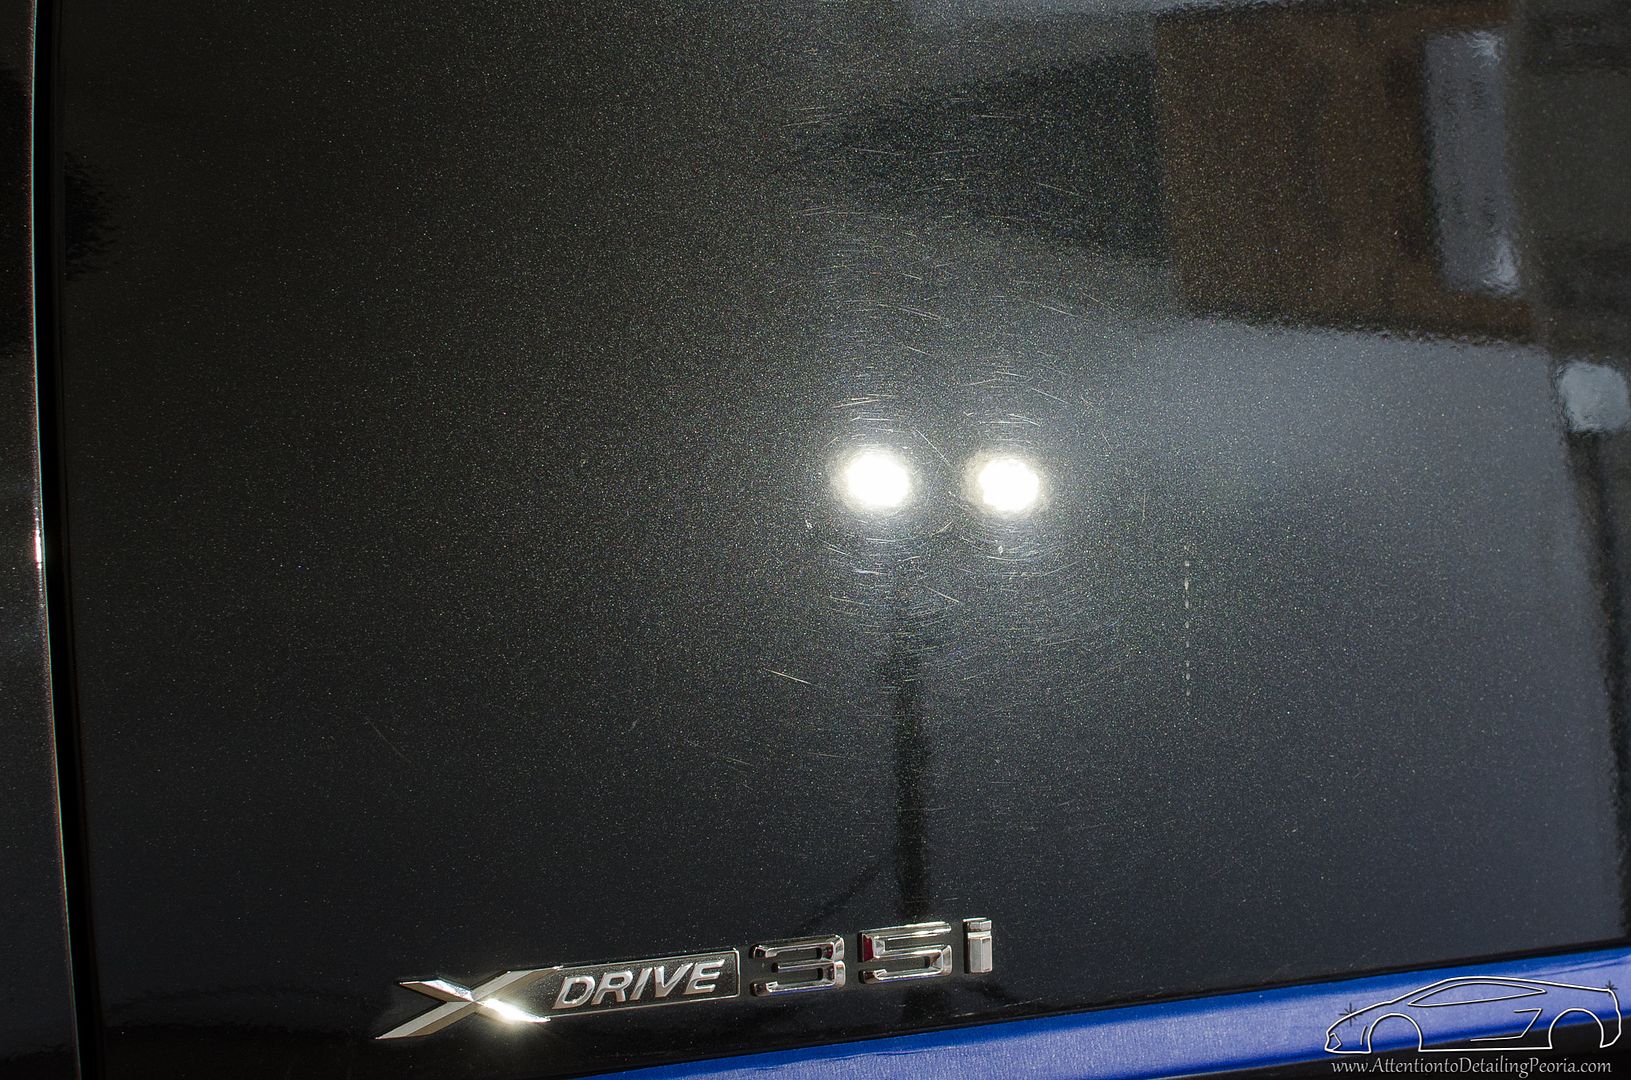 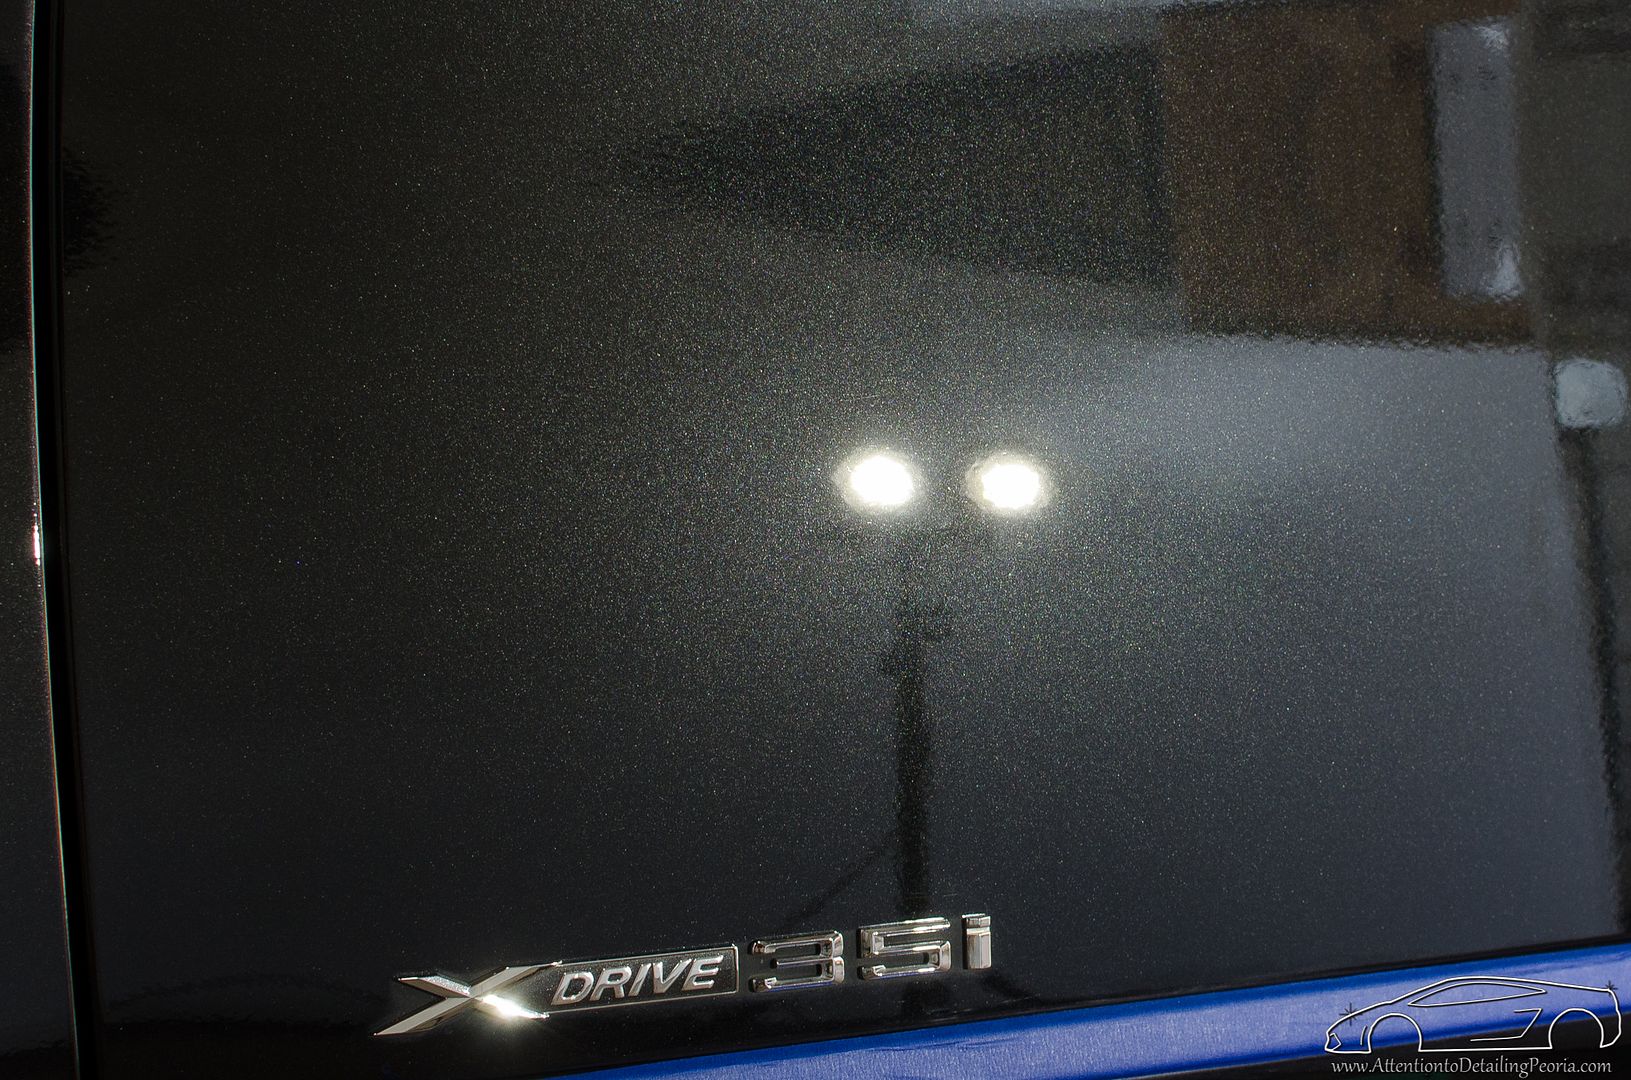 All of those photos were taken after compounding.. you can see how micromarring was not an issue on this rock hard paint, therefore it looked very nice even after heavy cutting. To reiterate some very good comments that were already made, your technique also plays a large role into the results you are achieving. Ensure you're using slow arm speed, adequate pressure, and maintaining pad rotation throughout the working cycle. Hope that helps! Zach McGovern Detailed Image Ask-A-Pro Blog Author www.AttentiontoDetailingPeoria.com |
|
Appreciate
0
|
| 07-01-2015, 06:54 PM | #12 | |
|
Captain
38
Rep 627
Posts |
Quote:
|
|
|
Appreciate
0
|
| 07-04-2015, 04:25 AM | #13 |
|
Second Lieutenant
57
Rep 271
Posts
Drives: 2015 X5 50i, 2015 Macan Turbo
Join Date: Jul 2011
Location: Northern CO
|
D300 on a MF cutting pad is my go to! Do you have a 5.5 pad? I find it the most versitile. Use adequate pressure, ~4 slow passes, small sections at a time, and dont oversaturate your pads or you just lay down all the fibers and they cannot cut properly. Clean your pads frequently, I just blow them out with an air compressor while spinning.
Good luck. |
|
Appreciate
0
|
| 07-05-2015, 08:33 AM | #14 |
|
Captain
38
Rep 627
Posts |
I also have Menzerna PG1000 and SI1500. Are these SMAT or Dat products?
edit: I just hit the hood again with Menzerna SI1500 and a LC Hydro-tech Cyan pad. Couldn't get the swirls out. Decided to use Poorboys Black Hole to see if I can cover it up with a glaze with a Buff n Shine Green polishing pad and it didn't do anything. I'm not sure if it's the paint but this is more difficult and I'm getting frustrated polishing and seeing no results. Detailed Image your results are amazing. I'm going to go at it again when I have more time and set a day a side for this. Maybe I need a light and to take this indoor to really concentrate on what I'm doing. Any recommendation for lights that won't cost too much. Its hard to capture the swirls with my camera but this is the best I could get. At certain angles you can't see the swirls but they are definitely still there.   Last edited by Zero_09; 07-05-2015 at 09:35 AM.. |
|
Appreciate
0
|
| 07-05-2015, 07:23 PM | #15 |
|
360
Rep 5,052
Posts |
All Menzerna products are diminishing abrasive (DAT).
Can you explain your technique a bit to me? How fast are you moving? What speed is the machine set to? How much pressure are you using? Do you have your backing plate marked to indicate if the pad is maintaining rotation or not? How much product are you using per section? How many passes are you making? What products & pads do you own? Etc. The more info you can provide (or even better yet... take a video), the more suggestions I can make. 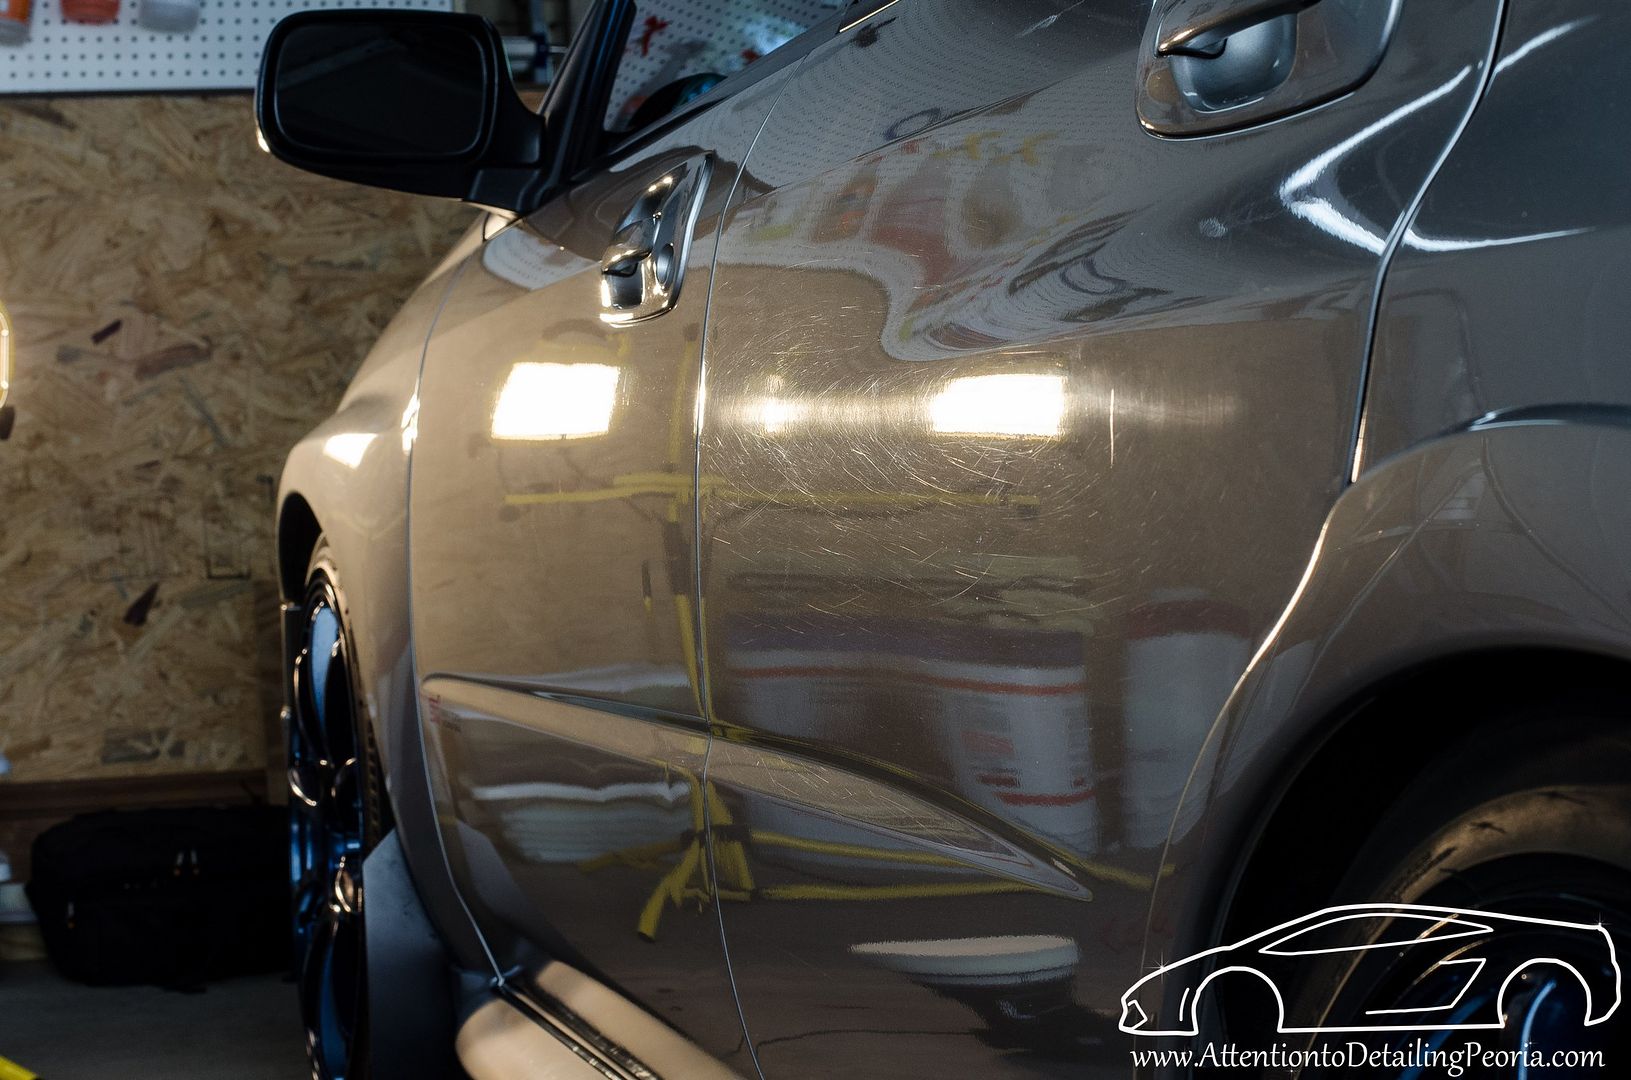 Silver paint can be difficult to spot swirls on (which is a good thing until you're trying to remove them), but I find that turning off nearly all of the lights except for my spot lighting helps tremendously. You can pickup a simple work light at your local hardware store... I would recommend an LED setup rather than a halogen light. Here are a couple of examples... HD LED Light & Dual HD LED Light. Zach McGovern Detailed Image Ask-A-Pro Blog Author www.AttentiontoDetailingPeoria.com |
|
Appreciate
0
|
| 07-06-2015, 01:05 PM | #16 | |
|
Captain
38
Rep 627
Posts |
Quote:
5" Buff n Shine Yellow pad with Wolfgang Total Swirl Remover. Switched to a 4" yellow pad and used Wolfgang Uber Compound and hit a smaller panel. Then took out the Megs D300 with 5" Megs MF cutting pad. I cleaned the pads on the fly with a terry towel. I probably went as fast as this guy The backing plate is marked with 3 lines which I think was a mistake. Not sure if the pad is vibrating or rotating sometimes but I do adjust my pressure to gauge it. Speed setting was at 5 with GG v3 polisher with 5-6 passes Gave up that day and went again with Lake Countey Hydro-tech Cyan cutting pad with Menz SI1500. Lots of dusting but same results as you can see with my picture above. Tried again with D300 and Megs MF cutting pad and it didn't get any better and decided to not go any further fearing I might damage the paint. So tried using Poorboys Black Hole with Buff n shine Green polishing pad at speed 4. Didn't look like it did anything with a couple of passes. Thought the glaze would cover up the swirls but no. |
|
|
Appreciate
0
|
| 07-06-2015, 09:04 PM | #17 |
|
Lieutenant
31
Rep 547
Posts |
This is an older video from Detail Image staring Todd Cooperider of Esoteric. Please note his arm speed, pressure, and the size of his work area.
I hope this helps.
__________________
What is absolute control???? Having the means and the abilities to exercise it at will but....chooses not to.
|
|
Appreciate
0
|
| 07-06-2015, 09:51 PM | #18 | |
|
360
Rep 5,052
Posts |
Quote:
The guy in the video you posted is moving quite fast... this may work on paint that is softer, however you should likely be moving 3-4x as slow. Say 1-2" per second. VERY slow. Allow the products to work against the paint..... see the video of Todd that psnt1ol posted. Slow (very slow) arm speed, moderate to heavy pressure (but not too much to prevent pad rotation), higher machine speed (5-6). Zach McGovern Detailed Image Ask-A-Pro Blog Author www.AttentiontoDetailingPeoria.com |
|
|
Appreciate
0
|
| 07-10-2015, 09:44 PM | #19 | |
|
Captain
38
Rep 627
Posts |
Quote:
|
|
|
Appreciate
0
|
| 07-11-2015, 07:54 AM | #20 | |
|
360
Rep 5,052
Posts |
Quote:
Zach McGovern Detailed Image Ask-A-Pro Blog Author www.AttentiontoDetailingPeoria.com |
|
|
Appreciate
0
|
 |
| Bookmarks |
|
|


