

|
|
|
|
 |

|
 |
BMW Garage | BMW Meets | Register | Search | Today's Posts | Mark Forums Read |
 |

|
BMW 3-Series (E90 E92) Forum
>
DIY 335I N54 Bank 1 sensor 1 (Pre-cat) O2 Sensor Replacement
|
 |
| 11-17-2016, 10:30 PM | #1 |
|
New Member
12
Rep 14
Posts |
DIY 335I N54 Bank 1 sensor 1 (Pre-cat) O2 Sensor Replacement
Changing the front o2 sensor for the 335i N54 is not for the weak at heart, arguably one of the more difficult sensors to change due to its inaccessibility.
Today we are changing the bank 1 sensor 1 only. However, I highly recommend changing both BANK 1 and BANK 2 sensor 1's at the same time.  A couple of the crucial tools that you will need to finish the job properly. Note: You may or may not need more or fewer tools depending on your mechanical skill. 10mm socket 8mm socket 17mm socket 16mm wrench 22mm wrench Flathead Screwdriver (for prying) t10 torx 7/8 O2 sensor socket (optional) [IMG]  [/IMG] [/IMG]Start with lifting the car up on JACK STANDS, and remove the Passenger side wheel for easier access. [IMG]  [/IMG] [/IMG]Remove the splash shield using the 8mm socket. [IMG]  [/IMG] [/IMG]Remove the cowl cover for easier access to the pre-cat o2 sensor wire route. [IMG]  [/IMG] [/IMG][IMG]  [/IMG][/IMG] [/IMG][/IMG][IMG]  [/IMG] [/IMG][IMG]  [/IMG] [/IMG]The yellow line represents the route of the BANK 2 Sensor 1. The orange line represents the route of the BANK 1 Sensor 1. [IMG]  [/IMG] [/IMG]The Black loom is the Bank 1, grey is Bank 2. It wraps behind the valve cover. [IMG]  [/IMG] [/IMG]Time to go under the car. Now it may sound crazy at first when you are only here to replace the O2 sensor but it must move. You have to remove the 2 bolts that attach the steering rack to the frame. Place the 16mm wrench on the top nut(stop it from spinning). The bolt is 10mm (odd? yes i know) [IMG]  [/IMG] [/IMG]Moving the steering rack aside, keeping the tie-rods attached to the wheel hubs. This will NOT ruin your alignment don't worry. Now you have access to the BANK 1 and BANK 2 pre-cat sensors. I recommend using a long 22mm wrench or the 7/8 "box end" style o2 sensor socket. [IMG]  [/IMG] [/IMG]Compare the new to the old to make sure its the correct sensor. Assembly is the opposite Disassembly. [IMG]  [/IMG] [/IMG]THEN YOU ARE DONE!  Not that hard when you do it once. Now you are ready to destroy the Cheap-Class. Not that hard when you do it once. Now you are ready to destroy the Cheap-Class.[IMG]  [/IMG] [/IMG] |
| 12-13-2016, 12:49 PM | #3 |
|
First Lieutenant
 43
Rep 301
Posts |
you can threw codes for the o2 sensor or if the car is running rich.
I did bank 2 few weeks ago. Here are a couple comments 1) You do not need to drop the PS rack. You can unbolt just the passenger side and loosen driver side enough to just slide it out a bit. 2) Use a stubby ratchet with the o2 sensor socket. A stubby 22mm socket will work too. It will break loose. 3) Be careful when you go to route the wiring around the valve cover. I broke one of the clips that holds the o2 sensor wires down. They are fragile. 4) It has been mentioned on the forums. You can use the bank 1 sensor p/n for bank 2 but you will end up with extra harness length that needs to be zip tied up. |
|
Appreciate
0
|
| 01-10-2017, 03:56 AM | #4 | |
|
Colonel
 
295
Rep 2,015
Posts |
Quote:
Do you by chance know what codes you got? And do you have a picture of the PS Rack Drop? Using Carly BMWhat app I have the following codes. They popped up at the same time, and I drove the car very hard. No no matter how many times I clear them, they come back as soon as I do a restart.....meaning shut down and restart engine. The last code worries me....heater.....hmmmm 02c3f DME Internal Error Lambda Probe Bank 1 Chip Analysis 02c40 DME Internal Error Lambda Probe Bank 2 Analysis Chip 02c9c Heater for Lambda Probe Front Catalyst Any help or input would be greatly appreciated. |
|
|
Appreciate
0
|
| 04-05-2017, 03:39 PM | #5 | |
|
New Member
2
Rep 14
Posts |
Quote:
|
|
|
Appreciate
0
|
| 04-19-2017, 11:48 PM | #6 | |
|
Private
 20
Rep 66
Posts |
Quote:
|
|
|
Appreciate
0
|
| 08-28-2017, 03:15 PM | #8 | |
|
Second Lieutenant
36
Rep 216
Posts |
Quote:
|
|
|
Appreciate
0
|
| 06-29-2018, 03:07 PM | #10 |
|
Enlisted Member
 
4
Rep 45
Posts |
I've failed on 2 attempts at doing this
 First time i had a large 22mm spanner that wouldn't fit becuase of the clip next to the sensor. I then bought a these: 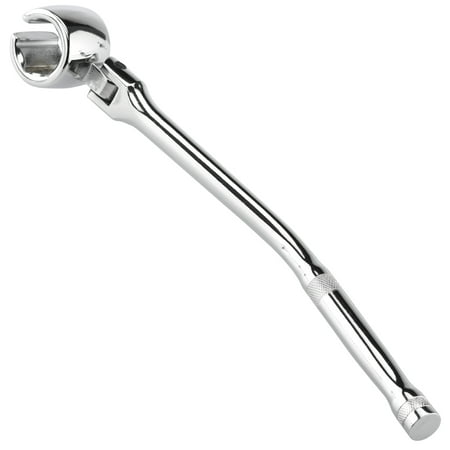 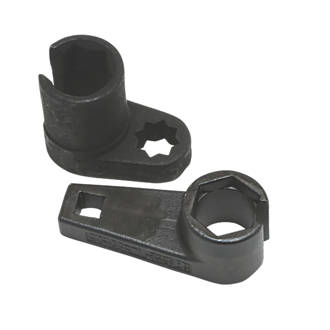 I can't get the wrench to seat because of the steering rack and i can't get the sockets to seat because the ratchet keeps moving. I almost had it stuck due the the angle at one point  What's the best way to get at the top nut for the steering rack? I had a feel about today and it seems like it's going to be a b**ch! I WILL get this done!  |
|
Appreciate
0
|
 |
| Bookmarks |
| Thread Tools | Search this Thread |
|
|

 Just out of curiosity though, what was the reason for replacing the sensors?


