

|
|
|
|
 |

|
 |
BMW Garage | BMW Meets | Register | Search | Today's Posts | Mark Forums Read |
 |

|
BMW 3-Series (E90 E92) Forum
>
DIY: VANOS Check Valve Replacement
|
 |
| 08-29-2015, 10:27 AM | #25 | |
|
Brigadier General
 
615
Rep 3,192
Posts
Drives: E92 325i MSport Coupe
Join Date: Apr 2012
Location: UK South East
|
Quote:
__________________
E92 pre-LCI 325i - Ohlins R&T; H&R spacers; M3 strut brace; Swift thrust sheets; 3 x chassis braces; diff brace; N53 V-brace; 034 subframe inserts; BMS clutch stop; BMS CDV; RE g/box mounts; Delrin shift bushes; Saikoumichi OCC; Cyba scoops; BMW Perf Exhaust; HEL s/steel brake hoses; M3 rear spoiler; Recaro Sportster CSs; M3 white dash LEDs; LED Angels; LED side repeaters; BMW Perf black grille; CSL reps; SSDD carbon diffuser; Monster Wrap black roof/clear front
|
|
|
Appreciate
0
|
| 09-04-2015, 12:06 PM | #26 |
|
Major General

1903
Rep 6,968
Posts
Drives: 2007 Black/Black 335i e90
Join Date: Apr 2011
Location: Holly, MI
|
I believe there are 2 check valves on the N54 motor, but the diagram only shows one.
http://bmwfans.info/parts-catalog/E9...ttached_parts/ Just did this DIY. My car has 115,000 miles on it with the original vanos solenoids in it. I have got the infamous 1/2 engine light 3 times in the last 3 weeks. So, I checked for codes and got code 002A87. I am hoping to avert spending $250.00 on two brand new vanos solenoids by doing this DIY. Time will tell. I removed the one of the vacuum tanks and the wheel well liner. Removing the passenger, front tire and wheel liner just shed more light in this small area. I then sprayed brake cleaner in the two cylinder indentions to clean out any dirt and grease etc. before removing the check valves. I used an e40 torx bit with a 1"extension. I had to feel my way from the top side of the engine with the torx bit and extension in hand to ensure the torx bit was in the slots. I then attached a 1/4 drive thin, ratchet and removed the check valves slowly but surely. The new check valves took all of 10 min to put in and tighten up. I made sure to lube up the green O rings with fresh engine oil, prior to installing the new check valves. I re-sprayed the area with brake cleaner to ensure I had a clean area. I let the engine run for about 5 min, and I checked to see if there was any leaking. No leaks.  I don't think trying to take them out via the wheel well would work very well. I tried going in with an extension and swivel on the end with the e40 attached to it. It was more than a pain then it was worth trying to get the e40 to bite. It's not a straight shot into the grooves of the torx bit from the wheel well. This is what prompted me to remove the vacuum tank, and do it from the top even though you can not see the check valve at all. Last edited by mweisdorfer; 09-04-2015 at 03:53 PM.. |
|
Appreciate
0
|
| 09-06-2015, 11:14 AM | #27 | |
|
Brigadier General
615
Rep 3,192
Posts
Drives: E92 325i MSport Coupe
Join Date: Apr 2012
Location: UK South East
|
Quote:
__________________
E92 pre-LCI 325i - Ohlins R&T; H&R spacers; M3 strut brace; Swift thrust sheets; 3 x chassis braces; diff brace; N53 V-brace; 034 subframe inserts; BMS clutch stop; BMS CDV; RE g/box mounts; Delrin shift bushes; Saikoumichi OCC; Cyba scoops; BMW Perf Exhaust; HEL s/steel brake hoses; M3 rear spoiler; Recaro Sportster CSs; M3 white dash LEDs; LED Angels; LED side repeaters; BMW Perf black grille; CSL reps; SSDD carbon diffuser; Monster Wrap black roof/clear front
|
|
|
Appreciate
0
|
| 09-06-2015, 03:34 PM | #28 | ||
|
Major General
1903
Rep 6,968
Posts
Drives: 2007 Black/Black 335i e90
Join Date: Apr 2011
Location: Holly, MI
|
Quote:
|
||
|
Appreciate
0
|
| 10-04-2015, 07:22 PM | #29 |
|
Registered
0
Rep 3
Posts |
Just checked my 2006 330i (@ 90K miles).
I have had occasionally seen 2A87 codes reported (along with 2EF5). Absolutely agree that removing the wheel and liner is the best way to go to get to the valves. They were clean not at all showing signs of blocking or other crud. Cleaned them with solvent and air, put them back to see if this changes anything. |
|
Appreciate
0
|
| 12-06-2015, 09:15 PM | #30 |
|
Nomore

149
Rep 793
Posts |
Just did this on my 2007 E92 335i 6MT. Alot easier than i thought
For me, might be different for 6AT or xdrive not sure. All i did was remove vacuum canisters. Unplug vacuum lines from canisters and tuck to the side. Unbolt coolant reservoir(10mm x 2), unplug coolant level sensor(bottom of reservoir) and pull out of its spot. Push the tank gently forward and toward the DS slightly out of the way. Basically in the location where the vacuum tanks would be. I could get the tank to stay in place so I used a small bungee cord to gently pull the tank to the DS and keep it out of the way. Pulled all wires out of harness talked about in this DIY. Pushed to the side. Theres 3 wires and one vacuum line. So 4 lines total for me. Now for the vacuum line going to the front boost solenoid... What i did was pull the vacuum line out of the forward facing nipple, on the "T" directly above the front boost control solenoid. You will see what im talking about when you see it. This gives you enough slack in the front wastegate vacuum line located in the bracket to pull it out of the bracket and out of the way. Now everything is out of the way and clear to work. I did not find it necessary to remove the bracket specified using a E8 bolt. And i did this all from above. No need to remove the wheel or fender liner. For me at least. Then i used a T40 socket like described above and a short 3/8 drive extension(3") and a ratchet. Unscrewed both vanos check valve filters and removed from cylinder head. To my suprise they were spotless. Now looking at them. I came to the conclusion that for some reason they were replaced already. I bought the car about 2 years ago from the 2nd owner ans it was dealer serviced its whole life and now currently at 126k miles. Since ive had it, ive regualrly changed the oil at 4-5k miles with Mobil 1 0W-40 European Formula synthetic only and a Mann oil filter(oem bmw). Ive put about 20k miles on the car since i got it and its my weekend car and i usually drive it in the twistys with some spirited driving. Engine is stock except for K&N drop in air filter and JB4, now MHD stage 1 ecu flash. So i know 20k miles isnt a ton of miles but to me it shows that regular oil changes will keep these filters clean. Im going to check them again in a year when i have more mods like inlets, fmic, dp's, and E85 blend again. I recommend anyone with over 80k miles to check and/or replace these because ive seen some pics of some nastyy clogged up vanos filters. Im sure this effects the vanos solenoids and engine performance and efficiency as well. Good luck and take your time! Anthony G |
|
Appreciate
0
|
| 12-06-2015, 09:43 PM | #31 |
|
Lieutenant
 
79
Rep 540
Posts |
Worked at the dealer for over 5 years, never trained nor have I even heard of these or seen one replaced/checked. Had a coworker go for engine technologies and this was never discussed as well.
At the same time we have never had a vanos problem go unsolved so I'm not 100% sure what this could fix |
|
Appreciate
0
|
| 02-09-2016, 07:27 PM | #32 |
|
Lieutenant Colonel
 
200
Rep 1,834
Posts
Drives: '05 E90 330i Manual
Join Date: Aug 2010
Location: Cape Town, South Africa
|
So I have finally tackled this and a bit disappointed with my findings (but also happy with my findings for another reason).
First of all, on the older N52 this is really an easy job. You need to lift the front right side of the car off the ground and remove the wheel, then remove the forward wheel well liner. With that removed, you can then access these Check Valves through the wheel well - seems odd, but it's the only practical way to do this and also see what you are doing. There was only a small amount of oil that came out, but the car drove last about a week ago, so I suppose some of the excess oil may have slowly seeped down. I removed the Vanos solenoids first and set them aside since I wanted to clean them too. I then started with the lower of the two Check Valves (I suspect this is the one for the exhaust side). You will need to unscrew it quite a bit until it comes out, and then you will see a small amount of oil coming out, but luckily not much, and once the Check Valve is out you can put some tissue paper there to soak it up and any that may still come out. The upper Check Valve is the same, just a little trickier to see. Now for the disappointment - I was really hoping to find some dirty Check Valves when I removed these, but they were actually very very clean (never been removed and still the original ones). They literally just had oil on them as expected, but no caked on muck or any signs of being blocked at all. This is what they looked like after a quick dip in some clean petrol and a wipe with some tissue paper. 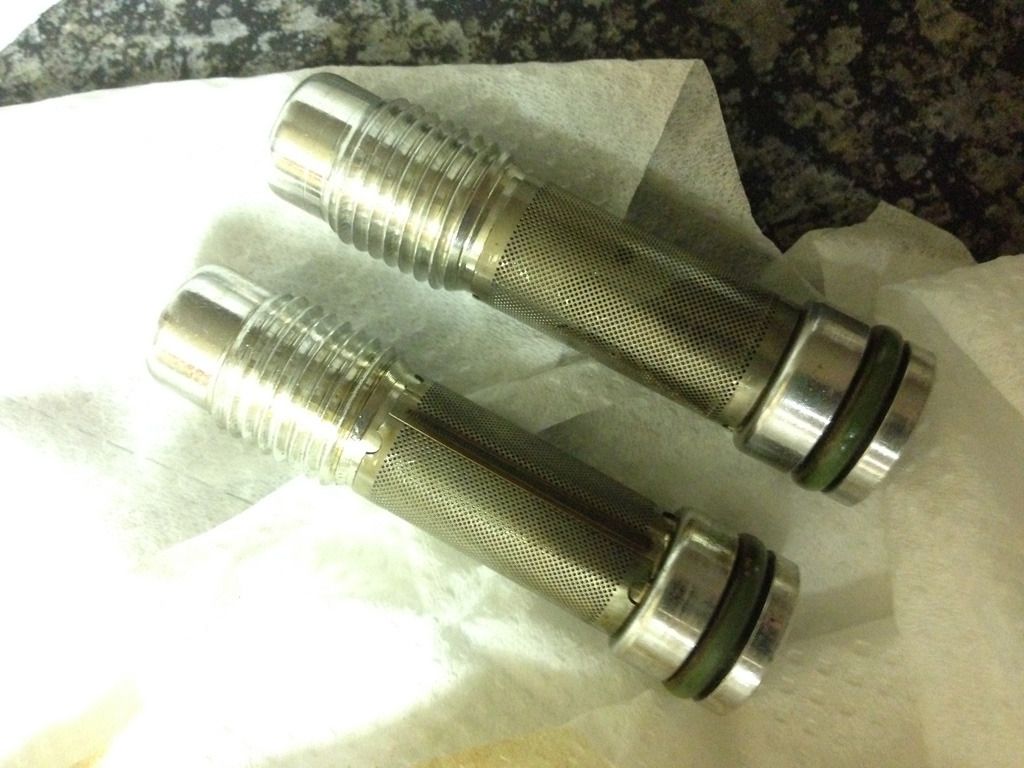 I then cleaned the two solenoids and wanted to use a variable power supply to try and actuate them, but luckily I checked the voltage with my multimeter before attempting this, for some reason my variable power supply is not working properly and supplying over 14 volts. So just gave them a good soak while agitating but they seemed pretty clean (cleaned them last about a year or so ago). I then let them stand to dry/evaporate. Back to the Check Valves - I noted that you can suck air through both of them, and you cannot blow air through them (if that makes sense), so the internal valve is functioning as it should. I also did this to help clean any possible blockages that maybe can't been seen. I sprayed them with some carb cleaner then wiped dry, more sucking of air through them, then a final dip in petrol before letting them dry. All nicely cleaned Check Valves and Vanos solenoids ready to be refitted:  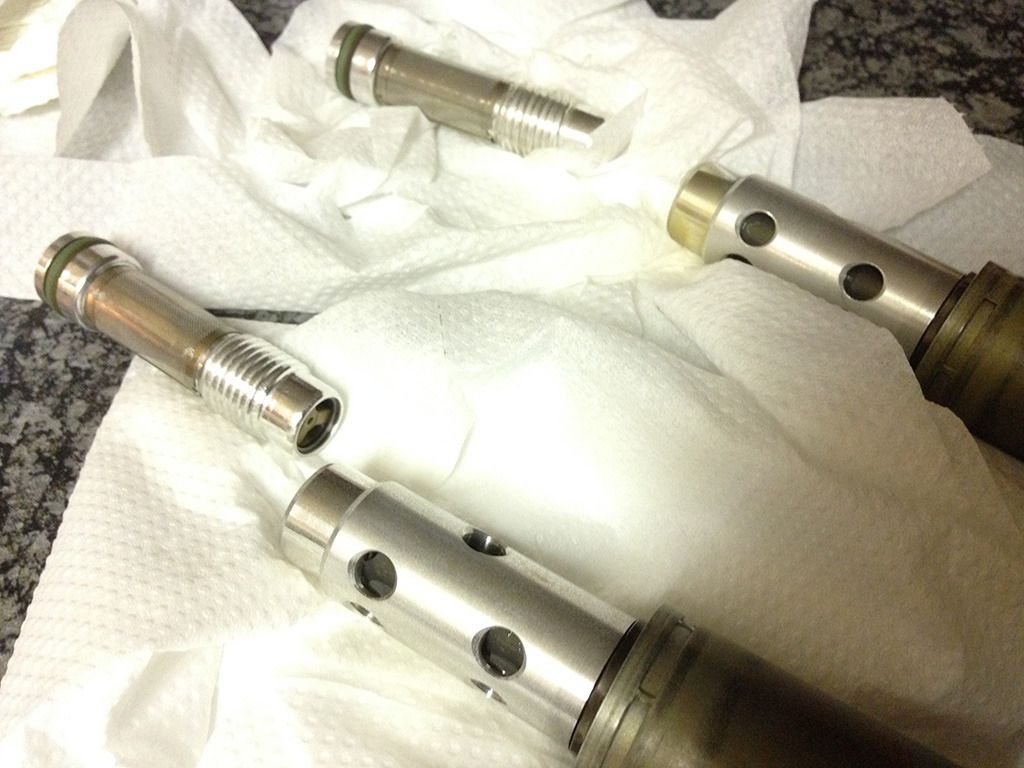 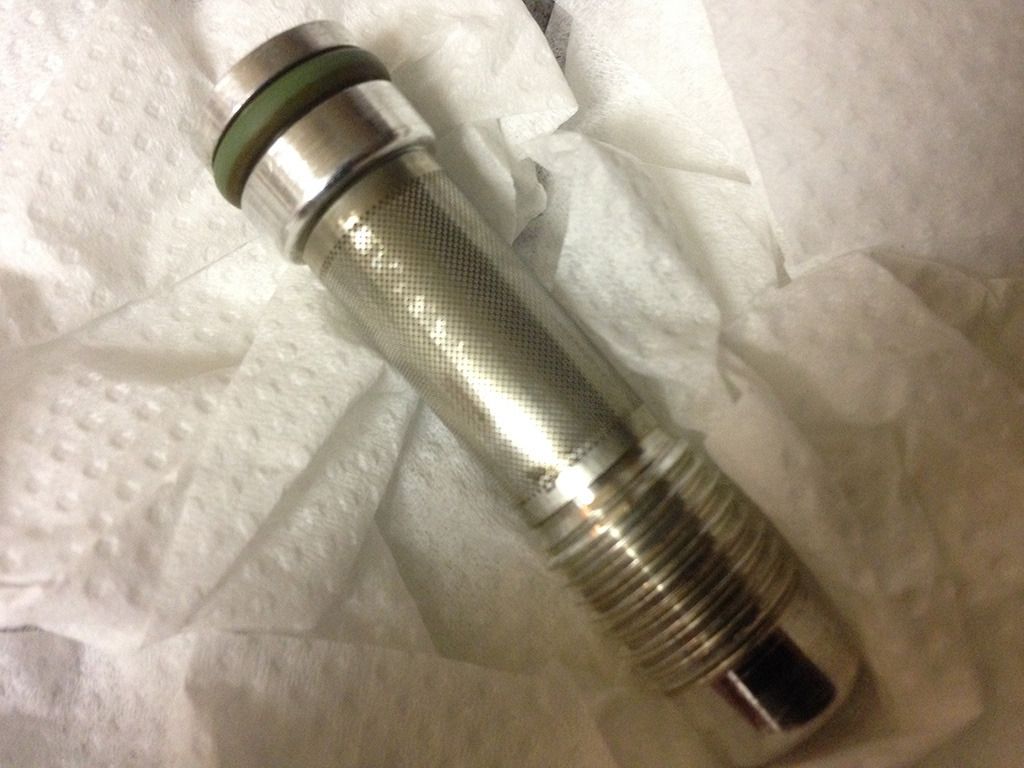 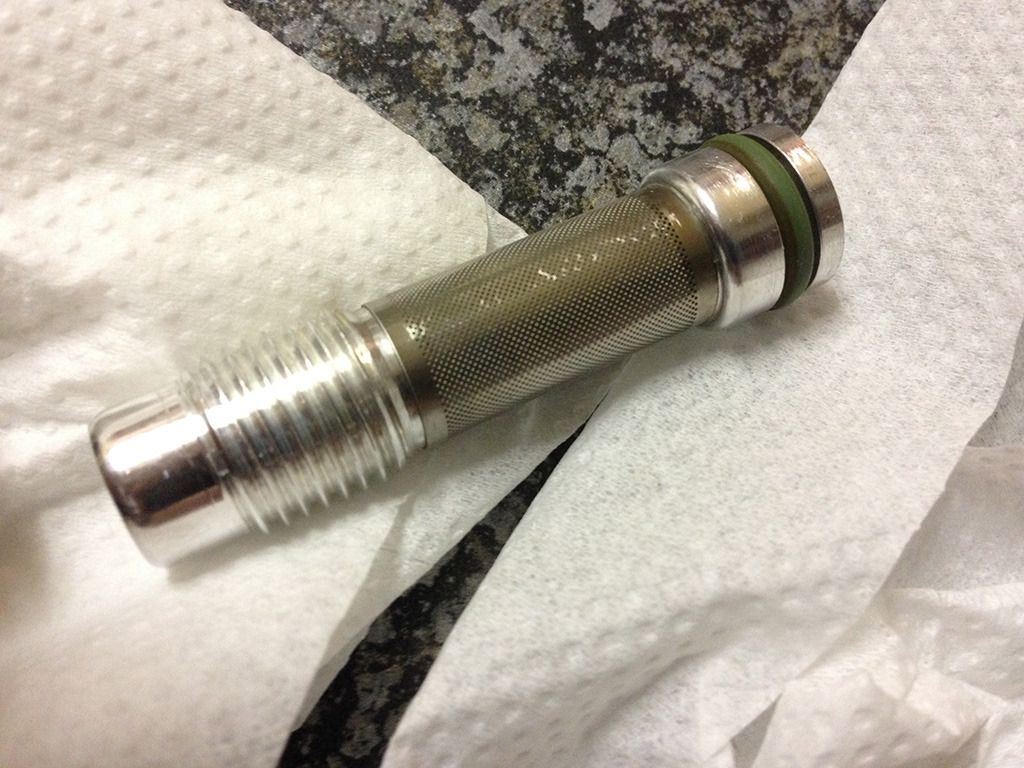 I put the Check Valves back in their original locations since I can't see any reason not to, but swapped the Vanos solenoids around (they are now back to their original factory positions). I will have to see how the car behaves when I drive it tomorrow. If I notice a positive behaviour that might be short lived, then it is possible that one of the solenoids is faulty or not working correctly. But at least it shows that my engine is still very clean generally thanks to the more frequent oil changes. And it is in fact now due for an oil change which is why I had to do this job now.
__________________
BMW E90 330i (M) '05 (His) | (Hers) BMW E46 320i f/l (M) '03
 |
|
Appreciate
0
|
| 07-30-2016, 07:40 PM | #33 |
|
Supreme Galactic Commander (one galaxy over...)
657
Rep 1,773
Posts |
For N54, I removed the wheel. wheel liner and vacuum canisters (the whole mount). Gave me access using a universal joint. The old valves appeared clean but the check valve function was much less smooth and was more sticky than the new ones. Glad I replaced (@120k). Thx for this DIY and thread!
__________________
Best,
Andy  '12 E82-PS2,Stoptechs,Clubsports+M3 bits,Accusump,Wagner DP+EVO III FMIC,ERCP,BMS Intake,Mason Strut Bar,Wedge Tune |
|
Appreciate
0
|
| 08-18-2016, 08:16 PM | #35 | |
|
Lieutenant Colonel
200
Rep 1,834
Posts
Drives: '05 E90 330i Manual
Join Date: Aug 2010
Location: Cape Town, South Africa
|
Quote:
__________________
BMW E90 330i (M) '05 (His) | (Hers) BMW E46 320i f/l (M) '03
|
|
|
Appreciate
0
|
| 05-10-2017, 12:12 PM | #36 |
|
Brigadier General
938
Rep 3,827
Posts
Drives: 330i, 135i
Join Date: Feb 2006
Location: San Diego CA
|
Interesting...thanks for sharing OP
|
|
Appreciate
0
|
| 06-29-2018, 05:25 AM | #37 | |
|
Captain
102
Rep 681
Posts |
Quote:
|
|
|
Appreciate
0
|
| 07-07-2018, 07:25 AM | #38 |
|
Private
 
9
Rep 52
Posts |
Hey guys, found this thread 2 weeks ago and just did mine!
 European 2006 330i N52. The hardest part was the wheel liner as one of the screws didn't want to come out, rust and idiots working on the car previously. Also, as just said, idiots, when I did my first oil change after driving the car a few thousand KM / Miles I found out the oil filter was loose in the housing, nothing in between so wasn't filtering correctly. So that MIGHT have something to do with the below.... But that has been fixed and this is 2 oil changes further. Left one is bottom. Right one is top.  Just did a few KM of driving and it feels smoother when I let my foot off the gas pedal or press it. Also, seems to have more power in the lower end. But... might be placebo |
|
Appreciate
0
|
| 07-07-2018, 11:55 AM | #39 |
|
Brigadier General
615
Rep 3,192
Posts
Drives: E92 325i MSport Coupe
Join Date: Apr 2012
Location: UK South East
|
Seeing all that crud, I suggest that next time you change the oil you cut open the paper element you've just removed and check for the presence of anything metallic...
__________________
E92 pre-LCI 325i - Ohlins R&T; H&R spacers; M3 strut brace; Swift thrust sheets; 3 x chassis braces; diff brace; N53 V-brace; 034 subframe inserts; BMS clutch stop; BMS CDV; RE g/box mounts; Delrin shift bushes; Saikoumichi OCC; Cyba scoops; BMW Perf Exhaust; HEL s/steel brake hoses; M3 rear spoiler; Recaro Sportster CSs; M3 white dash LEDs; LED Angels; LED side repeaters; BMW Perf black grille; CSL reps; SSDD carbon diffuser; Monster Wrap black roof/clear front
|
|
Appreciate
0
|
| 07-09-2018, 06:19 AM | #40 | |
|
Private
9
Rep 52
Posts |
Quote:
 Ran 30KM's yesterday and today and it incredibly more smooth with AC on and runs great, way more torque in lower end. The metal shavings do worry me a little though... Gonna drive 3500KM's with this car in my Holiday, 4 days from now (German autobahn and all...), we'll see. Thought I'd post the pics of the vanos check valves though for anyone wanting to do it, it's fairly easy to do when you have the wheel liner off and the right tools |
|
|
Appreciate
0
|
| 07-09-2018, 08:14 AM | #41 |
|
Captain
102
Rep 681
Posts |
Let's see the metal shavings. Could be timing chain throwing off metal. I know of a n52 which has been showing tiny aluminium slivers in the oil filter for the past 20k miles and no issues.
|
|
Appreciate
0
|
| 08-18-2018, 03:24 PM | #42 |
|
Lieutenant

113
Rep 513
Posts
Drives: 2008 335i
Join Date: Jan 2018
Location: Vancouver
|
I did this through the top with a mirror and flashlight if anyone is interested to do it that way. It helps to have at least a 3 or 4-inch extension to your T40 bit before the end, and another 4 inches after the bend to attach to your ratchet.
If you had one of those flexy cameras this job would be a sinch. |
|
Appreciate
0
|
| 09-13-2018, 11:44 AM | #43 |
|
Captain
180
Rep 772
Posts
Drives: 2015 435i grand coupe xdrive
Join Date: Jan 2017
Location: Philadelphia, PA
|
how impossible is this when you have relocated inlets
__________________
2015 435i grand coupe xdrvie (current)
2006 F250 powerstoke CCSB (current) 2014 M235i Black on Red (SOLD) / 08 e90 335i MT Pure Stage 2 High flow (SOLD) 08 128i 6MT (SOLD) / 08 335i 6MT Pure stage 1 (SOLD) |
|
Appreciate
0
|
| 05-05-2019, 07:58 PM | #44 | |
|
New Member
4
Rep 30
Posts |
Quote:
Last edited by shanes; 05-05-2019 at 09:13 PM.. |
|
|
Appreciate
0
|
 |
| Bookmarks |
| Thread Tools | Search this Thread |
|
|


