|
|
|
|
 |

|
 |
BMW Garage | BMW Meets | Register | Today's Posts | Search |
 |

|
BMW 3-Series (E90 E92) Forum
>
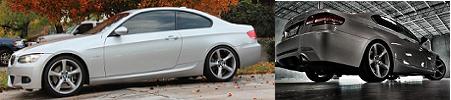
Trashed 335i Paint - Restored and Coated with CQuartz UK
|
 |
| 06-15-2015, 01:13 PM | #1 |

360
Rep 5,052
Posts |
Trashed 335i Paint - Restored and Coated with CQuartz UK
The owner of this vehicle contacted me with the hope that I could help bring some life back to this relatively low mileage 335i that he had just purchased. He was considering having it repainted because of the poor finish, however we were confident that we could restore the finish to a brilliant shine while saving the customer a considerable amount of money compared to the cost of a new paint job.
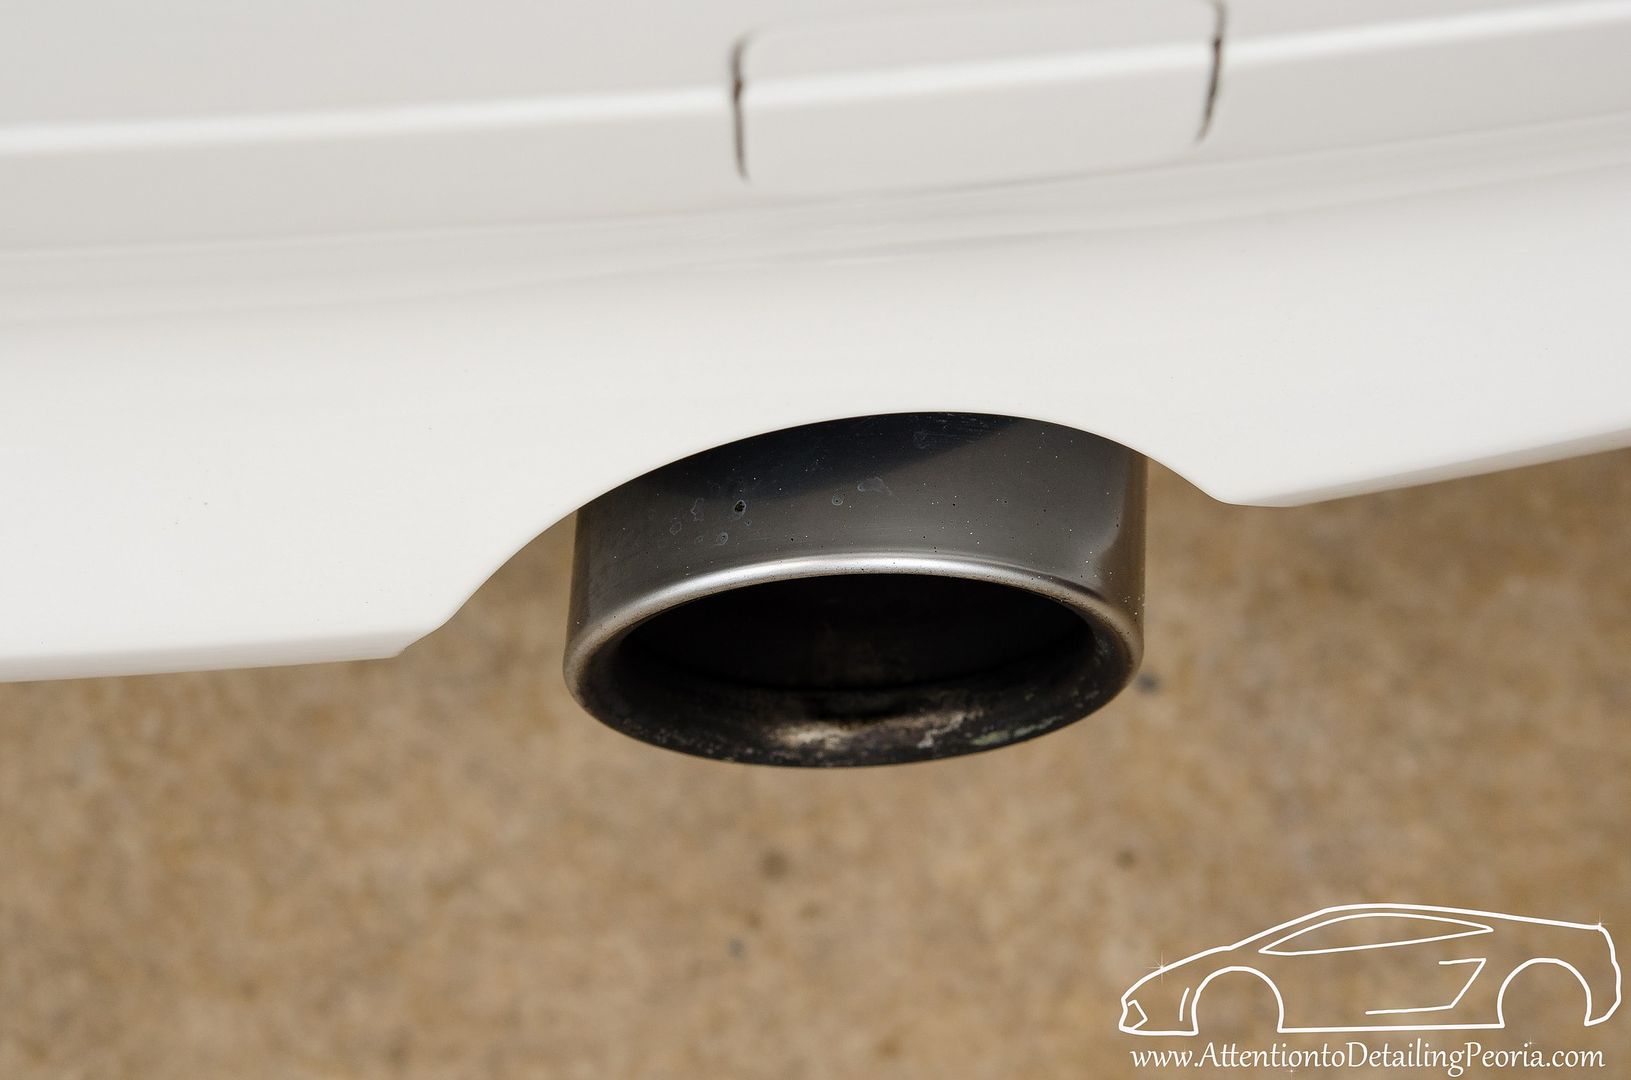
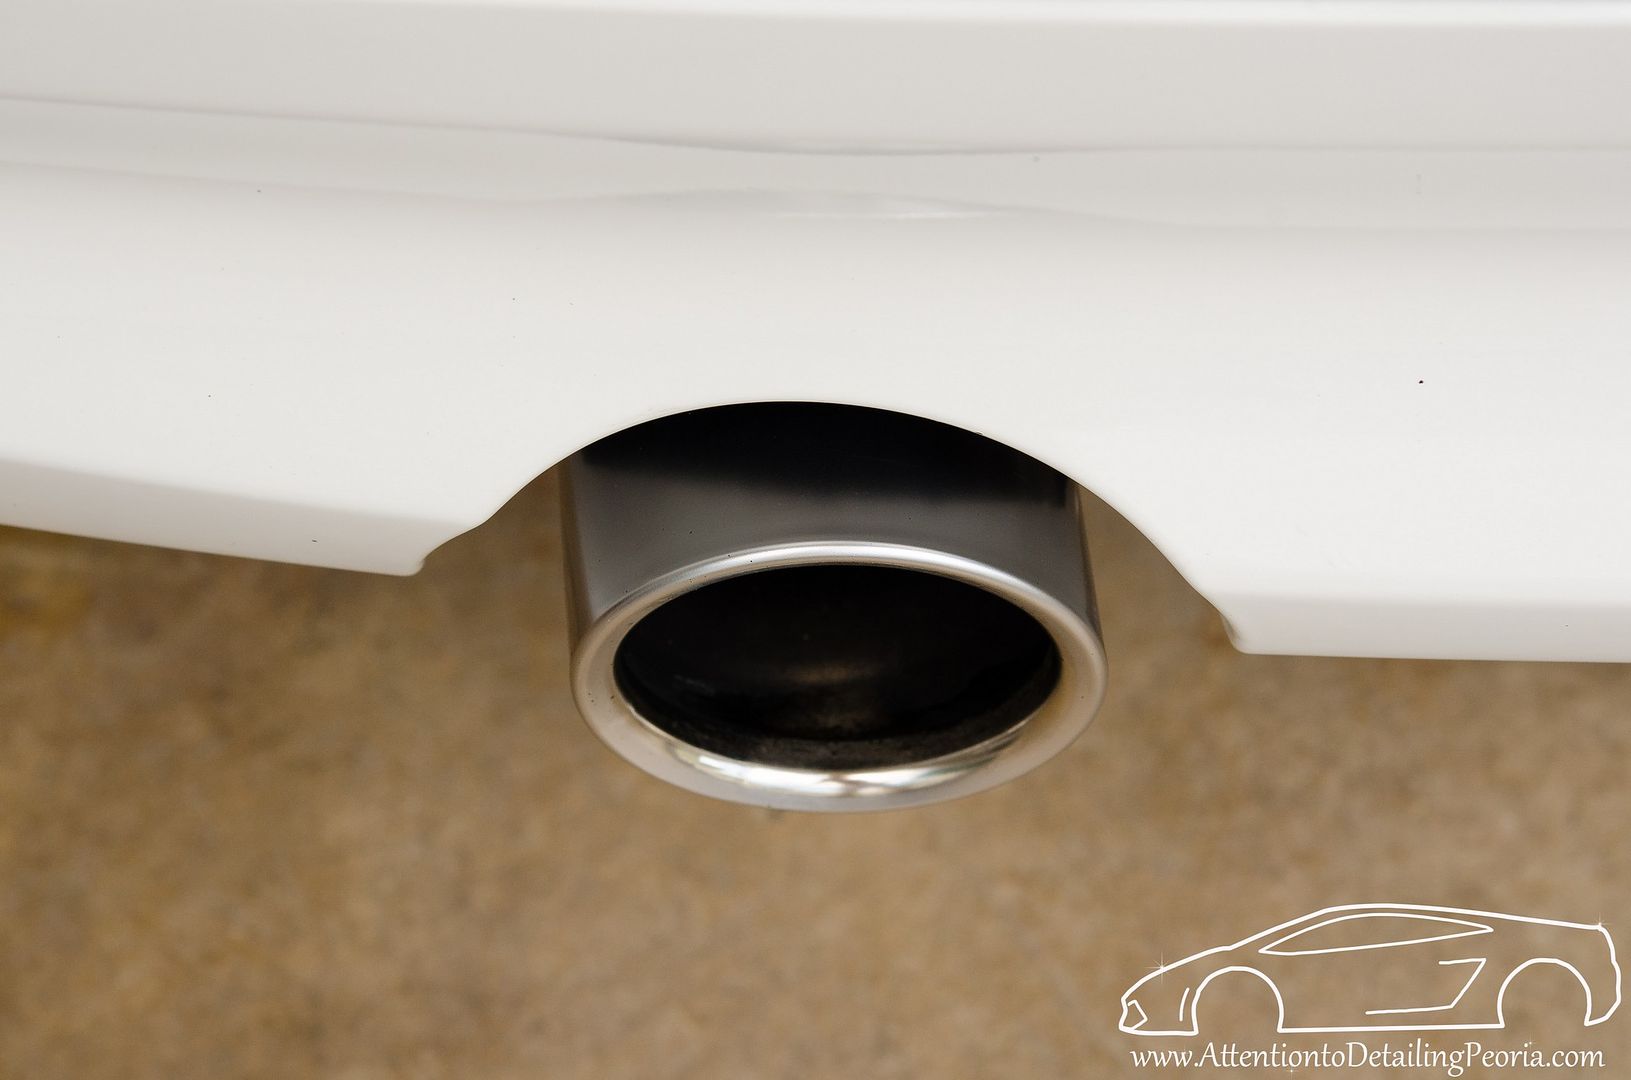
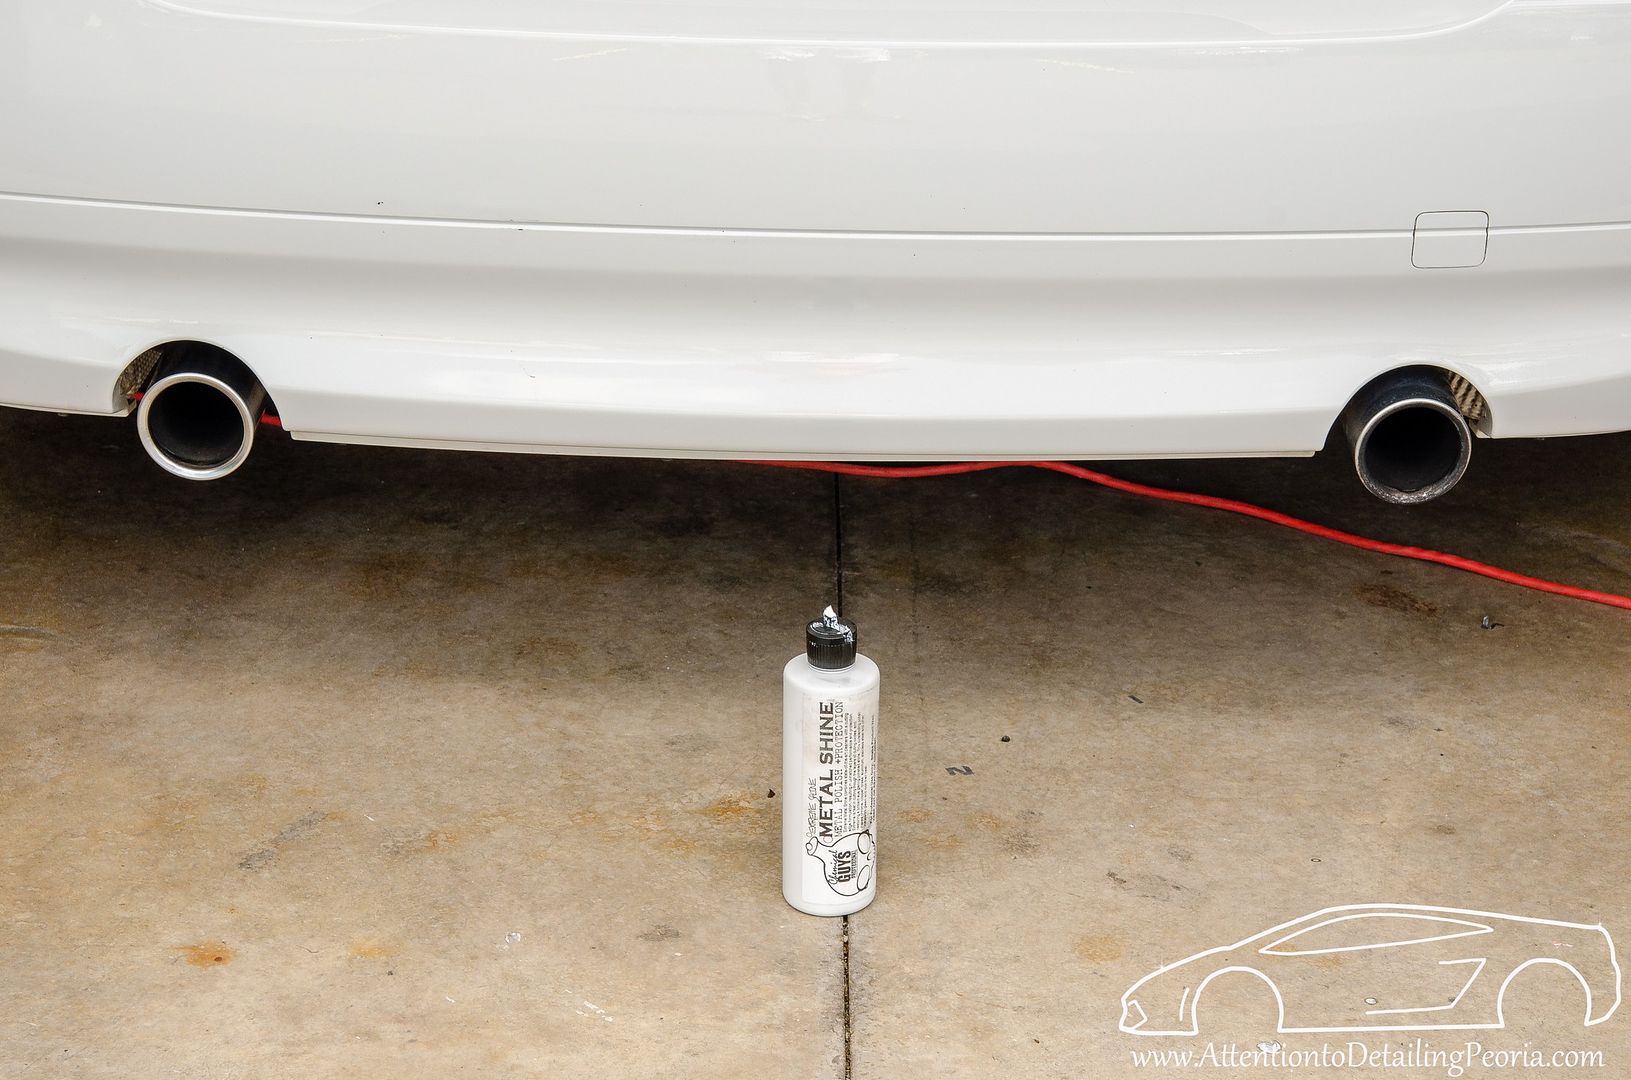
Upon my initial inspection, it was very clear that this paint needed a tremendous amount of work to restore it. This vehicle went through my normal cleaning and decontamination process, and was then followed with an intensive 3 step paint correction process to remove the majority of surface defects and greatly improve gloss and clarity. After the paint was restored, a ceramic paint coating was applied to help provide years of durable protection, easy maintenance, and incredible shine! This was a long project, but the results were fantastic! Process Exterior Tires: Tuf Shine Tire Cleaner & Tire Brush Wheels: Sonax Full Effect Wheel Cleaner & Various Brushes Pre-Wash: CG Citrus Wash via Foam Lance then pressure rinse Wash: ONR Bug Removal: Meguiar's D103 and Stoner Tarminator Paint Decontamination: Medium Grade Speedy Prep Towel with Nanoskin Glide as Lubrication Tape trim and other areas of concern Paint Thickness Readings Taken Compound/Cutting (twice): M101 with Meguiar's MF Cutting Pads via Rupes LHR21ES and Rupes LHR75e Wash & Oil/Residue Removal: Pre-Soak panel with 50% IPA, then wash with ONR Polishing: M205 with Lake Country White Polishing Pad Coating Prep/Polishing Oil Removal: CarPro Eraser Ceramic Paint Coating: CQuartz UK Exhaust Tips: CG Metal Polish + Protection via #0000 Steel Wool Glass: CarPro Eraser Tire Dressing: Optimum Opti-Bond Interior All cracks and crevices blown out Thorough Vacuum All vinyl and plastic wiped down with 303 Aerospace Protectant All weather floor mats rinsed and scrubbed with Meguiar's D103 Leather (driver's seat): Steam cleaned, scrubbed with D103, steam cleaned Glass: CarPro Eraser Products available at www.DetailedImage.com Before When the vehicle arrived, the defects were easily visible in the sunlight. Notice the holograms, swirls, and scratches on every inch of paint. 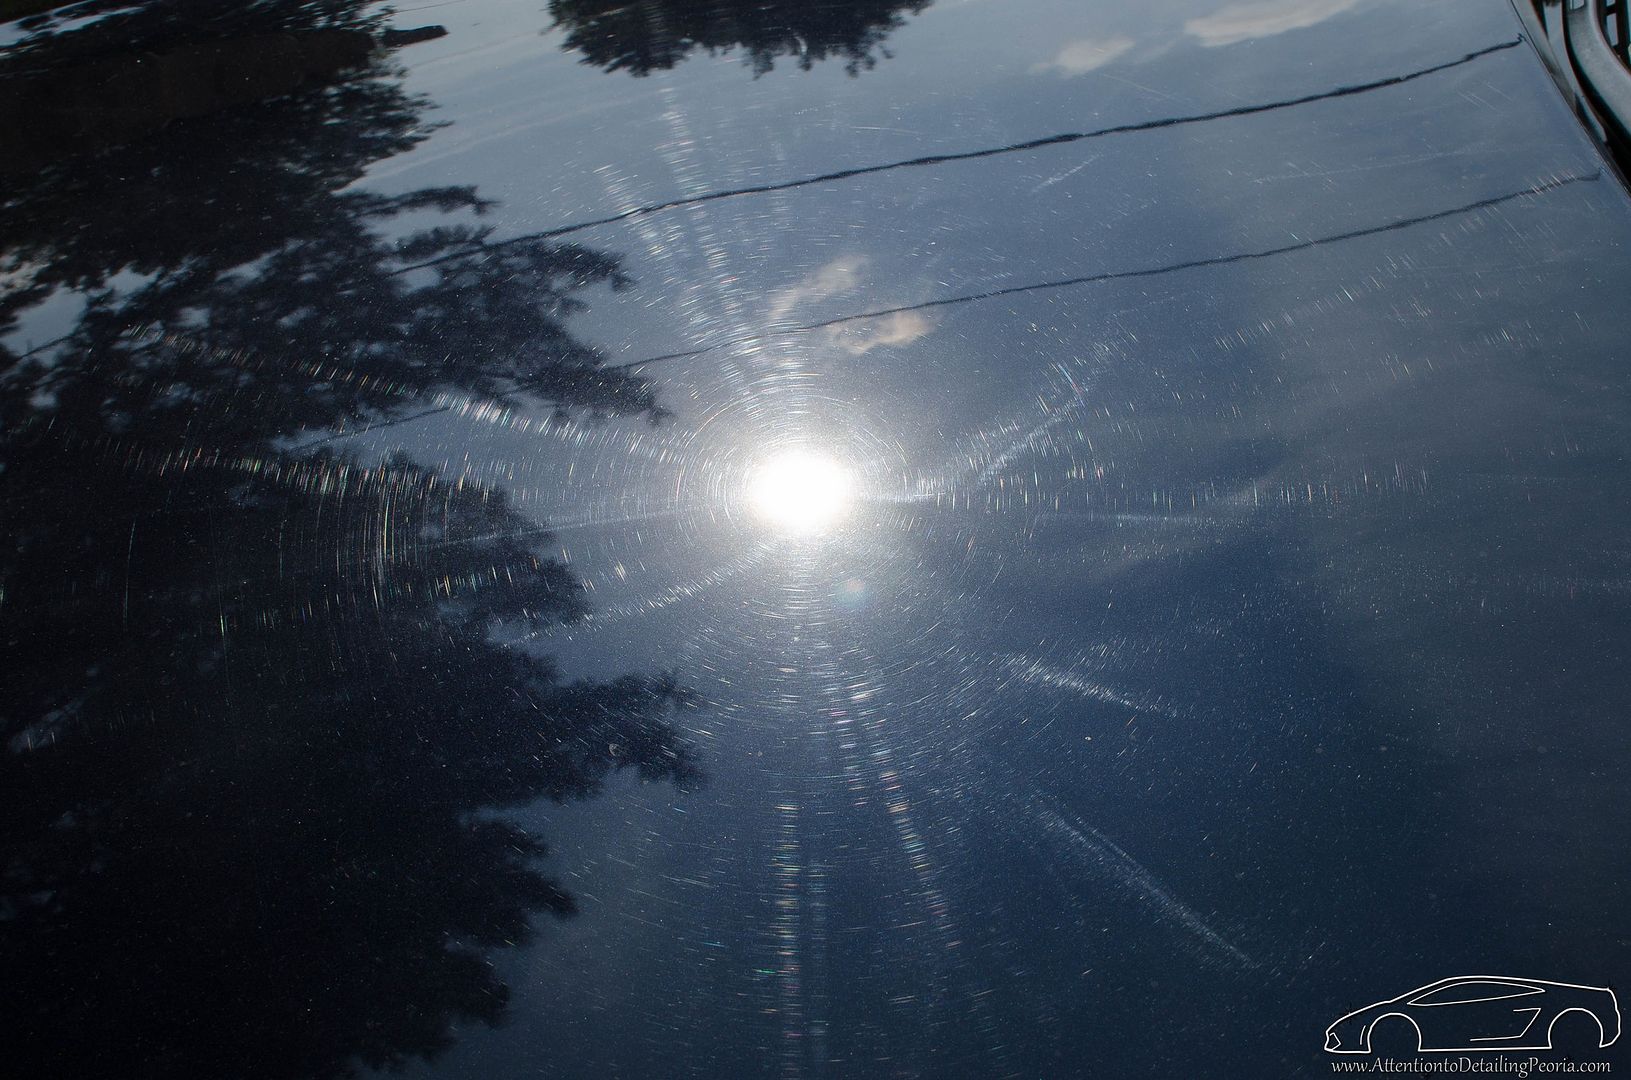 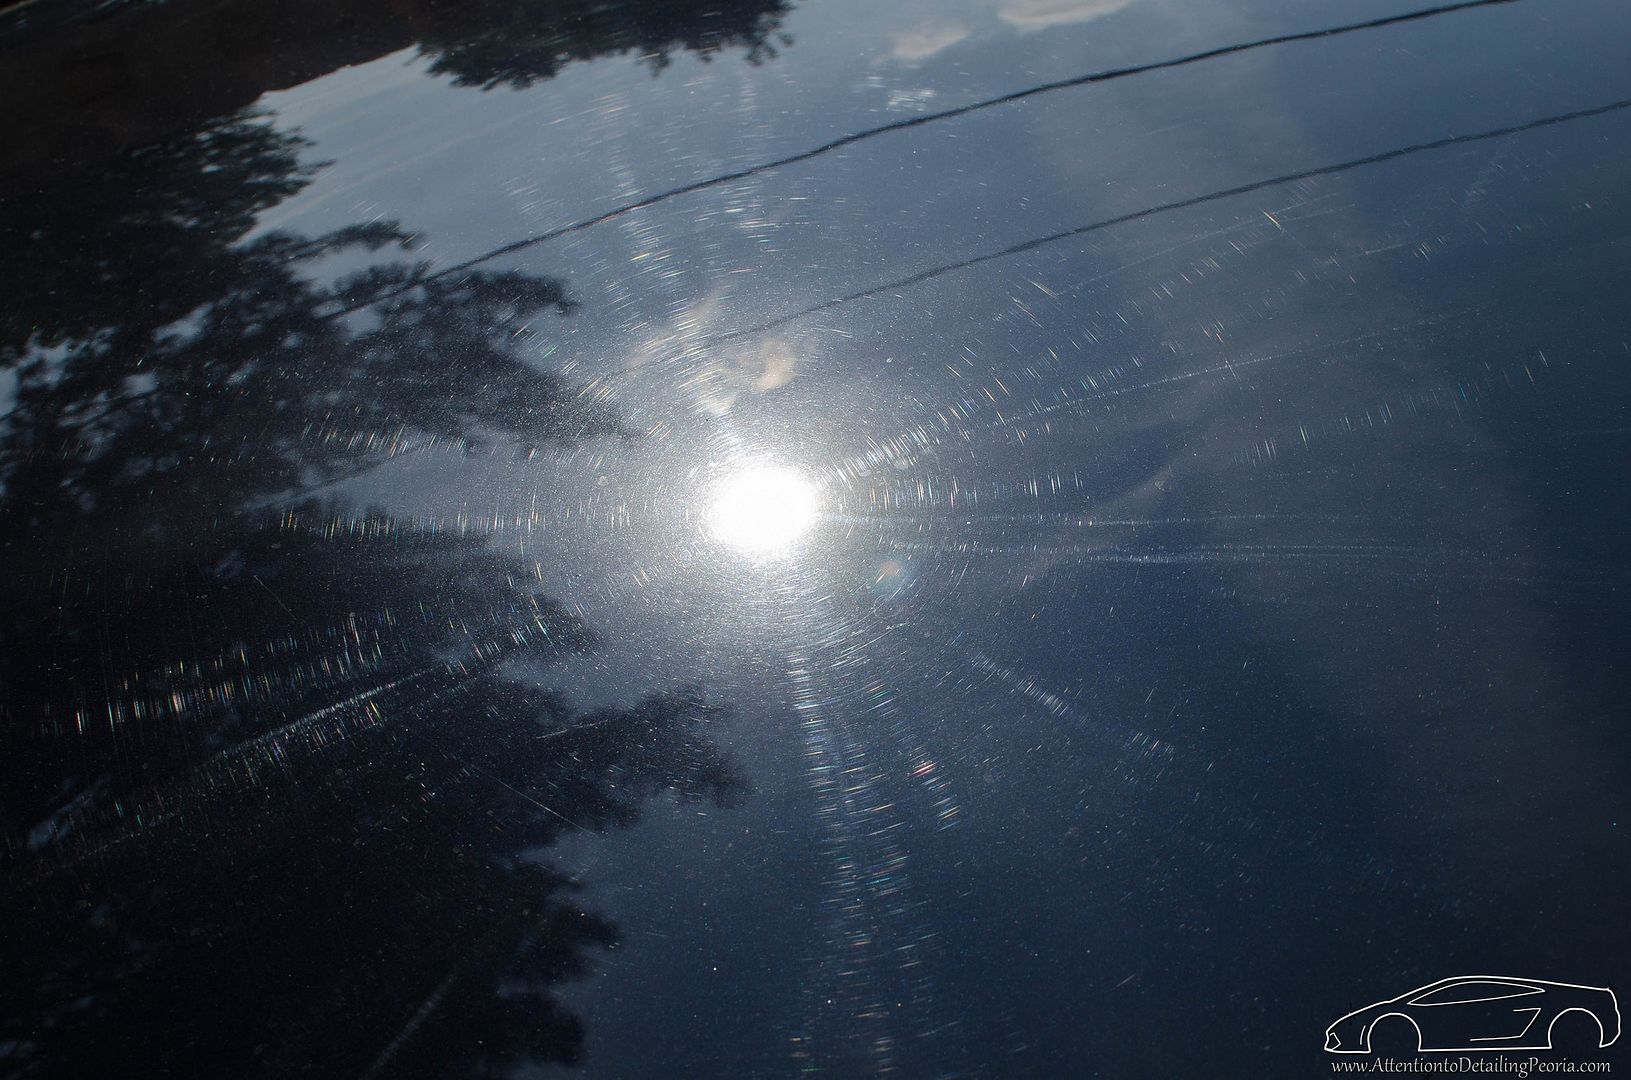 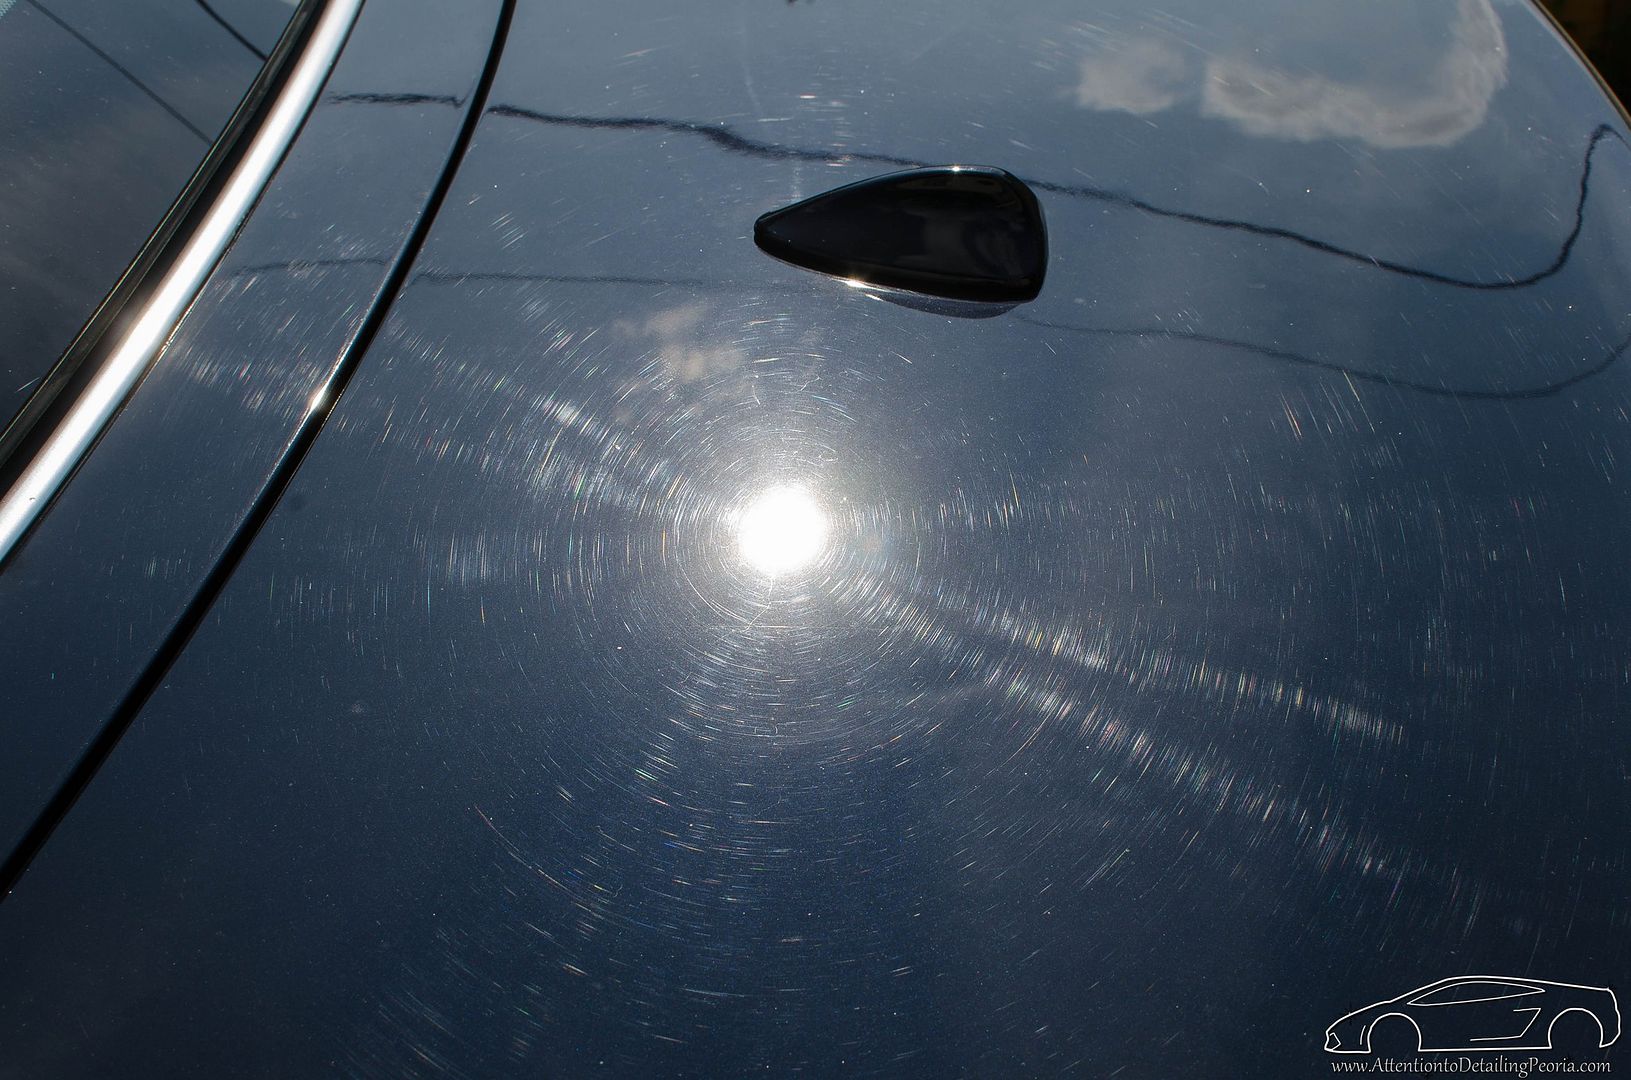 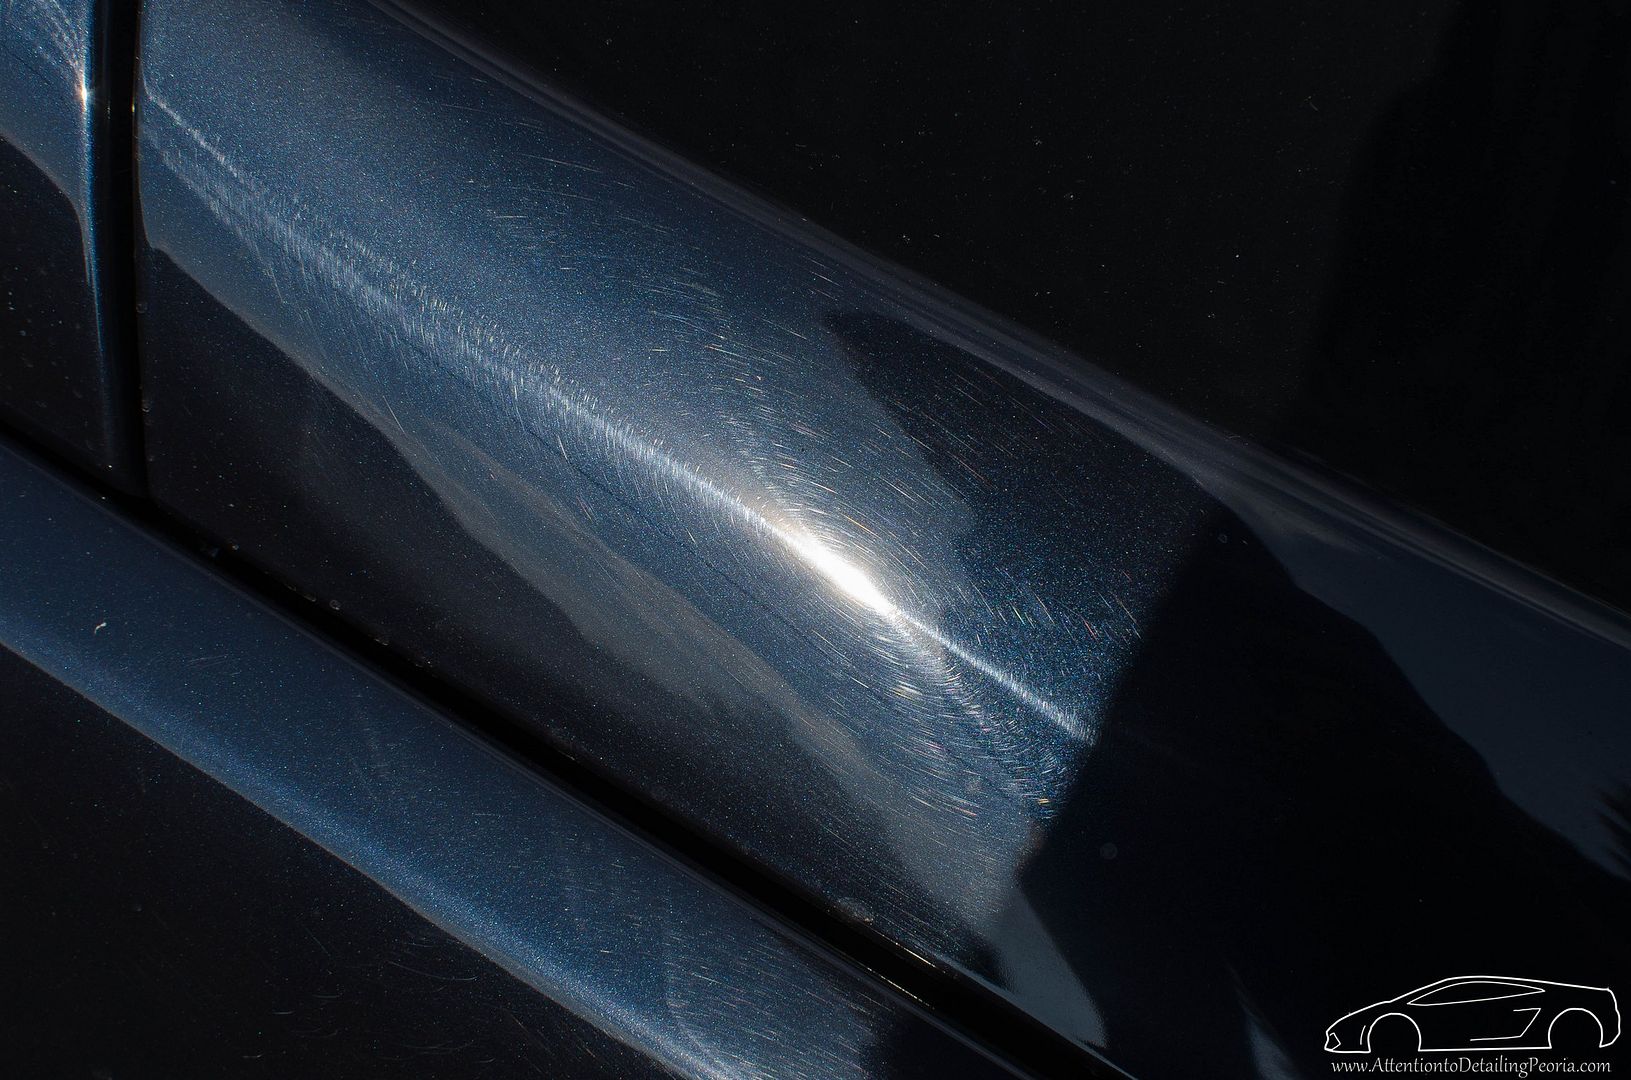 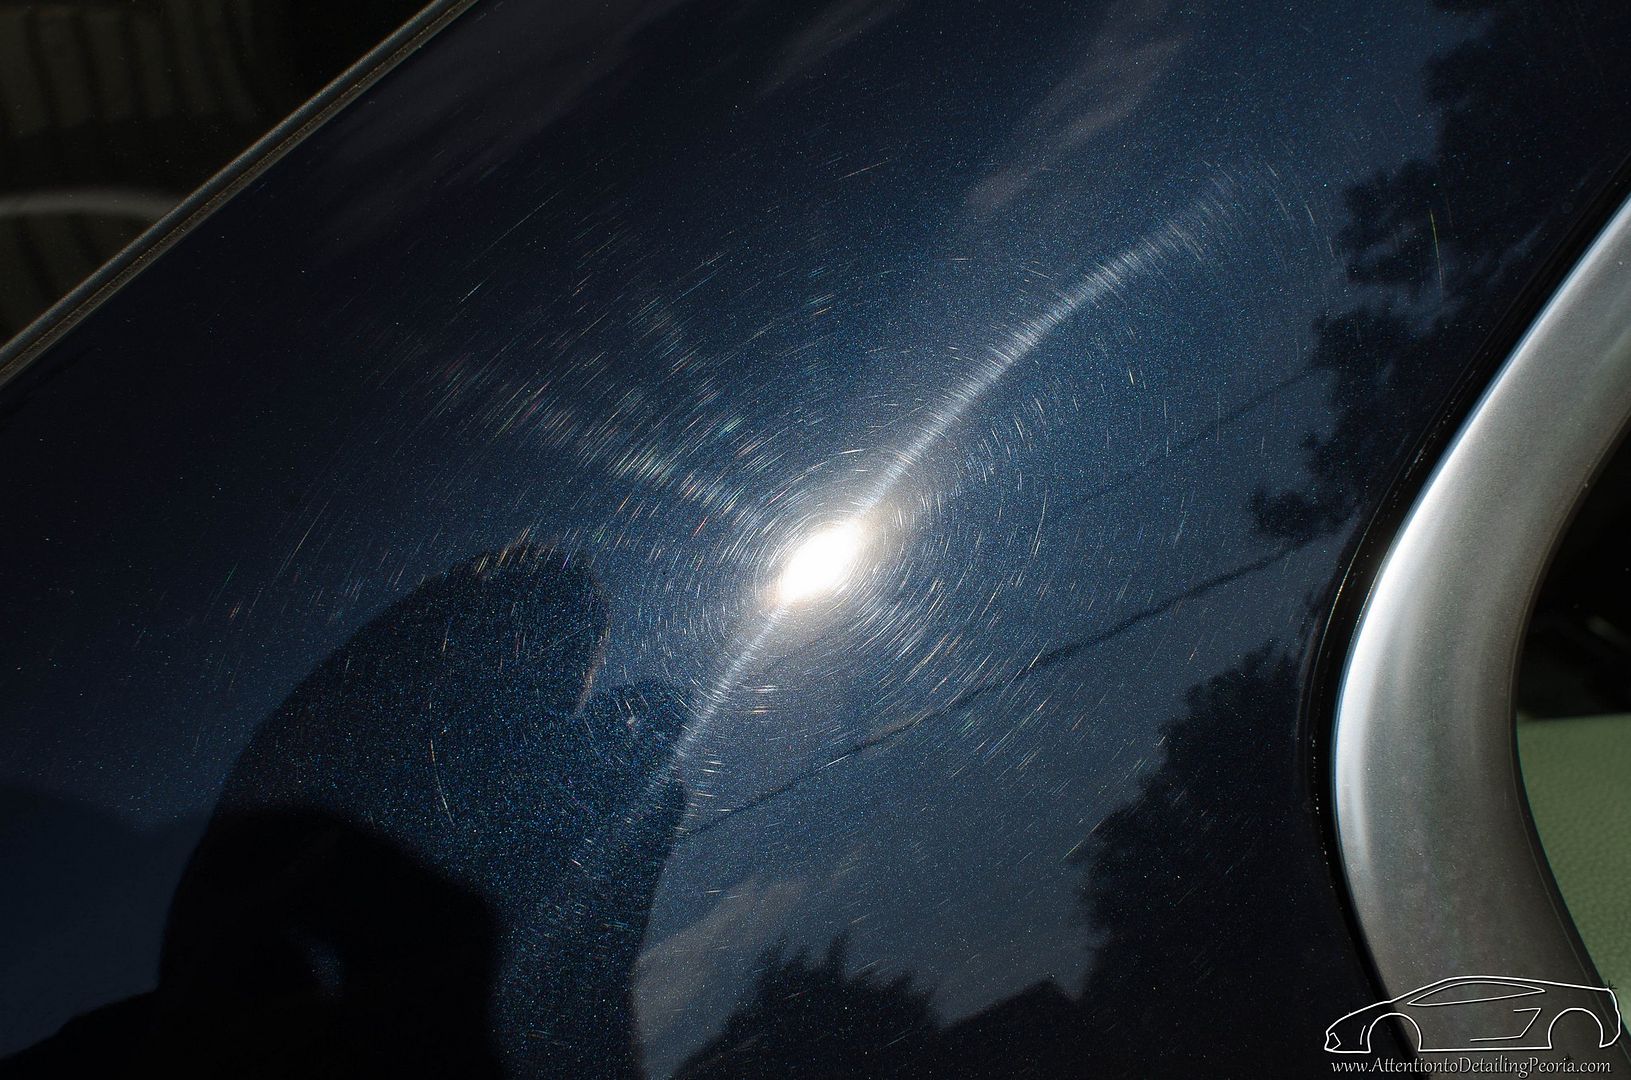 During As always, I started with cleaning the wheels and tires. In typical BMW fashion, these had plenty of brake dust built up on them. Sonax Full Effect wheel cleaner makes quick work of this mess by reacting with the brake dust and loosening it from the surface. 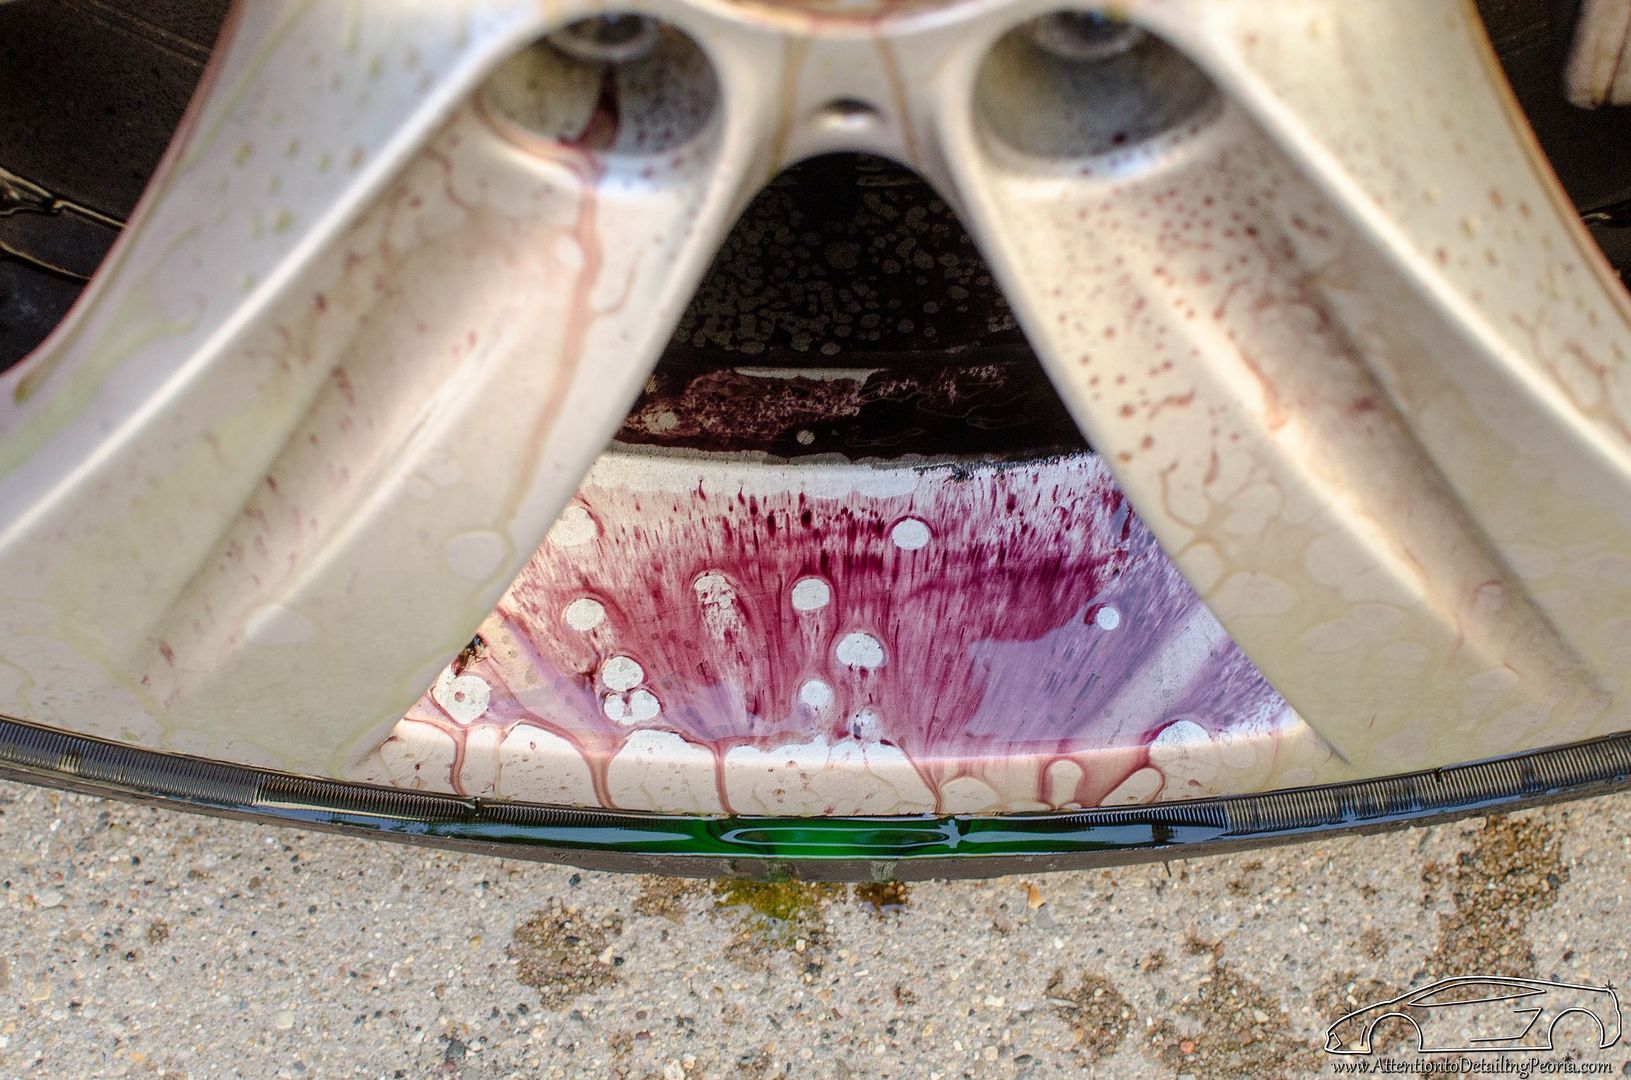 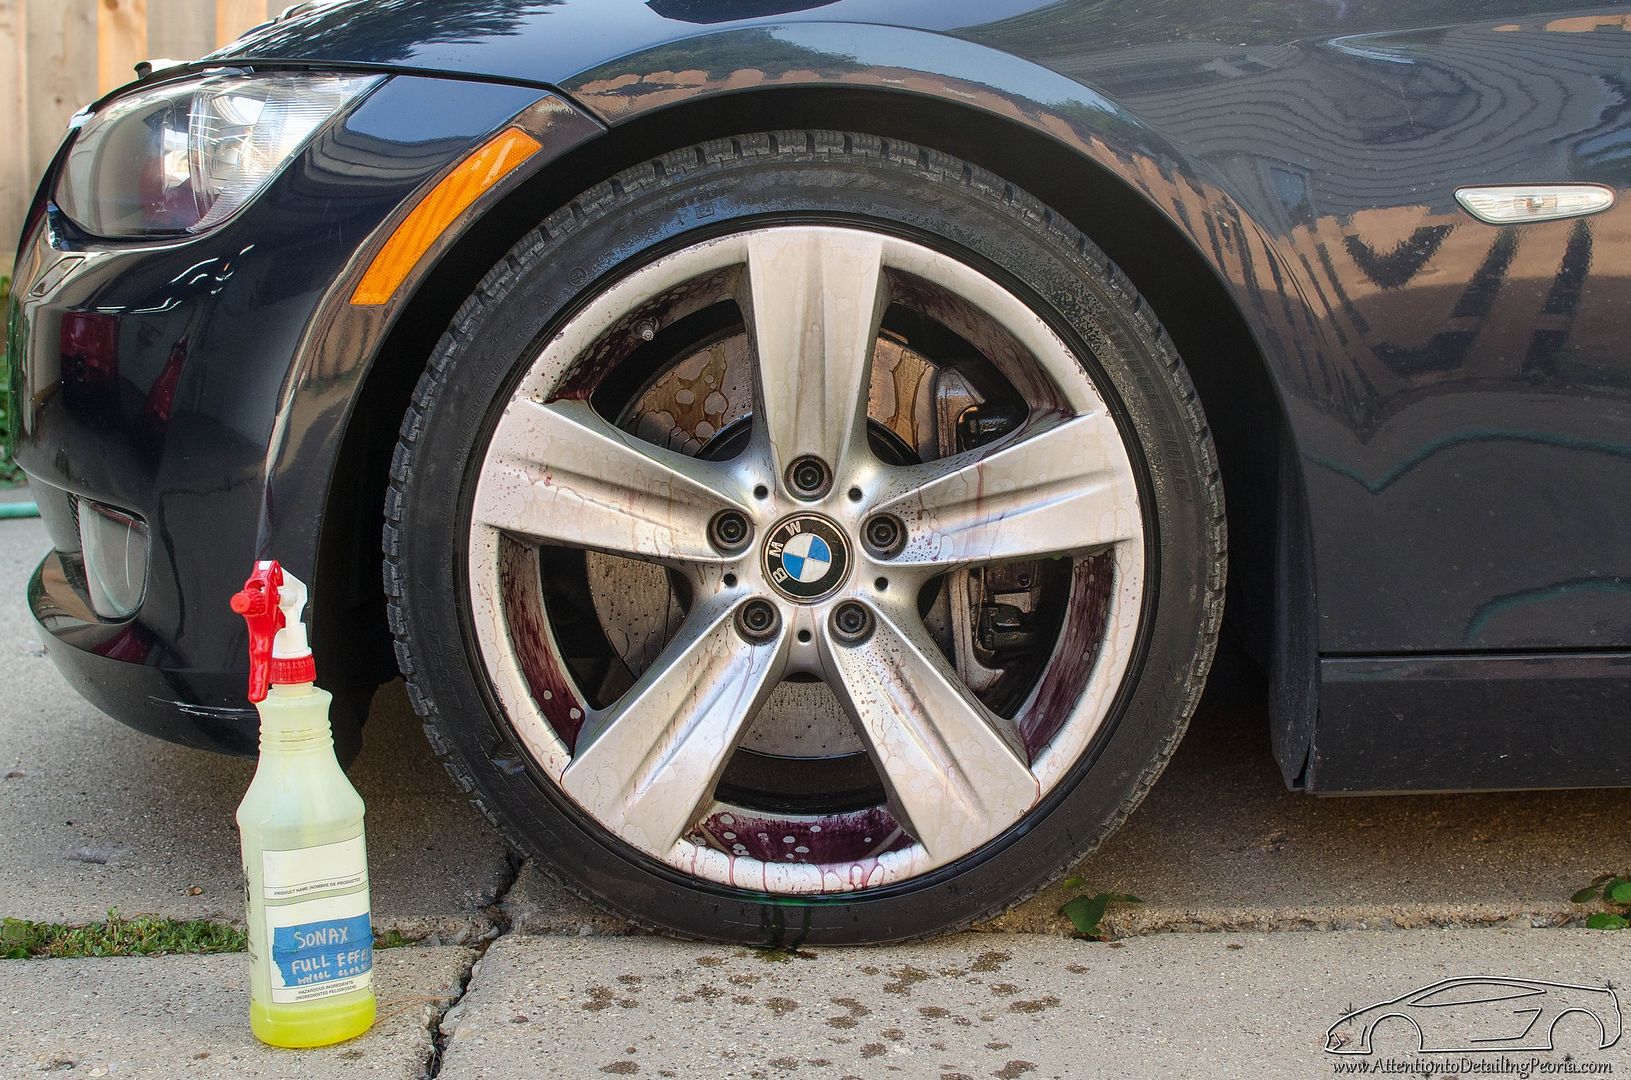 A lot of filth coming from the inner barrels of the wheels 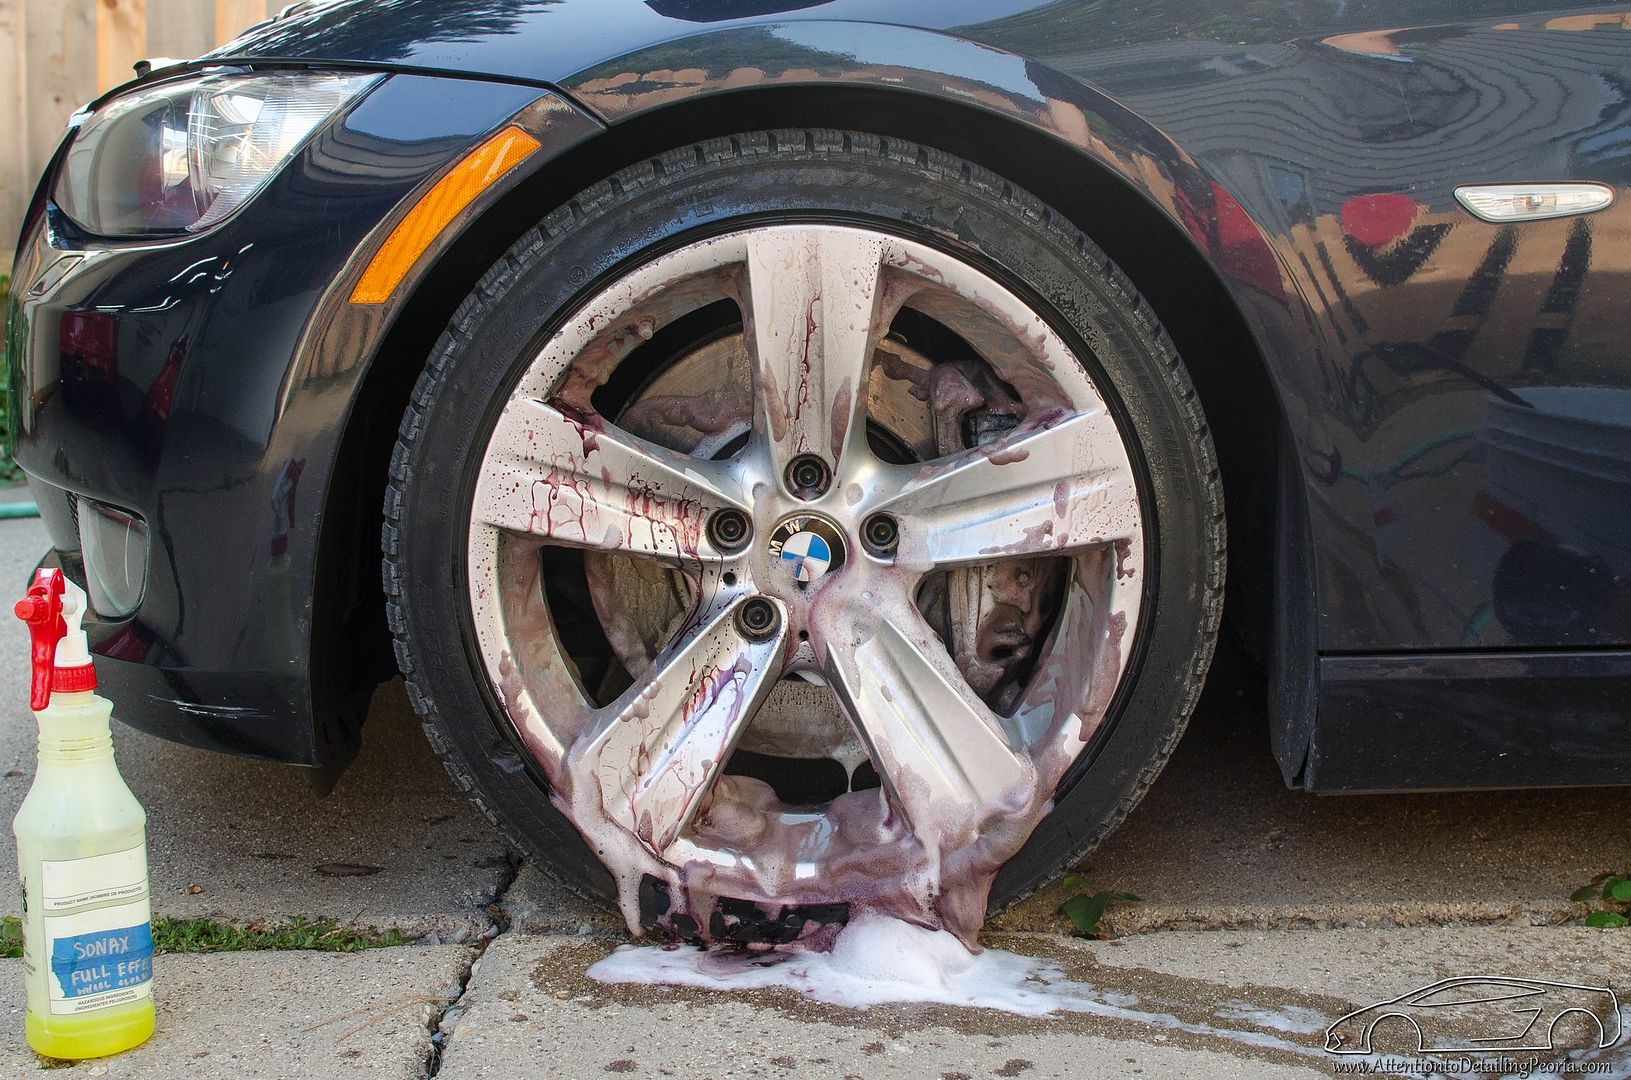 Wheels and tires cleaned up. While they certainly look better, all of the wheels truly need to be refinished as they were simply neglected for too long and are beyond repair. 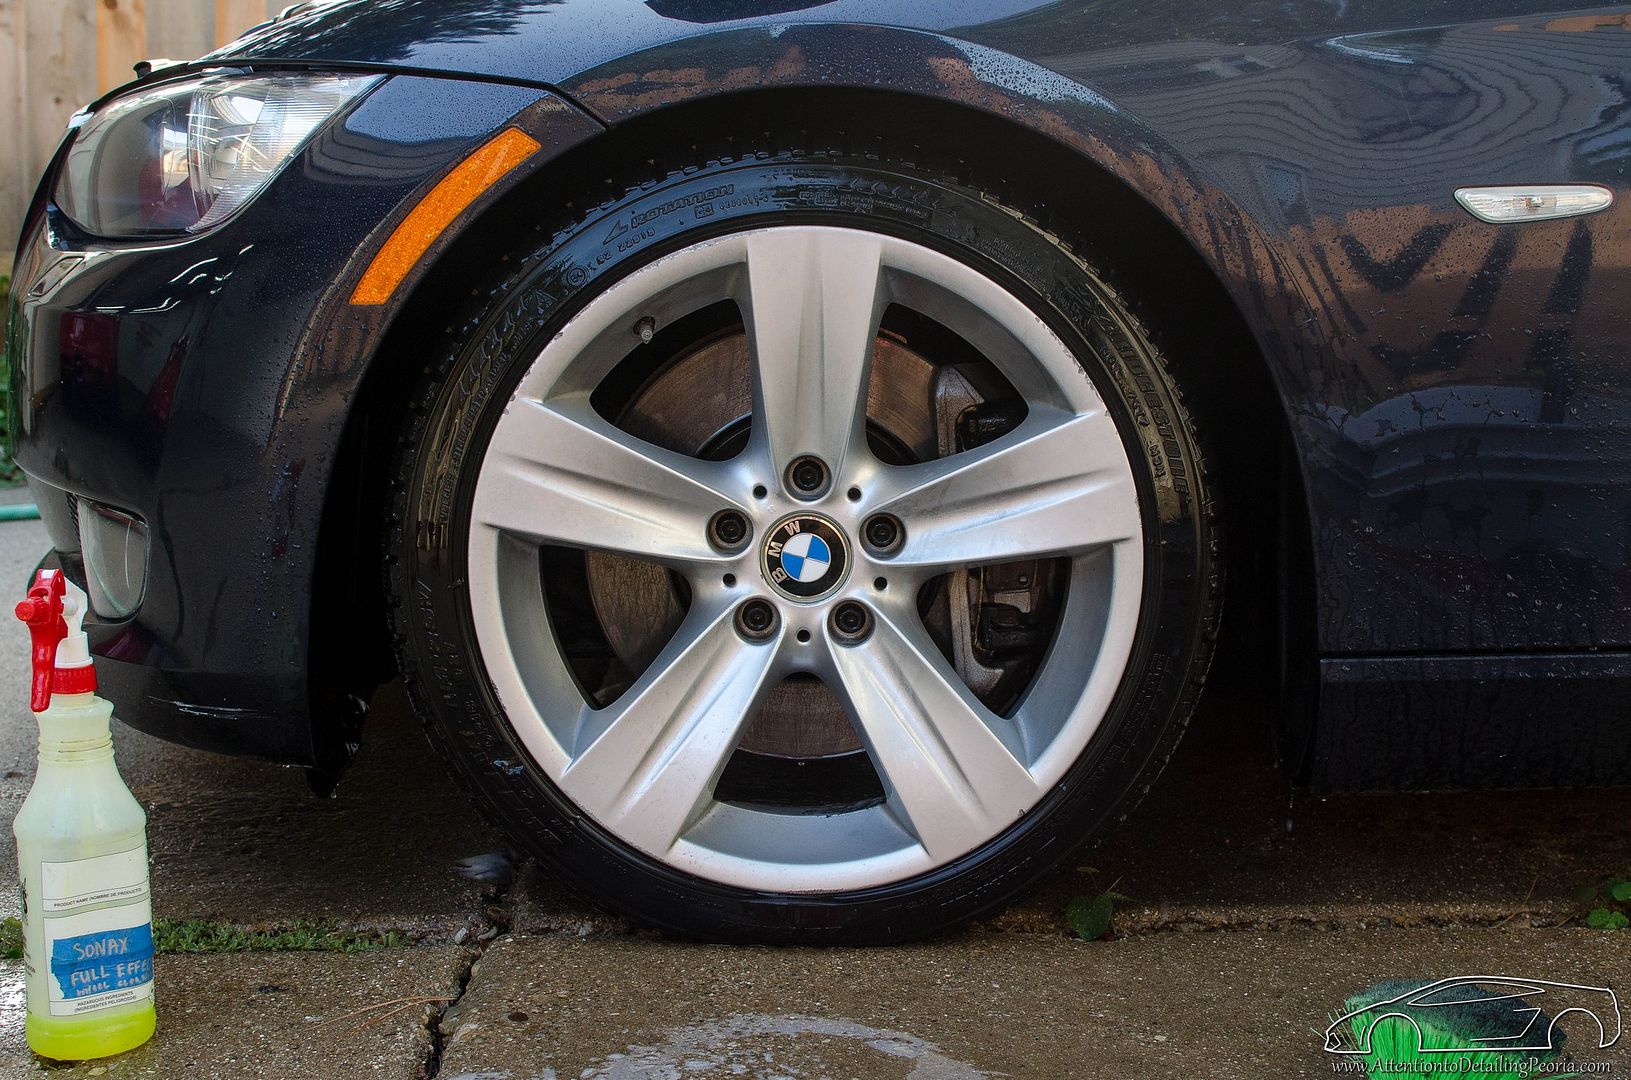 The vehicle was pressure rinsed, foamed, rinsed again, and then thoroughly washed. 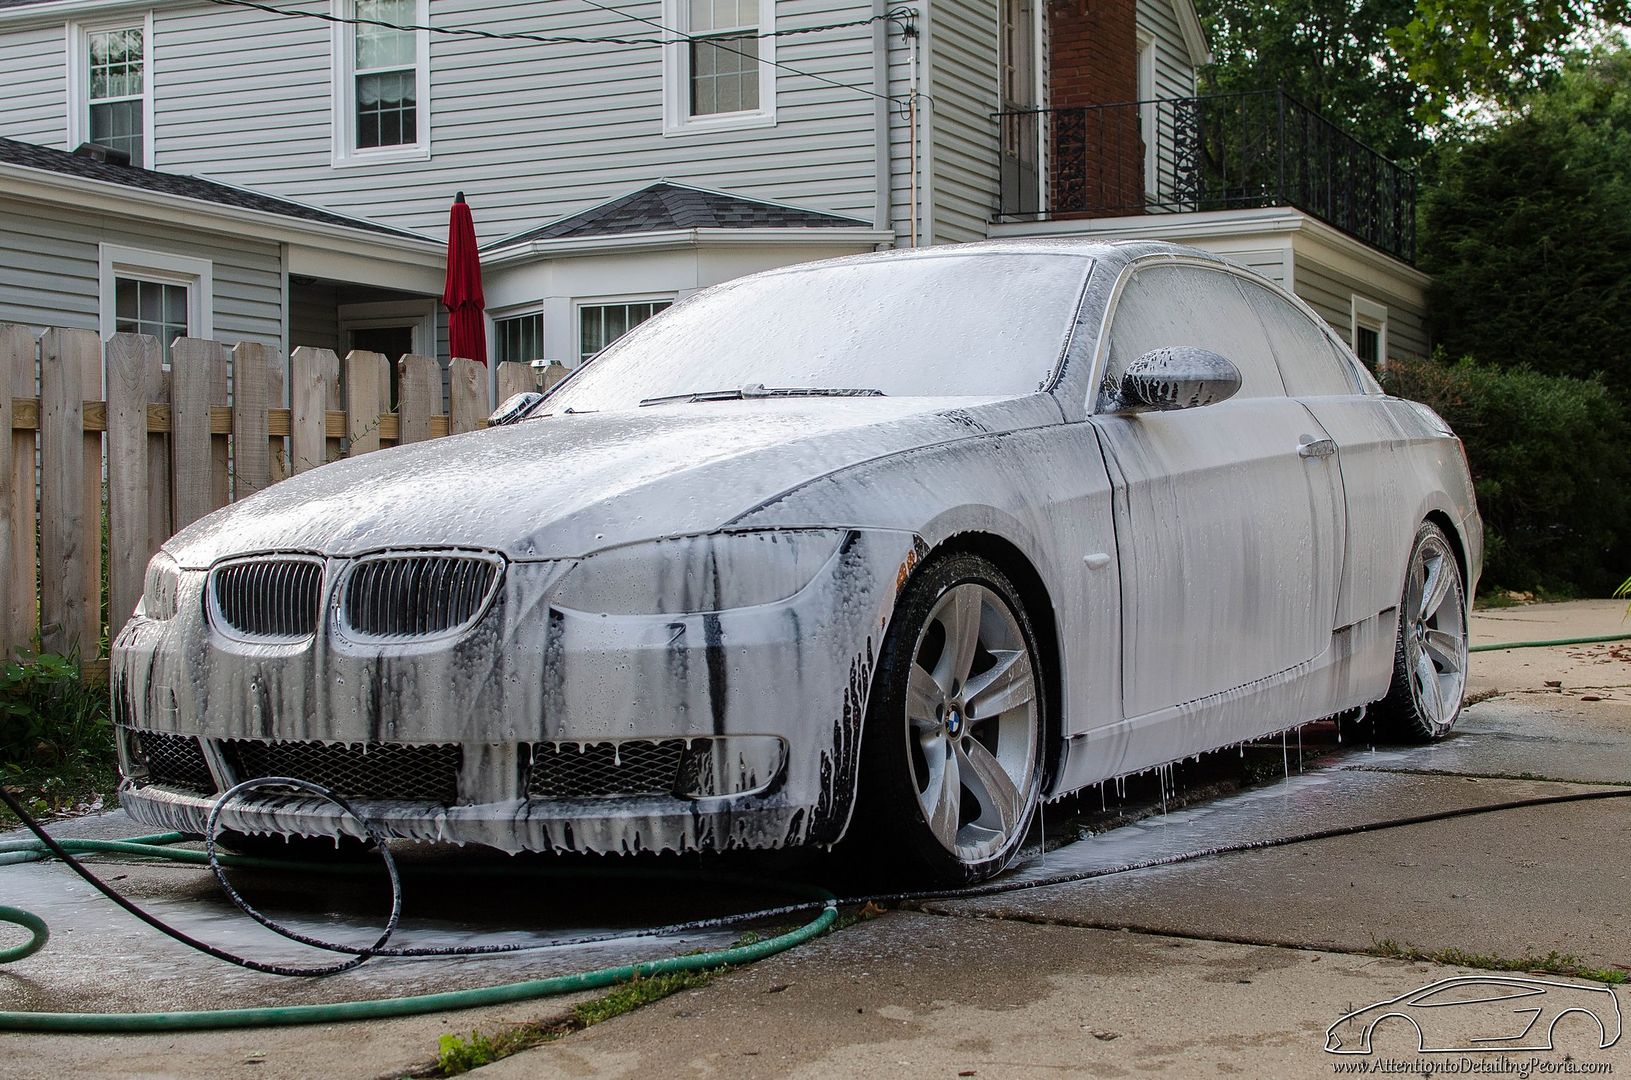 After the wash process, I began with the decontamination. Notice the amount of bonded particles that were removed on just a small part of the hood. It is critical to ensure all bonded contaminates are removed prior to polishing. 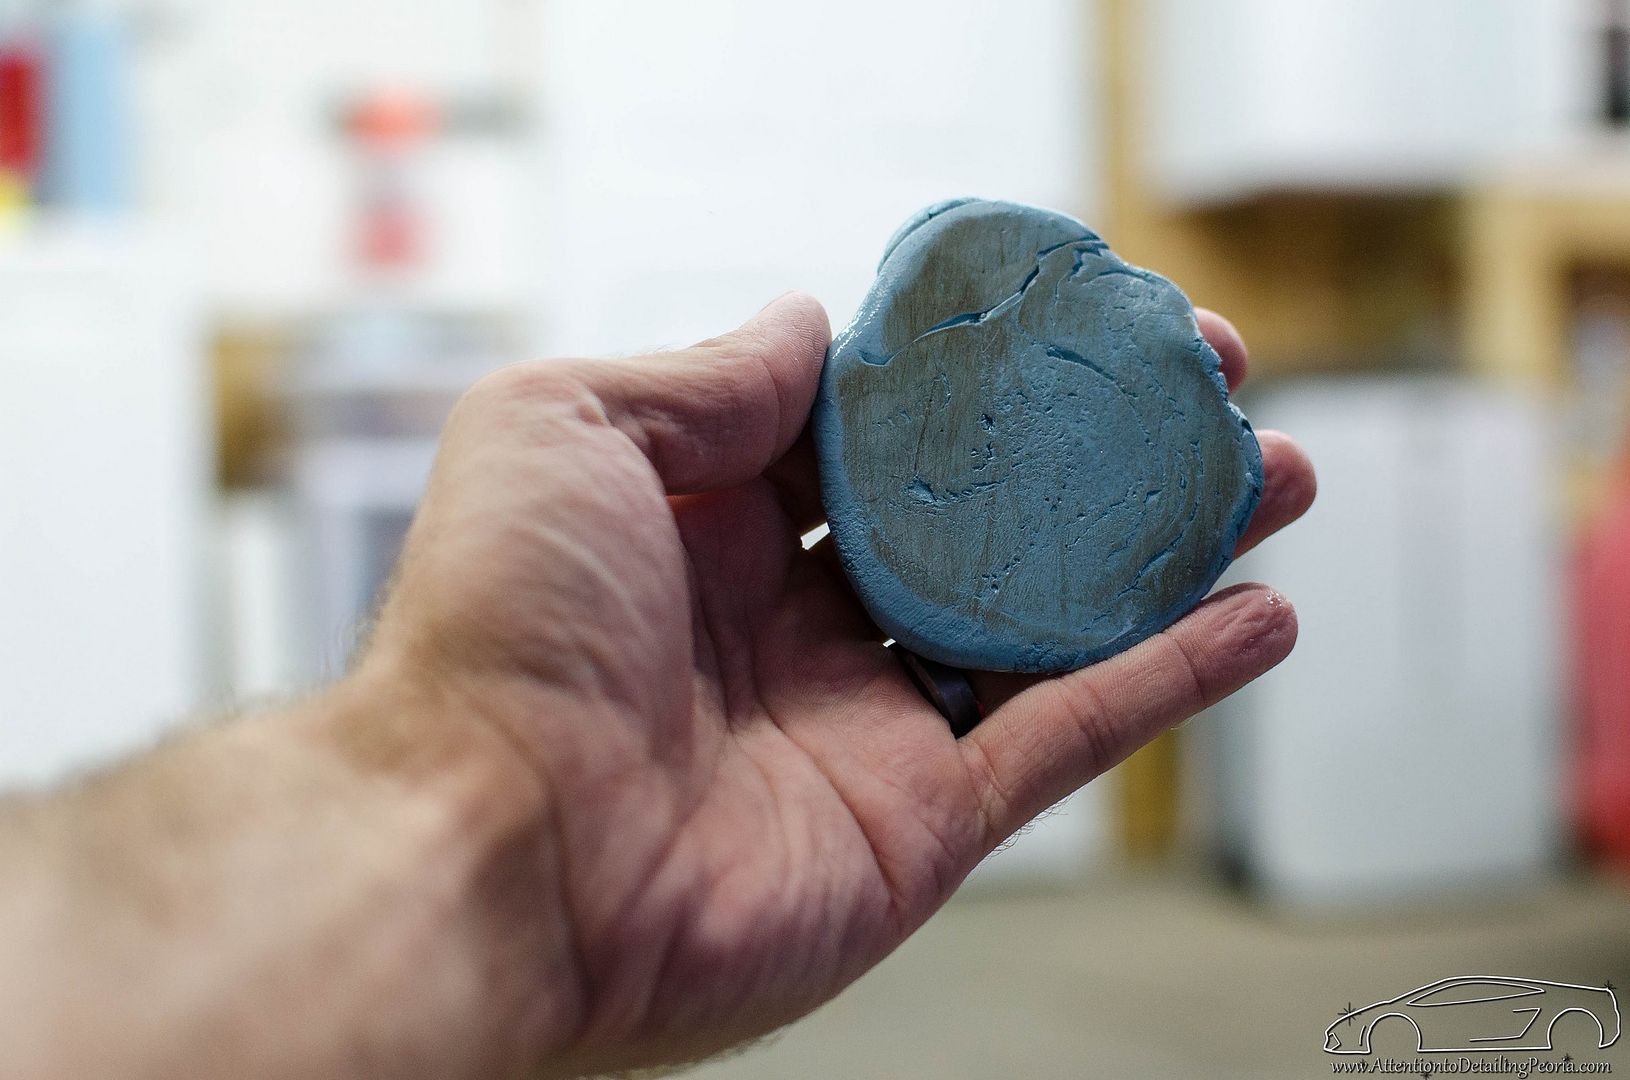 I began my testing on the hood. After much correction, the difference was incredible. No high powered lights needed to see this transformation! 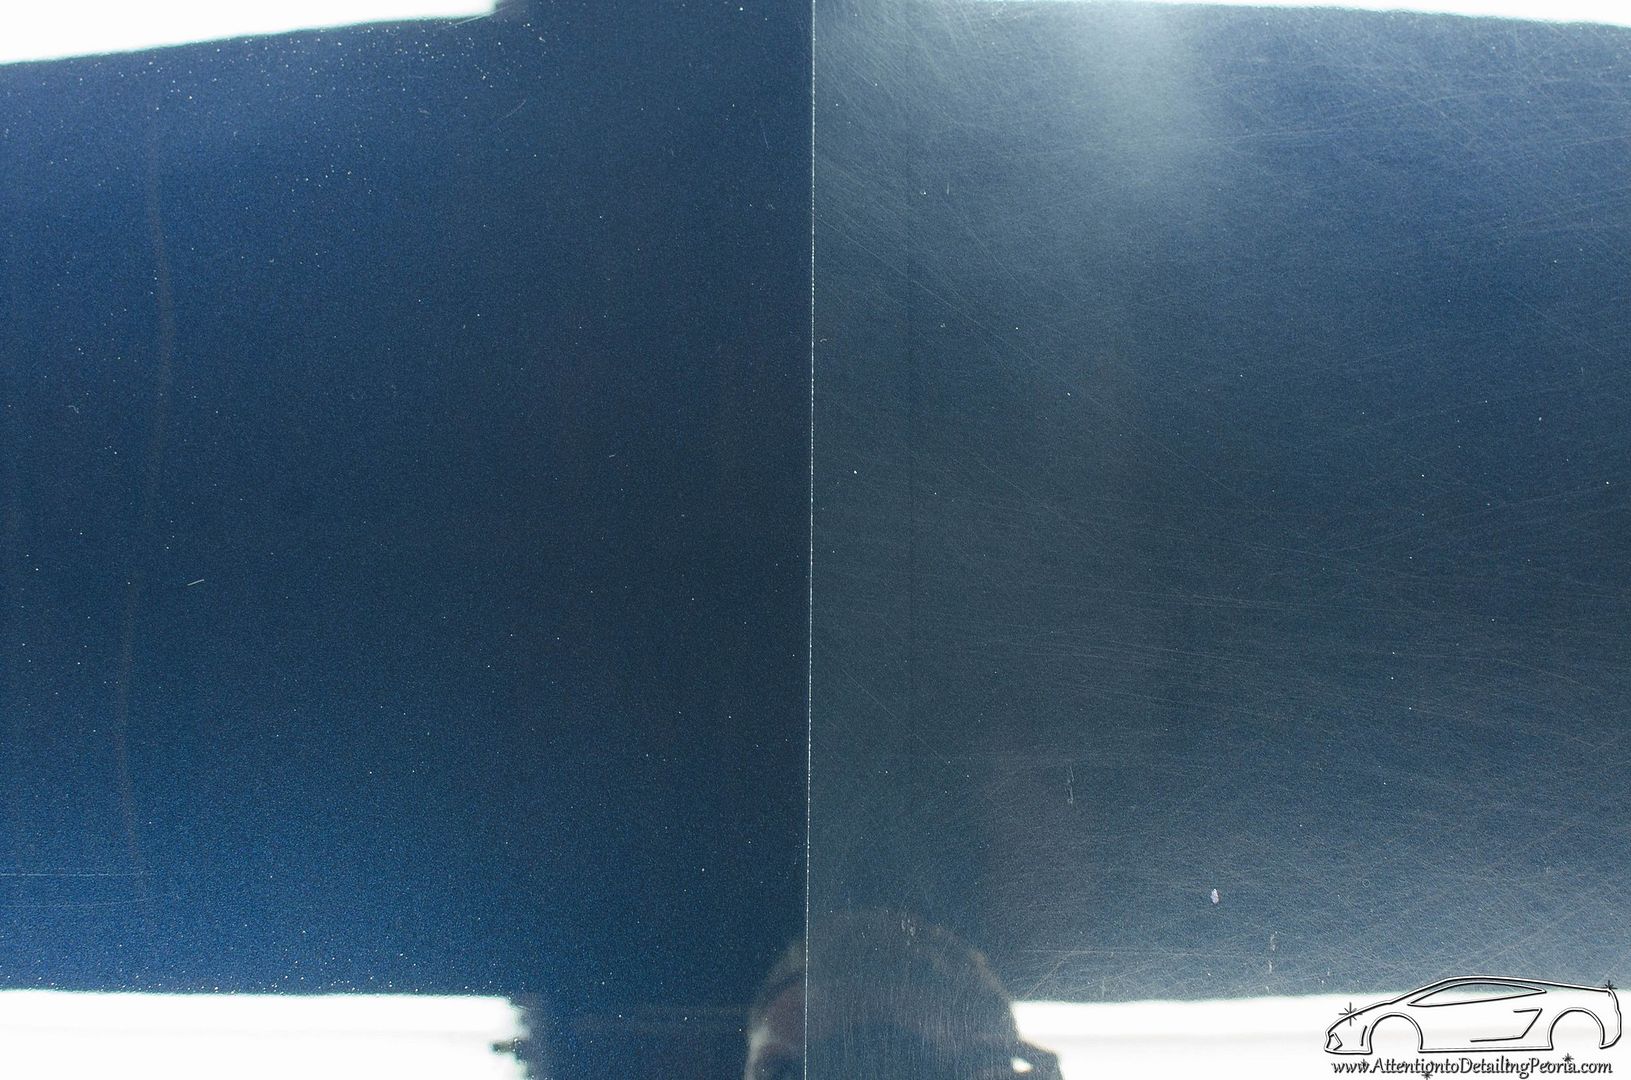 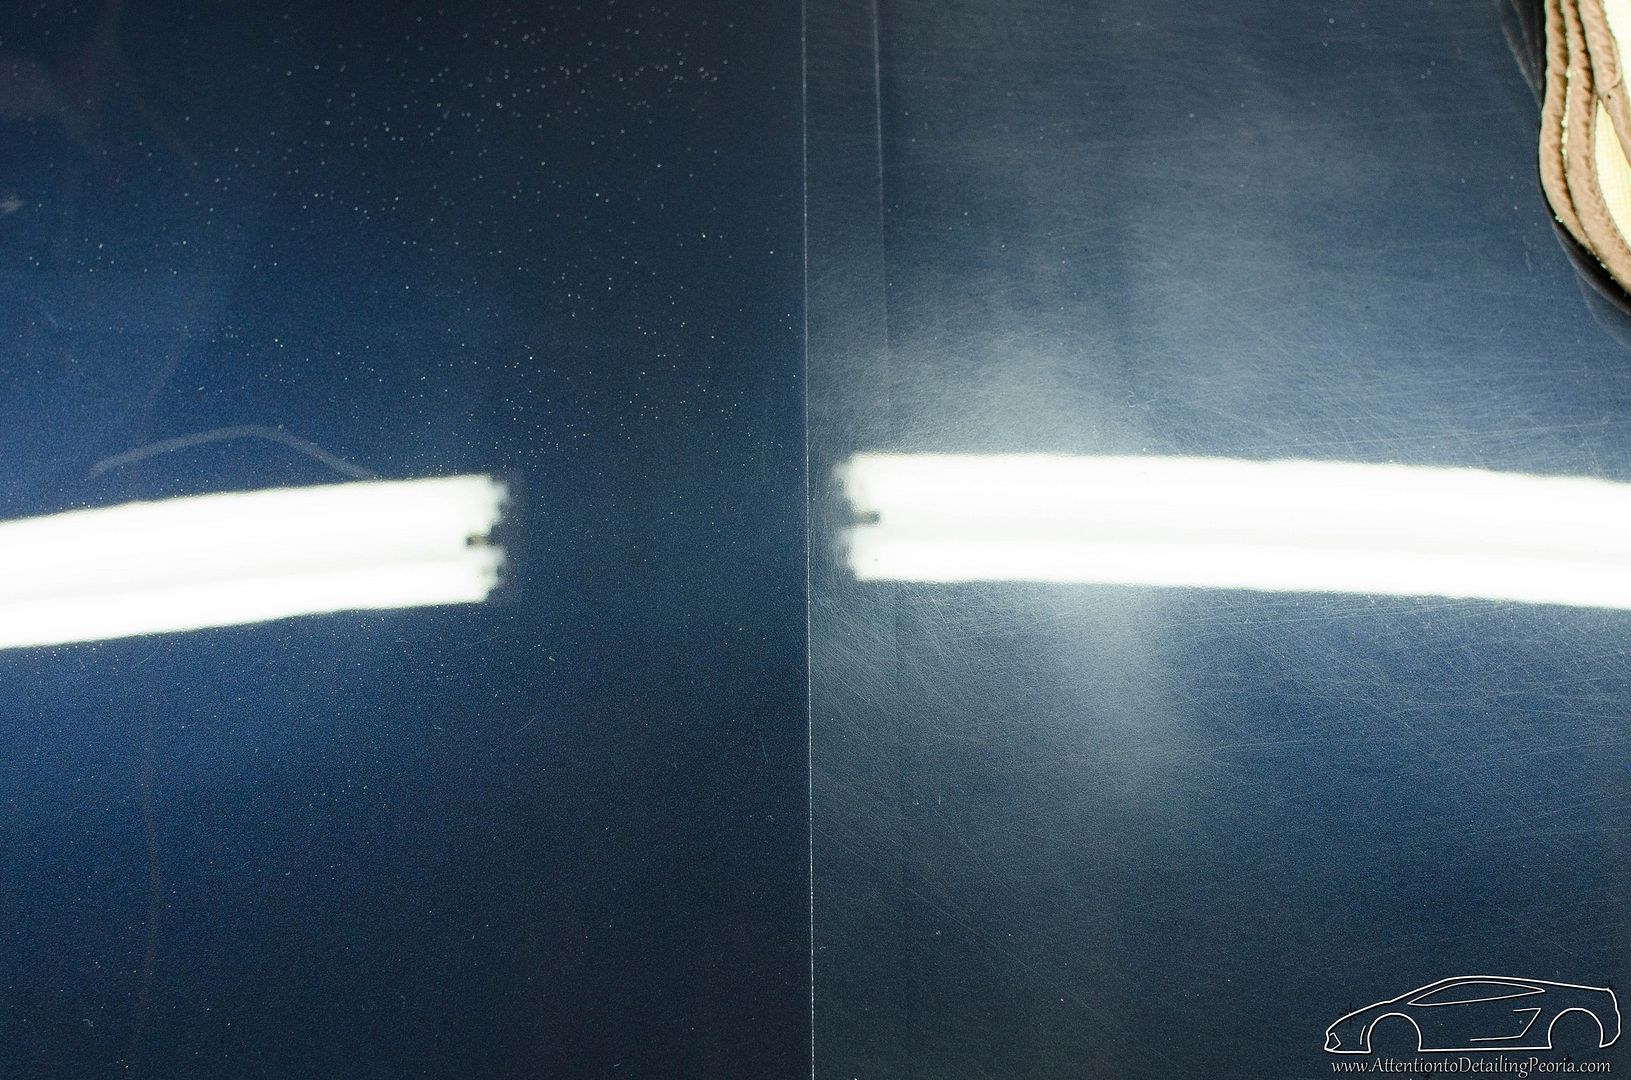 50/50 on the hood 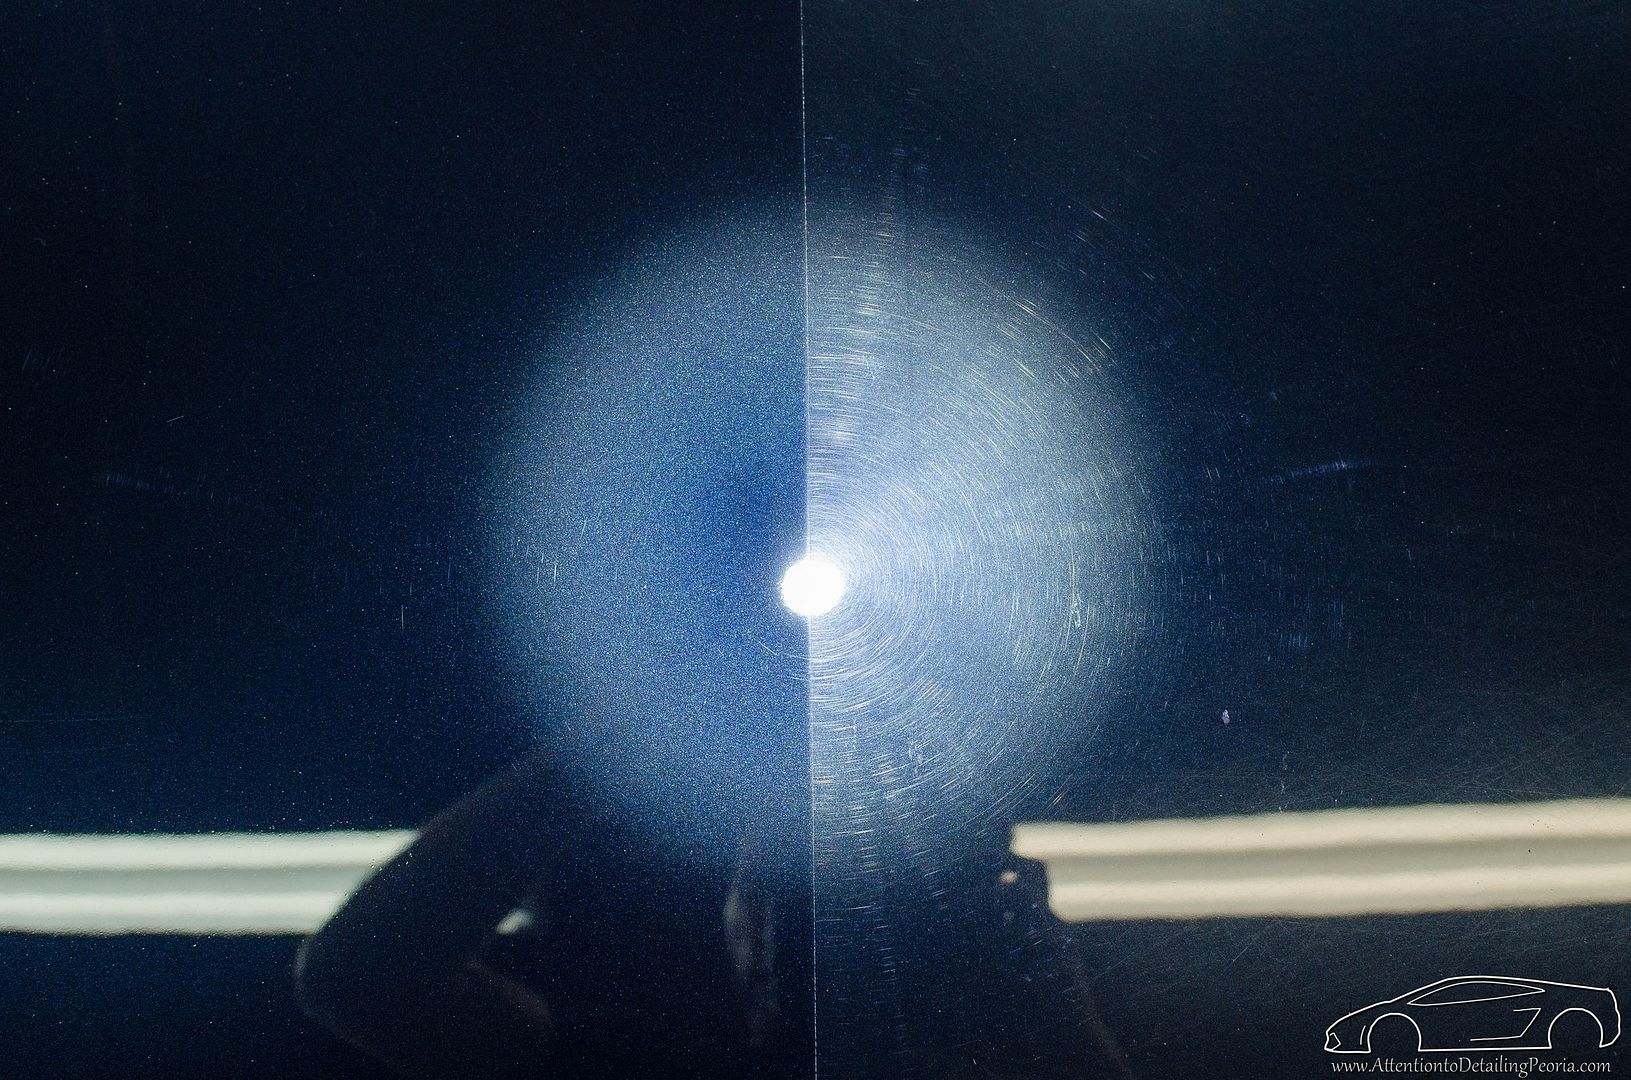 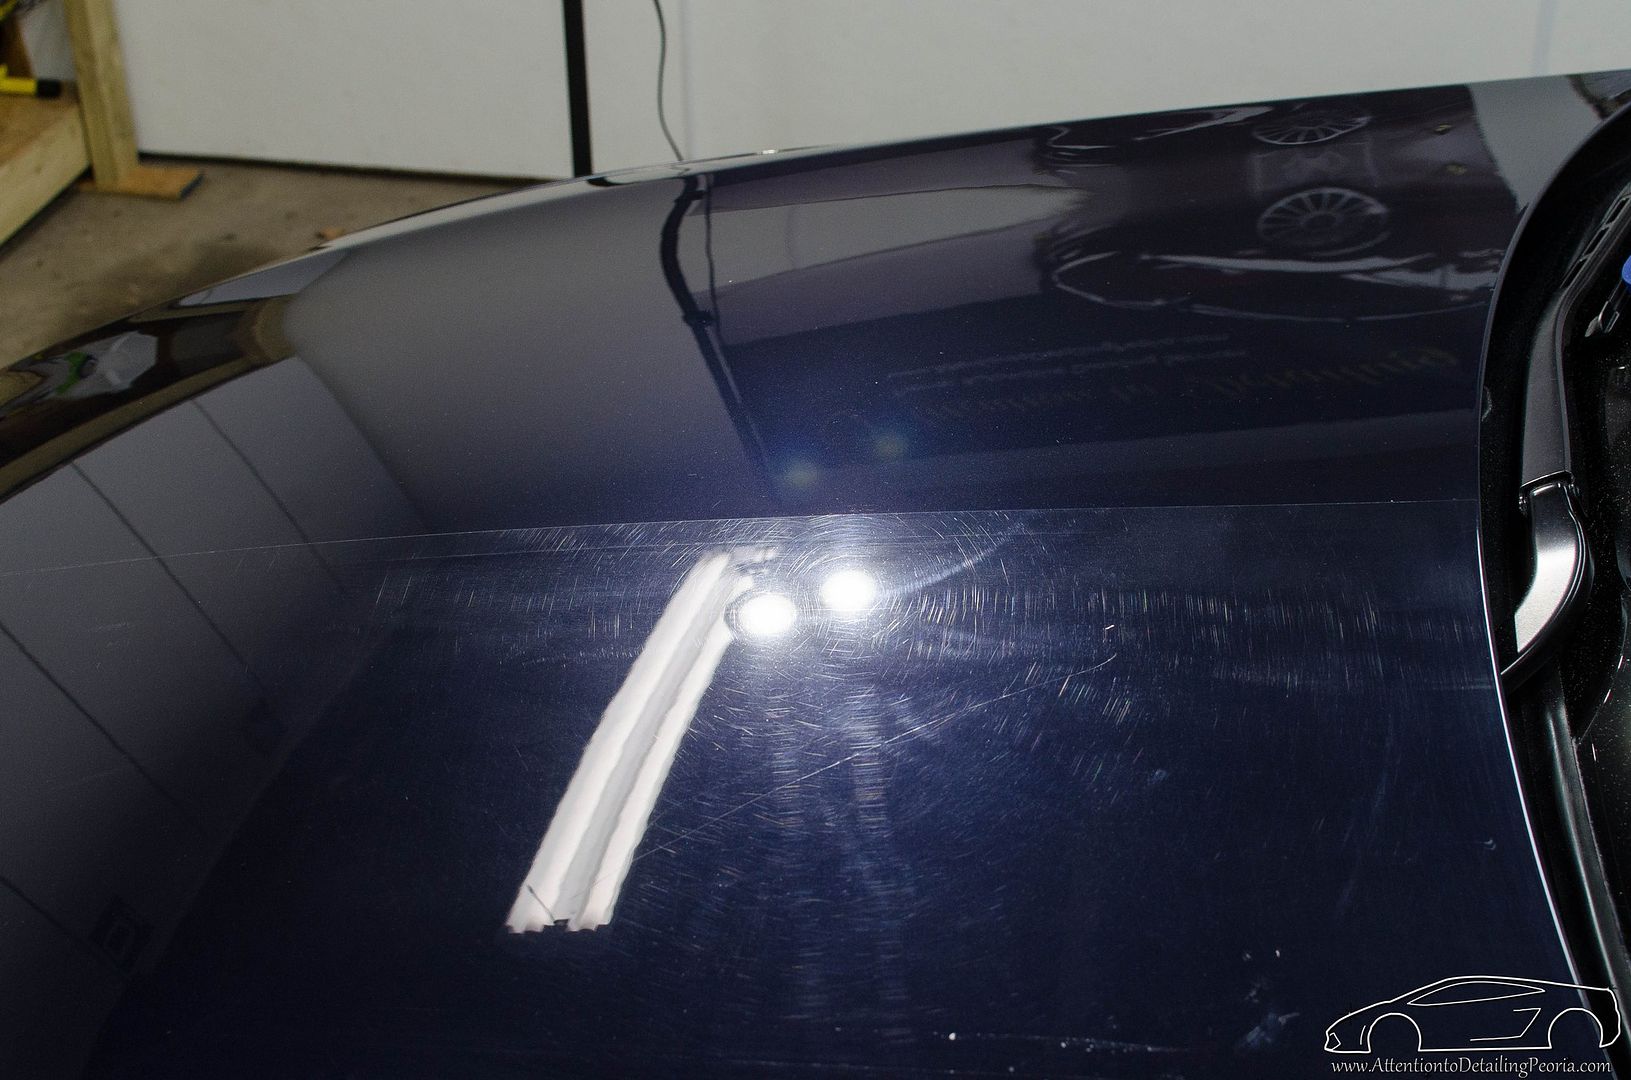 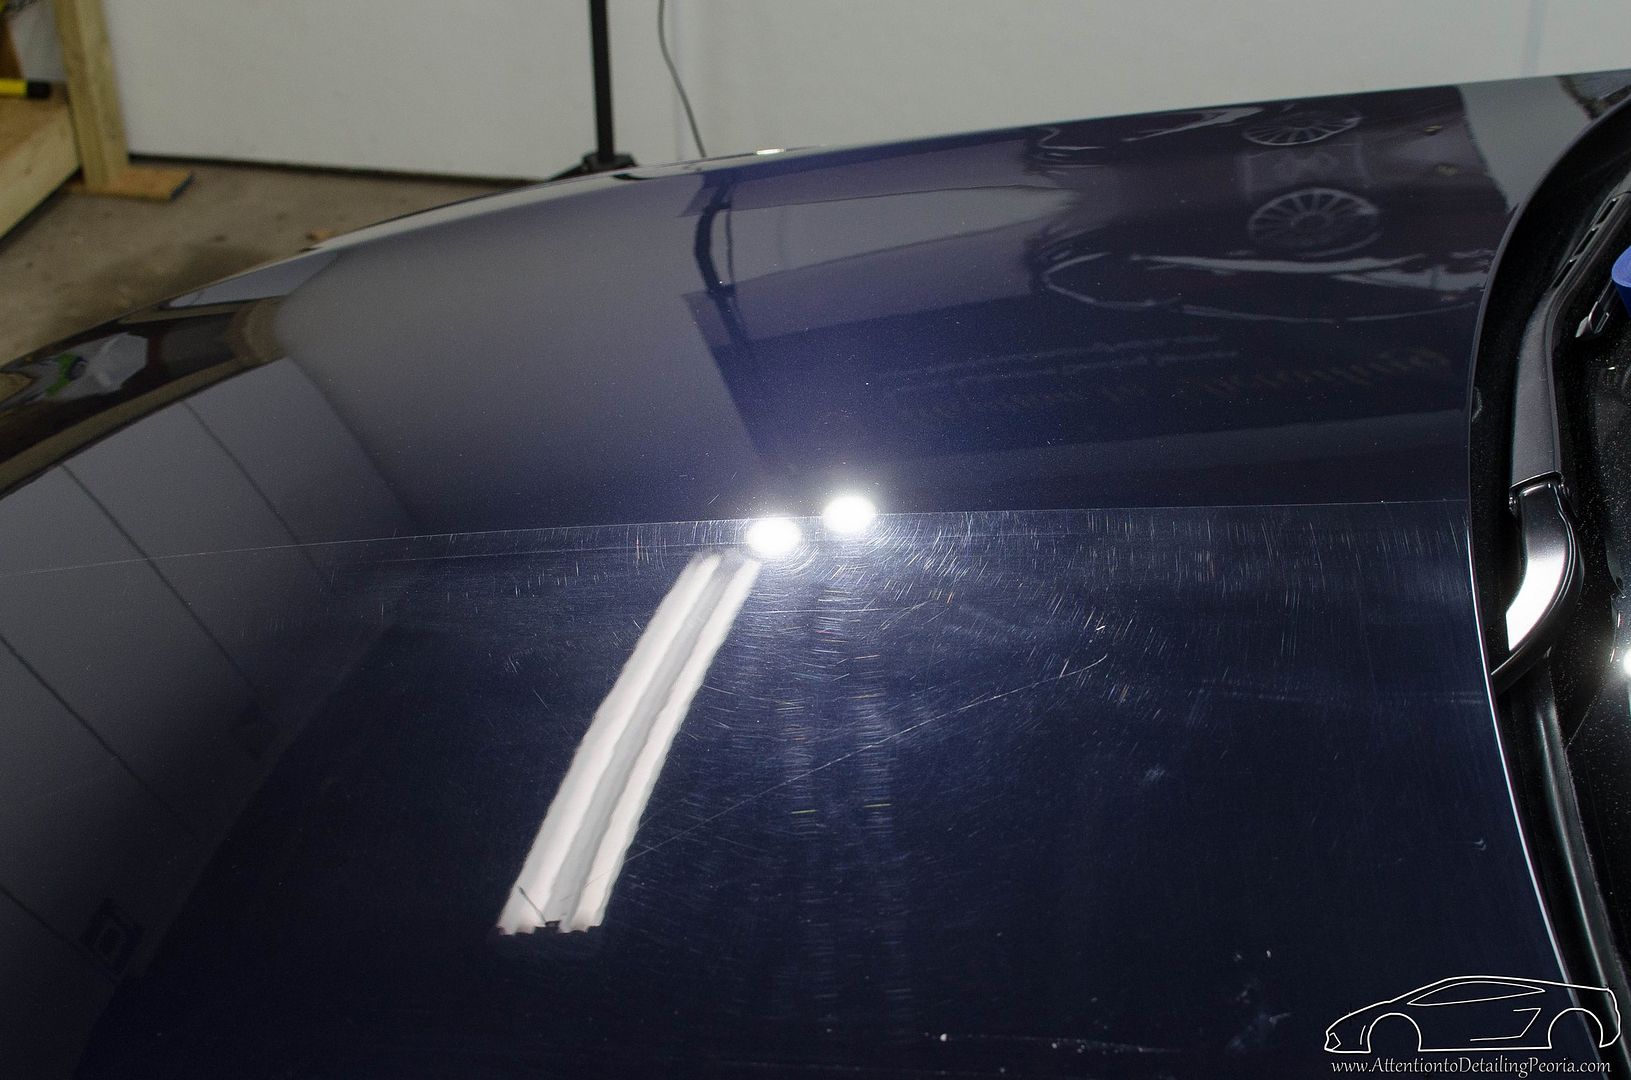 50/50 shot on the door after compounding 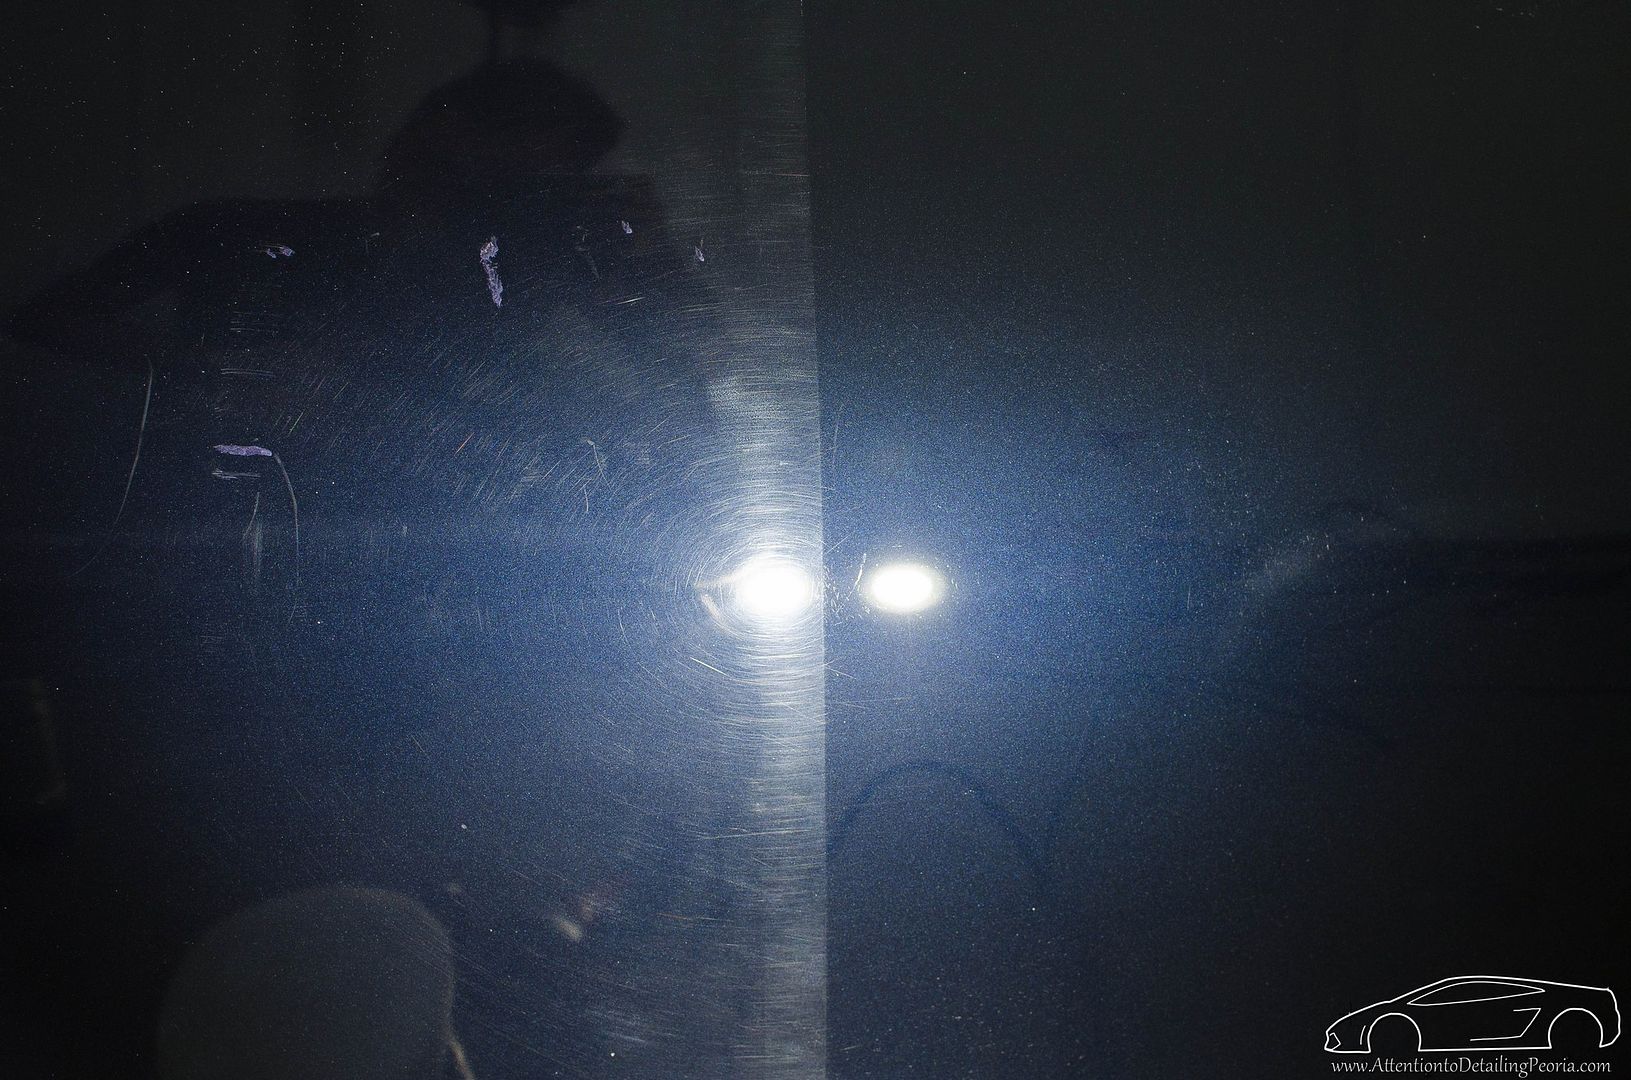 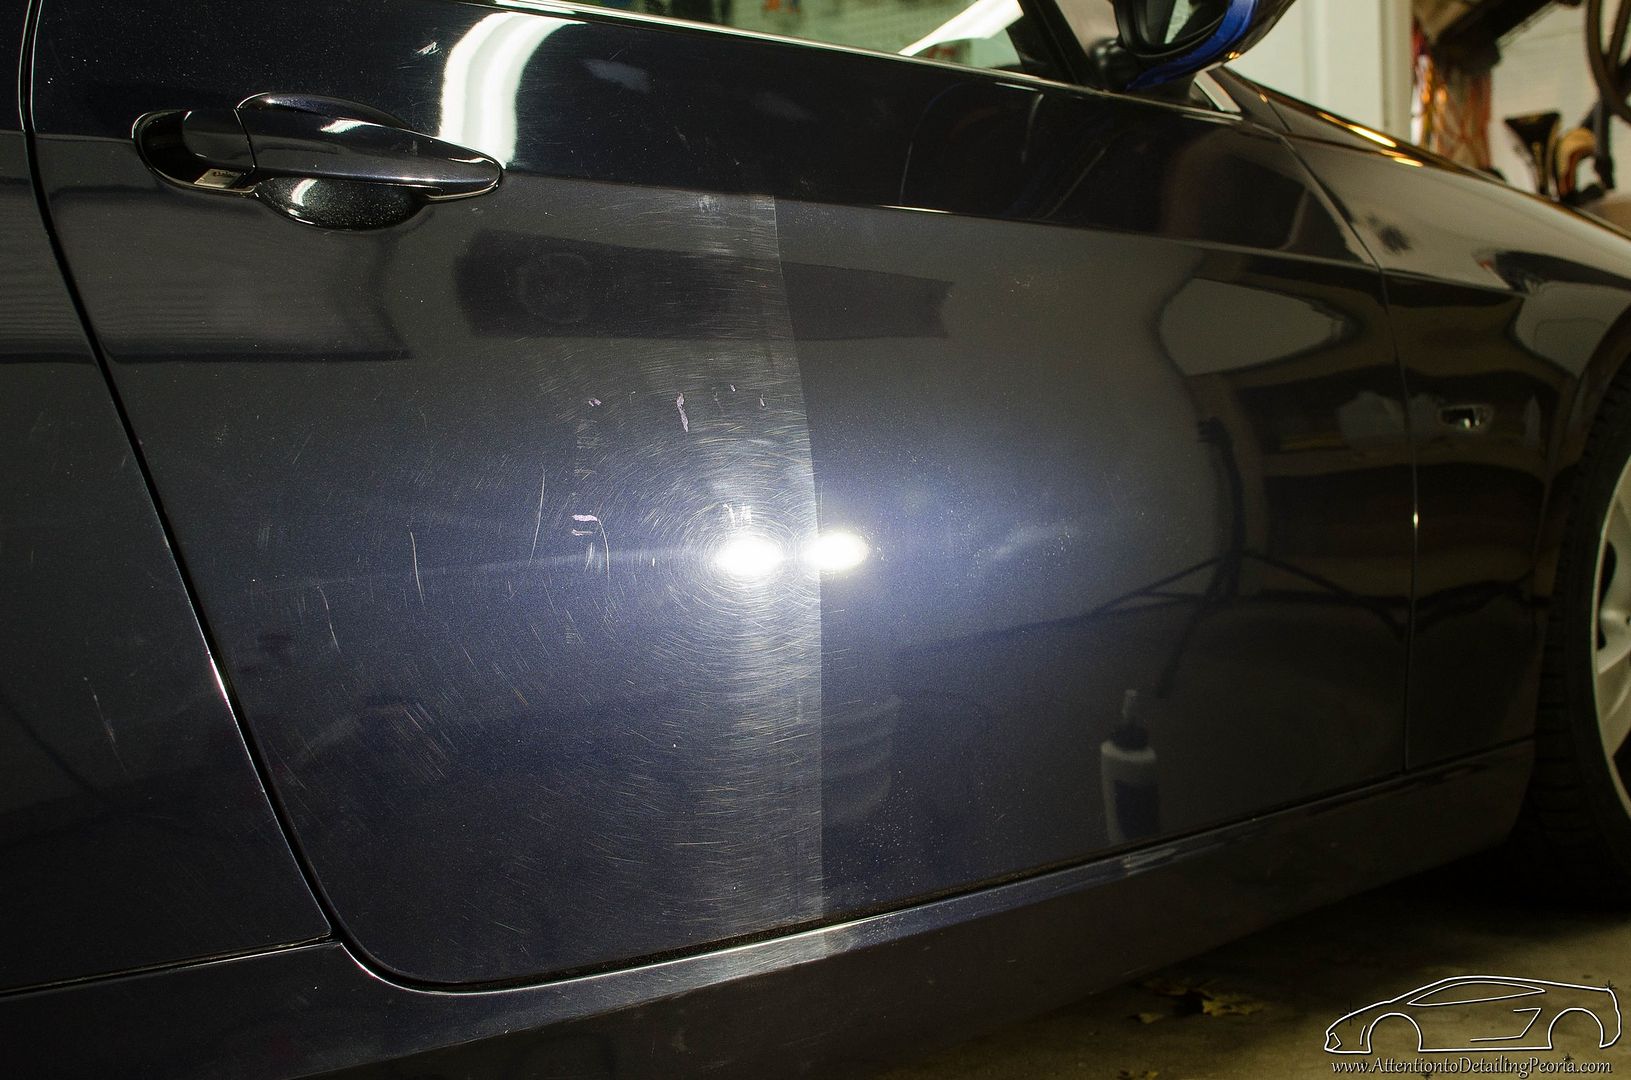 Fender before correction 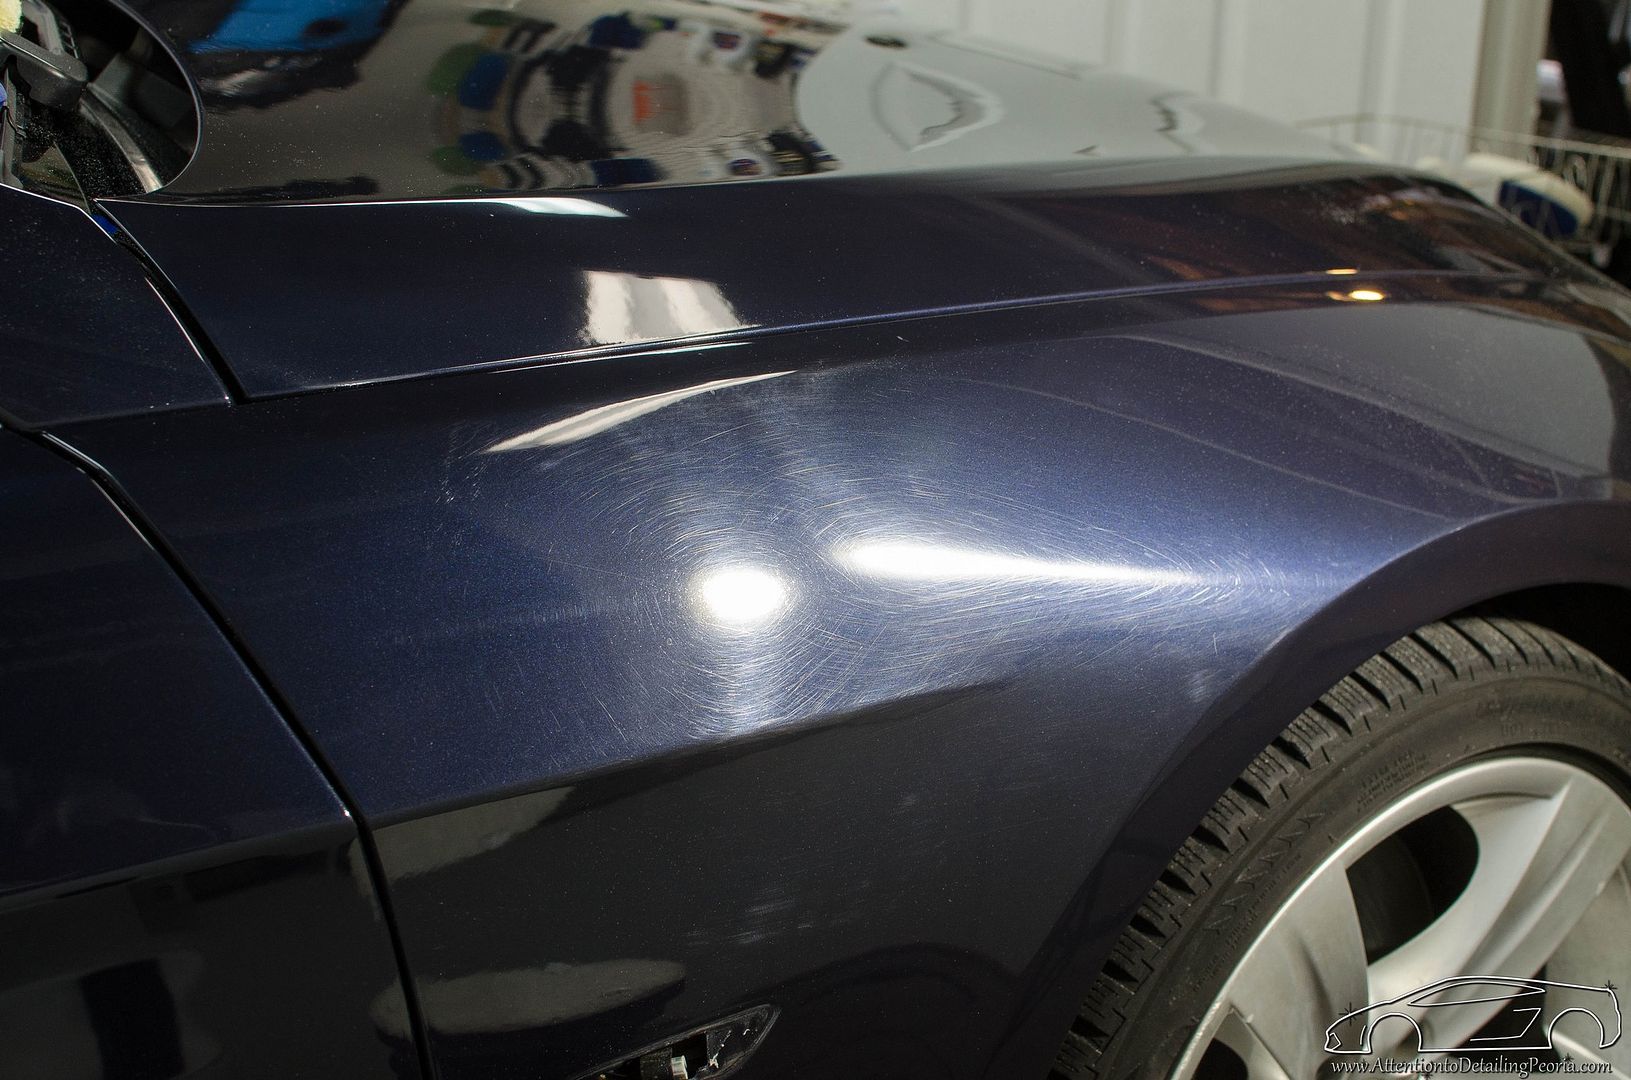 Fender after compounding 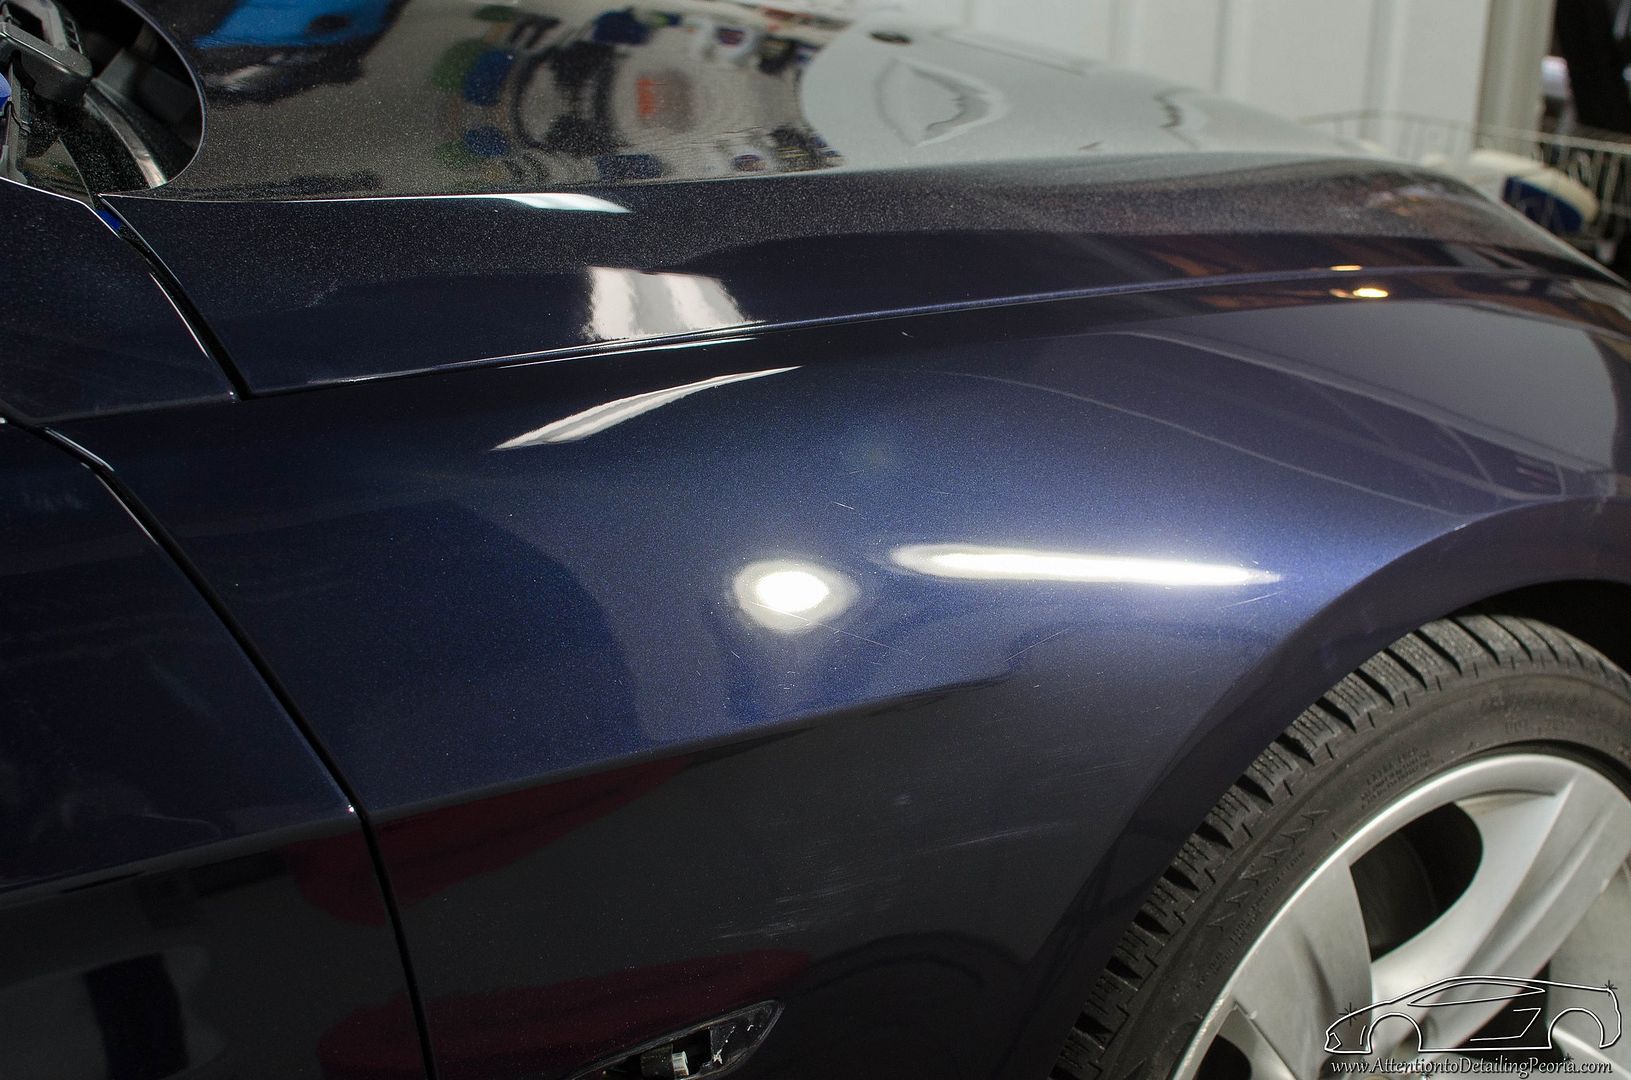 Top of rear quarter panel before correction 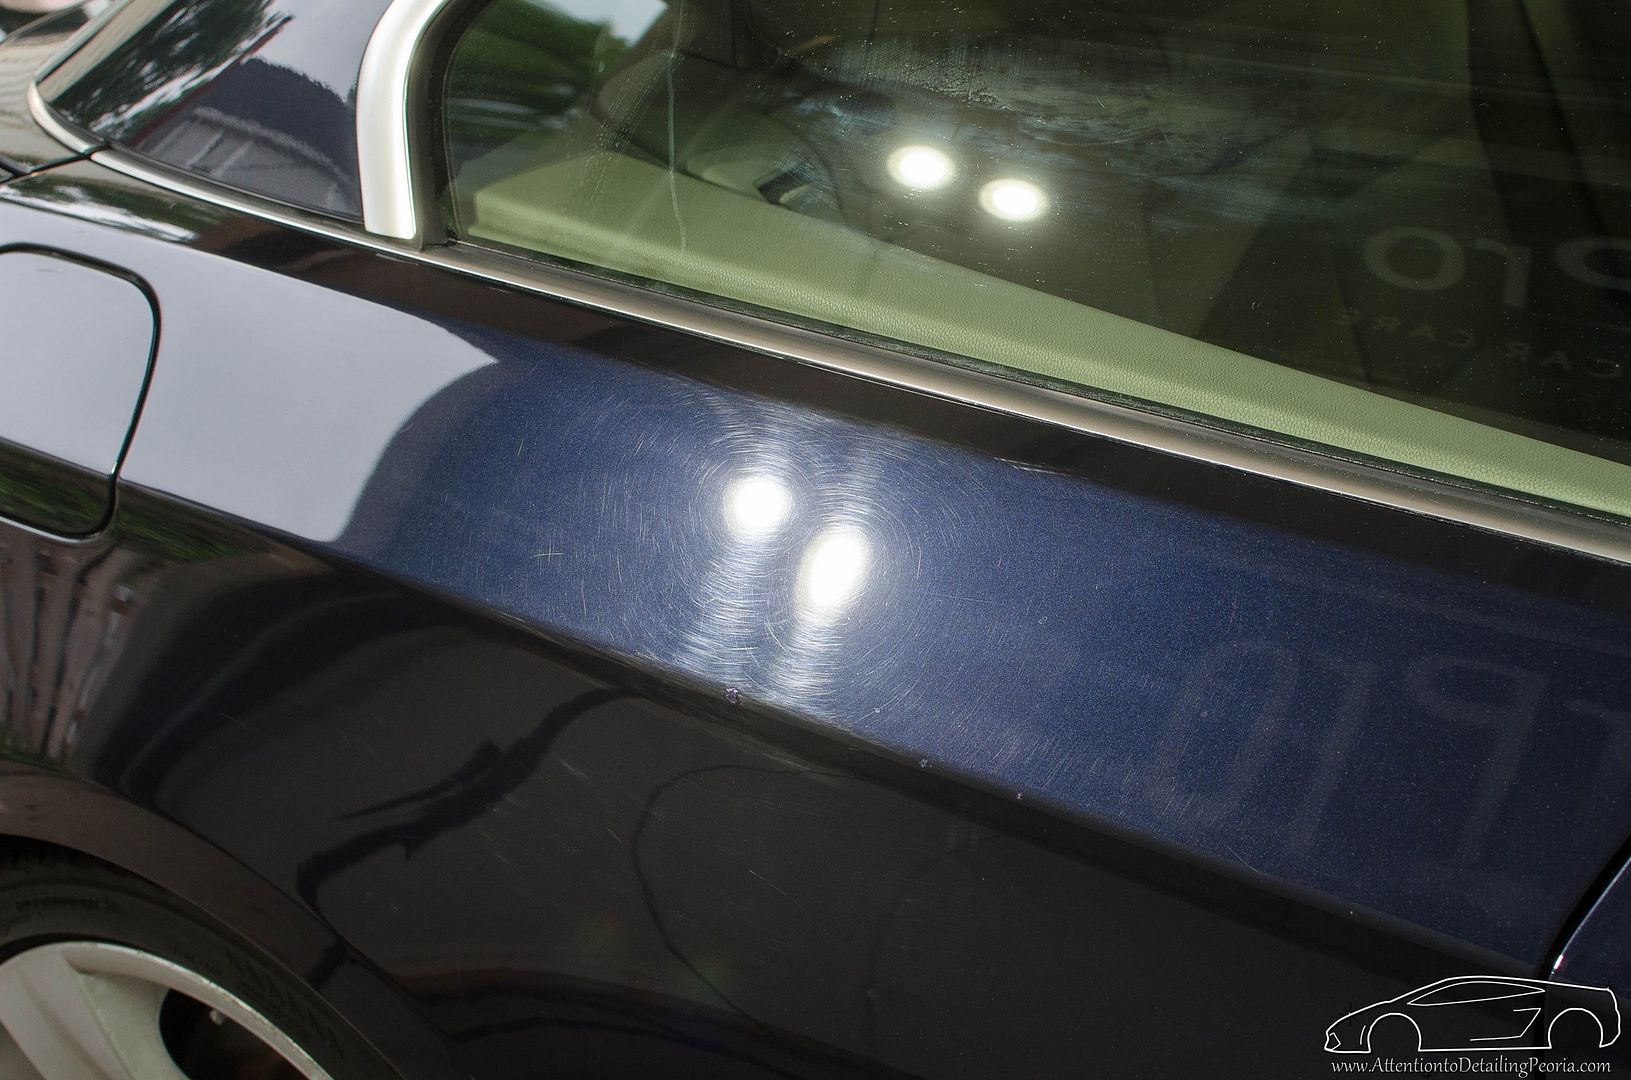 Top of rear quarter panel after compounding 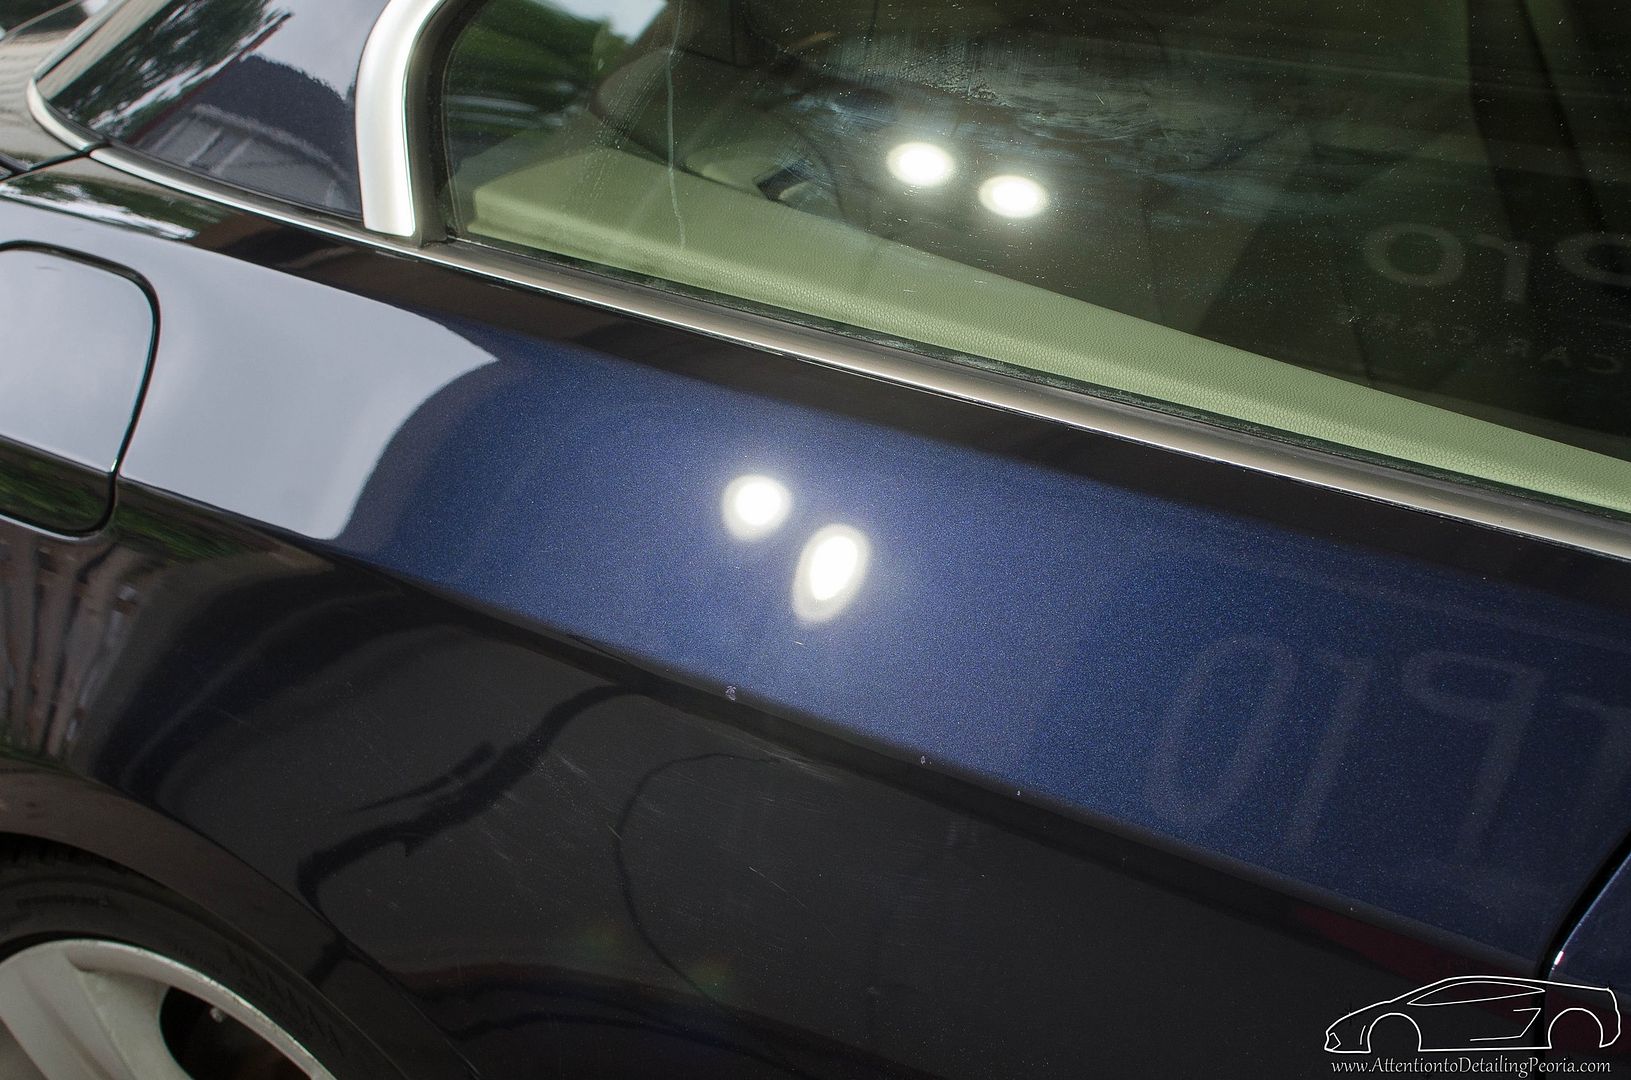 Rear bumper before correction 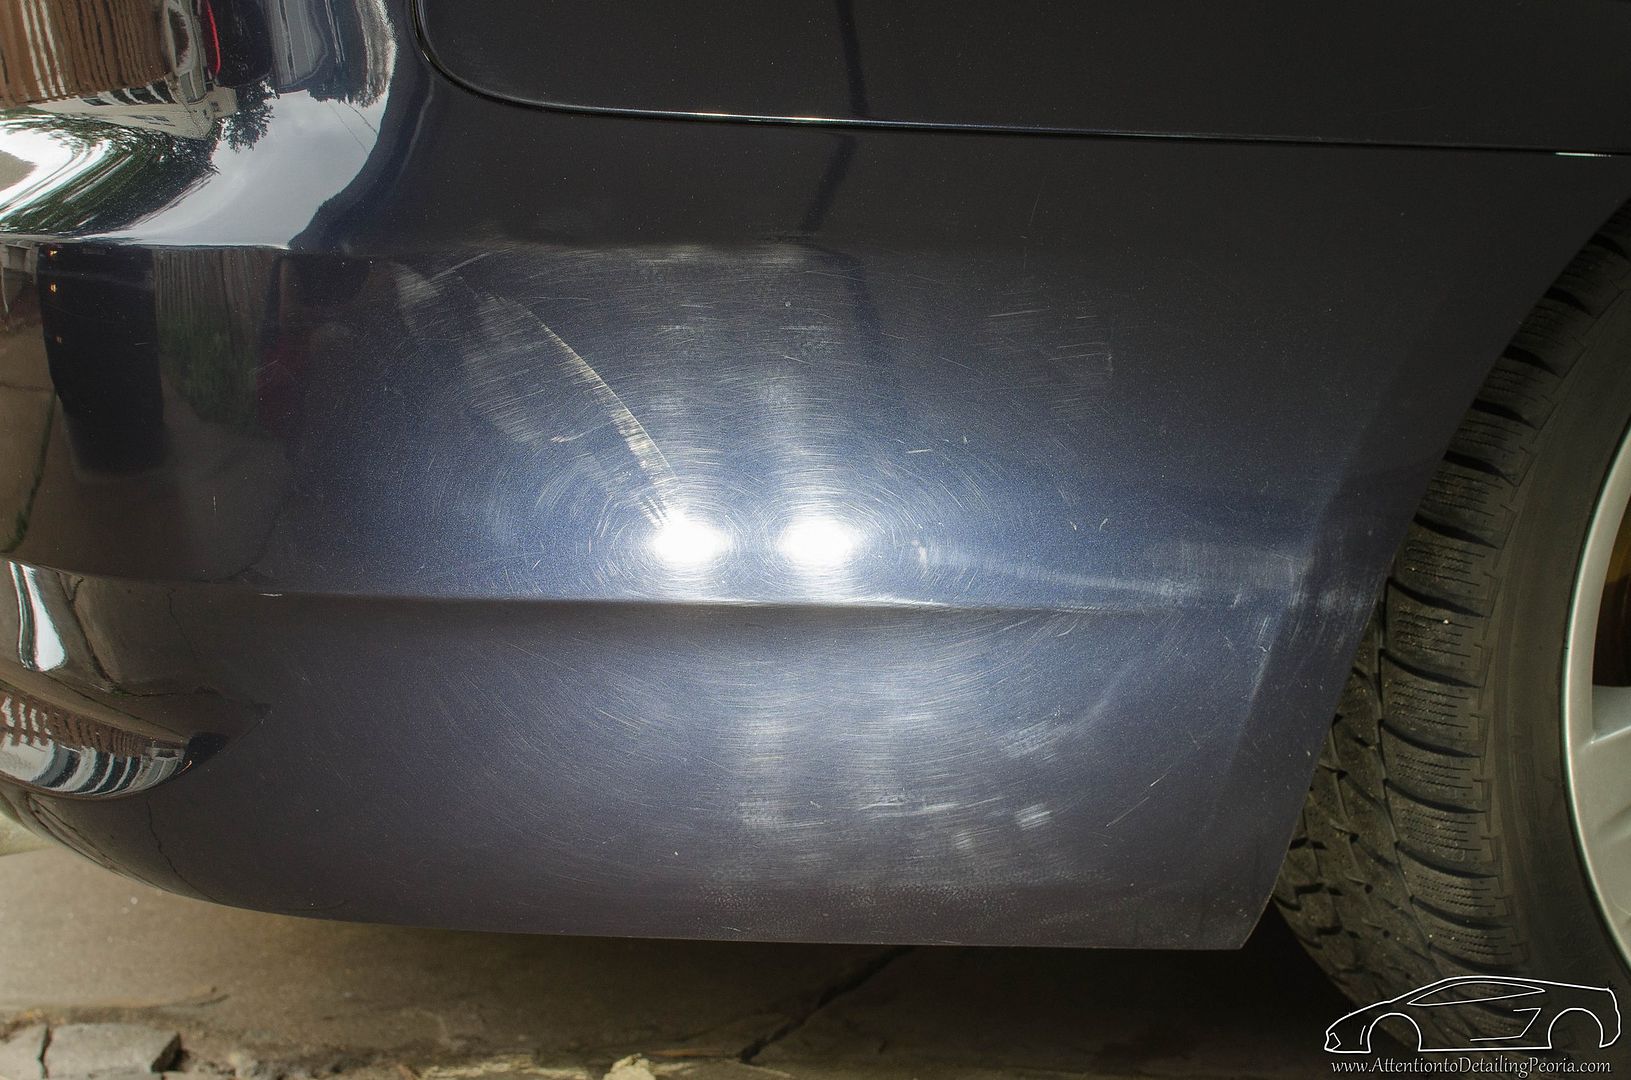 Rear bumper after compounding 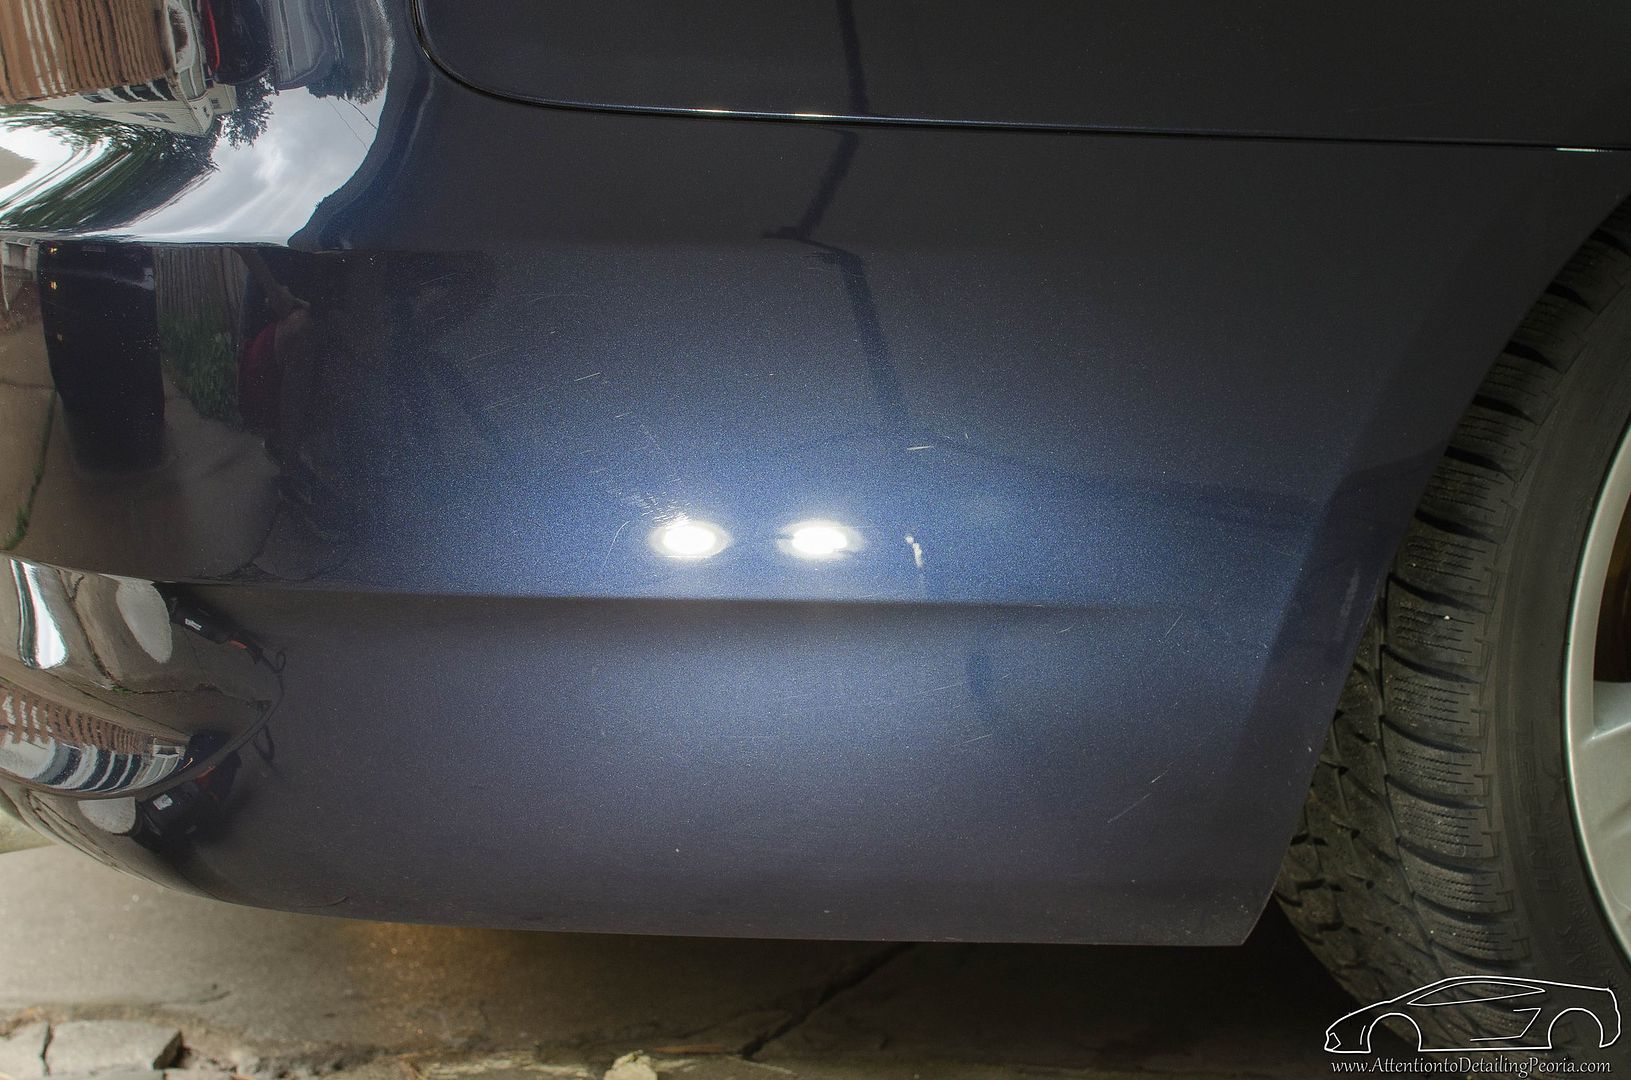 Trunk before correction 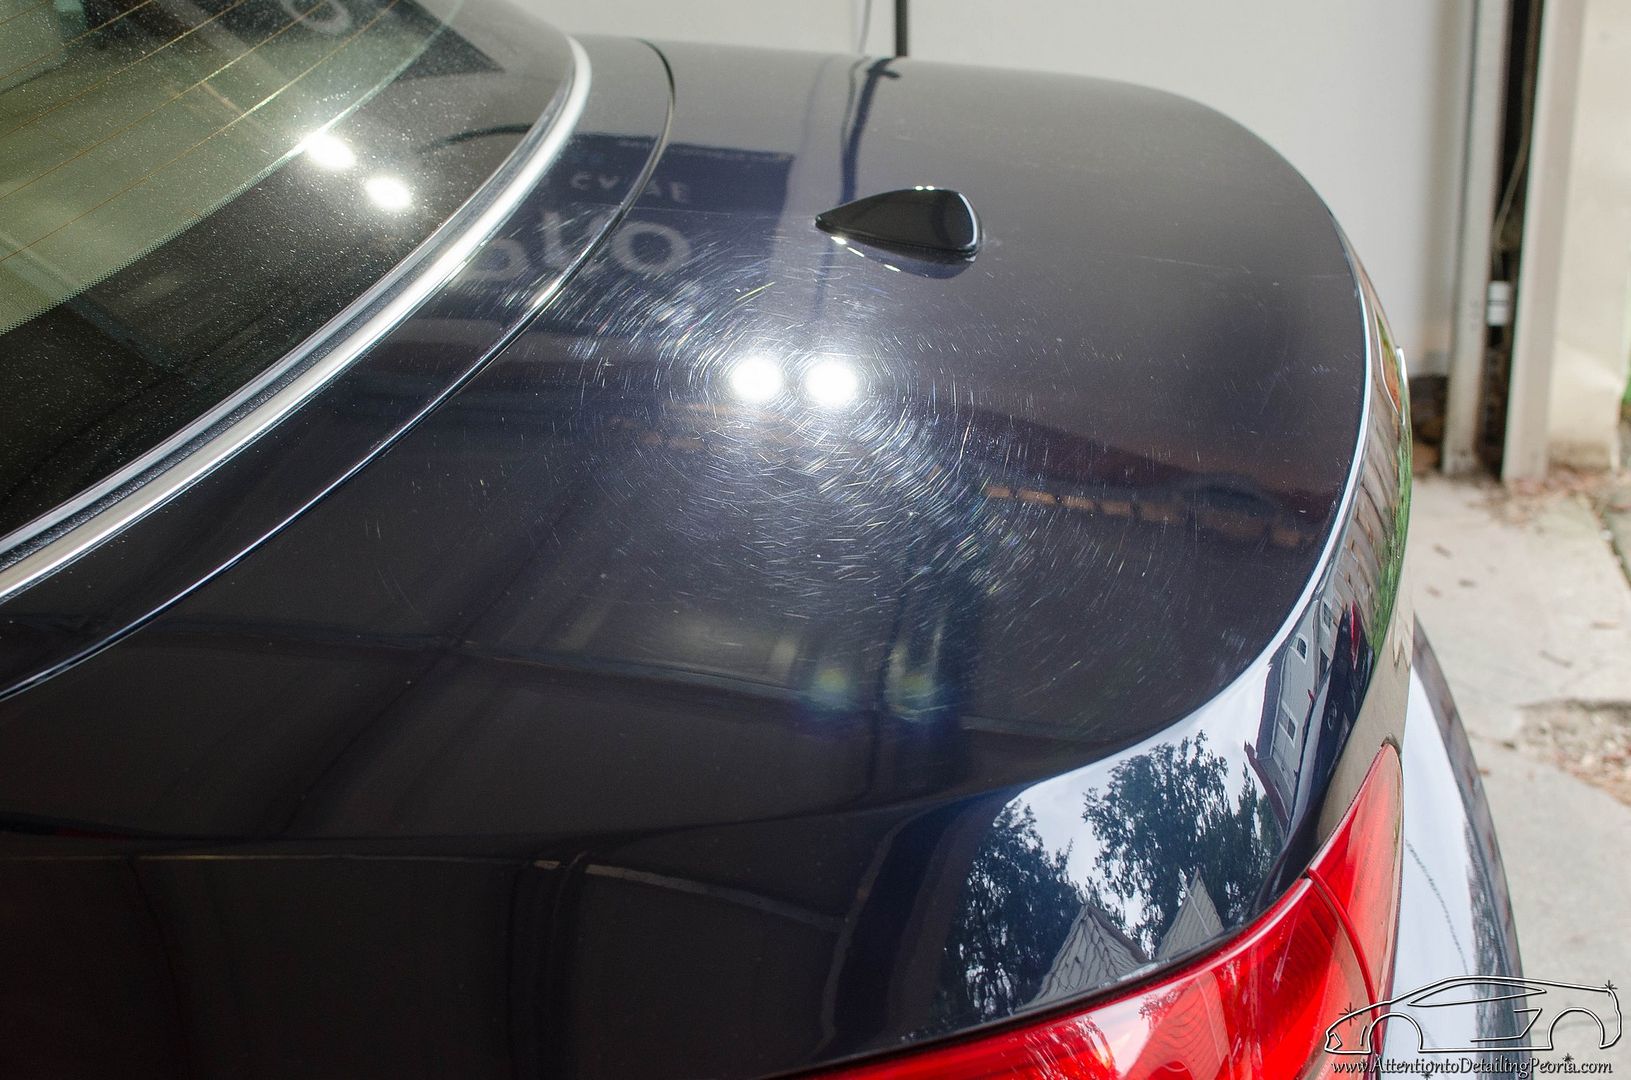 Trunk after 1st compounding pass (notice the remaining defects) 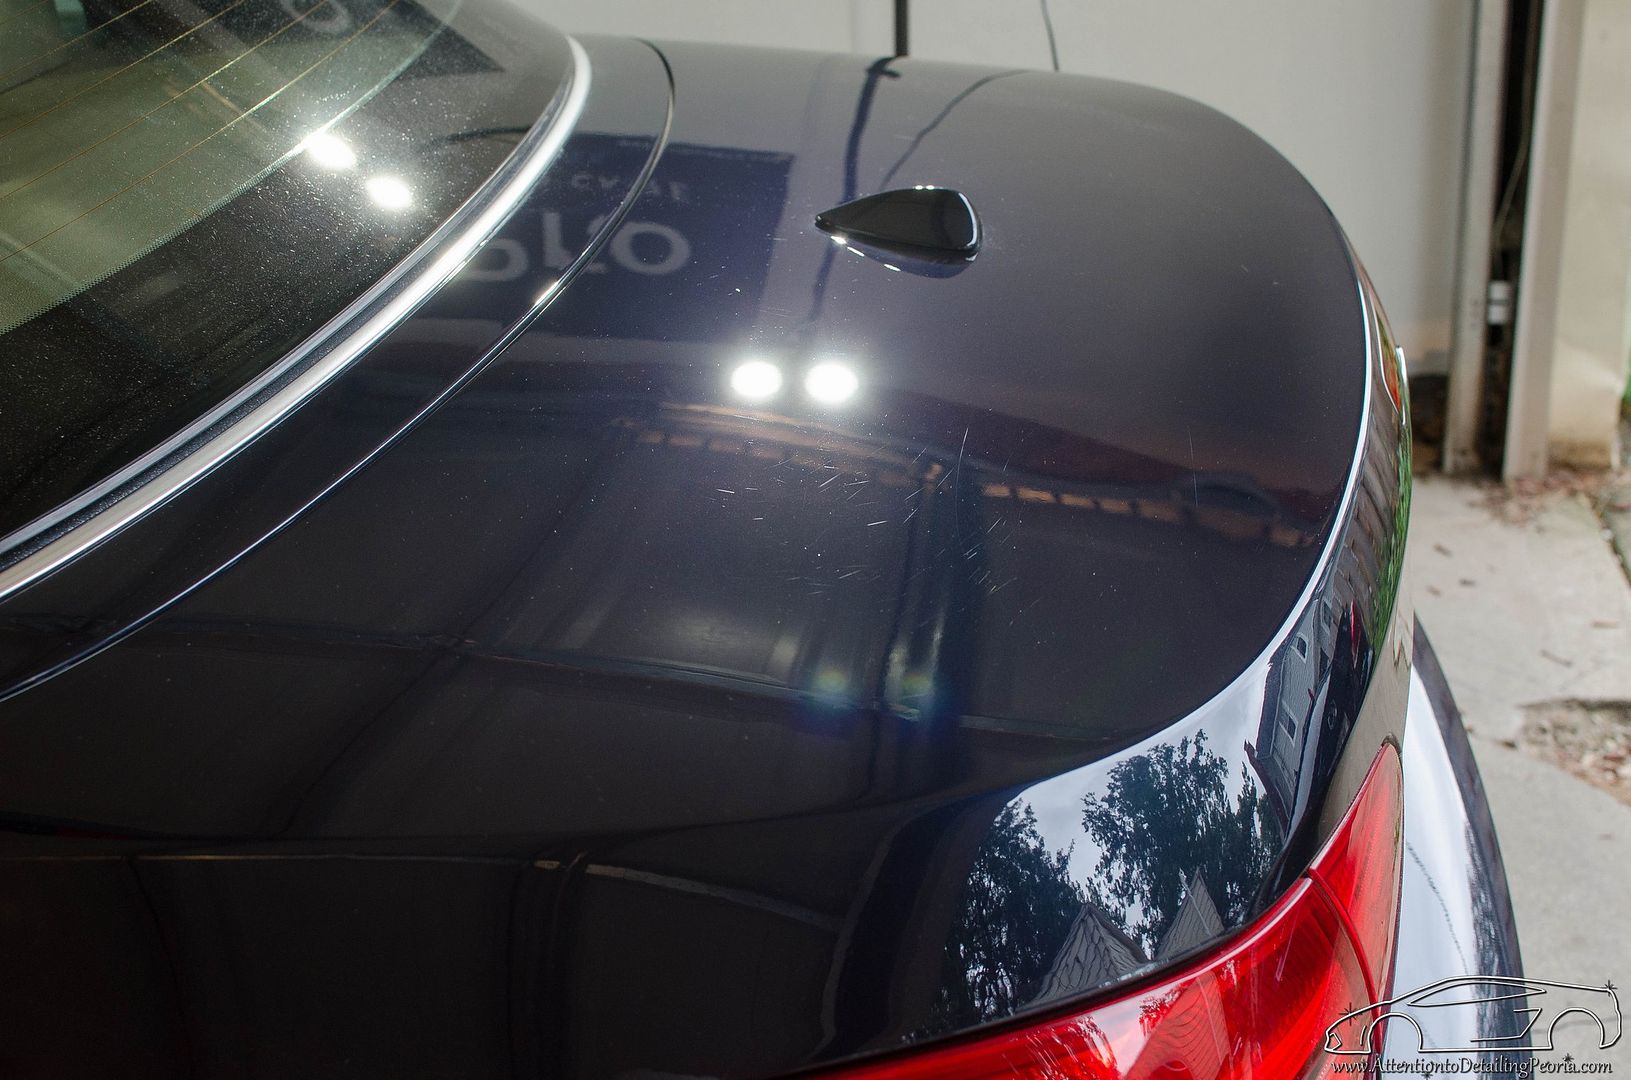 Trunk after 2nd compounding pass. Even better correction. 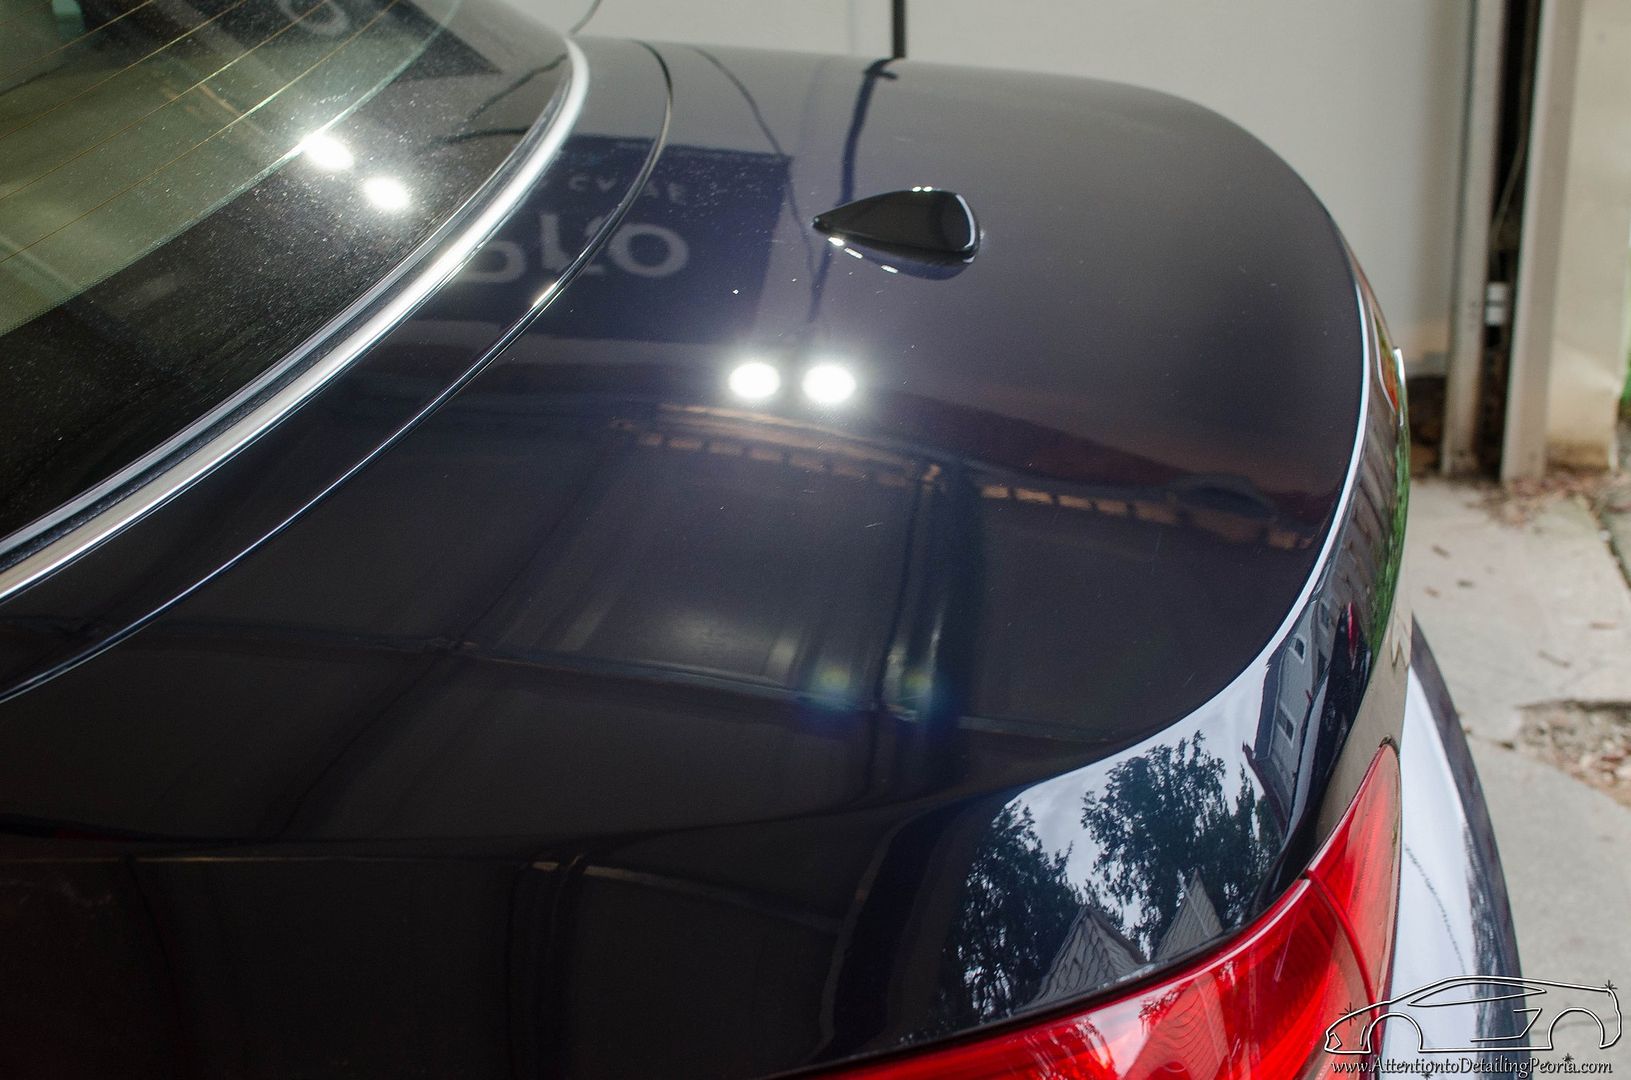 Zach McGovern Detailed Image Ask-A-Pro Blog Author www.AttentiontoDetailingPeoria.com |
| 06-15-2015, 01:15 PM | #2 |
|
360
Rep 5,052
Posts |
50/50 on rear quarter with halogens.
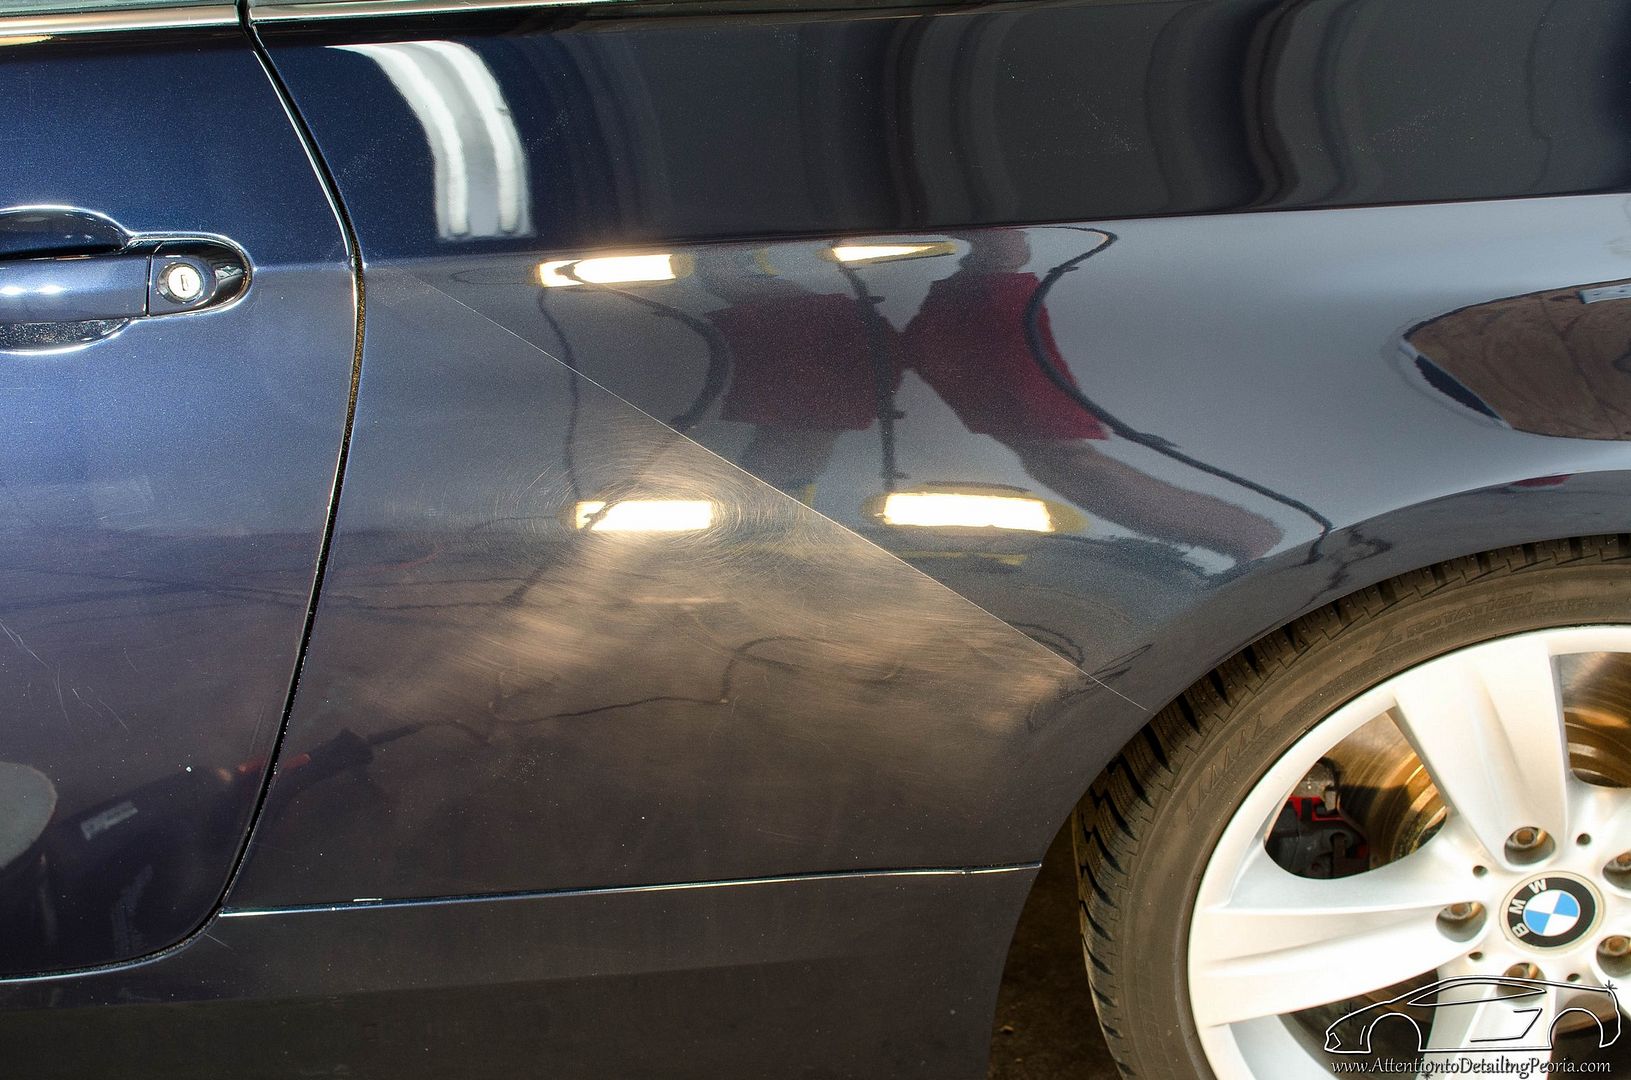 50/50 on rear quarter with LEDs. You can easily see the holograms on this panel with these LED lights. This is damage from a previous detailer who was incapable of using a machine properly (which is obvious by the overall condition of the vehicle 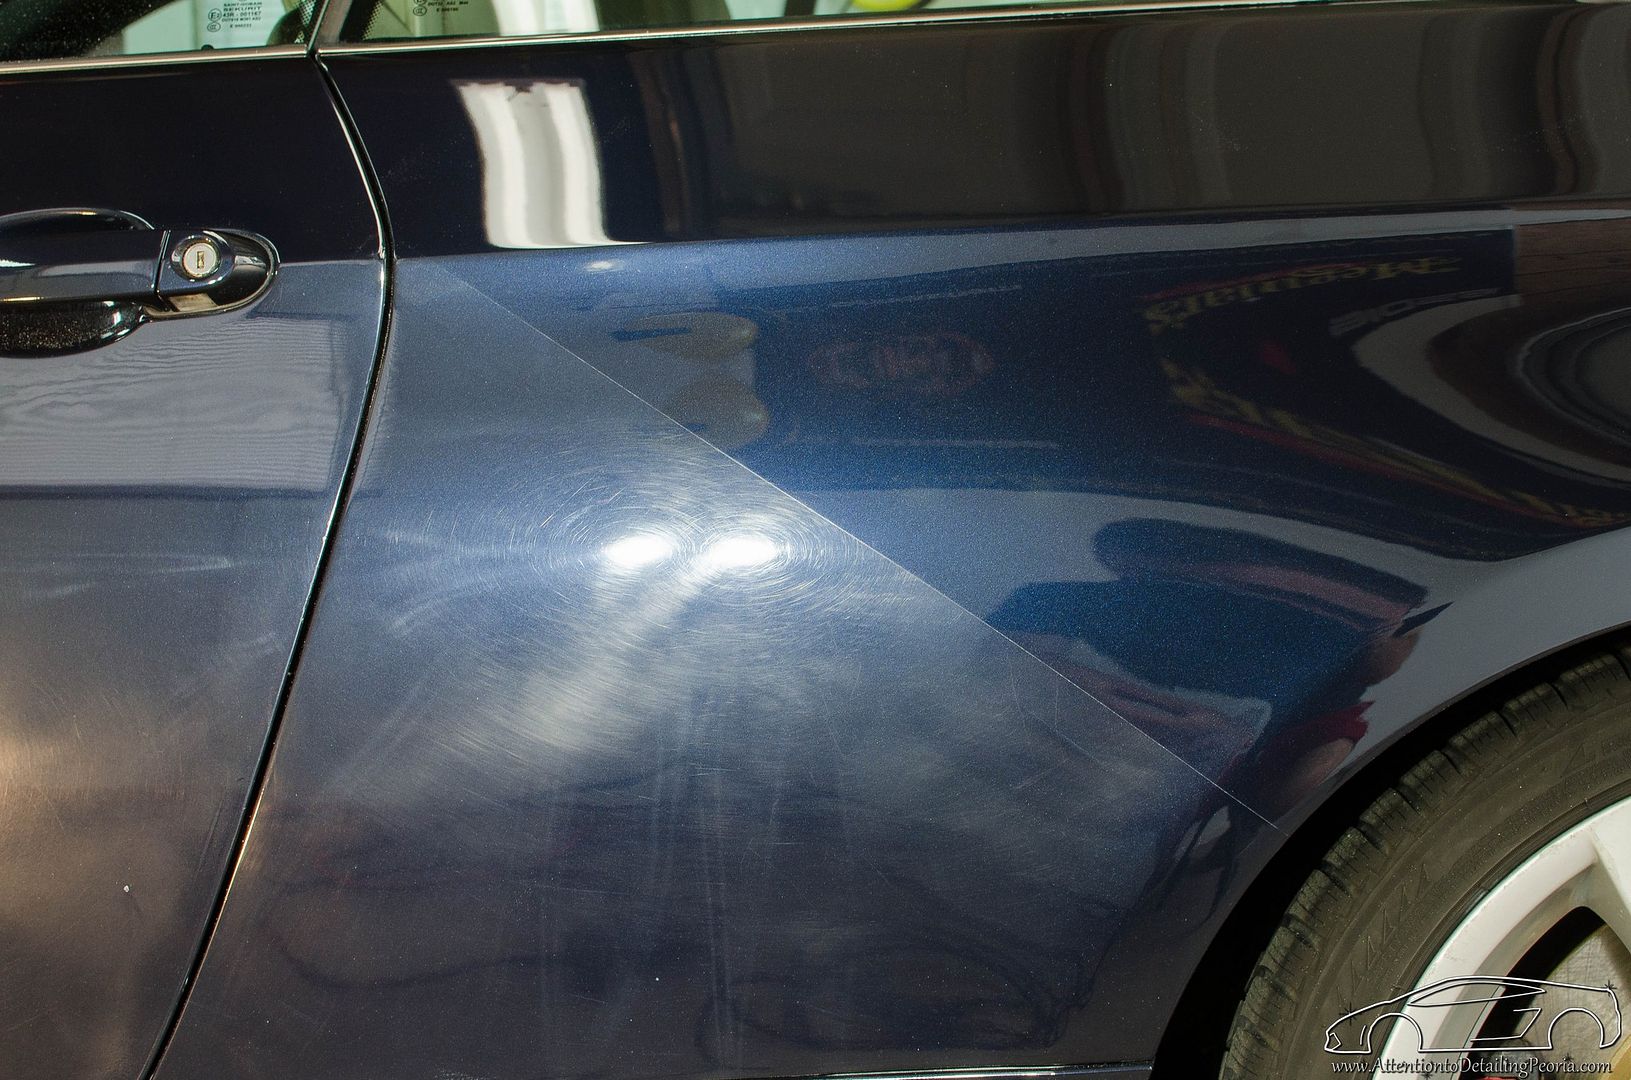 50/50 on driver's door 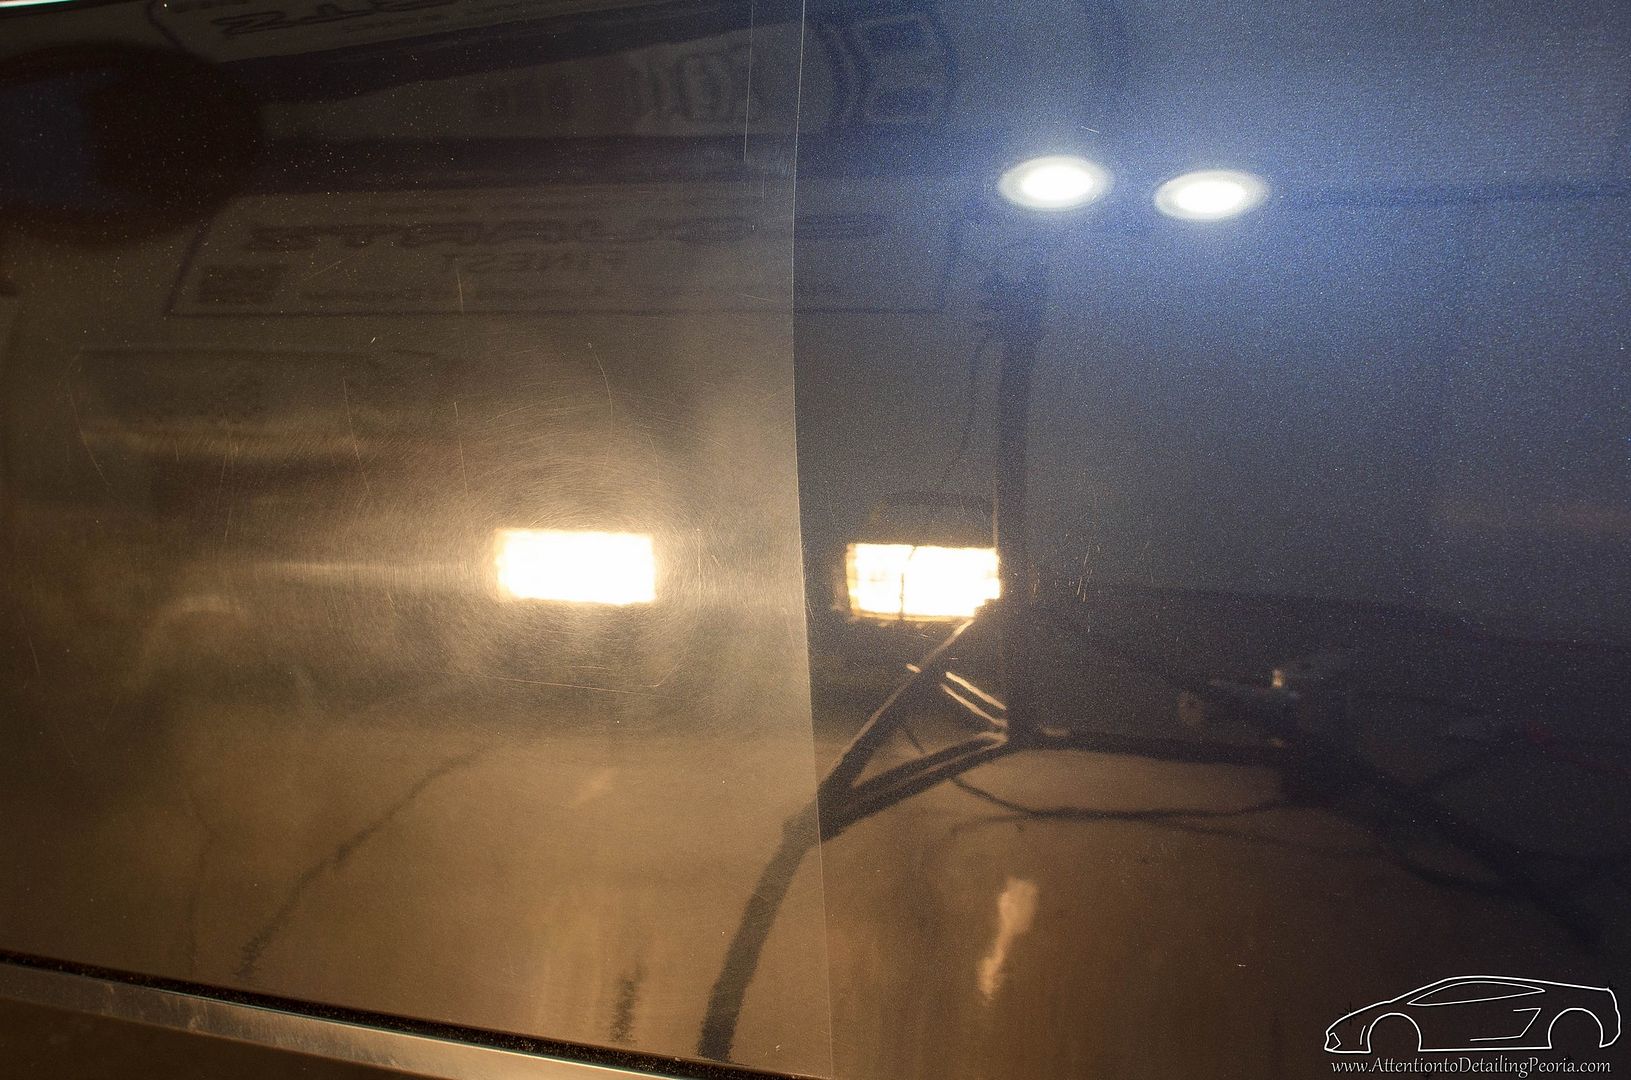 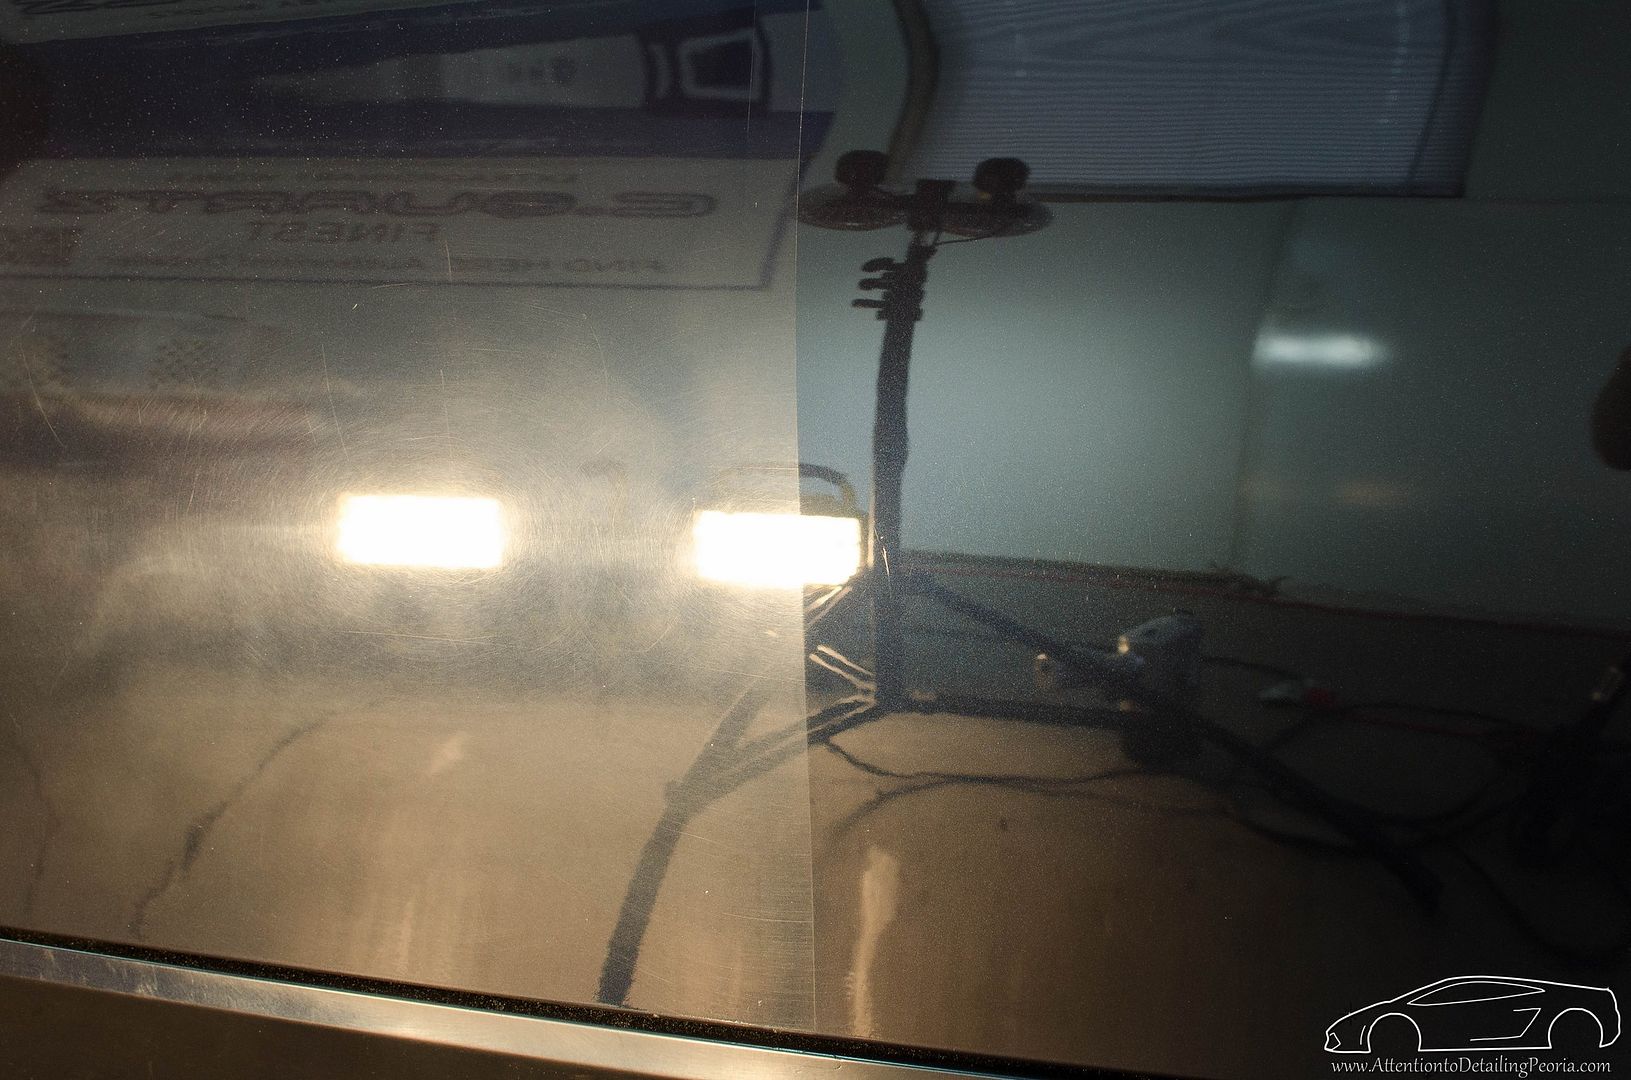 Driver's door before correction. Notice the complete lack of reflection 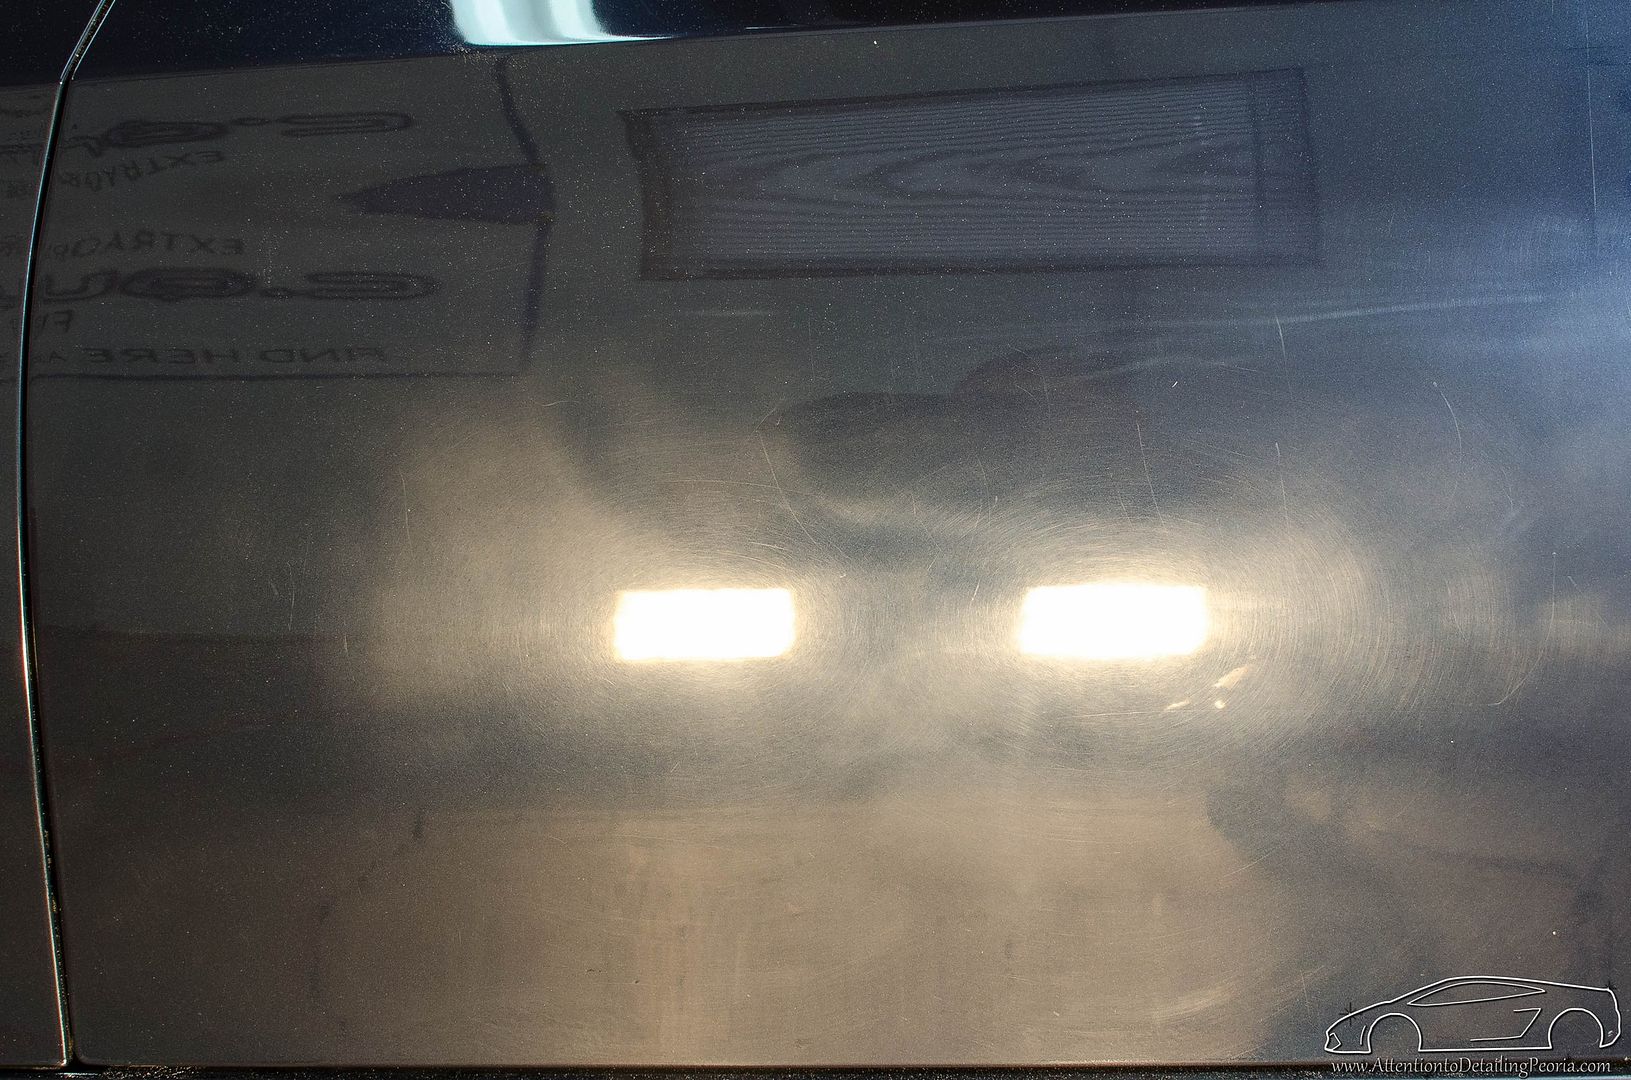 Driver's door after correction. Clarity drastically improved! 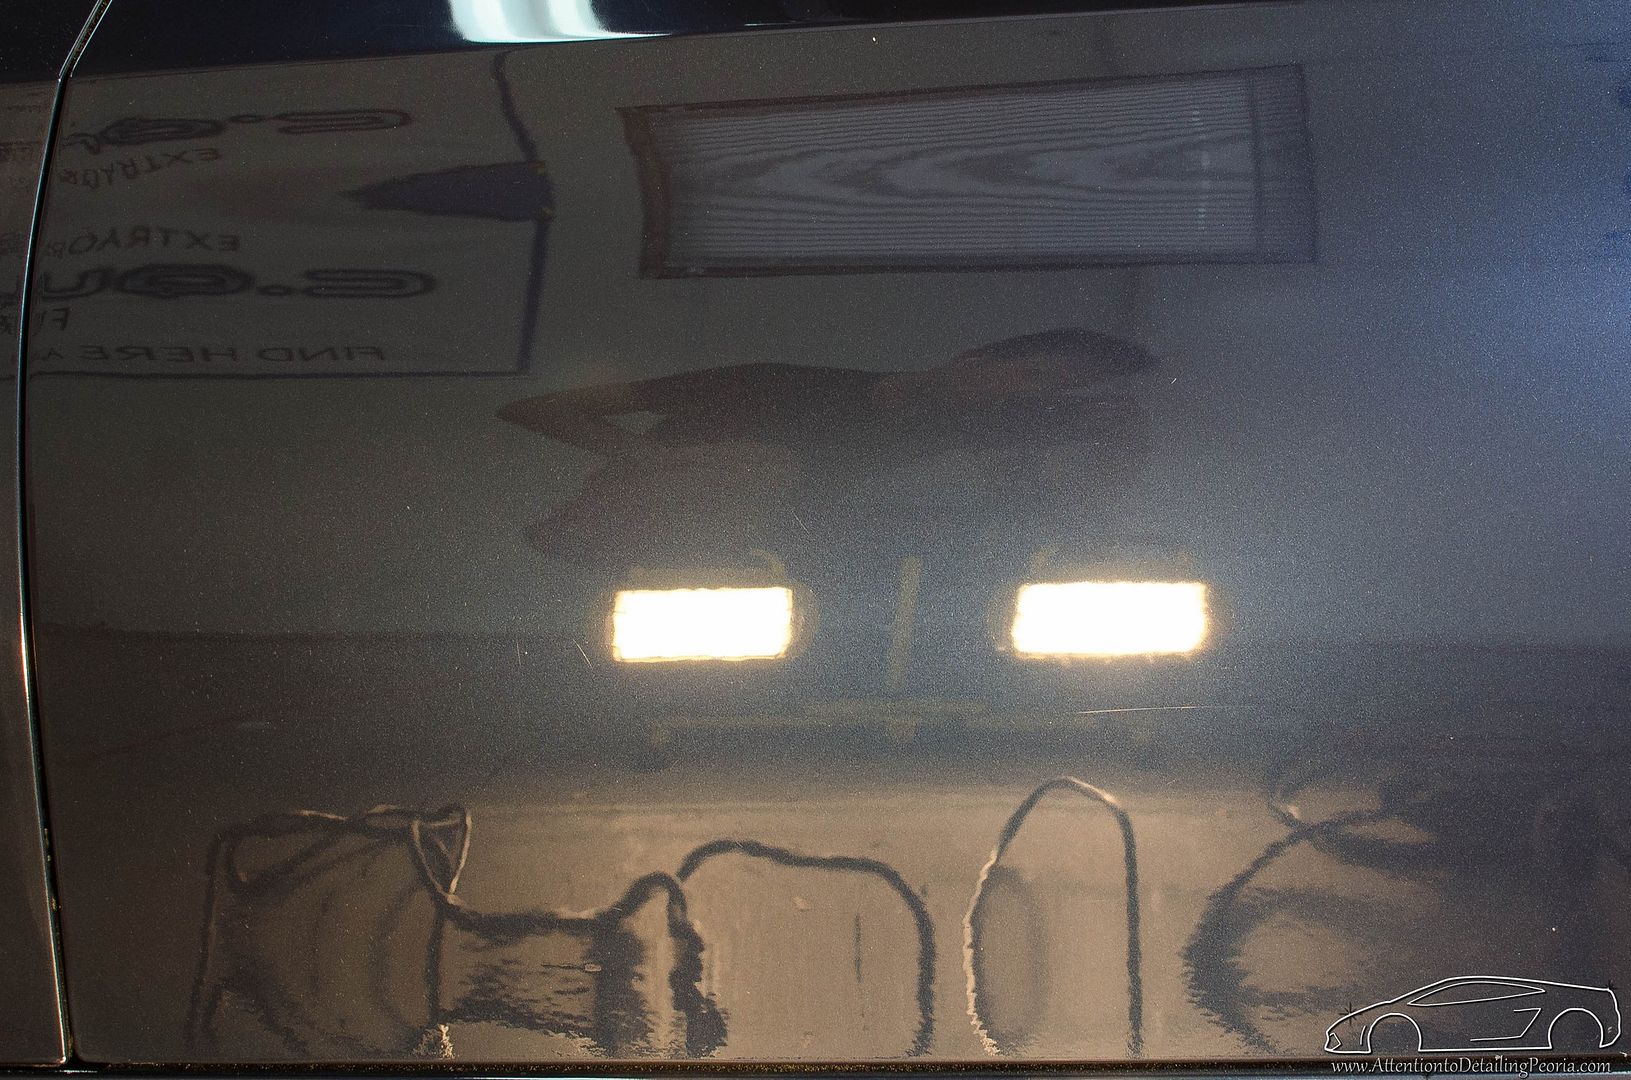 50/50 on driver's door 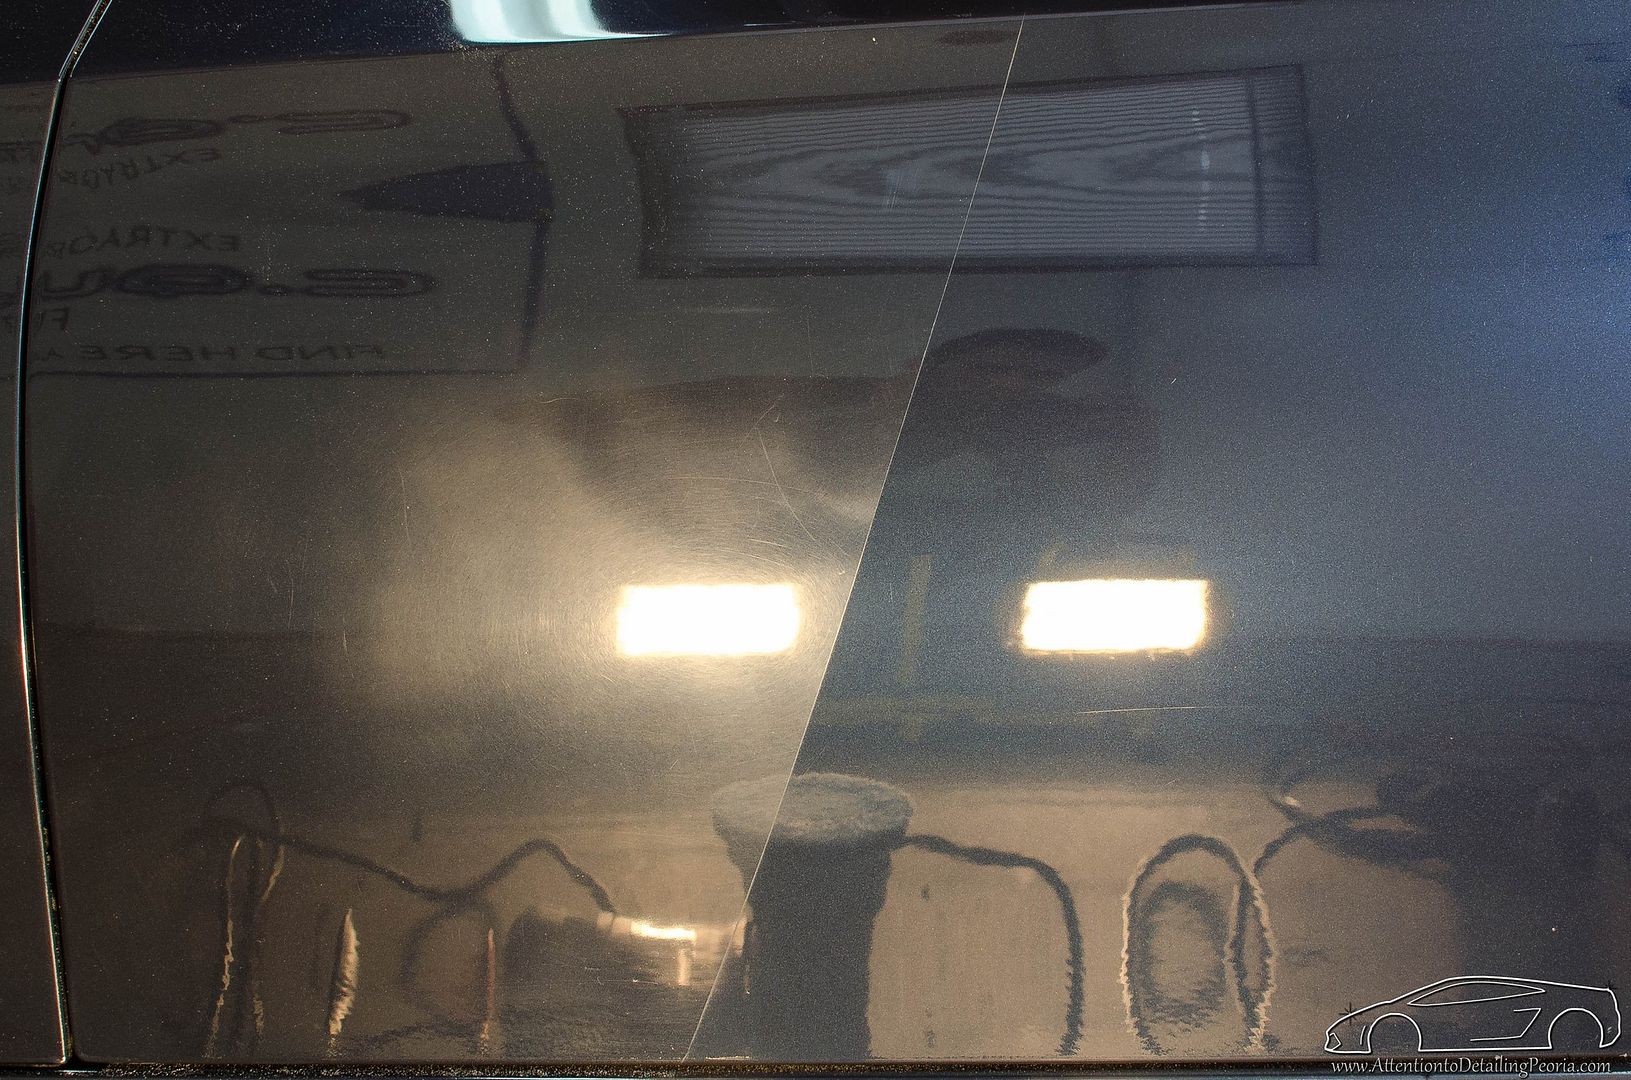 Matt finishing up with the side skirts with the 3" machine. He spent 7-8 hours working hard with the 3" machine on this project... that is A LOT of work! 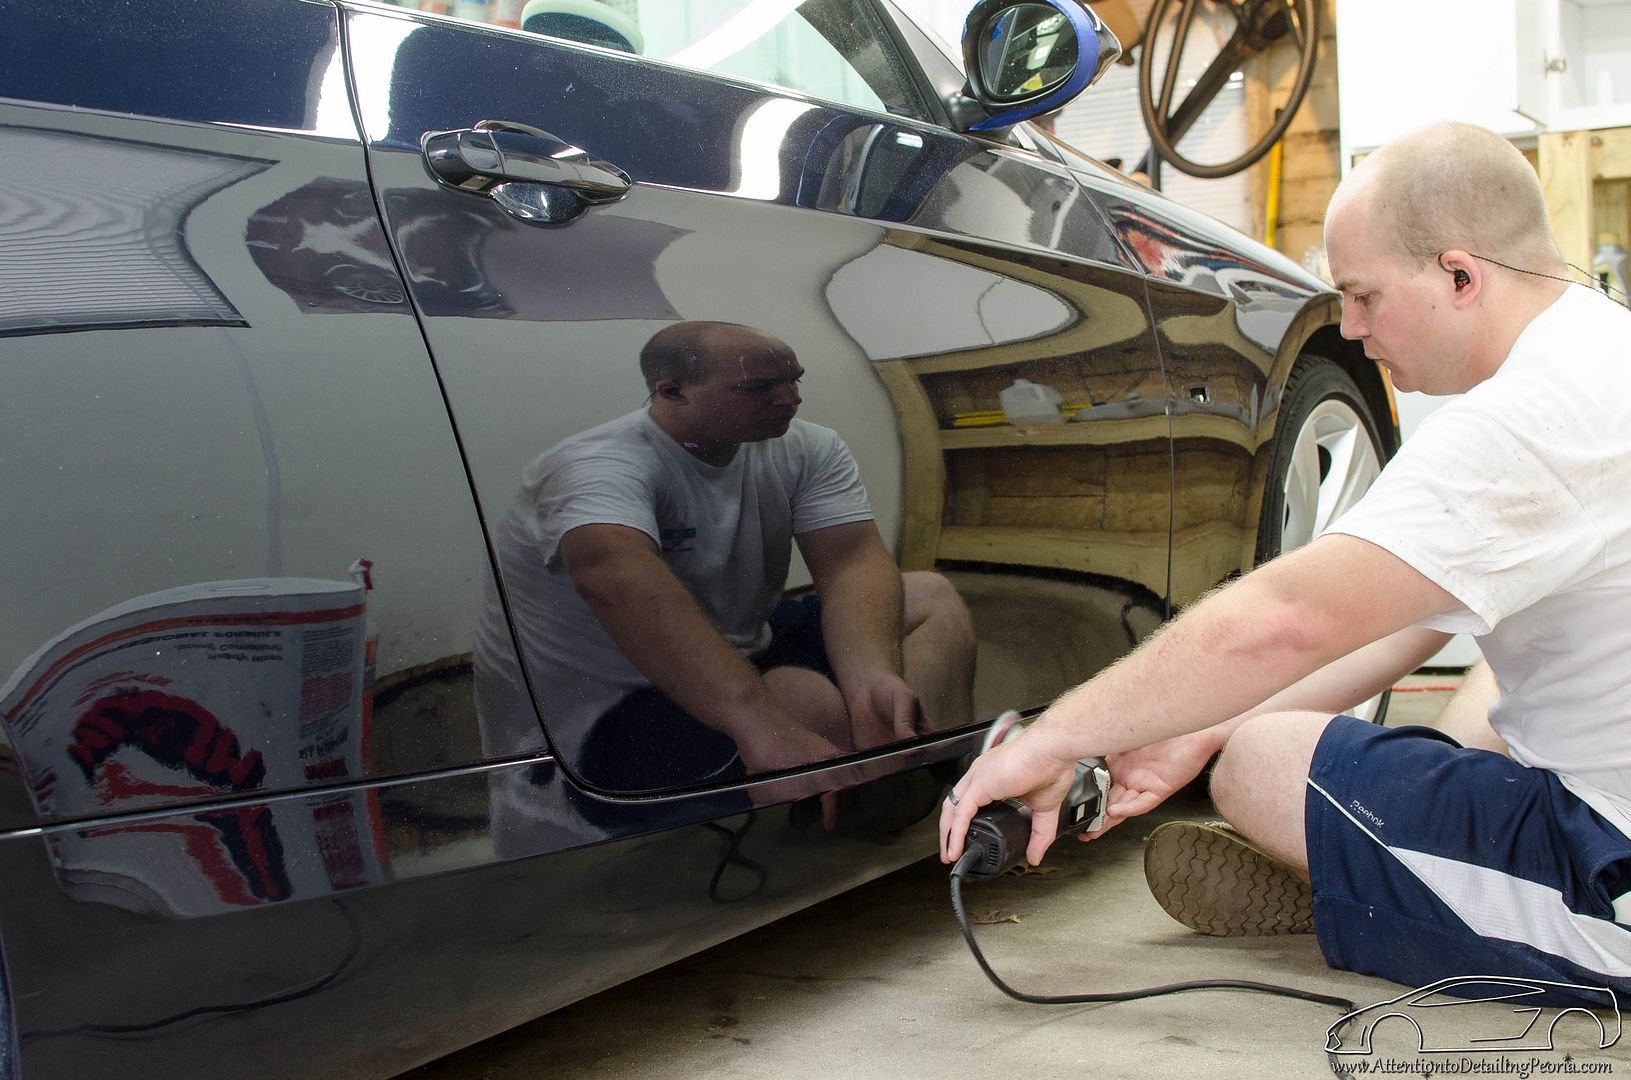 Rear bumper before correction 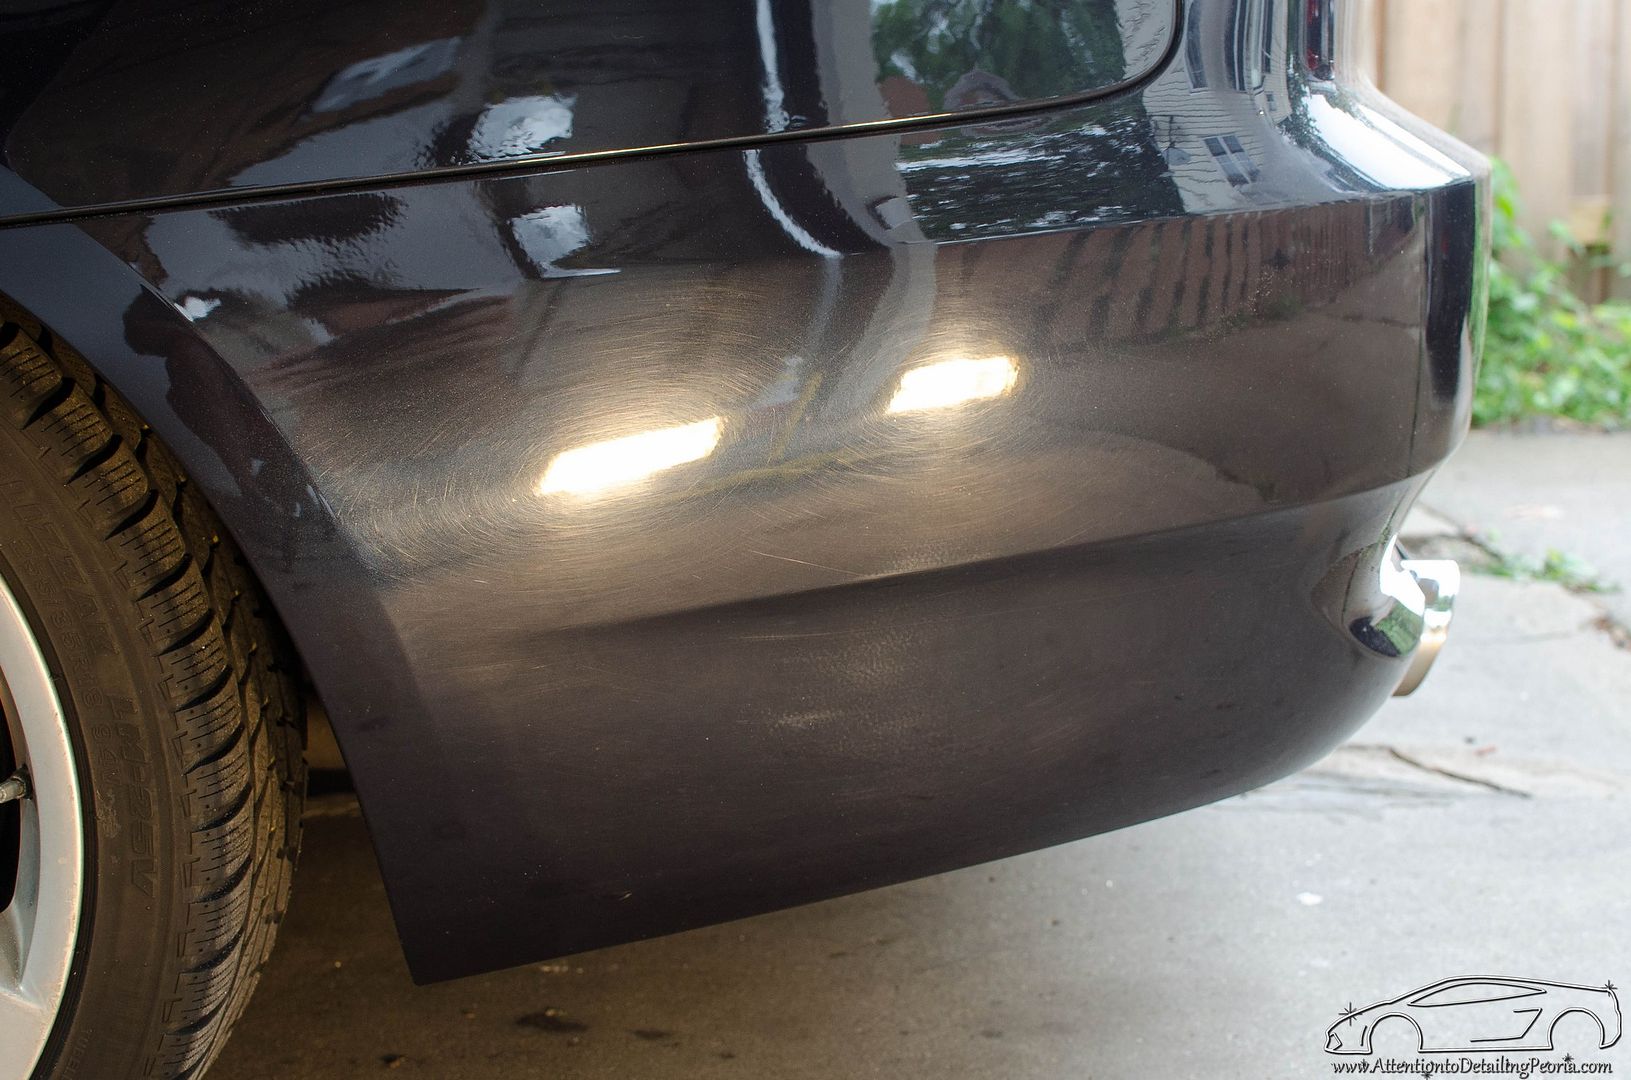 Rear bumper after compounding 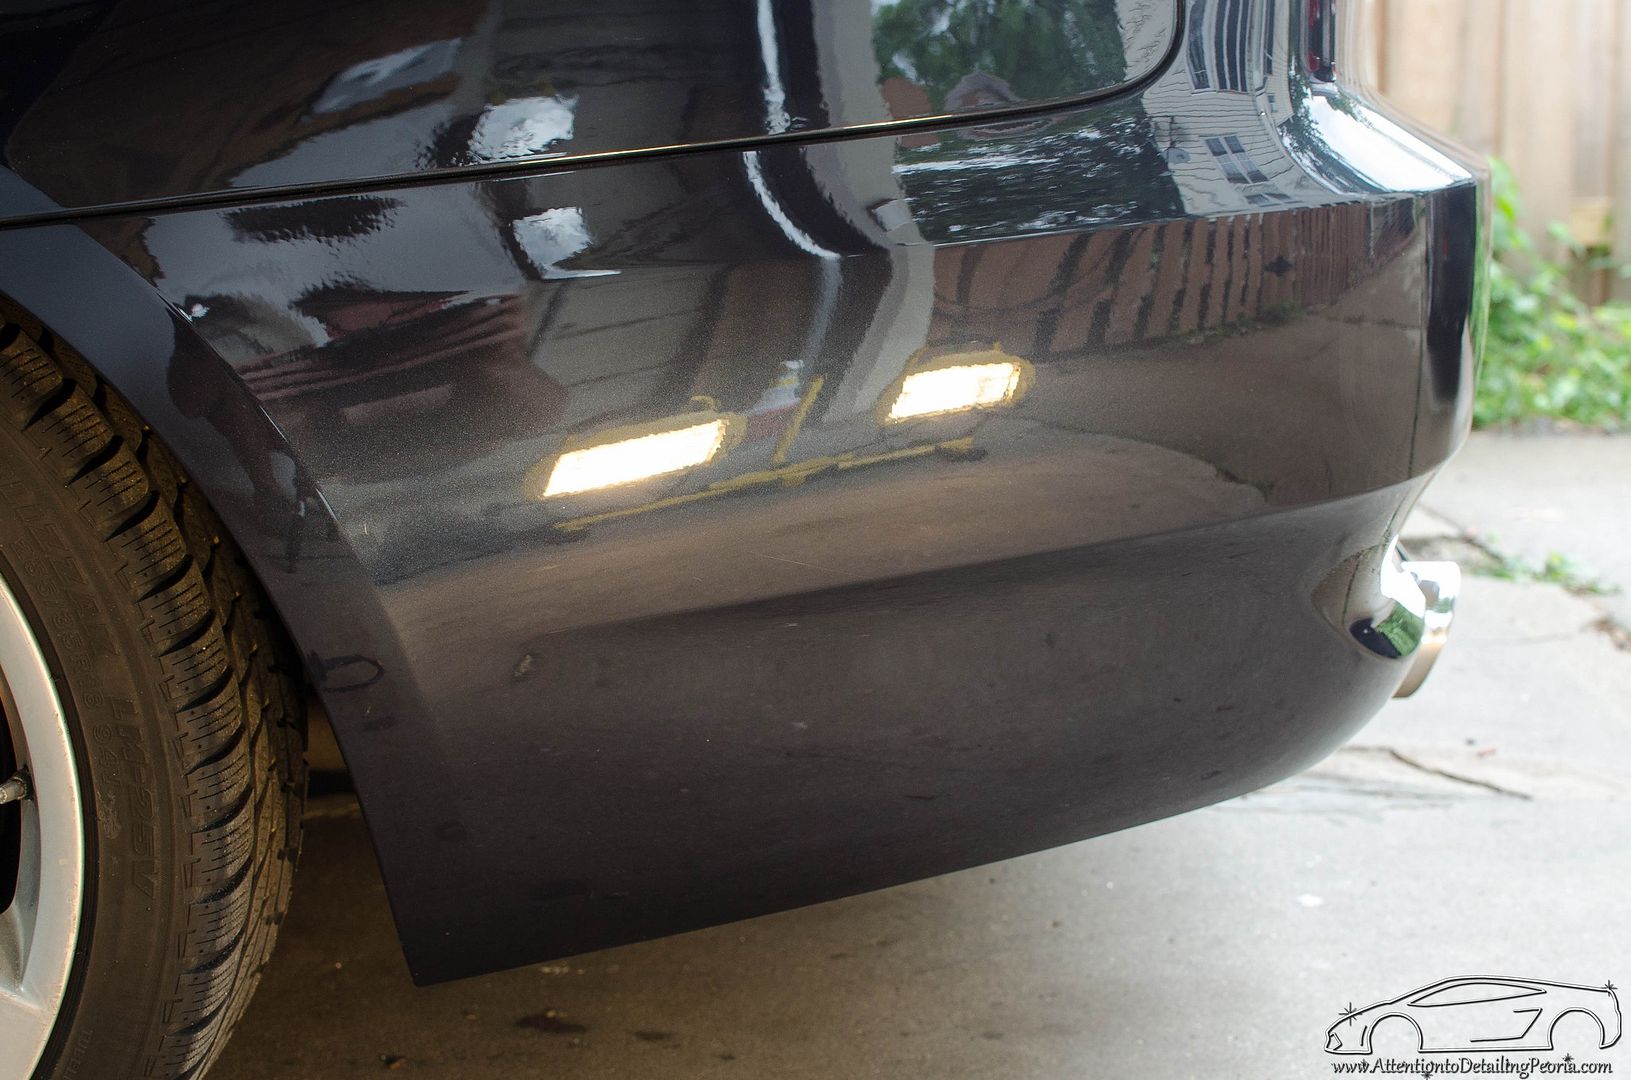 Fender before correction 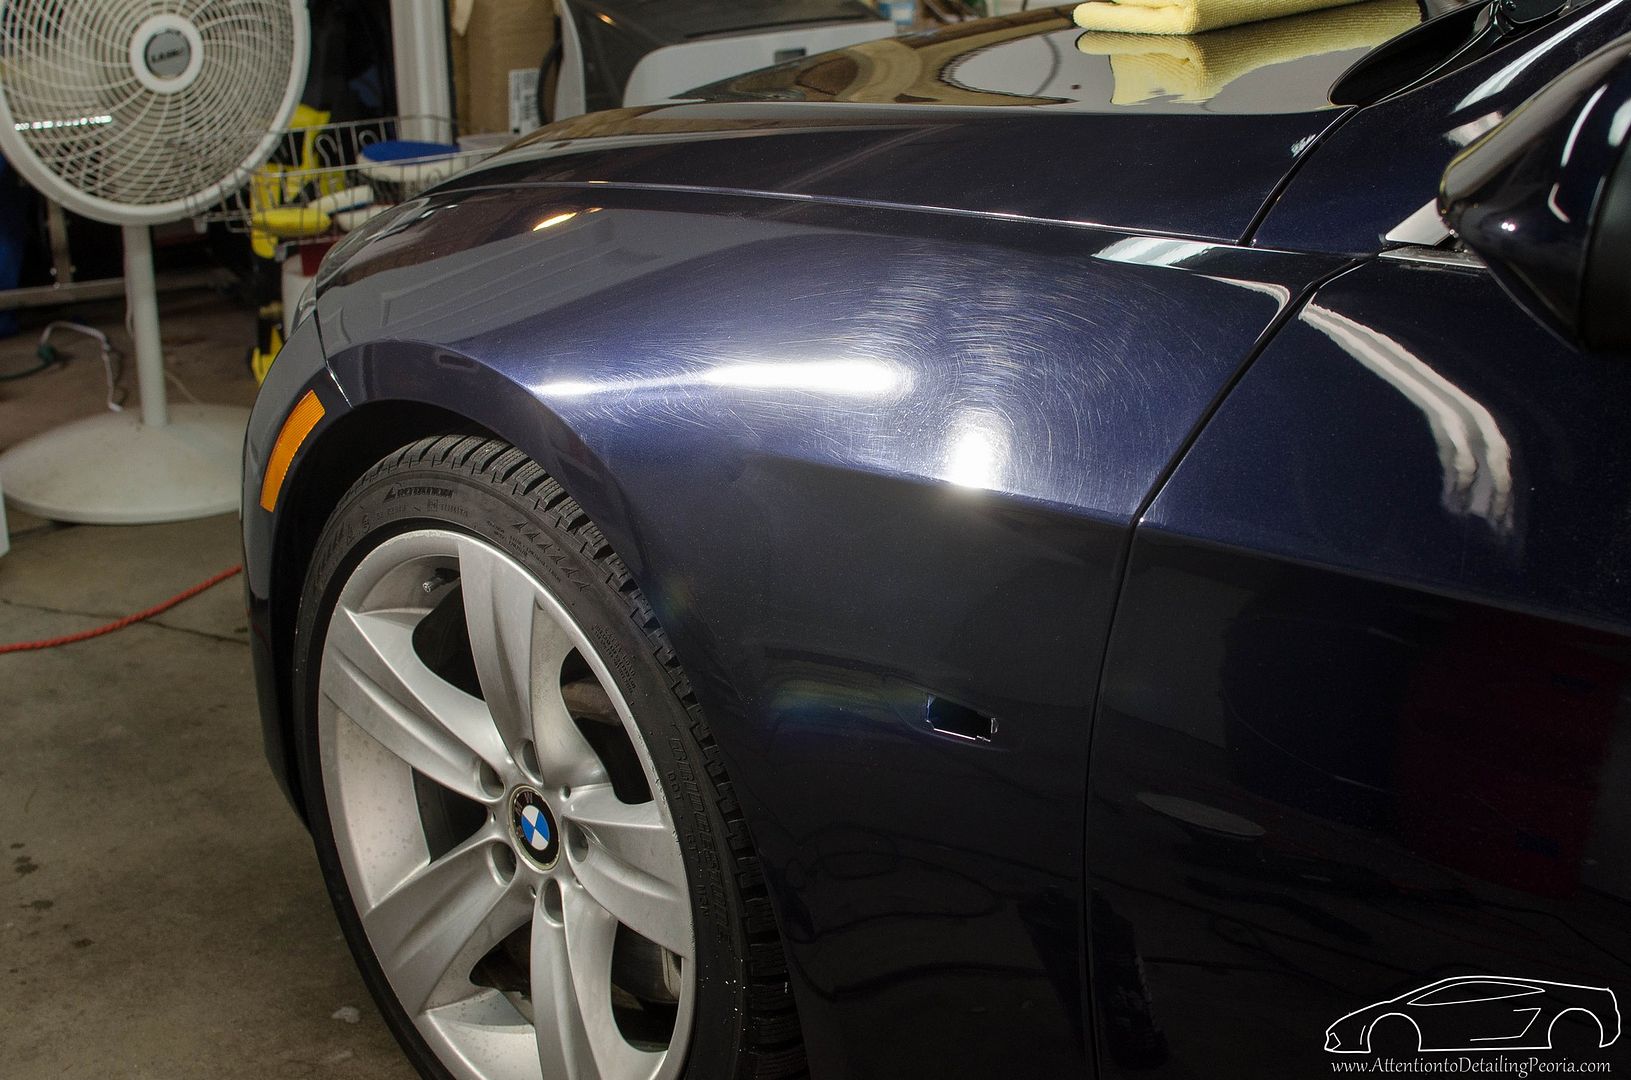 Fender after compounding 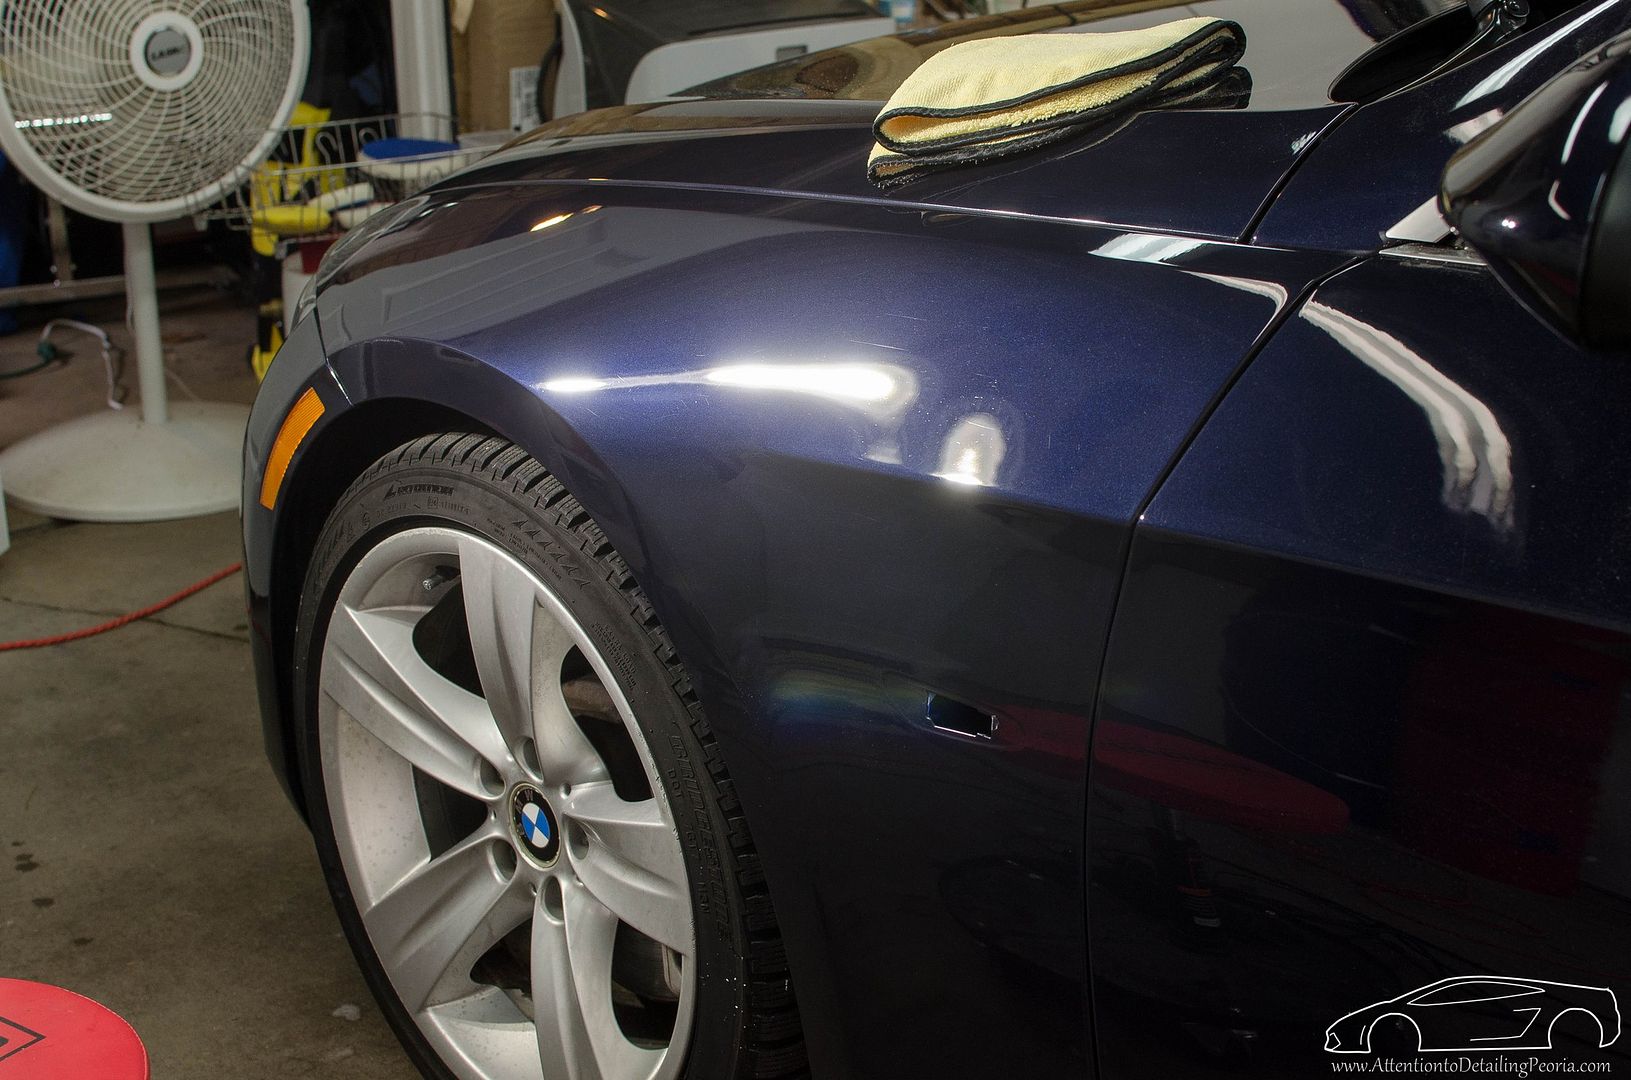 This 50/50 shows the improvement made with our final finishing polish. The left side has been polished and is an incredibly deep blue and the right side shows the haze left from the heavy cutting process. 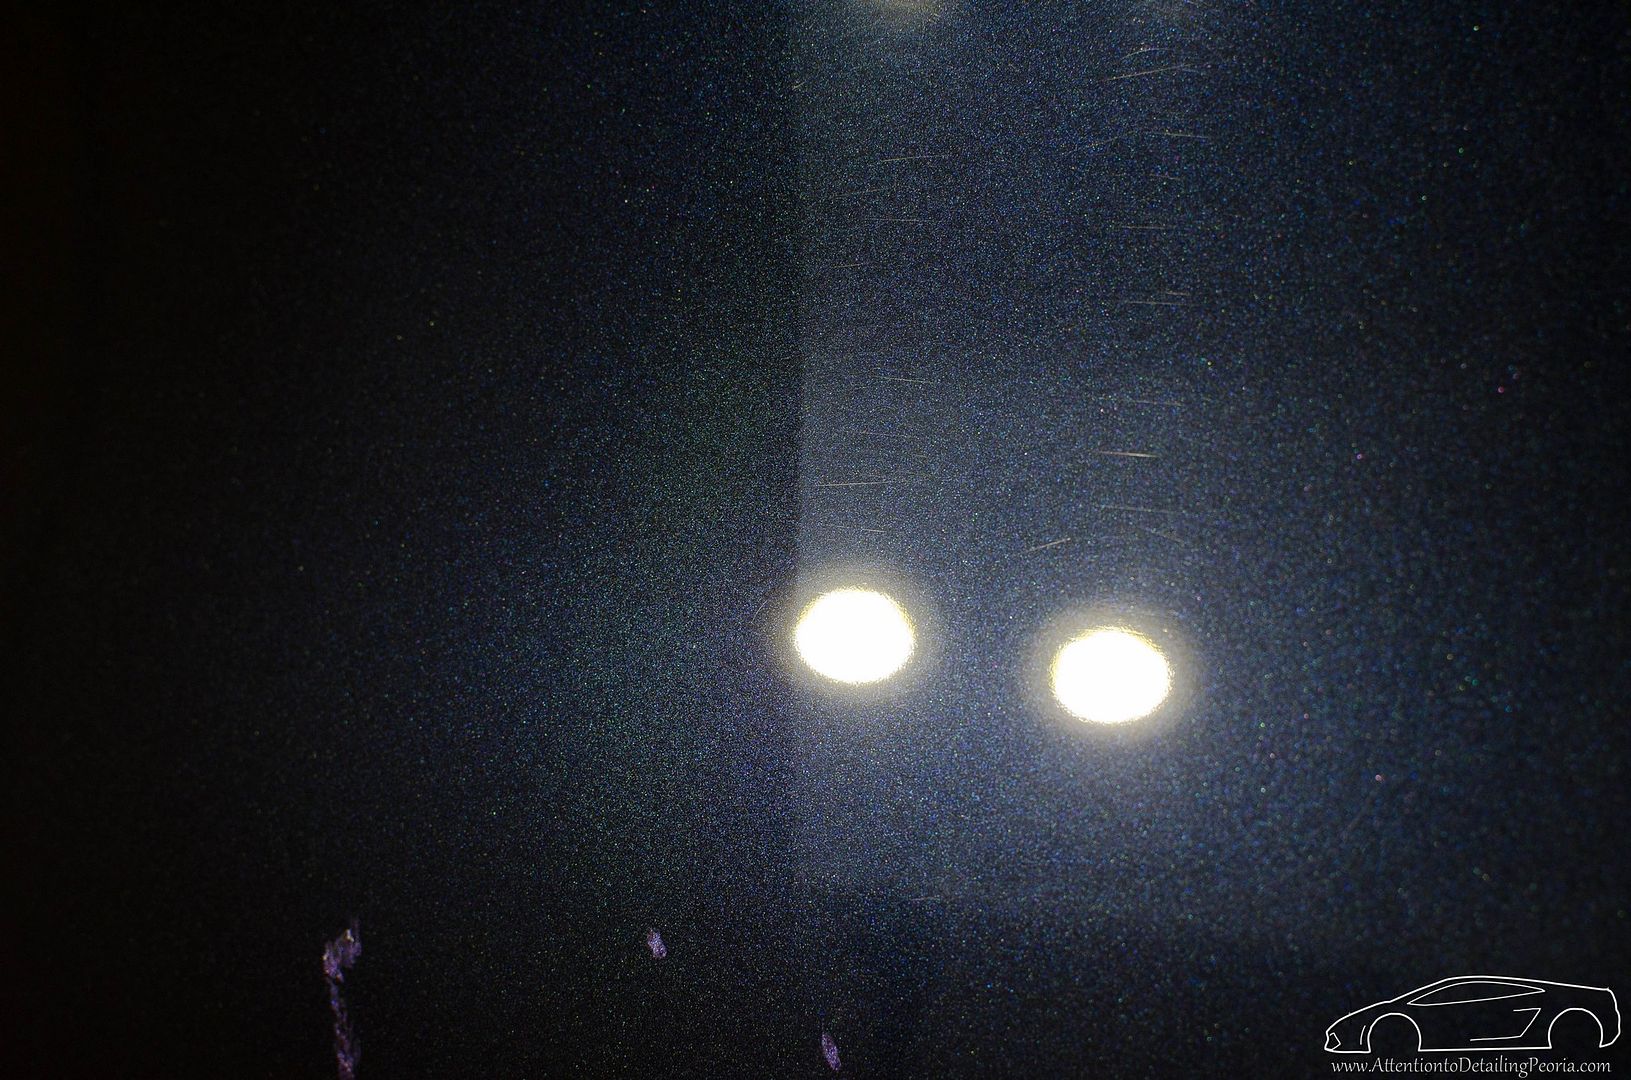 After correction and coating, this paint looked fantastic!   The next day I started with the interior. While the car was only scheduled for the basic interior cleaning, I cleaned up the leather on the driver's seat to show the owner how he can improve his leather on his own if he wishes. 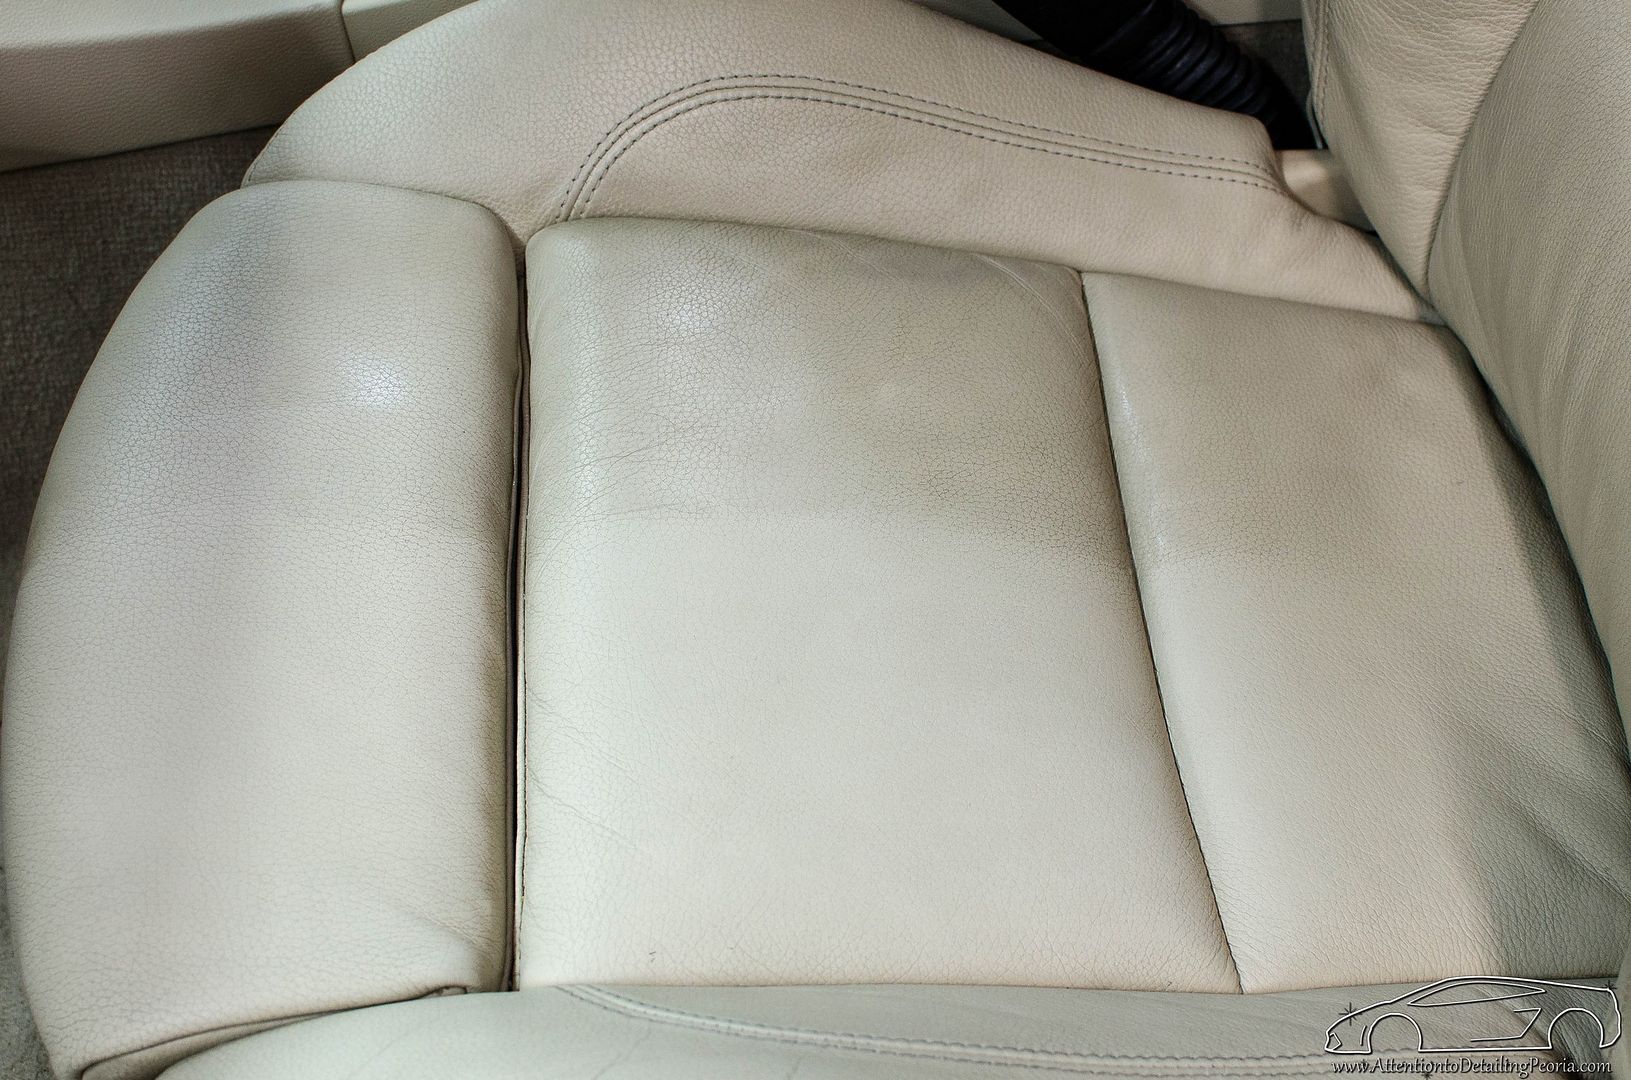 Exhaust tip before polishing. I am confident that these have never been polished due to the incredibly thick buildup on the inside of the tip. 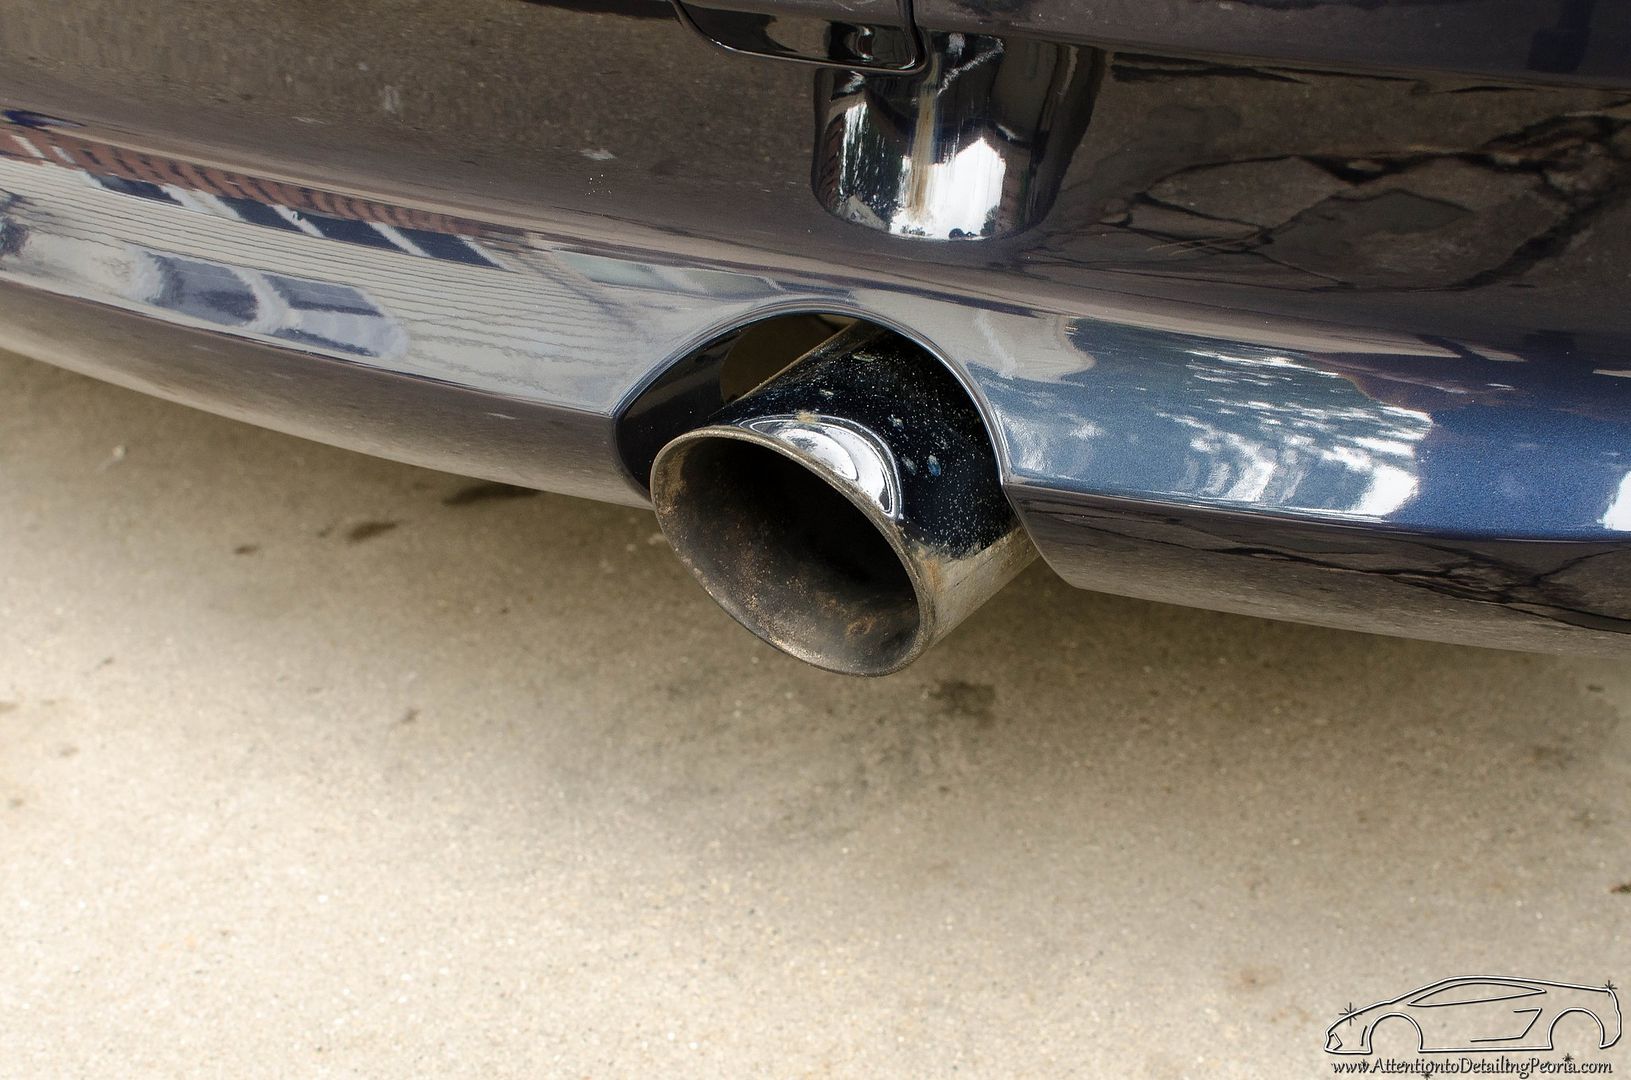 Exhaust tips all cleaned up 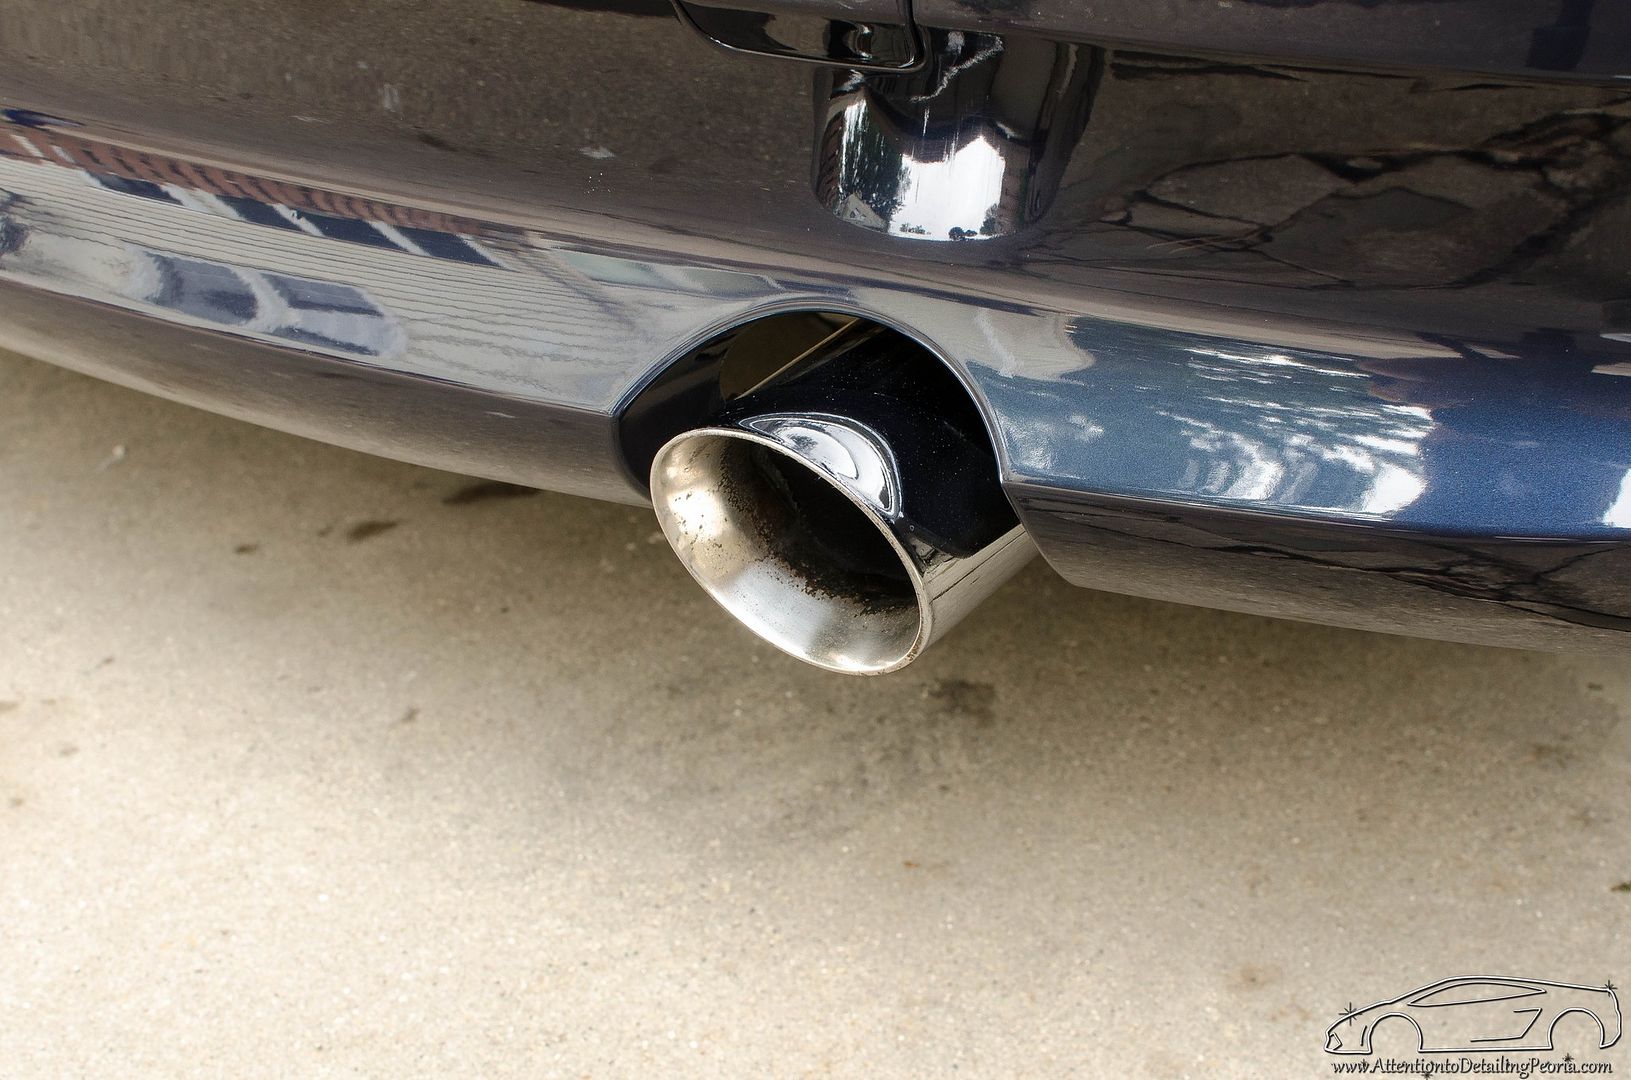 After This truly looks like a different vehicle. The paint is now full of life. Reflections are crisp and vibrant. 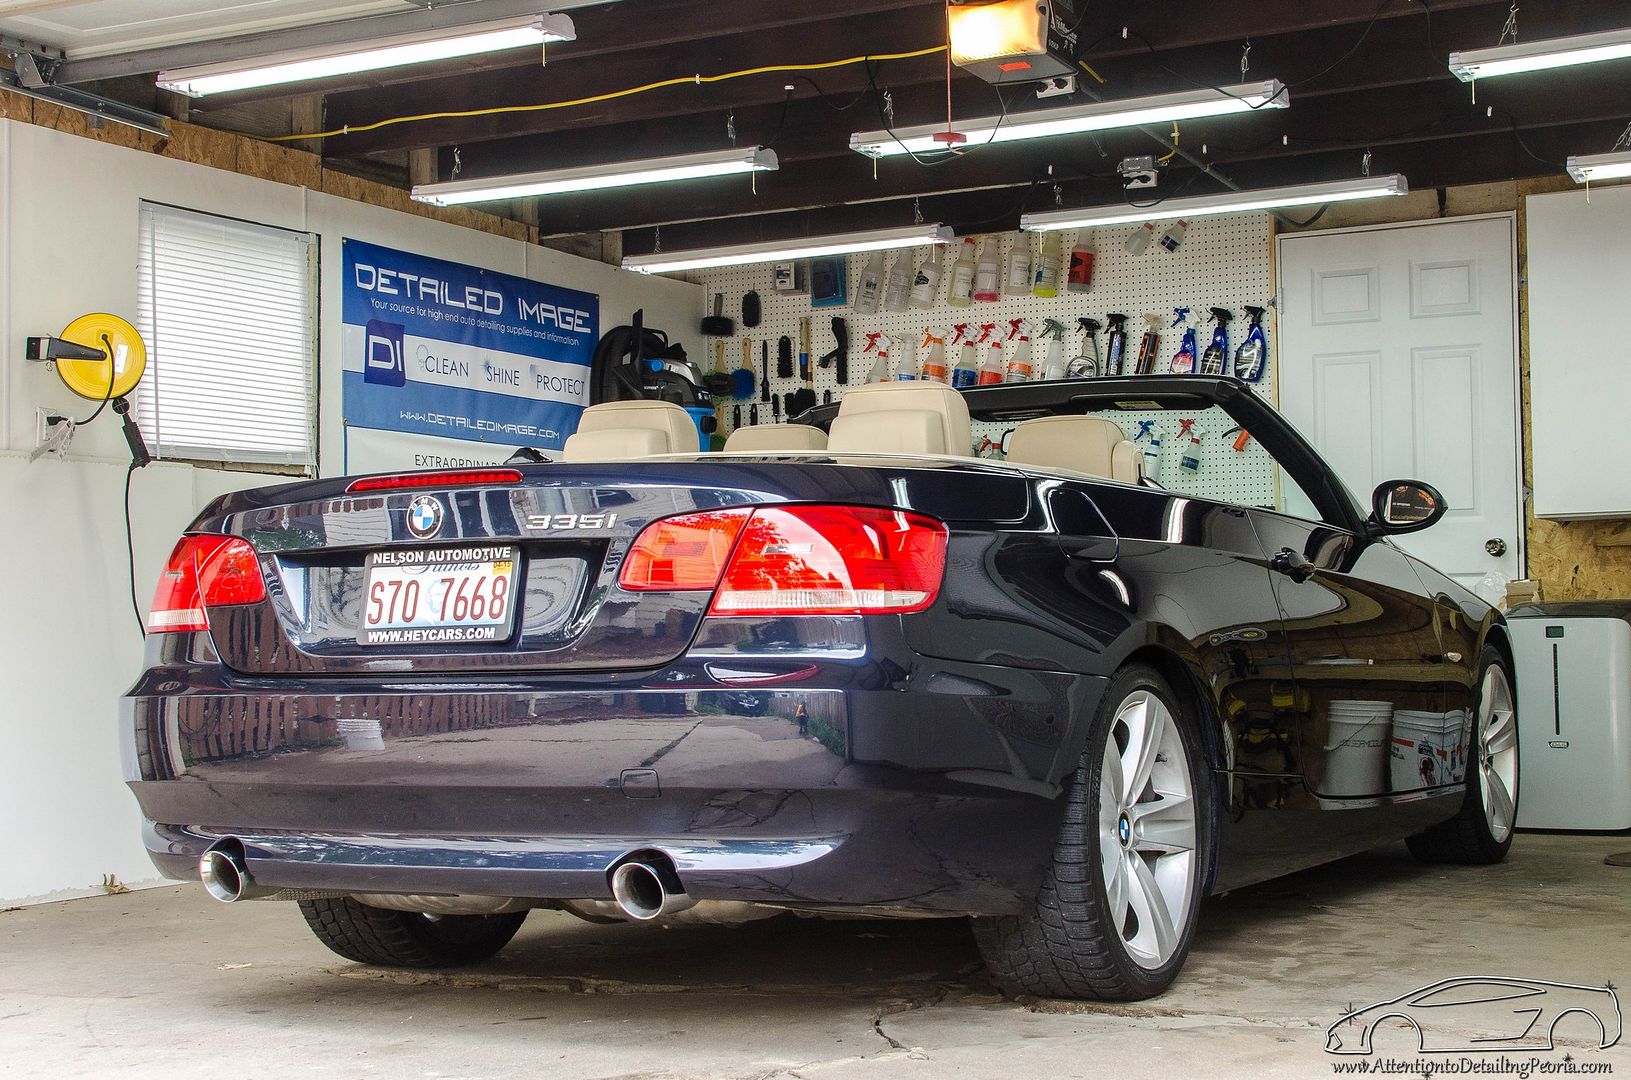 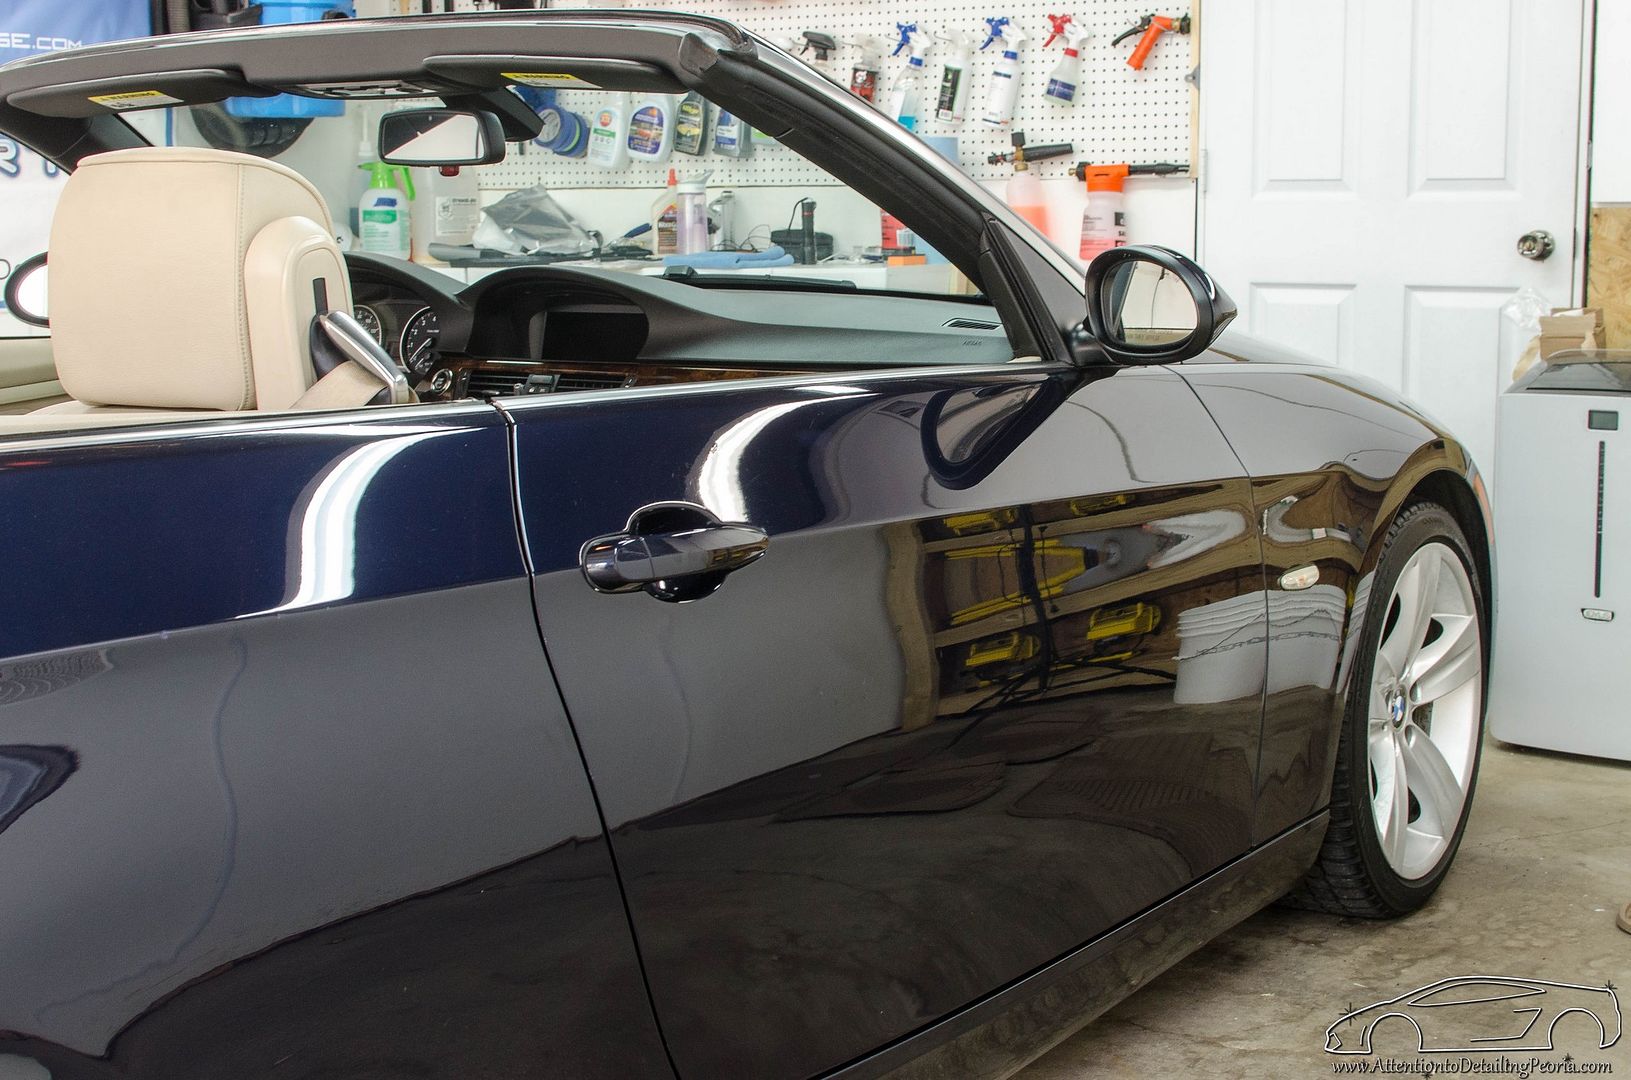 Unfortunately it was a cloudy/rainy day, but you can still see how great this paint looks. I am very pleased with our results! About 24 man hours went into this turn around, and it was well worth it!  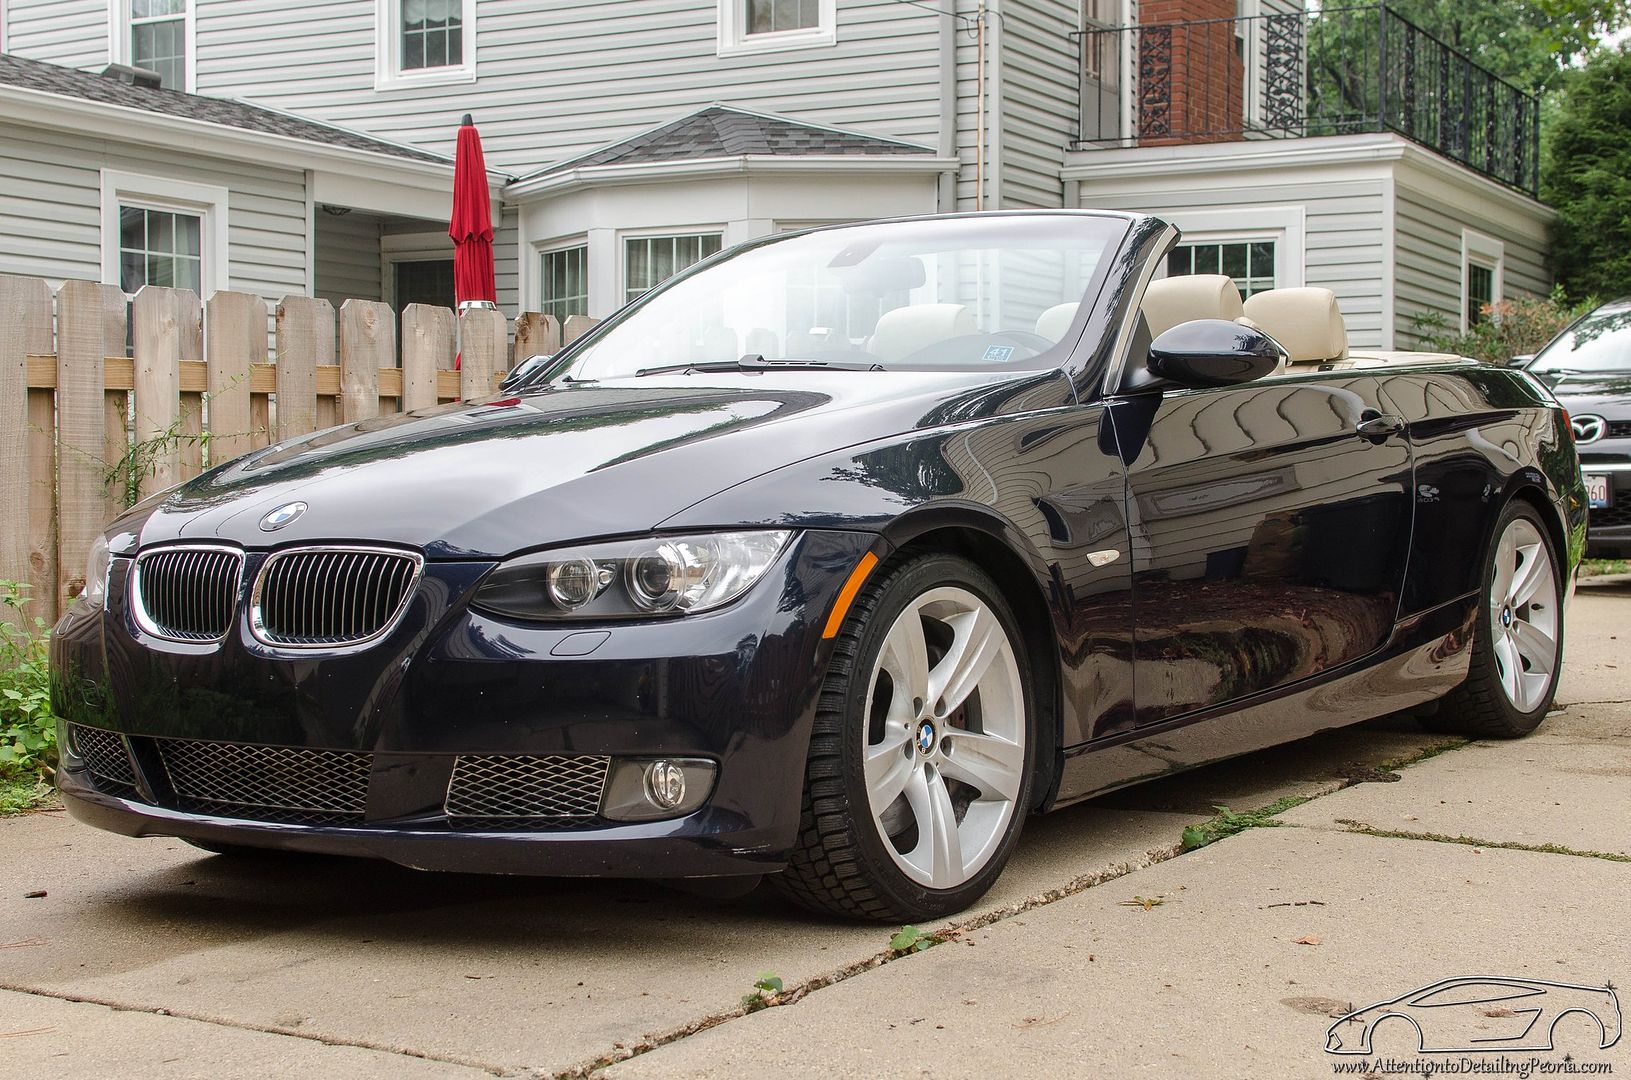 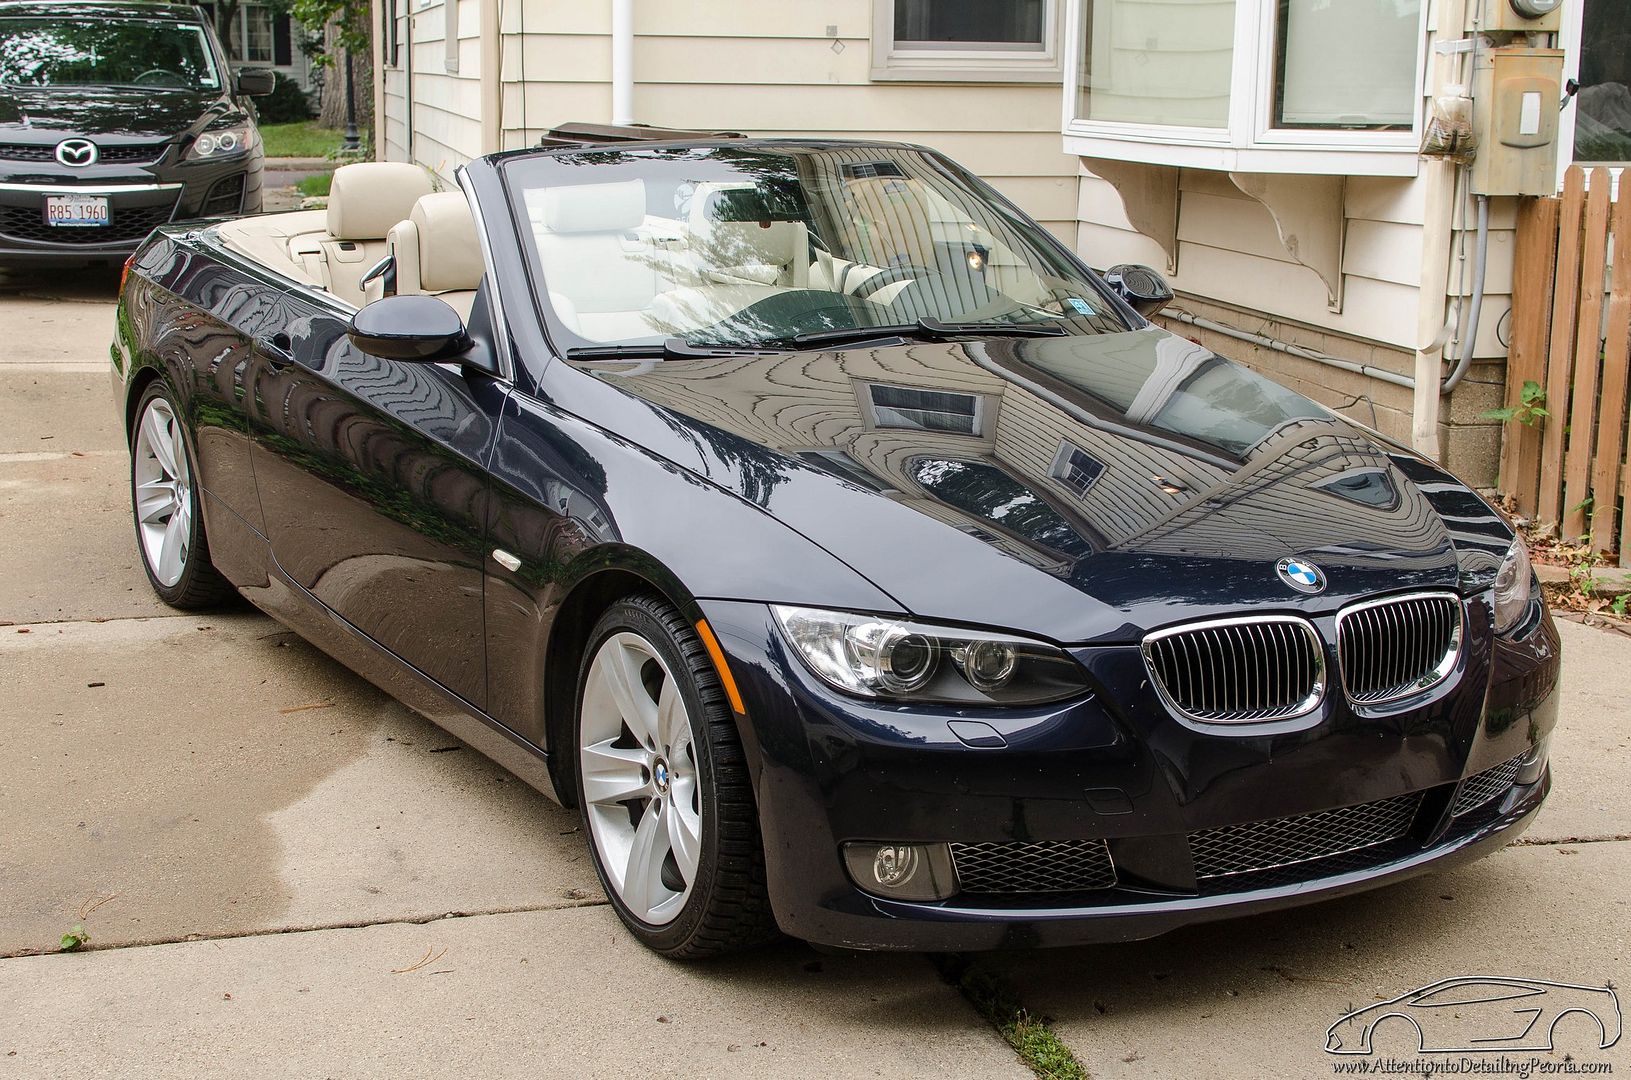 Please let me know if you have any questions regarding the products or processes used throughout the job, or other detailing related questions for that matter! I am always happy to help. Zach McGovern Detailed Image Ask-A-Pro Blog Author www.AttentiontoDetailingPeoria.com |
|
Appreciate
0
|
| 06-24-2015, 09:09 PM | #5 |
|
360
Rep 5,052
Posts |
Thanks! It is surely amazing what improper maintenance can do over time!
Zach McGovern Detailed Image Ask-A-Pro Blog Author www.AttentiontoDetailingPeoria.com |
|
Appreciate
0
|
| 06-24-2015, 10:48 PM | #6 |
|
Private First Class
 

30
Rep 162
Posts |
Wow that is an amazing job!!! If only you were in my area. Just a quick question out of curiosity. Are those exhaust tips chrome or brushed aluminum. Because, I can never get mine to shine like that and people tell me its because its brushed aluminum. THANKS
 |
|
Appreciate
0
|
| 06-25-2015, 09:28 AM | #7 | |
|
360
Rep 5,052
Posts |
Quote:
   They certainly don't have as much shine as a polished or chrome finish, but they still look great when cleaned. Zach McGovern Detailed Image Ask-A-Pro Blog Author www.AttentiontoDetailingPeoria.com |
|
|
Appreciate
0
|
| 07-06-2015, 07:54 AM | #10 |
|
360
Rep 5,052
Posts |
|
|
Appreciate
0
|
| 07-15-2015, 01:06 PM | #11 |
|
Driving cars and riding bikes really fast
285
Rep 1,001
Posts |
Wow that looks incredible! Nice work man. Have you used Sonax Full Effect on matte wheels before? I want to buy some but haven't found reviews for use on matte surfaces, etc.
__________________
335i, sport pkg, 3 pedals, Blacked out, LED markers, OZ Ultraleggera wheels, Firestone Indy 500s, x-pipe, vibrant 1792, PE mod
MHD stage 2+, BMS DPs, ARM charge pipe, Tial BOV, ARM FMIC, dual cone, CSF radiator, M3 control arms, sways, HAWK pads. https://www.strava.com/athletes/8309149 Follow me on Strava |
|
Appreciate
0
|
| 07-15-2015, 01:17 PM | #12 | |
|
360
Rep 5,052
Posts |
Quote:
I personally haven't used SFE on matte wheels, though I do not see it being an issue. The cleaner is a pH neutral chemical, so it should not disturb the finish when used as directed. To be absolutely safe, I would recommend testing the cleaner on an inconspicuous area (ie barrel of the wheel) before covering the entire wheel. Zach McGovern Detailed Image Ask-A-Pro Blog Author www.AttentiontoDetailingPeoria.com |
|
|
Appreciate
0
|
| 07-15-2015, 01:21 PM | #13 | |
|
Driving cars and riding bikes really fast
285
Rep 1,001
Posts |
Quote:
__________________
335i, sport pkg, 3 pedals, Blacked out, LED markers, OZ Ultraleggera wheels, Firestone Indy 500s, x-pipe, vibrant 1792, PE mod
MHD stage 2+, BMS DPs, ARM charge pipe, Tial BOV, ARM FMIC, dual cone, CSF radiator, M3 control arms, sways, HAWK pads. https://www.strava.com/athletes/8309149 Follow me on Strava |
|
|
Appreciate
0
|
| 07-15-2015, 02:35 PM | #14 |
|
Private First Class
47
Rep 194
Posts |
Wow, what a difference. I have an e92 in black and in some areas its nearly as bad as the one above. Glad to see its repairable. How many hours did it take to do the whole car?
|
|
Appreciate
0
|
| 07-15-2015, 03:16 PM | #15 | ||
|
360
Rep 5,052
Posts |
Quote:
Quote:
Zach McGovern Detailed Image Ask-A-Pro Blog Author www.AttentiontoDetailingPeoria.com |
||
|
Appreciate
1
|
| 07-17-2015, 12:35 PM | #17 |
|
Colonel

483
Rep 2,283
Posts |
 #detailgod #detailgod
__________________
|
|
Appreciate
0
|
| 07-18-2015, 07:01 AM | #18 |
|
360
Rep 5,052
Posts |
|
|
Appreciate
0
|
| 07-26-2015, 03:38 PM | #20 |
|
Enlisted Member
 
0
Rep 32
Posts |
brilliant !!! , might have to give it a try
__________________
|
|
Appreciate
0
|
| 07-26-2015, 05:51 PM | #21 |
|
Private First Class
55
Rep 157
Posts
Drives: 2011 E90 6MT 335i
Join Date: Jul 2015
Location: Redondo Beach, CA
|
Wow, that is some amazing work on those swirl marks!
I noticed you said you pressure washed both before and after putting some foam soap on the car. I've heard to not pressure wash paint as you don't want dirt flying and scratching the paint, is it not that big of a deal? |
|
Appreciate
0
|
| 07-26-2015, 09:21 PM | #22 | |
|
360
Rep 5,052
Posts |
Thanks guys!
Quote:
Hope that helps! Zach McGovern Detailed Image Ask-A-Pro Blog Author www.AttentiontoDetailingPeoria.com |
|
|
Appreciate
0
|
 |
| Bookmarks |
|
|