

|
|
|
|
 |
|
 |
BMW Garage | BMW Meets | Register | Today's Posts | Search |
 |

|
BMW 3-Series (E90 E92) Forum
>
Evan's E61: Twin Turbo Wagon Build Log
|
 |
| 02-22-2016, 11:49 AM | #24 | ||
|
Captain
 581
Rep 672
Posts |
Quote:
Quote:
LED technology will surpass HIDs but at this point it isn't quite there, some matrix/cluster LEDs (think Audi S8) have the advantage of multiple light sources for a more accurate and dynamic light output but when it comes to light intensity and raw lumens a properly setup HID projector still holds the crown. From a retrofitting standpoint LED units which offer desirable output like the Acura MDX or RLX are difficult to fit into other housings, not only are the optics/lenses/shourds a one piece unit, there is a large heat sink to worry about. As I understand it, the Acura RLX LED headlights are some of best on the market today. Here are a few threads on how they compare to HID projectors: https://www.hidplanet.com/forums/for...rlx-headlights https://www.hidplanet.com/forums/for...-vs-modded-s2k The BMW LEDs are not in the same ball-park and are far inferior with their raw output and light control (reflective bowls vs projector lenses). Evan |
||
|
Appreciate
1
BKBMW335I156.50 |
| 02-24-2016, 11:20 AM | #25 |
|
Captain
581
Rep 672
Posts |
Final stages of the retrofit...
 I went through with building some foreground limiters, it was my first time and it took me a while. I wanted them to be adjustable so it took me a little bit to design some that could slide up and down without interfering with the lens holder. The other part that took me a while was the alignment since I now have a foreground cutoff and if they were not aligned propoerly (just like a regular cutoff) it would drive me crazy so it was each projector needed to alignments, YAY! Here were the finished limiters  Before  After  The hardware work out well as the nuts on the rear were held in the place by the bowl allowing easy one-handed adjustment with a screwdriver from the front side, those adjustment screws can also be accessed when the lens holder mounted. I left some material on the top of the limiter so it is easier to grab during adjustment.  Very limited foreground! After this pic I took the car out for a quick drive to test them, there was a little too much foreground limited and I ended up raising the limiters ~2-3mm  Stock MH1 7.0 foreground  After custom limiters, this was before I adjusted them to allow more foreground.  With the limiters setup aggressively it limited the first ~15ft of foreground in front my car, 7.0s have great intensity on 50w, not sure if the limiters helped this at all by blocking and recycling extra light.  The following shots are after adjusting the limiters up to allow more foreground, now only ~10ft of foreground is limited, this works out great as most of the really intense/bright foreground is gone which was my goal  Impressive output for a MH1  This picture is exactly what I see when driving.  On the road, I wanted to retain as much of the foreground width as possible, I find this light very useful in low speed cornering situations. On the MH1 7.0 this part of the beam pattern isn't very intense so it works well, the light is ample enough to be useable but not too bright where it will hurt long range vision.  All was good so time to seal them up. The BMW E6X housings need to be cut open unfortunately, previously I used straps/tie-downs to hold the leans and housing together while it was sealed. Some packaging/moving saran wrap work great, it can hold nice and tight but also is safe for the lens. I used small dollops of JB Kwik in key areas to help add some structural rigidity the the lens and housing marriage after that was done I laid a bead of 3M Window Weld to complete the seal. I can curious to see how this combo holds up.  So dark with the black demon eyes  All done  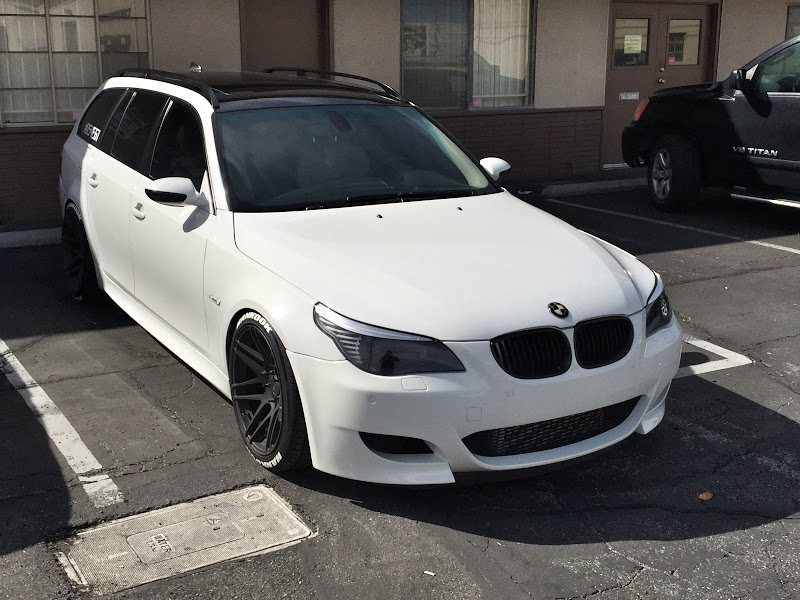 |
|
Appreciate
0
|
| 02-24-2016, 11:48 AM | #26 |
|
New Member
2
Rep 15
Posts |
Man, she looks sleepy now that the eyes are all blacked out. Really cool and inspiring. I may have to do something like this eventually, considering all the dang wires in my headlights have cracked and missing insulation. REALLY, tempted to rewire with 14AWG Tefzel. Question: What is the functional purpose of limiting foreground?
__________________
The Mind Is a Terrible Thing
2006 M5 (Garage Queen) 2005 WRX (My DD) 1983 944 (Garage King & First Ride)  |
|
Appreciate
0
|
| 02-24-2016, 01:02 PM | #27 | |
|
Captain
581
Rep 672
Posts |
Quote:
|
|
|
Appreciate
1
|
| 02-24-2016, 01:34 PM | #28 | |
|
Banned
104
Rep 1,059
Posts |
Quote:
 |
|
|
Appreciate
0
|
| 02-24-2016, 10:35 PM | #29 | |
|
Captain
581
Rep 672
Posts |
Quote:
Not an engineer but have a mind that thinks like one, I learn as I go. |
|
|
Appreciate
0
|
| 02-25-2016, 11:07 AM | #30 |
|
Captain
581
Rep 672
Posts |
I installed some M5 rear integral links, now all oem rear suspension components are now M5 spec (if not upgraded). The process was fairly straightforward, the EHC needed to be disabled/deflated and it was a little awkward reinstalling the super long bolt that runs through the swingarm, integral link, and knuckle.
 TOP: 535xi BOTTOM: M5   Installed   Oem oil cap 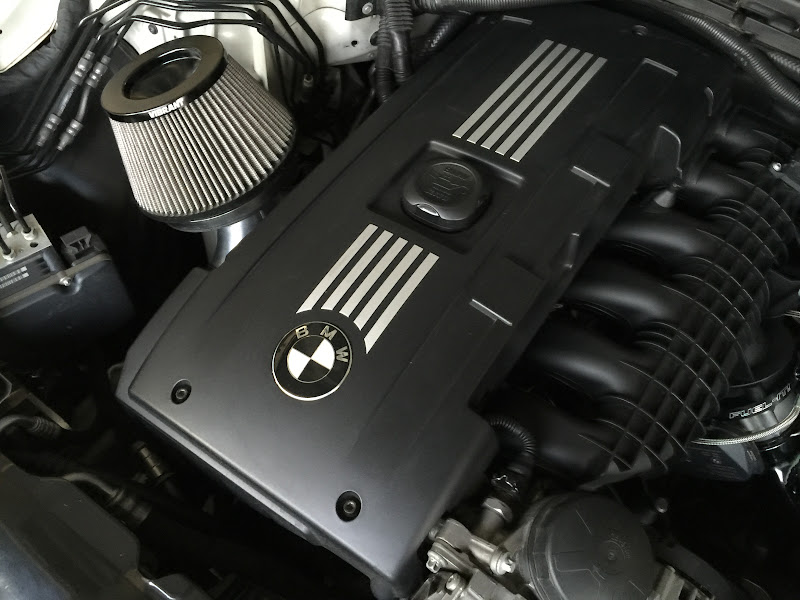 Aluminum cap, a little bit of a round peg in a square hole but it doesn't bother me enough to change it, so it stays.  New aluminum pedals arrived, count them! 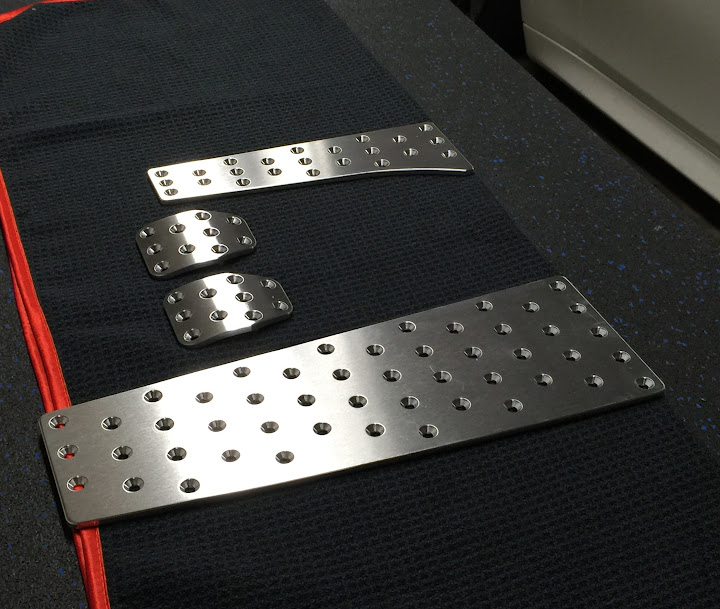 |
|
Appreciate
0
|
| 03-18-2016, 11:50 AM | #31 |
|
Captain
581
Rep 672
Posts |
Bimmerfest is coming up soon (for a procrastinator like myself) so I need to get my ducks in a row and execute this 6MT and M5 Drivetrain swap soon so I can defend my title!
 ...but in the meantime, feeding time!   VTT hot-side CP vs stock (fvcking stock, get the fvck outta here stock!)  Prepped for install  Clean   Gave my inlet system a cleaning  You win some, you lose some. I was hopeful these M5 front lower control arms would fit, no dice. But it's OK, the M5 control arms are beefy since their larger thrust arms are dainty relative to the ones found on the 535xi so I consider the stiffness a wash. Now all possible M5 suspension component upgrades have been made, with the exception of these control arms everything is M5-spec, rather "M5 Hybrid Suspension"   |
|
Appreciate
0
|
| 04-11-2016, 08:41 PM | #32 |
|
Captain
581
Rep 672
Posts |
With the rotor off you can see the business end of my rear suspension:
- KW V3 + oem Air - M5 brakes + SS lines - M5 front upper guide arm - M5 integral link - Oem wishbone (same as M5) - Bullet-nosed studs, LOVE studs  For my manual conversion I sourced the pedal assembly from an E60 M5, the first unit I bought (with 2 pedals on the left) was damaged during shipping and the mounting location for the clutch return-spring was broken. The second pedal assembly I purchased (right) was supposed to be complete with clutch pedal and master cylinder but as you can see it was brake pedal and sensor only. Luckily between the 2 assemblies I was able to piece together a fully functional unit.   I am a big fan of machined pedals, I ran some on my old M5 and this will be my second set for the E61. I went with a brushed aluminum finish and it looks absolutely tits and should blend into to my interior well. Oem vs. Brushed  Drilling holes to mount the pedals  Old pedal (raw Al cut for grip) bottom brushed up top  Pedal assembly ready for install  Here is the DIY for stuff like this: Bentley Manual and Google  Picked up a transmission jack for the differential, transfer case, and trans. Test fitting the M5 LSD here  In position  Fits into the non-M subframe without issue  Huge heat-sink wraps around the rear of the subframe  Test fitting with my custom 3" exhaust, close but I will trim the heat stink to give a cushion for diff movement  The E61 has these huge pull rods which connect to the brace my LED reverse light is bolted to and run to the jack points in front of the rear tires. The heat sink will need to be trimmed to accommodate these as well. There are some different pull rod combos for the M5 sedan, M5 wagon, and 535xi wagon, I feel what I currently have is the strongest setup so I will make them work.  I used a Sharpie to mark the heat sink that will be trimmed, all of the black areas will be cut off. I don't plan to track my wagon much if at all so I think the trimmed heat sink will still be fine for my application.  Up next was comparing my 535xi driveshaft (top) to the M5 shaft (bottom). I was originally going to have the M5 shaft customized to mate with the N54 but I want to explore the possibility of configuring a hybrid driveshaft: front half 535i and rear M5. The downside of running a hybrid is the M5 6MT output flange, guibo, and bearing will all be smaller compared to a full M5 spec driveshaft setup. The upside it is would be a bolt-on solution and save some coin on custom fabrication costs. The difference in diameter between the non-M and M5 output shaft and guibo is under around 5% or less so rather insignificant big-picture. It is a long-shot but the M5 bearing may be compatible with the non-M front 1/2 of the driveshaft, once I get the halves separated I can confirm.  M5 knuckles dwarf the non-M  Notice the inner diameter of the bearing, pretty close! This is one reason why I think there may be chance to run a hybrid setup  Comparing bearing diameter  Here are some comparison pics of the non-M AT axles compared to M5   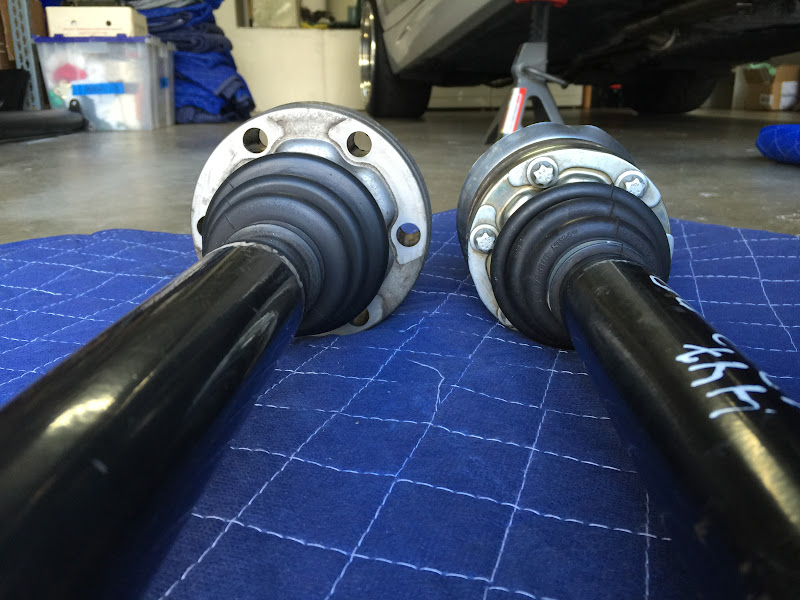 |
|
Appreciate
0
|
| 04-12-2016, 10:09 AM | #33 |
|
New Member
2
Rep 15
Posts |
Man Evan, sorry to hear about your motor blowing! I guess the positive side, is that it now forces you to do some internal mods you might not have considered before. If the driveshaft adventure doesn't end up working out the way you want it to, remember that The Driveshaft Shop can custom make a 1 piece carbon fiber DS for you eliminating the guibo in the process. They also make axles too, but I suspect the M5 ones are going to work out just fine for the time being. As always, the pictures are so awesome and appreciated, keep up the good work.
__________________
The Mind Is a Terrible Thing
2006 M5 (Garage Queen) 2005 WRX (My DD) 1983 944 (Garage King & First Ride) |
|
Appreciate
0
|
| 04-12-2016, 01:20 PM | #34 | |
|
Captain
581
Rep 672
Posts |
Quote:
Aside from the deep burning desire to drive with 3 pedals, the trans and drivetrain swap are focused on simplifying the drivetrain and making it more reliable for my power levels. Conversions like this are not usually cheap so I have put a lot of effort into collecting economical parts, you could call it a budget build. I think the E60 M5 components will be robust enough for what I will be throwing at them and considering I paid a hair over $600 for the guibo, driveshaft, LSD, and axles, I consider it a great value for the added performance and security. If I start splinting components I will look into more serious options but we will cross that bridge when we get there. Evan |
|
|
Appreciate
0
|
| 04-15-2016, 01:05 AM | #35 |
|
Captain
581
Rep 672
Posts |
Draining ATF. I have the smell of ATF!
 Rotating engine to get access to the torque converter bolts, turning the engine kind of sounded like a rock tumbler!  This little orange slice fell out while turning the engine, lol  Risky business, do not try at home.  Unbolting bell housing, thought I could be clever and access the torx bolt from the top with a wrench....  ...and my trusty Thompson seatpost.  Well that didn't work, started to strip the bolt so jumped shipped, dropped the trans down and with the help of my neighbor, was able to navigate the socket and clusterfvck of extensions onto the bolt while I broke it free from underneath the wagon  A little tricky guessing where to position the trans jack on this beast of a 6AT+TC, the transfer case ended up being heavier than I thought but it was balanced well enough I didn't run into any real problems. As I was pulling the AT off I noticed the torque converter was staying attached to the block, the Bentley manual said you should NOT allow this to happen. It turns out I only removed 4 of the 6 torque converter bolts, the Bentley manual never specified the amount of bolts that needed removal and the photo only showed 4. Shame on Bentley for not being more detailed with instructions and shame on me for not being more thorough! I ran tie down between the subframe for added security, sliding a huge heavy trans off the engine while you are laying on the ground right next to it is quite exhilarating.  The beast is out, or should I say the malignant tumor has been removed.  #WeightSavings  Beauty and the Beast  I did some "testing" to check the weight of the two units. 6MT has fluid, 6AT does not but TC does. I know the the 6MT weighs about 97lbs and based off that I would sat the 6AT+TC must be around 185-195lbs, essentially twice the weight.  Can't wait to drive a manual  Front  SO much larger  Something new to sort through. The 6MT I sourced was from a 335i, the bracket closer to the camera is what arrived on the 335i trans, the bracket behind it is intended for a manual 535i and 550i, the top mounting holes are too wide for my trans so I will have to look into where I went wrong and see if it can be resolved or if I will need a custom bracket to mount the trans to the main trans support.  Took the driveshafts apart to see if a hybrid shaft was possible  NO, it is not  LEFT: Non-M RIGHT: M5  535(x)i  M5  So yolked bro! :banana  |
|
Appreciate
0
|
| 04-15-2016, 01:40 AM | #36 |
|
Major Private First Class


449
Rep 1,327
Posts
Drives: 2010 E90 335i M Sport
Join Date: Mar 2014
Location: US, NA, Earth, Milky Way Galaxy
|
Glad to see you're making progress after that close call and catastrophic failure. It happens. You seem to be in good spirits.

__________________
2008 E92 335i 6MT: FBO + MMP Silicone Inlets | Stage 1 LPFP | 335is clutch + MFactory SMFW | Custom BuraQ + MHD tune | 3.5Bar N20 sensor [SOLD]
2010 E90 335i M-Sport AT: 5" Stepped FMIC, Stage 2 LPFP - MHD V7 E60 Tune running 100% E85 - VRSF DPs |
|
Appreciate
0
|
| 04-16-2016, 10:48 PM | #38 | ||
|
Captain
581
Rep 672
Posts |
Quote:
Quote:
 It is my Type-A personality but there is a lot of merit to a clean workspace while working on car, both for staying organized so you can find what you need when you need it and not waste time fumbling around and also to not contaminate things which need to stay clean. ----------------------------------------------------------------- The M5 LSD needed some modification and after testing fitting it with my exhaust and pull rods I knew what to cut off. It was a balance of removing enough material for adequate clearance, with leaving as much as possible for cooling, while making it look as good as possible. I am pretty happy how it came out. Evan Oem M5 heatsink  ...aaaaaaaand it's GONE!  Pretty hacked up after the cutting  After some more grinding and sanding    535xi and M5 top, modded M5 bottom  Prepped the axles for install, the threads had been hit with some anti-rust coating which needed to be cleaned   Had to pull out the motor for the telescoping wheel function, the bolts were very hard to reach and I am not looking to putting them back in.     Paddle shift steering wheel and control module removed along with the console and electronic gear selector.  Hole punched out for manual shifter :banana  Didn't have the special tool to lock the flywheel/starter in place while the FW bolts are removed so this was my solution.  One hurdle to clear will be the transmission support and bracket. According to RealOem I have compatible part numbers but that is not the reality, the mounting points for where the bracket connects to the trans are different since my trans was sourced from an e9X 335i. The E6X support, bracket, and bushing combo is monstrous compared to the E9X setup. I really like the design of the E6X bushings where it allows the upper bracket to reside inside the bushing, it makes a lot of sense and IMO the design better suited for high torque than the 335i mount. My goal is to use the E60 support and either modify the top bracket have one made to make the mounting locations work. Not sure which direction to go yet. Bare trans  Trans with 335i bracket (holes align)  535i bracket (improper fit)  E6X vx E9X  Showing how the E6x bracket feet mount inside the bushings   Bushing (bearing) comparison  |
||
|
Appreciate
0
|
| 04-24-2016, 12:52 PM | #39 |
|
Captain
581
Rep 672
Posts |
I ended up making a tool to remove the rear differential bushings, part Habor Freight wheel bearing tool, part Home Depot hardware, part 36mm socket I have for the axle nuts. The 36mm socket was a great fit for the front bushings.
 Bushings out  Oem vs MFactory Solid (rubber)  Bushings in  M5 axles in  Look how close the outer CV joint is to the wheel carrier!  My test fitting and eye balling suggested fitment would be tight but I didn't think it would be THIS tight! Clearance is literally 1-2mm If it fits it fits!  LSD, the traction drug  Test fitting pull rods with the modified LSD heatsink.  Looking good  Exhaust should clear no problem  Cleaned up more heat shield   ...and my RD Sport sways   |
|
Appreciate
0
|
| 05-01-2016, 11:09 PM | #40 |
|
Captain
581
Rep 672
Posts |
Bought a manual M5 steering wheel to replace my SMG unit with those silly paddle things. eBay find from a M5 with 72k, it was pretty dirty but cleaned up well.
Even though my E61 is more M5 than 535xi, I don't feel there is any need to have those "M" badges sprinkled throughout the car so, just as with my previous M5 wheel, I will run it with the non-M trim. I also happen to think it looks better. I also snagged the rear aux panel from the center console, mine only had cigarette outlets so the aux input was a welcomed addition. The panel is also prepped for rear seat heater buttons which is nice since I plan to retrofit those down the road. My car was interestingly optioned with the ski pass and heated steering wheel but no "cold weather package" and ultimately no heated rear seats. Evan BEFORE    [IMG]https://lh3.googleusercontent.com/-Gm76bcqb0cE/VyYv_2c996I/AAAAAAAAoTQ/zX8R2KgT3AIzE-_y0***GMXCvn7A0vxUgCCo/s800/IMG_6556.JPG[/IMG]  BEFORE/AFTER       AFTER      Aux Panel  |
|
Appreciate
0
|
| 05-01-2016, 11:10 PM | #41 |
|
Captain
581
Rep 672
Posts |
Here is one of the "detail" mods I finally got around to installing. I purchased a rear door handle insert for my driver door which functionally is a key-hole delete. It worked out as I had hoped, there was no fitment issues and the actual locking cylinder didn't need to be removed, the cover simply sat on top of it.
CLEAN! Evan  Before  After   |
|
Appreciate
0
|
| 05-02-2016, 03:40 AM | #43 |
|
Private
 5
Rep 54
Posts |
Be careful with that key hole cover! I had the door lock actuator fail on the drivers door and the only way to unlock the door was to take the actual metal key out of the fob and forcibly turn the lock. Install of the new actuator wasn't bad but it was a pain not being able to open the door with the fob while I waited to have time to install it. If I had the key hole cover I would have had to open all the windows with the fob to open it from the inside, imagine doing that in the rain! I've actually had to replace actuators on both drivers side doors since I've had the car. Pretty stupid how often the door locks fail on the e9X's, if you have the option in idrive then turn off the automatic door lock setting that locks the doors once you start moving. Greatly extends the useful life haha
|
|
Appreciate
0
|
| 05-02-2016, 10:35 AM | #44 | |
|
Captain
581
Rep 672
Posts |
Quote:
I have done some coding in NCS Expert to manipulate locking features, notably having all doors unlock once the car is stopped and turned off so passengers don't struggle with BMW's double handle pull to open the door. I find it interesting how BMWs don't have this feature enabled from the factory. I still have auto-lock activated. I guess I never thought about preserving the actuators since they never caused any issues. Evan |
|
|
Appreciate
0
|
 |
| Bookmarks |
|
|


