

|
|
|
|
 |

|
 |
BMW Garage | BMW Meets | Register | Today's Posts | Search |
 |

|
BMW 3-Series (E90 E92) Forum
>
ATM Intercooler Install
|
 |
| 06-26-2017, 04:13 PM | #1 |
|
Ex-Gasser

31
Rep 68
Posts |
ATM Intercooler Install
Hey All.
It took me me longer than I wanted to post this, and I don't have as many pictures as I wanted to get. However, this simple walk through with photos should be a useful reference for people installing the ATM intercooler in the future. With that being said, let's dive in. First off, I noticed this product was high quality as soon as I got it out of the box. To me, the fact that Dave and ATM incorporated the rounded end tanks and rounded header bars into the design speaks to the level of passion and excellence that went into the development of this intercooler. 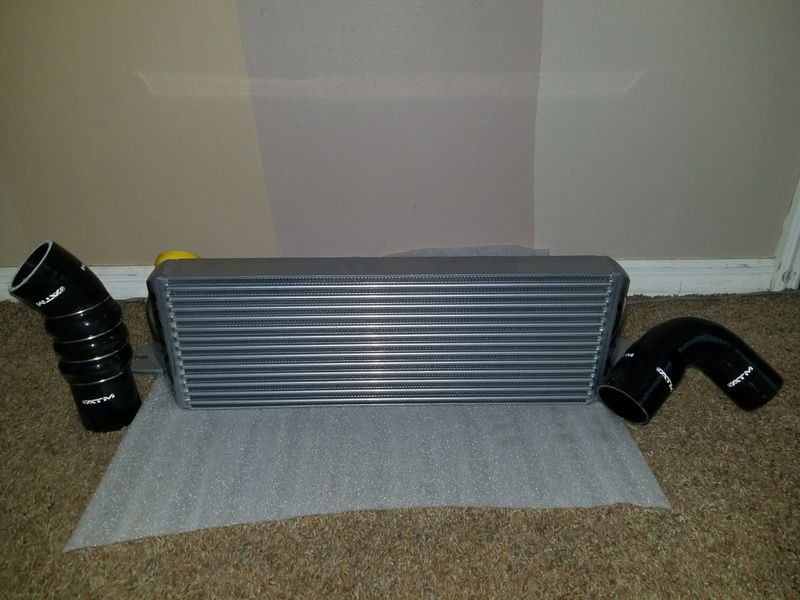 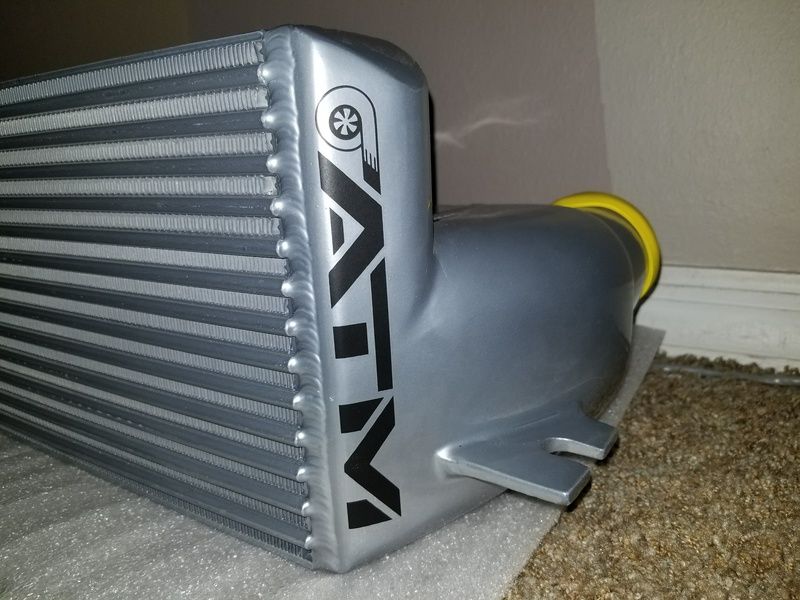 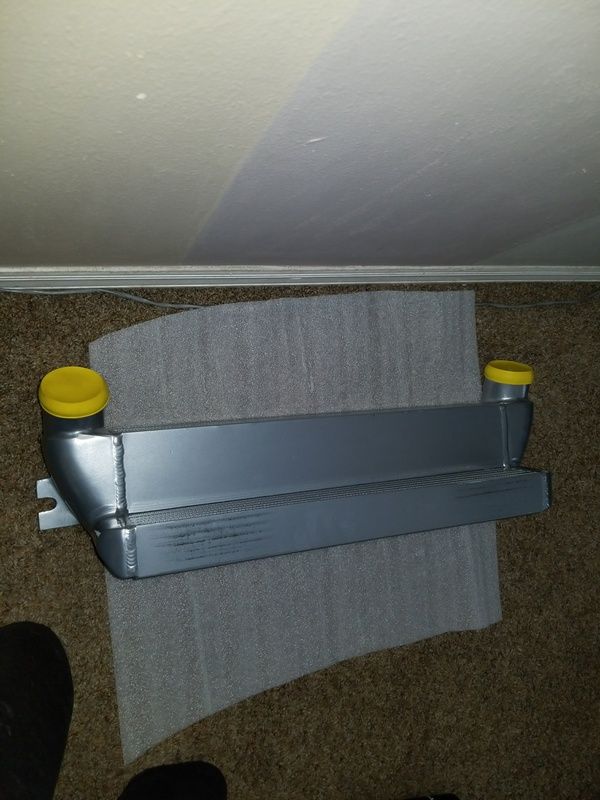 Now, to the install.  Get your tools ready and get your car in the air by the safest means available to you (I used jack stands). A lift would make this easy job even easier. Be sure to follow the provided instructions as well, in case I miss anything here. Please forgive me, I didn't record exactly what sizes I was using, so these are my guesstimates.  You will need: Time - 2 hours (from opening garage to closing when done, including a 15 minute break) Jack stands or a lift Torx bits (T20, T25, T30) Socket Wrench 8mm - 15mm sockets Flat head screwdriver 1.) Remove the belly pan/sump guard/splash guard/plastic cover from underneath your engine bay. There are approximately eight fasteners that hold this on (like I said, these are guesstimates ) Once they're off, you have access to the underside of the engine and the intercooler.2.) Remove radiator fan and shroud. Two clips, one on either side, about half way up the shroud, then a line held onto it by two clips. There is also a Torx fastener on the underside of the fan attached to the oil cooler that will need to be removed. You DEFINITELY want to do this before you start. 3.) The factory intercooler is held in by two clips, and two Torx fasteners. The clips are circled in the picture below, and the arrows points towards the area where the Torx fasteners are. 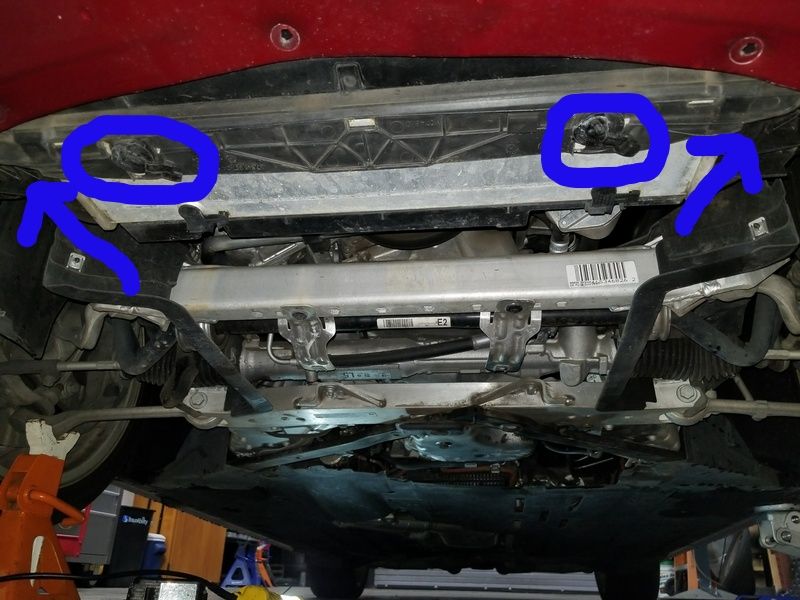 4.) You can unclip the factory boost hoses simply by sticking a flat head screwdriver under the clip, lifting, and twisting. The clips come right off. Once the clips are off, just twist the hoses to get them off the intercooler. You can then pull the intercooler out and away from the car. 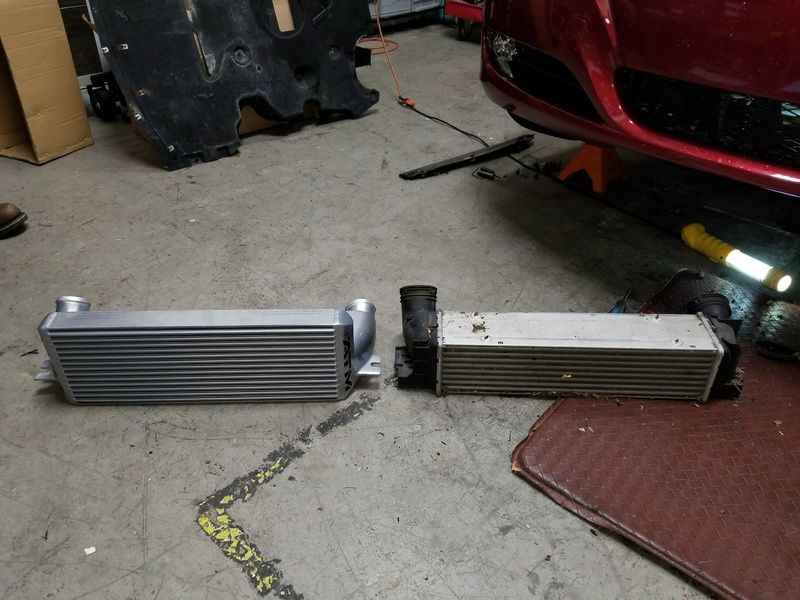 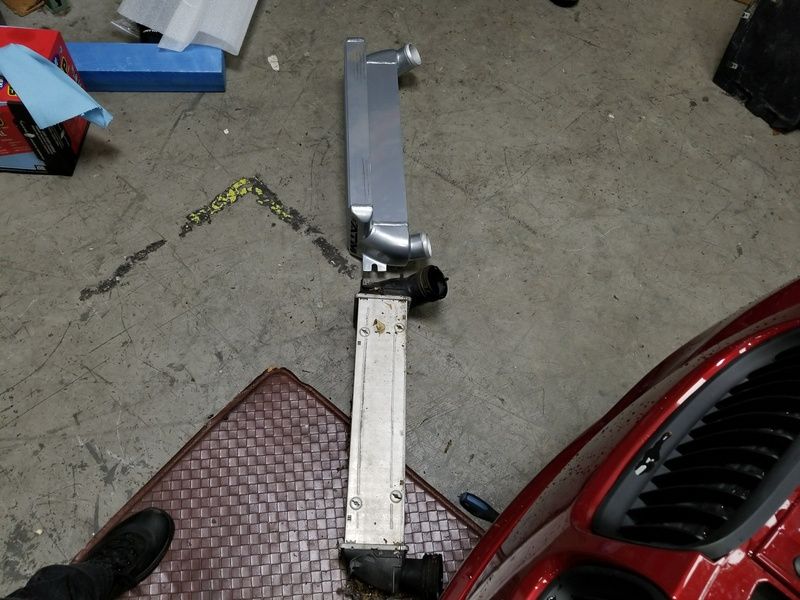 5.) Remove the factory boost hoses from the turbo outlet and the charged air intake tube. I chose to take the intake pipe off the car as it would have been extremely difficult to get the factory clamp off, then install the new clamp and hose while the pipe was still installed.  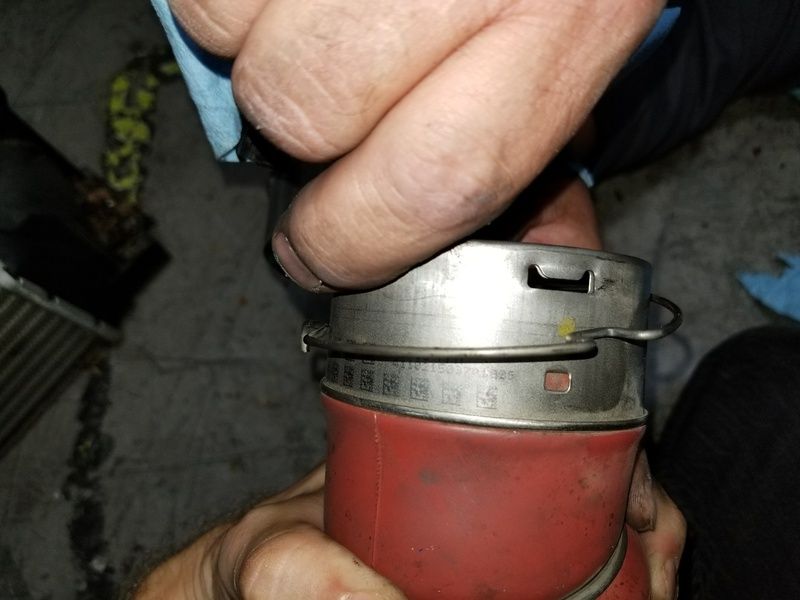 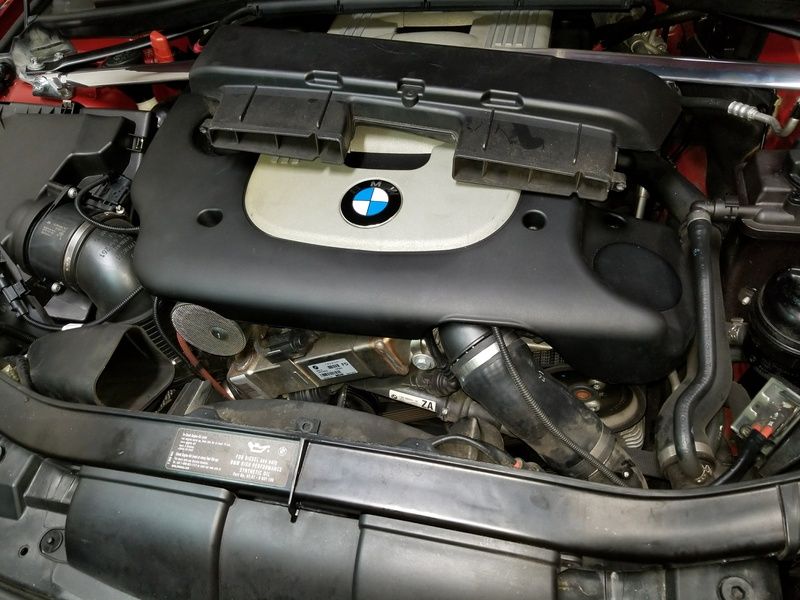 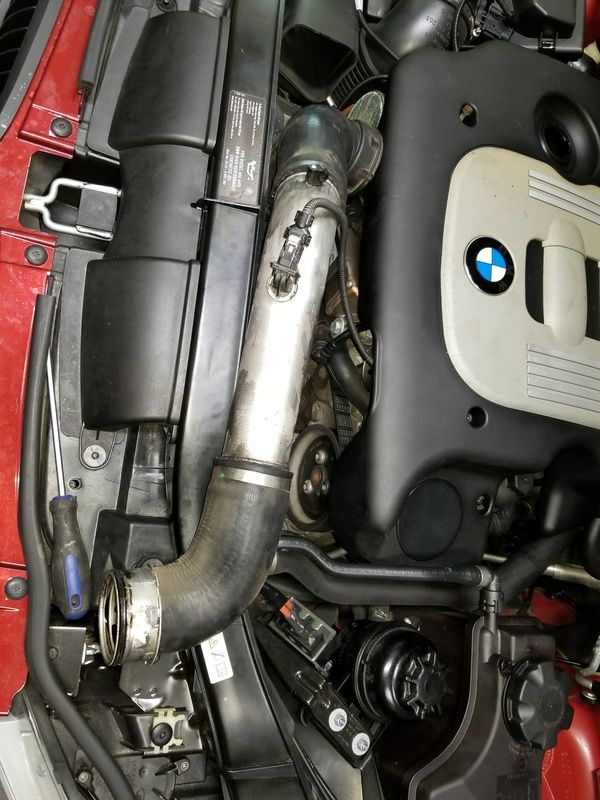 Removing factory clamp from charge pipe. 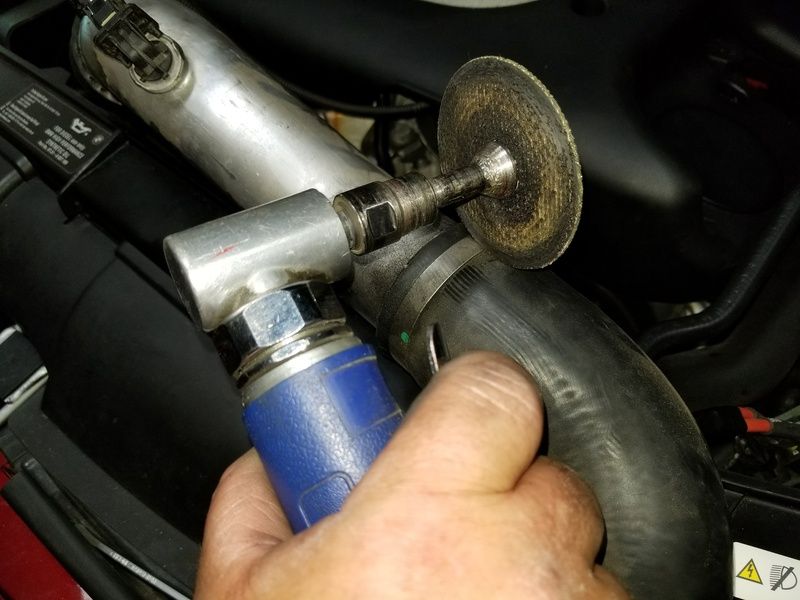 Looks like the CBU is creeping (car has 63k miles, CBU cleaning last done at 40k miles)  6.) Next I installed the new flange to adapt my turbo outlet to the new ATM boost hose. When installing the flange, I applied the provided Loctite to the inside of the new flange, and a little to the leading edge of the turbo outlet. Here is my turbo outlet before the flange is installed. 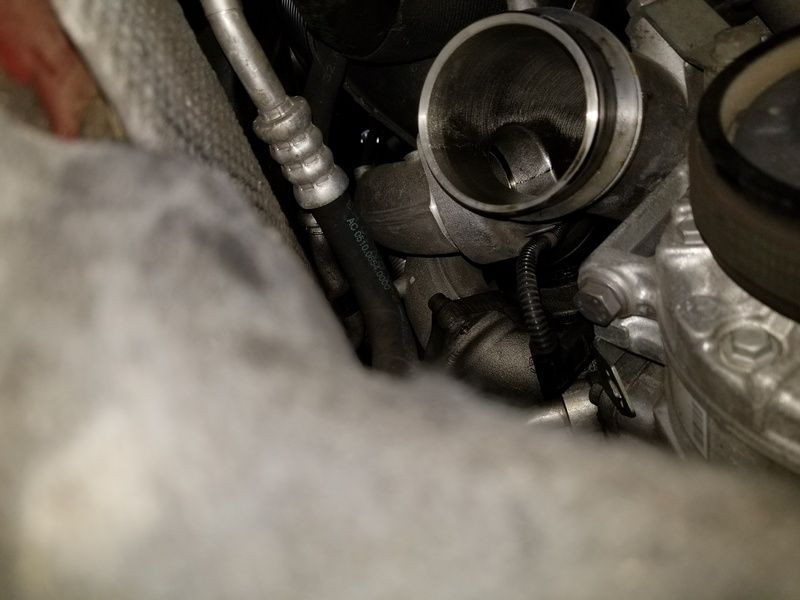 As the new flange was slid on little by little, we added and evenly spread a little Loctite as it went on. 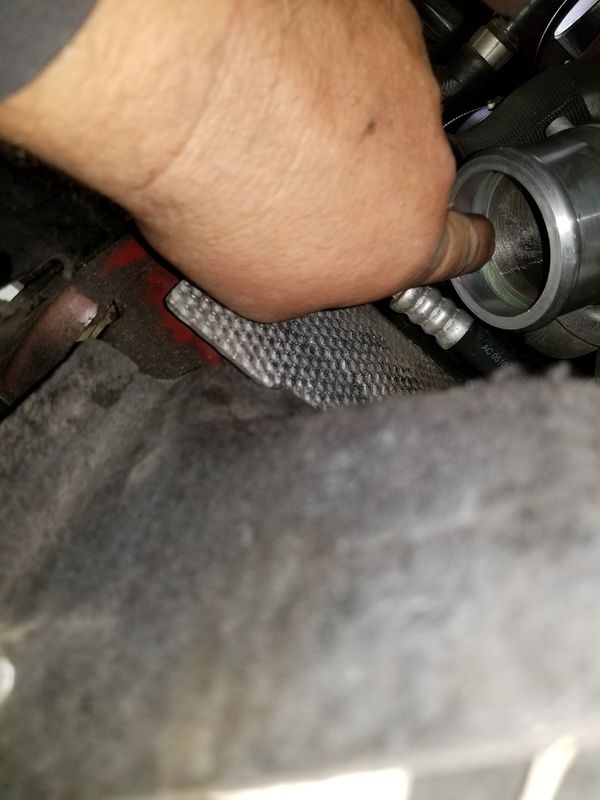 We used the handle of a hammer to tap the flange completely onto the turbo outlet. Light tapping around the perimeter of the lip of the flange until it was all the way on. 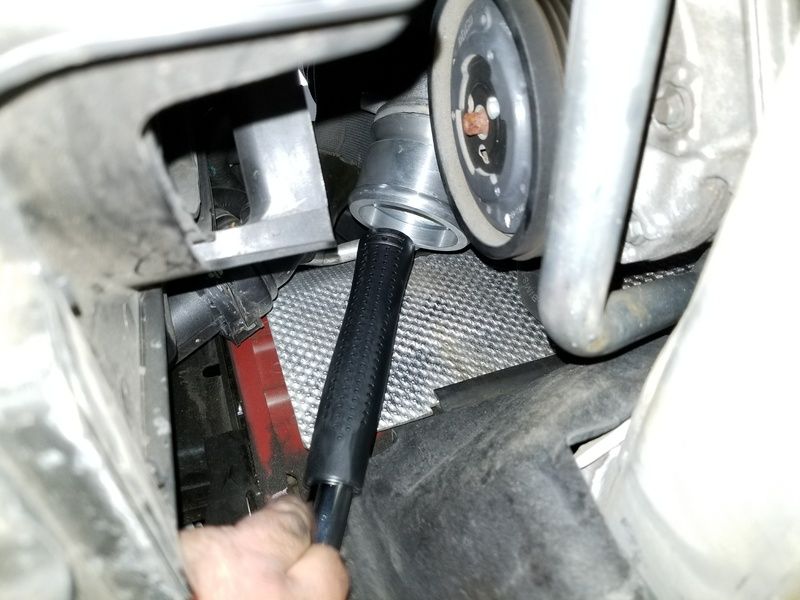 This is where I run out of pictures, unfortunately  7.) Install the new boost hose on the charged intake air pipe. Reinstall the charged intake air pipe onto the throttle body module thing. Make sure you tighten enough so they stay on, but no too tight they can't be twisted if they need to be adjusted. 8. ) Install the new boost hose onto the turbo outlet. Be careful how you position your clamp. The turbo outlet is extremely close to a pulley, as you can see in this photo. Be sure the clamp won't touch the pulley, even if it were to move a little. And make sure the nut to tighten the clamp is facing you when it's installed, for easy access.  9.) Next, you just lift the new ATM intercooler into place. Attach the two Torx fasteners that were previously removed, then reconnect the boost hoses. I didn't have to trim any plastic to get mine to fit. The intercooler fits and sits just right in the space provided. That's all I've got on it. My apologies for not having photographed the whole process. I'm sure I'll be in here updating/editing this post a few times down the line. Last but not least, a picture of the intercooler installed. Not the best, but all I have for now.  My car is stock (will be tuned BPC Stage 2+ in 10 days). I use Torque Pro with a Bluetooth OBD adapter for my readings. I monitored my CACT for a month before the install, so I am pretty familiar with how my car behaves and operates and what temperatures were expected under certain conditions. I have a few logs, but have to dig them up. That being said, the ATM intercooler is a massive improvement. I live in central Florida about 8 miles East of the Gulf of Mexico. The heat and humidity has been especially bad that past two weeks (because summer actually started ). When I had my factory intercooler installed, my CACT would sit at about 10 degrees above ambient temperature while cruising. On a pull from 50-110 mph, I would see the CACT increase by up to 50+ degrees. With the ATM intercooler, I ALWAYS sit at <5 degrees above ambient temperature while cruising, and most of the time is right at ambient temperature. When I do a pull from 50-110 mph, the most I've seen my CACT increase is by ~20 degrees. I have yet to see my CACT get up to 120 degrees since I installed the ATM intercooler. That's saying A LOT living in Florida. On top of the above awesomeness, I noticed the recovery time back to lower temperatures after a pull dramatically decreased. After a 50-110 mph pull, it takes about a minute to get back to cruising CACT. With the factory intercooler, it would take at least 3 or 4 minutes. My fuel economy seems to have improved in the 1-2 mpg range. Nothing drastic, but definitely noticeable. The acceleration feels a little smoother and I feel like the engine noise is changed ever so slightly. *Update* - Car made about 10 whp more on dyno than a 335d with the factory intercooler. Feedback is welcome. Enjoy! Last edited by 3d Turbo; 07-07-2017 at 08:55 AM.. |
|
Appreciate
8
|
| 06-26-2017, 05:36 PM | #4 | |
|
Ex-Gasser
31
Rep 68
Posts |
Quote:
I'm stock right now. Will be tuned in 10 days. I added my reaction and results thus far to the bottom of the original post. |
|
|
Appreciate
0
|
| 06-26-2017, 10:23 PM | #5 |
|
Captain

61
Rep 722
Posts |
Good Job!
__________________
11' m57 335d 165k Miles - JR 2, ATM Full Exhaust & Intake, Wagner FMIC, AAR Boost Pipe, AAR Swirl Delete, AAR EGR Delete
08' n54 135i FBO E85 - SOLD |
|
Appreciate
0
|
| 07-03-2017, 10:31 AM | #8 |
|
50
19
Rep 230
Posts |
Don't mean to thread jack but I'm overdue for updating Iaknown's ATM IC setup as well.
I had the original kit, but the hot side hose was complicated to install with it being the original coupler-metal pipe-coupler-to IC setup. Dave quickly remedied this by creating the one piece hose pictured above on the left. That hose was a godsend. No issues with boost link, only two hose clamps needed, and much easier install. |
|
Appreciate
3
|
| 07-05-2017, 08:45 PM | #9 |
|
Sleepy
75
Rep 367
Posts |
God i want one of these so bad
 Also to me what stands out about this is product is the fluoro lined hoses! Cant do this type of cunstruction without that you would have oil everywhere oozing from the hoses. I put a largeer intercooler on my vw and one side had the fluoro lined hose and the kther hose was not. So one side was dry the other side sweated oil so bad it formed drips and collected huge amounts of dirt and dust...no good. Thanks for the review now i drool hehe. |
|
Appreciate
1
3d Turbo30.50 |
| 07-07-2017, 08:52 AM | #10 | |
|
Ex-Gasser
31
Rep 68
Posts |
Quote:
Yes all components of this product are well designed and the forethought is obvious. FYI, my car made about 10 whp more than a 335d with factory intercooler. |
|
|
Appreciate
0
|
| 07-07-2017, 03:01 PM | #12 | |
|
Banned
2125
Rep 3,368
Posts |
Quote:
Unfortunately mine is on the car, otherwise I'd weigh it without packing material. Maybe Iaknown can chime in... |
|
|
Appreciate
1
3d Turbo30.50 |
| 08-02-2017, 05:09 PM | #13 |
|
Private First Class
 27
Rep 189
Posts |
Trying to figure how the boost hose is connected to the turbo so I can remove it.
I've got the airbox removed so I have good access. Any help appreciated. Thanks! Why do so many posts have the pictures blocked by photobucket? |
|
Appreciate
0
|
| 08-02-2017, 05:28 PM | #14 |
|
Private First Class
27
Rep 189
Posts |
I got it, finally.
For the next guy, it's similar to the other clips but instead of one hump to put a screwdriver to pry, there are two smaller humps. Between the two it runs inside the band. Get the screwdriver in there and pry it out from the band. Fortunately, when you get intercooler off the boost hose spins on the turbo so you can position it for best access. |
|
Appreciate
0
|
| 08-02-2017, 07:14 PM | #15 | |
|
Banned
144
Rep 316
Posts |
Quote:
|
|
|
Appreciate
0
|
| 08-04-2017, 12:11 PM | #17 |
|
Ex-Gasser
31
Rep 68
Posts |
Sorry for the late reply.
Yes I noticed photobucket blocked all the photos. I haven't come up with a free alternative yet. I m sure eventually there will be one. Glad you got it figured out RED-d. Btw, where are you in Florida. I'm just North of Tampa in Odessa. |
|
Appreciate
0
|
| 08-04-2017, 01:00 PM | #18 |
|
Captain
160
Rep 803
Posts |
Photo bucket really messed up, from reading the articles about it, they gave no notice.
One article mentioned View post on imgur.com as a good alternative that is free. |
|
Appreciate
0
|
| 07-27-2018, 07:54 PM | #22 |
|
OG
43
Rep 136
Posts |
I did read the thread, I've also seen tuners say that an intercooler requires a tune as well so I'm still not fully convinced, anyone else run an IC on stock tune?
|
|
Appreciate
0
|
 |
| Bookmarks |
| Tags |
| atm, diesel, diy, install, intercooler |
|
|


