

|
|
|
|
 |

|
 |
BMW Garage | BMW Meets | Register | Search | Today's Posts | Mark Forums Read |
 |

|
BMW 3-Series (E90 E92) Forum
>
LCI Halogen to LCI Xenon (non-adaptive)
|
 |
| 02-19-2020, 04:15 PM | #1 |
|
Private
 15
Rep 78
Posts |
Hi guys,
I realise this topic has been done to death, over multiple years and forums. However.. I'm still struggling to glean some information required for this retrofit - most threads seem to be related to pre-LCI to LCI conversions. Are the same mods required? Acquired a pair of LCI non-adaptive bi-xenons for my LCI halogen equipped 335d, and I have fitted and coded (currently for halogen) an FRM3 MAX BROSE. Xenon level sensors are easy (front & rear). These need wiring to the FRM, will the loom with P/N# 61120395932, work OK? I realise it is for a 2006-2008 car. Found the P/N here; https://www.e90post.com/forums/showthread.php?t=912413 Haven't found a pinout as yet, so if anyone has it, that would be awesome. Wiring modifications between the FRM and xenon clusters is where I'm struggling the most; does anyone know know exactly what's needed? LCI Hal to LCI Xen, full OEM retrofit. Then coding - adding $522 to the VO, resetting the FRM and CAS and going from there. Do the bulb checks still need disabling if the car is programmed properly for Xenon clusters? Any help would be greatly appreciated!!  |
| 02-19-2020, 04:23 PM | #2 |
|
Private
15
Rep 78
Posts |
Quick update (literally after posting the original message..)
Pinout for the levelling sensors found; And a cable repair set, including plugs/pins/small length of wire, which could be used to create the loom for both levelling sensors; https://www.autodoc.co.uk/herthbuss-elparts/7694978 If the following pre-made harnesses aren't applicable to the LCI E90; http://www.sparesdeals.com/index.php...product_id=656 |
|
Appreciate
0
|
| 04-28-2020, 08:37 AM | #3 |
|
New Member
0
Rep 14
Posts |
Hi Nick,
I'm looking at fitting Pre Lci Xenons to my Pre Lci Halogen 56 plate E91 and wondered if you come up with a plug and play solution? im not exactly great with wiring but did your harness 61120395932 come in the end? Is the Levelling sensors essential for it all to work and does that harness have all connections to just plug and play? Hope all went well. |
|
Appreciate
0
|
| 05-25-2021, 05:14 AM | #4 |
|
Private
15
Rep 78
Posts |
Hi there mate,
No plug and play solution, but I am currently in the process of knocking up my own looms to make this as OEM as possible (currently running xenons having modified the internals - but this doesn't work with my FLA retrofit - and I would rather they are wired as per BMW's intention). I've gleaned information from all over the place (annoyingly ~95% of these conversions and wiring diagrams are pre-LCI!), but have been able to construct the following; (Please correct me if I am wrong on anything - this is my no means concrete information - just what I was able to collate from hours of forum-digging). Right headlight 1 - Pin 14 FRM (x14260 - 0.75mm" wire) 2 - GROUND (2.5mm" wire) 3 - Pin 38 FRM (x14261) - SAME AS HALOGEN 4 - GROUND - SAME AS HALOGEN 5 - Pin 41 FRM (x14260 - 0.5mm" wire) 6 - UNPOPULATED 7 - Pin 8 FRM (x14260 - 1.5mm" wire) 8 - Pin 51 FRM (x14260) - SAME AS HALOGEN 9 - Pin 32 FRM (x14260) - SAME AS HALOGEN 10 - Pin 28 FRM (x14260) - SAME AS HALOGEN 11 - Pin 30 FRM (x14260) - SAME AS HALOGEN 12 - Pin 40 FRM (x14261) - SAME AS HALOGEN Left headlight 1 - Pin 41 FRM (x14261 - 0.75mm" wire) 2 - GROUND (2.5mm" wire) 3 - Pin 6 FRM (x14261) - SAME AS HALOGEN 4 - GROUND - SAME AS HALOGEN 5 - Pin 41 FRM (x14260 - 0.5mm" wire) 6 - UNPOPULATED 7 - Pin 50 FRM (x14261 - 1.5mm" wire) 8 - Pin 50 FRM (x14260) - SAME AS HALOGEN 9 - Pin 19 FRM (x14260) - SAME AS HALOGEN 10 - Pin 15 FRM (x14260) - SAME AS HALOGEN 11 - Pin 17 FRM (x14260) - SAME AS HALOGEN 12 - Pin 13 FRM (x14260) - SAME AS HALOGEN Height Sensor Front 1 - Pin 26 FRM (x14260 - 0.35mm" wire) 2 - EMPTY 3 - EMPTY 4 - Pin 49 FRM (x14260 - 0.35mm" wire) 5 - Pin 31 FRM (x14260 - 0.35mm" wire) 6 - EMPTY Height Sensor Rear 1 - Pin 27 FRM (x14260 - 0.35mm" wire) 2 - EMPTY 3 - EMPTY 4 - Pin 48 FRM (x14260 - 0.35mm" wire) 5 - Pin 29 FRM (x14260 - 0.35mm" wire) 6 - EMPTY TLDR; Angel Eyes Pin 1 on both headlights needs wiring as per the diagram using 0.75mm2 wire. On a halogen car, these are wired (to a different pin FRM side) using 0.5mm2 wiring - so it might be possible to just swap the pin? Ground Needs running to pin 2 on each headlight from the ground connector combs on the chassis close to the headlights either side. Xenon Shutter Pin 5 on both headlights need connecting to pin 41 on the FRM connector x14260 with 0.5mm2 wire. 3 Corner LED's Pin 7 needs connecting as per the diagram using 1.5mm2 wiring. Level Sensors (3 wires to each sensor) are wired as per the diagram using 0.35mm2 wiring. The rest appears to be identical to the halogen wiring - so can be left in situ. AHL is a different beast however, but do-able. I have the wiring information for that should anyone be interested in fitting adaptive xenons. I was going to do it myself, but non-adaptive are so much easier  Cheers! Edit: Edited to correct wiring on Pin 6 of both headlights. Last edited by Nickdot; 07-06-2021 at 04:40 PM.. |
|
Appreciate
0
|
| 09-28-2021, 11:33 AM | #5 |
|
Private
15
Rep 78
Posts |
Quick update on the above.
I have now completed this retrofit as OEM as I could possibly get (only the wire colours that I ran are non-OEM). For those interested, I can confirm the wiring diagram is as follows; Right headlight 1 - Pin 14 FRM x14260 (0.75mm2 wire) 2 - GROUND - X166 (2.5mm2 wire) 3 - Pin 38 FRM x14261 (2.5mm2 wire) - SAME AS HALOGEN 4 - GROUND - SAME AS HALOGEN 5 - Pin 41 FRM x14260 (0.5mm2) 6 - Residual from Halogen - can leave in place 7 - Pin 8 FRM x14260 (0.5mm2 wire - should be 0.75mm2) - MOVE FROM PIN 1 8 - Pin 51 FRM x14260 (0.5mm2 wire) - SAME AS HALOGEN 9 - Pin 32 FRM x14260 (0.5mm2 wire) - SAME AS HALOGEN 10 - Pin 28 FRM x14260 (0.5mm2 wire) - SAME AS HALOGEN 11 - Pin 30 FRM x14260 (0.5mm2 wire) - SAME AS HALOGEN 12 - Pin 40 FRM x14261 (0.75mm2 wire) - SAME AS HALOGEN PROCESS PIN 1 - 0.5mm2 from FRM X14260 pin 8 - MOVE TO PIN 7 RUN 0.50mm2 wire to PIN 5 FROM FRM x14260 PIN 41 RUN 0.75mm2 wire to PIN 1 FROM FRM x14260 PIN 14 RUN 2.5mm2 GROUND TO X166 Left headlight 1 - Pin 41 FRM x14261 (0.75mm2 wire) 2 - GROUND - X165 (2.5mm2 wire) 3 - Pin 6 FRM x14260 (2.5mm2 wire) - SAME AS HALOGEN 4 - GROUND - SAME AS HALOGEN 5 - Pin 41 FRM x14260 (0.5mm2 wire) 6 - Residual from Halogen - can leave in place 7 - Pin 50 FRM x14261 (0.5mm2 wire - should be 0.75mm2) - MOVE FROM PIN 1 8 - Pin 50 FRM x14260 (0.5mm2 wire) - SAME AS HALOGEN 9 - Pin 19 FRM x14260 (0.5mm2 wire) - SAME AS HALOGEN 10 - Pin 15 FRM x14260 (0.5mm2 wire) - SAME AS HALOGEN 11 - Pin 17 FRM x14260 (0.5mm2 wire) - SAME AS HALOGEN 12 - Pin 13 FRM x14260 (0.75mm2 wire) - SAME AS HALOGEN PROCESS PIN 1 - 0.5mm2 from FRM X14261 pin 50 - MOVE TO PIN 7 RUN 0.50mm2 wire to PIN 5 FROM FRM x14260 PIN 41 RUN 0.75mm2 wire to PIN 1 FROM FRM x14261 PIN 41 RUN 2.5mm2 GROUND TO X165 Height Sensor Front 1 - Pin 26 FRM x14260 (0.35mm2 wire) 2 - EMPTY 3 - EMPTY 4 - Pin 49 FRM x14260 (0.35mm2 wire) 5 - Pin 31 FRM x14260 (0.35mm2 wire) 6 - EMPTY Height Sensor Rear 1 - Pin 27 FRM x14260 (0.35mm2 wire) 2 - EMPTY 3 - EMPTY 4 - Pin 48 FRM x14260 (0.35mm2 wire) 5 - Pin 29 FRM x14260 (0.35mm2 wire) 6 - EMPTY The height sensor looms themselves are easy enough to make, I grabbed the correct size wire off of eBay and knocked them up, these were then heatshrinked (for the part that would be outside of the car); 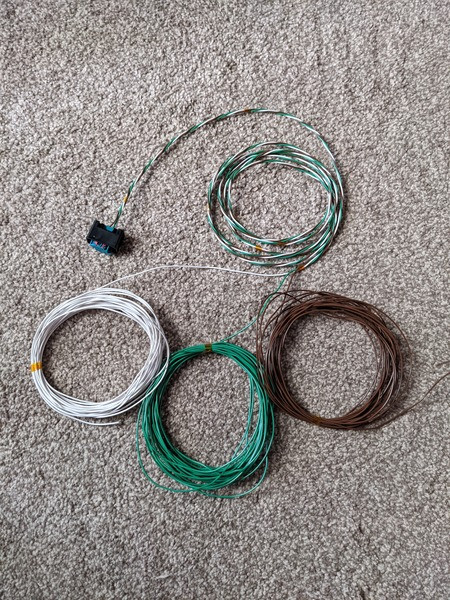 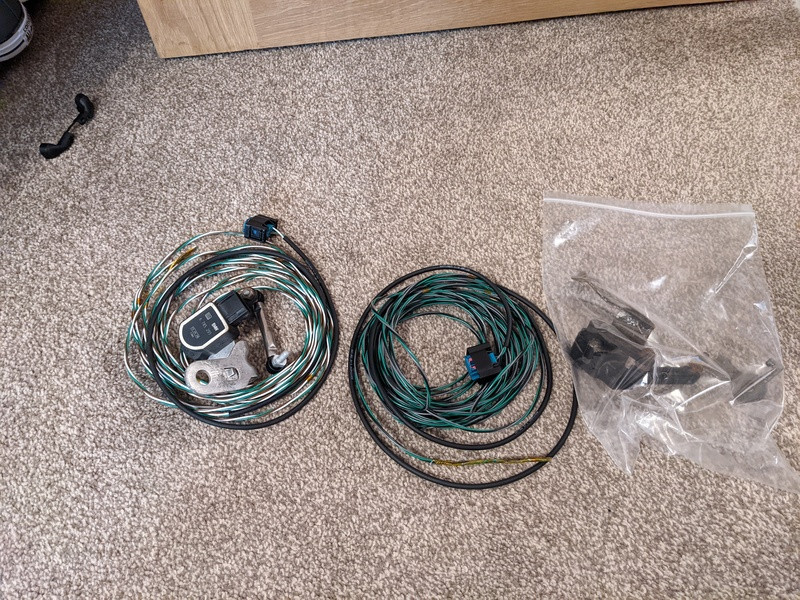 The sensors themselves are easy enough to source. Just make sure they have the correct brackets attached (as they differ between the M3 and non-M cars). 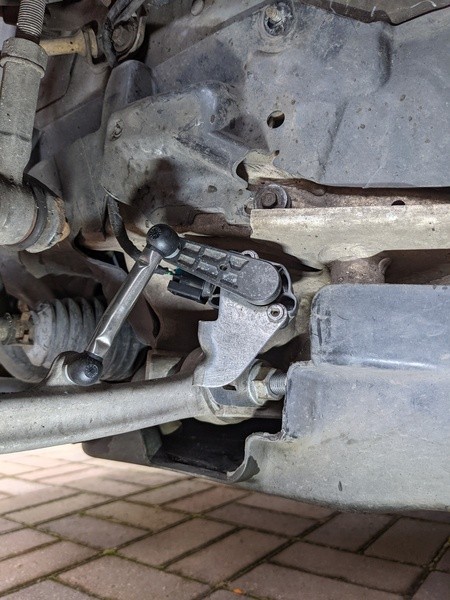 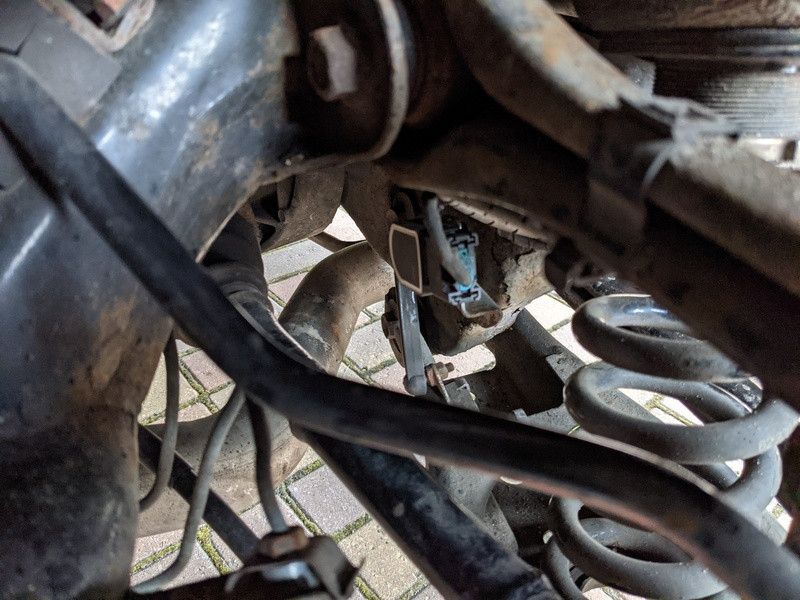 The wiring through the cabin was the next big hurdle. For the front sensor, it was a simple task of wiring along the existing wiring up to where it joins the main harness back into the cabin. 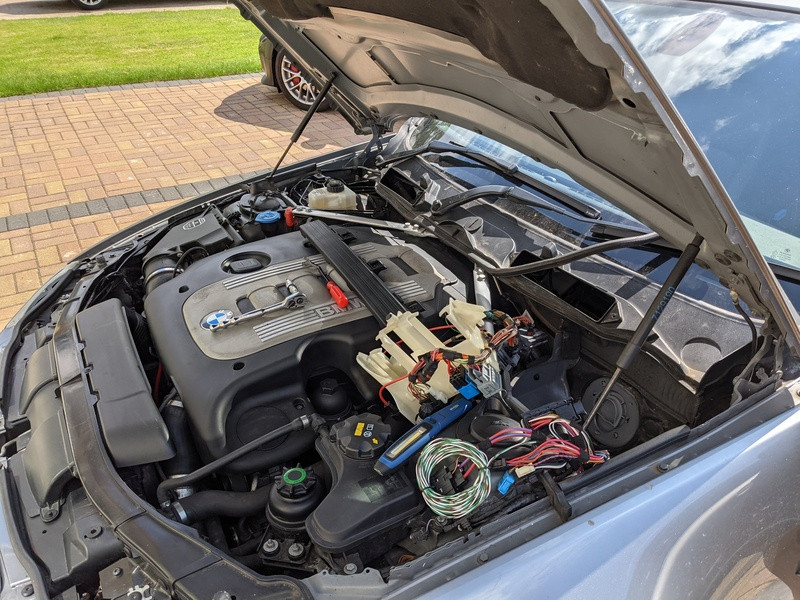 For the rear sensor, removing the arch liner and alarm revealed a spare hole in the grommet into the cabin next to the rear seats - perfect for this wiring; 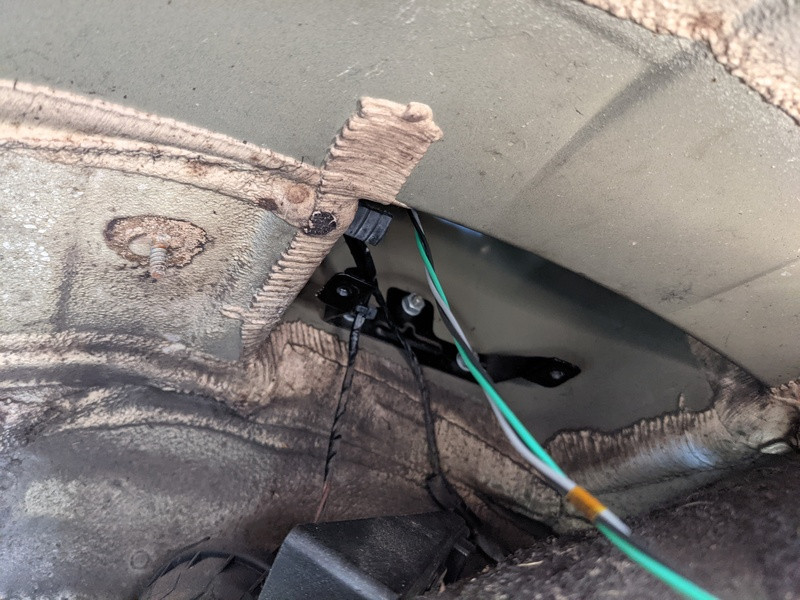 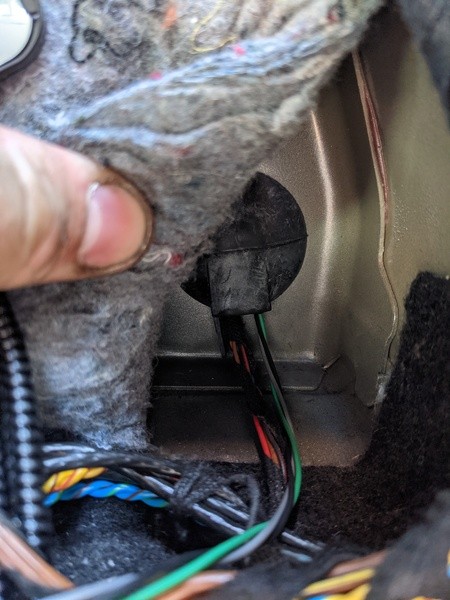 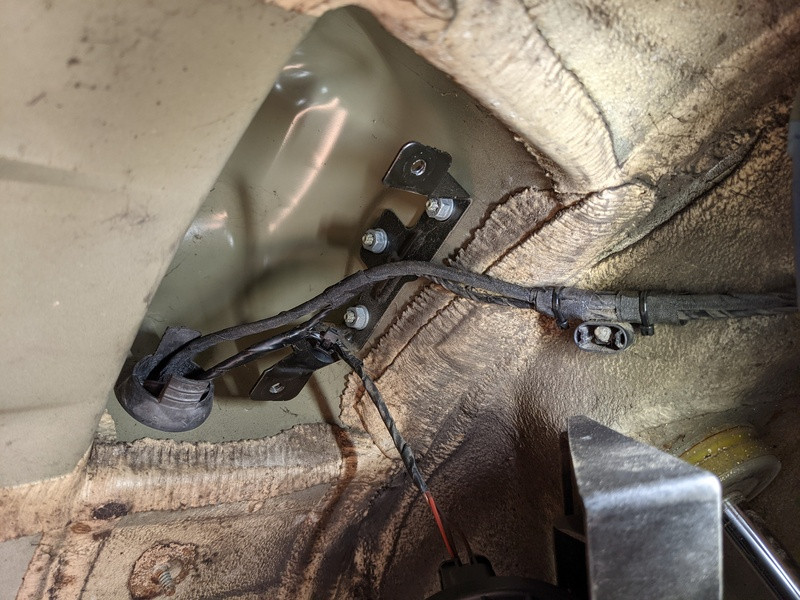 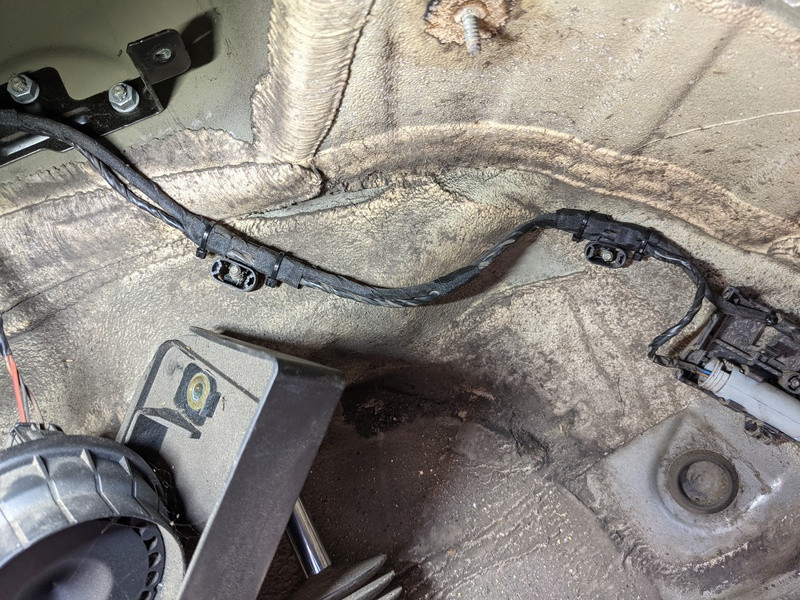 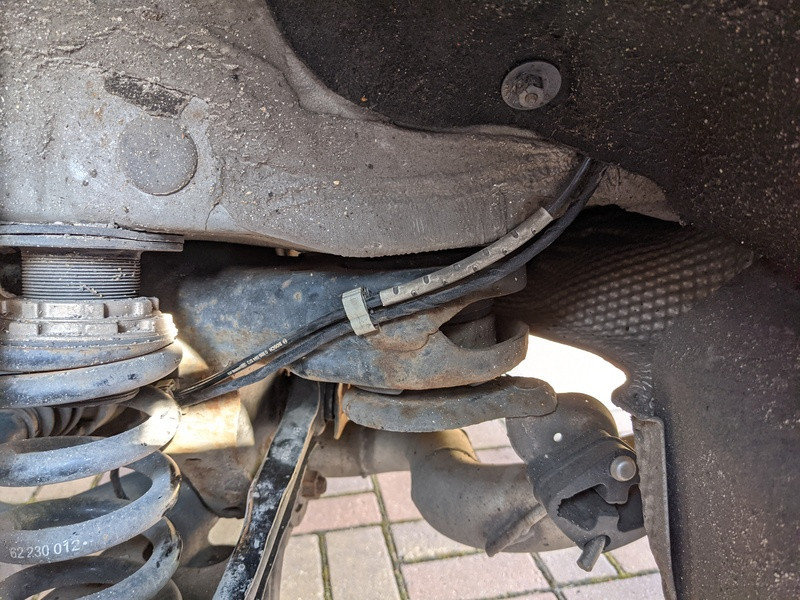 Then along the main harness towards the front of the car; 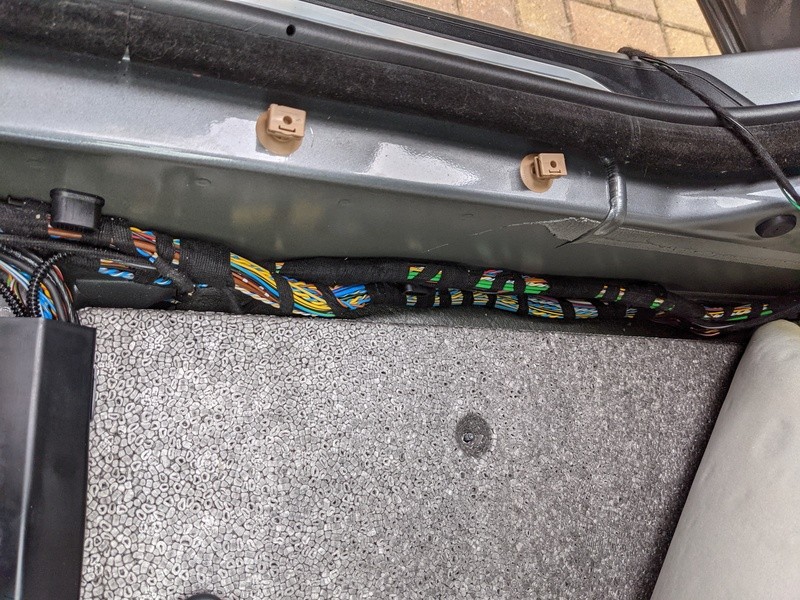 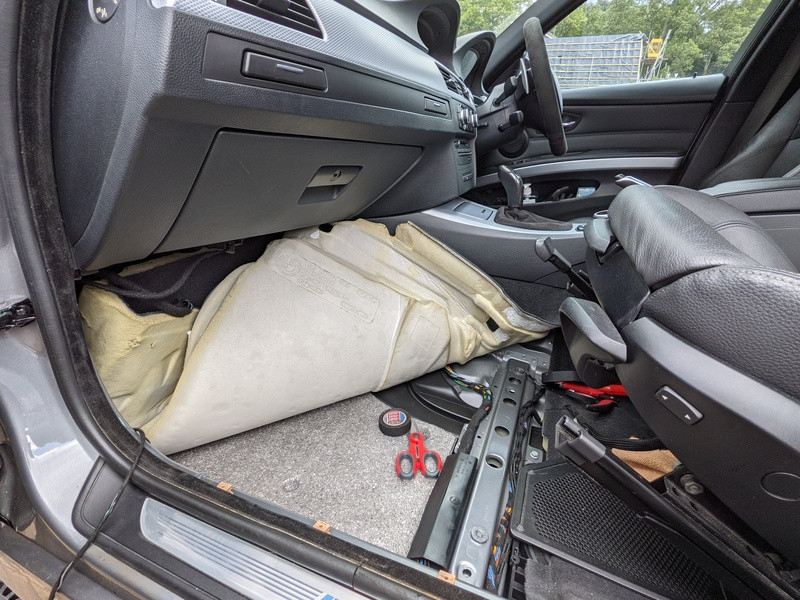 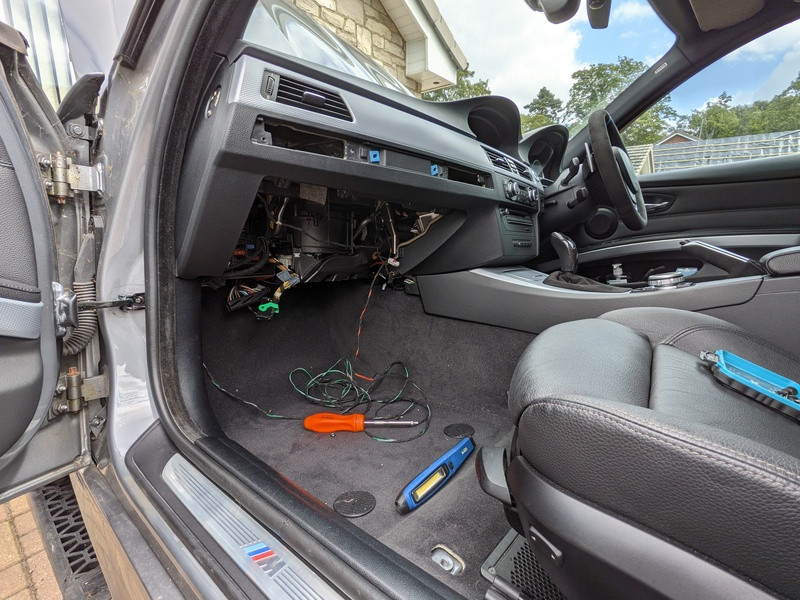 Wiring the additional wires for the passenger headlight and front sensor loom into the cabin itself required the DDE to be removed, but it meant there was plenty of room to feed through the bulkhead and to make a tidy job of it; 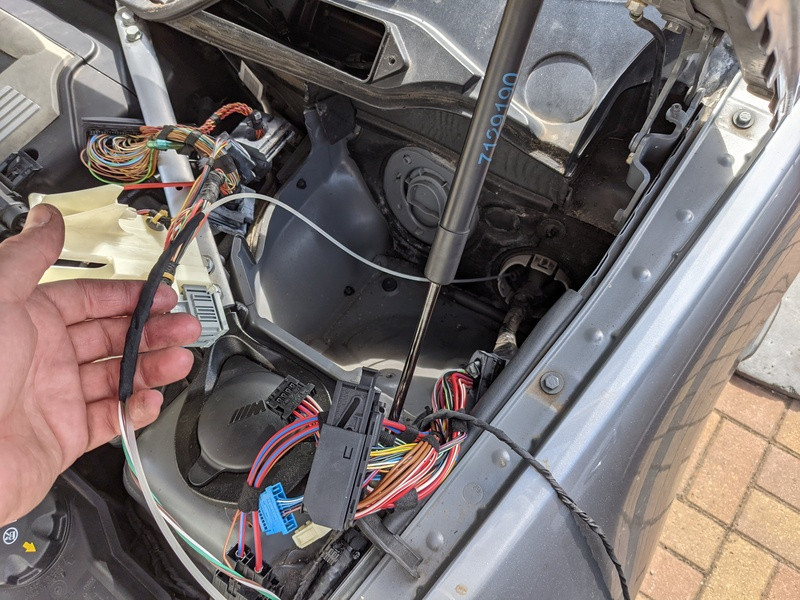 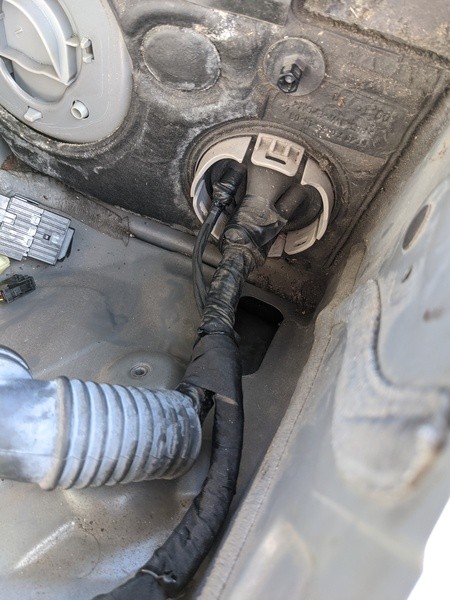 With all of the wiring in the passenger footwell (UK spec car), this then needed passing behind the dash into the drivers footwell towards the FRM. This was a bit of a struggle, but there is a channel along the back in which you can pass an electricians draw wire, and pull the looms through (I also took this opportunity to tape everything together to keep it neat and tidy; 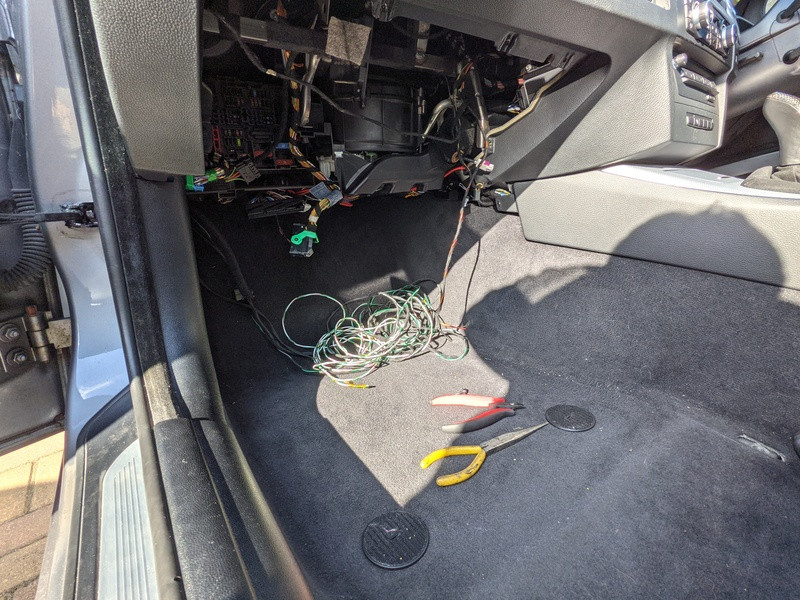 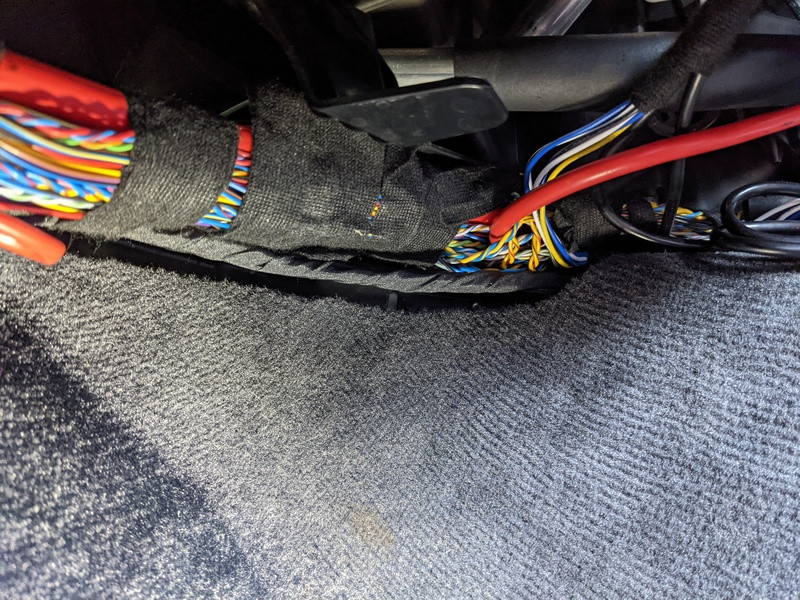 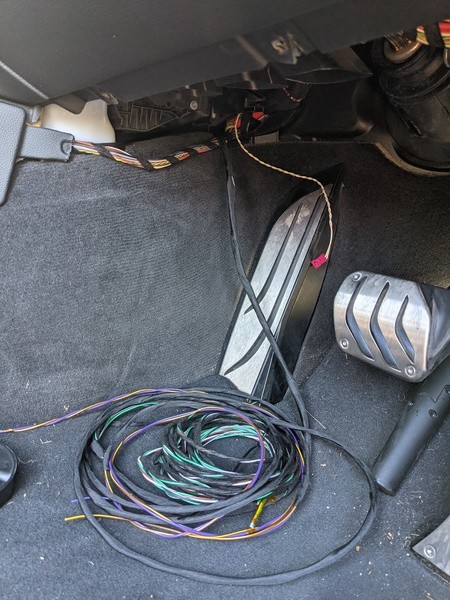 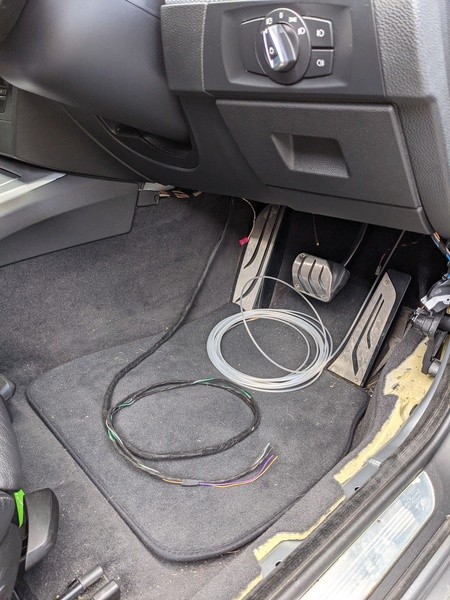 I don't have a picture, but you can then follow the loom up and over the pedals to reach the FRM; 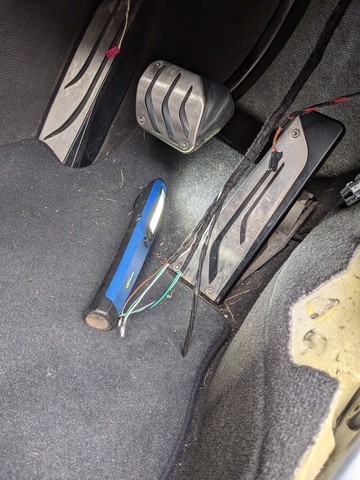 As for the drivers side wiring to the headlight, this can be run alongside the harness down this side of the car; 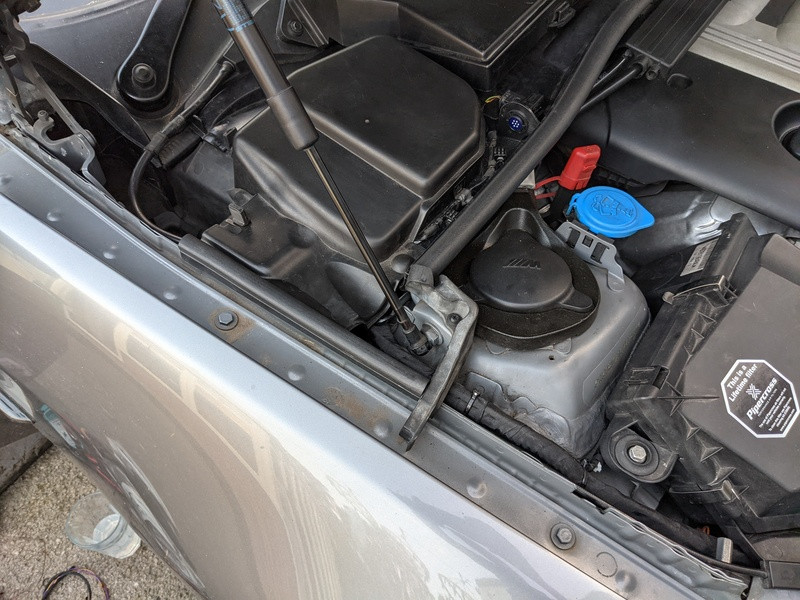 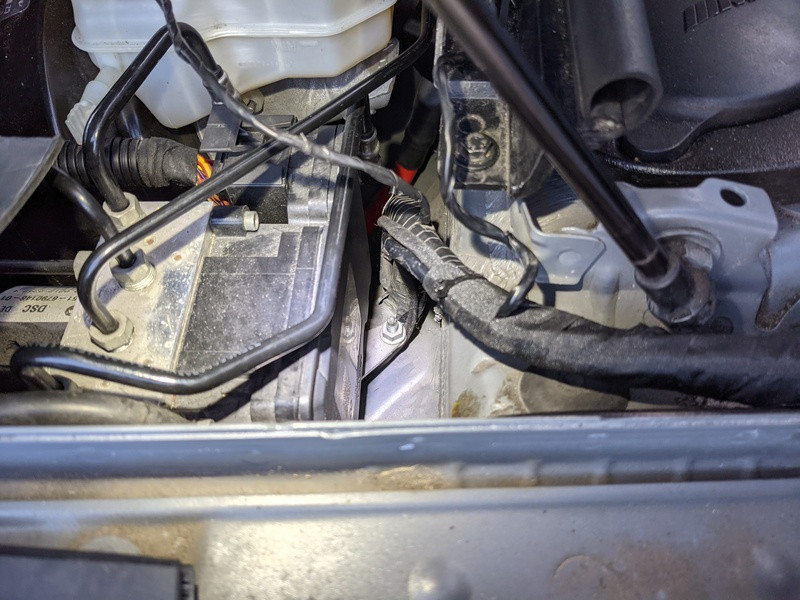 And then fed through the bulkhead behind the master cylinder/ABS pump (this was a struggle); 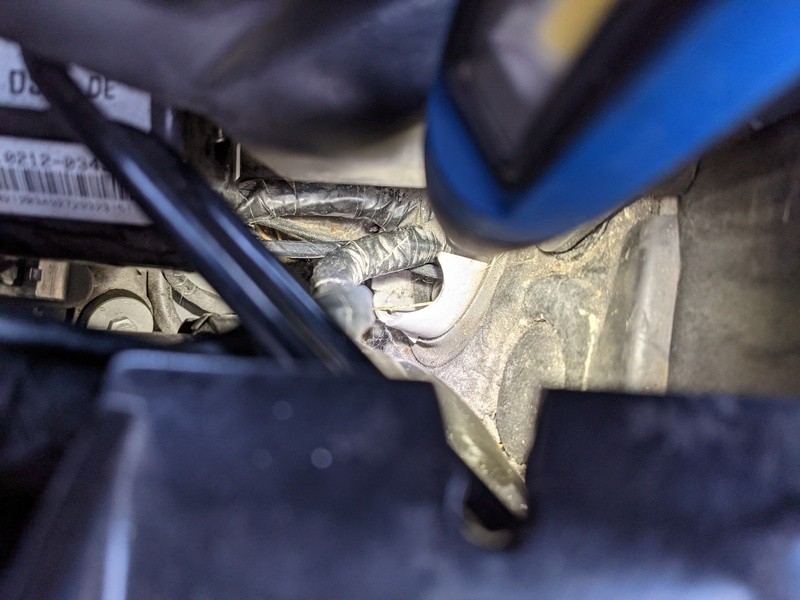 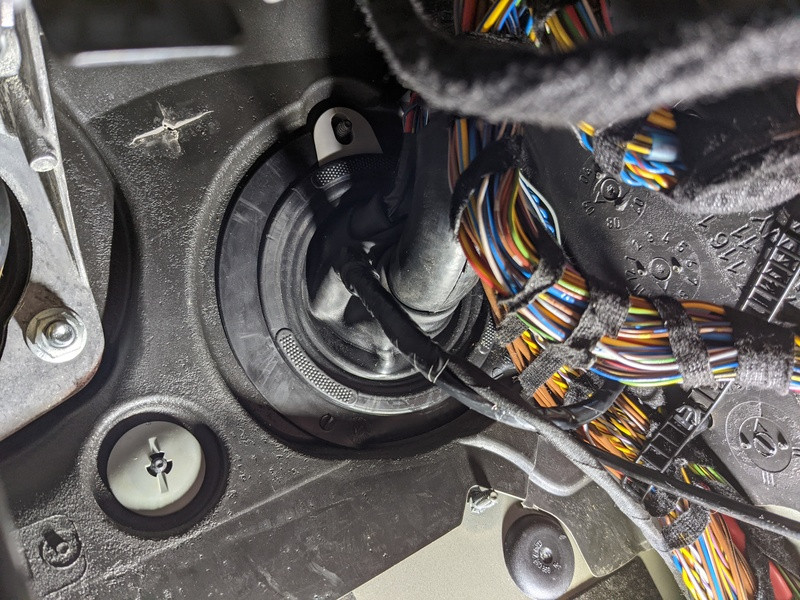 I left the wiring of the headlight connectors themselves to last, so that I could continue to drive the car in between wiring jobs (as it took a few days to complete in total). Wiring in the earths to the ground combs on either side of the chassis was a piece of cake; 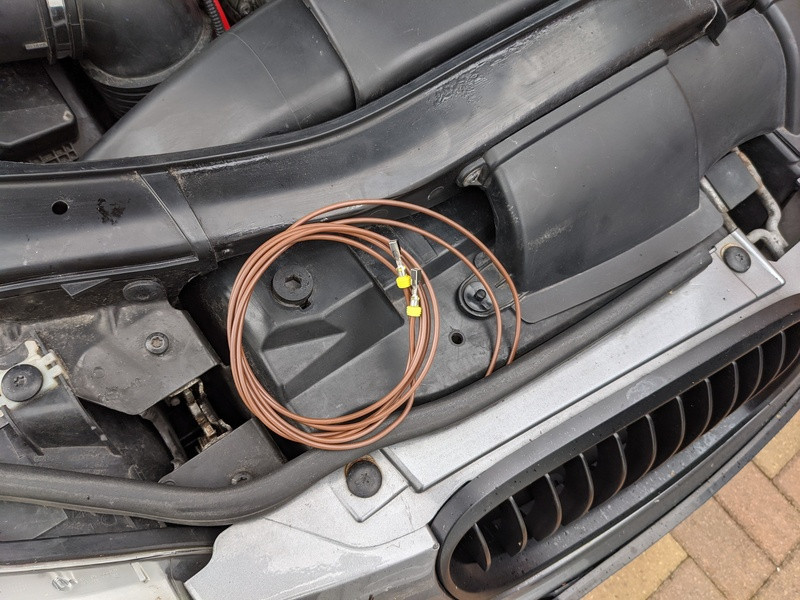 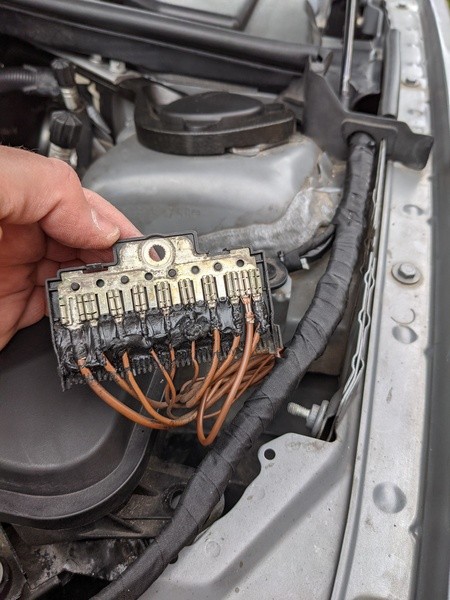 The looms were then taped up to keep them as neat as possible; 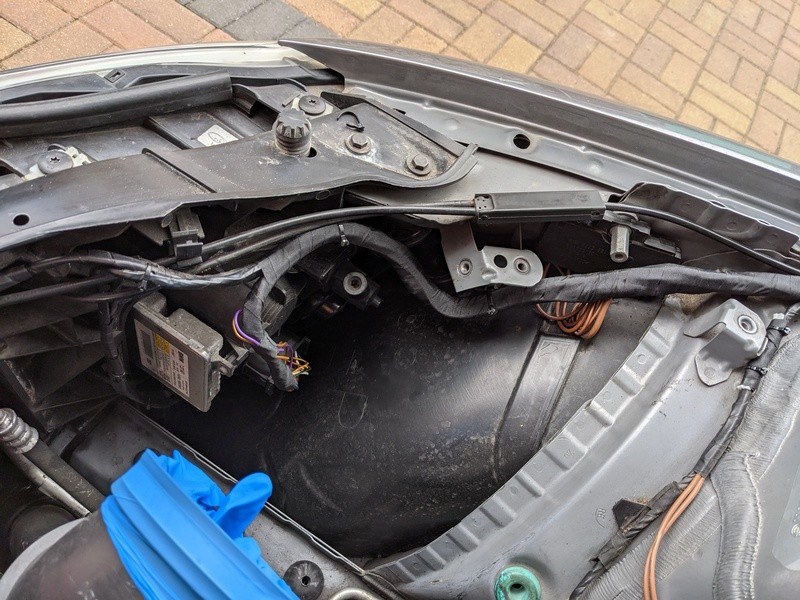 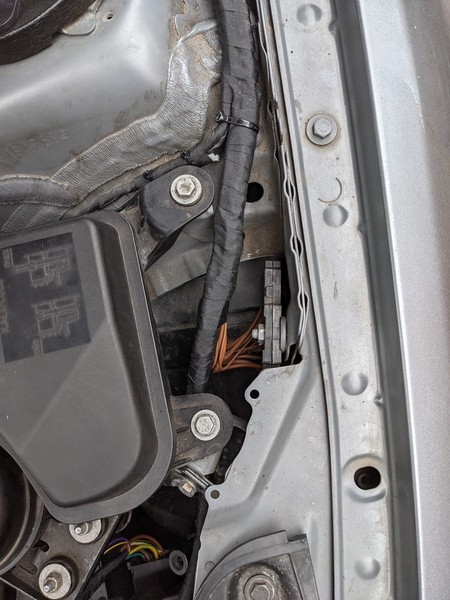 Lastly, the headlight wiring was terminated and plugged in (take care on this part to use the correct size seals (green/black)), as the green seals are smaller then the black ones. Shutter; 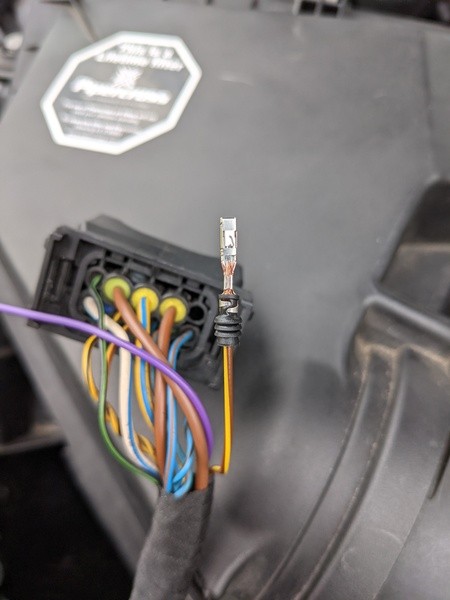 Sidelight/halo; 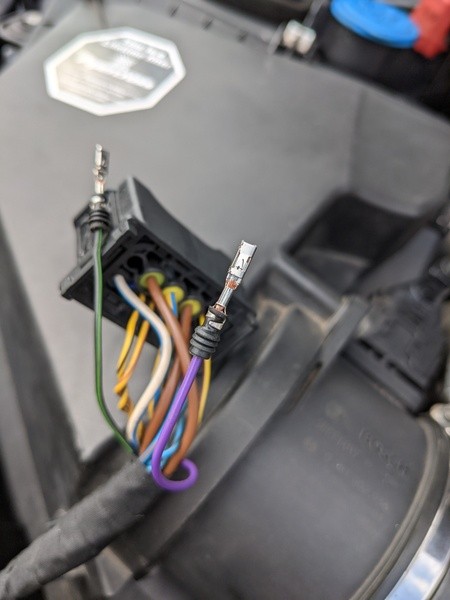 Re-terminated OLD sidelight wire (going to PIN 7) for the 3 LED's, as the black seal was too big for its new position, and needed a green seal; 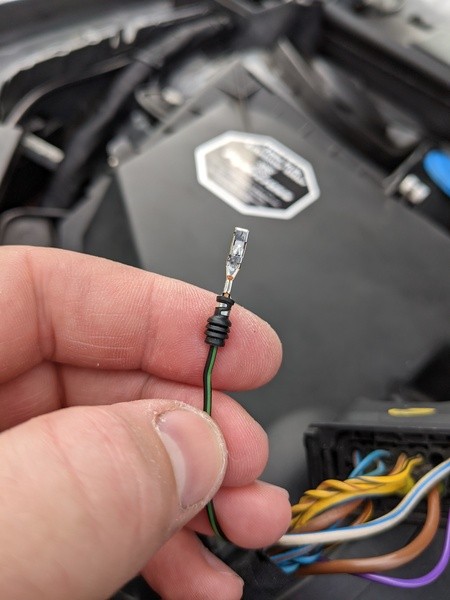 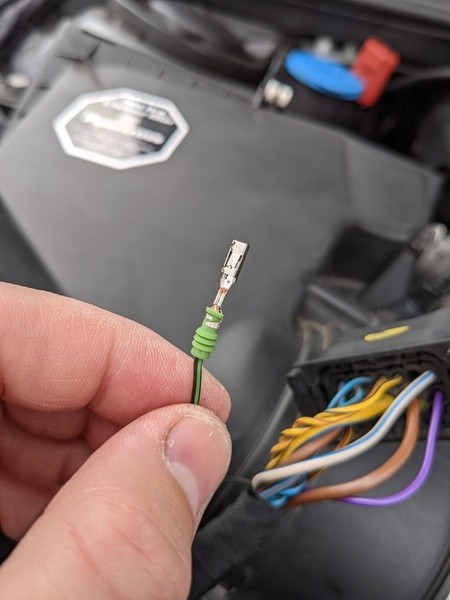 Voila; 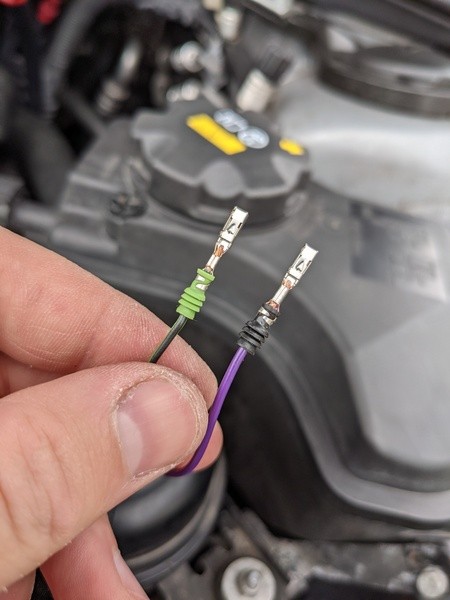 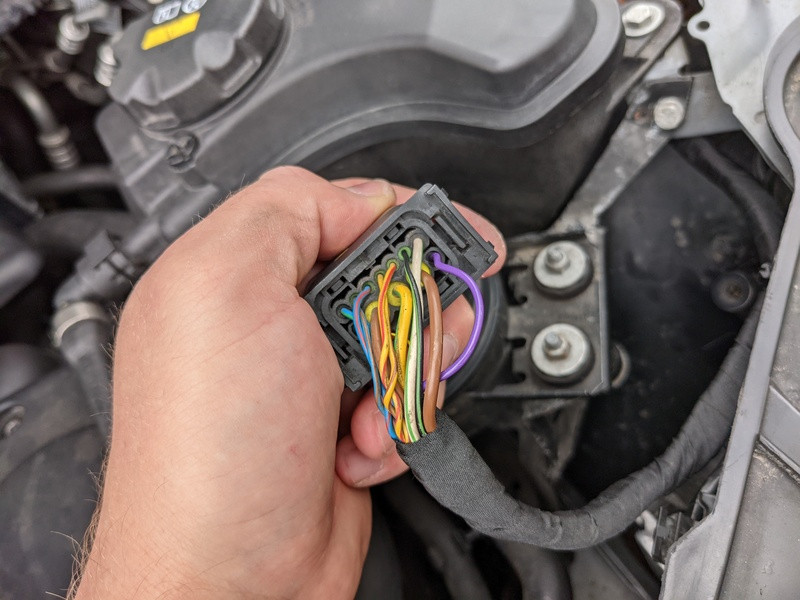 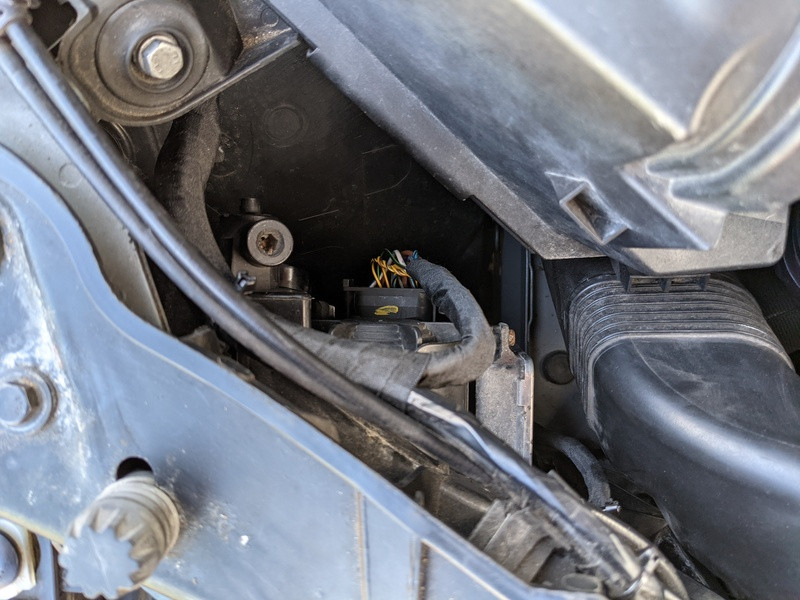 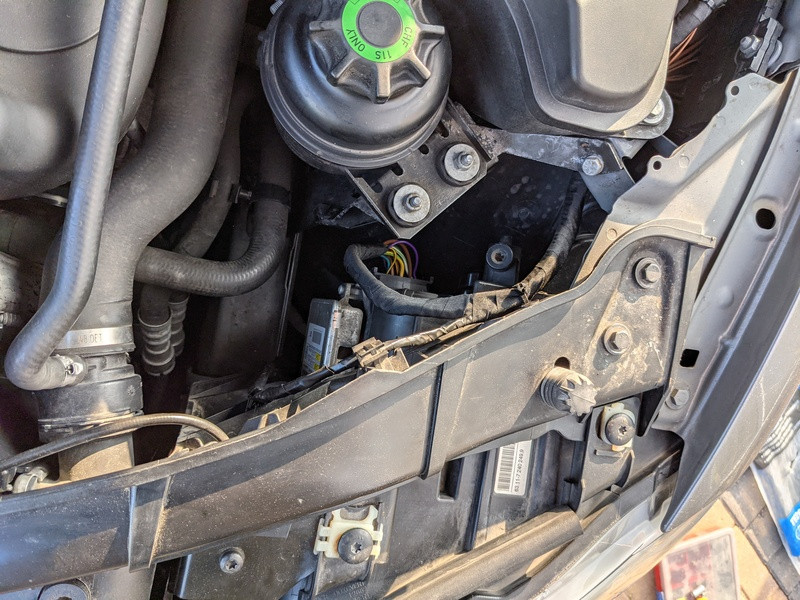 The easiest part of this retrofit was the termination and wiring of the connectors on the FRM (as per the above) - I found it easiest with the FRM removed; 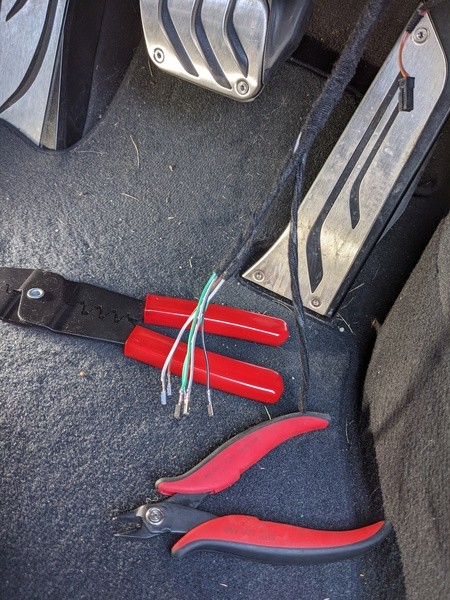 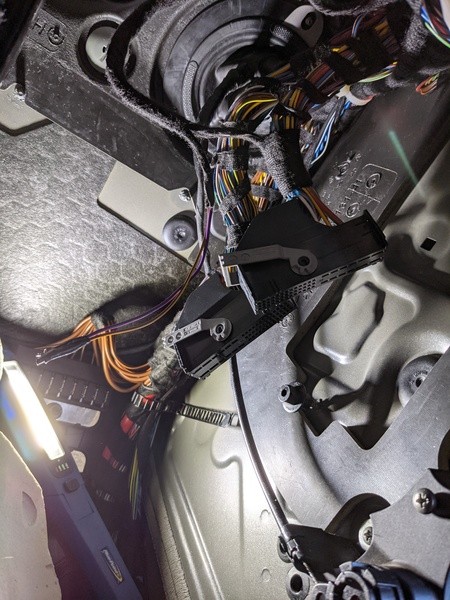 As for the two wires into a single connector for the Xenon shutter, I simply soldered them together, and then onto a small 'tail' which would then plug into the FRM connector; 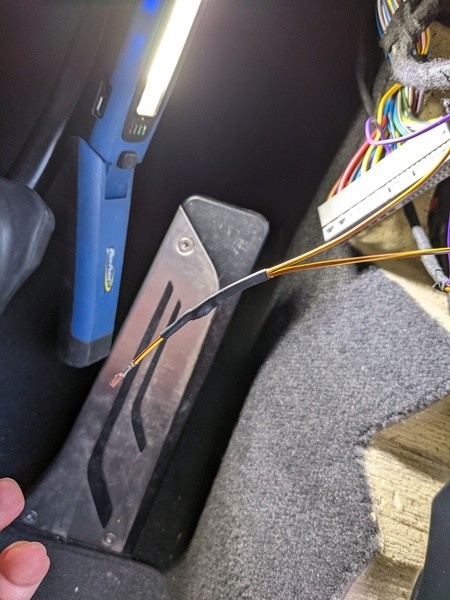 Done;  I hope that helps anyone hoping to attempt this retrofit to this capacity. It was rather difficult at times, I can't count on a single hand the amount of hours I was on my back in the drivers footwell staring up under the dash trying to run the wiring neatly. I went through meters and meters of loom tape. I swore a lot. But it was definitely worth it. Happy to answer any questions if anyone has any  EDIT: Lots more photos added. Last edited by Nickdot; 09-29-2021 at 07:44 AM.. |
|
Appreciate
3
|
| 09-28-2021, 11:36 AM | #6 |
|
Major
 

858
Rep 1,362
Posts
Drives: 09 E90 335i M-Sport 6MT RWD
Join Date: Nov 2017
Location: Ontario, Canada
|
I gotta say that's ballsy and very impressive to do a wiring project spanning the whole car and properly/cleanly run. kudos!
|
|
Appreciate
0
|
| 09-28-2021, 06:02 PM | #7 | |
|
Private
15
Rep 78
Posts |
Quote:
It was a fair amount of effort, but I did have some fun with it - haven't done anything so wiring intensive before, so was a bit of a learning curve. Just hope the above post helps anyone else wanting to do the same!  |
|
|
Appreciate
0
|
| 07-09-2022, 05:59 PM | #10 | |
|
First Lieutenant
 46
Rep 339
Posts |
Quote:
Interested in making and selling the wiring loom? |
|
|
Appreciate
0
|
| 07-11-2022, 08:55 AM | #11 | |
|
Private
15
Rep 78
Posts |
Quote:
2 x 3 wire looms for the height sensors 2 x 2 wire looms for the headlights themselves Then 2 x earths for the front lights again Wire you can grab in every size/colour from eBay, same goes for the contacts themselves (or https://www.lllparts.co.uk/ - although delivery can take a while). You then need a crimp tool, I use the following and have never had an issue; https://uk.rs-online.com/web/p/crimp-tools/7106499 |
|
|
Appreciate
0
|
| 10-14-2022, 10:58 PM | #12 |
|
Private First Class
 
38
Rep 141
Posts
Drives: 2019 440i | 2020 X3 X30i
Join Date: Oct 2017
Location: FL
|
Hey I'm slowly doing this to my E90 and I bought the OEM brown wiring and I guessed which terminal contacts I needed for the ground and I got that to work, but the rest of the wires I need to add into the FRM to the headlights (such as pin 1 and 5), do you have the part numbers of the exact pin contacts you used? And how many meters of wire did you order/use? And the part number for the green seal for pin 7, I can't seem to find it anywhere on realoem.
Thanks a lot this is a big help!
__________________
2019 F36 440xi B58 | 2011 E90 328xi N51 | 2010 E92 335xi N54 (sold) | 2015 F32 435xi N55 (sold) | 2020 G01 X3 30i B46 | 1996 E36 328iS M52 (RIP)
|
|
Appreciate
0
|
| 10-24-2022, 10:07 AM | #13 | |
|
Enlisted Member
 
6
Rep 43
Posts
Drives: BMW 330d M Sport
Join Date: Oct 2021
Location: Aberystwyth
|
Quote:
|
|
|
Appreciate
0
|
| 10-25-2022, 02:35 PM | #14 | ||
|
Private First Class
38
Rep 141
Posts
Drives: 2019 440i | 2020 X3 X30i
Join Date: Oct 2017
Location: FL
|
Quote:
I've got grounds hooked up and the two pairs of wires running from the FRM to the headlights so it's just those contacts going to the small pins on the headlight holding the retrofit back
__________________
2019 F36 440xi B58 | 2011 E90 328xi N51 | 2010 E92 335xi N54 (sold) | 2015 F32 435xi N55 (sold) | 2020 G01 X3 30i B46 | 1996 E36 328iS M52 (RIP)
|
||
|
Appreciate
0
|
| 10-25-2022, 02:48 PM | #15 |
|
Enlisted Member
6
Rep 43
Posts
Drives: BMW 330d M Sport
Join Date: Oct 2021
Location: Aberystwyth
|
Great work, I shall be doing this myself shortly just waiting on the right set of lights to come up
|
|
Appreciate
0
|
| 10-29-2022, 02:57 PM | #16 | |
|
Private First Class
38
Rep 141
Posts
Drives: 2019 440i | 2020 X3 X30i
Join Date: Oct 2017
Location: FL
|
Quote:
Lesson learned, be careful when buying these headlights because looks like they get internal damage when in an accident. The good side from the first pair had the typical lazy eye but I fixed that by popping in the little adjustment motor, wish I could've fixed the other damage that easy I'll post some pictures to show you what exactly broke because I definitely got fooled thinking it was just a simple fix of lazy eye, but at least I have a full good pair and a full bad pair Good news is I finally have every terminal connector so now today I'm gonna crimp them on the wires and hopefully have the harness complete and finished by tonight
__________________
2019 F36 440xi B58 | 2011 E90 328xi N51 | 2010 E92 335xi N54 (sold) | 2015 F32 435xi N55 (sold) | 2020 G01 X3 30i B46 | 1996 E36 328iS M52 (RIP)
|
|
|
Appreciate
1
Matt_E906.00 |
| 09-28-2023, 07:34 AM | #17 | |
|
Private First Class
175
Rep 133
Posts |
Quote:
The Pre-LCI official retrofit instructions indicate another 2 wire "Connection Cable" is needed between the Junction Box (JFFB) and the FME (Pins 43 & 44). Do you recall if this cable was still necessary on your LCI Model? Thanks! |
|
|
Appreciate
0
|
| 11-30-2023, 06:19 AM | #18 | |
|
Private
15
Rep 78
Posts |
Quote:
I do not remember running any cabling between the JBBF and the FEM on my LCI. Cheers! |
|
|
Appreciate
0
|
| 04-09-2024, 10:52 AM | #20 |
|
New Member
0
Rep 6
Posts |
Hey, Im about to tackle this DIY but I need help, I didnt understand the part numbers as its very confusing when it comes to wiring and these small plugs and all, can someone please help me out and list to me all the part numbers that I need to complete this retrofit? Thank you.
|
|
Appreciate
0
|
 |
| Bookmarks |
| Thread Tools | Search this Thread |
|
|


